

If you need to familiarize yourself with the Shopify platform, you might wonder how to edit the theme, alter the visual components, or integrate new features. All solutions are available in the Shopify Liquid tutorial. Luckily, you don't have to be an expert programmer to work with Liquid codes.
In this article, we – LitExtension, cover the Shopify Liquid tutorial for beginners, avoiding technical jargon wherever possible and including definitions as needed.
- Shopify Liquid features 101
- Shopify Liquid tutorial: how to use Liquid to customize pages
- Resources to learn Shopify Liquid
Are you curious about Shopify Liquid tutorial for beginners? Let's discover now!
Shopify Liquid Features 101
#1 What is Shopify Liquid?
All Shopify themes are built on the open-source template language known as Shopify Liquid.
Liquid is a direct pipeline between stored data and HTML. Thus, it is also referred to as a template engine or syntax rather than a language, but it still uses if/then statements, logic, and loops like any other programming language.

A template language like Liquid does not require the designer to know the stored data. As a result, your themes are wholly agnostic and can be used with different stores without considering their contents.
The Shopify Liquid code is essentially a placeholder.
- When the code is created and sent to the browser, it retrieves detailed referenced data from your Shopify store, such as store name, product details, images, etc.
- The browser then downloads resources like your CSS and Javascript files to display your customized theme.
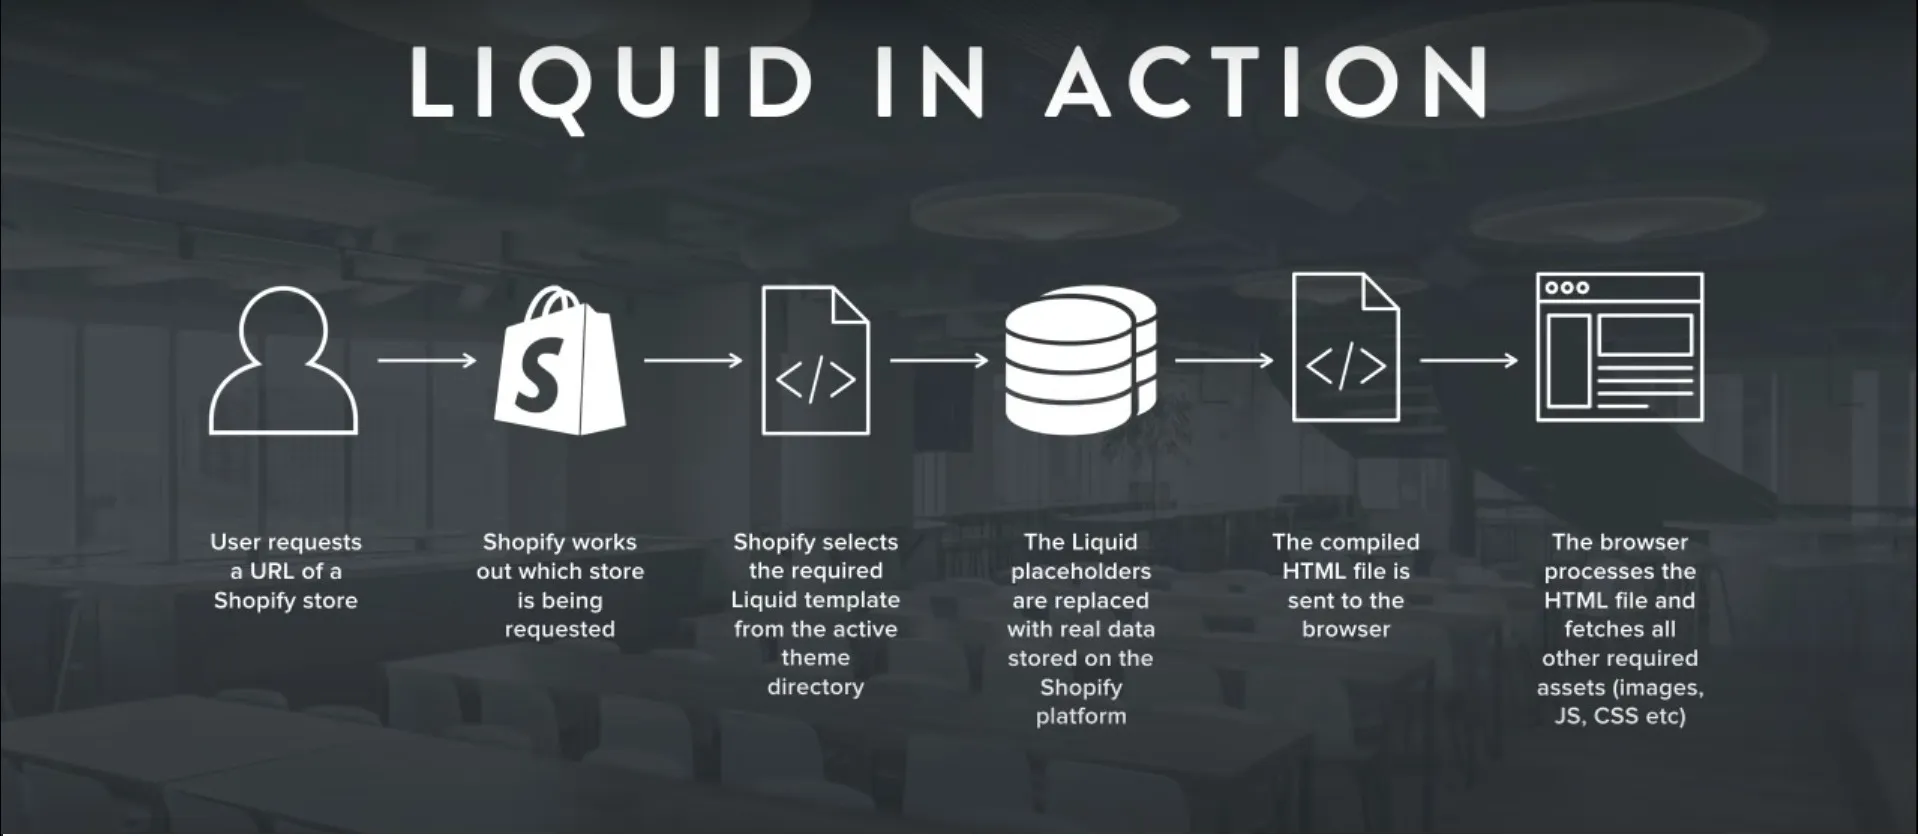
This enables Shopify themes to be store-neutral, which means the same code can be used for numerous stores without modifications.
Liquid files have the extension of .Liquid and have two types of delimiters:
- Double curly brace delimiters {{ }} represent output.
- Curly brace percentage delimiters {% %} represent logic.
Here is an example of {% %} denoting logic:
Input | Output |
{% if product.title == 'Health potion' %} It's an uncommon potion. Take it lightly! {% endif %} | It's an uncommon potion. Take it lightly! |
Here is an example of {{ }} denoting output:
Input | Output |
<title> {{ page_title }} </title> {% if page_description -%} <meta name="description" content="{{ page_description | truncate: 150 }}"> {%- endif %} | <title> Health potion </title> <meta name="description" content= "Do you have poor health? We have the remedy just for you, though! Simply need a boost? No need to be concerned, as we have a ..."> |
Besides, the Liquid is characterized by three main parts:
- objects,
- tags,
- and filters.
We will mention these three in the following section.
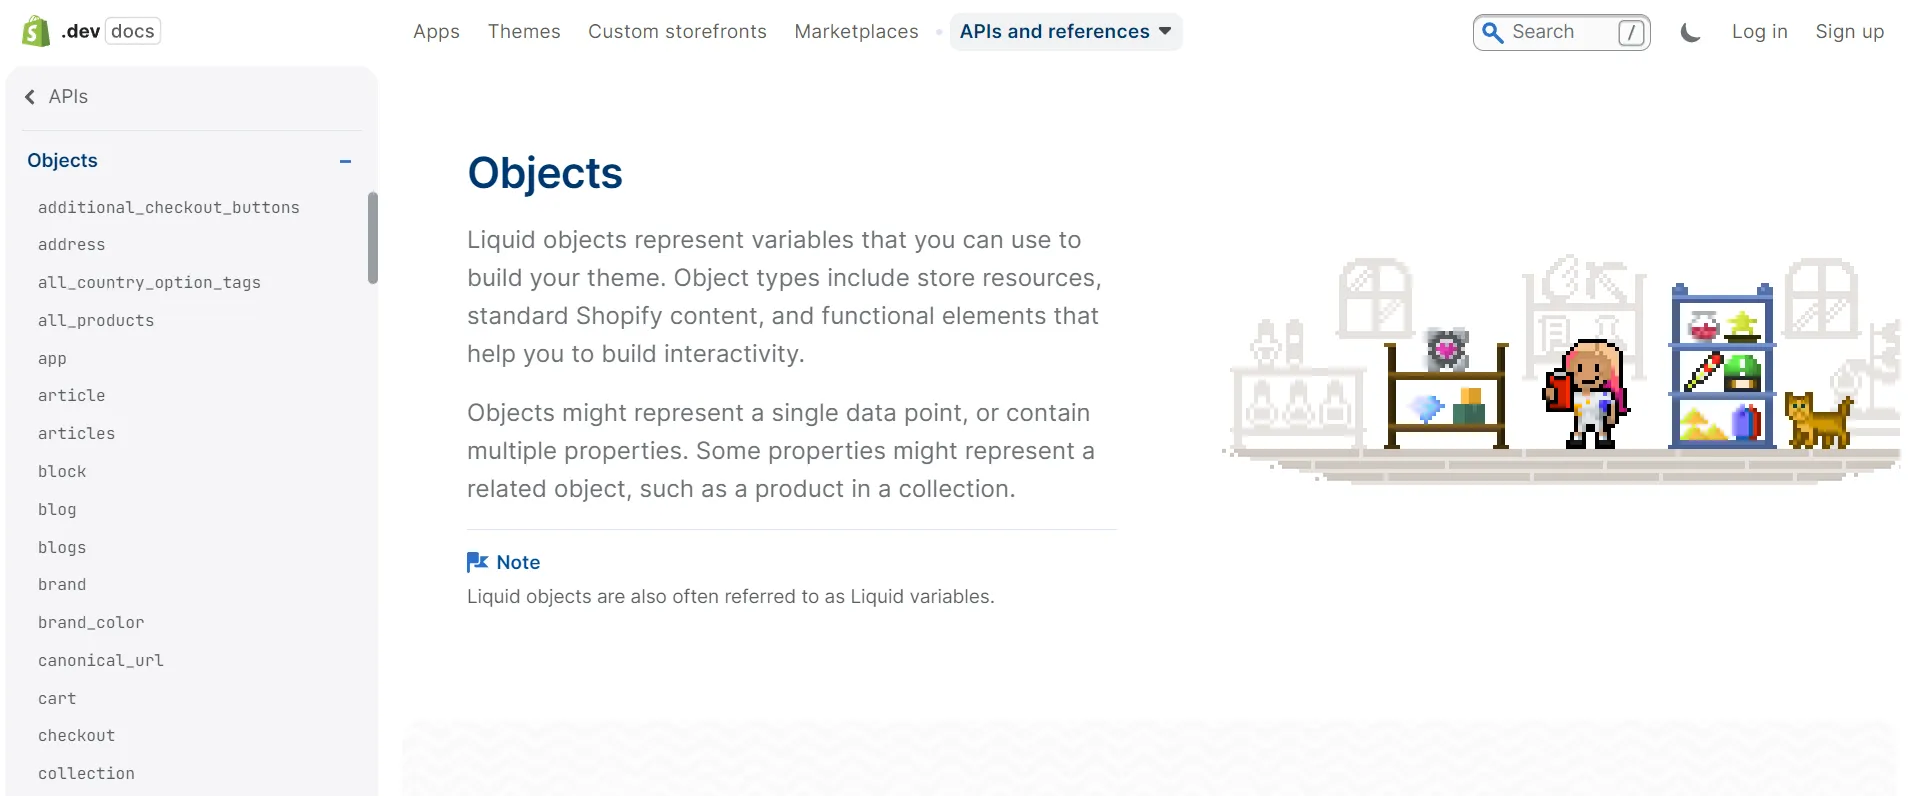
#2 Shopify Liquid objects
Objects contain the content Liquid shows on a page.
In Liquid, objects – wrapped in {{ }} – output data fragments onto the page. A dot syntax system separates an object from its properties, which can support various properties.
For instance, in the object {{ page.title }}
- page: a term before “.” is the object.
- title: a term after “.” is the property.
Hence, this would output the title property of the page object.
For instance:
Input | Output |
{{ page.title }} | About Us |
#2.1 Content objects
Scripts and stylesheets produced by Shopify or third-party apps are also output by content objects for your Shopify store's template and section files.
- {{ content_for_header }}: in theme.liquid file, the master template file in Shopify.
- {{ content_for_layout }}: in theme.liquid file, retrieving content from other templates.
- {{ content_for_index }}: in templates/index.liquid file, retrieve the sections to be rendered on your homepage.
#2.2 Global objects
Any .liquid file in your theme can access global objects. The following information is retrieved from your store using them:
- {{ all_products }} – The products list in your store (up to 20).
- {{ articles }} – An index of your website's articles.
- {{ blogs }} – An index of all the site blogs.
- {{ canonical_url }} – The current page URL with all parameters removed.
- {{ cart }} – Your store’s cart.
- {{ collections }} – An index of your collections.
- {{ current_page }} – The number of the current page (used for paginated content)
- etc.
Note:
- These objects can have dozens of properties, each serving a specific purpose.
- Many objects aren't global or content objects.
#3 Shopify Liquid tags
Tags build the logic and control templates’ flow. When the template is rendered, curly brace percentage delimiters “% and%” and the text they are surrounded by do not result in any visible output.
This enables you to assign variables, set up conditions, and implement loops without displaying any Liquid logic on the page.
Look at an example below:
Input | Output |
{% if user %} Hello {{ user.name }}! {% endif %} | Hello Adam! |
Compared to objects, tags are a little more active. They can alter how objects are displayed, run conditional if/then statements, and create loops.
- Theme tags
- Variable tags
- Iteration tags
- Control flow tags

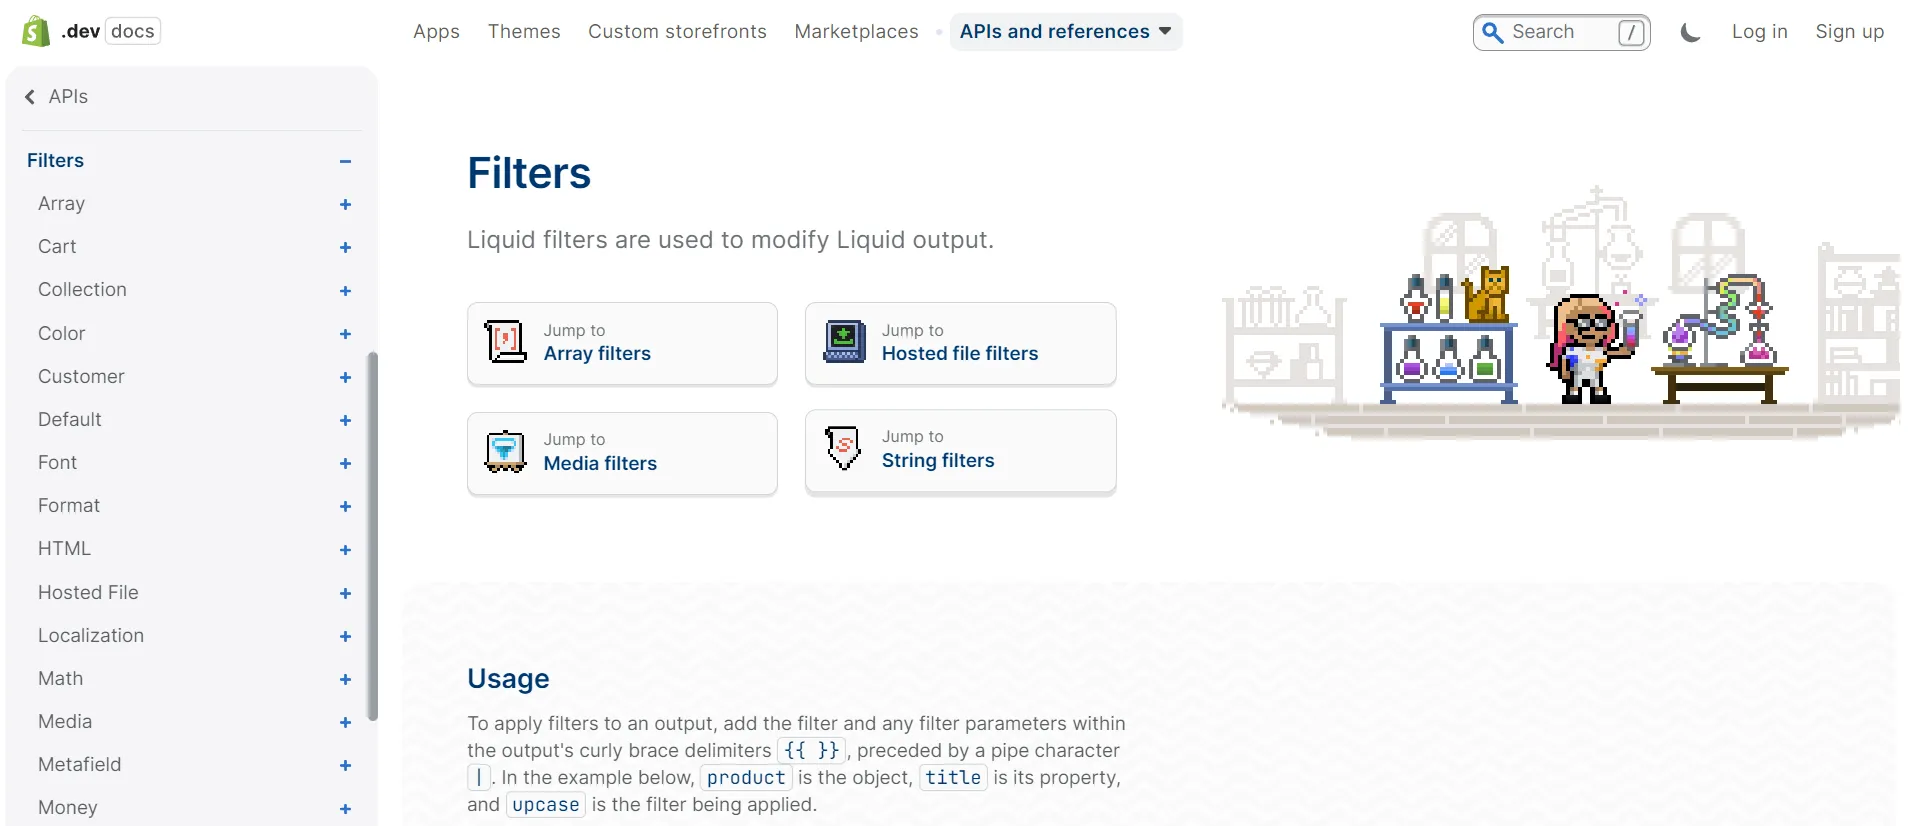
#4 Shopify Liquid filters
Filters modify the output of Liquid objects or variables. They are separated by the pipe character | and are used with double curly braces {{ }} and variable assignment.
Filters have three main purposes:
- Manipulate output data.
- Enable the agnostic nature of our themes.
- Help theme designers save time by lowering the amount of code to write.
Filters are embedded in an object's curly braces and enhance its output in response to numerous actions.
- Color filters
- Font filters
- HTML filters
- Math filters
- Money filters
- Date filters
- Highlight filters
- String filters
- Array filters
Here is an example.
Input | Output |
{{ "/my/fancy/url" | append: ".html" }} | /my/fancy/url.html |
{{ "adam!" | capitalize | prepend: "Hello " }} | Hello Peter! |
Simply put, filters give us the ability to modify data that is already stored in our store. After being “piped” through the filter, what we start with on the left-hand side is revealed on the right-hand-sized side. The front end of the theme then outputs this last modified data.
Without the filter, Shopify would publish in a format that might not be readable by humans – the database format.
Shopify Liquid Tutorial: How to Use Liquid to Customize Pages
Knowing how to use well-known theme components is a great way to comprehend how Shopify themes work because we learn best by doing.
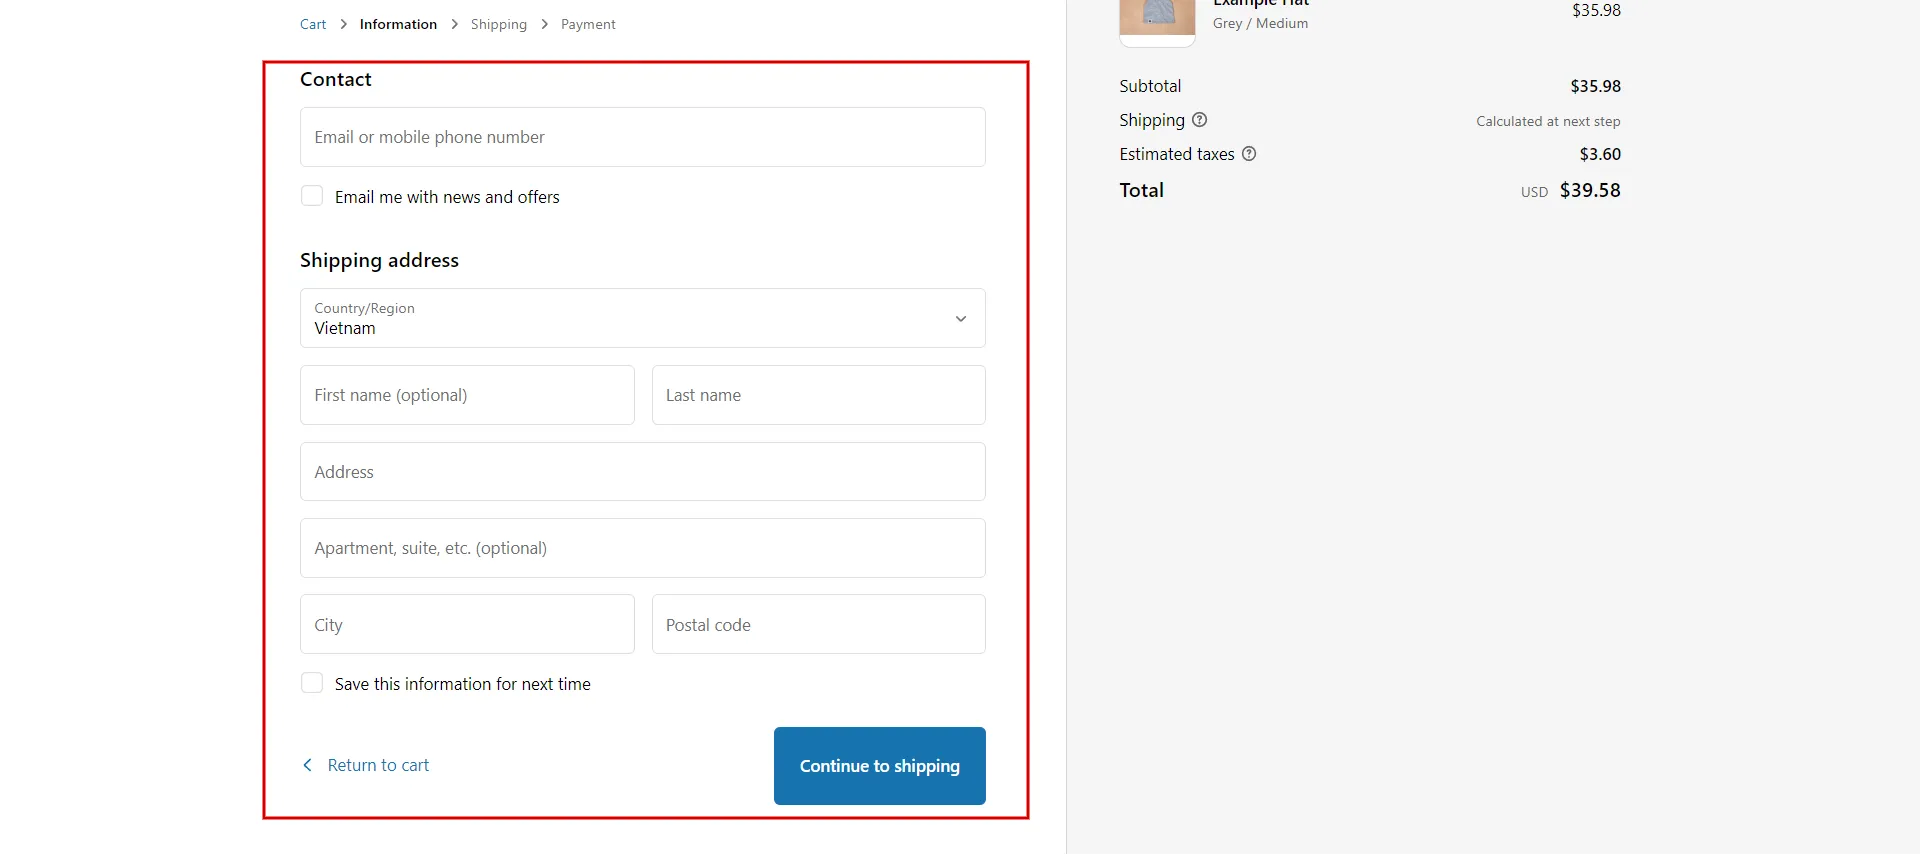
Look at the custom checkout page in Shopify Liquid tutorial for the Dawn theme of Shopify. Here are the instructions:
- Step 1: Back up theme.
First, go to Online Store > Themes > Click the … button to show the drop-down menu > choose Duplicate.
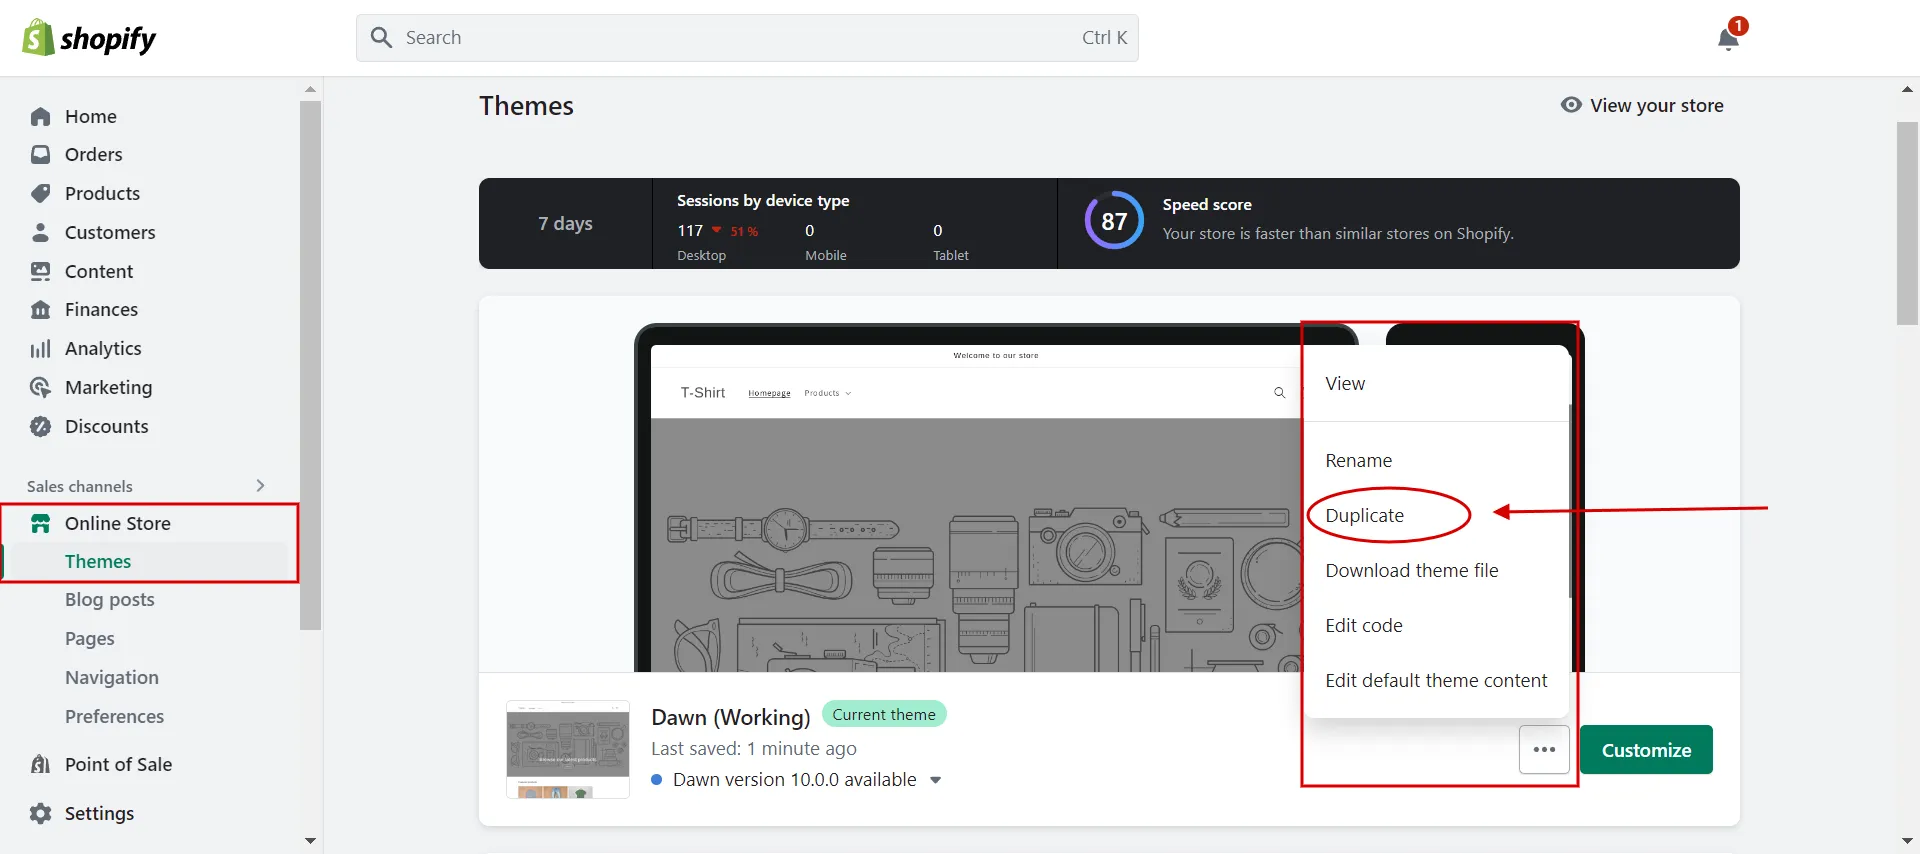
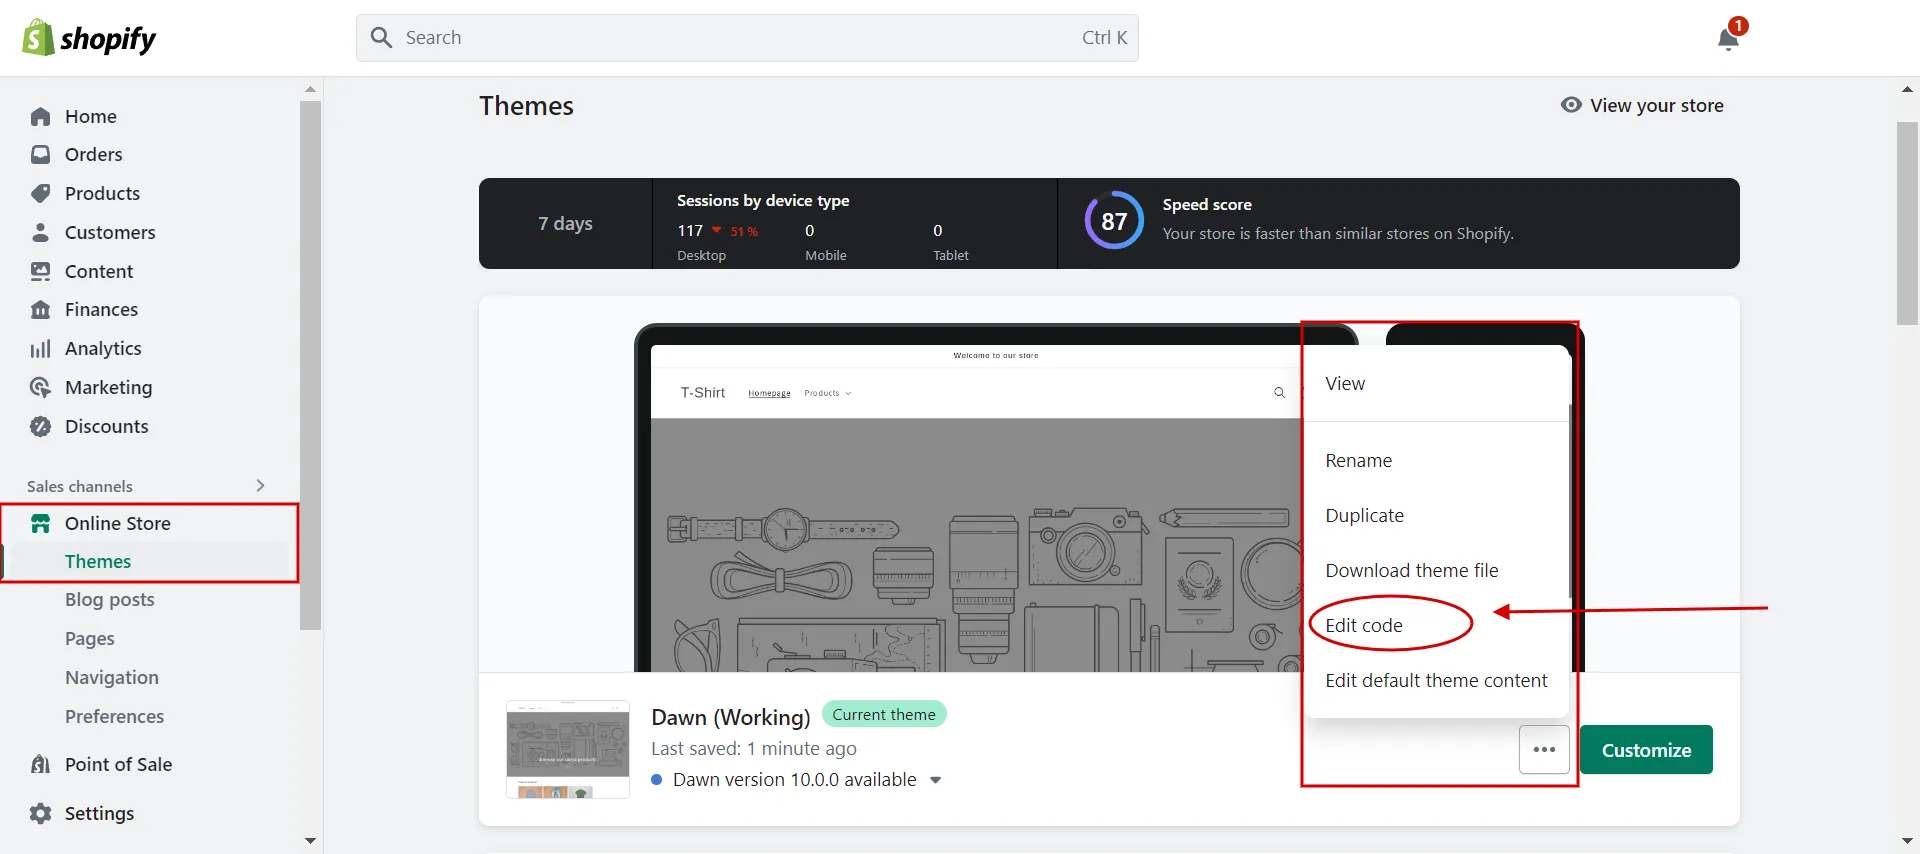
- Step 2: Access Code editor.
Navigate to Online Store > Themes > click the … button and choose Edit code.
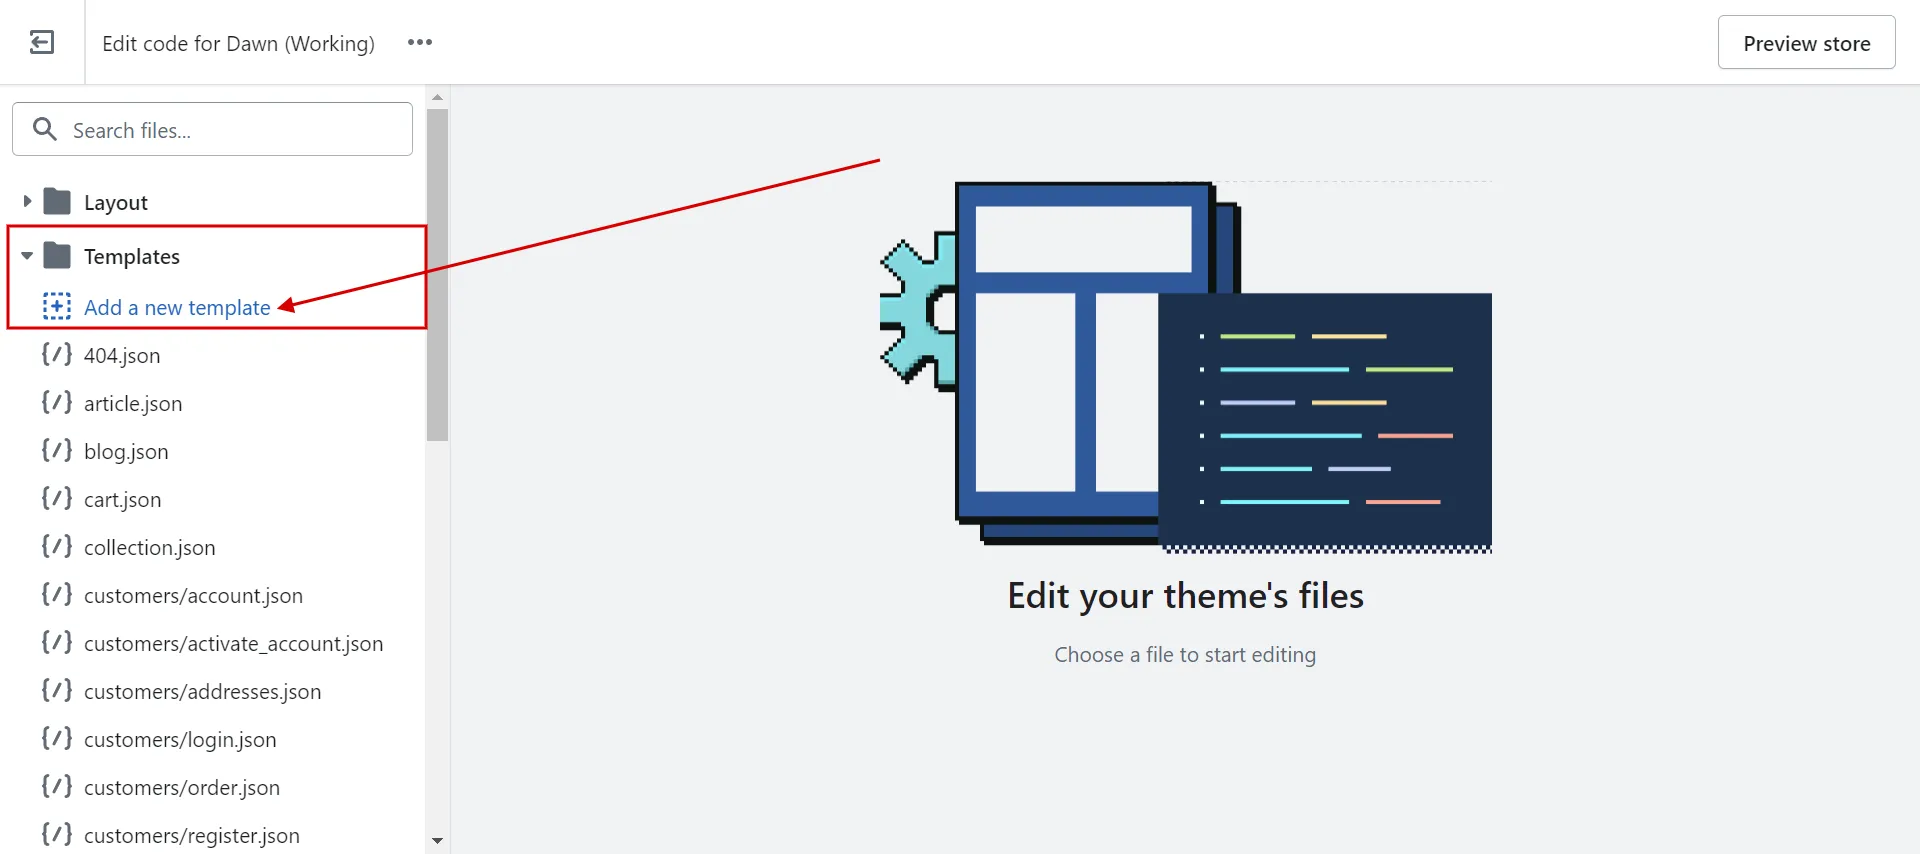
- Step 3: Create checkout.liquid.
In the templates tab, click Add a new template.
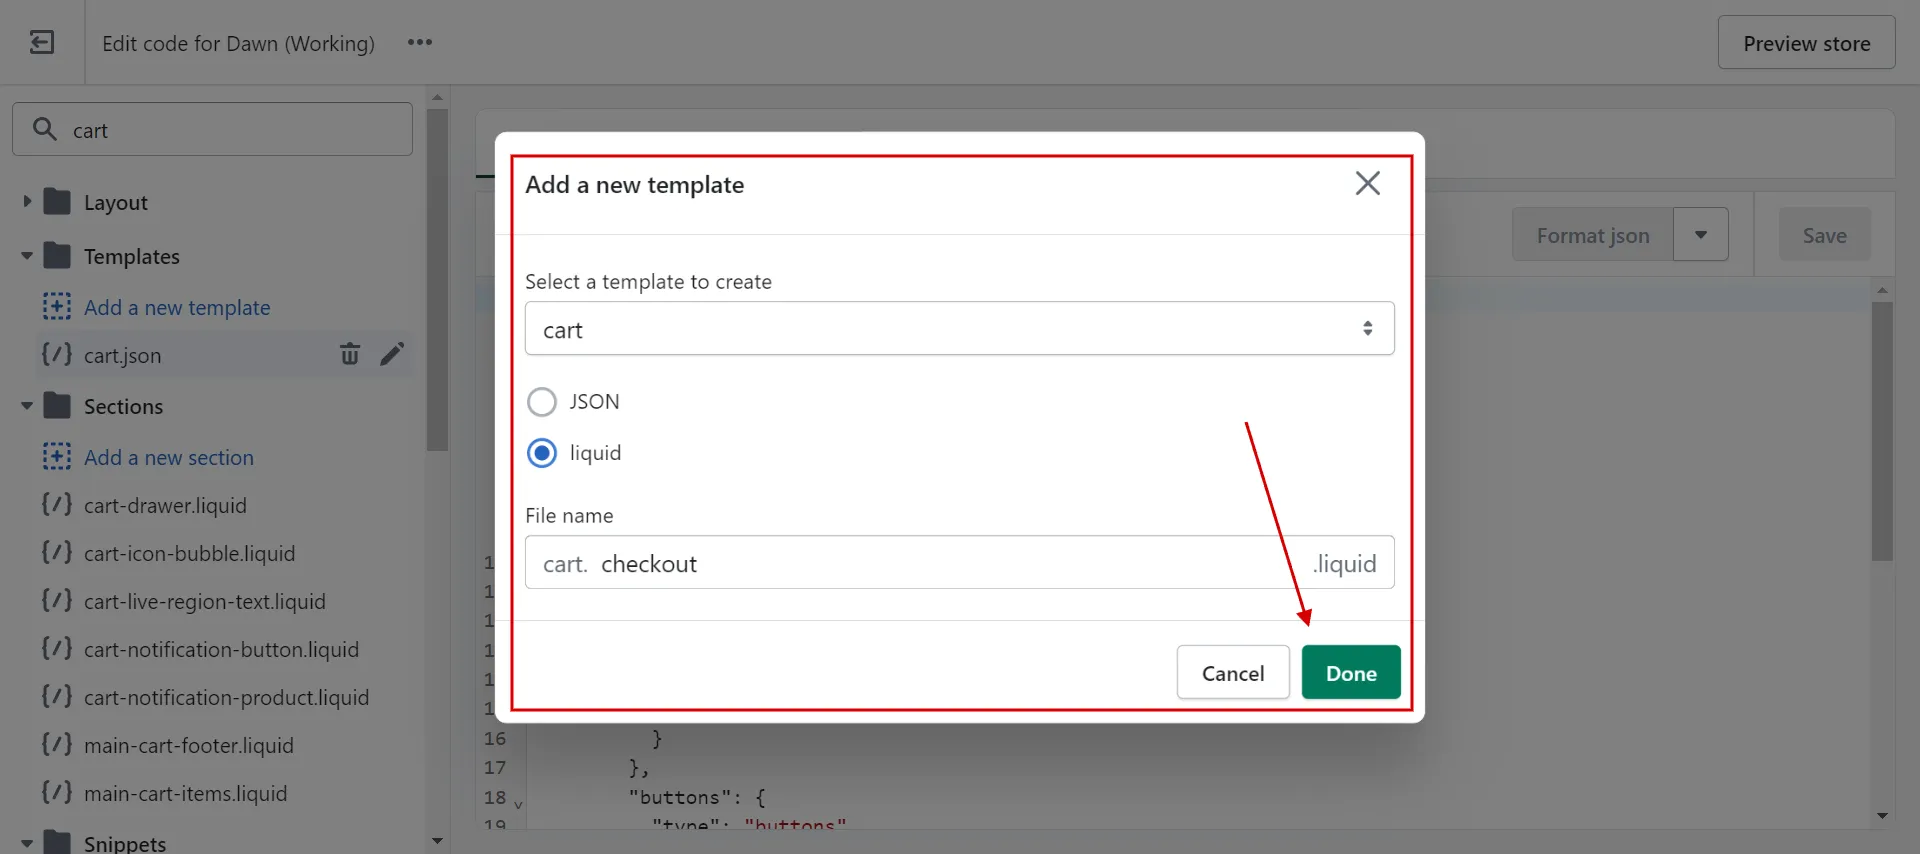
Then choose cart in template box, click Liquid, and type file name to create checkout.liquid file.
- Step 4: Add checkout code.
Next, add the code to the checkout.liquid file. We advise searching for checkout form codes in Shopify Liquid code examples. It begins with {% form %} and ends with an end form tag ({%- endform -%}).
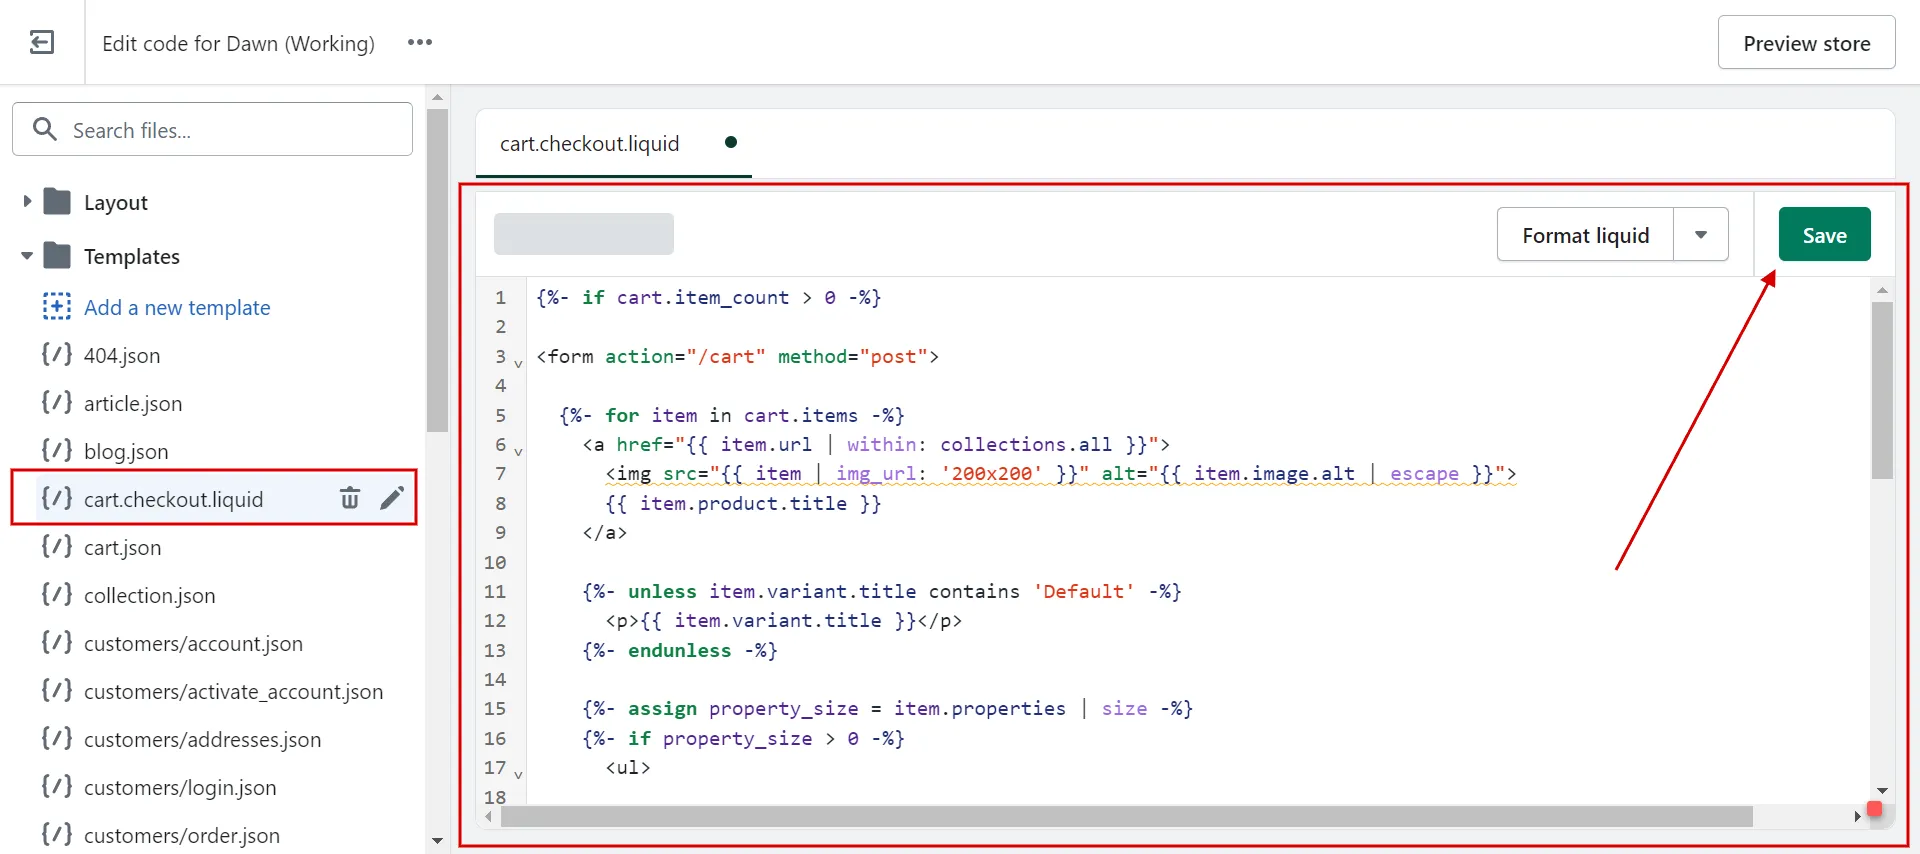
- Step 5: Save changes.
Once you have changed the code that you want, click Save and check Preview.
Now you know a basic introduction to Shopify Liquid templates and how to customize the checkout page in Liquid Shopify tutorial.
Besides Liquid, you can build a Shopify theme from scratch, build on top of Dawn, Shopify’s reference theme, or use available pre-themes. Check it out!
Want to migrate to Shopify?
If you are intending to migrate to Shopify, LitExtension offers a great migration service that helps you transfer your data from the current eCommerce platform to a new one accurately and seamlessly with utmost security.
Shopify Liquid Resources to Learn
You have now gained a lot of knowledge about Liquid and its functionality from this comprehensive Shopify Liquid tutorial.
We suggest the following sources if you want to learn more about Liquid Shopify tutorial:
- Shopify Liquid Templates: Check out how Liquid codes can be used to write various website components.
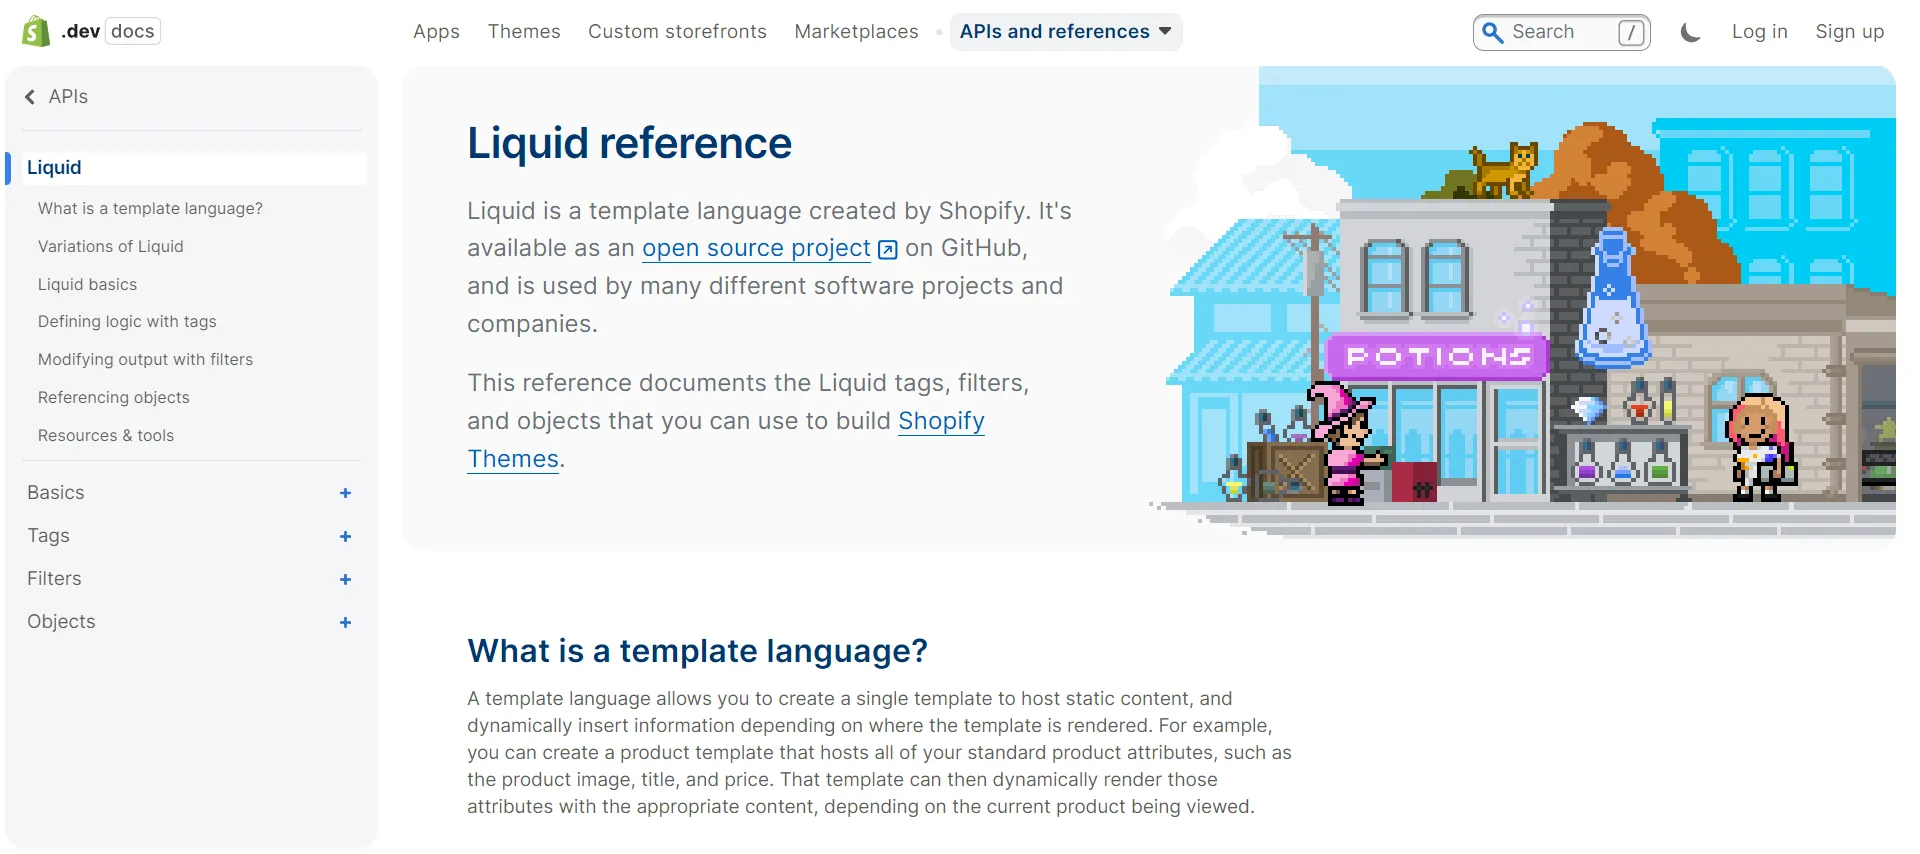
- Liquid References: Document the Liquid tags, filters, and objects you can use to build custom Shopify Themes.
- Learning Liquid Series: Numerous topics relating to Liquid are covered in this collection of articles from Shopify.
- YouTube Shopify Liquid Tutorial: Watch videos to learn about Shopify theme development using Liquid.
- Shopify Liquid Cheat Sheet: Provide every Liquid object, tag, and filter, view straightforward examples, and visit the Shopify Framework reference materials.
With the help of Shopify Store Development Services, a more cost-effective solution, you can create your own Shopify website from scratch and add any necessary features to expand your company.
Shopify Liquid Tutorial – FAQs
Is Shopify Liquid easy to learn?
Shopify originally developed Liquid as an easy-to-learn and secure Liquid templating language. Liquid is a straightforward and quick templating language. If you've used any popular templating languages before, you should be comfortable using Liquid because they all have similar syntax.
What can I do with Shopify Liquid?
Like any template language, Liquid builds a link between an HTML file and a data store; in this case, the data store is a Shopify store. This is accomplished by providing an easy-to-use and readable syntax for accessing variables within a template or .Liquid file.
How do I write Liquid codes on Shopify?
Here is a sample of Liquid coding for Shopify’s contact form:
| <h1>{{ page.title }}
{% endif %} {%- assign formId = 'ContactForm' -%} {% form 'contact', id: formId %} {% include 'form-status', form_id: formId %} {{ form.errors.translated_fields.email | capitalize }} {% endform %} |
In this piece of code, we can see cases of all three Liquid features:
- Object: The {{ page.content }} object is a substitute for the page's body content specified in the Shopify user interface.
- Tag: The {% form %} tag is used to add a form to the page, and the {% endform %} tag is used to close it out.
- Filter: {{ form.errors.translated_fields.email | capitalize }} is a filter for capitalization in an object.
What programming language is Shopify Liquid template written in?
Shopify uses Ruby-based Liquid, which is an open-source template language. It loads dynamic content on storefronts and serves as a Shopify framework.
How does Shopify Liquid code differ from HTML?
Standard HTML code and Liquid constructs are combined to create a Liquid file. When working with a Liquid file, the syntax is easily read and distinguished from HTML. The use of two sets of delimiters makes this even more straightforward.
How do I show my product in Shopify Liquid?
Here is the Shopify product Liquid tutorial. Follow our instructions to show a product in Shopify Liquid:
- Step 1: Navigate to the Online Store > Edit code.
- Step 2: Go to Templates > product.Liquid file.
- Step 3: Add the code below the product title.
- Step 4: Based on your current theme, ensure that the SKU changes dynamically when you choose other variants. If not, you must add a few lines of JavaScript to the JavaScript file for your theme.
Final Words
We covered a lot of ground, but hopefully it has provided you with a thorough introduction to the Shopify Liquid Tutorial. You can make your page ideas a reality by comprehending the code that powers your Shopify theme. Even better, you can develop unique code blocks throughout your Shopify store.
LitExtension, the #1 Shopping Cart Migration Expert hopes that our article, “Shopify Liquid Tutorial: A Shopify Coding Guide for Beginners”, will help your online store look better. For other excellent ideas, read more blogs on the LitExtension blog and interact with our eCommerce community.


