
Choosing a suitable logo and style is an excellent way to build your brand, acquire customer loyalty, and attract new customers. However, the question of how to change logo on Shopify can be a little confusing if you’ve never done it before.
In this article, we – LitExtension, will demonstrate how to change the logo on Shopify website in 3 easy ways
Let’s figure out the importance of logos before learning how to change logo on Shopify.
Why a Logo Is Vital in Shopify Store
A logo makes your brand easily identifiable and raises your company's voice in various online business markets. Here are 3 reasons why a logo is essential to a Shopify store.
#1 Brand awareness
Shopify logo is a customer's first impression of the store because it appears on its header and announces your brand. An excellent logo conveys the company message and complements the company name well. You show off your logo instead of a large text block expressing your company's objective.
#2 Brand identity
An effective logo is a brief introduction to your products or what distinguishes you from the competition. It assists clients in understanding what you are selling and your aesthetic or unique appeal. You will have competition in every niche you choose. If you want to save time, AI logo makers can assist you with many unique design features. Hence, your logo and brand image will set you apart from the competition.
#3 Brand loyalty
If you have an existing brand or hope to create one, the logo will indicate to customers your reputation. If your logo demonstrates an interest in the consumer, the customer will remain. They'll look through your catalog, buy something, and maybe come back for more.
If consumers like your product and see it again, they will remember the experience associated with your logo and purchase it again.
Now you understand the importance of a logo for an eCommerce store. Let's review three ways to add a logo to your Shopify store.
How to Add Logo to Shopify by Admin Dashboard
The first method is to operate directly in the Shopify admin dashboard after logging into your account. Here are the complete instructions:
- Step 1: Choose Settings > Brand.
From the admin dashboard, select Shopify brand settings.
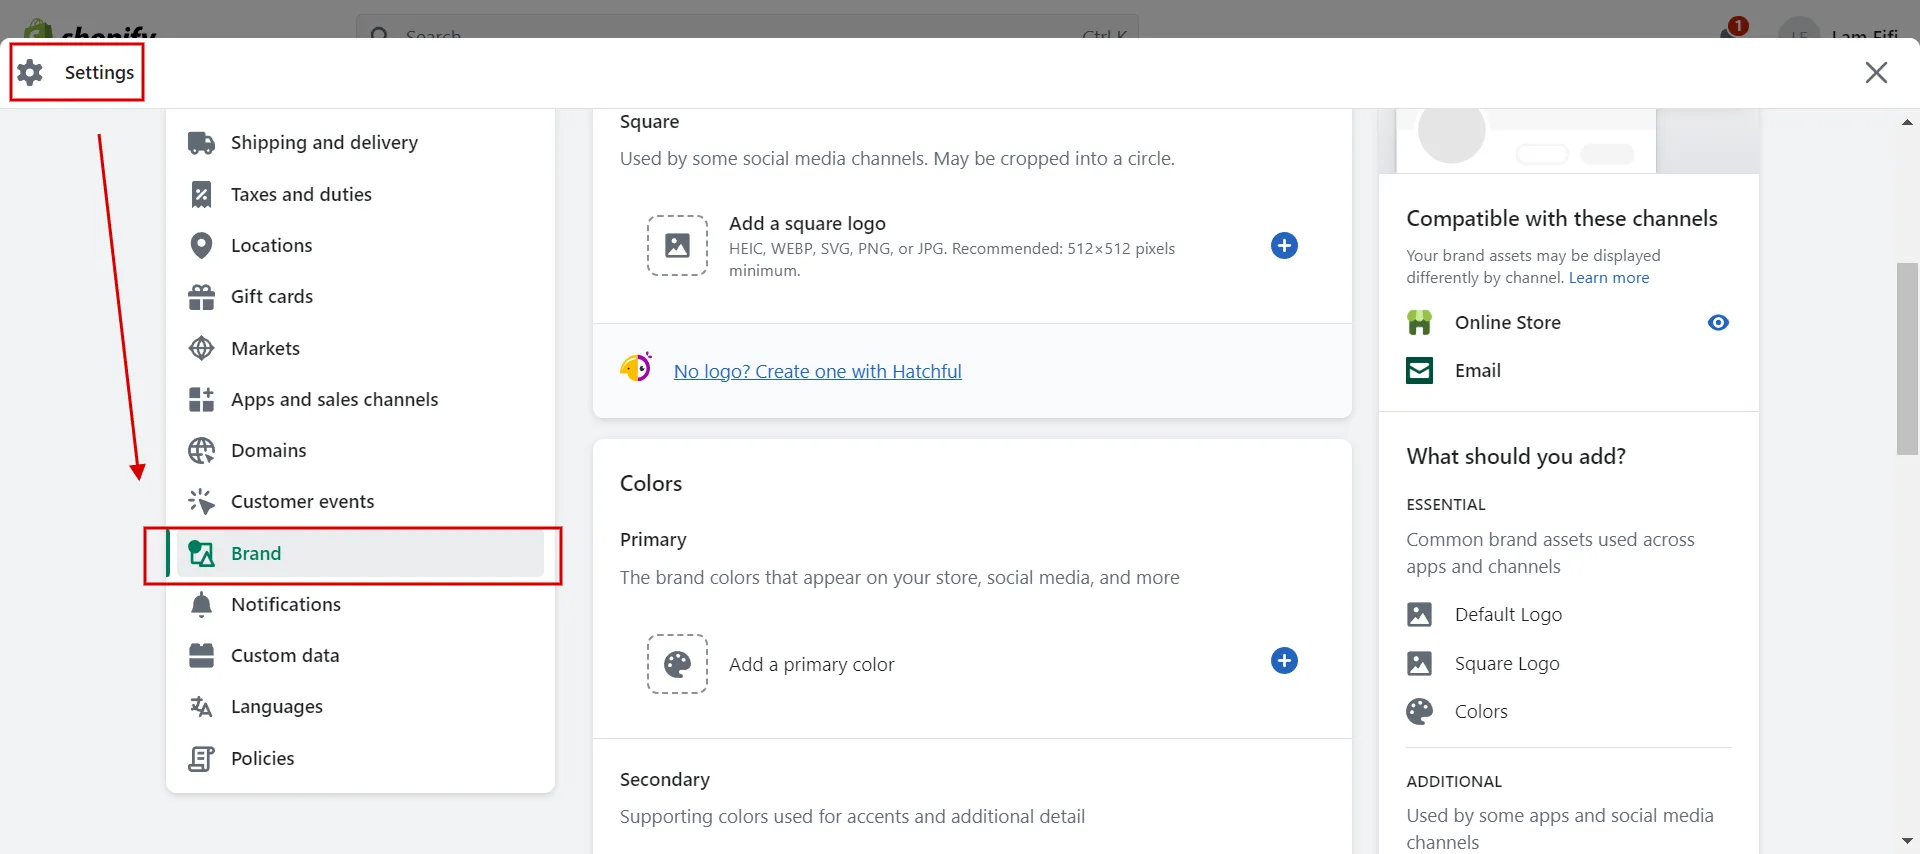
2. Step 2: Add default logo.
In the Logos section, click the + button to add a default logo.
Then click Add images and upload your logo image from your computer. Next, click Done.
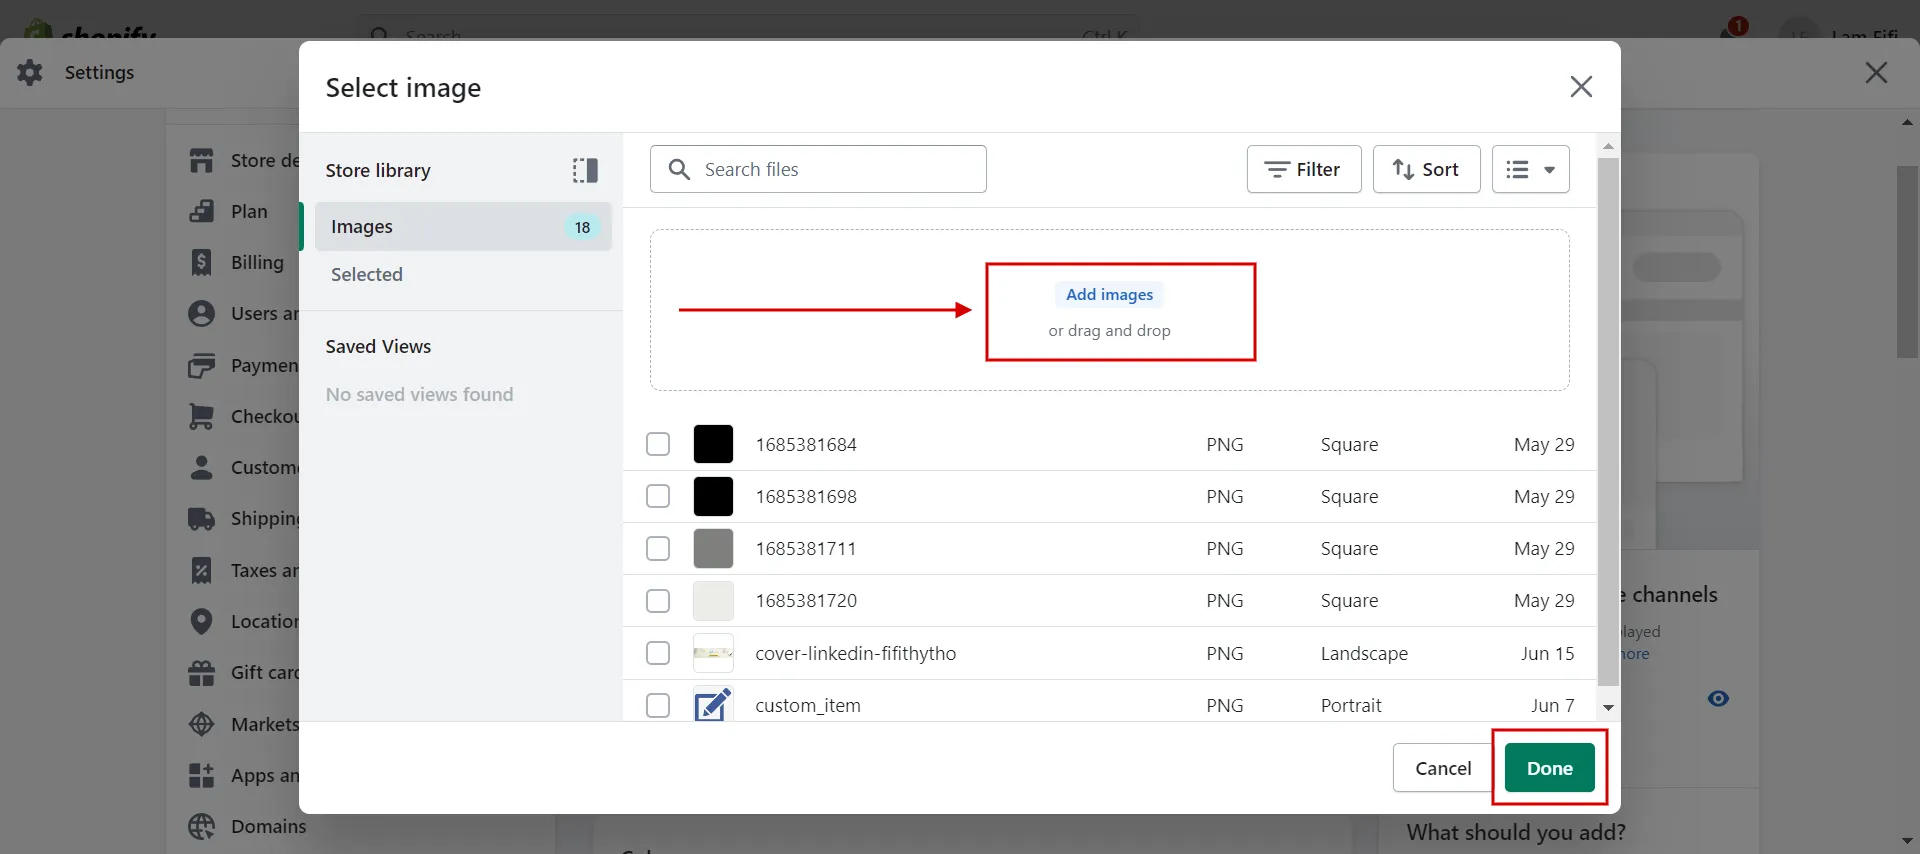
Note: A logo should be in HEIC, WEBP, SVG, PNG, or JPG format. Shopify logo size is 512 pixels (Recommended minimum width).
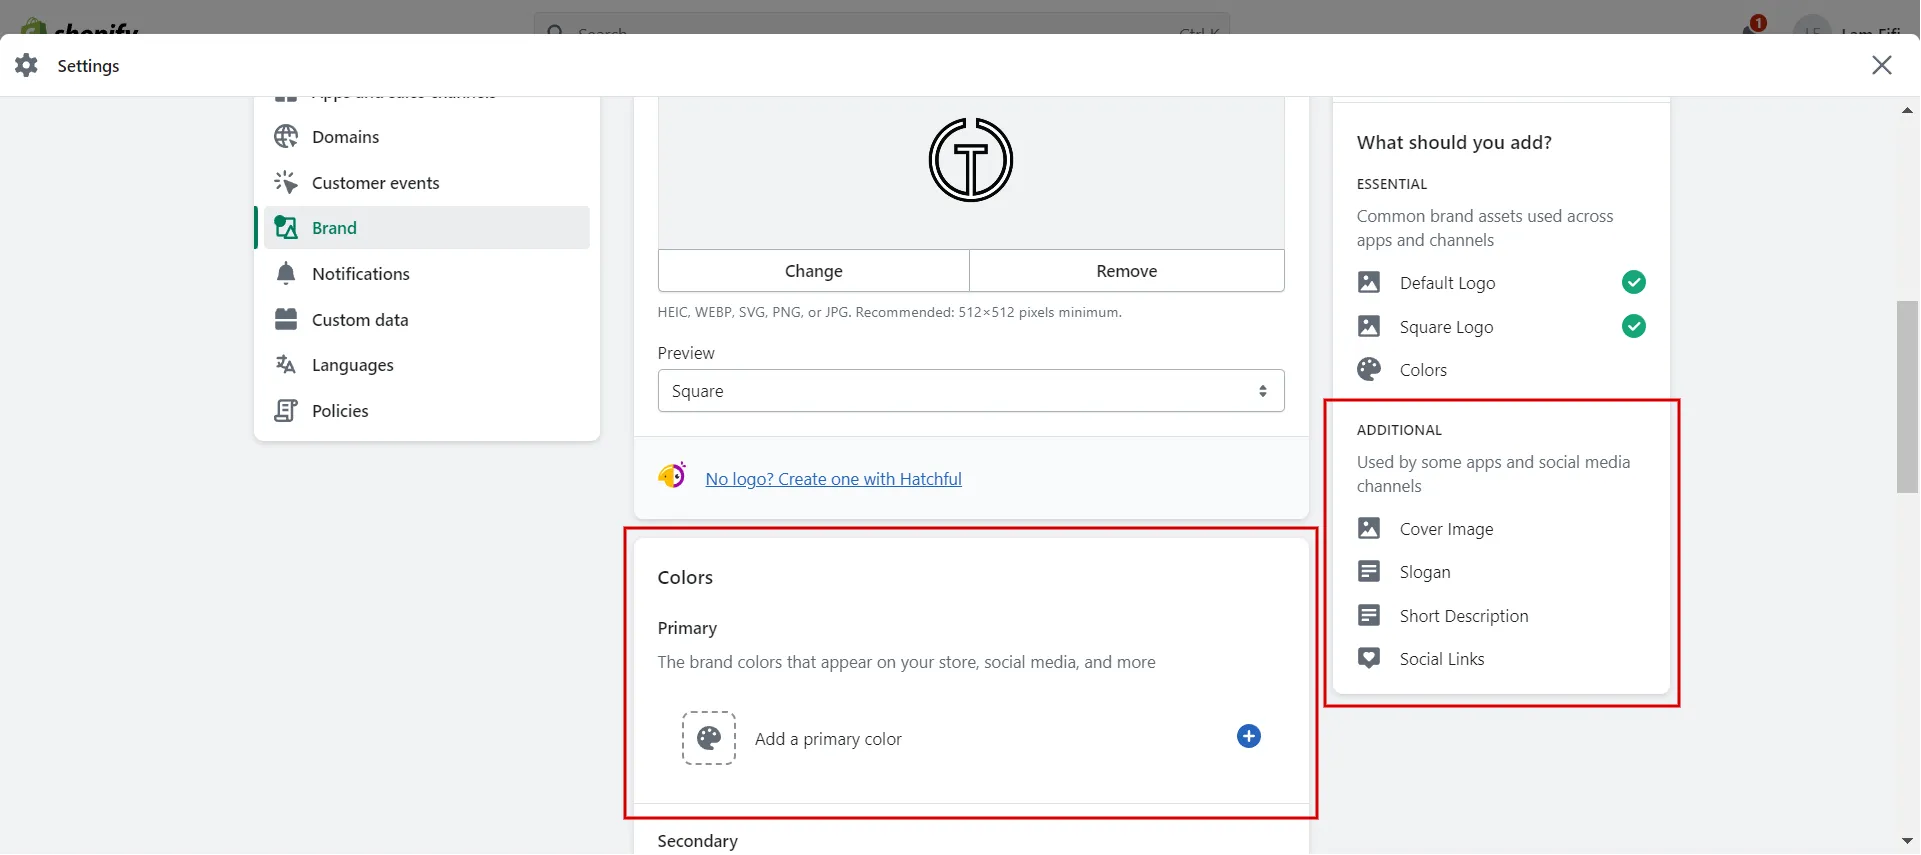
3. Step 3: Add square logo.
The square logo is automatically modified to match the default logo. Change it by clicking the Change button.
4. Step 4: Add additional assets.
Continue to add value to additional assets like colors, cover images, slogans, short descriptions, and social links.
5. Step 5: Save the chanege.
Finally, save any changes.
This is how you add logo to Shopify by admin dashboard. In the following section, we'll look at how to change logo on Shopify theme.
How to Change Logo on Shopify Theme
The theme is the second way to update the logo on Shopify. Let's go into the specifics.
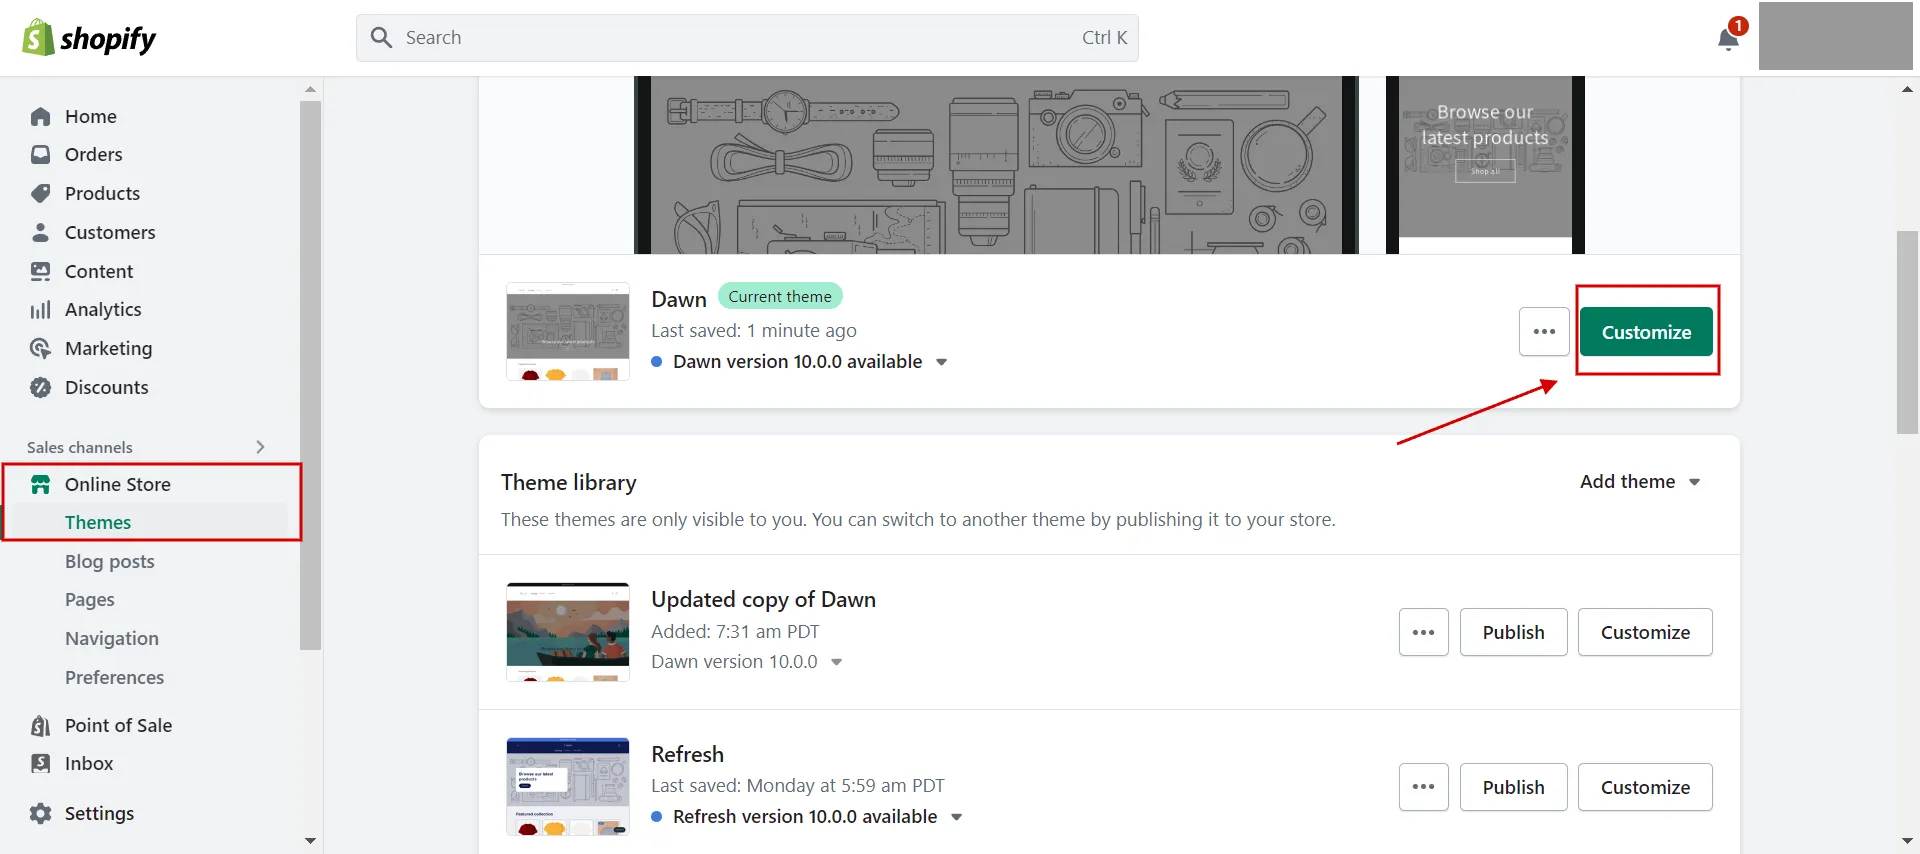
- Step 1: Find the customize page.
Log into the Shopify account, go to Online Store, choose Theme, and click to Customize button on the current theme you want to change a logo.
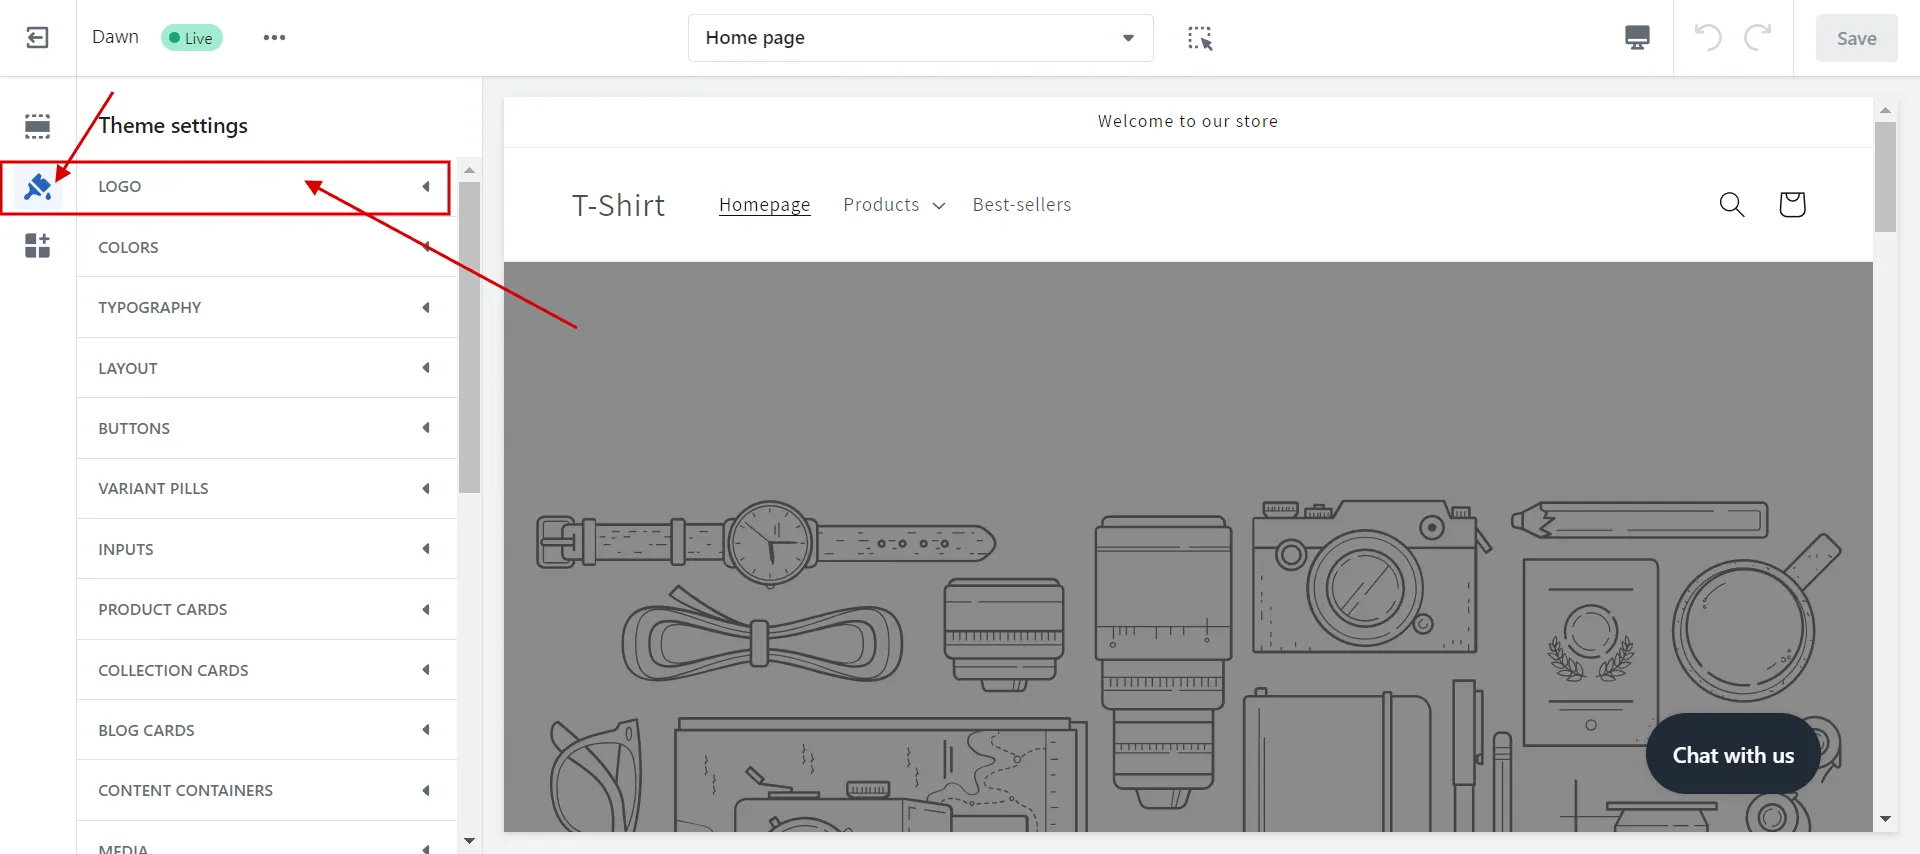
2. Step 2: Choose Theme settings.
Next, click on Theme setting on the left side of the options panel, and choose Logo.
3. Step 3: Click Select image.
You see two sections which are Logo and Favicon image.
Choose the Select image button to add a logo or click Explore free images if you are not prepared with your logo image.
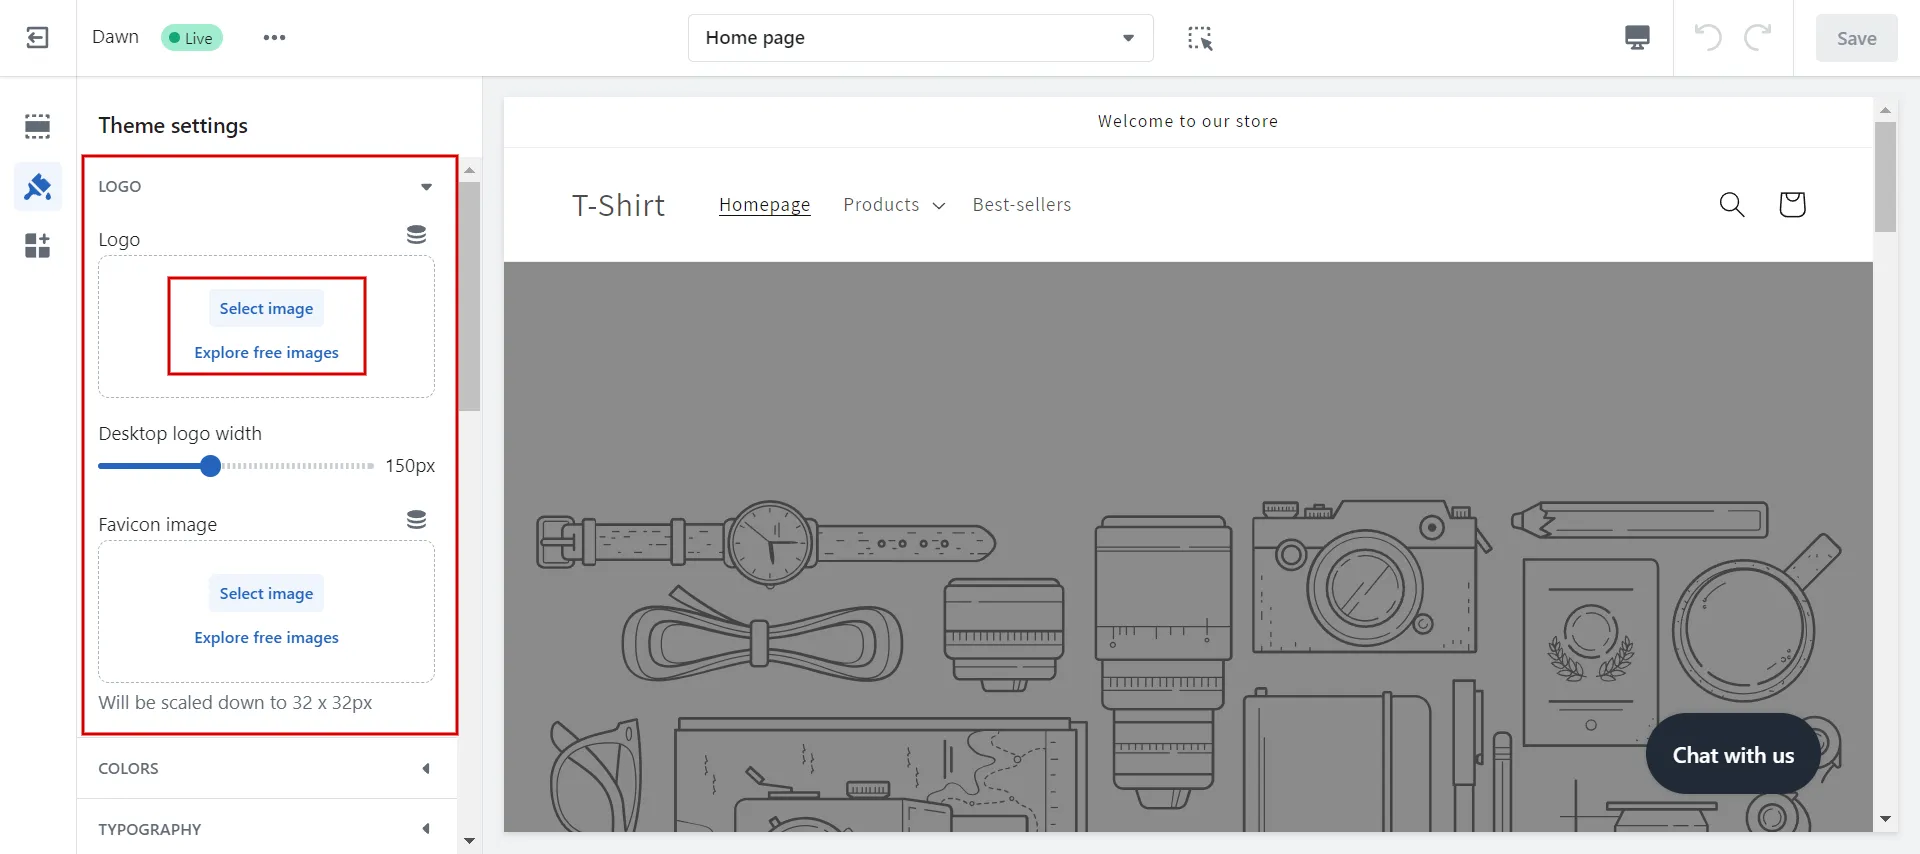
4. Step 4: Click Save.
Then, click Add images button to upload a logo image.
You may also modify the desktop Shopify logo size from 50px to 300px. Save it at the end.
This is a simple and quick method to add the logo to Shopify. Check out the following section to learn about the advanced approach to Shopify's change logo.
Want to migrate to Shopify?
If you are intending to migrate to Shopify, LitExtension offers a great migration service that helps you transfer your data from the current eCommerce platform to a new one accurately and seamlessly with utmost security.
How to Change Logo on Shopify Code Editor
This part will demonstrate how to alter the Shopify logo design in the code editor, which is more complicated. You can also change the width of the logo.
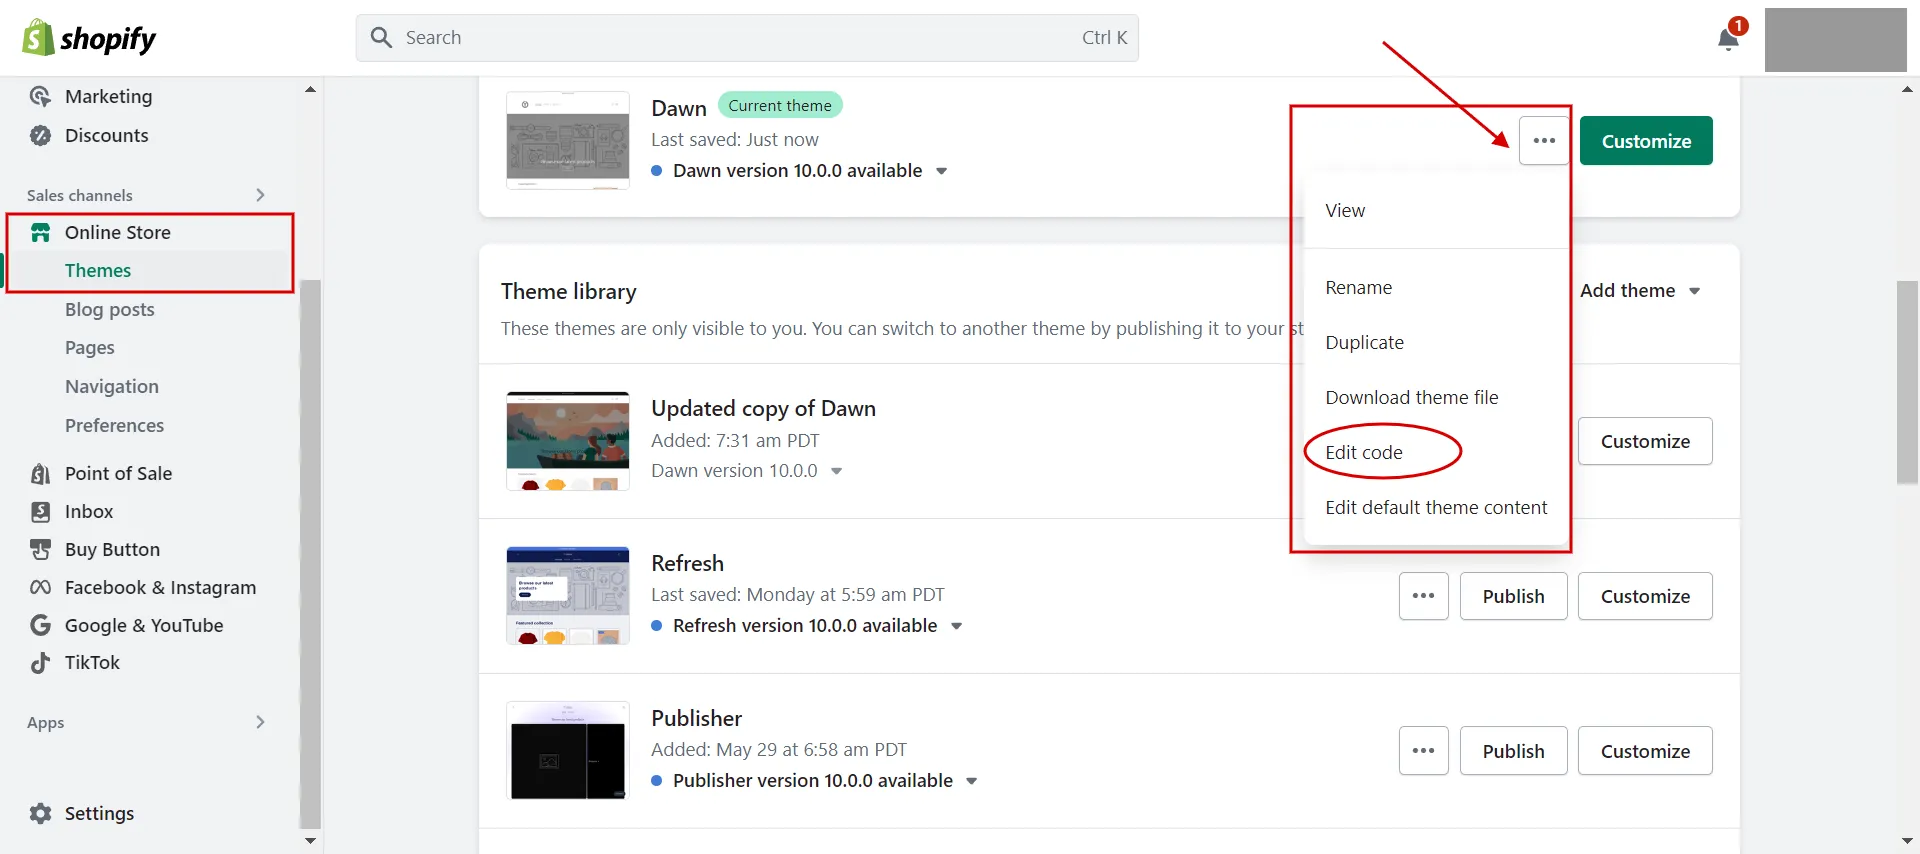
- Step 1: Find edit code in the theme tab.
Access Online Store and choose Themes. Then, click the ‘…’ button and choose Edit code on the current theme.
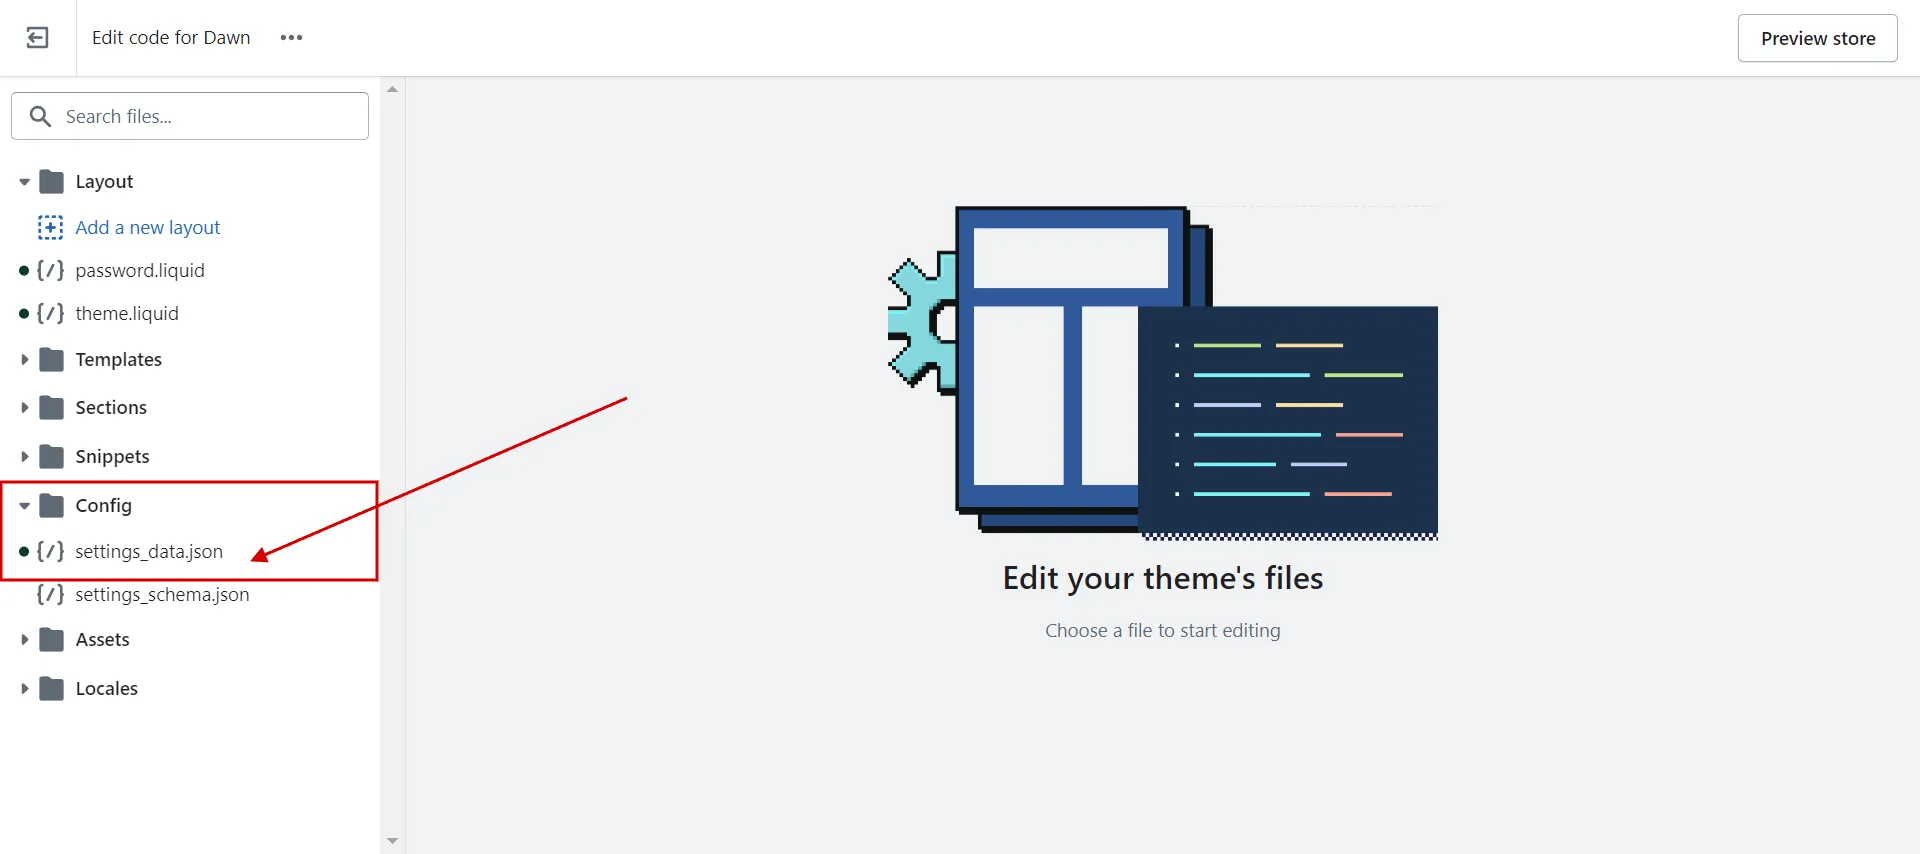
2. Step 2: Open Config folder.
In the Config folder, find and choose settings_data.json.
3. Step 3: Find the code.
In the code screen, add the below code like that
| “logo”: “Shopify:\/\/shop_images\/[your logo name].png”
“logo_width”: XX |
Replace ‘[name your logo].png' with the name of your own logo file.
Note: You should upload your logo file to Shopify first.
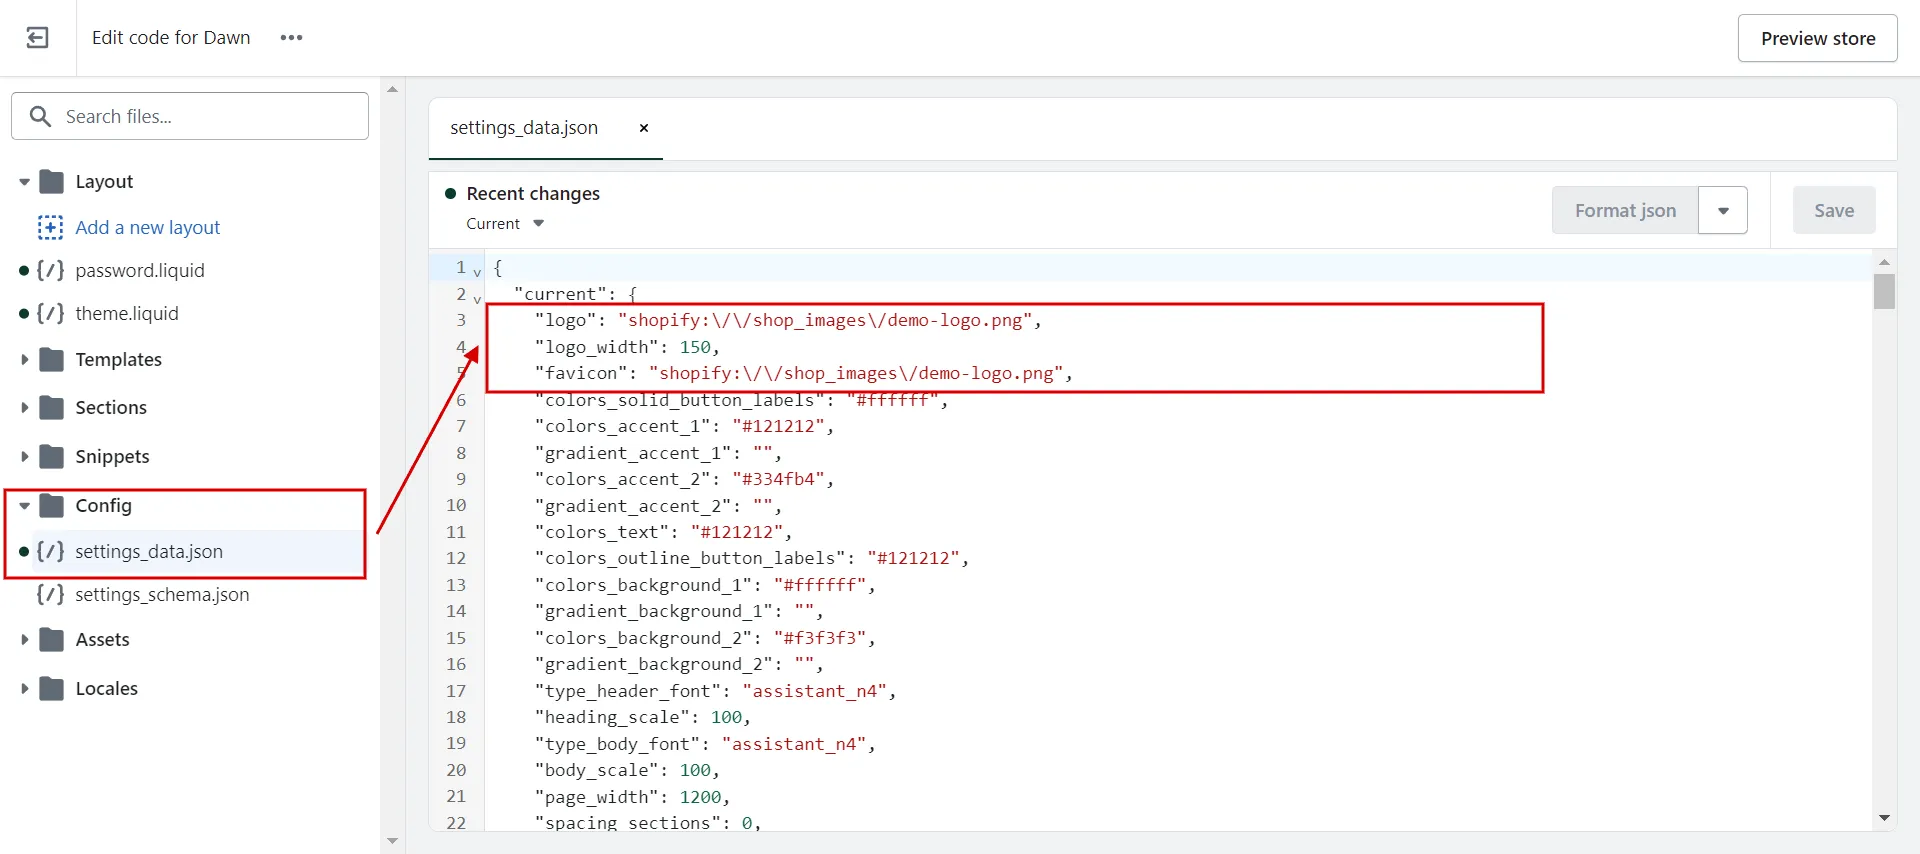
To change the size of the logo, look at the code line “logo_width”: 150 and change 150 to a different number.
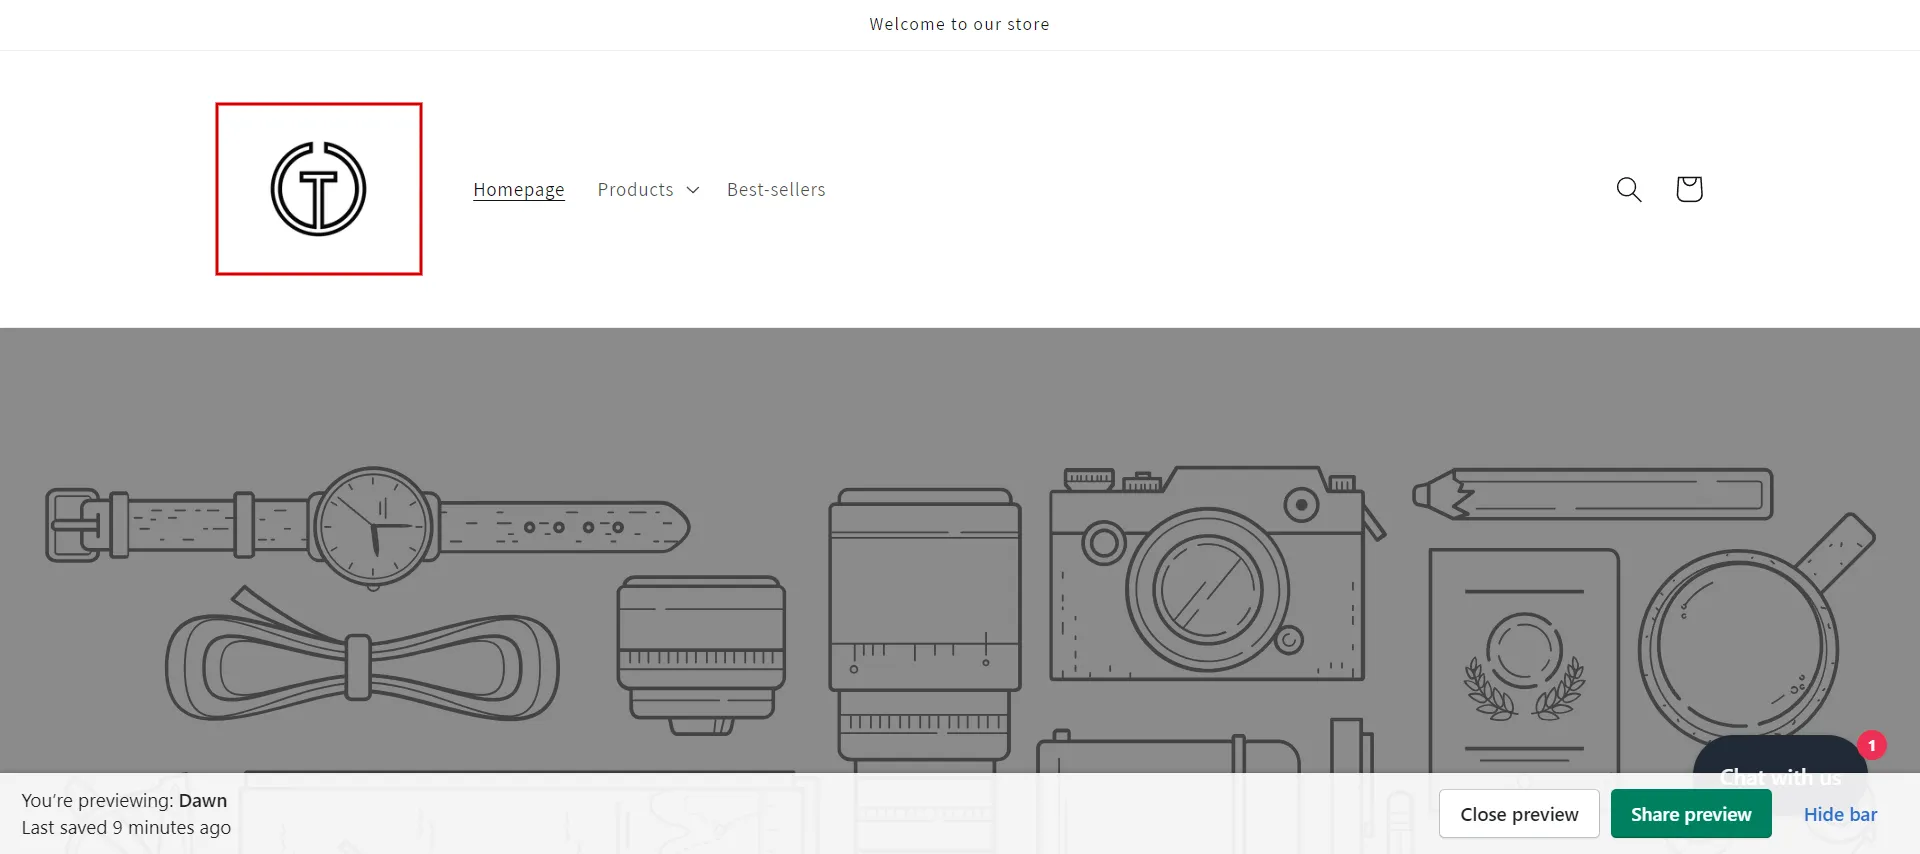
4. Step 4: Check front-end and Save
Save it, and remember to check the front-end page by clicking the Preview store button.
From now on, you learn how to change logo on Shopify from basic to advanced methods.
Learn more about Shopify Tutorial – 9 Complete Steps to Get Instant Sales if you are curious about the Shopify platform.
Shopify Change Logo – FAQs
How do I change my website logo in Shopify HTML?
Follow our steps to update your website's logo in Shopify HTML:
- Step 1: Navigate to Online Store > Themes.
- Step 2: Locate the theme you wish to modify and then click Customize.
- Step 3: Access Theme settings.
- Step 4: Select Logo.
- Step 5: Choose Select image, and then do one of the following:
- Choose the Library tab to select an image you uploaded to your Shopify admin.
- Go to the Library tab and then Upload to add an image from your computer.
- Step 6: Select Save.
How do I create a custom logo for Shopify?
Hatchful by Shopify is a free application that allows you to build your logo. Here is the way to create your custom logo.
- Step 1: Open the Hatchful tool.
- Step 2: Press Get Started button.
- Step 3: Determine the sort of business you most closely connect with your store. Click the Next button.
- Step 4: Decide on the graphic style for your logo. You may select more than one option. Choose Next.
- Step 5: Enter your company name, and if you have a tagline, type it in as well. This incorporates both into your logo. Click Next.
- Step 6: Determine where you intend to use your logo. Select all applicable choices. Click Next button.
- Step 7: Select the logo you believe best suits your company. On the following screen, you can change the logo.
- Step 8: Use the side menu to change your logo's language, fonts, and colors. Click Next.
- Step 9: Hit the Download button.
How do I add my logo to my Shopify store?
Look at our steps for adding a logo to your Shopify store.
- Step 1: Click Settings > Brand in your Shopify admin.
- Step 2: Add or pick your brand logos from your photos in the Logos area.
- Step 3: With the drop-down menu, you can search files for a certain file name, sort existing photographs, or switch from a list view to a grid view.
How to change the background behind header logo on Shopify?
Feel free to follow the instructions outlined below!
- Step 1: To add a background image to your header, go to the Theme settings page and click "Customize"
- Step 2: Under Header, pick Header Background and upload an image you want.
- Step 3: Adding a background image to your header is an excellent approach to giving your Shopify store a distinct appearance.
How to change logo on chrome tab on Shopify?
Follow our instructions to learn how to change logo on Shopify for browser pages titles.
- Step 1: Access Online Store > Themes > Customize.
- Step 2: Navigate to Theme settings.
- Step 3: Click Favicon to add Favicon to Shopify.
- Choose the Library tab to select an image you uploaded to your Shopify admin.
- To upload an image from your computer, go to the Library tab and then Upload.
- Step 4: Add alt text to favicon:
- Select Edit.
- Add a brief description.
- Choose Save.
- Step 5: Click the Save button.
How to change the logo icon for live chat on Shopify?
Follow our easy instructions to change the chat button on Shopify.
- Step 1: Choose Settings > Apps and sales channels.
- Step 2: Hit Inbox from the Apps and sales channels page.
- Step 3: Tap the Open sales channel button.
- Step 4: Click Chat settings, followed by Shop store.
- Step 5: Do one of the following in the Chat visibility section:
- Choose Visible if you want consumers to be able to message you from the Shop app.
- To disable messaging in the Shop app, select Not Visible.
- Step 6: Save the file.
Wrapping Up
As you can see, a comprehensive guide on how to change logo on Shopify is already available to help you complete your ecommerce store. We hope you can successfully build and upload your desired logo to your Shopify store.
LitExtension, the #1 Shopping Cart Migration Expert, provides the most straightforward and cost-effective solution for your eCommerce store on Shopify. Visit our LitExtension blog and eCommerce community for more tips on running your online store.


