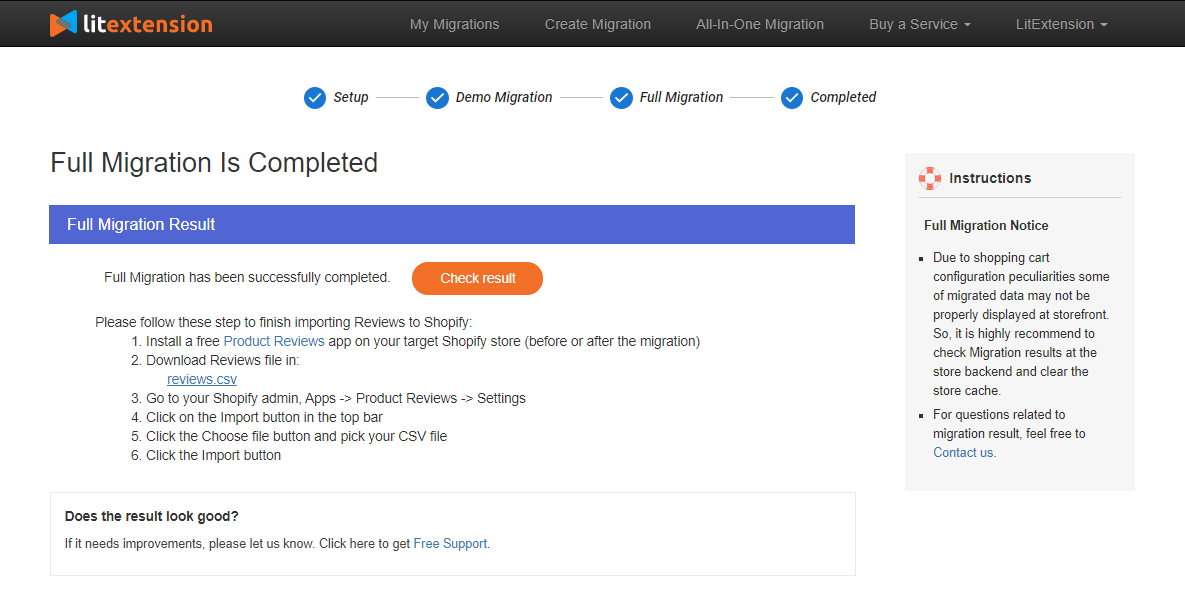
After Full Migration is complete, you will be notified and the screen would look like this. Now it’s time to check migration results. Checking the results after data migration is a must in order to ensure all of your data has been fully transferred and displaced correctly on the Target Store.
Note: Data from third-party apps can not be migrated by the LitExtension automated app (Basic Migration Package). But don’t worry. You still can migrate all of your special data with our Custom Fields Migration Service, which will be carefully and professionally performed by our experts.
Each platform has a unique way to arrange and display your data. Therefore, the checking process is different on each shopping cart. Remember to check on both the back-end and front-end of your store.
Note: You can have a Personal Assistant check and ensure the normal operation of your store with the All-in-One Migration Service, or you can check out some of our featured shopping carts below.
Shopify
On Shopify, all of the products will be fully displayed on the storefront after the Full Migration except for the out-of-stock products. Hence, you are supposed to find them from the catalog or by onsite search.
You should check your product details which are product descriptions, images, variants, and meta descriptions carefully.
One thing to jot down is that Shopify does not have categories and subcategories. Instead, there are collections and product tags. Data in categories and subcategories on your Source store will be automatically moved to corresponding collections and tags on Shopify.
After finishing checking data on storefront, login to the Shopify admin and browse customer and order data from the back-end.
Note: If you want to transfer product reviews from Source cart to Shopify, please check out the following steps to import reviews to Shopify:
- Get the free app Product Reviews on your Target Shopify store (before or after the migration)
- Export reviews from your Source store to CSV file.
- Go to your Shopify admin, navigate to Apps -> Product Reviews -> Settings
- Hit Import button in the top bar
- Click “Choose file” button and select the CSV file you’ve exported
- Click “Import” button
Magento
After the full migration to Magento, you are supposed to check data on backend and everything is ready for the operation on the new platform. If the site does not run properly or some of the entities are not displayed on the frontend, it could be an issue of your theme or configuration.
On Magento 2 dashboard, you need to clear cache and reindex data by applying these following command lines:
- php bin/magento indexer:reindex
- php bin/magento cache:clean
Note: Out-of-stock products might not be visible from the front-end. Therefore, you can change the setting following these steps:
Store → Configuration → Catalog → Inventory → Stock Options → Display Out-of-stock Products → Yes, all product will be shown in the frontend.
WooCommerce
WooCommerce brings you the results of your automated migration right on the storefront. Just type your new store’s URL or follow the confirmation link in email and access the shop site.
If you are using a template specifically designed for WooCommerce, the products catalogue can be your homepage where the imported entities will be. Then, log into the WordPress admin dashboard and go to WooCommerce tab to check your data in the back-office.
Moreover, you need to activate “Generate Thumbnail” to display images on the frontend.
- Login to your WooCommerce Target Site.
- Go to “WooCommerce” > “Status” > “Tools” > click “Regenerate”. Select “Product lookup tables” > click “Regenerate”
BigCommerce
After the full migration, you can check whether the products and items appear on the front-end or not. And don’t forget to log into the admin panel and custom the entities as you want.
OpenCart
Go to the front-end and check all your items in the catalog, the categories and onsite search. Check from the admin panel if any products from the source store aren’t on display on the new one.
Log into the back-end and go to the Catalog > Products to find the entities and check whether it is Enabled or not.
Note: Out-of-stock products can be disabled and not visible from the front-end.
Prestashop
First of all, you have to clear cache in order to see migrated entities. After that, your migrated entities such as products and categories are visible on the storefront.
Once again, you should check all the items and make sure they are displayed from the catalog and also the search.
Log into the backend of your new store and take a look at all transferred entities from the admin panel.
Please note that due to PrestaShop configuration, you will not be able to see the products that are assigned to a separate category from the back-end. Therefore, you must go to Products menu and use Filter by category to fix it.
In case you choose to migrate products and to display your images on frontend properly, please regenerate thumbnail Images following these steps:
- Go to Design > Image > REGENERATE THUMBNAILS
- Select an image = “All”; Erase previous images = “No”; hit “Regenerate thumbnails”
- In case it is Time-out during the process, please repeat the steps for incremental regeneration until it is fully completed.


