If you are migrating away from Miva Merchant, exporting its data beforehand is a crucial step of the process. With the exported file, you can adjust the data as needed before migration and keep a secure backup in case any issues arise during the migration process.
In this guide, LitExtension will walk you through the steps to export your data from Miva Merchant to CSV files, ensuring it’s ready for a smooth migration to your new platform.
1. To begin with, you will need to select Data Management from the Quicklinks section.
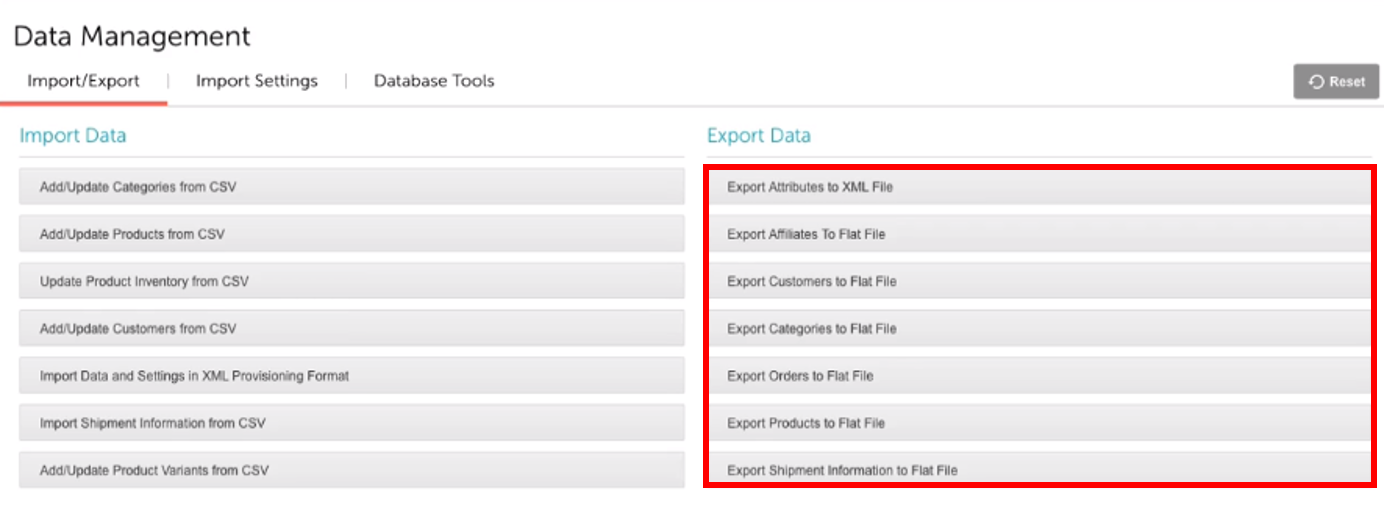
2. Next, select the data you want to export (Product, Orders, Customers,…) from the Export Data list in the right-hand side of the screen.
Note: Remember to export your store entities to Flat File.
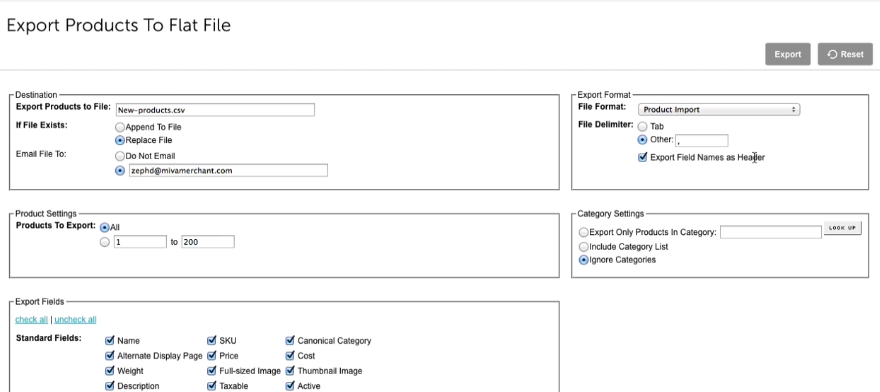
3. Miva Merchant will provide you with some options to configure your CSV file before downloading.
By default, the CSV file will be uploaded to your FTP. Otherwise, you can fill in your email address so that Miva Merchant can send the CSV file you want to export via your personal account.
In the Export Format section, please enter a comma in the Other tab of the File Delimiter option and don’t forget to tick on Export Field Names as Header.
4. Next, you can pick and choose which Product/Order/Customer details you wish to include in the export file.
5. When finished, click on the Export button in the upper right corner. Log in to your server and download the file via FTP or open your email to get the export file if you selected so.


