If you are migrating away from ePages, exporting its data beforehand is a crucial step of the process. With the exported file, you can adjust the data as needed before migration and keep a secure backup in case any issues arise during the migration process.
In this guide, LitExtension will walk you through the steps to export your data from ePages to CSV files, ensuring it’s ready for a smooth migration to your new platform.
1. Export products to CSV file on ePages
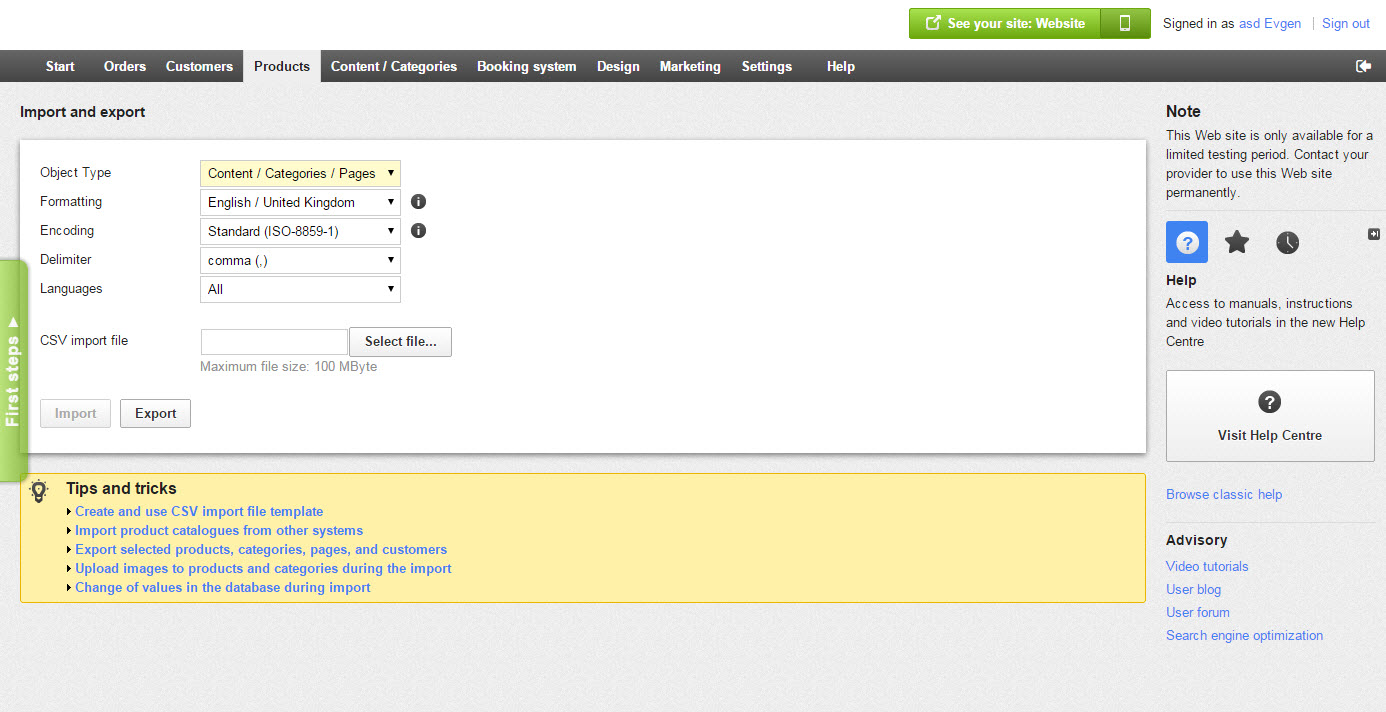
- Login to the ePages admin area and go to the Products Import and Export tab.
- In an Export form, you will need to set parameters for the future file.
- Select Content / Categories / Pages in Object Type field.
- Select Category Product Assignment to get Product Categories. Products and Product types fields are shown the same.
- Set UTF-8* Encoding in the appropriate field.
- Select comma (,)* as delimiter and press the Export button.
Note: (*) These meanings have to be the same while exporting the data.
- Hit Export and save the file to your computer in a place that is easy for you to find. After that, come back to Migration Wizard and upload files to a proper field.
2. Export orders to CSV file on ePages
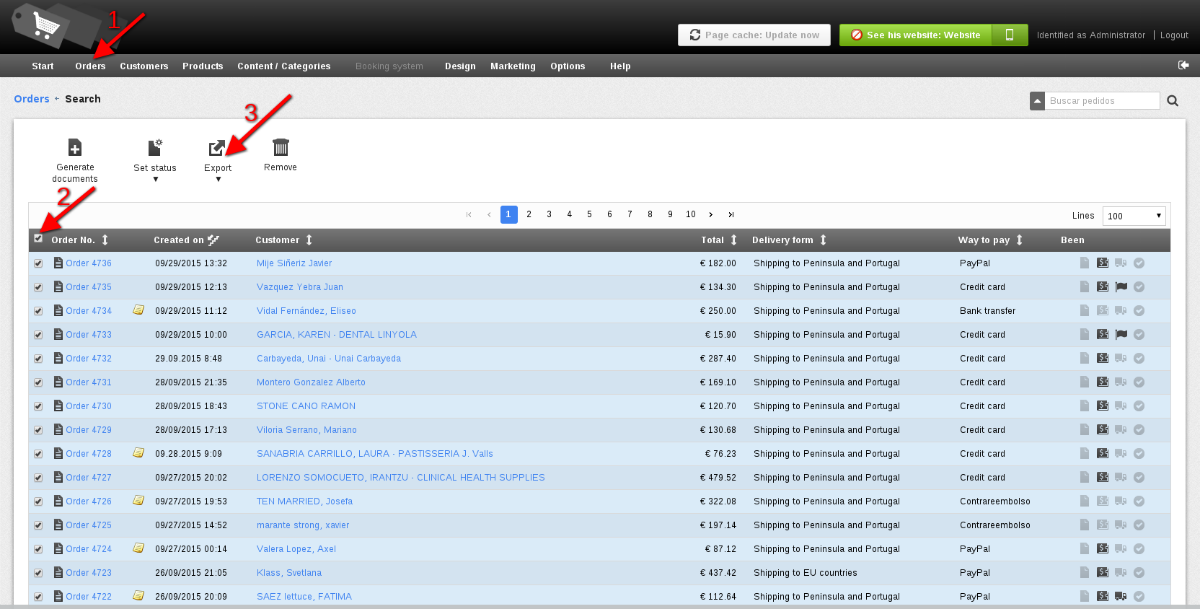
- Log in to the admin panel.
- Step to Orders Menu.
- Choose the orders you’d like to export, or all of them in the tick box in the top left corner.
- Hit Export.


