If you’ve found your way to this Shopify tutorial, chances are you’re curious about the platform, or even ready to build your own online store. The good news is, you don’t need to be a tech expert or have years of eCommerce experience. What you do need is a clear, practical guide that takes you step-by-step from the very beginning all the way to launching your store.
That’s exactly what we’ve prepared for you, a 10-step guide to setting up your Shopify store:
- Step 1: Create a Shopify account
- Step 2: Choose a storefront theme
- Step 3: Customize your website
- Step 4: Set up the domain
- Step 5: Add your first product
- Step 6: Configure essential settings
- Step 7: Create essential pages
- Step 8: Integrate Shopify apps
- Step 9: Place a test order
- Step 10: Pick a plan and start the business!
Without further ado, let's get started!
Shopify Tutorial: How To Set Up A Shopify Store
Shopify has everything you need to sell online, and getting started is easier than you think. We’ve broken the process into 10 clear, actionable steps so that if you follow along, you’ll have a fully set-up store ready to launch.
Also, if you prefer a visual guide, we’ve created a video version of this Shopify tutorial. Check it out now:
Step 1: Create a Shopify account
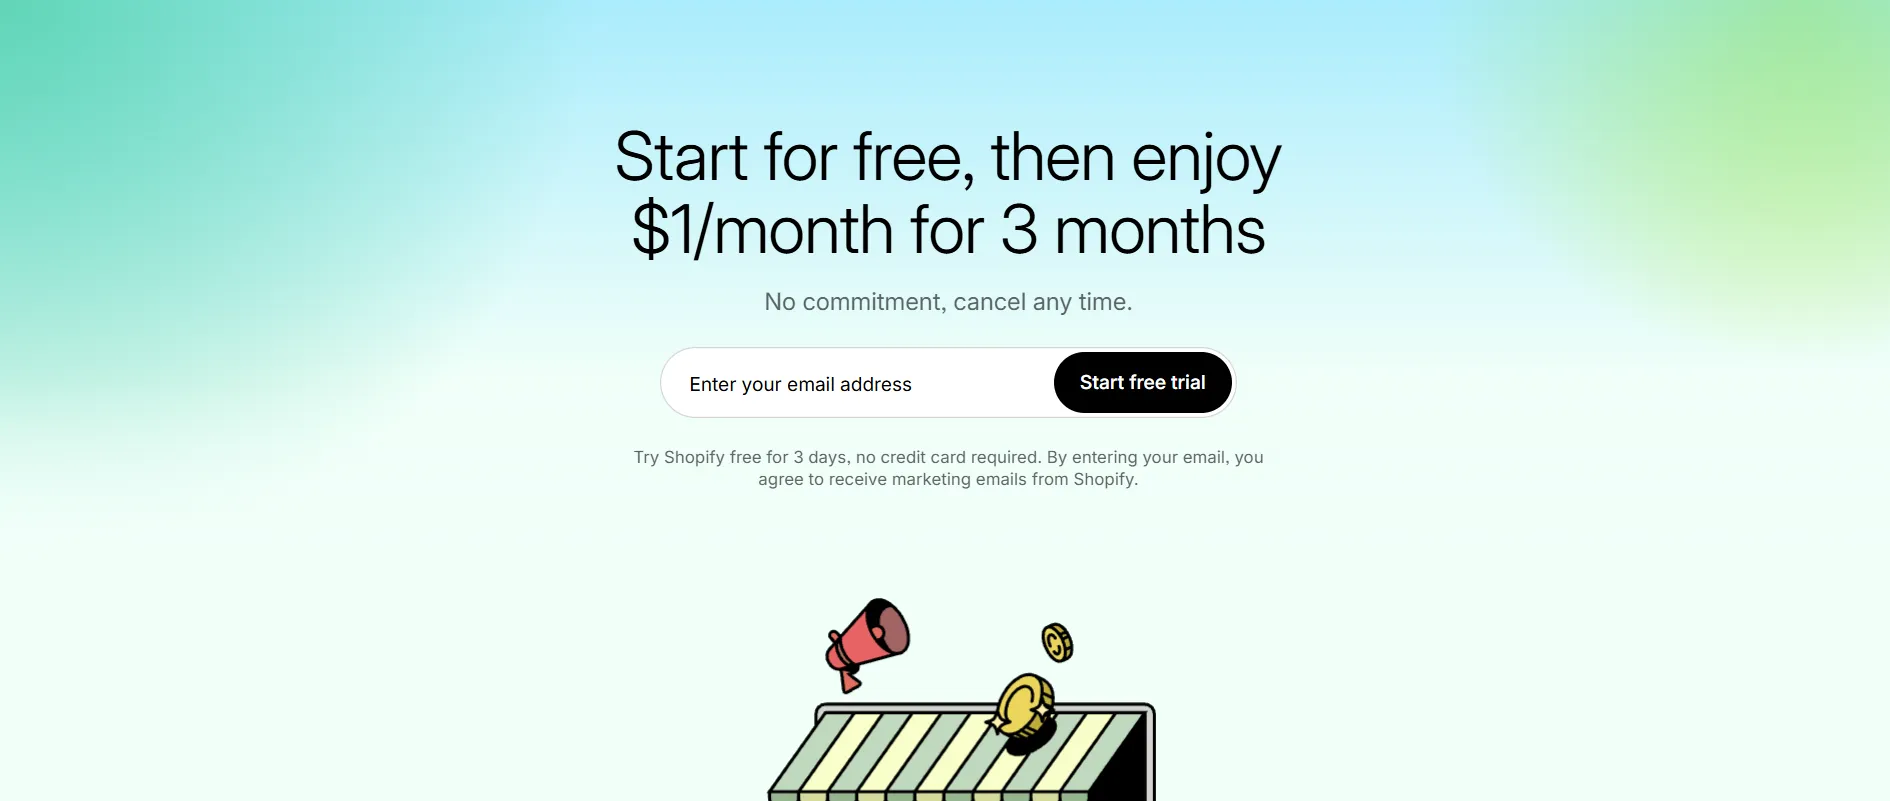
First, let’s create a Shopify account. Shopify currently offers a 3-day free trial or a 3-month trial for just $1/month, so you can experience the platform to the fullest at the lowest possible cost before committing to a paid plan.
Head over to the Shopify homepage, enter your email address, and click “Start free trial”. Shopify will then connect your email to the new account, similar to confirming email access (for example, if you use Gmail, you may see a prompt to allow Shopify to link with your Google account).
Next, this platform will ask you a few questions about your business information, including what you are selling on Shopify, which industry you are in, and why you set up the store.
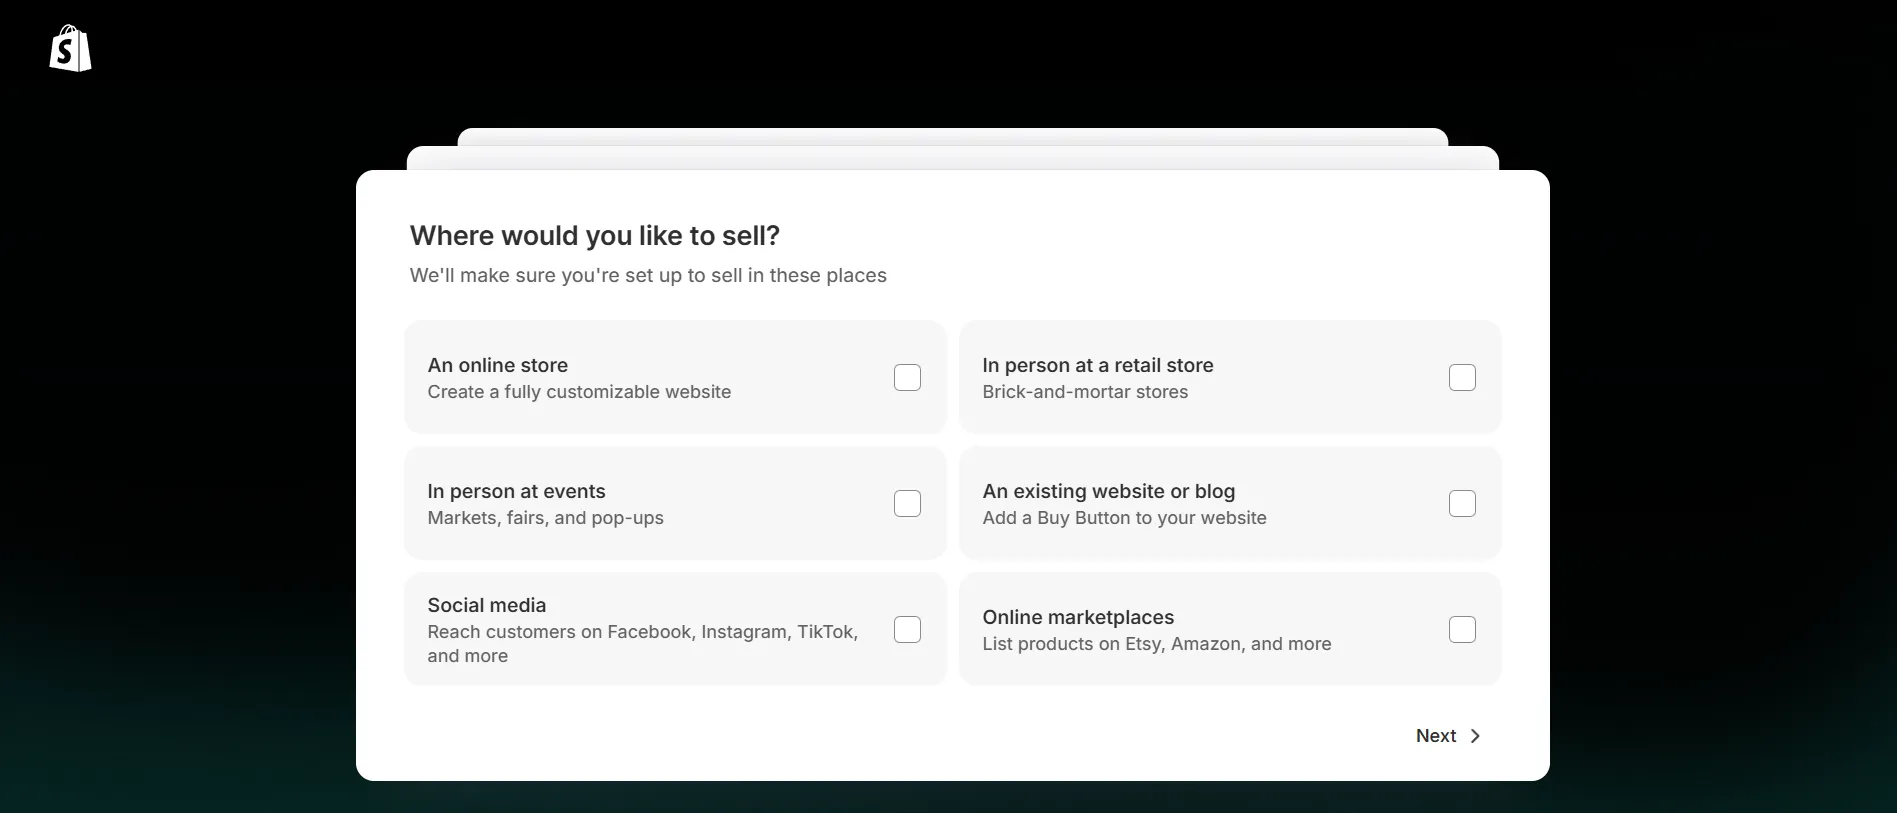
If you’re just experimenting, you can skip this personalized setup. However, we recommend completing it, as your answers will help Shopify suggest the most relevant tools, features, and templates for your store, saving you setup time later.
Once you’ve finished this step, you’ll be taken to your Shopify dashboard, where you can start building your online store.
Want to Migrate Your eCommerce Platform?
If you want to migrate to Shopify, LitExtension offers a great migration service that helps you transfer all your data accurately.
FREE DEMO NOW

Step 2: Choose a storefront theme
In the next step, you’ll select a storefront theme that sets the look and feel of your online store.
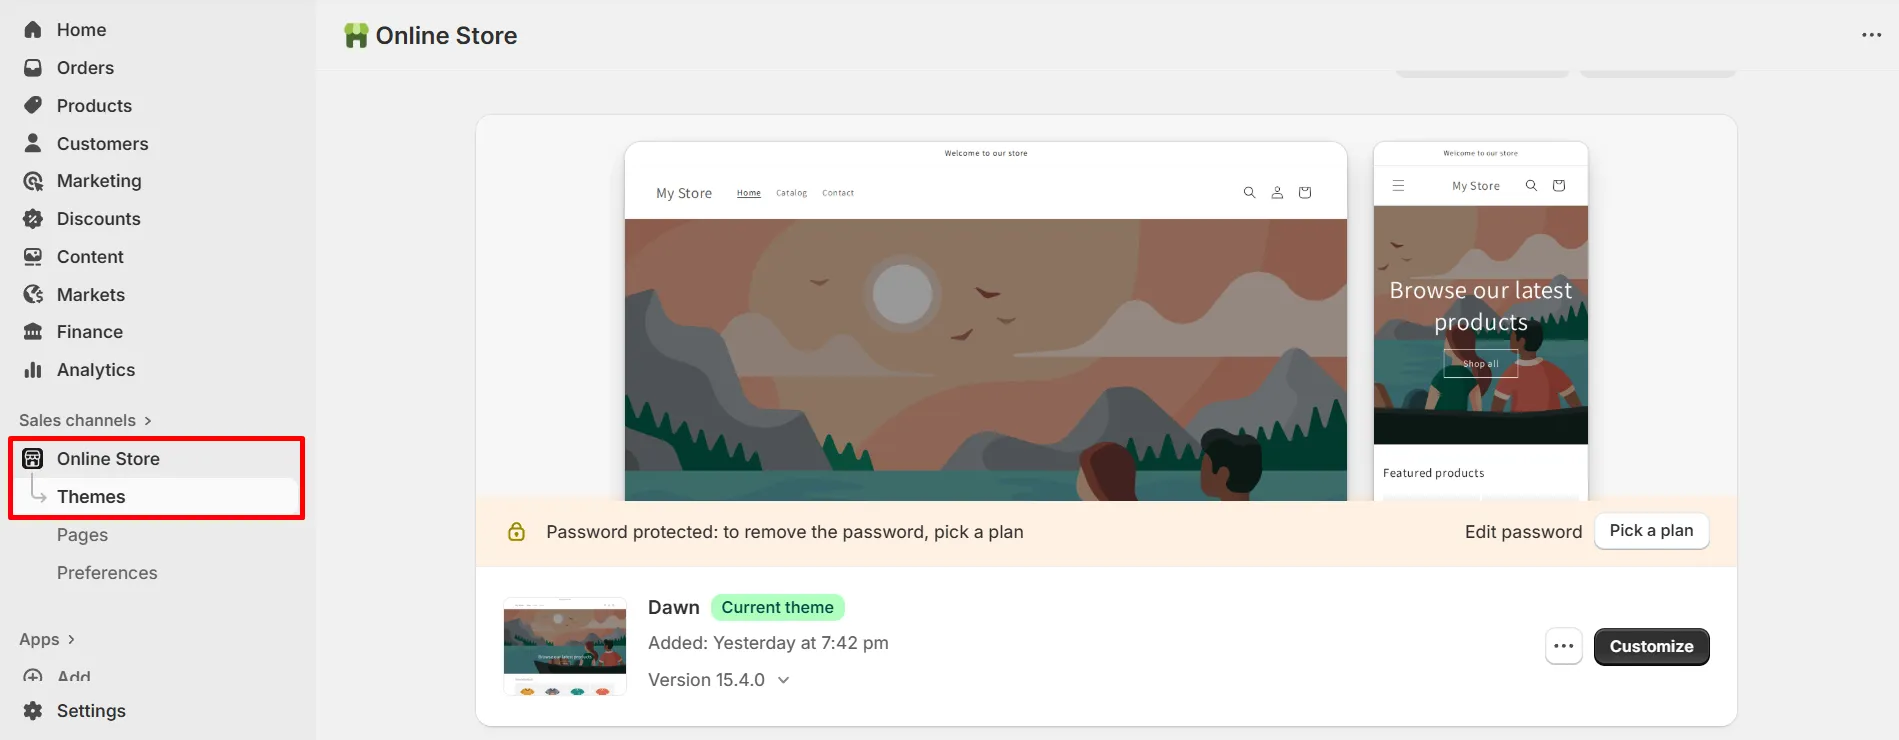
From your Shopify dashboard, go to Online Store > Themes. Here, you’ll find your default theme (usually Dawn), along with options to “Explore free themes” or browse the Shopify Theme Store.
https://themes.shopify.com/
Shopify offers over 800 themes, both free and paid, covering a wide range of industries and styles. You can filter themes by industry, catalog size, and features to find one that best fits your products and target audience. For anyone unsure which theme to choose, we’ve put together a curated list of the best Shopify themes to help you decide.

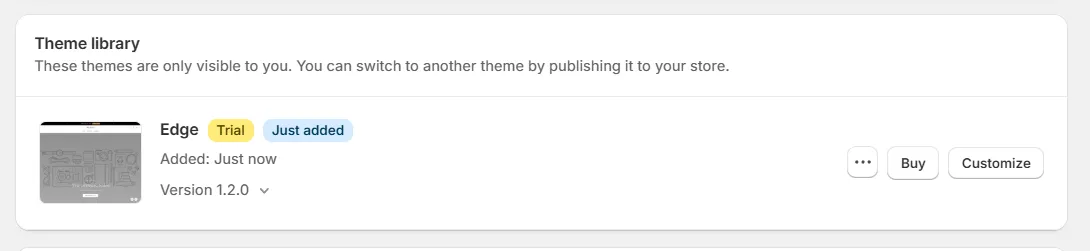
On the Shopify free trial, you can add premium themes to your store and explore their customization settings; you’ll only need to purchase the theme to publish it live.
In this Shopify tutorial, we’ll be customizing the default Dawn theme. Each theme has slightly different settings, so sticking with Dawn for now will make it easier to follow along step by step.
Step 3: Customize your website
Once you’ve found a theme you like, click “Add” to install it, then preview and customize it to match your brand before publishing.
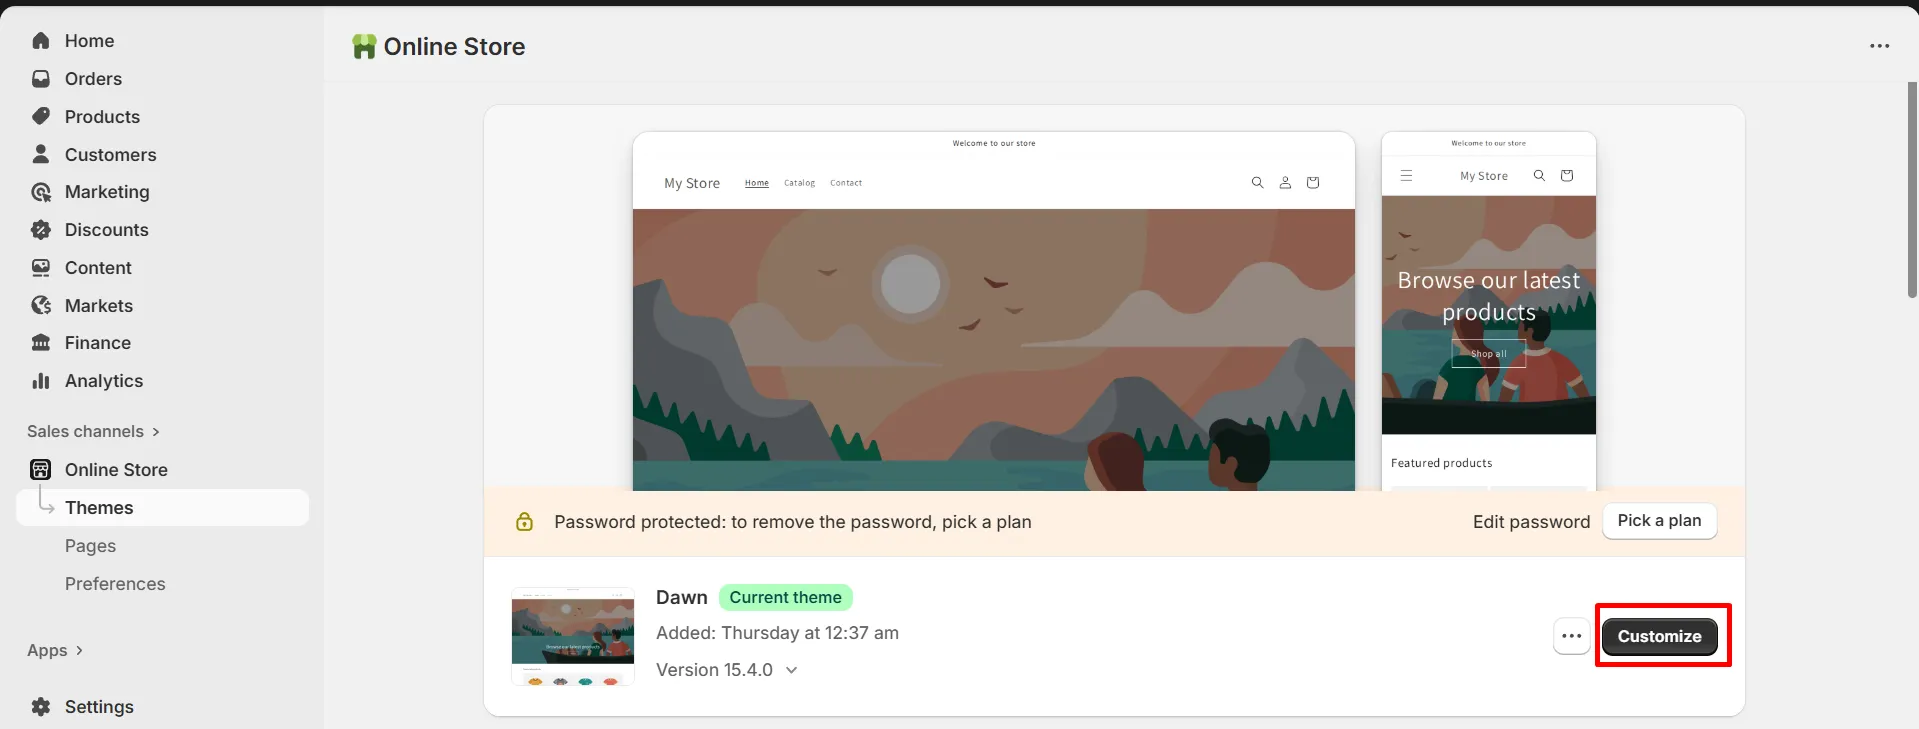
From your Shopify dashboard, go to Online Store > Themes and click “Customize” on your active theme.
1. Explore the Shopify theme editor
This opens the updated Shopify theme editor, which has three main areas:
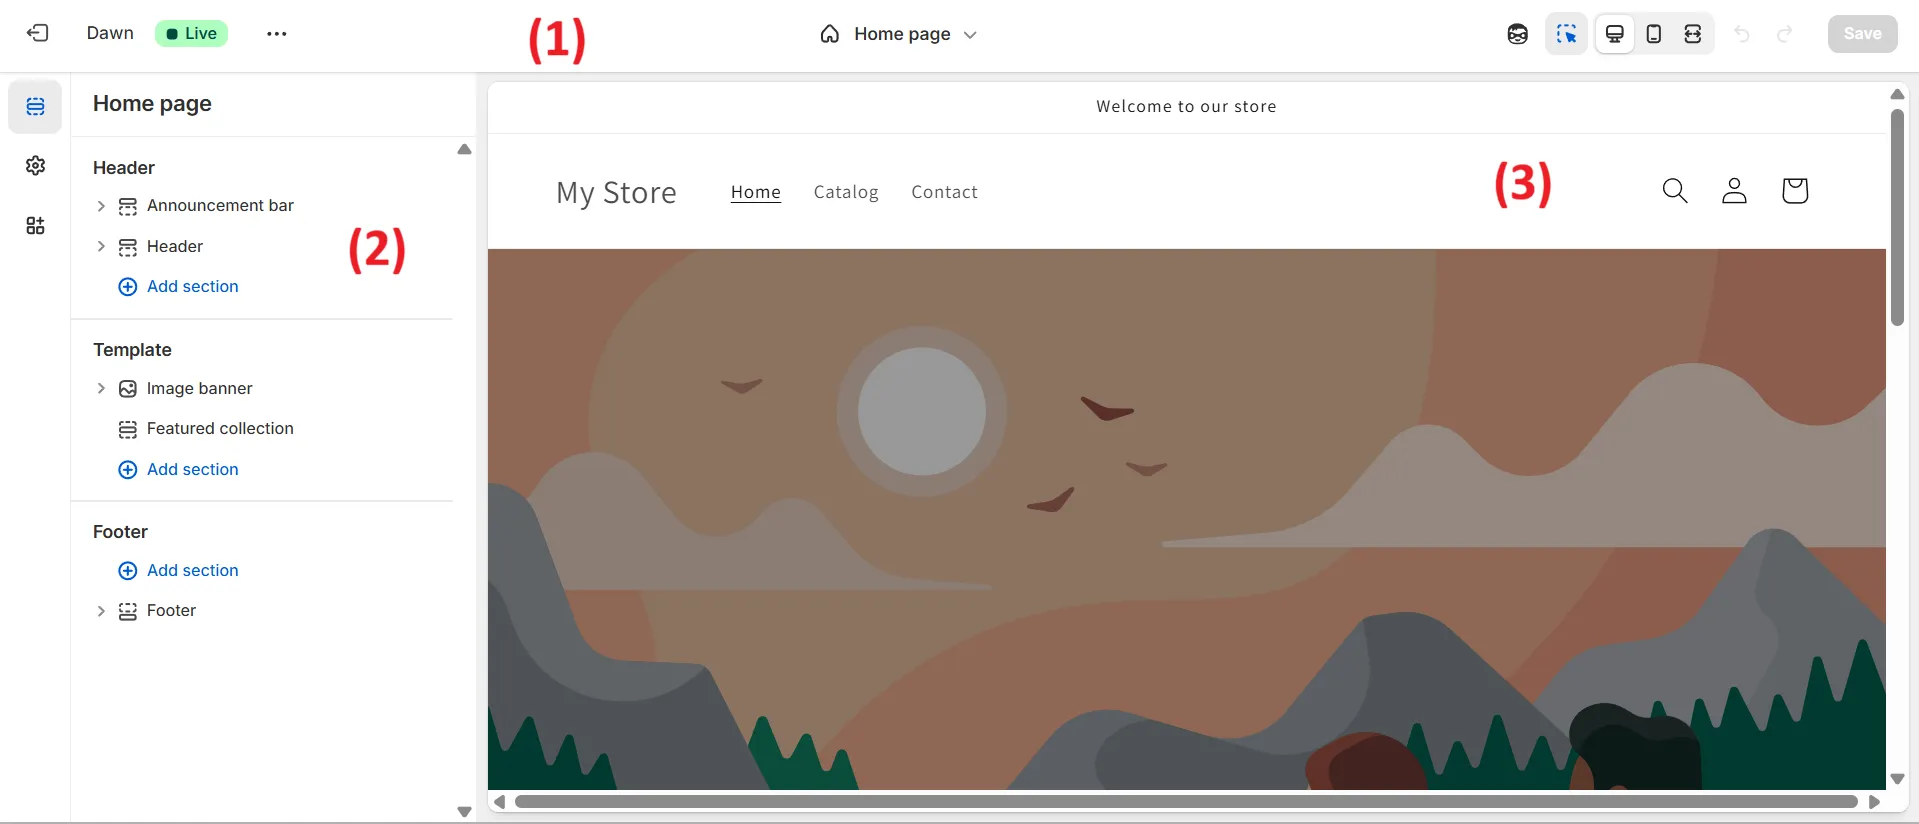
- (1) Menu bar: At the top, showing your theme name, page selection dropdown, device preview buttons, and the Save button.
- (2) Sidebar menu: On the left, listing all sections, blocks and other theme settings.
- (3) Preview window: In the center/right, displaying your store with live updates as you make changes.
2. Customize your website
Moving to the customization part, here are the basic steps:
- Select the page to edit: At the top of the editor, click the dropdown menu to choose which page you want to customize (e.g., Homepage, Product Page, Collection Page).

- Edit sections: Shopify themes are made of “sections” (header, slideshow, featured products, footer, etc.). Click on a section in the left-hand panel to open its settings.
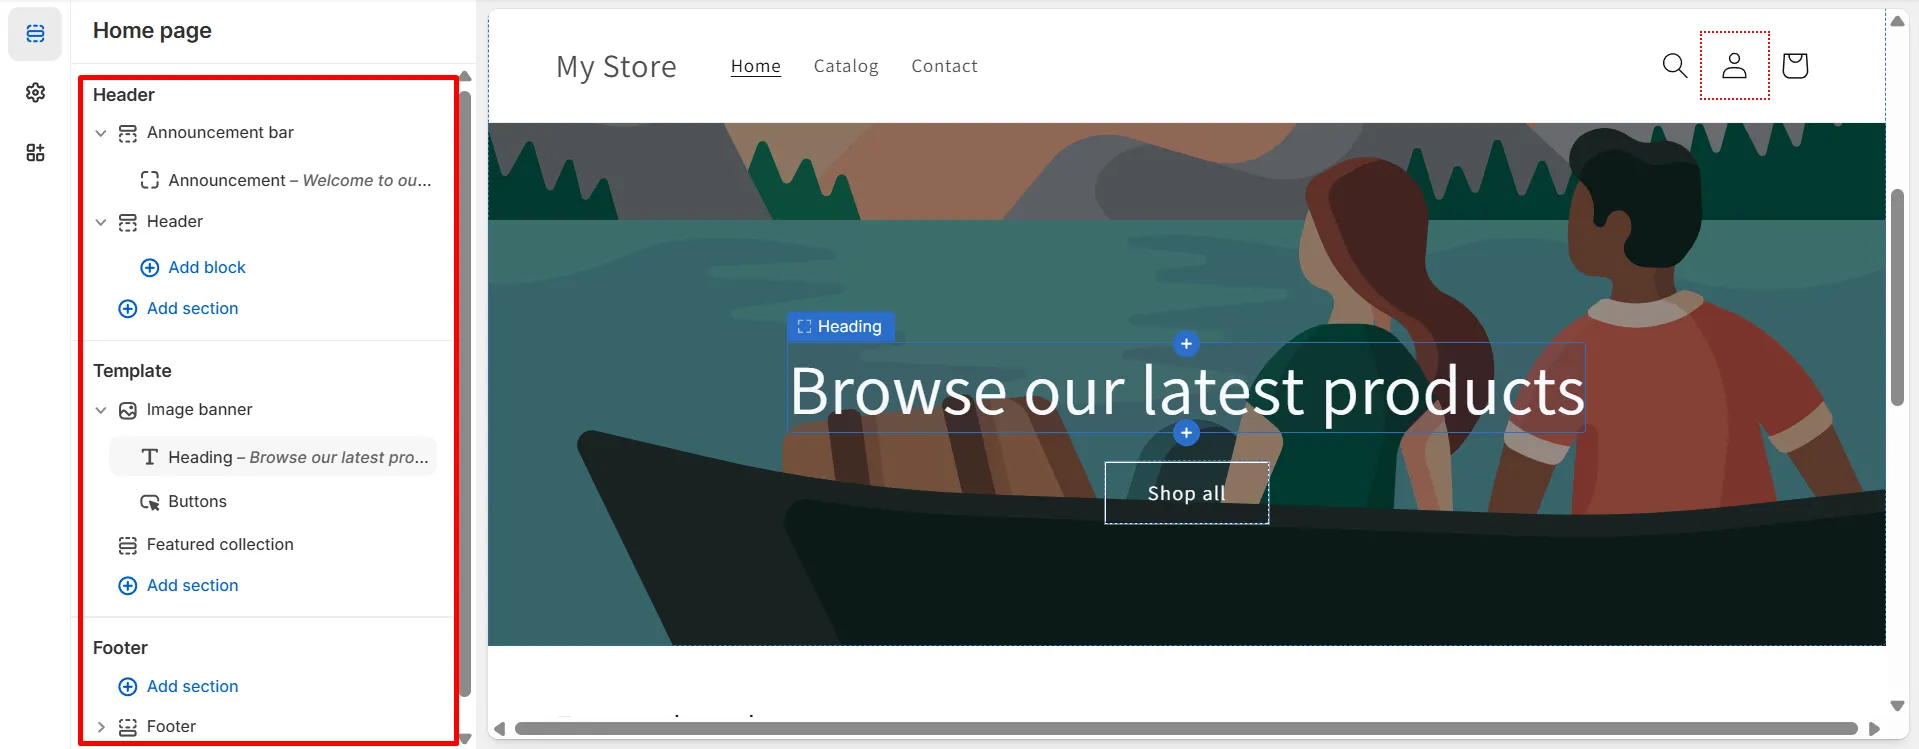
- Change text & images: Within each section, you can replace default text, upload your own images, and adjust headings.
- Reorder or remove sections: Drag sections up or down to change their order. If you don’t need a section, click the eye icon to hide it or “Remove” to delete it.
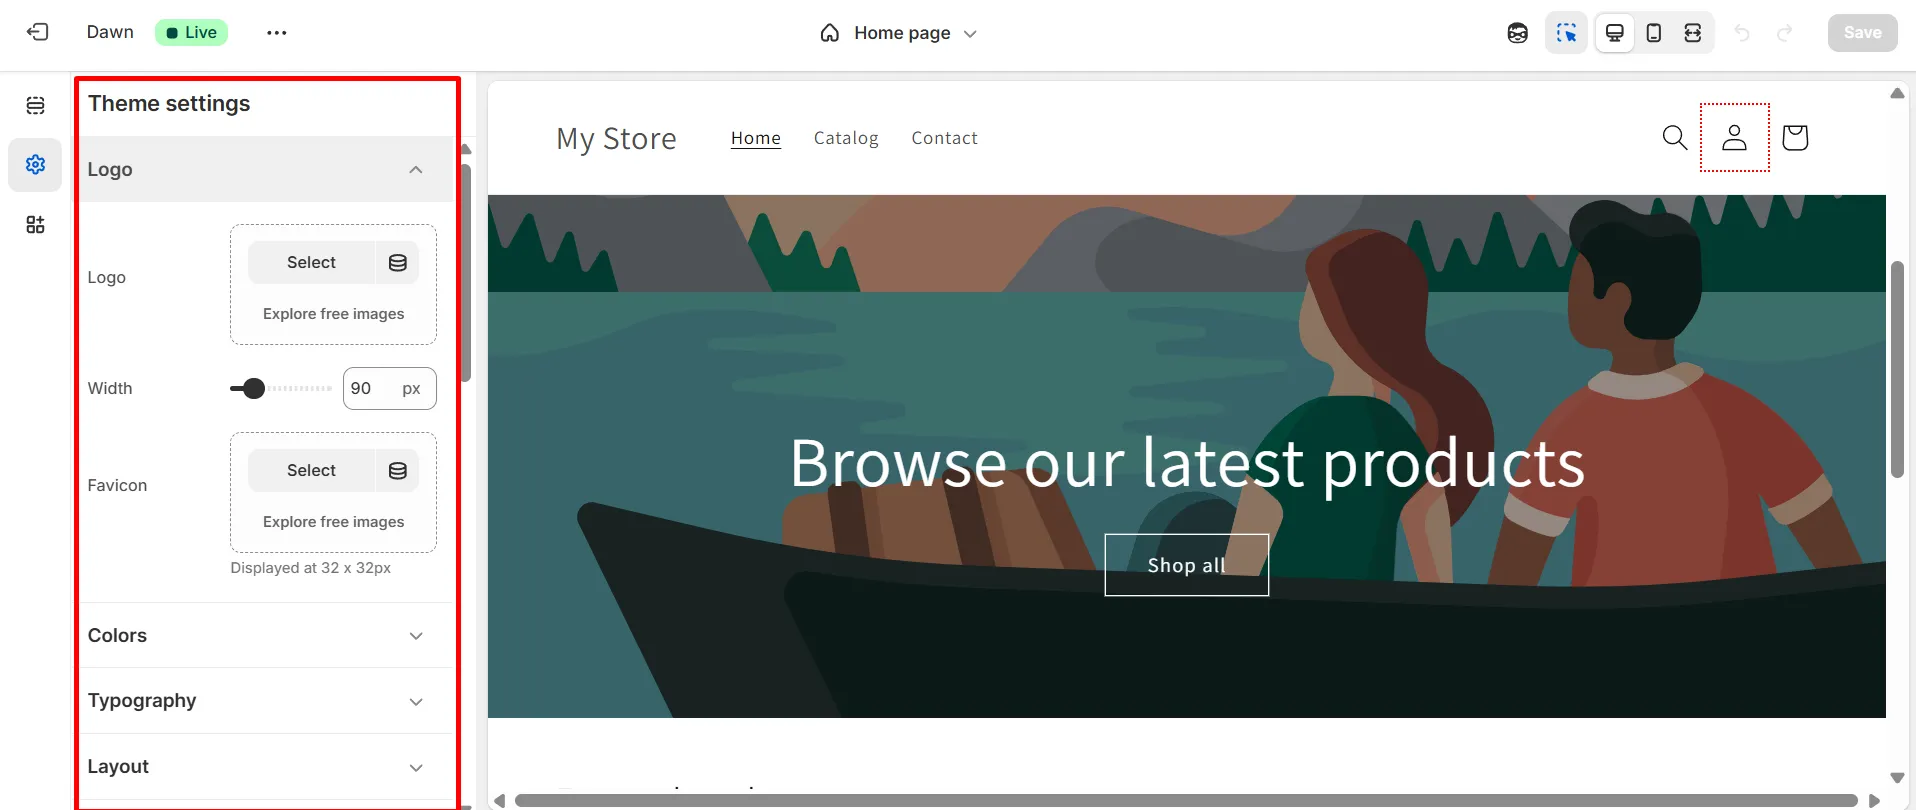
- Adjust colors & fonts: Open the “Theme settings” panel to change colors, fonts, and button styles. These changes will apply across your store.
- Preview for mobile: Use the desktop/mobile toggle at the top to see how your store looks on different devices.
- Create a new template: If you want a unique layout for a specific product, collection, or page, click “Create template” from the dropdown menu. Give it a name, choose a base layout, and customize it separately from your default design.
- Save your changes: Always click “Save” in the top right corner after making edits to avoid losing your work.
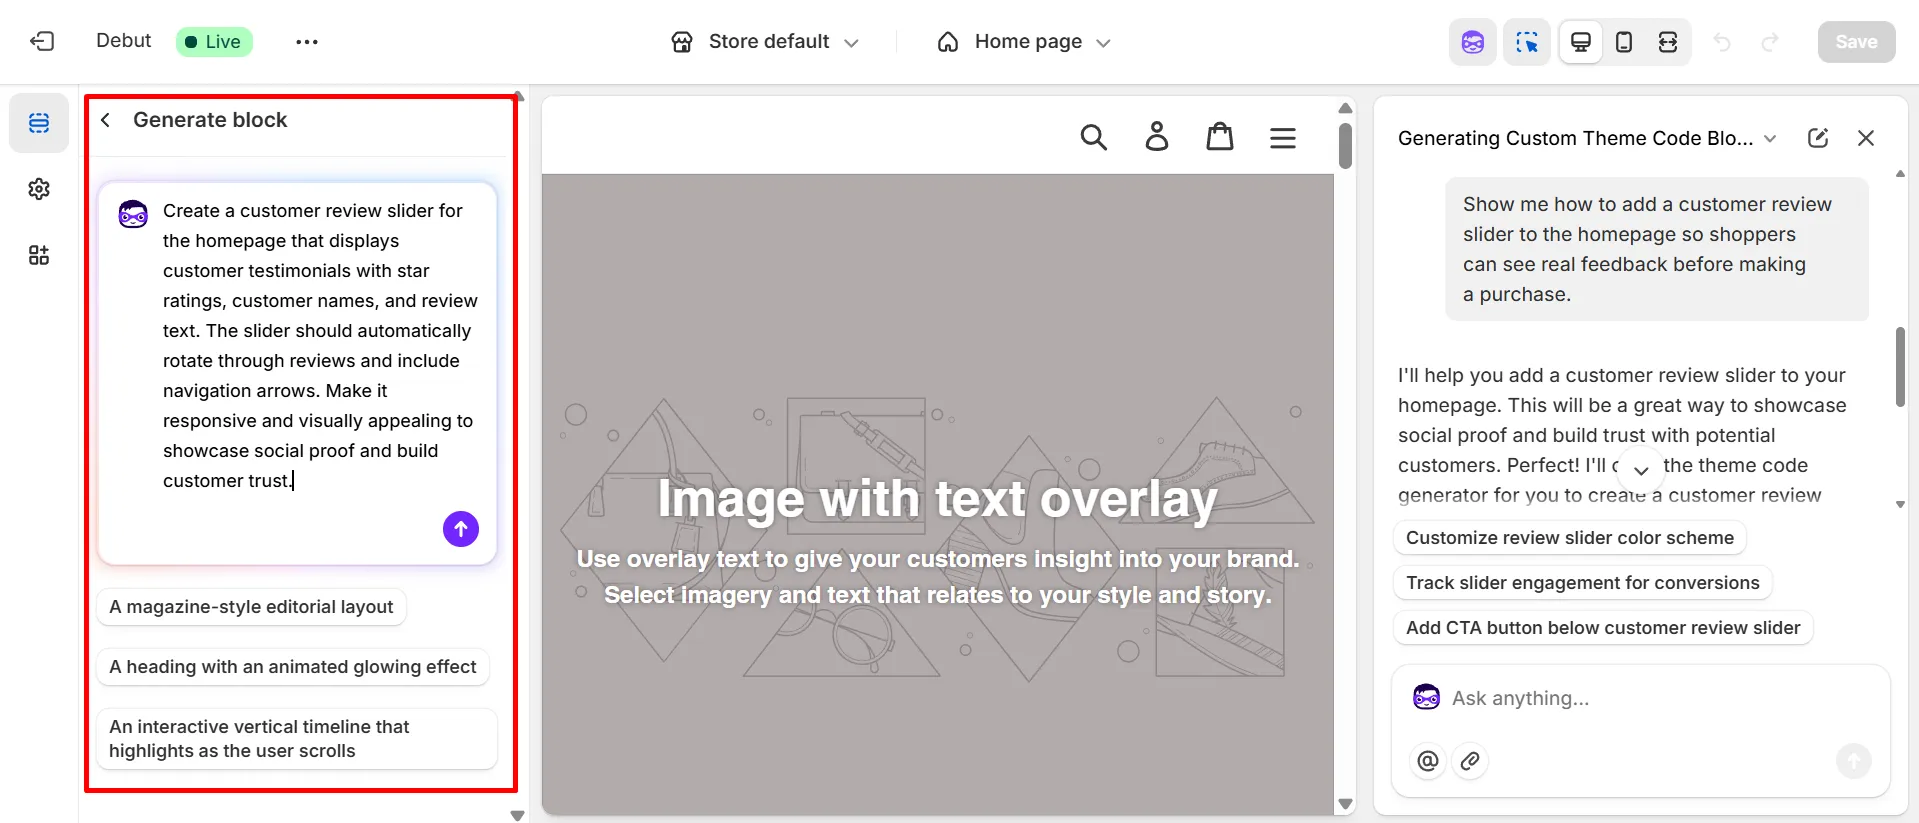
Throughout this process, you can rely on Shopify’s Sidekick AI, your built-in assistant. If you’re unsure about a design choice, need help finding a setting, or want recommendations for layouts and color palettes, simply ask Sidekick. It’s available right from your dashboard and can guide you step by step.
With your store customized to match your brand, you’re ready to offer shoppers a polished and engaging browsing experience.
Step 4: Set up the domain
By default, your Shopify store comes with a temporary domain that looks something like yourstorename.myshopify.com. While this works fine for testing, it’s not what you want to share with customers or print on business cards. For this reason, you’ll need to set up your own custom domain.
That said, you don’t have to set up your custom domain right away if you’re still working on your store and not ready to go live. You can always connect it later when you’re closer to launch.
To add your domain, Shopify gives you two options:
- Purchase a new domain directly through Shopify for a quick, hassle-free setup
- Connect a domain you already own from another provider.
Depending on your needs, here’s how to do each:
1. Buy a new domain
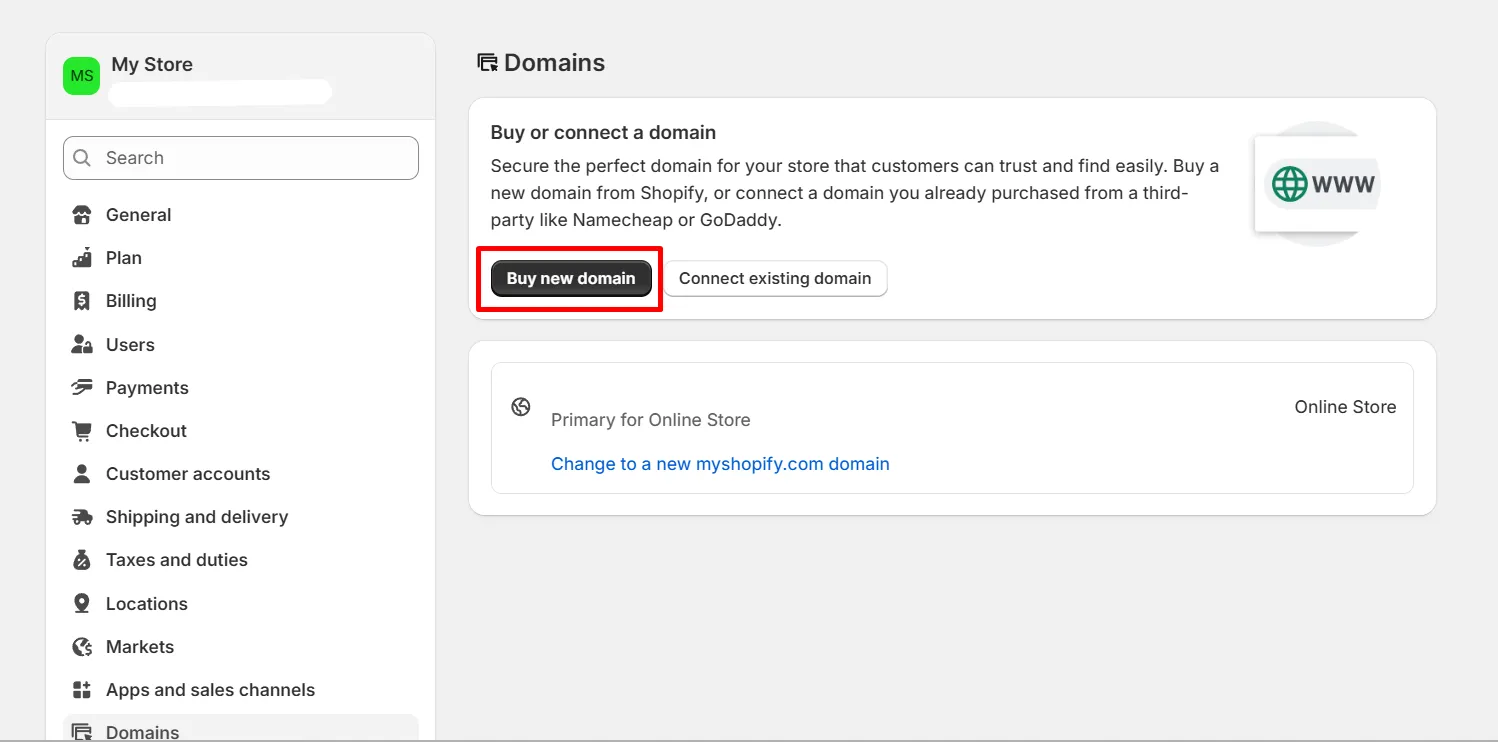
- From your Shopify admin, go to Settings > Domains.
- Click Buy new domain to purchase one directly from Shopify.
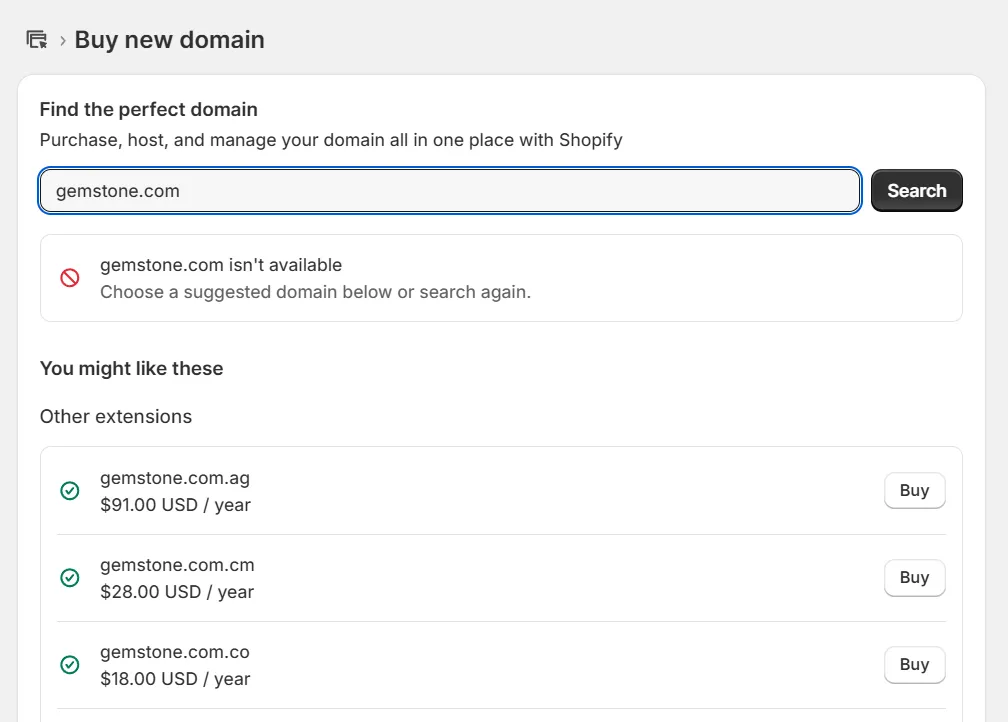
- Enter the name you want and search for availability.
- If it’s available, follow the checkout process. Shopify will automatically connect your domain to your store, so you won’t need to configure DNS records yourself.
2. Connect an existing domain
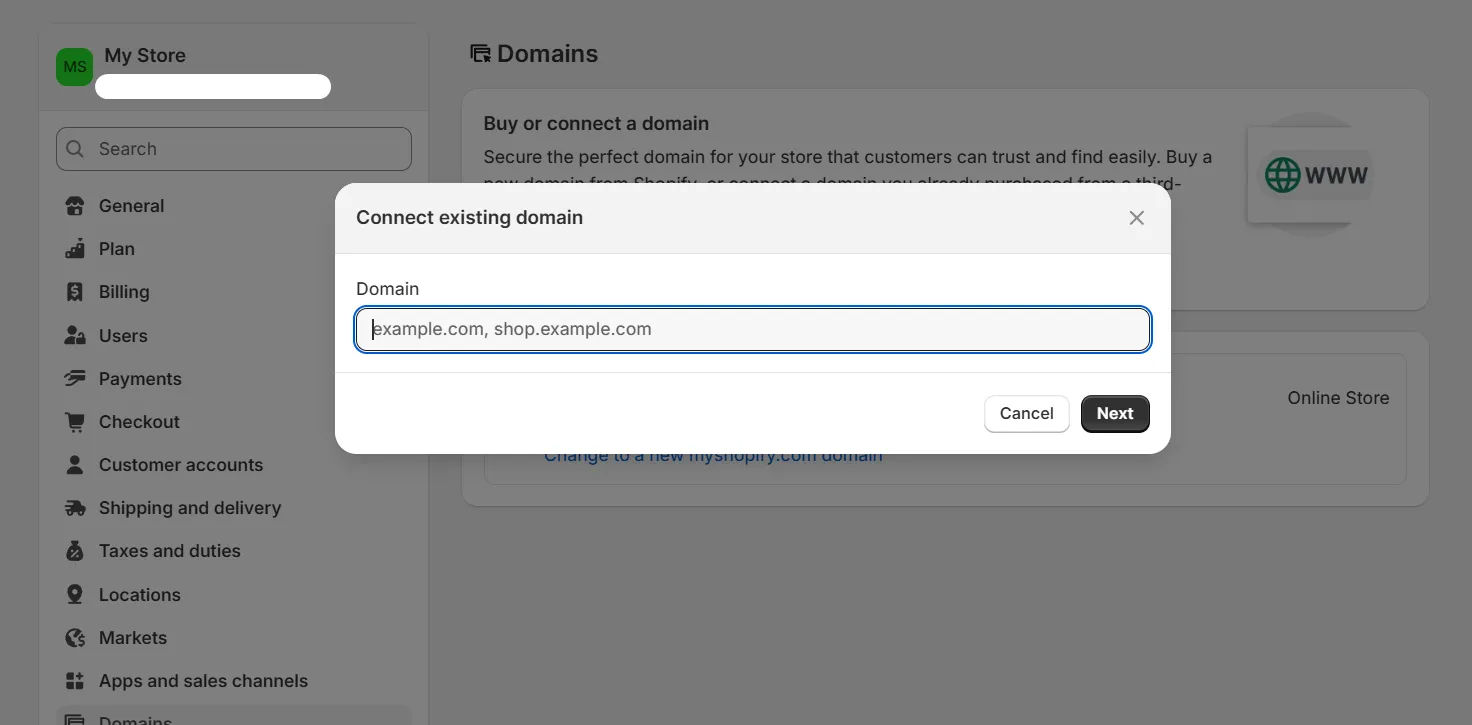
- From the Domains page, click Connect existing domain.
- Enter your domain name and follow the guided steps to link it.
- You may need to update your DNS settings in your current domain provider (e.g., GoDaddy, Namecheap) so Shopify can recognize and connect it.
Finally, once your domain is connected and set as your primary domain, this will be the URL customers see in their browser.
Step 5: Add your first product
Moving on, it's time to add products to your Shopify store and kick off your eCommerce business. You just need to complete these simple tasks here.
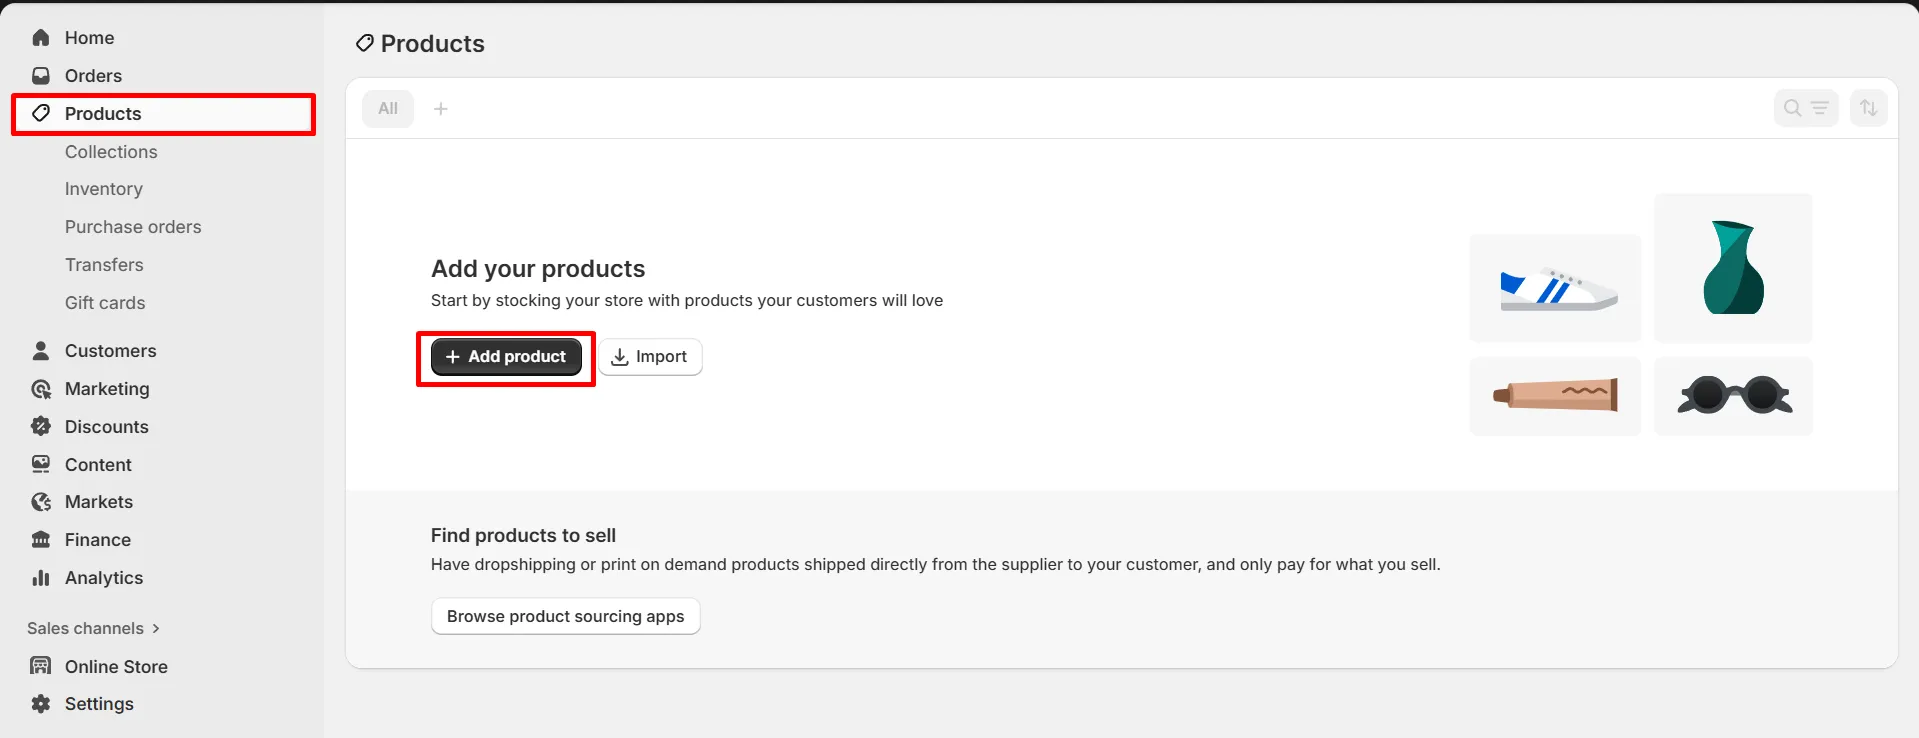
1. Add a new product
From your Shopify admin dashboard, go to “Products” and click “Add product”.
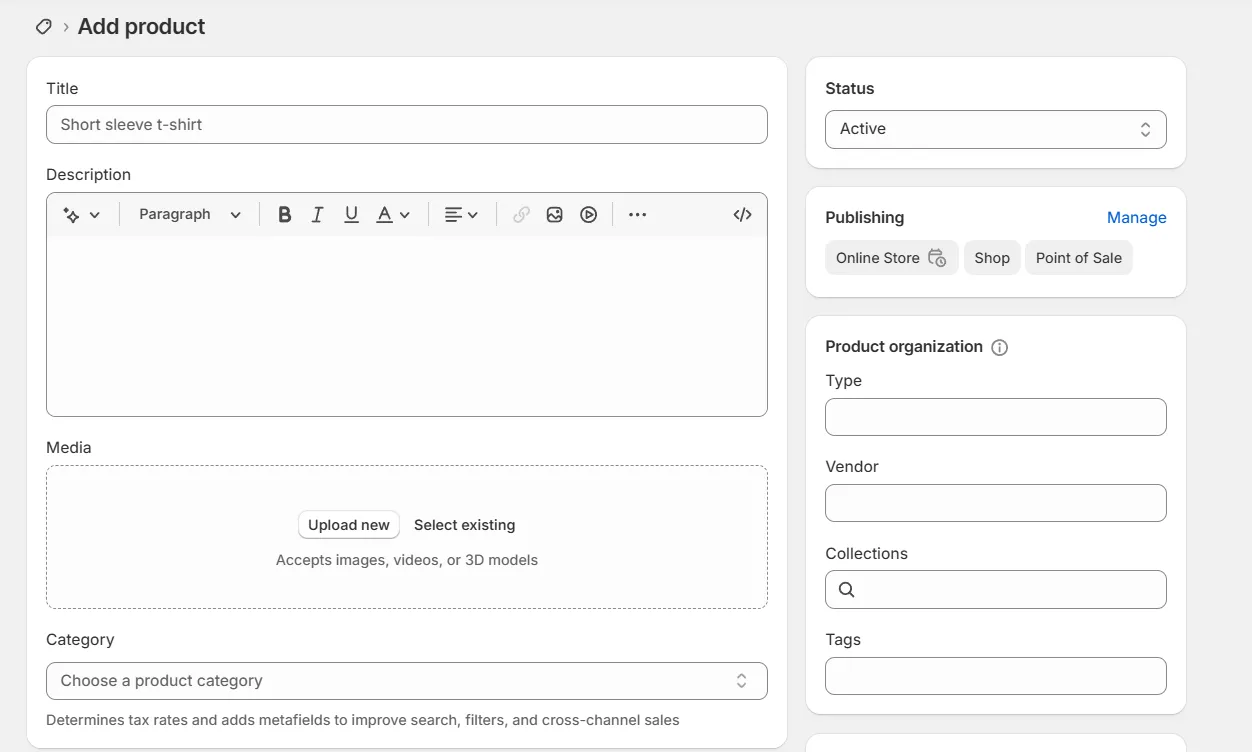
2. Fill in product details
Now, add the product title, description, and media (images, videos, or 3D models) to showcase your product. As soon as you enter your product, Shopify’s AI Magic will suggest a suitable product category for you. This not only saves time but also helps keep your catalog organized from the start. You can stick with the suggestion or choose a different category if it’s a better fit.
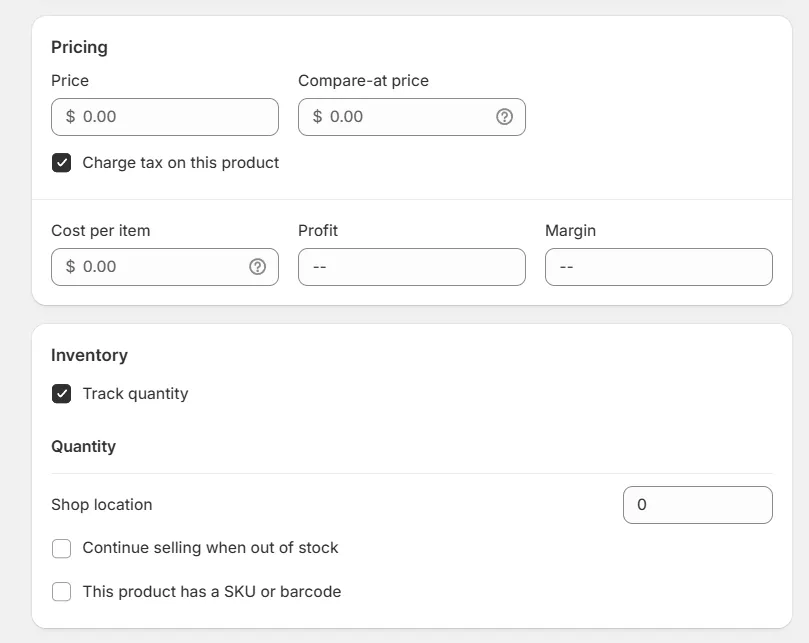
3. Set the price
Once done, set the price (in “Pricing”) and enable “Track Quantity” (in “Inventory”) to monitor stock. For physical items, add the weight under “Shipping” along with any other necessary customer details.
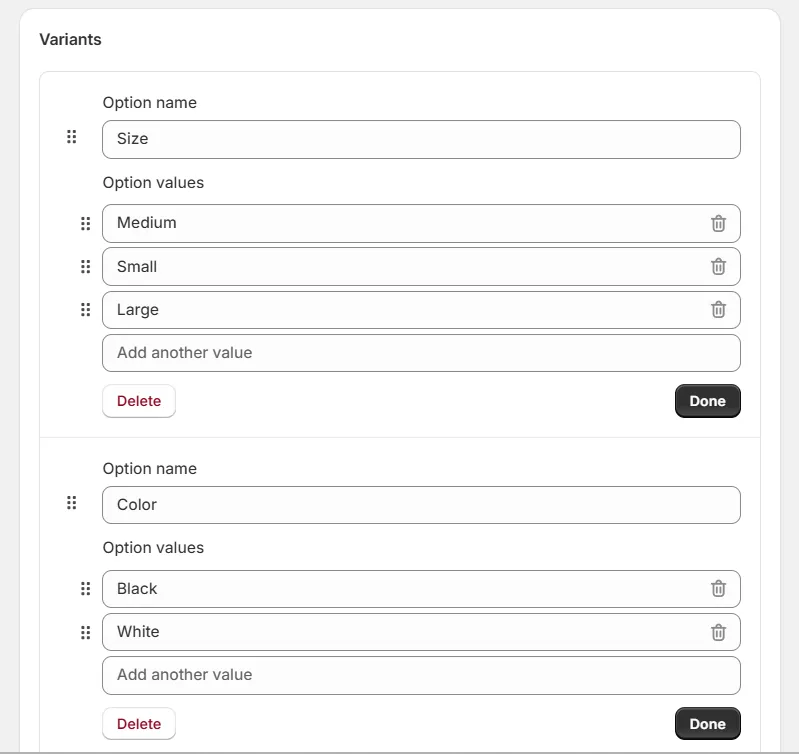
4. Add variants if needed
To offer different options, scroll down to “Variants” and click “Add variants” for sizes, colors, or materials, then enter each variant’s unique details (price, SKU, and inventory quantity, etc.).
If you are satisfied with the settings, click “Save product” to make it live on your store.
As you can see, the steps above are pretty simple; however, you will have to repeat them over and over again for basically every single product. Not exactly the most efficient way to spend your time!
And here's where the bulk uploading solution (via CSV files) comes to the rescue and saves you tons of time and effort. Even better, if you're looking to migrate your entire store, not just product files, then turning to reputed migration services like LitExtension is definitely the way to go.
We've pulled together every necessary step for product bulk-uploading in this short video. You can give it a watch here:
Step 6: Configure essential settings (payments, shipping, etc.)
Now that your Shopify store is taking shape, it’s time to enhance the behind-the-scenes settings that keep your business running smoothly. All of these adjustments are made from the Settings page in your Shopify admin, which is located at the bottom-left corner of your dashboard.
1. Store details
Before you can start selling, Shopify needs the key information about your store, things like your name, address, and branding. You’ll find all of this in the General page of your Shopify admin.
You’ll see several sections here:
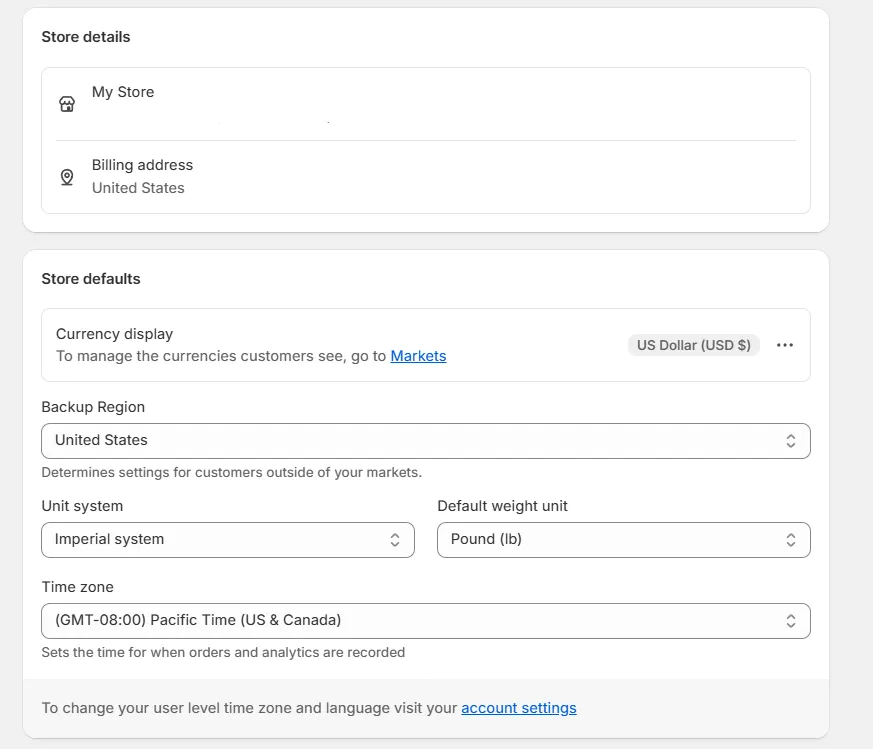
- Store details: Add or update your store name, phone number, and email address. This is what customers will see in browser tabs, emails, and receipts.
- Store defaults: Set your default currency, choose your currency formatting, decide on measurement and weight units, and set your time zone.
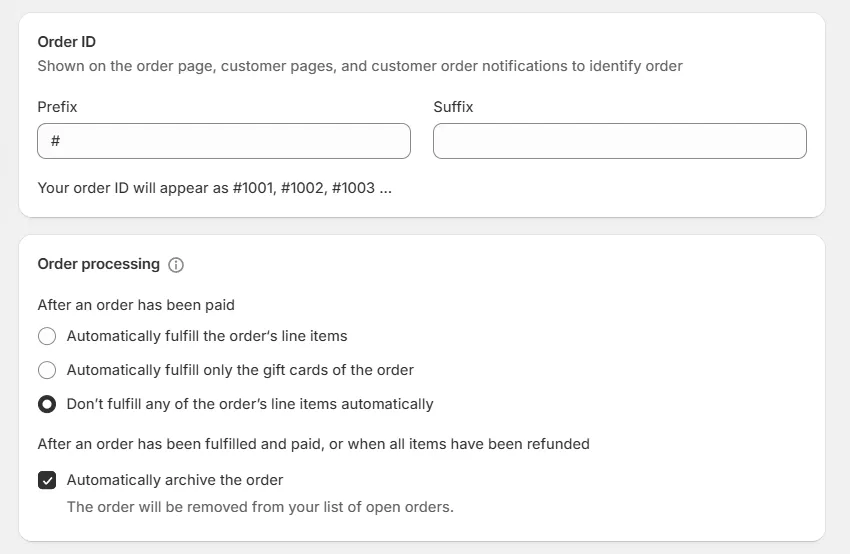
- Order ID: Customize how your order numbers appear (e.g., add prefixes or suffixes).
- Order processing: Adjust how orders are handled after purchase, such as automatic fulfillment or manual review.
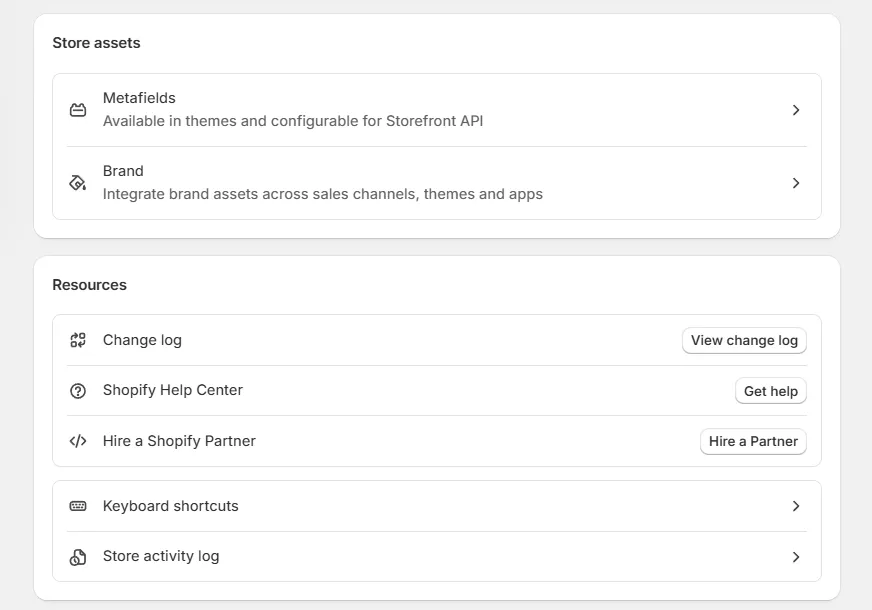
- Store assets: Upload your store logo, brand colors, and other assets to keep your branding consistent.
- Resources: Quickly access Shopify’s changelog, keyboard shortcuts, and your store activity log.
- Organizations and store transfers: Transfer store ownership to a new owner or group your store into an organization.
Once you’ve reviewed and filled in the details in each section, click “Save”.
2. Users and permissions
This is where you bring your team on board. Whether it’s a business partner, a store manager, or someone handling orders, the Users page lets you add them and decide exactly what they can do in your store.
- Click Add users.
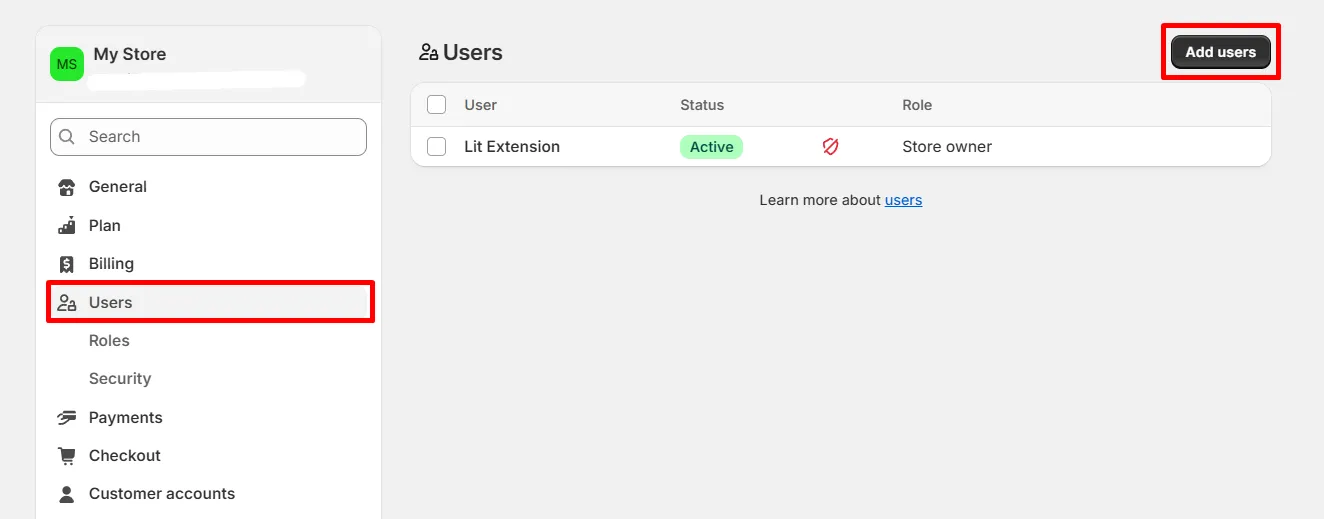
- Enter the person’s email address, this is where Shopify will send their invitation.
- Under Roles, choose the role that best matches their responsibilities (for example, “Orders” for fulfillment staff, or “Administrator” for someone who needs full access).
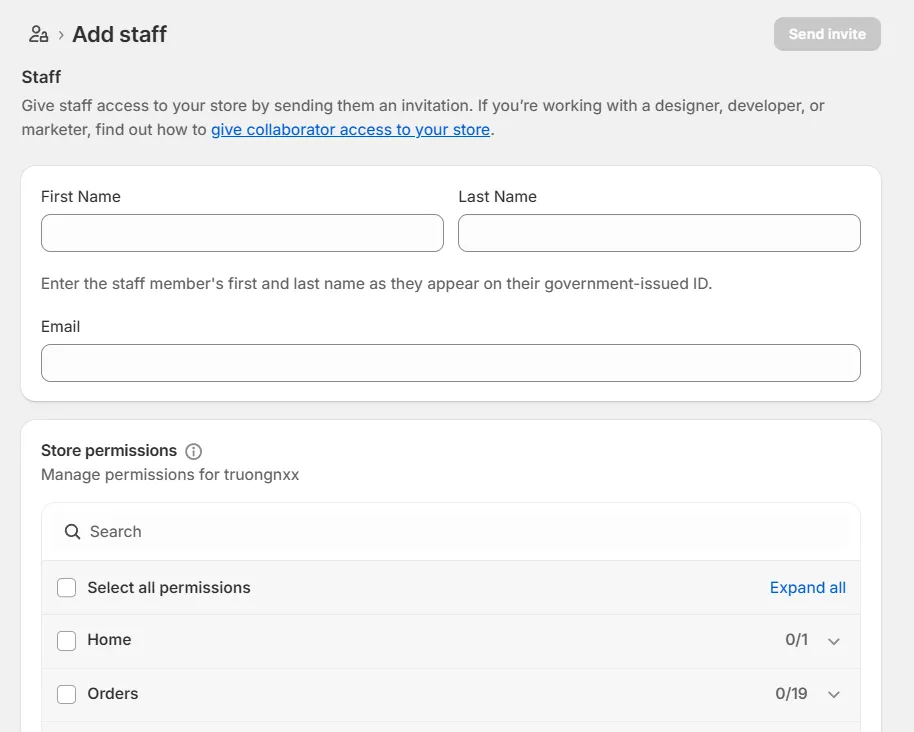
- If you want an extra layer of security, require two-step authentication for their account.
- Save your changes, and Shopify will send an invite link that expires after 7 days.
As soon as they accept the invite, they’ll appear in your Users list. You can always click on their name later to adjust their role or remove them if they no longer need access.
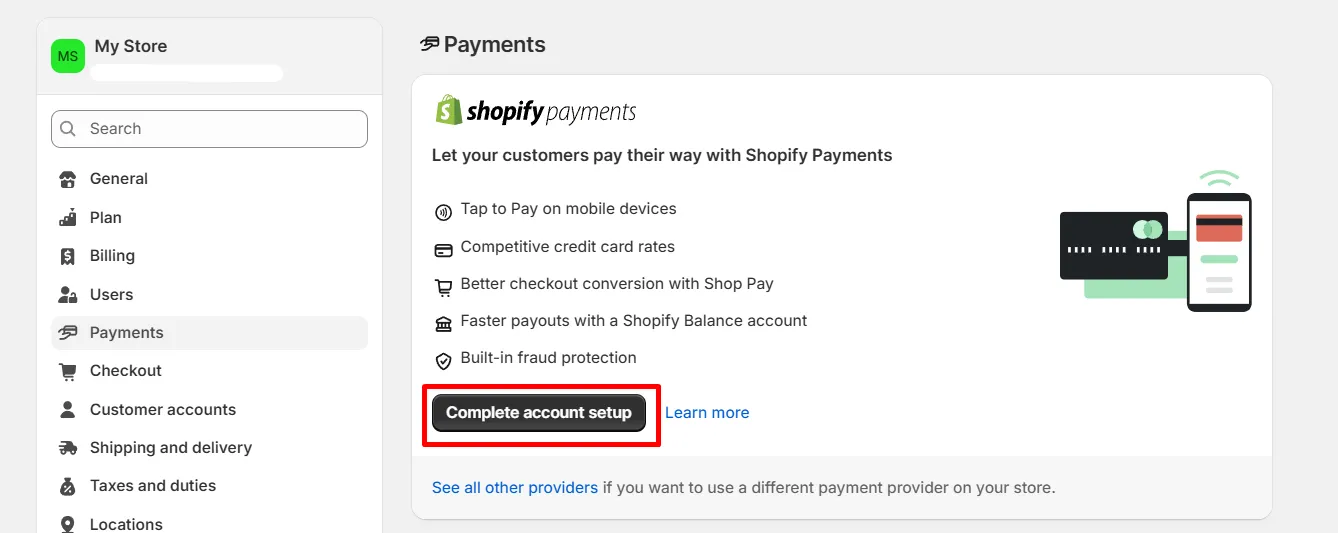
3. Payments
You’ve got your team set up, let’s move on to something exciting, getting paid. Shopify makes this part pretty straightforward, especially if you choose their built-in option, Shopify Payments.
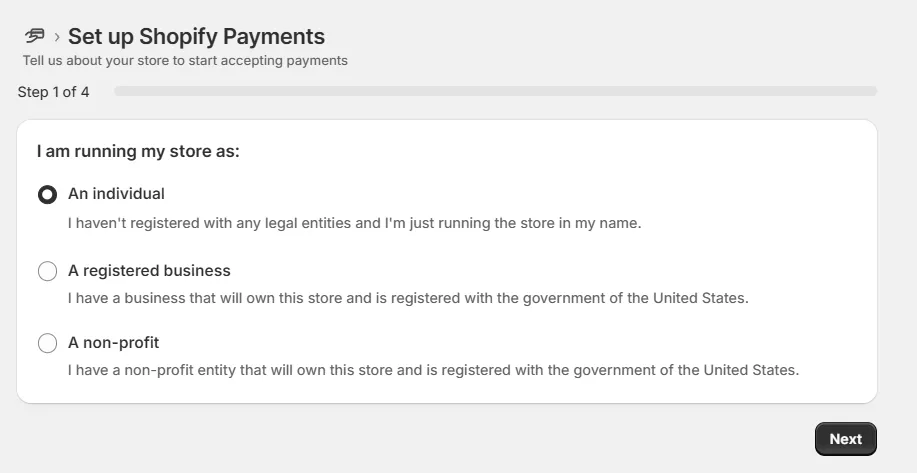
In the Payments section, you’ll see Shopify Payments at the top if it’s available in your country. Click Complete account setup, and Shopify will walk you through a short setup process.
You’ll be asked to select your business type and enter your bank account details so Shopify knows where to send your payouts. You’ll also need to provide any required tax information, such as a VAT number if applicable.
If you want to offer more ways for customers to pay, you can connect additional payment providers here as well. Popular choices include PayPal, which can be activated by simply logging into your PayPal account, or third-party gateways like Stripe.
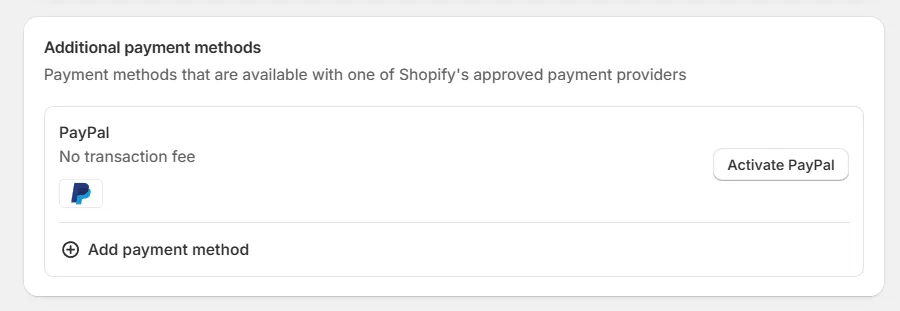
With this step done, your store will be ready to accept orders and send funds straight to you.
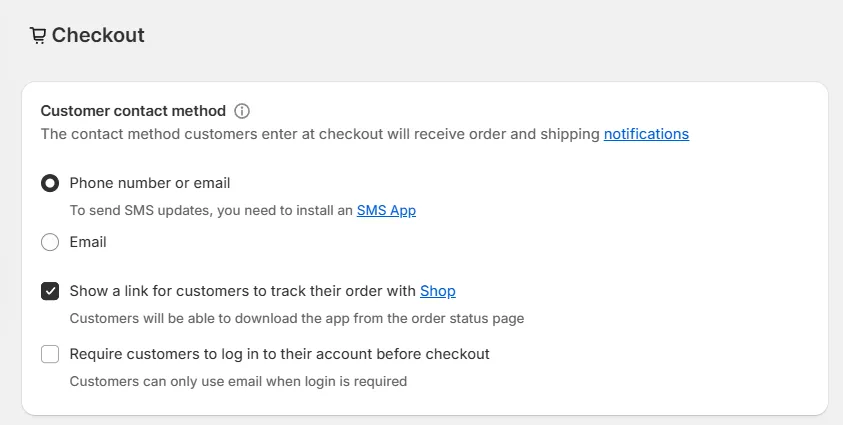
4. Checkout
Your checkout is where browsing turns into buying, so you want it to be as simple and stress-free as possible. In the Checkout settings, you can fine-tune how customers move through the process and what information you collect.
Here’s what you’ll see and what each option means:
- Customer contact method: Let customers check out with an email address, a phone number, or either. If you allow phone numbers, you can send order updates by SMS.
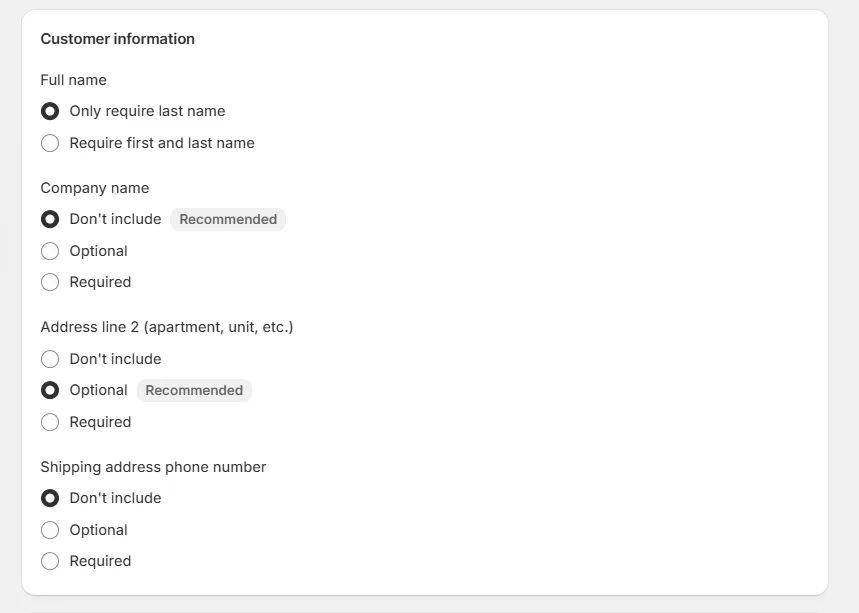
- Customer information: Decide the information that your customers have to fill-in when checking out (name, address, etc.)
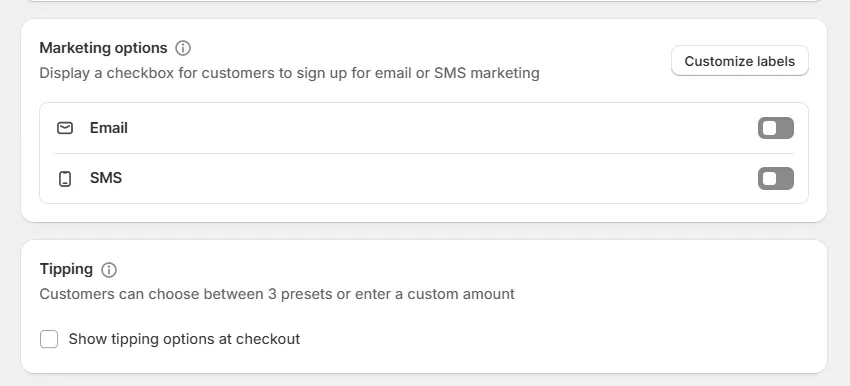
- Marketing options: Add a sign-up checkbox to your email marketing list, allowing customers to opt in while checking out.
- Tipping: Enable this option if you want to give customers the ability to leave a tip, which is ideal for service-based or food-related businesses.
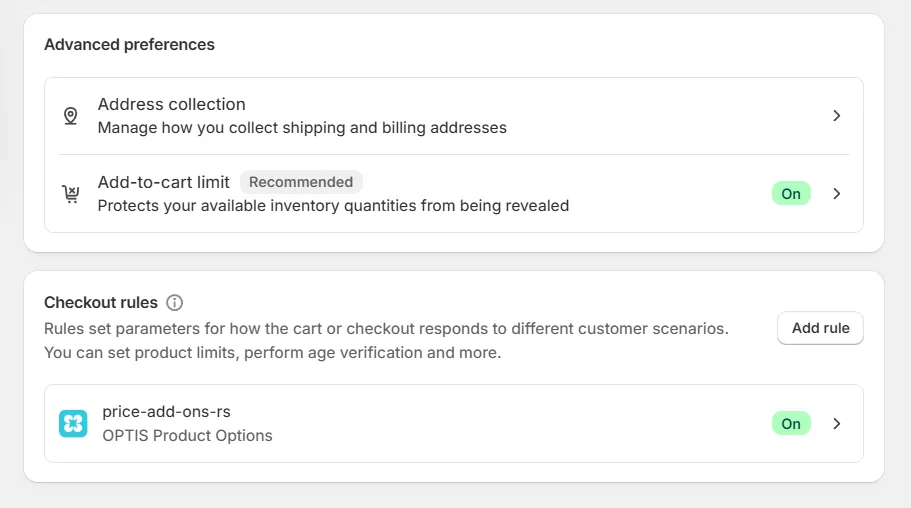
- Address collection: Decide how you collect shipping and billing addresses, including whether you want them to be separate or combined.
- Add-to-cart limit: Enable this to prevent customers from seeing exactly how many units you have in stock, helping protect your inventory data.
- Checkout rules: Set up rules for your checkout using compatible Shopify apps. You can use these to enforce product limits, require age verification, and more.
After you’ve set these options, your checkout will be faster, smoother, and more aligned with how you want to run your store.
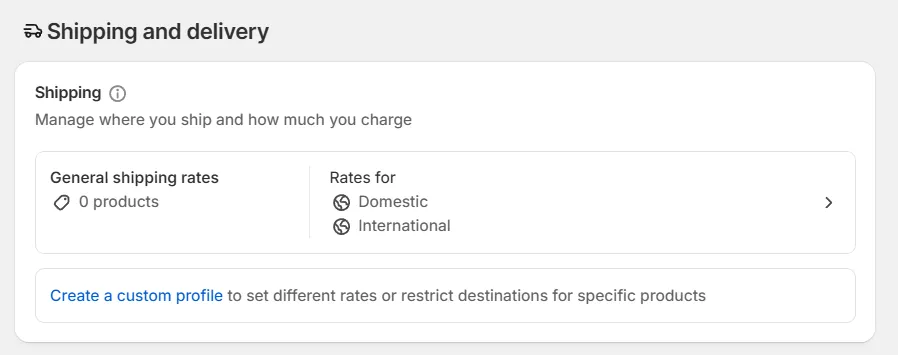
5. Shipping and delivery
Shipping is how your products make their way from you to your customers, so it’s worth setting it up carefully. In the Shipping and delivery section, you can decide where you ship, how much you charge, and whether you offer options like local pickup.
- Under General shipping rates, click Manage rates to start setting up your shipping options.
- Create your shipping zones by grouping countries or regions where you’ll send orders, such as “United States” or “Europe.”
- For each shipping zone, choose the rates you want to offer. You might provide free shipping to encourage orders, set a flat rate for simplicity, or use carrier-calculated rates so customers pay exactly what the shipping service charges.
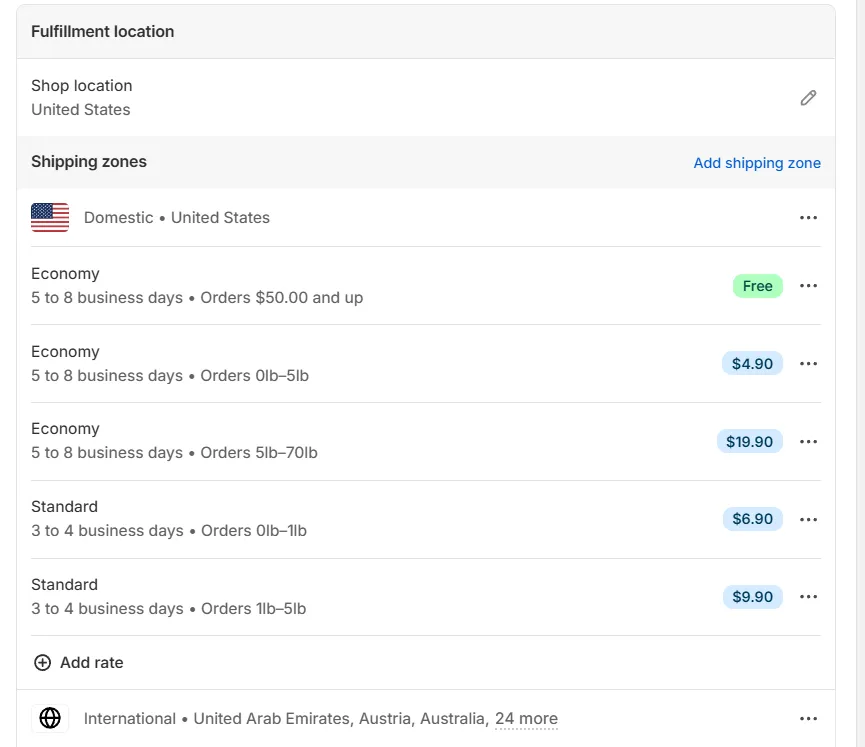
- If you offer local delivery or pickup, set those options up here as well. This is great for customers who live nearby and want to save on shipping costs.
- When you’re happy with your setup, click Save so your rates and zones are ready to go.
6. Taxes and duties
Taxes aren’t the most exciting part of setting up your store, but setting them up correctly now will help you avoid problems later. In the Taxes and duties section, Shopify helps you handle this without too much hassle.
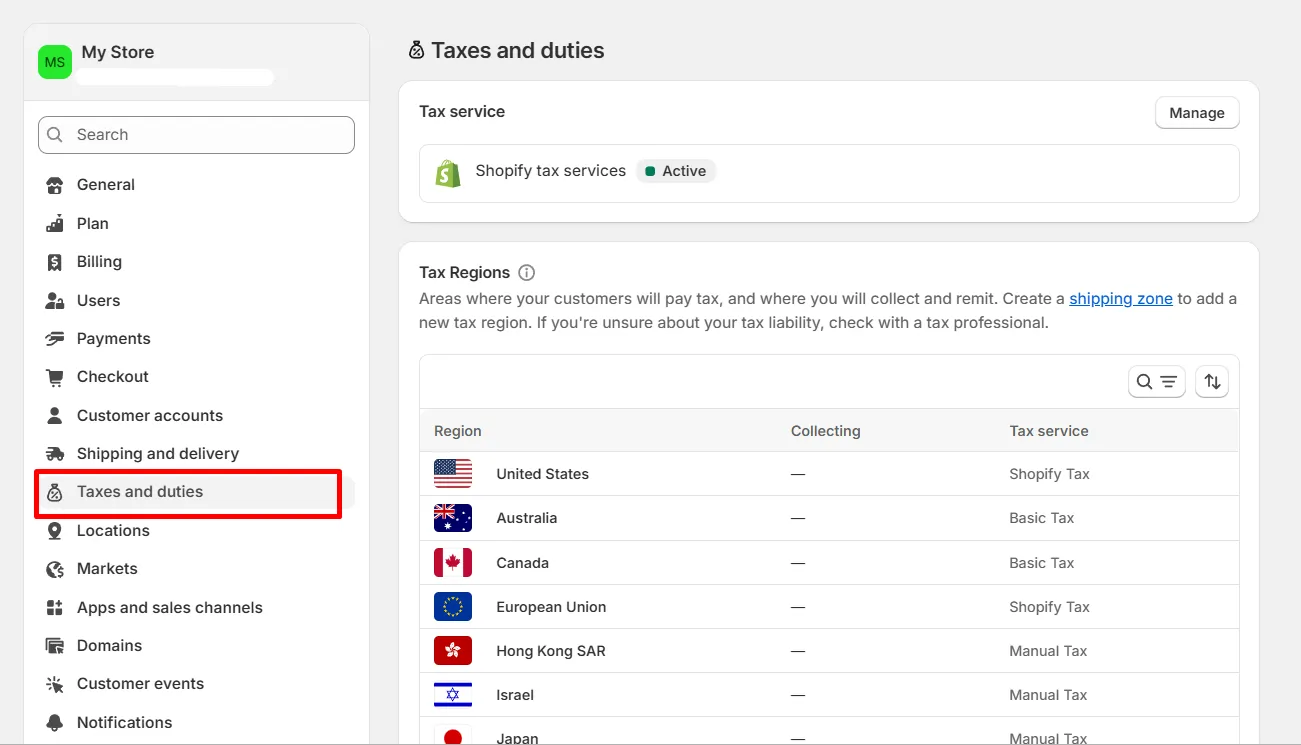
When you open this section, you’ll see that Shopify has already filled in the tax settings for your region based on your store’s address. Take a moment to review these and make sure they match your local tax requirements.
In case you sell to other regions or countries, you can add those here too so Shopify can automatically apply the correct rates at checkout.
If you plan to sell internationally, you’ll also need to decide how duties are handled. You can choose to include them in your product prices or have customers pay them separately upon delivery. This choice affects how your prices appear and how smooth the delivery experience is for buyers, so it’s worth thinking through.
7. Locations
With Locations, you tell Shopify where your inventory lives and where orders ship from. This could be a warehouse, a physical store, or even your own home, and it ensures stock levels stay accurate and orders go out from the right place.
- Click Add location if you have more than one place where products are stored or orders are fulfilled.
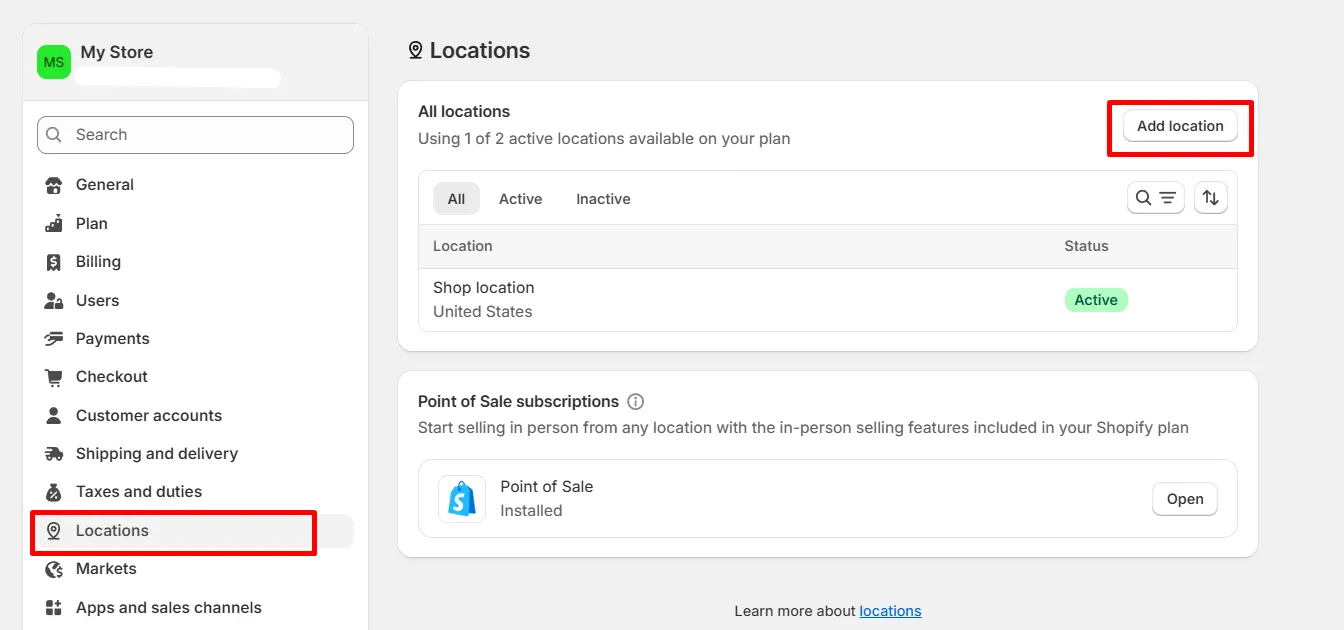
- Enter a clear location name and the address so Shopify knows exactly where this inventory is based.
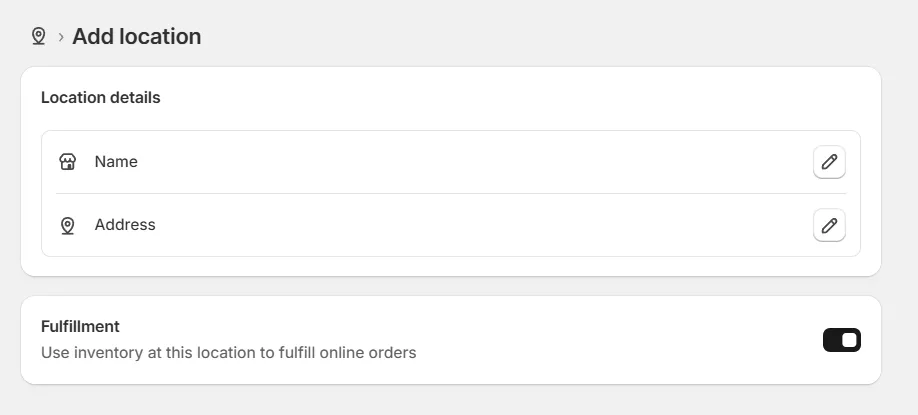
- Assign products or stock to each location so your inventory counts are correct across your business.
- Repeat this process for each warehouse, store, or dropshipping partner you use.
Once you’ve added all your locations, Shopify can route orders efficiently and keep your inventory levels accurate, no more confusion about what’s in stock where.
8. Policies
Last but not least, your store’s policies set clear expectations for customers and protect your business at the same time. Shopify makes this easy by giving you built-in templates that you can edit to suit your needs.
- Open the Policies section to see fields for your Refund policy, Privacy policy, Terms of service, and Shipping policy.
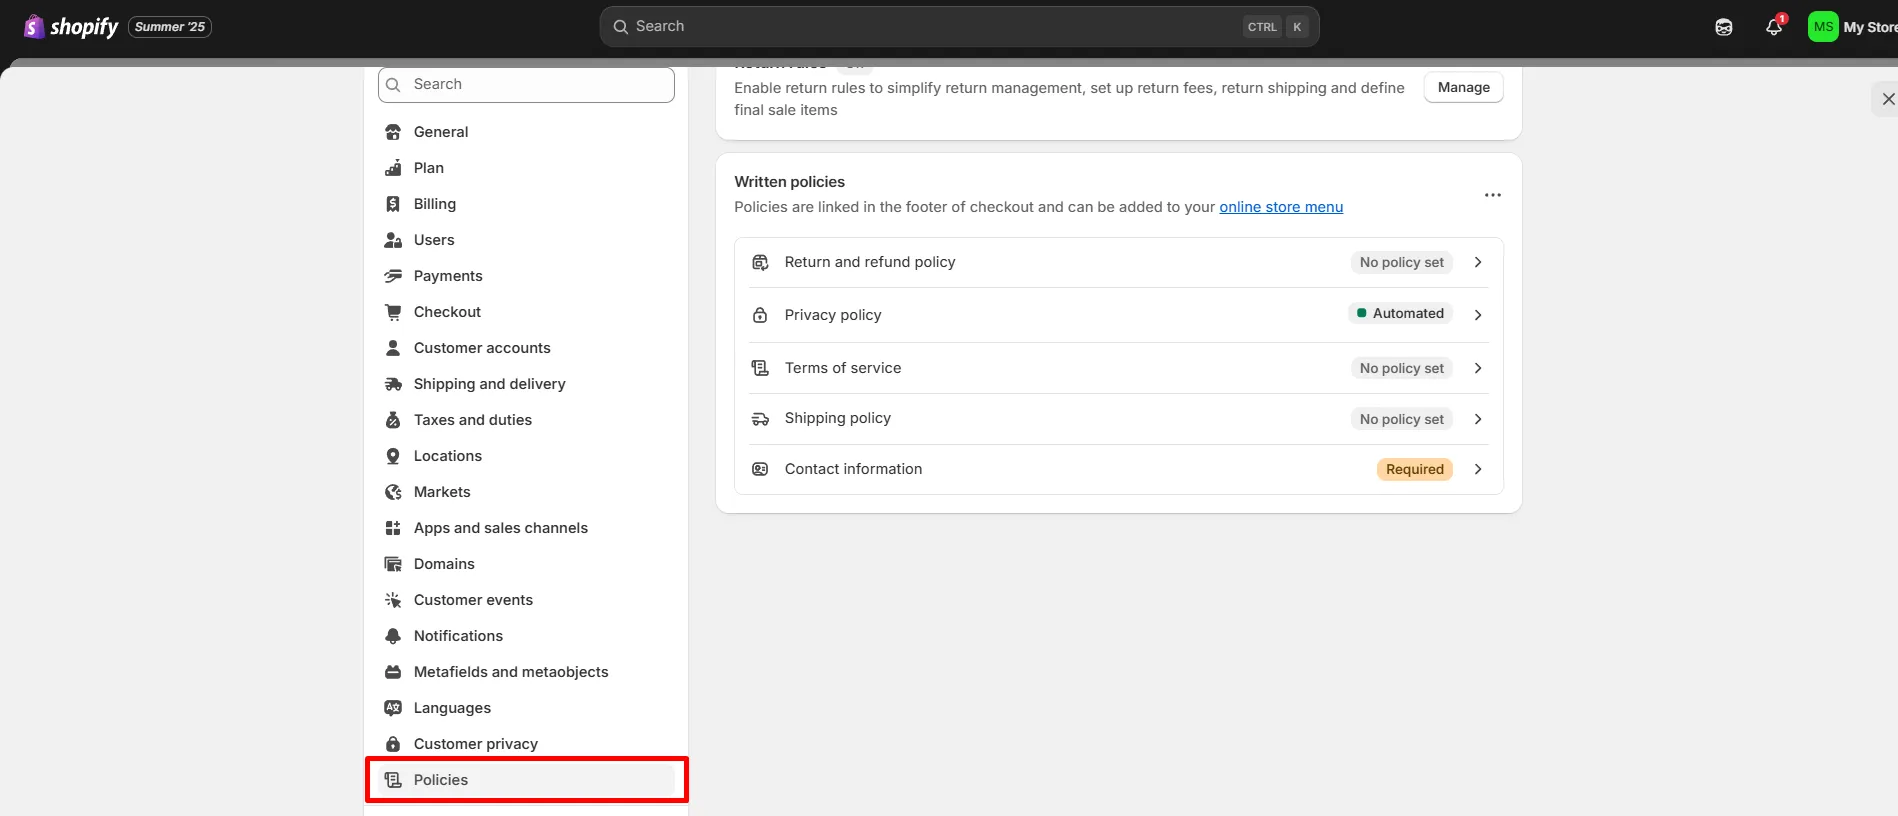
- Click Create from template if you’d like to start with Shopify’s suggested wording, then customize it to match your products, processes, and tone of voice.
- Be clear and specific about important details like refund timeframes, return conditions, and shipping timelines, so customers know exactly what to expect.
- Save your changes, and Shopify will automatically display your policies on your checkout page and in your store footer for easy access.
Taking a few minutes to set these up now helps build trust with your customers and prevents misunderstandings later on.
Step 7: Create essential pages
Aside from product catalogs, you should not overlook essential pages like About Us, History, or Contact Us. They help tell your brand's story and offer transparency, which gives visitors more confidence when considering their purchases!
Let us tell you what to do to add a simple Contact Us page in our Shopify tutorial:
- Go to Online Store > Pages and click on “Add page”.
- In the “Title” box, type the name of your page like “Contact Us” or “Get in Touch” (or any other title you prefer).

- Next, in the content area, you can write a short message inviting visitors to reach out. You could also include a quick greeting, your store's address, phone number, etc.
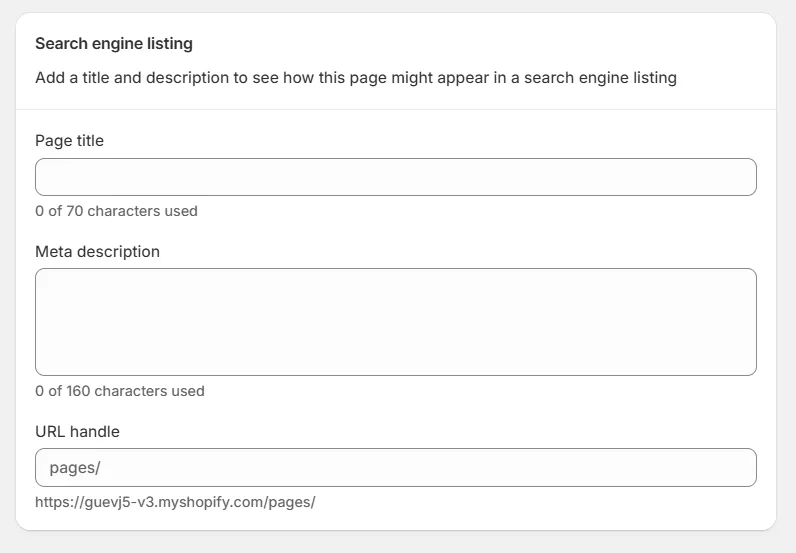
- From the “Theme template” dropdown on the right, select page.contact so Shopify automatically adds a contact form to the page.
- Then, scroll down to the “Search engine listing” section, where you can fill in the settings so search engines can display your page clearly in results.
It's that simple! You can follow these same steps to set up other essential pages like About Us, History, or any other key information to make your store more welcoming.
Step 8: Integrate Shopify apps
Shopify already comes with plenty of features, but adding apps can make it even more useful. The Shopify App Store has over 8,000 apps to help you with marketing, sales, customer support, shipping, product sourcing, and much more. Integrating the right apps can save you time, automate tasks, and even boost your revenue.

Here’s how to get started:
- From your Shopify admin, navigate to Settings > Apps and sales channels.
- Click Shopify App Store to explore available apps. You can browse by category or use the search bar to find something specific, like “email marketing,” “SEO,” or “loyalty programs.”
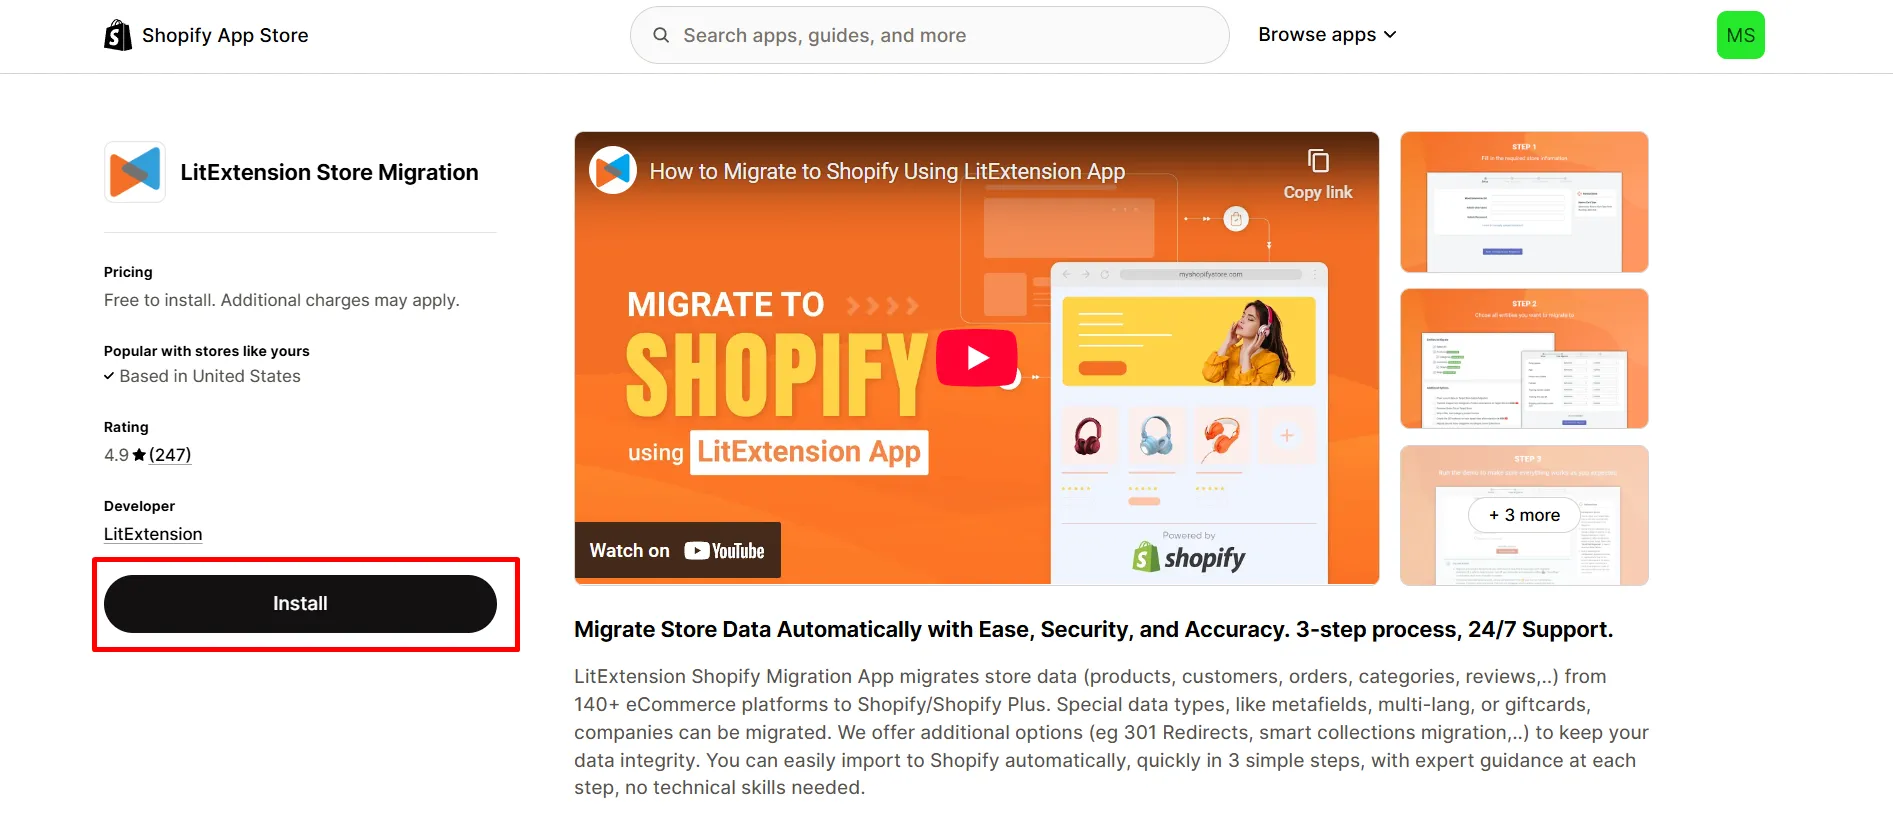
- When you find an app you’re interested in, click on it to read the description, check reviews, and see the pricing details.
- Click “Install” to install it, then follow the prompts to connect it to your store.
- Many apps will walk you through a quick setup process right after installation.
- Once installed, the app will appear in your Apps dashboard, where you can open it at any time to adjust settings or uninstall it if you no longer need it.
Our tip is that you should start with the essentials, test how they work for your business, and then add more as needed. Too many apps can slow down your store and make management harder.
We have also compiled 25+ free Shopify apps here to give beginners like you a good head start; check them out!
Step 9: Place a test order
If you’ve made it to this stage of the Shopify tutorial, you might be eager to set your store live right away. But before you start taking real orders, it’s a good idea to run a test purchase to make sure everything, from checkout to payment, works smoothly.
1. Use the Bogus Gateway
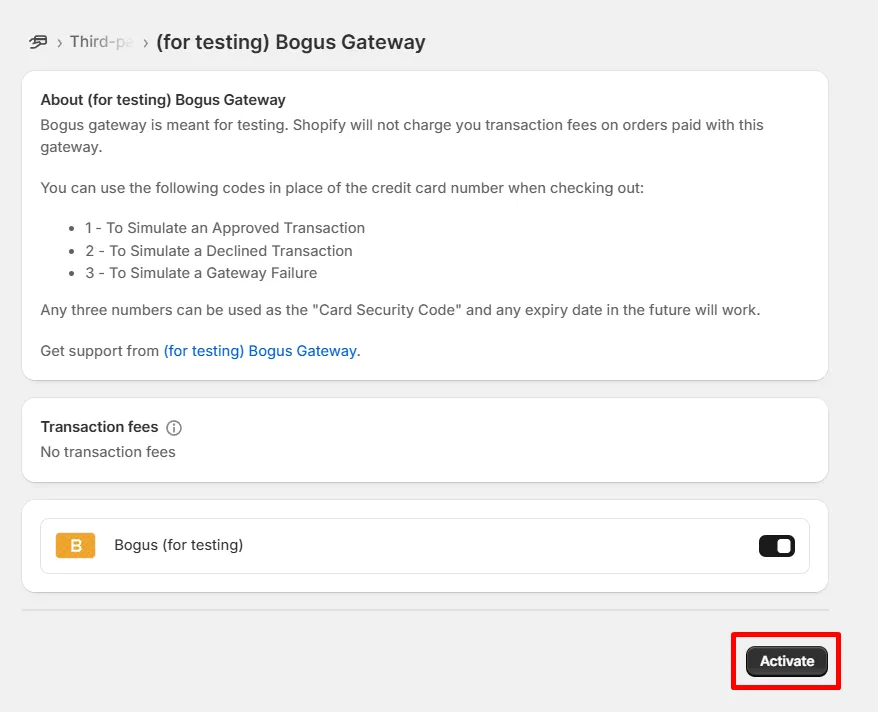
The Bogus Gateway is a payment provider for testing purposes, especially useful if Shopify Payments isn’t available in your country or you don’t want to connect a real payment method yet.
- Go to Settings > Payments to deactivate any providers that you have enabled.
- In the Third-party providers section, click Choose third-party provider.
- On the “Third-parrty payment providers” page, you can see Bogus Gateway right at the top of the list. Click on it.
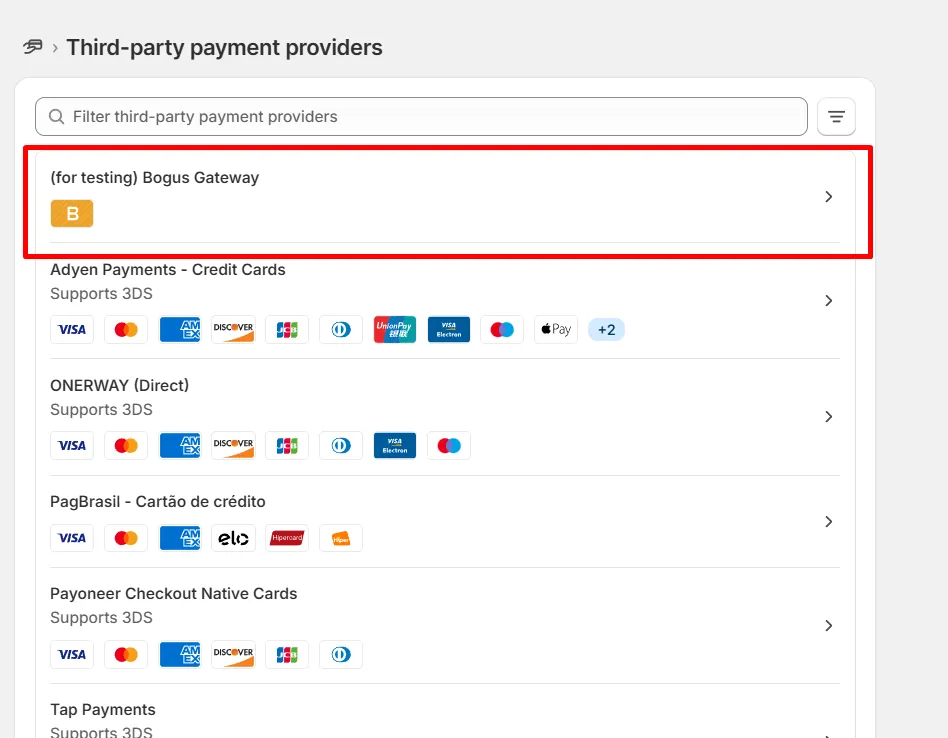
- Read the brief instructions, then click Activate (for testing) Bogus Gateway.
- Visit your store just like a customer would and place a test order.
2. Use Shopify Payments test mode
If you’re using Shopify Payments, you don’t need the Bogus Gateway, you can test directly in Shopify Payments’ built-in test mode.
- Go to Settings > Payments > Shopify Payments.
- Click Manage, scroll to Test mode, and check Enable test mode.
- Save your changes.
- Visit your store and place a test order using one of Shopify’s test credit card numbers (e.g., Visa: 4242 4242 4242 4242 with any future expiry date and any 3-digit CVC).
- After confirming everything works, go back to Settings > Payments and turn off Test mode so you can start accepting real orders.
Don’t forget to cancel that order if you don’t want to charge yourself any fees, though.
Step 10: Pick a plan and start the business!
Congratulations, if you’ve reached this step, your Shopify store is nearly ready to launch.
Now it’s time to choose the plan that will take you from setup to sales. Shopify offers four main pricing options: Basic, Grow, Advanced, and Shopify Plus for enterprise-level needs.
If you’re just starting out, here’s some great news: new users can get Shopify for just $1/month for the first 3 months. This gives you plenty of time to test your store, attract customers, and start making sales before committing to the regular pricing.

After selecting a plan, remember to remove all storefront passwords to get the store public by going to Themes > Disable password.
Want to Migrate Your eCommerce Platform?
If you want to migrate to Shopify, LitExtension offers a great migration service that helps you transfer all your data accurately.
FREE DEMO NOW
How to Make the First Shopify Sale
Your Shopify store is all set up and ready to roll! Let us tell you how to jumpstart your first sales and set the stage for even more to come:
Drive traffic with free marketing strategies
As the name suggests, free traffic is an excellent way to get started without immediately pouring money into ads. The most common approach is to optimize your search engine rankings (SEO) and ensure your Shopify store shows up when people search for products like yours:
- Use tools like Google Keyword Planner or Ahref to find keywords.
- Narrow down the options until you end up with a list of strong keywords that fit your products (but aren’t so competitive that you’ll get buried).
- Slot these words into your product titles, descriptions, and meta tags naturally. Remember to avoid keyword stuffing at all costs.
SEO aside, another goldmine to consider is social media like Instagram, Facebook, and TikTok. Here, you can connect and engage with potential customers (share images, reply to comments, answer DMs, etc.) entirely for free!
Launch targeted ad campaigns
Once you've got the budget and resources lined up to go beyond free traffic, why not invest in paid advertisements? Ads are among the fastest lane to your first Shopify sale, and when done right, they can put you in front of just the right people:
- Define your target audience: how old are they, where do they live, what interests do they have?
- Start small with a few ad variations first. Let these ads run and see which one pulls in the most clicks or sales, then put more budget into the winning options.
- Set retargeting ads with Facebook Pixel or Google Ads to remind visitors (who have seen the products but not yet bought them) to return and complete the purchase.
Set up sales channels
Last but not least, consider creating multiple sales channels for your products, such as Instagram, Amazon, eBay, etc. That way, you're basically giving your customers more roads leading to your Shopify store. It also reduces friction in the buying process, now that customers can make a purchase right away without leaving the app they're on.
As of this writing, there are hundreds of multichannel selling tools and applications. Yet, LitCommerce remains the leader, and it's not hard to see why. You can handle ALL your stores (from 300+ eCommerce platforms and social media channels) all from one simple dashboard. No more jumping from platform to platform; instead, everything’s right there at your fingertips!

How to Use Shopify Tutorial: FAQs
Is Shopify easy for beginners?
Yes! Shopify is designed to be user-friendly, even if you’ve never built a website before. The dashboard is simple to navigate, there are built-in templates for your store design, and most features (like adding products or setting up payments) are just a few clicks away. Plus, Shopify has a huge help center and community forum if you ever get stuck.
How to learn Shopify step by step?
The best way is to follow a structured guide, like the Shopify tutorial you’re reading now. Usually, you can start with creating your account, customizing your theme, adding products, and configuring essential settings. Shopify’s Help Center offers detailed articles, and there are plenty of free video tutorials on YouTube that walk you through each step visually.
Do I need an LLC to run a Shopify store?
No, you don’t need an LLC to start selling on Shopify. You can operate as a sole proprietor in most countries. However, forming an LLC (or another business entity) can provide legal protections and tax benefits, so it’s something worth considering as your business grows.
How much does Shopify take from a $100 sale?
It depends on your Shopify plan and payment provider. If you use Shopify Payments on the Basic plan, the fee is 2.9% + 30¢ per transaction. For a $100 sale, that works out to $3.20 in fees ($2.90 + $0.30). Higher-tier plans have lower fees, and using a third-party payment gateway may involve additional costs.
How to start getting paid on Shopify?
First, set up your payment provider in Settings > Payments. If Shopify Payments is available in your country, you can activate it and connect your bank account directly. Once you’ve made sales, Shopify will transfer the funds to your account based on your payout schedule (usually every 1–3 business days).
Final Thoughts
Whew! This Shopify tutorial has covered pretty much everything you should know on how to start a Shopify store.
As mentioned above, Shopify is a top-rated platform for eCommerce businesses for its ease of use, reasonable pricing, and various customization options! Over time, it is definitely a solid eCommerce solution to rely on for a long-term eCommerce strategy.
You can check out our LitExtension blog and join our eCommerce community to acquire more practical suggestions for your online stores. And, if you’re planning on moving to Shopify, work with our LitExtension migration experts and experience the most time-plus cost-effective solution!

