Wix is a popular website builder that allows users to create a website from scratch with detailed instructions. Some steps may be unnecessary, while others might be overwhelming with too many features. Therefore, we have compiled a list of Wix tutorials to help you quickly make your website public in 2024.
In this article, we will cover the following points:
- #Stage 1: Get familiar with Wix & choose the method to start Wix site design.
- #Stage 2: Wix essential tutorials to customize website design & make it attractive.
- #Stage 3: Prepare your Wix website for launch by optimizing it & making it more robust.
Let's get started!
Want to Migrate to Wix?
If you intend to migrate to Wix, LitExtension offers a great migration service that helps you transfer your data from the current eCommerce platform to a new one accurately, painlessly, and with utmost security.
Stage 1: Essential Steps to Begin with Wix
Step 1: Sign up for a Wix account
To begin creating your Wix website, start by clicking on the ‘Get Started‘ button on the Wix homepage.
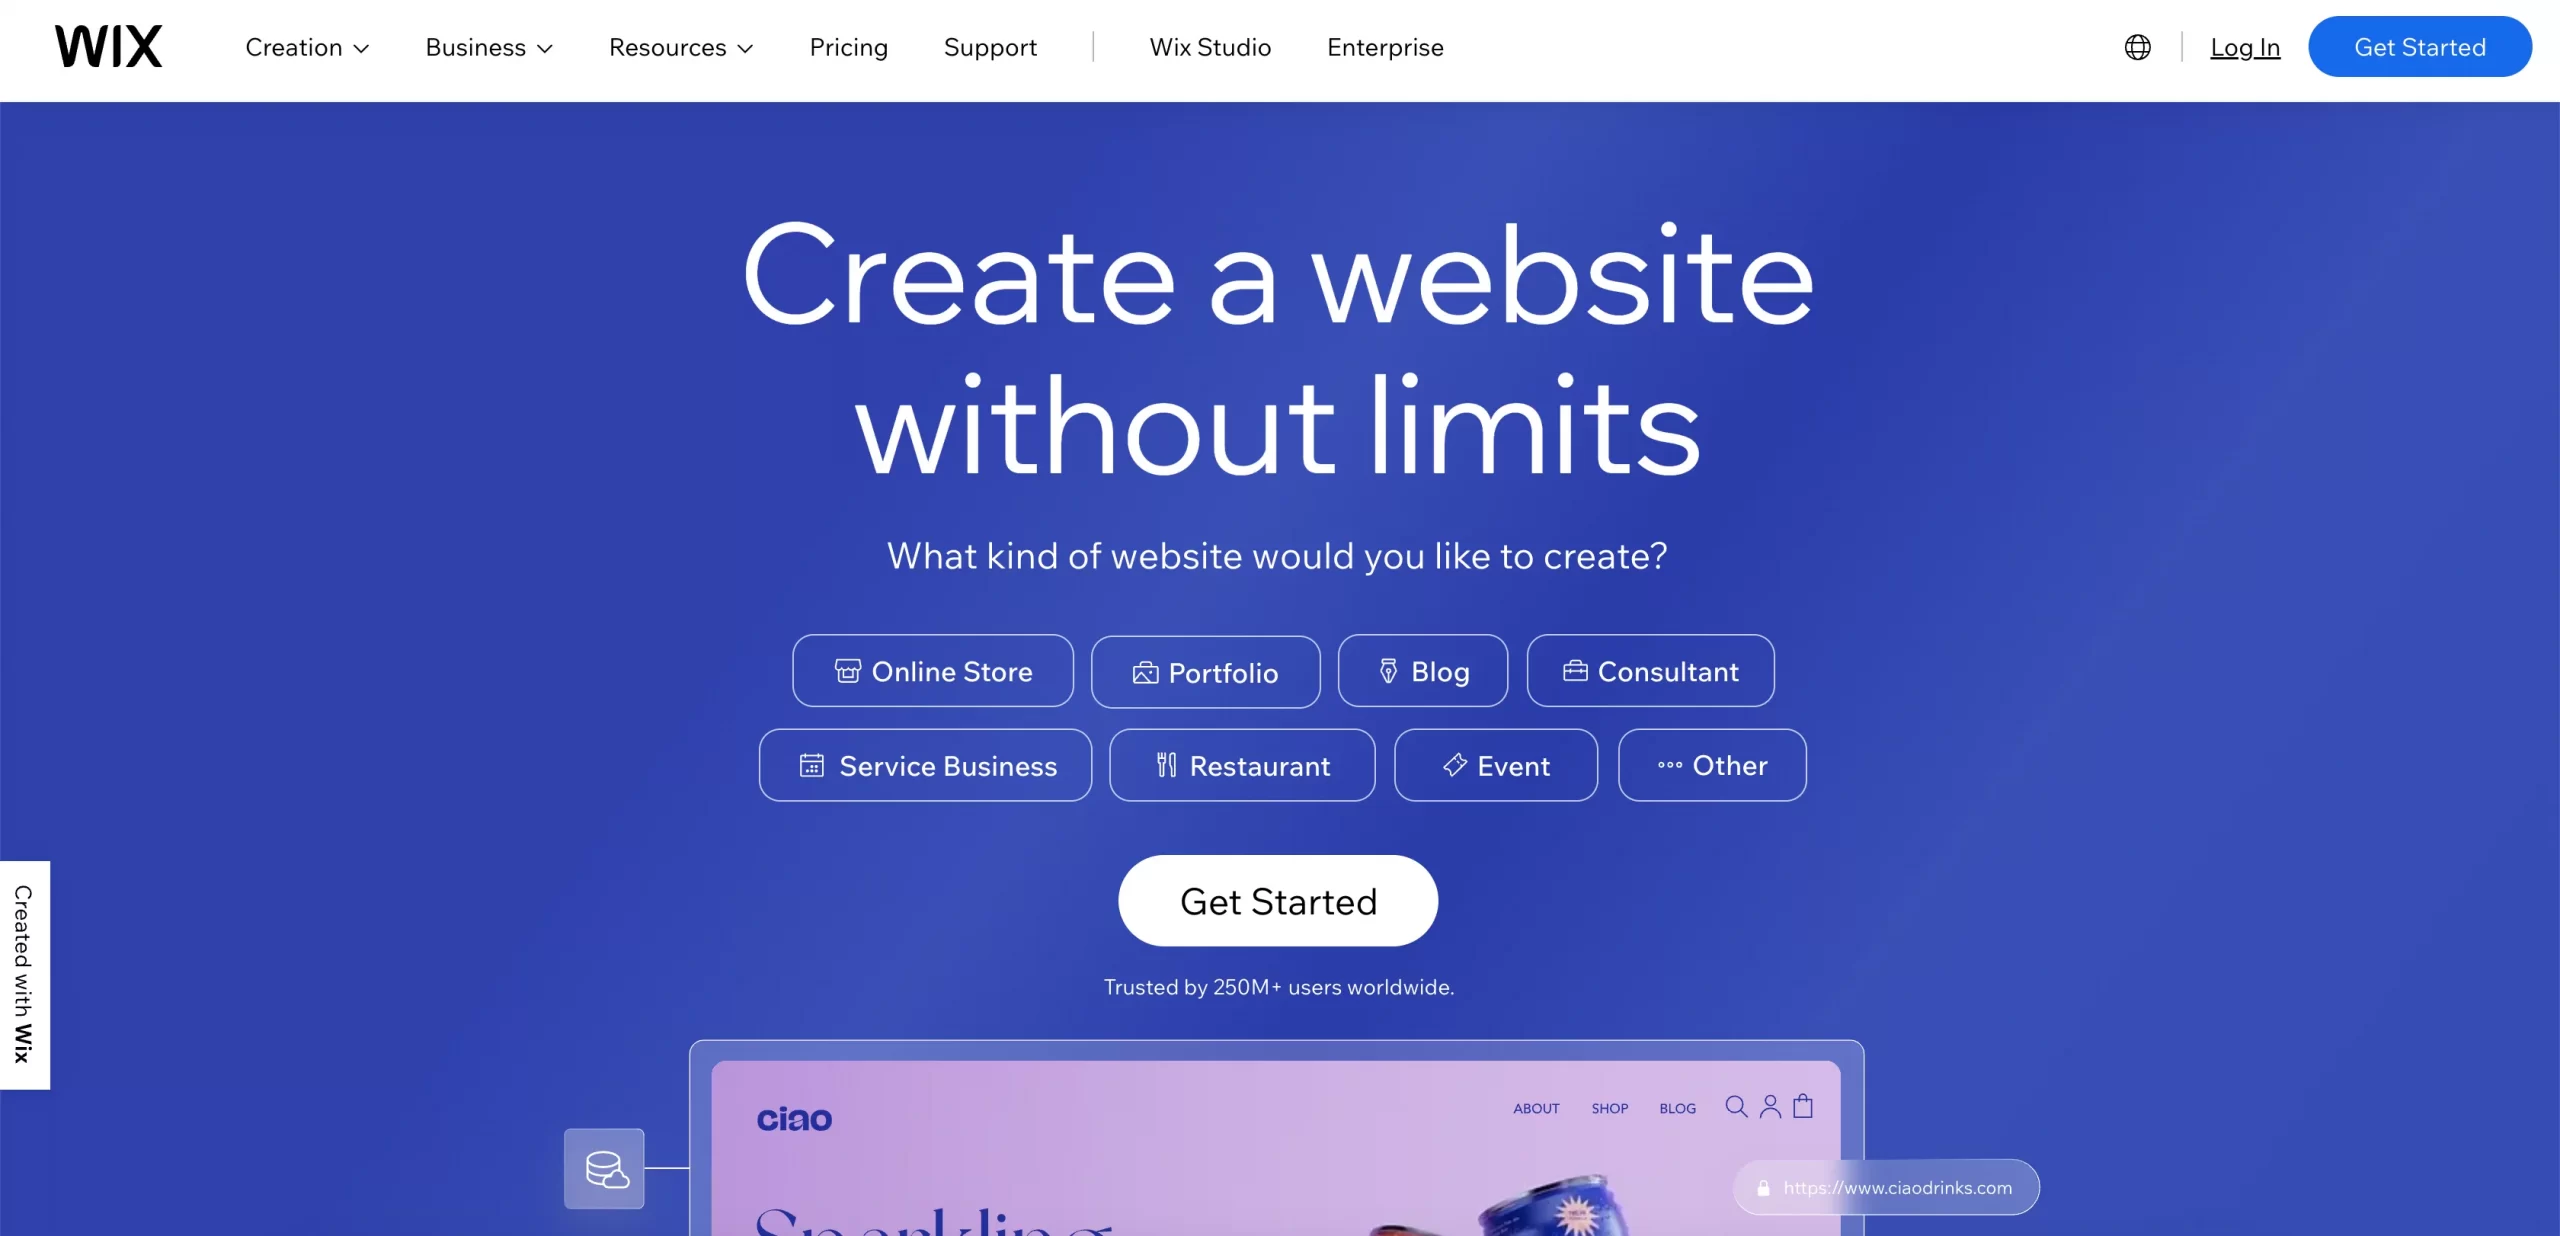
Afterward, you will need to complete a Wix sign-up form, which only takes a few minutes to complete. The form requires you to provide your email address and set up a password for your account.
Alternatively, you can log in quickly using your Facebook or Google account.
Step 2: Chat with Wix AI or finish a quick question
After completing the registration process on Wix, you will now see the Wix AI section. This section is designed to gather some business information from you.
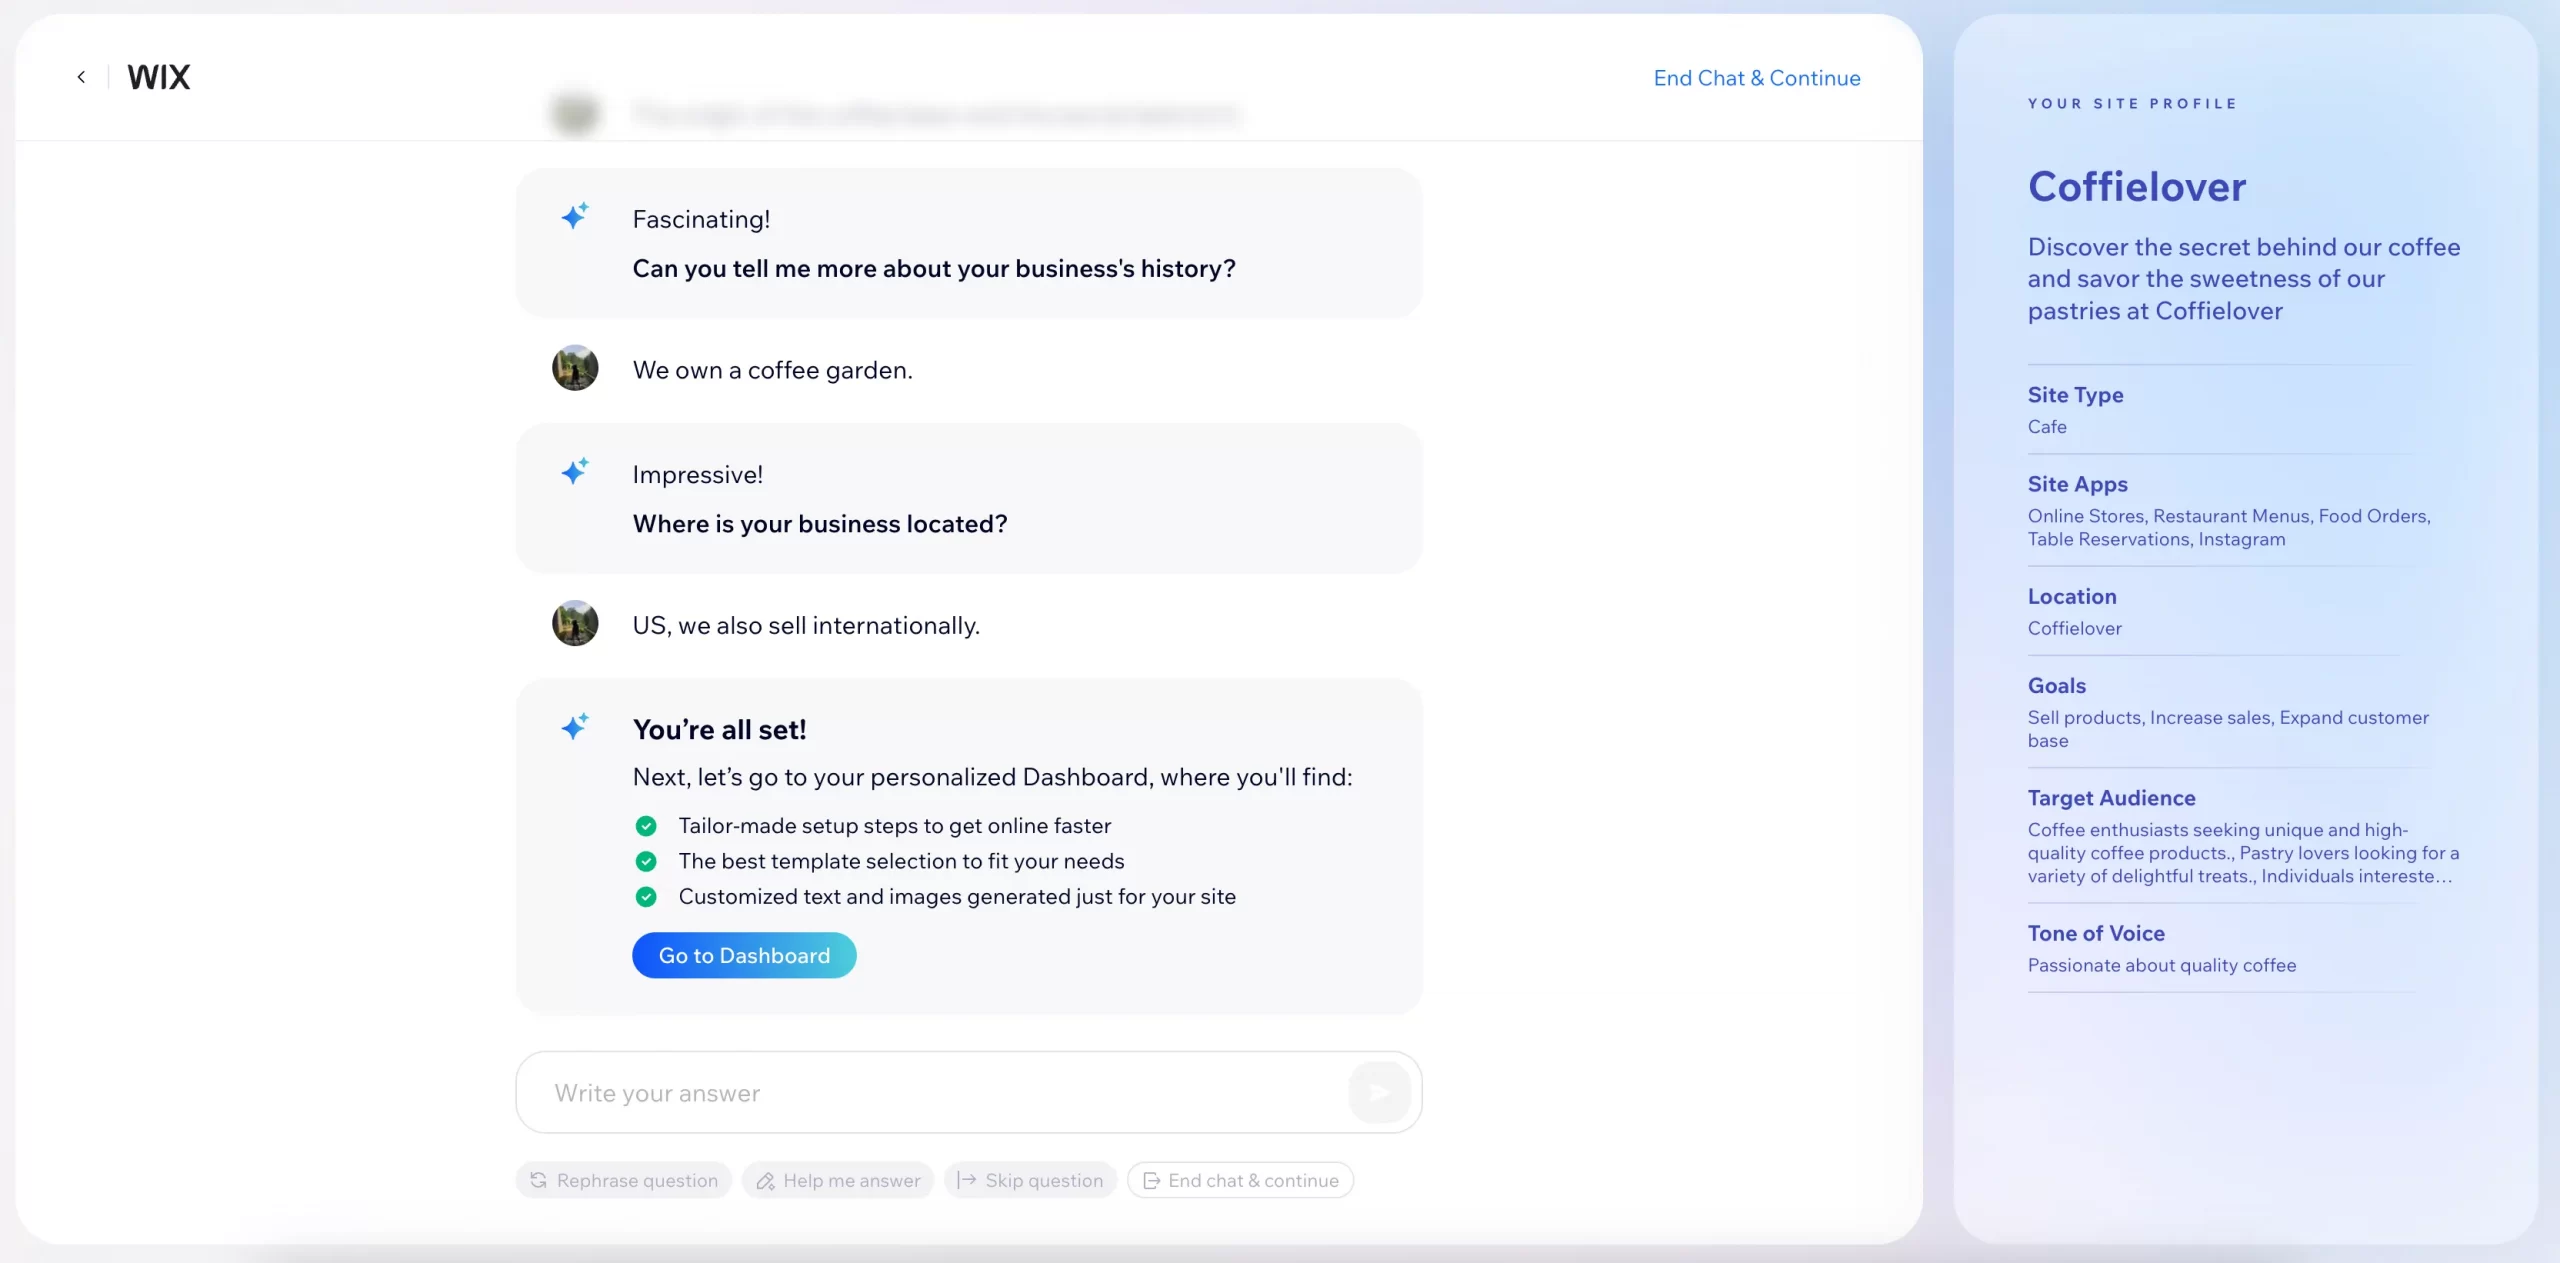
For instance, if you provide a detailed answer to a question, Wix will review your website based on the following factors:
- The type of website you need;
- The apps and features required for your website;
- Your location;
- Your website's goals;
- The target audience;
- The tone of voice that you prefer for your website.
*Note: The questions asked may differ for each user since they are personalized.
Based on this information, Wix can create a website tailored to your specific needs. Simply click on the ‘Go to Dashboard' button and start your journey with Wix.
Alternatively, you can skip the chat with Wix AI and answer a quick question from Wix asking about the type of website you want to create.
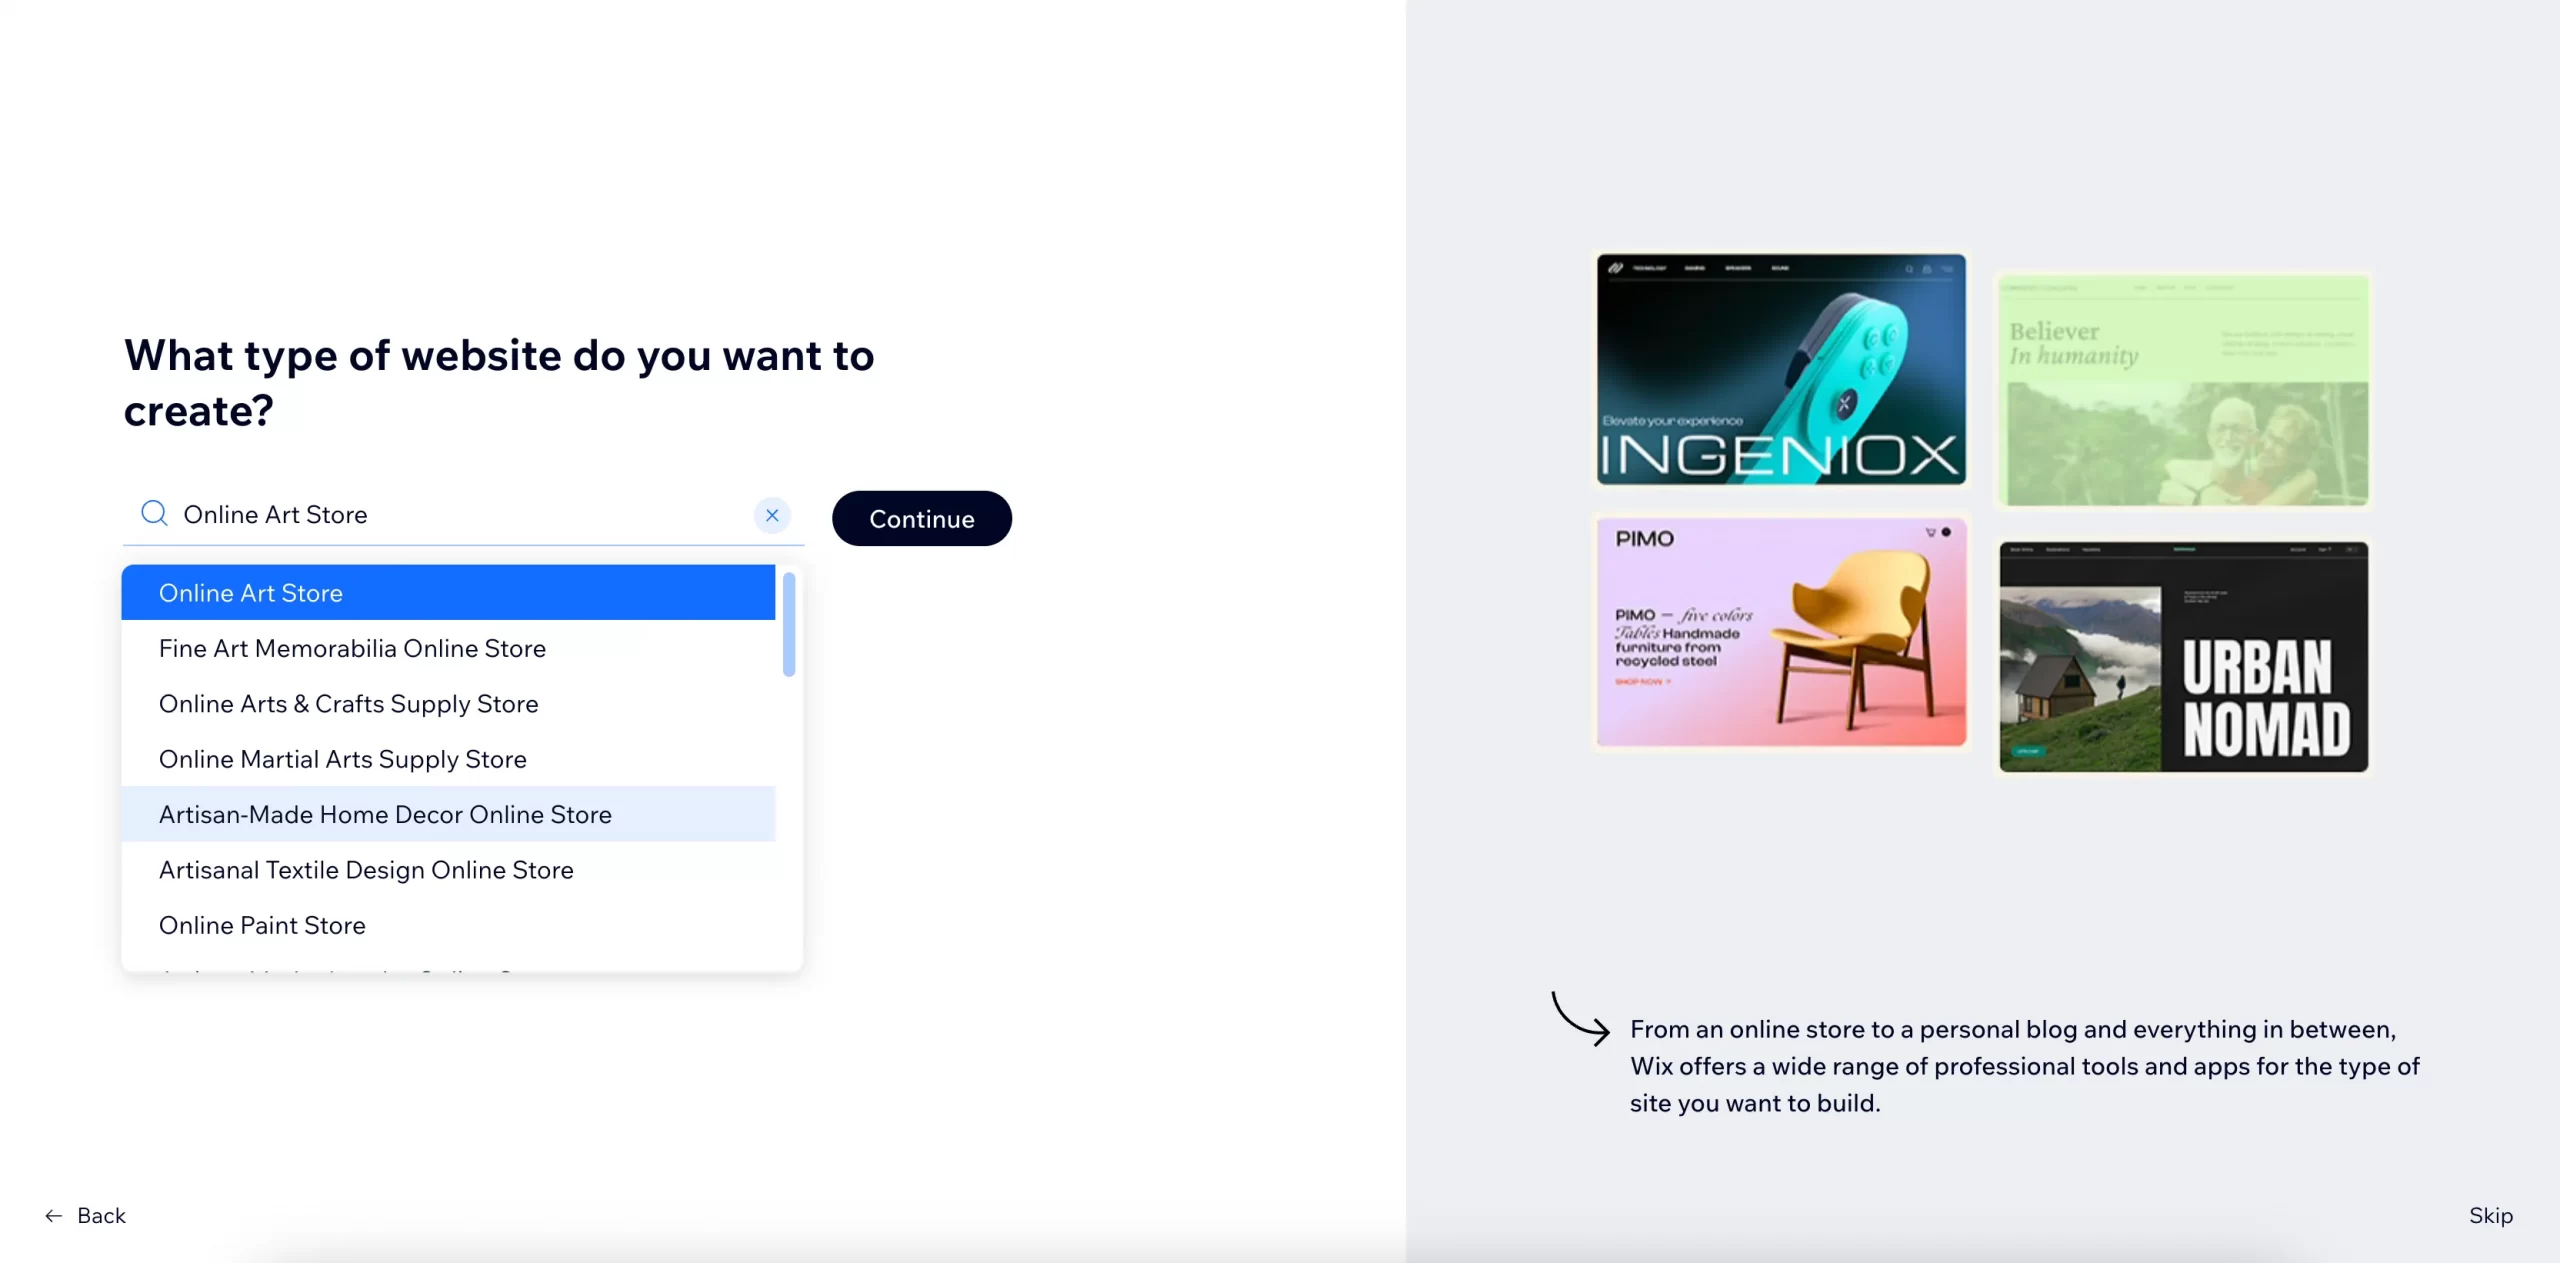
Either way, you will be directed to the appropriate Wix dashboard with the necessary tools to support your Wix site.
Editor’s comment: Via Wix tutorials, I highly recommend the Wix AI support to visualize the site at a glance. The more detailed information you provide, the better your website will be.
Step 3: Choose a version to start: Wix ADI or Wix Editor?
After logging in to your Wix account, click the ‘Design Site‘ button at the top right corner of the dashboard to change the design of your website.
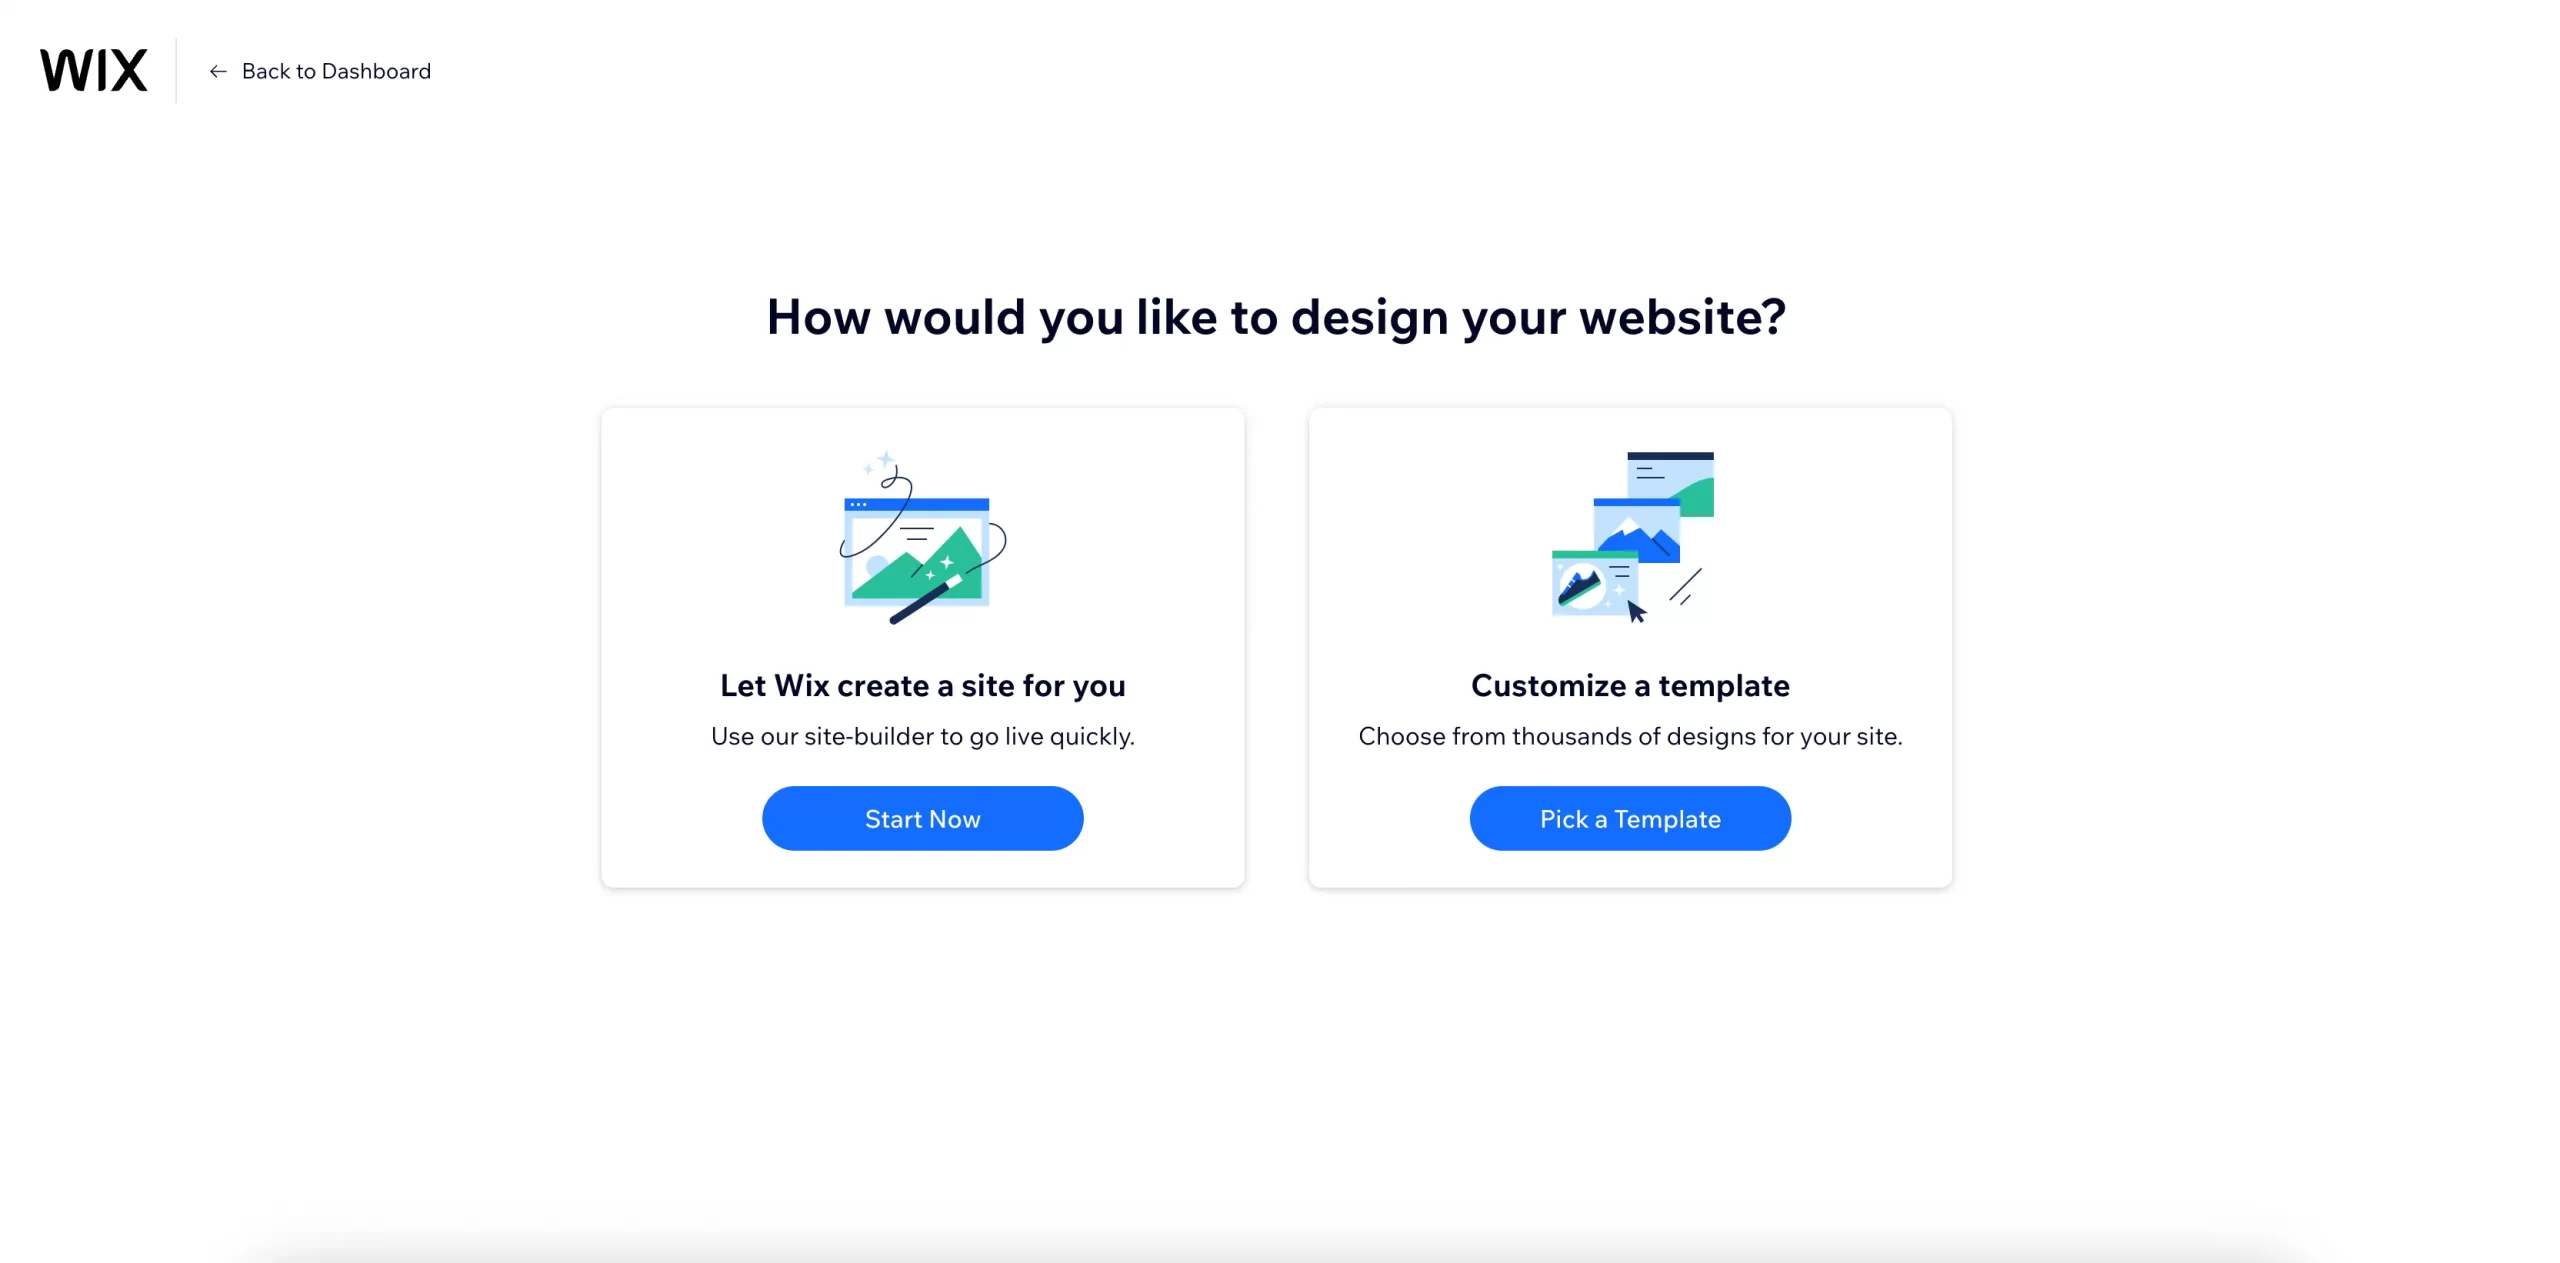
Next, you have two options to decide how to create a Wix website from scratch:
- Start with Wix ADI: Wix will create a website for you using AI based on the information you provided in the previous step.
- Start with Wix Editor: You can design your website by yourself by selecting a Wix template.
1 – Start with Wix ADI
If you choose to start with ADI, great!
You might wonder, “What is Wix ADI?” Wix ADI stands for Wix Artificial Design Intelligence. As its name suggests, this version uses machine learning algorithms to assist users in building their websites.
You just need to wait for a bit while the system generates a site for you. The time required for this may vary depending on various factors, such as your internet connection or the complexity of your site. However, don’t worry, as the result may impress you a lot!
Below, you will see a Wix sample site created by AI that reflects the vibes, color scheme, and layout of the Wix site.
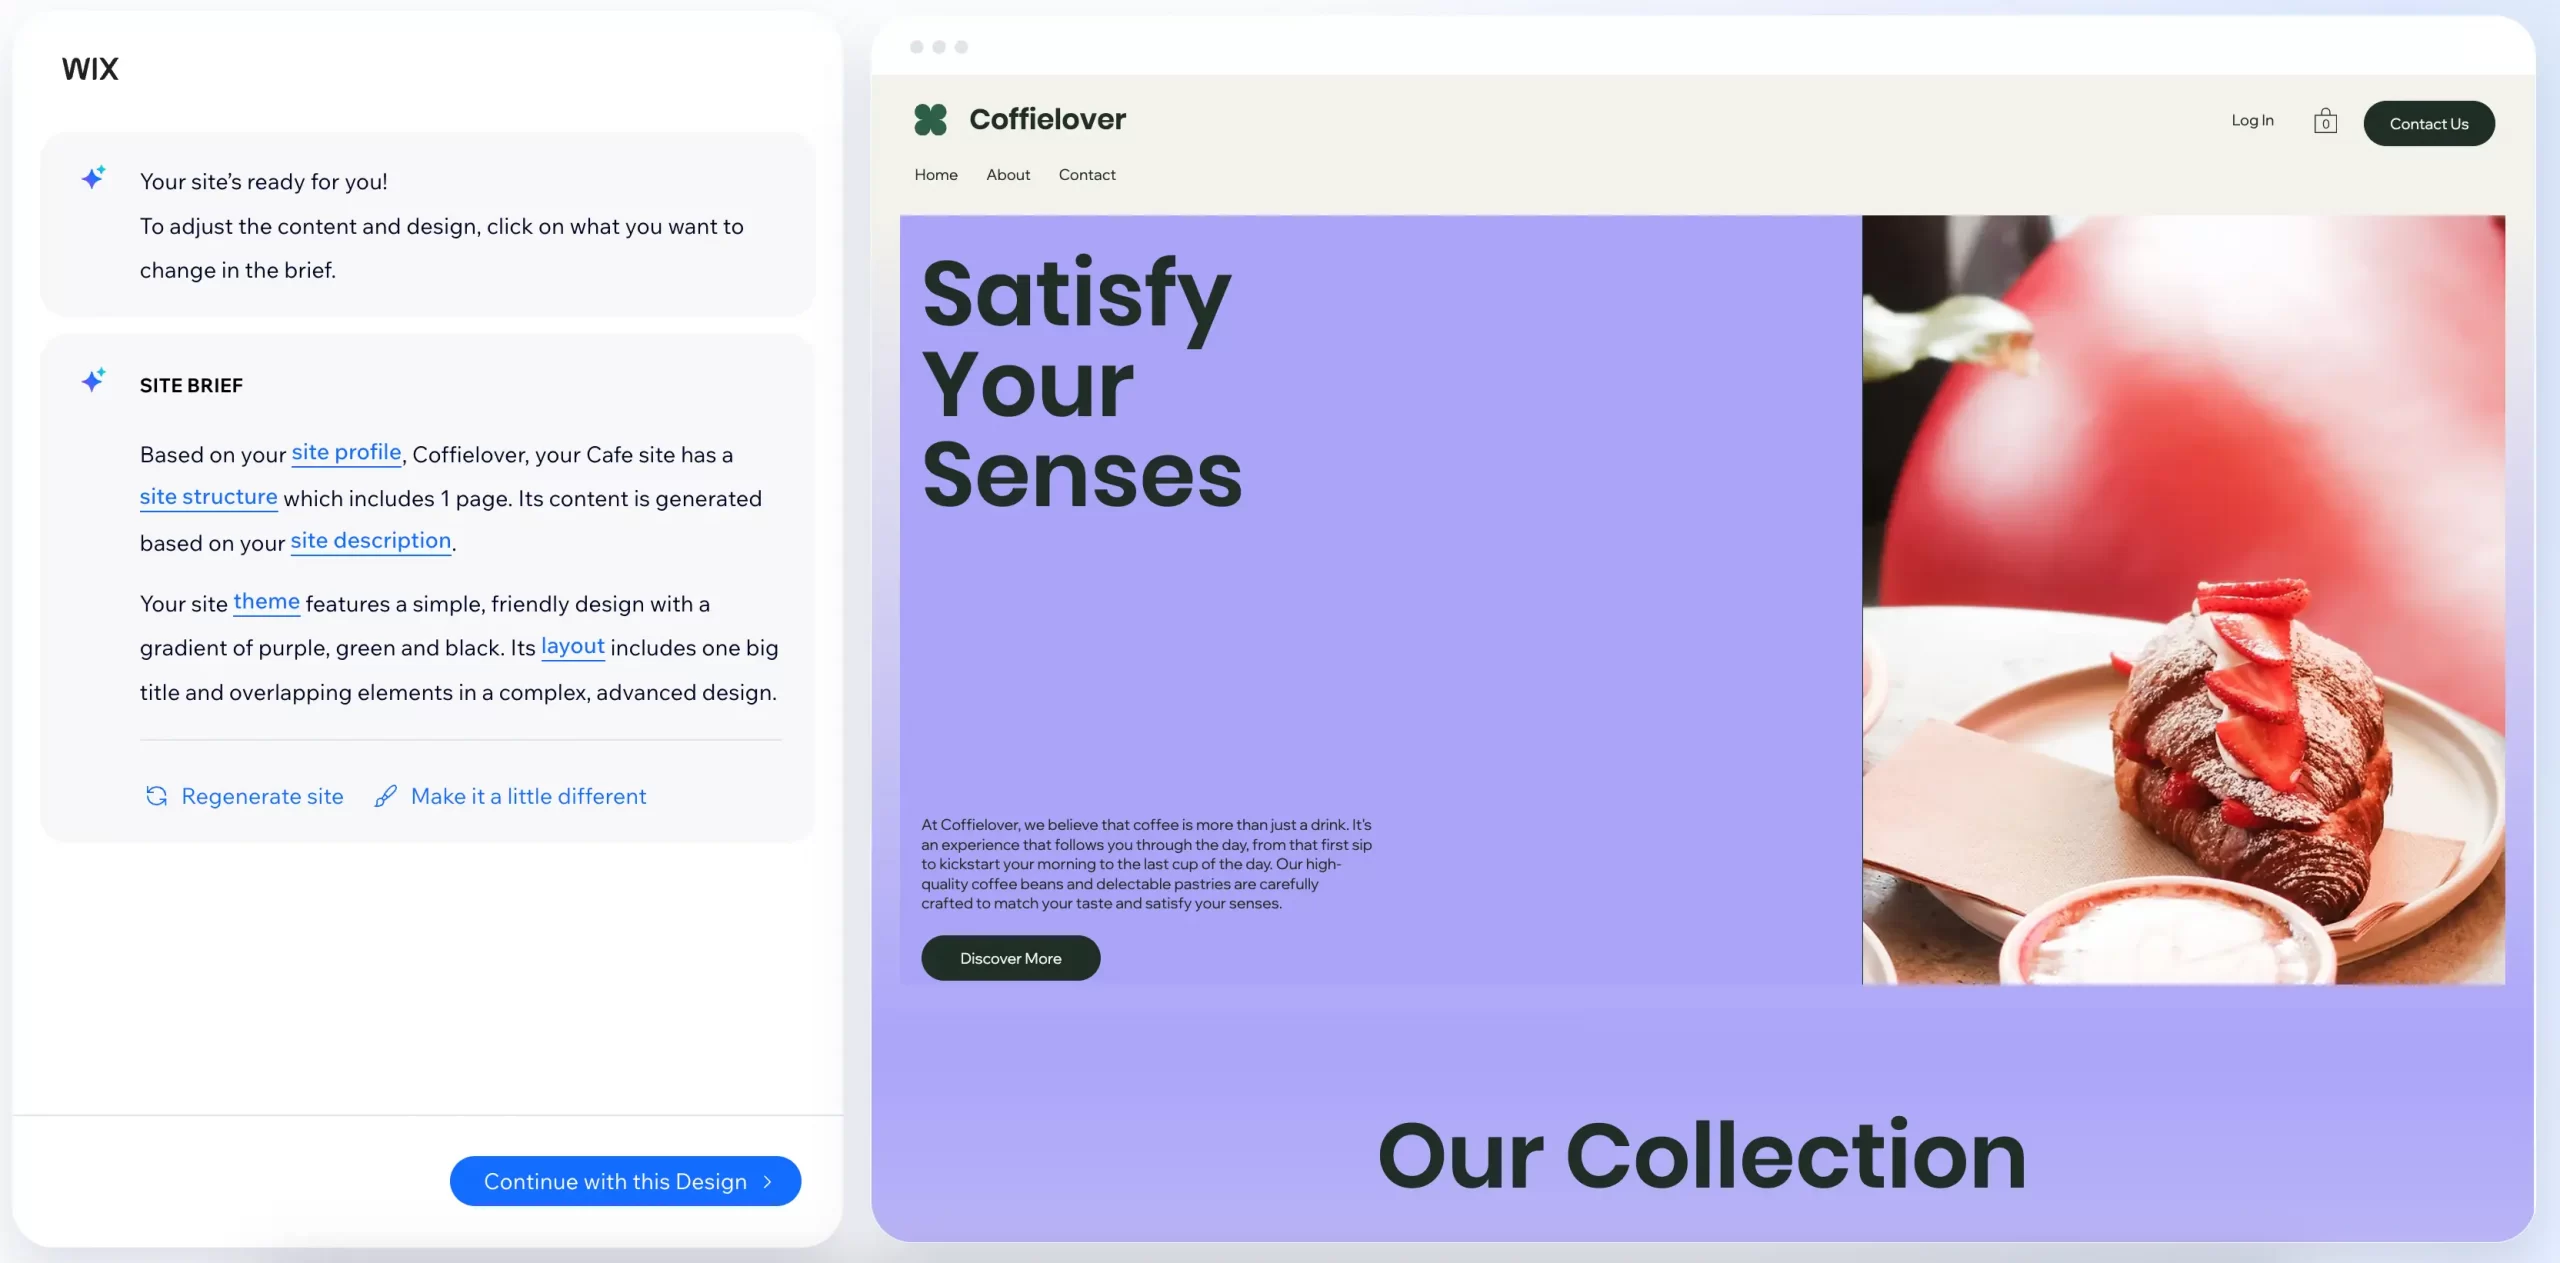
If you don't like it or feel like it doesn't match your brand, you can click on ‘Regenerate site‘ or ‘Make it a little different‘ button, and Wix ADI will generate another option for you.
Editor’s comment: While using ADI for Wix tutorials, it takes some time to find the perfect Wix sample site that resonates with my thoughts. Overall, I think it’s a good option for those who are not really confident in website design.
2 – Start with Wix Editor
If you choose to start with Wix, that is also great!
Wix has tried their best to bring the most user-friendly experience of creating websites to their customers. Consequently, both Wix ADI and Wix Editor versions are easy to use.
Nevertheless, Wix Editor will require more effort in your website development project. In return, you can utilize comprehensive Wix tools to create your unique website and customize it yourself.
To start designing your Wix website, all you need to do is select a template from the Wix market. With over 800 website templates available, you may find that you have many options. While having so many options is great, it can also be overwhelming.
On the other hand, we published a detailed comparison between Wix ADI vs Wix Editor, in case you can’t decide which one would be suitable for you.
Editor's comment: Wix Editor is easy to use, but it takes time to choose the right template. In Wix tutorials, I only recommend this option for those who are clear on business purpose and website display.
Stage 2: Steps to Customize Wix Website Design | Wix Tutorials 2024
Before we begin this section of Wix tutorials, we want to clarify that most of the steps provided are intended for those who opt to start with Wix Editor. However, if you prefer to start with ADI, there is no need to worry because you can still use the same techniques to edit the site generated by Wix ADI.
Step 1: Choose a Wix template
To start your website construction process, you need to choose a website template first. Luckily, Wix Template Market makes sure that you can approach various design options, categorized into different sections, including:
- Business & Services
- Store
- Creative
- Community
- Blog
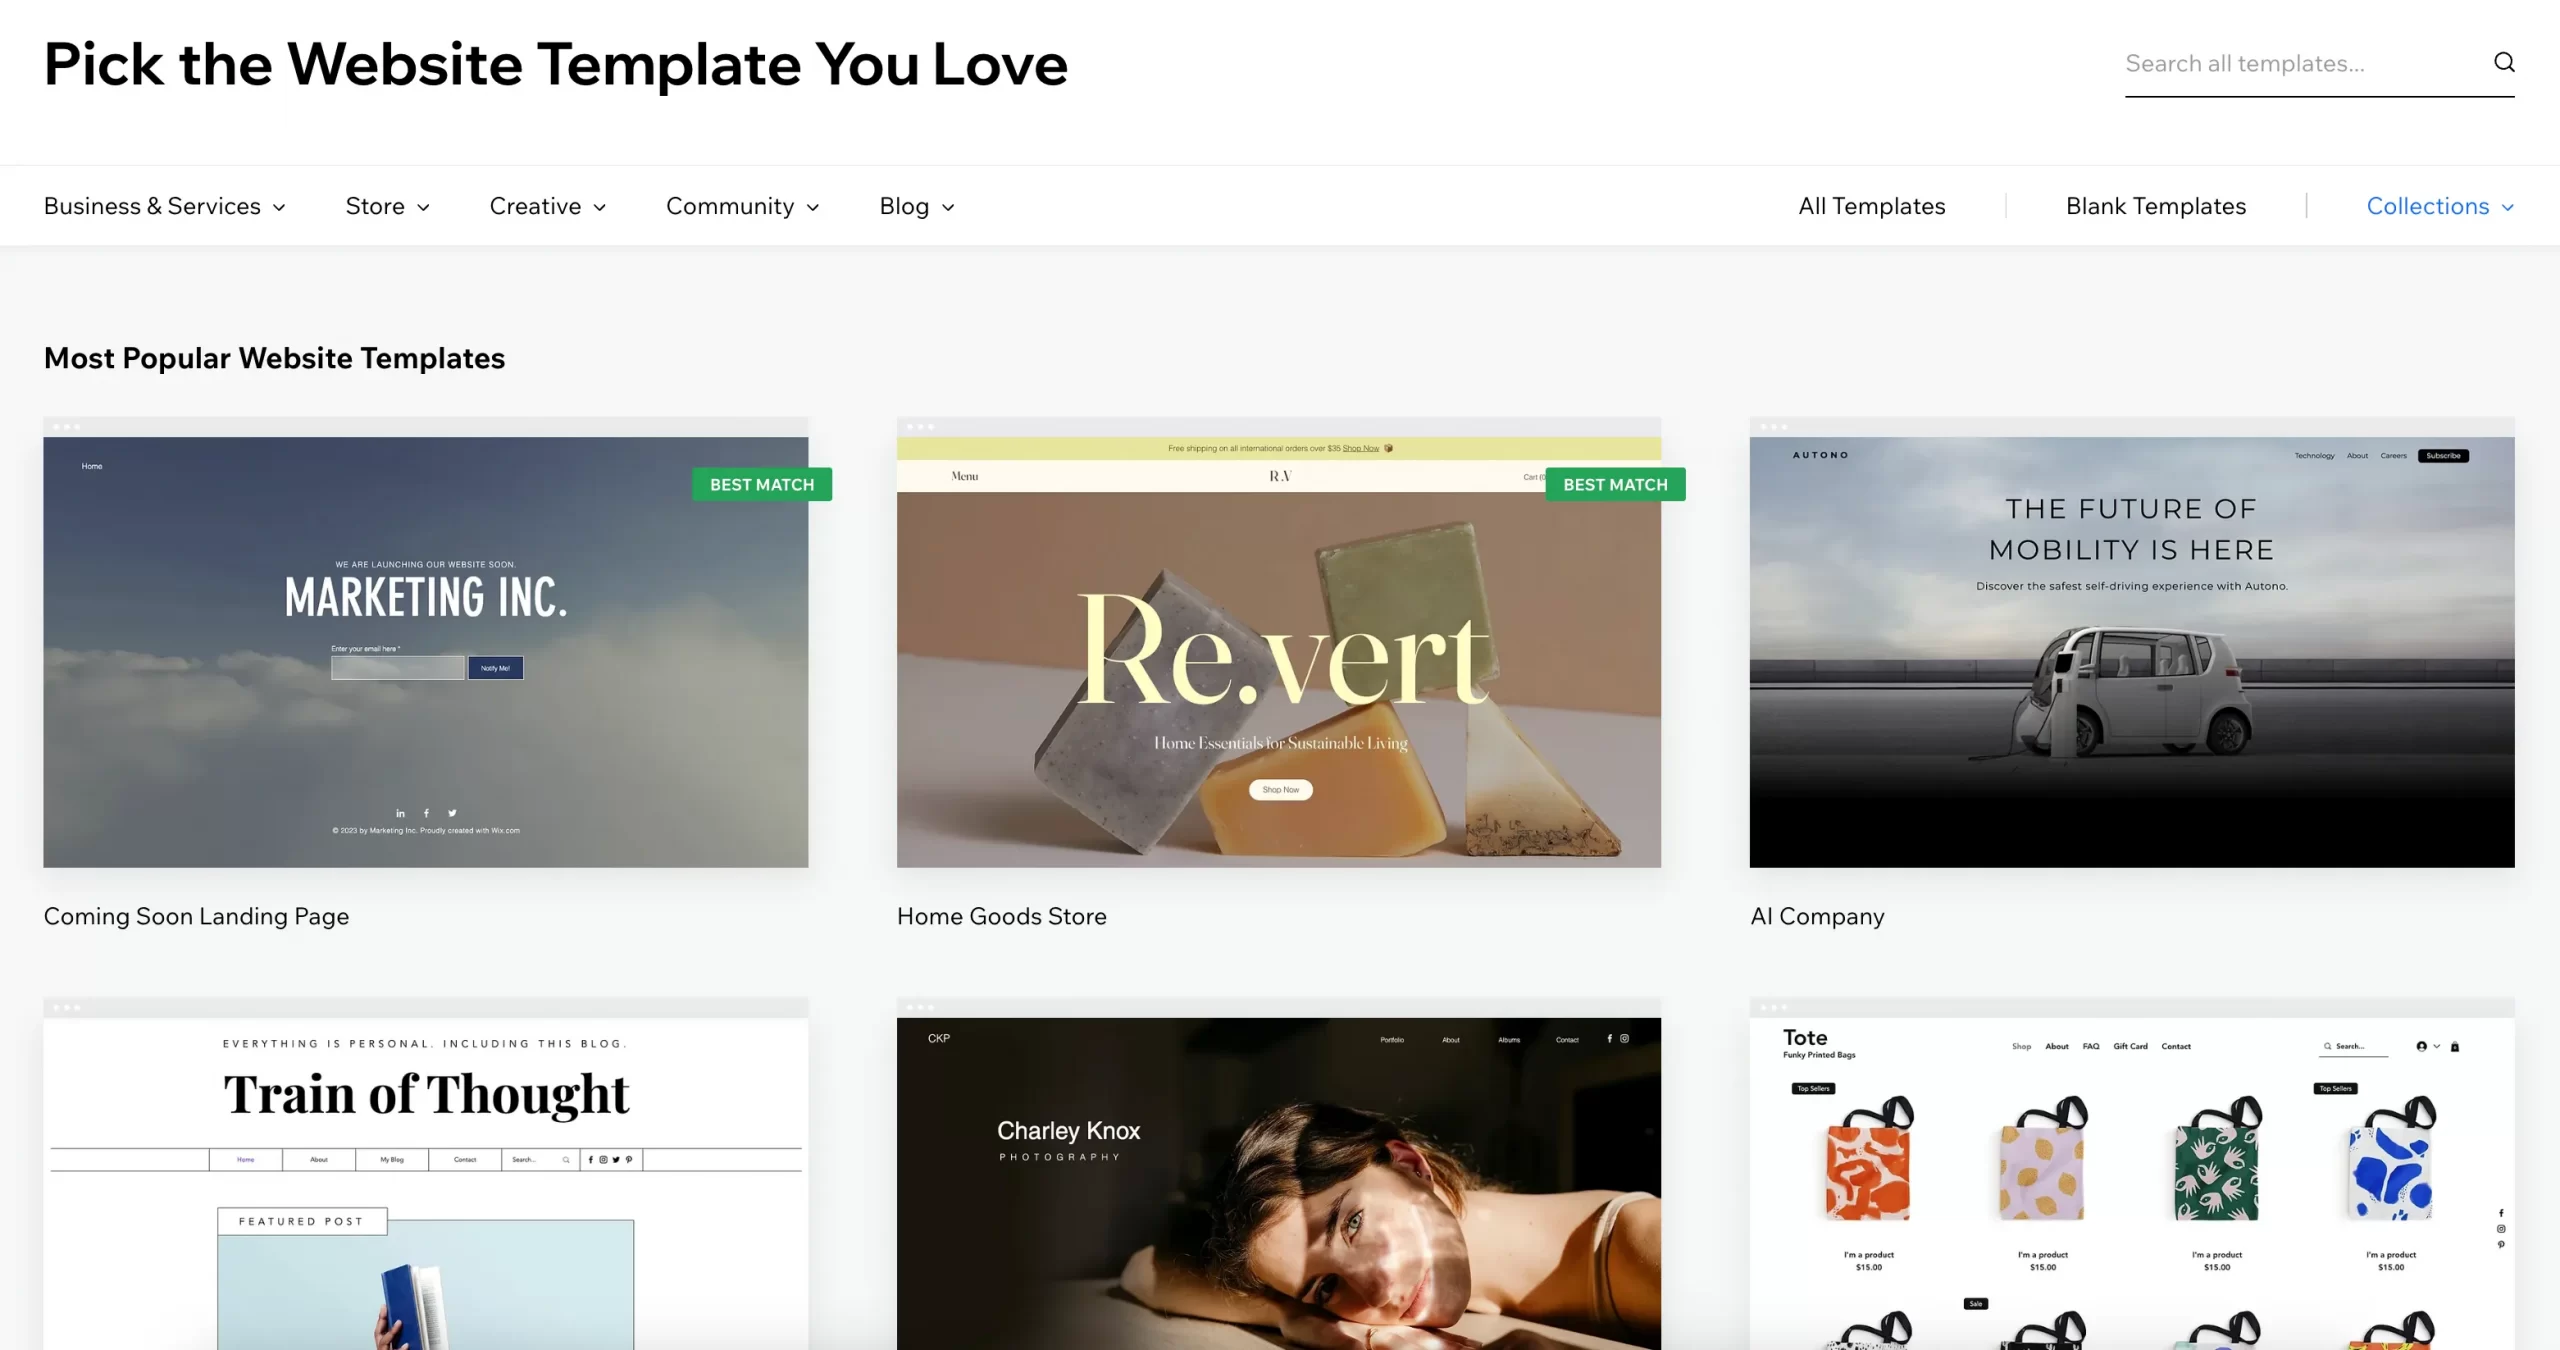
Importantly, make sure that you choose the template that exactly matches your initial purpose since you can't change Wix web template.
If you're overwhelmed with the incredible number of templates, don't miss our picks of best Wix templates for your website.
Step 2: Edit Text and add Sections
So, how to edit Text on Wix and add Sections?
After choosing your website template, you will now be navigated to the Editor. From now on, you can start adding and editing sections on your website.
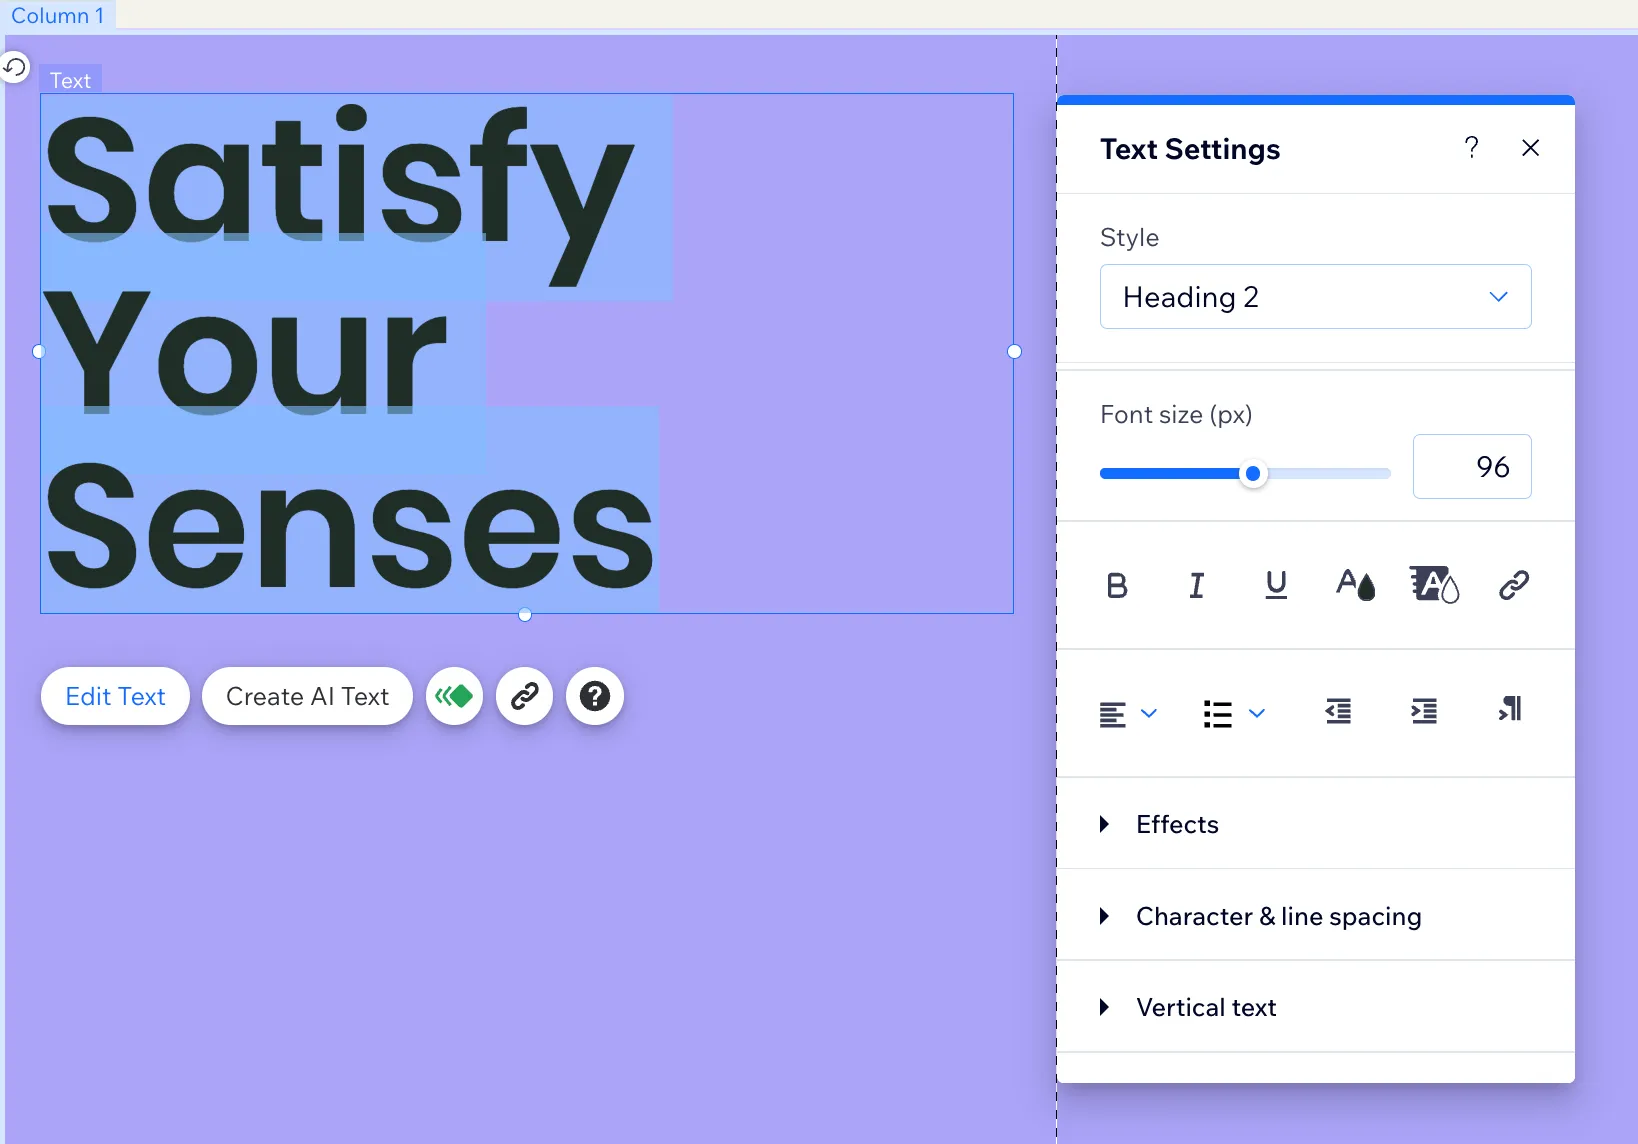
If you want to modify the main title of your website, simply double-click on it. This will open the ‘Text Settings‘ box, where you can make changes to factors like themes, bold, bullet points, line spacing, and SEO.
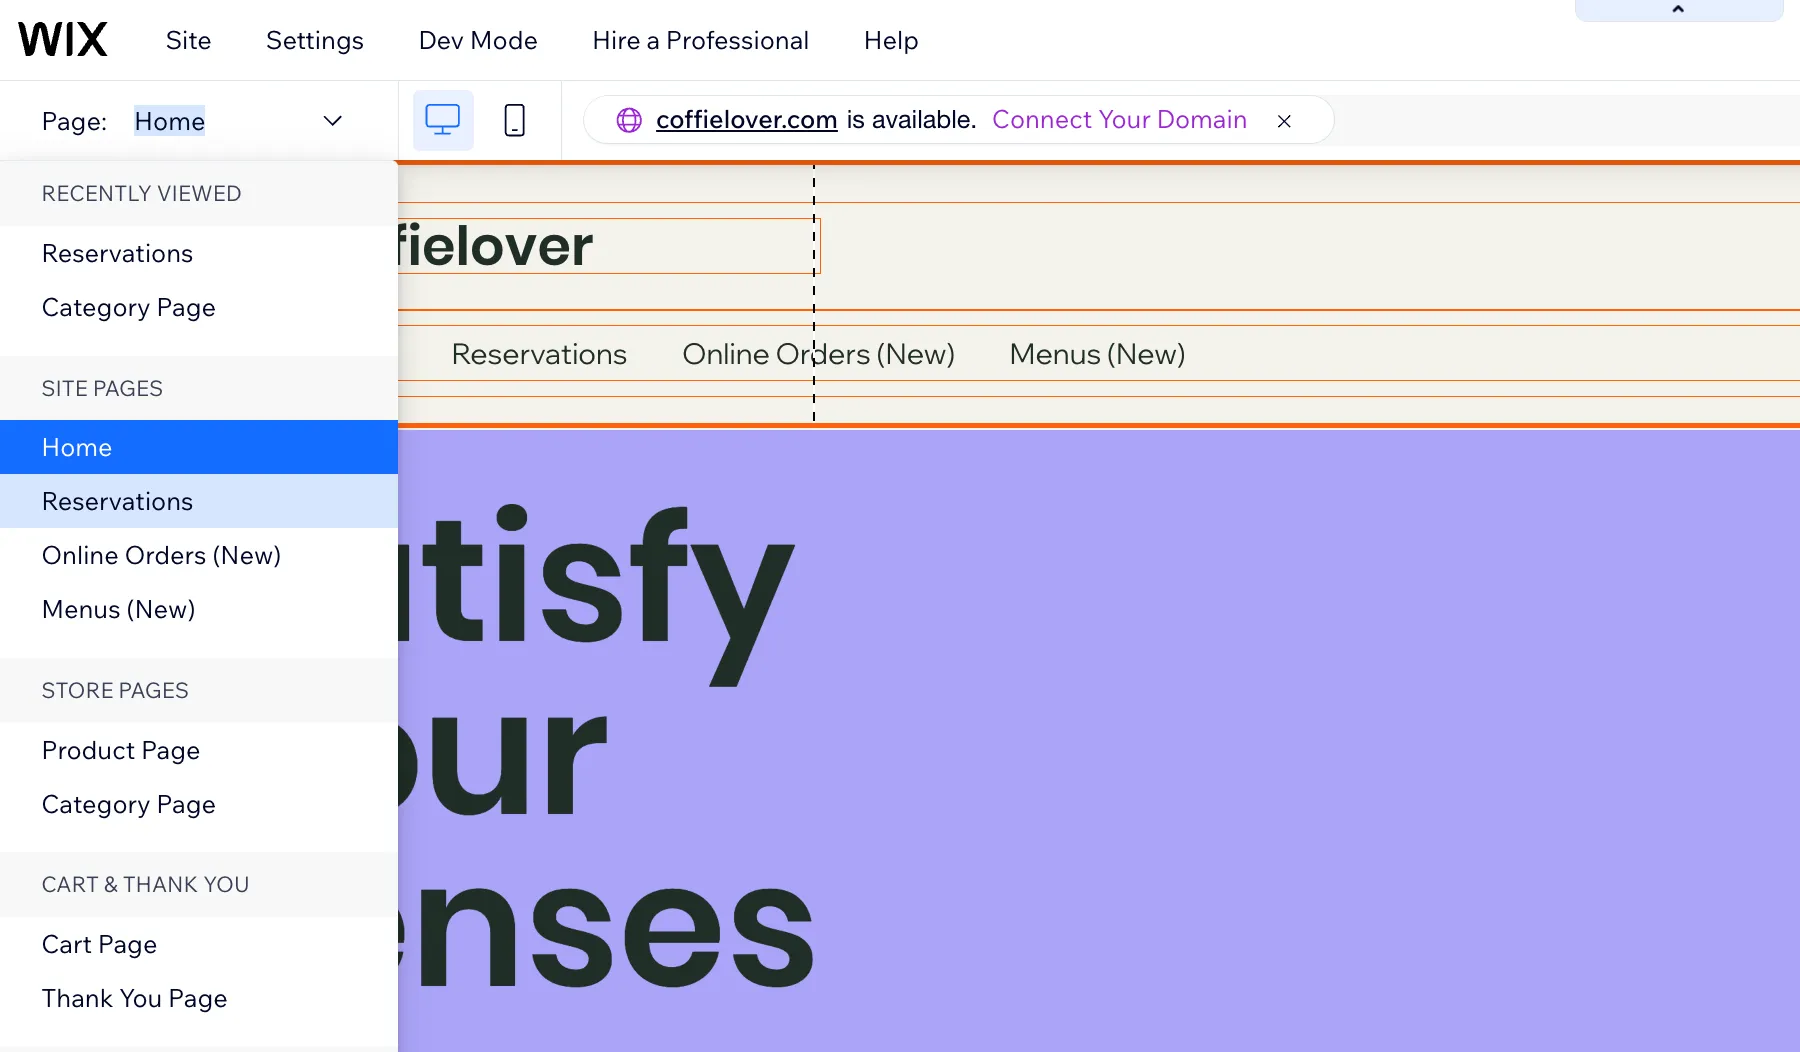
By navigating to ‘Page,’ you are able to access, manage, and modify different pages of the website, such as the homepage, blog, contact us, etc.
To add new elements to your website, go to the left menu bar and click on ‘Add Section‘. You will see a range of functional elements that can be added to your website.
You can either add a ‘Blank section‘ to customize from scratch or choose from available options like Welcome, About, Gallery, or Contact. To add, just drag and drop!
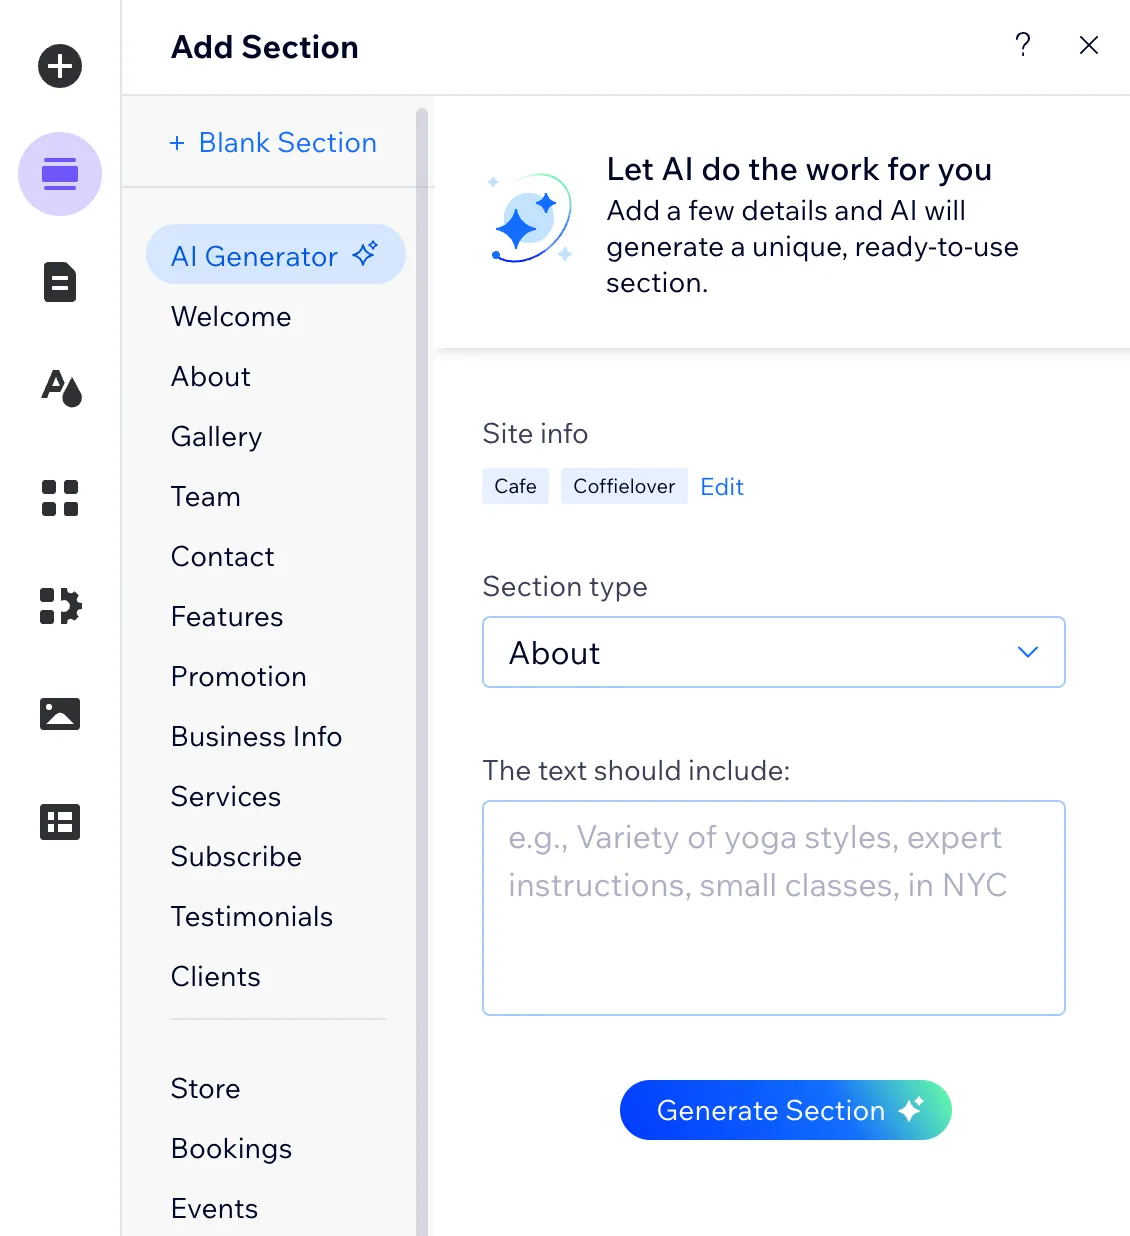
Or else, you can use Wix AI to generate content for you. Simply enter some information, and the AI will do the rest.
FYI: You can follow the same process to edit various sections of your website on Wix. This website builder is designed to be user-friendly and allows you to easily drag and drop elements to customize your site.
If you need to undo or redo any changes, simply click on the arrow-shaped icons located on the top bar.

Step 3: Add font to Wix and choose colors
It's important to choose the right color theme for your website. The color scheme should not only showcase your online brand's uniqueness but also leave a positive impression on your audience.
Thankfully, Wix offers a variety of themes with different color combinations. To access the themes, click the ‘Site Design' icon and select ‘Change Theme‘. You'll be presented with a colorful list of themes to choose from. Simply pick the one that best suits your needs.
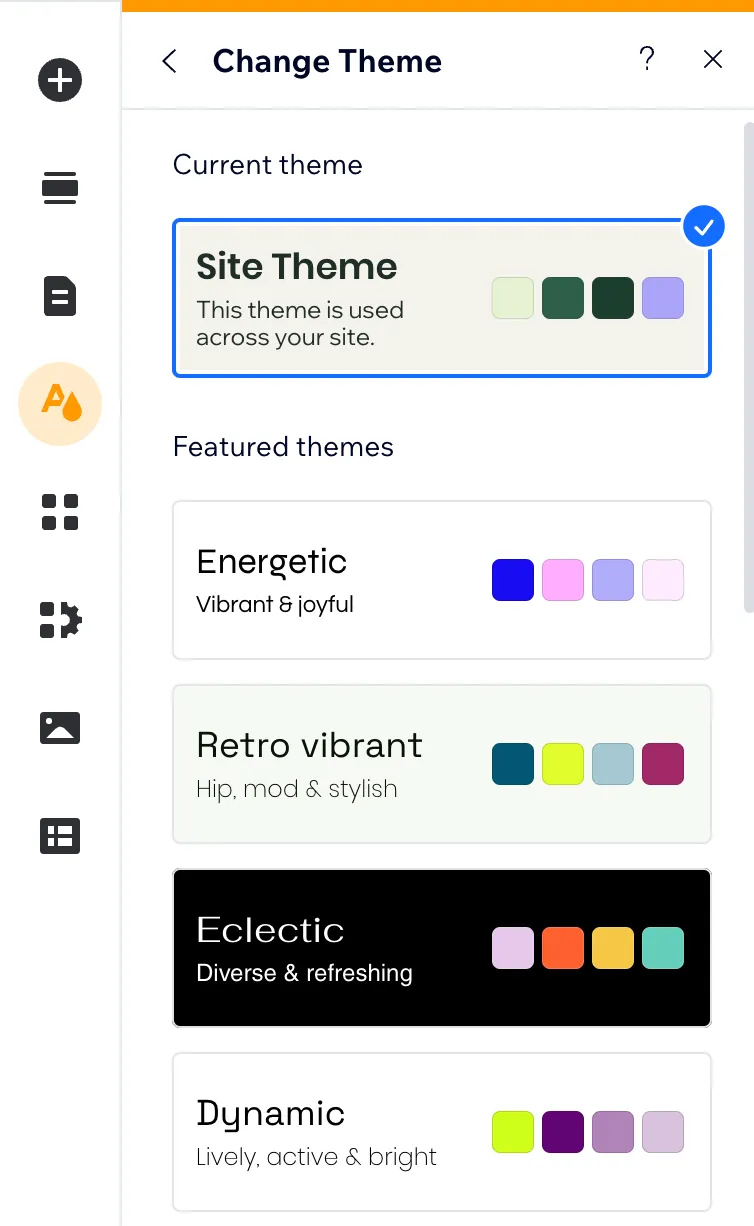
To edit your theme color on Wix, look for the button with the water droplet icon. This button allows you to adjust individual colors to your liking.
In addition to the variety of attractive theme colors, Wix offers a vast selection of fonts for your text. To change the font, double-click on any text on the screen and select the suitable font from the font list.
FYI: For a more personalized look, you can upload your own brand font to Wix.
Step 4: Upload images and galleries
Wix offers a wide range of visual materials, such as stock images, videos, illustrations, and vector art, that are completely free to use.
To access these resources, select the ‘Media’ icon on the left menu bar and scroll down to see different material categories, such as Wix images, Wix videos, Shutterstock images, and Shutterstock videos.
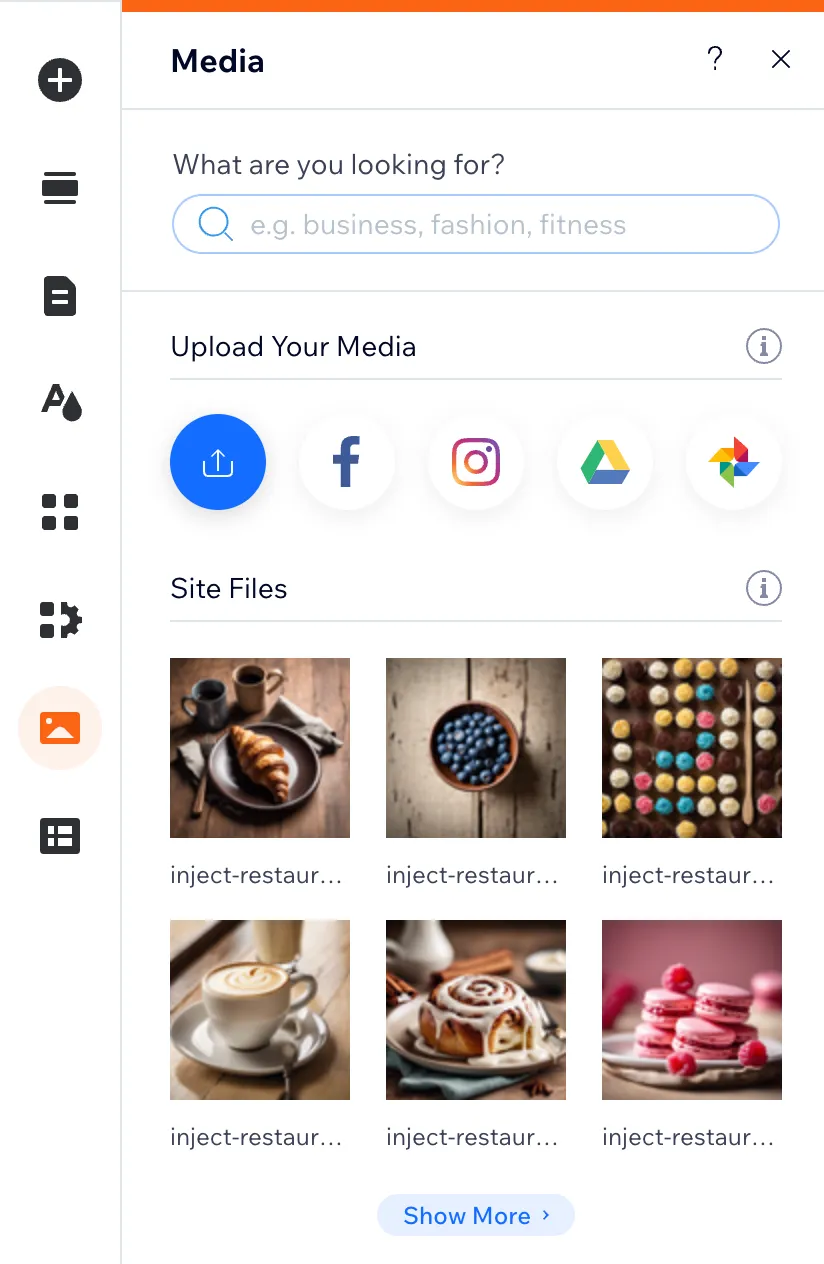
Click on the ‘Show More’ button to see each of them in detail. This will take you to a single collection where you can explore and use the visuals that best suit your needs.
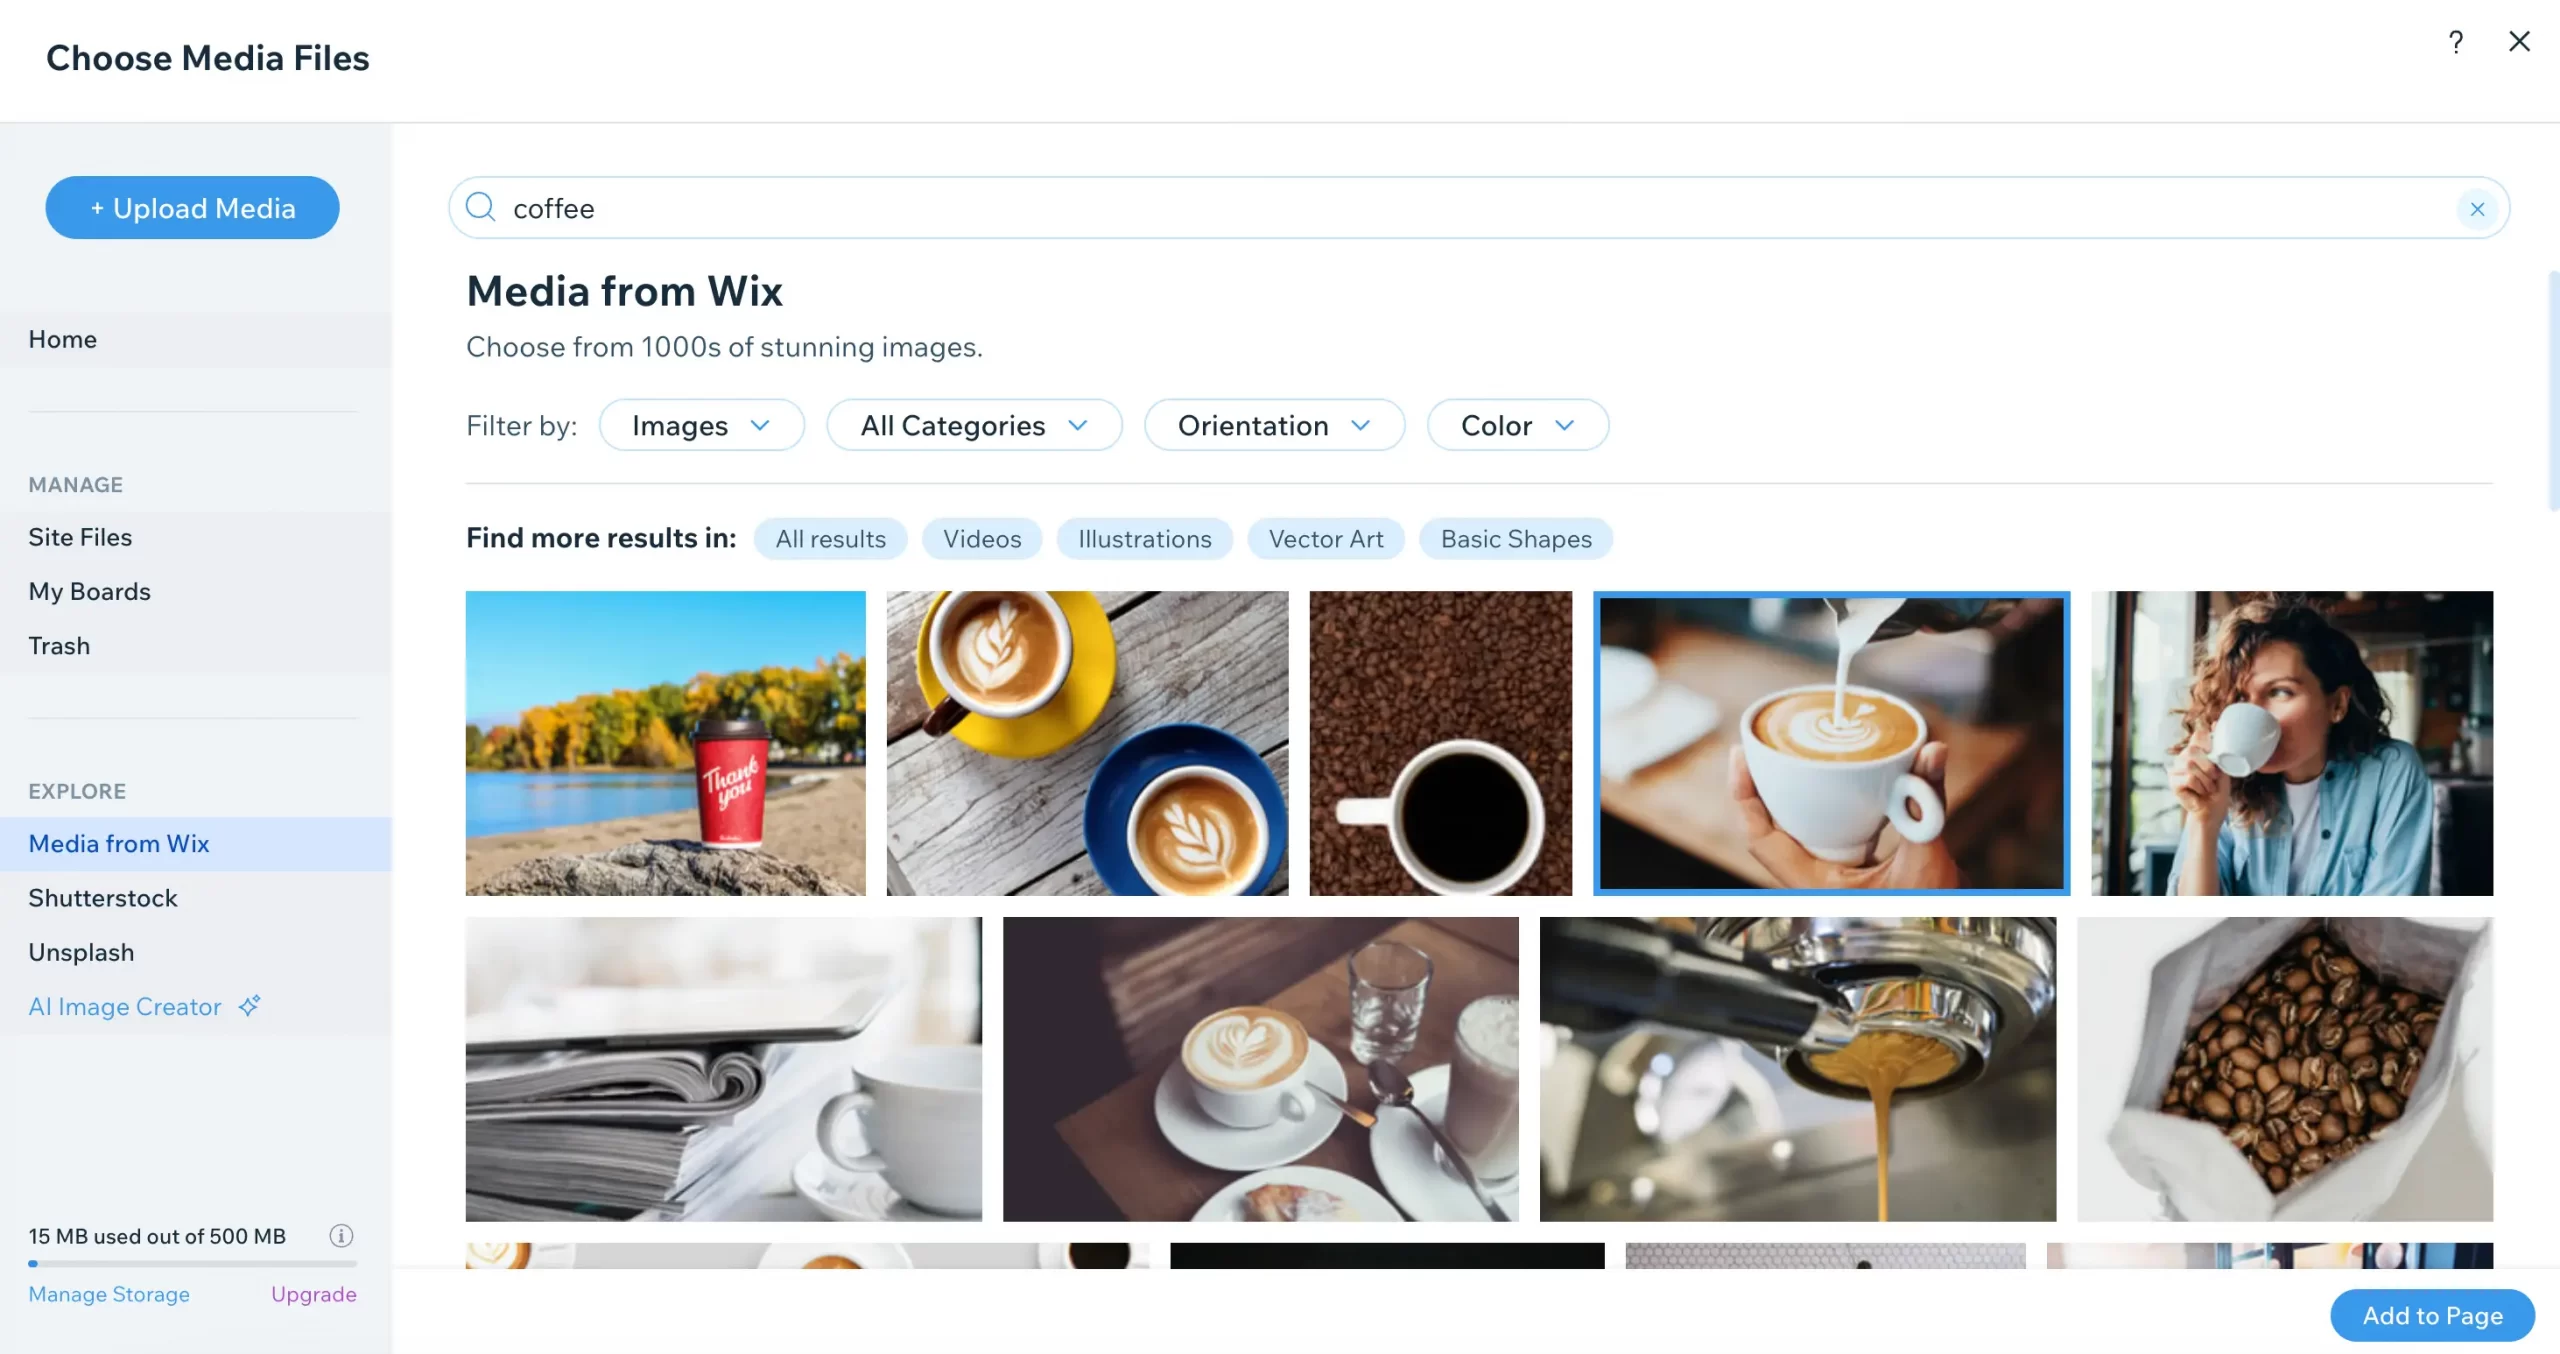
To choose an image from the album and publish it on your website, simply click on your favorite image and select ‘Add to page’.
Wix also provides an option to directly pay for Shutterstock each time you choose an image from them. If you would like to upload and use your own media materials, click on the ‘+ Upload Media’ button.
Consider adding an image gallery to enhance the visual appeal of your website and attract more traffic. Navigate to ‘Add Element‘ > select ‘Gallery‘. You will be presented with 5 different gallery templates:
- Recommended: 2 templates for creating image galleries.
- Pro Galleries: 10 templates to display all elements, such as photos, text, and videos.
- Grid Galleries: 4 templates to divide your gallery into different sub-boxes.
- Slider Galleries: 3 gallery templates to display your images one by one, just like a presentation slide.
- More Galleries: 6 other galleries with interesting effects and 3D animations.
Just drag and drop a gallery template from the category to where you want it to appear on your page, and you'll have a stunning gallery within minutes.
Step 5: Edit Pages and Menus
Next on Wix tutorials, navigate to ‘Sites Pages and Menus‘ option to create pages for your website.
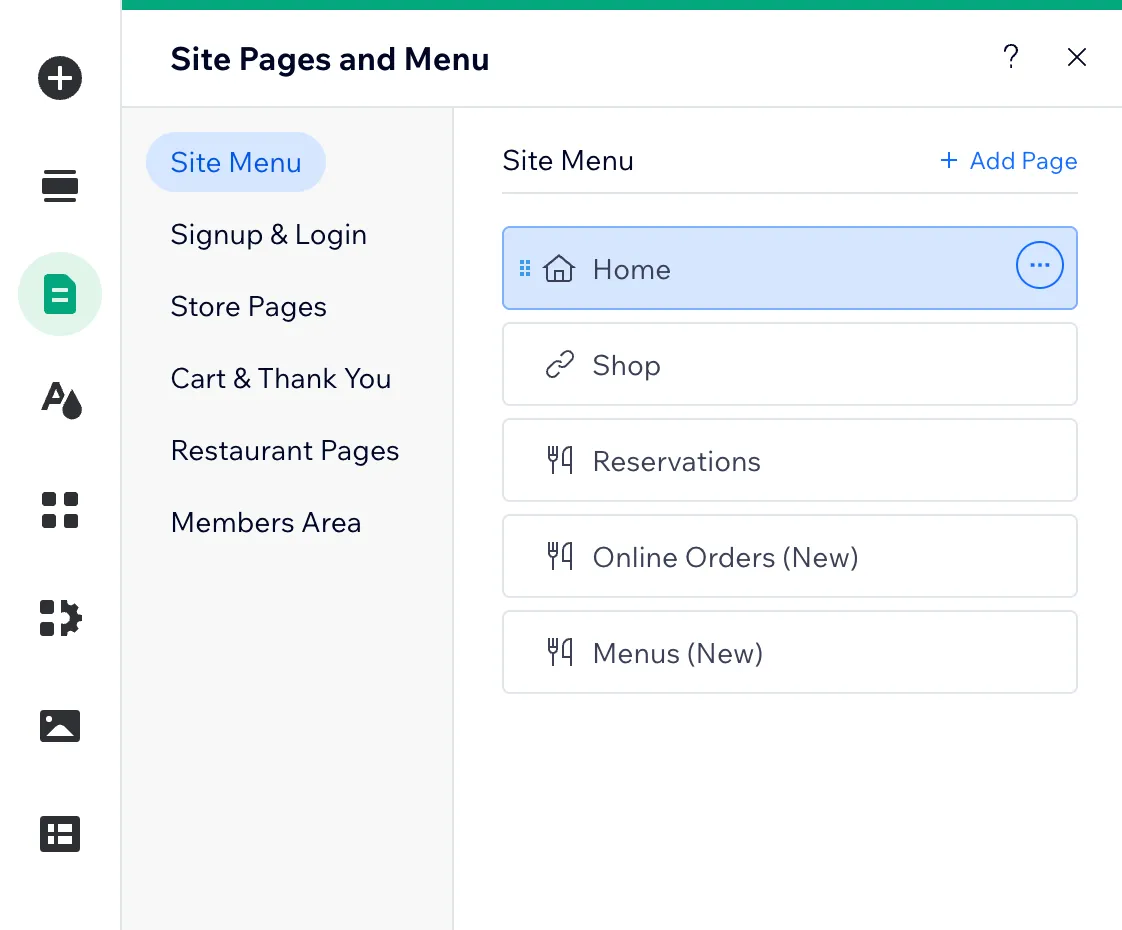
First, go to the ‘Site Menu‘ section and click ‘+ Add Page‘. Then select the page you want to edit and make changes to the text and elements as needed.
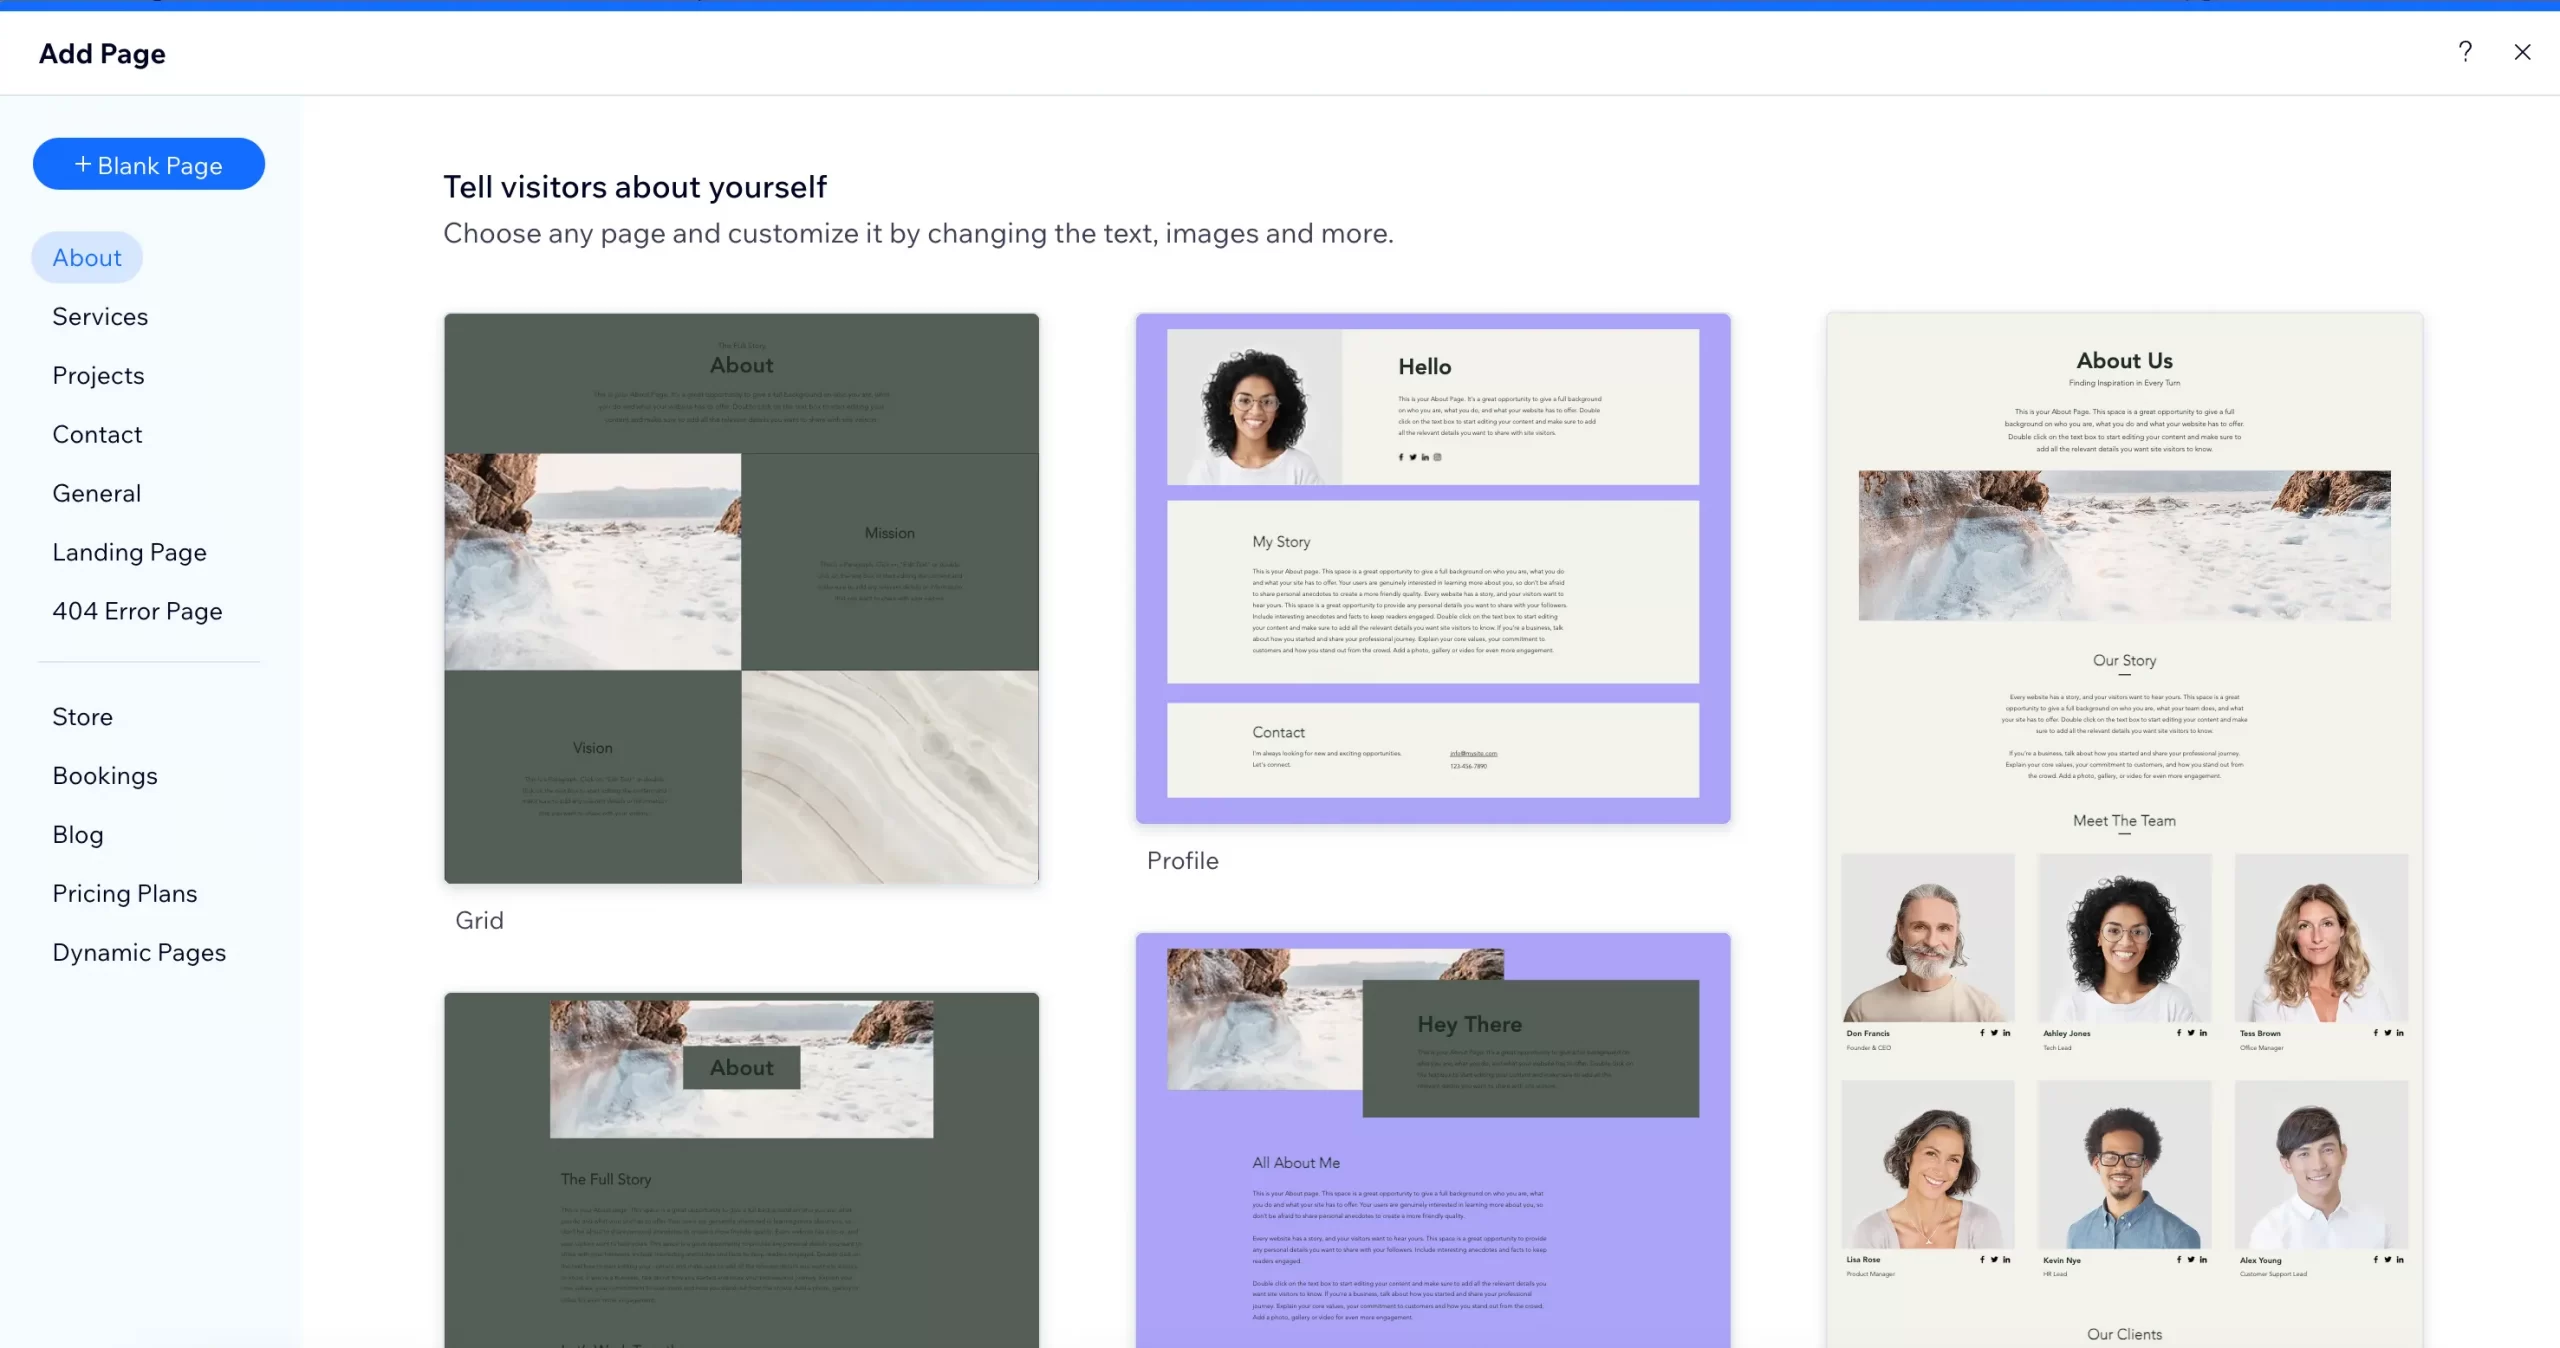
Otherwise, you can choose any available template for your new page or build it from scratch by selecting ‘+ Add Blank Page’.
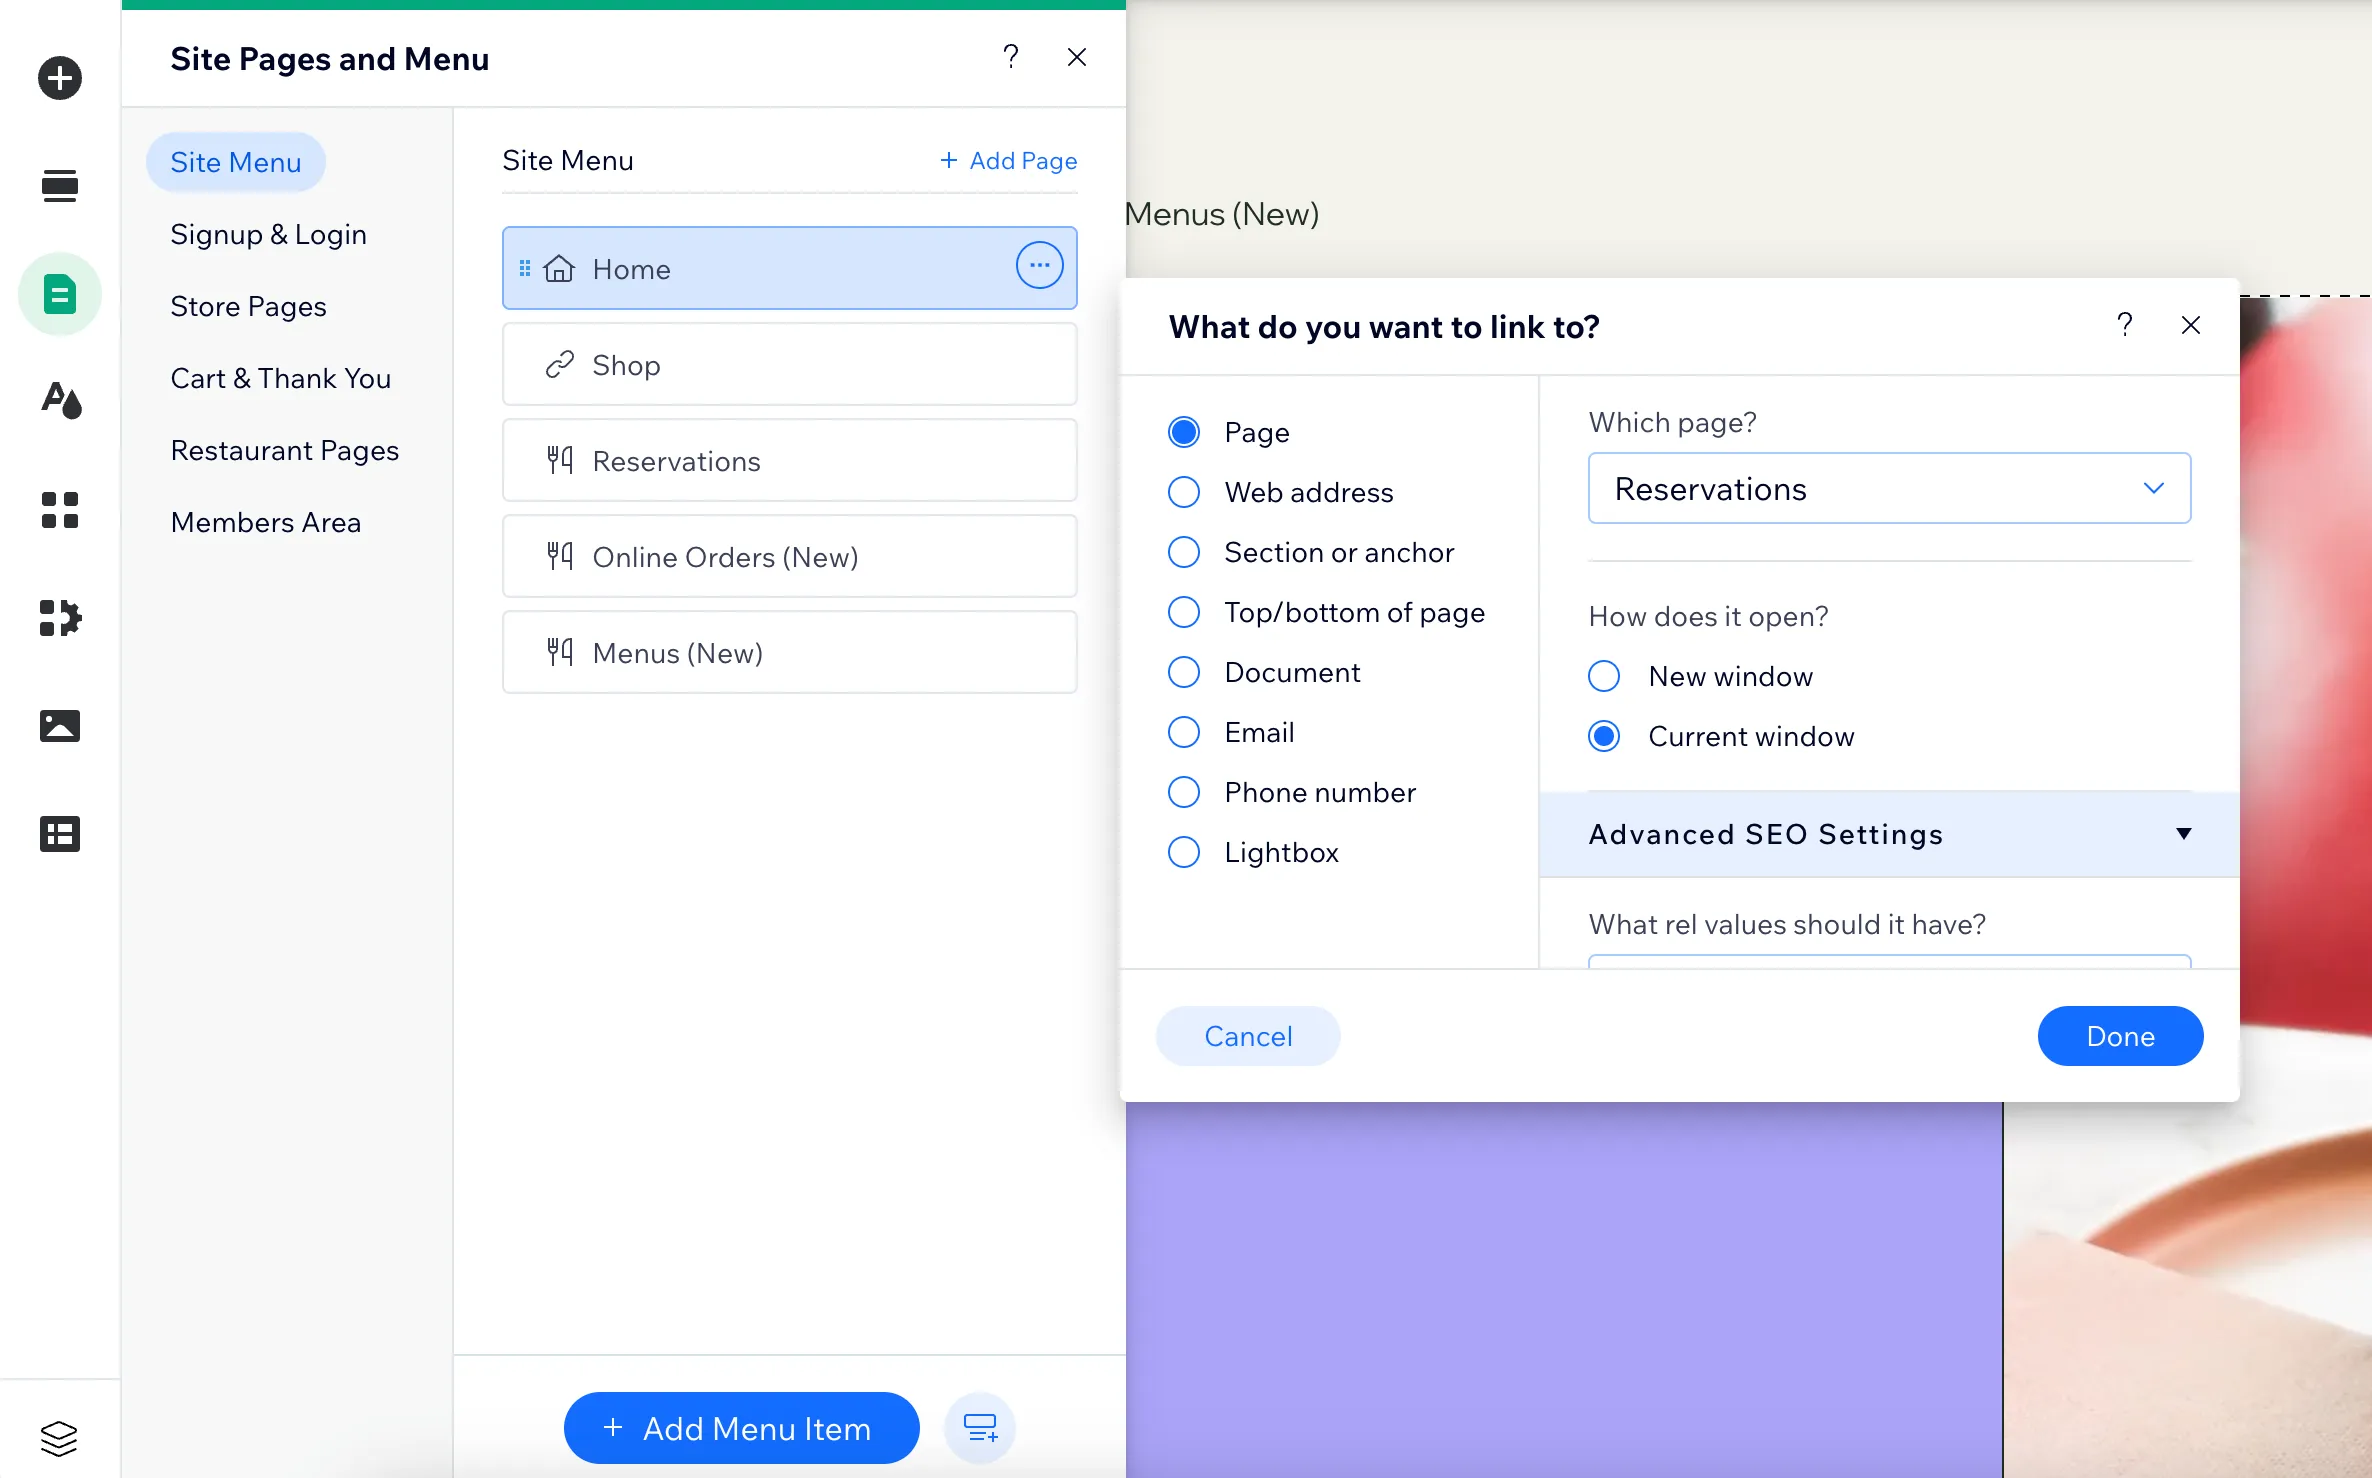
Now is for the Menus section. By clicking on ‘+ Add Menu Item’, you can easily create a new Menu section by modifying page linking directories and SEO factors.
Step 6: Add Wix Blog
*Note: If you can't find the Wix Blogs section, you can add it to your Wix site from the App Market.
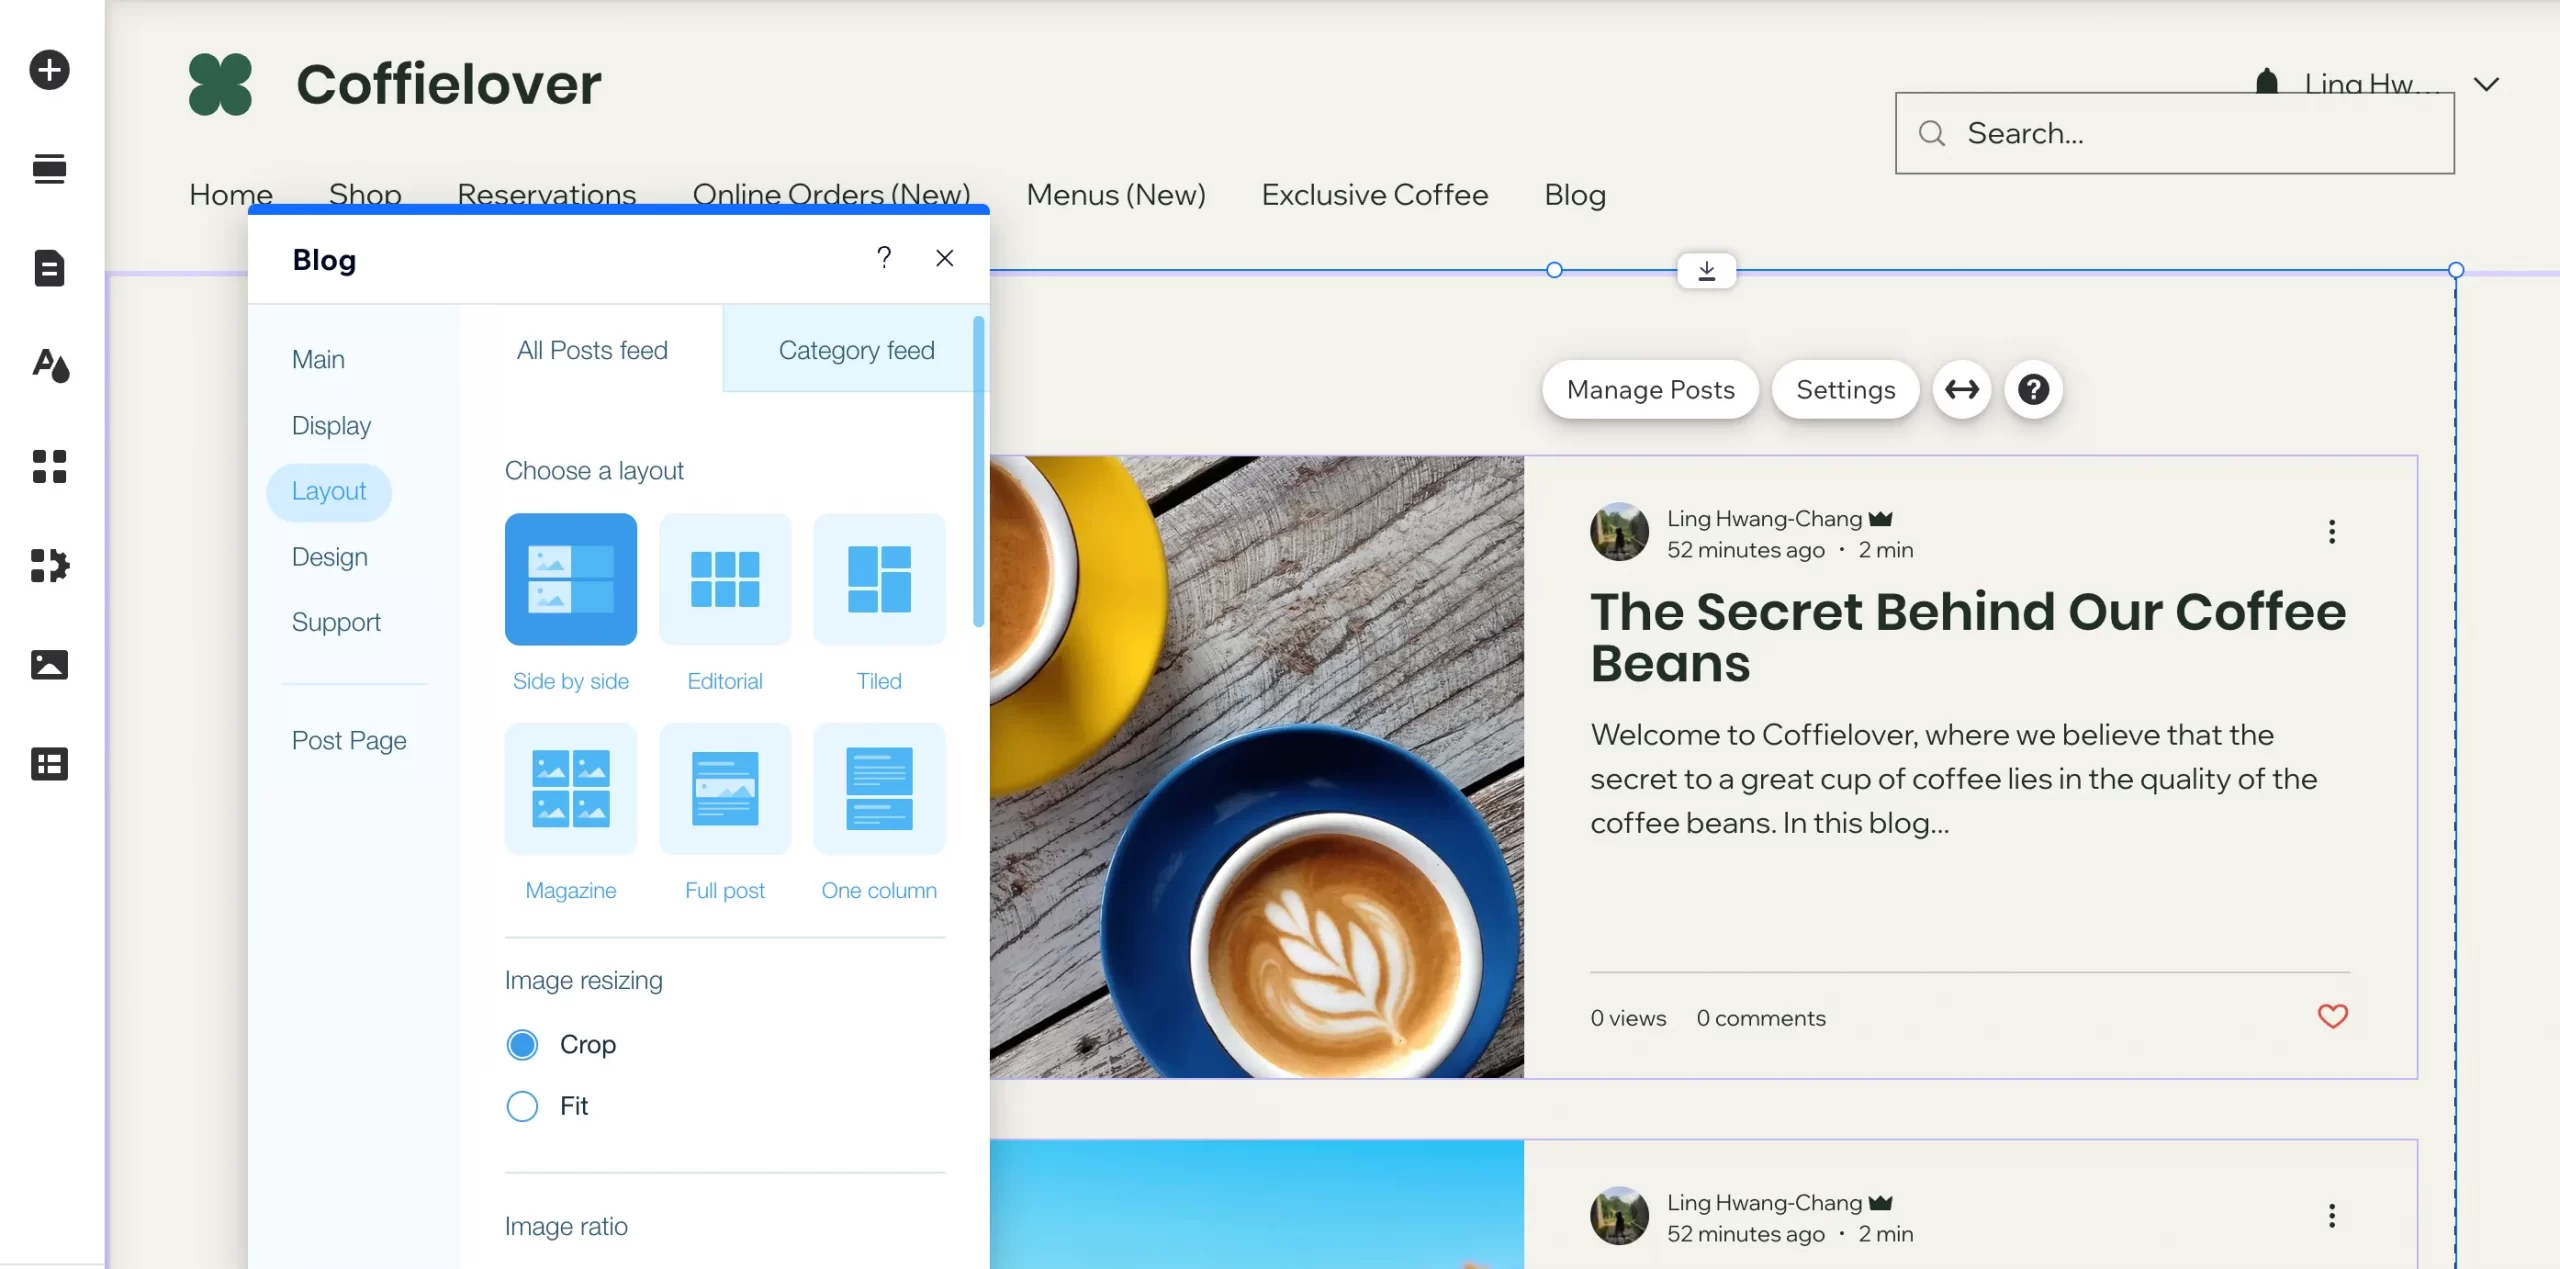
Next, on our Wix website builder tutorial, let's learn about Wix Blog. To add a new blog post to your Wix site, first, go to ‘Settings’ and you will see ‘Blog‘ section and then click on ‘Create a Post‘.
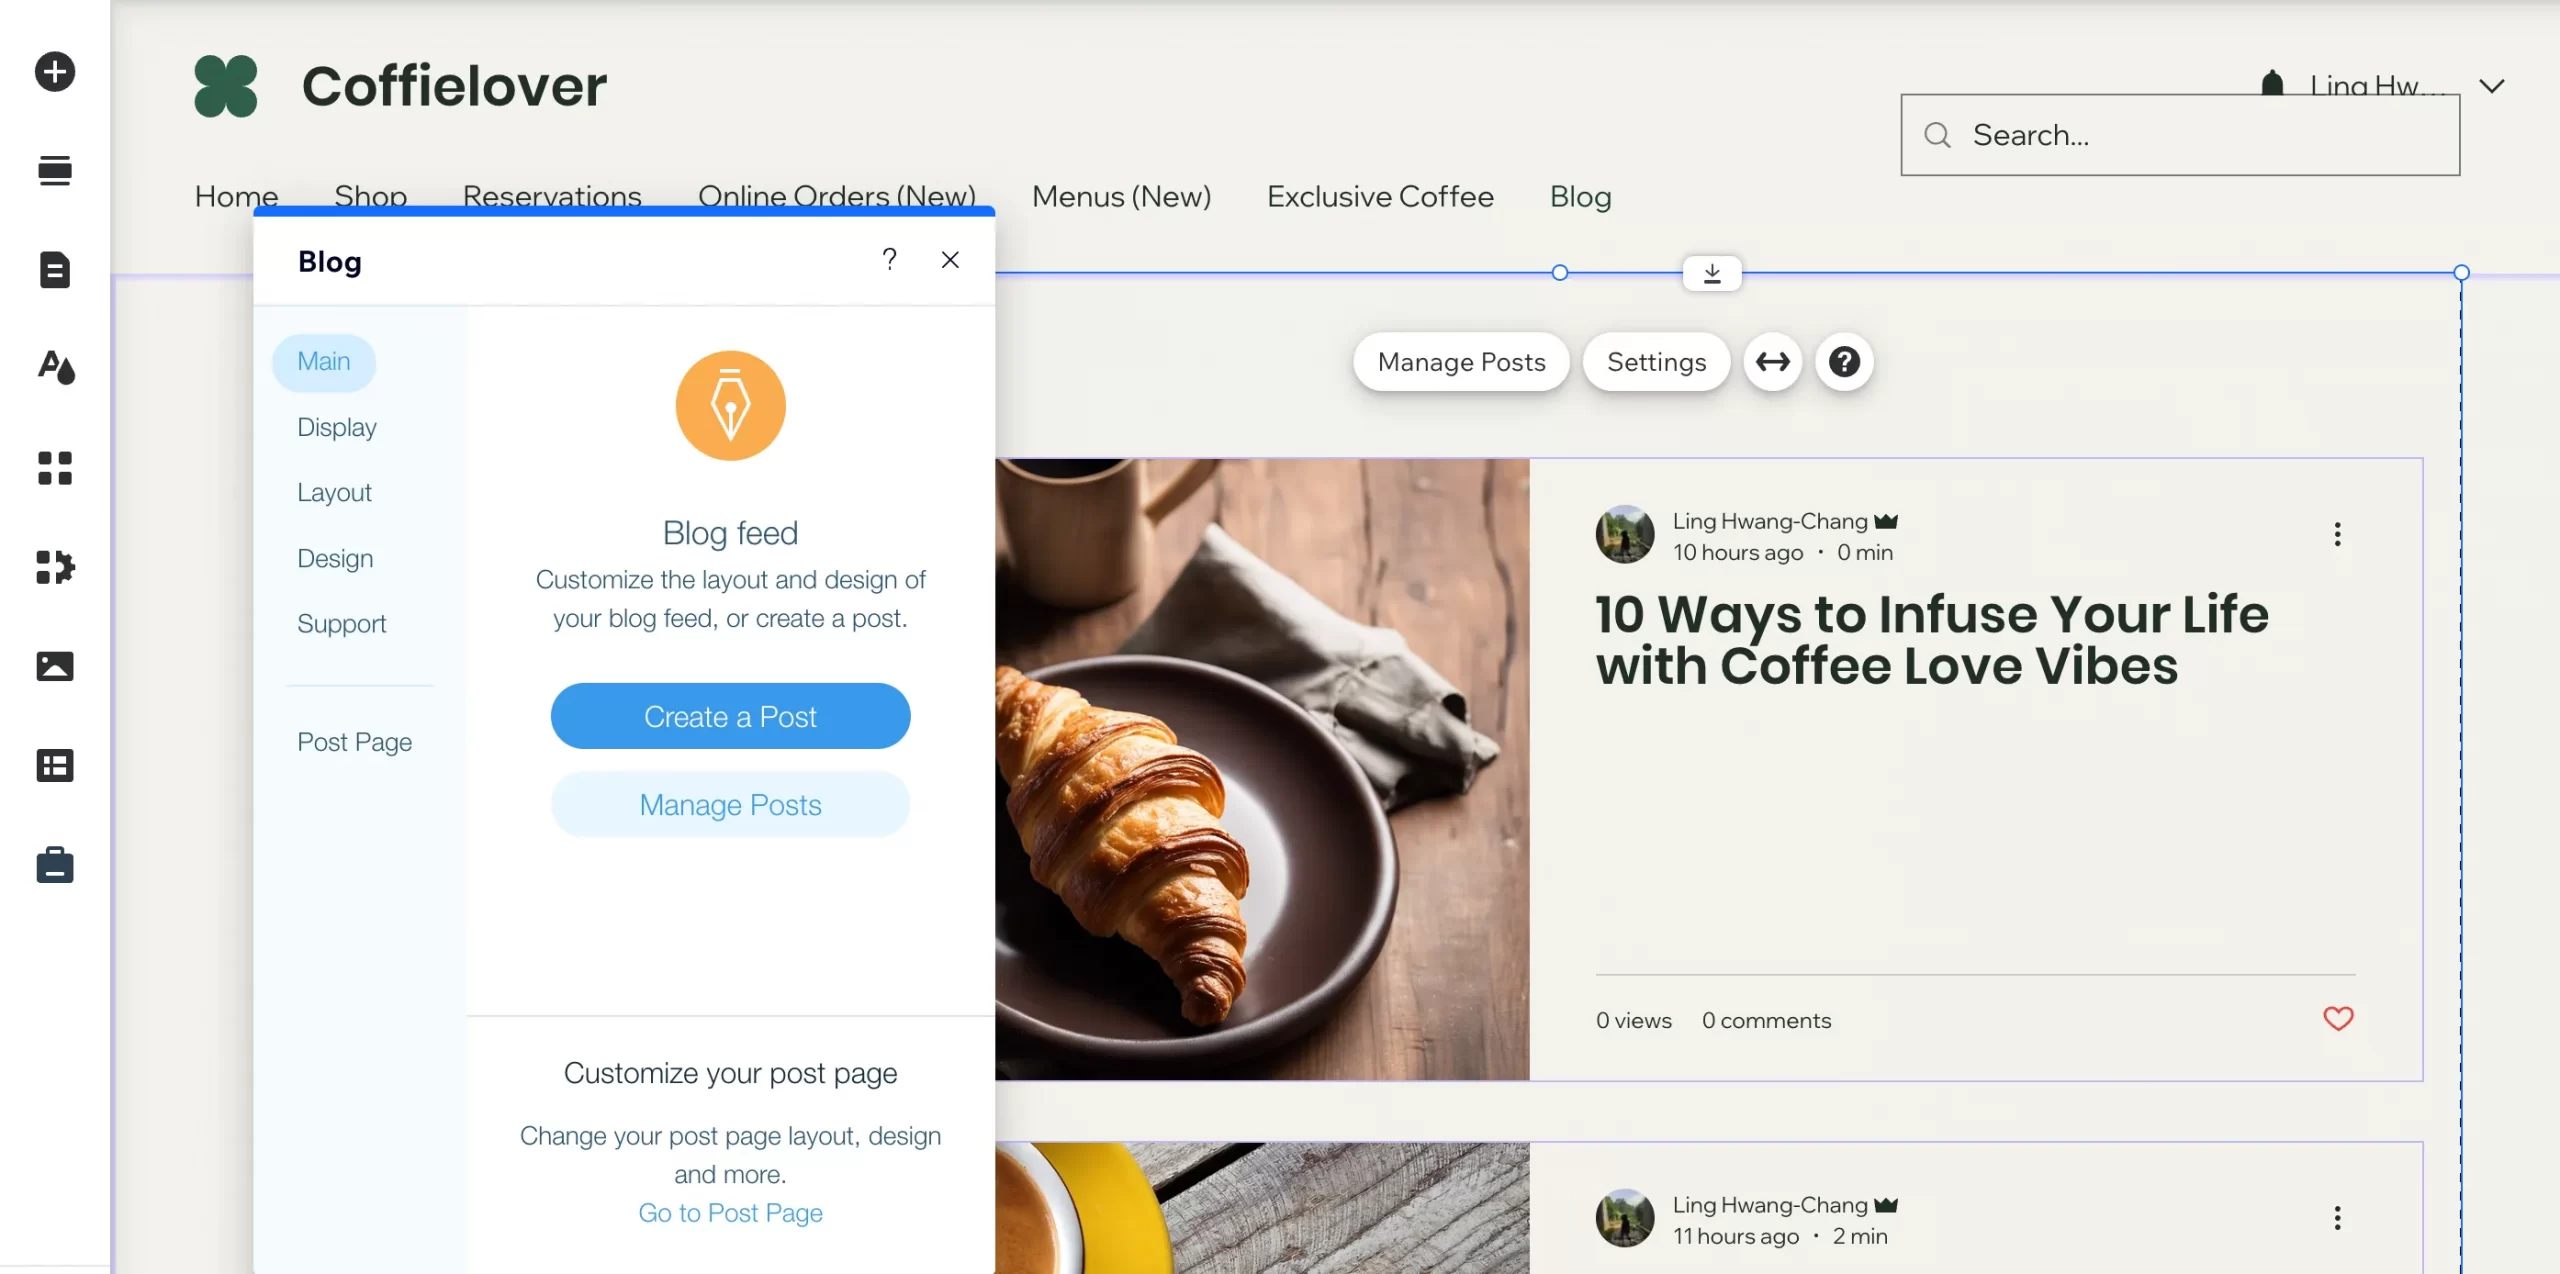
Now, you can easily create your own blog with the support of AI, SEO settings, and all blog functions available (you can discover all later in this section).
If you want to manage your blog, then select ‘Manage Posts’. Subsequently, the dashboard will clearly display all the status of your posts, such as published, drafts, scheduled, and trash.
Or, if you’re about to customize the Blog section's design and appearance, you can freely do so by moving around the Display, Layout, Design, or Support section.
Step 7: Edit Wix Online Store
Did you know that Wix hosts more than 3 million live stores? (Source: BuiltWith) This impressive number showcases the platform's popularity. When it comes to eCommerce, Wix has a core advantage over other platforms such as Shopify or Squarespace, its simplicity.
With Wix Online Store, you get access to features like store management, store analytics, and digital marketing, which make it easy to operate your online store. If you want to learn more, you can read a Wix eCommerce review here.
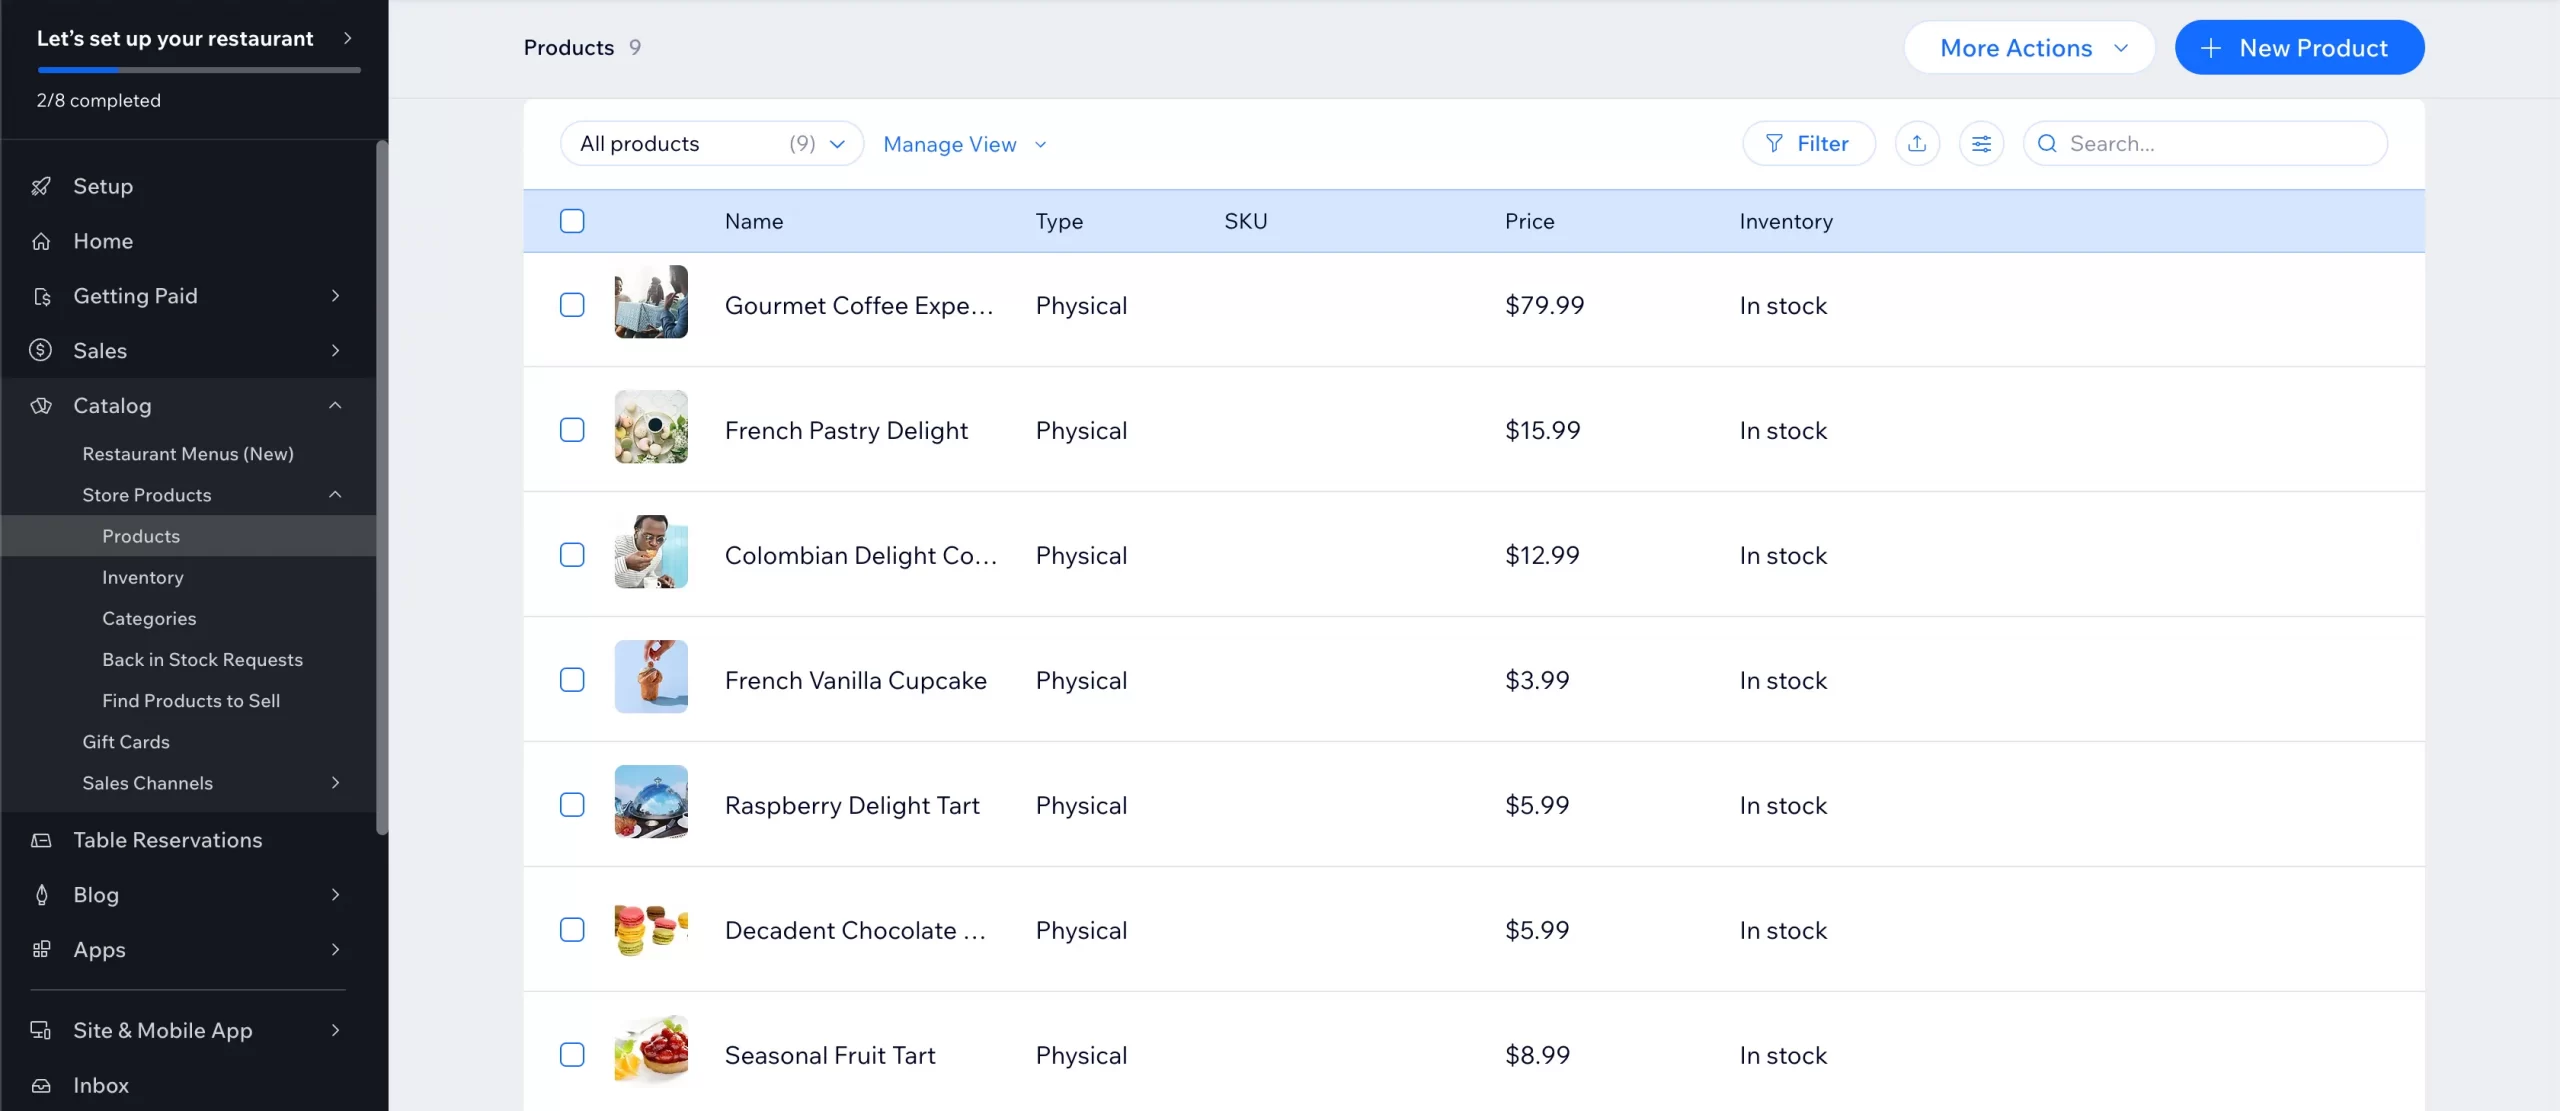
In addition to these features, Wix also offers a variety of website templates and additional features that can be added to your website.
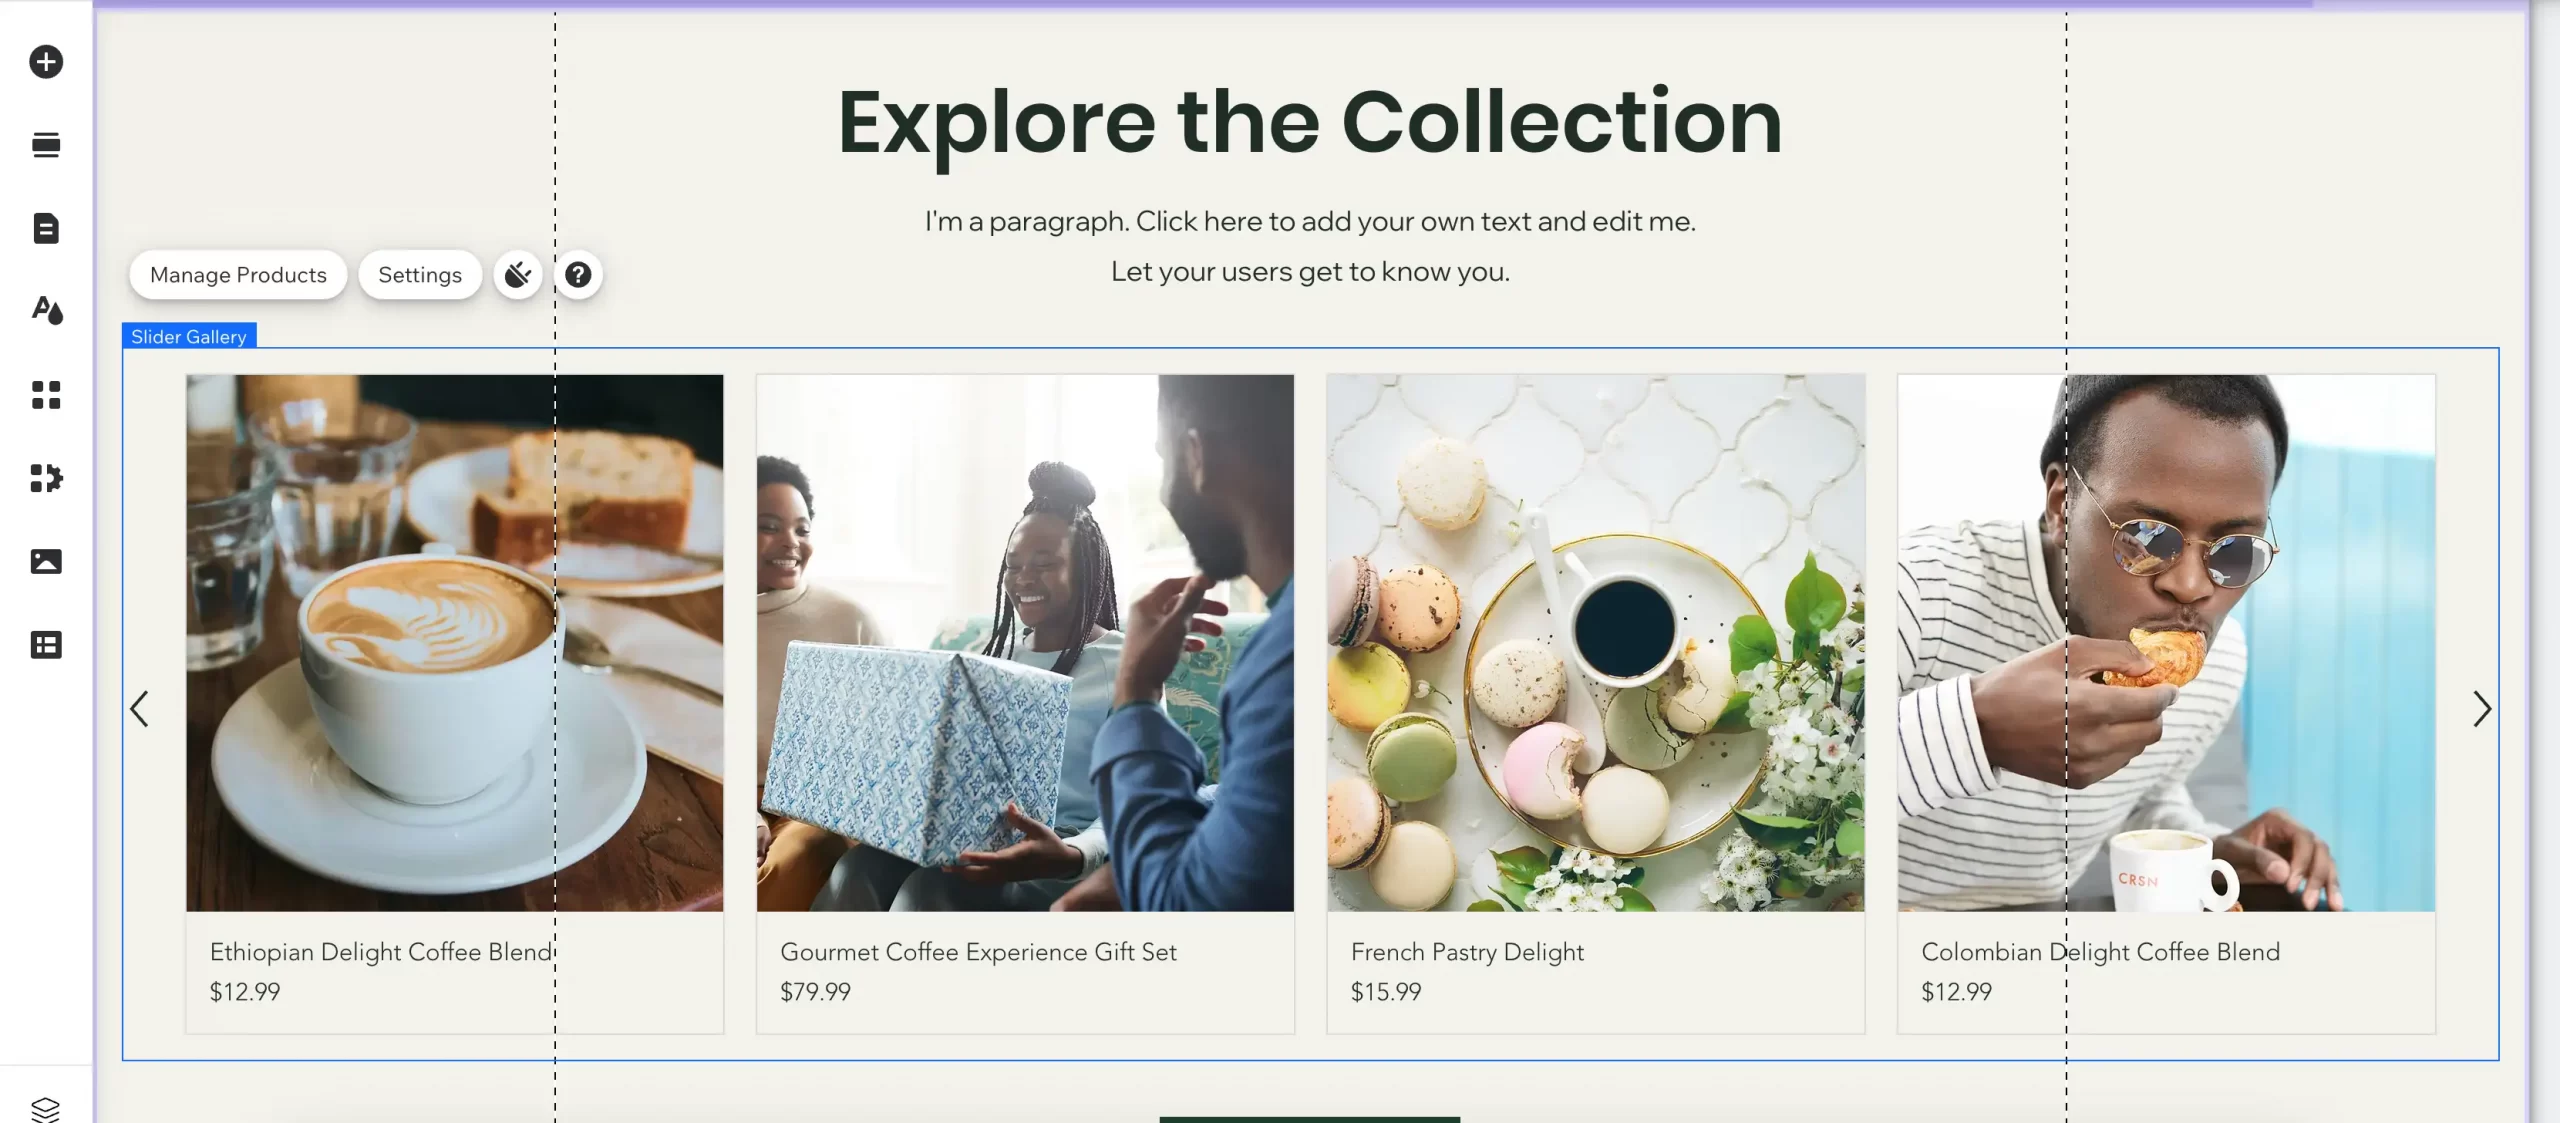
Whether you're starting a new eCommerce business or already have an online store, Wix is a great option for you.
Step 8: Make the Wix site responsive
According to Deloitte, reducing mobile site speed by just 0.1 seconds can lead to an 8% improvement in bounce rates. In Wix tutorials, we strongly highlight the importance of optimizing your website's mobile friendliness.
So how to create a website on Wix and make it mobile responsive?
Thankfully, Wix offers an easy solution by allowing you to switch your web interface from desktop to mobile view. Simply hover over and select the mobile icon on the top horizontal bar to see your website from a mobile screen perspective.
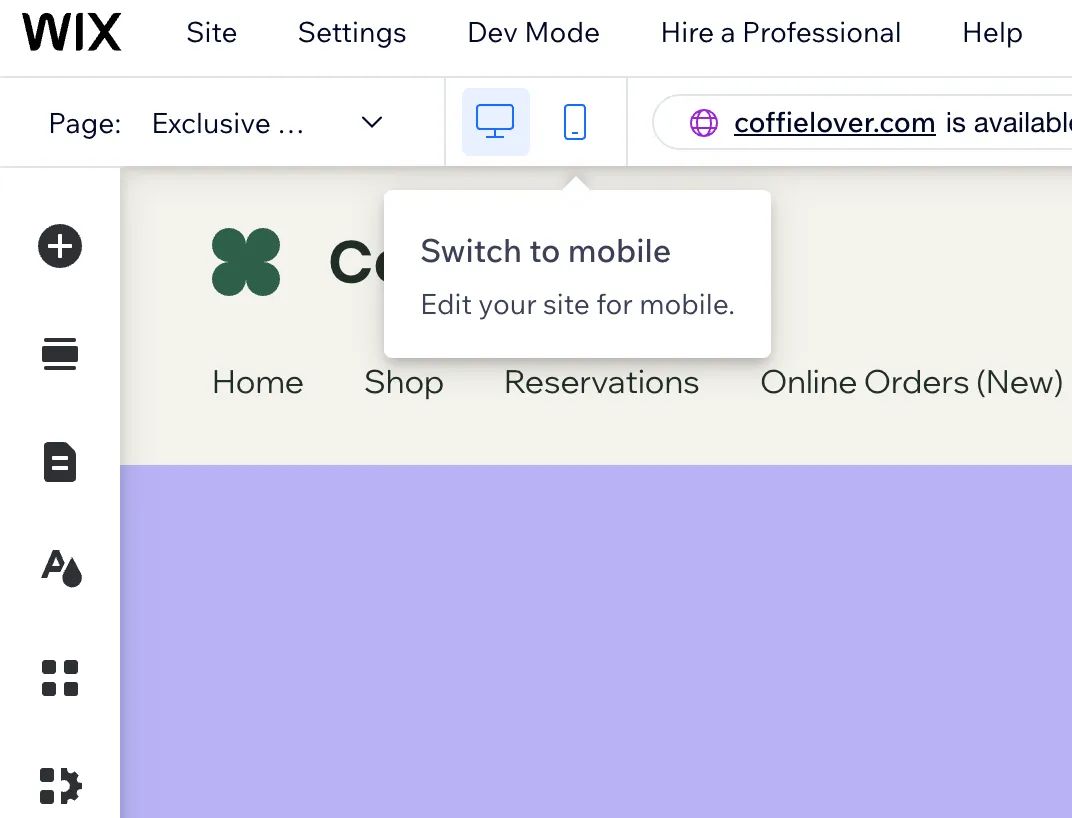
Once you've switched to mobile view, you can edit your site's mobile responsiveness to ensure it's optimized for mobile devices.
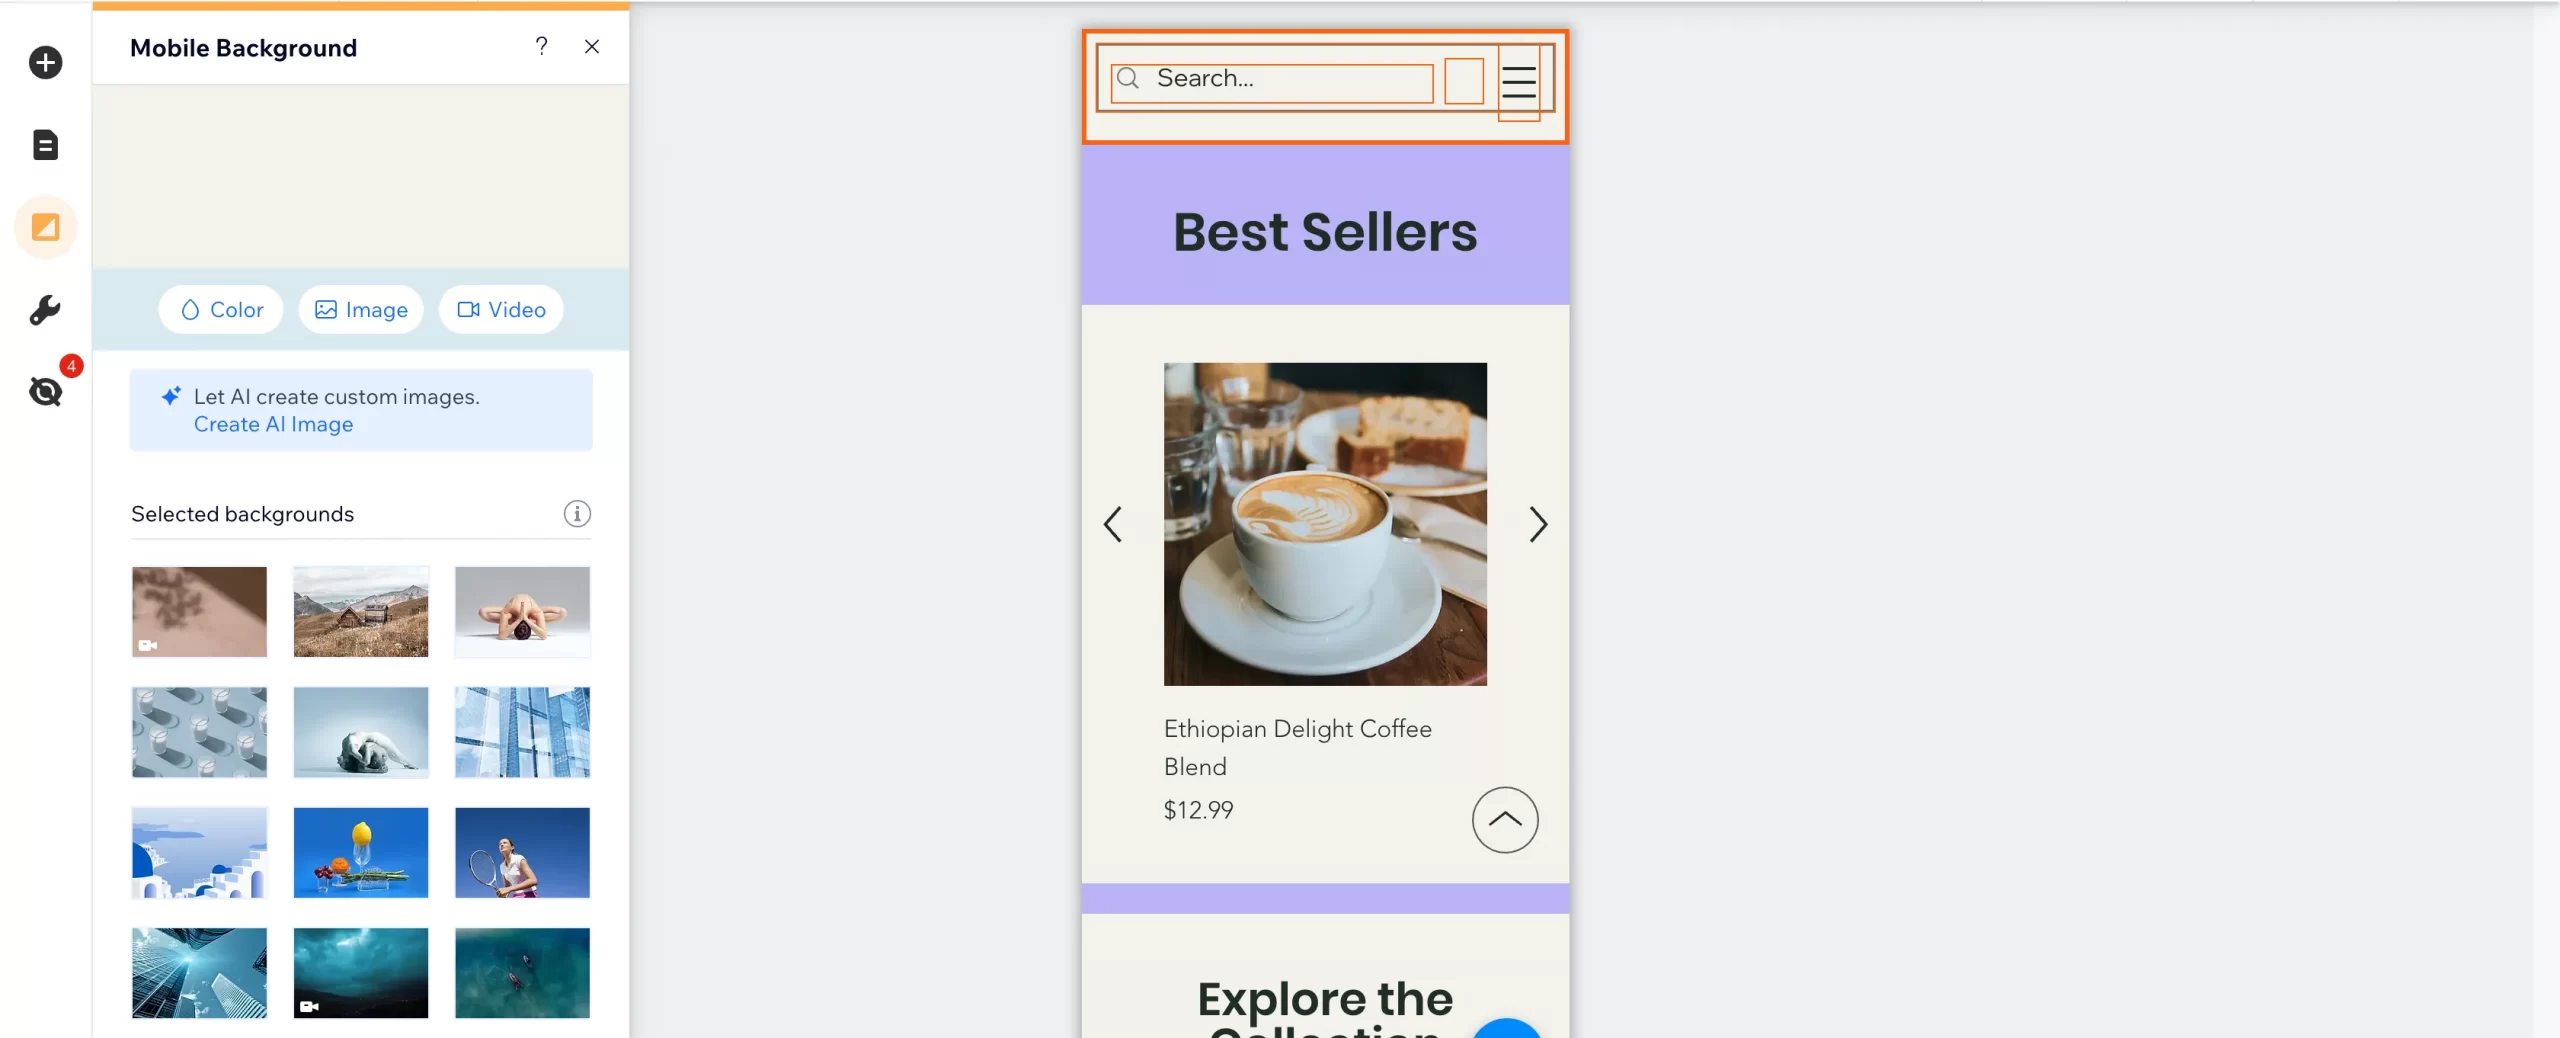
Especially, with Wix's mobile editor, you can make changes and add components without affecting the desktop version of your website.
And that concludes all the important Wix tutorials on website visualization.
Editor’s thoughts: I believe that the Wix website design is user-friendly and comes with strong AI support. In my experience, Wix provides excellent design options that cater to all my needs while providing full support.
However, if I had to point out a downside, I would say that the time taken to edit the website can be a bit long, and the editor may become laggy when working with many elements.
Stage 3: Final Steps to Get Wix Site Ready to Publish
We are now at the final stage of the Wix tutorials. Let's get ready to publish your beautiful website.
Step 1: Add more apps
Wix has an app market that offers a plethora of apps to customize your Wix site and make it more powerful. To access the app market, simply select ‘Wix App Market‘ on the left side of your screen and start searching for the functionality you want to add to your site.
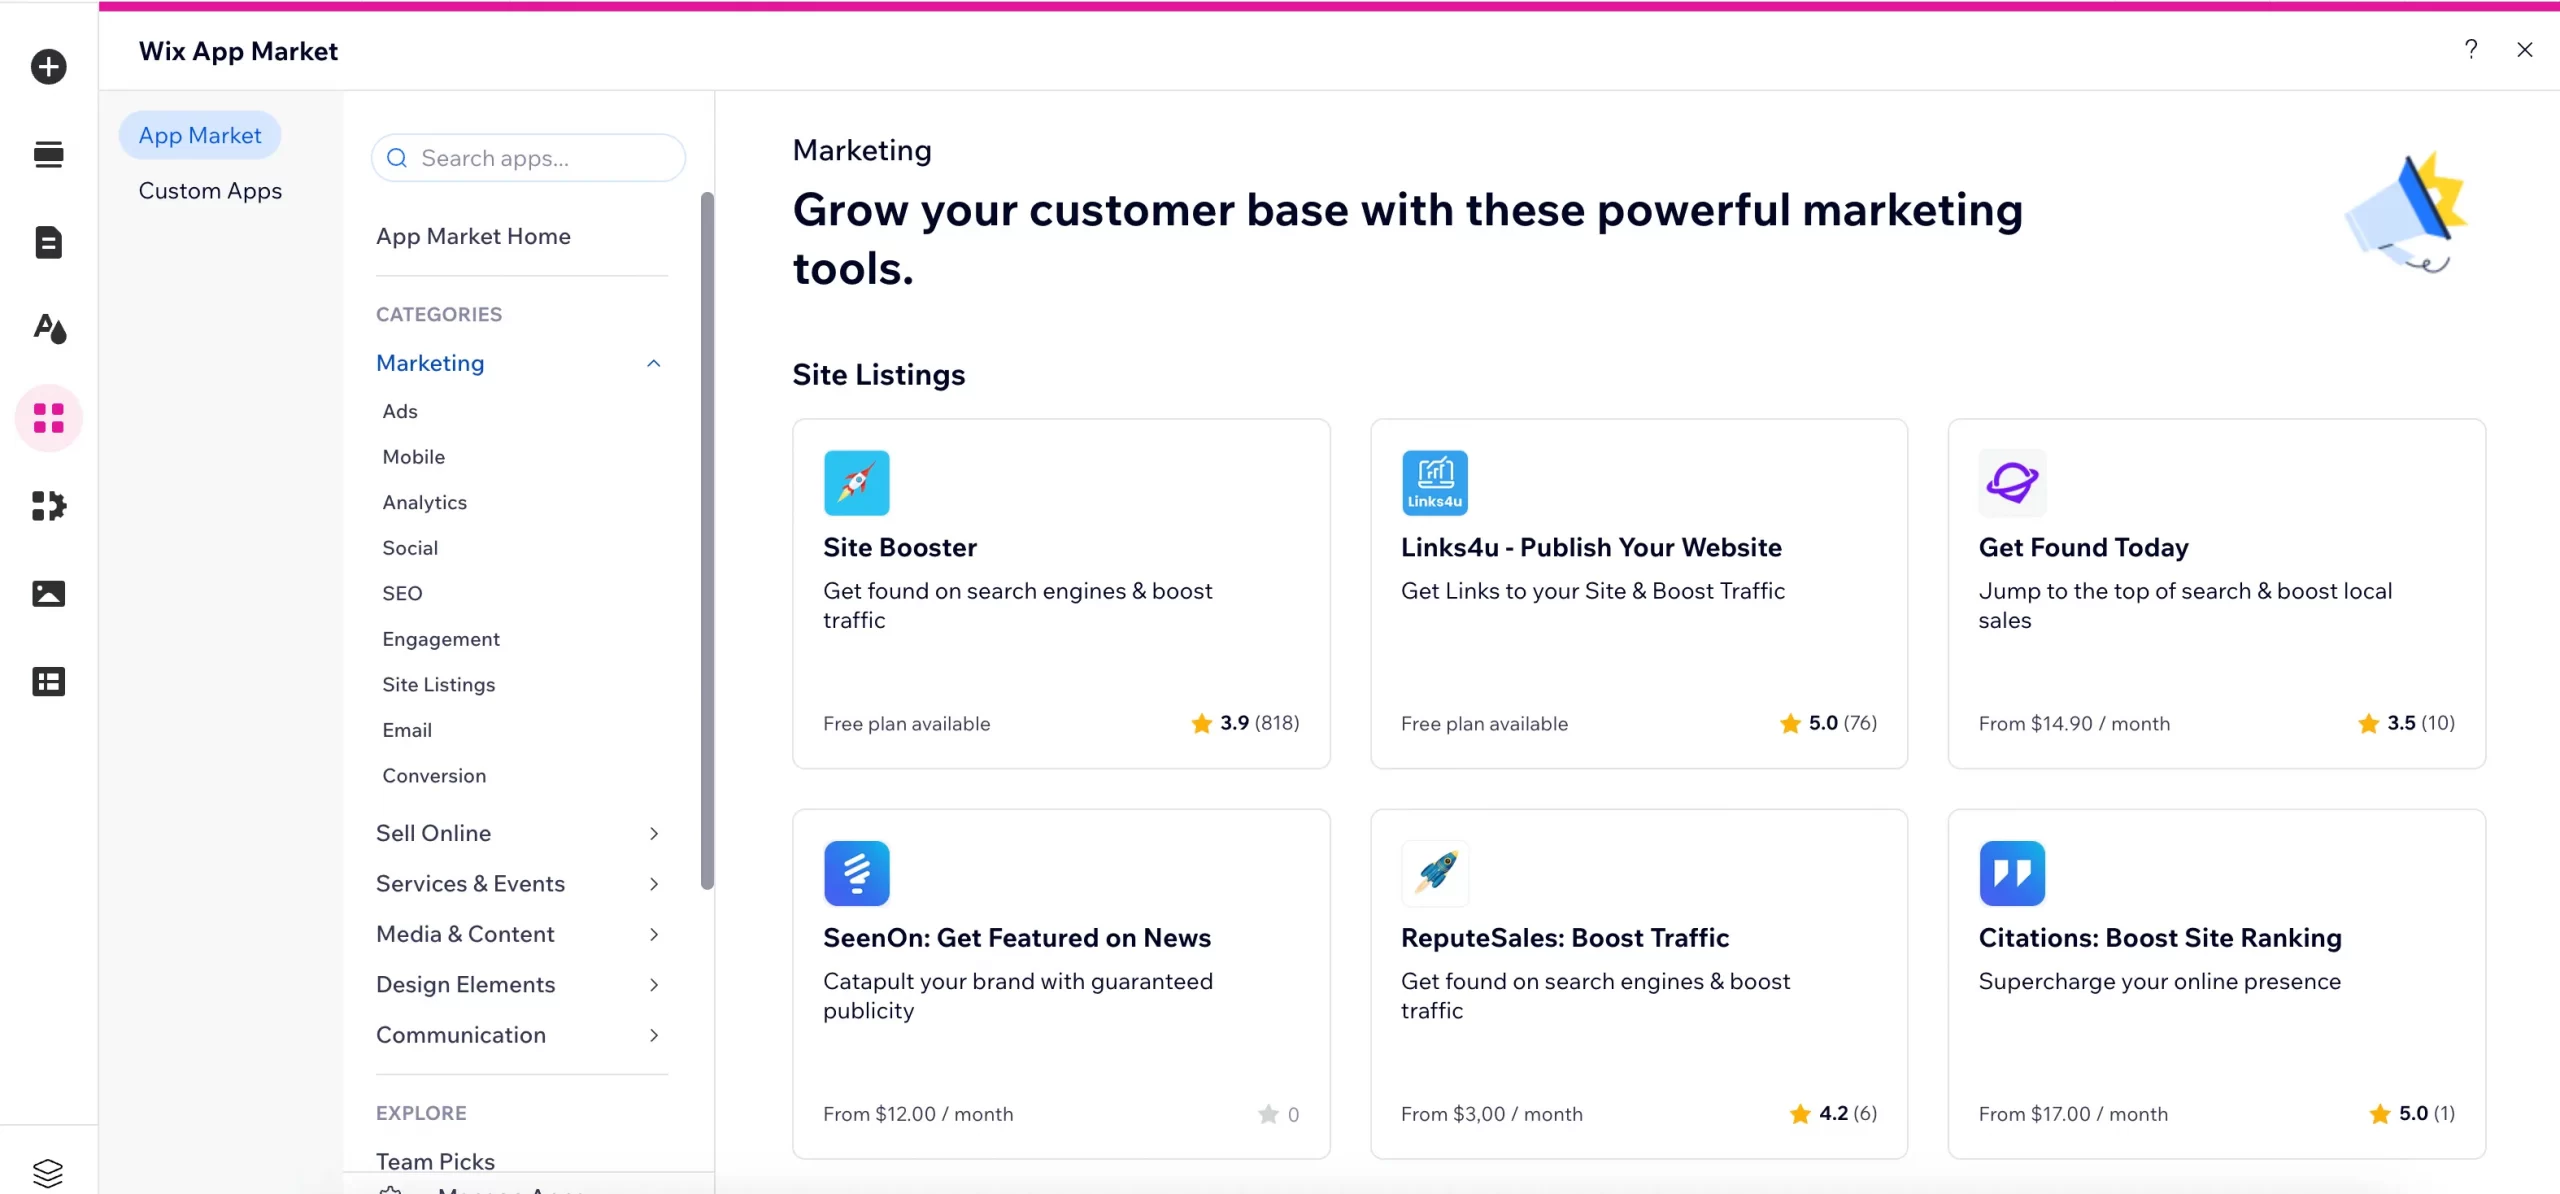
The installation process is very simple: To activate an app on your website, you only need to click on it and choose ‘Add to Site’.
Step 2: Optimize Wix site for search engines
The Wix team has put in a lot of effort to enhance their SEO feature to compete with WordPress and Weebly. This feature covers basic SEO functions like meta title, meta description URLs, image alt, and so on.
To optimize SEO for each page of your website, follow these steps: select ‘Menu & Pages‘ and click on ‘Site Menu.' Then, hover over the page you want to change, choose the circle icon in the right corner, and select ‘Settings‘.
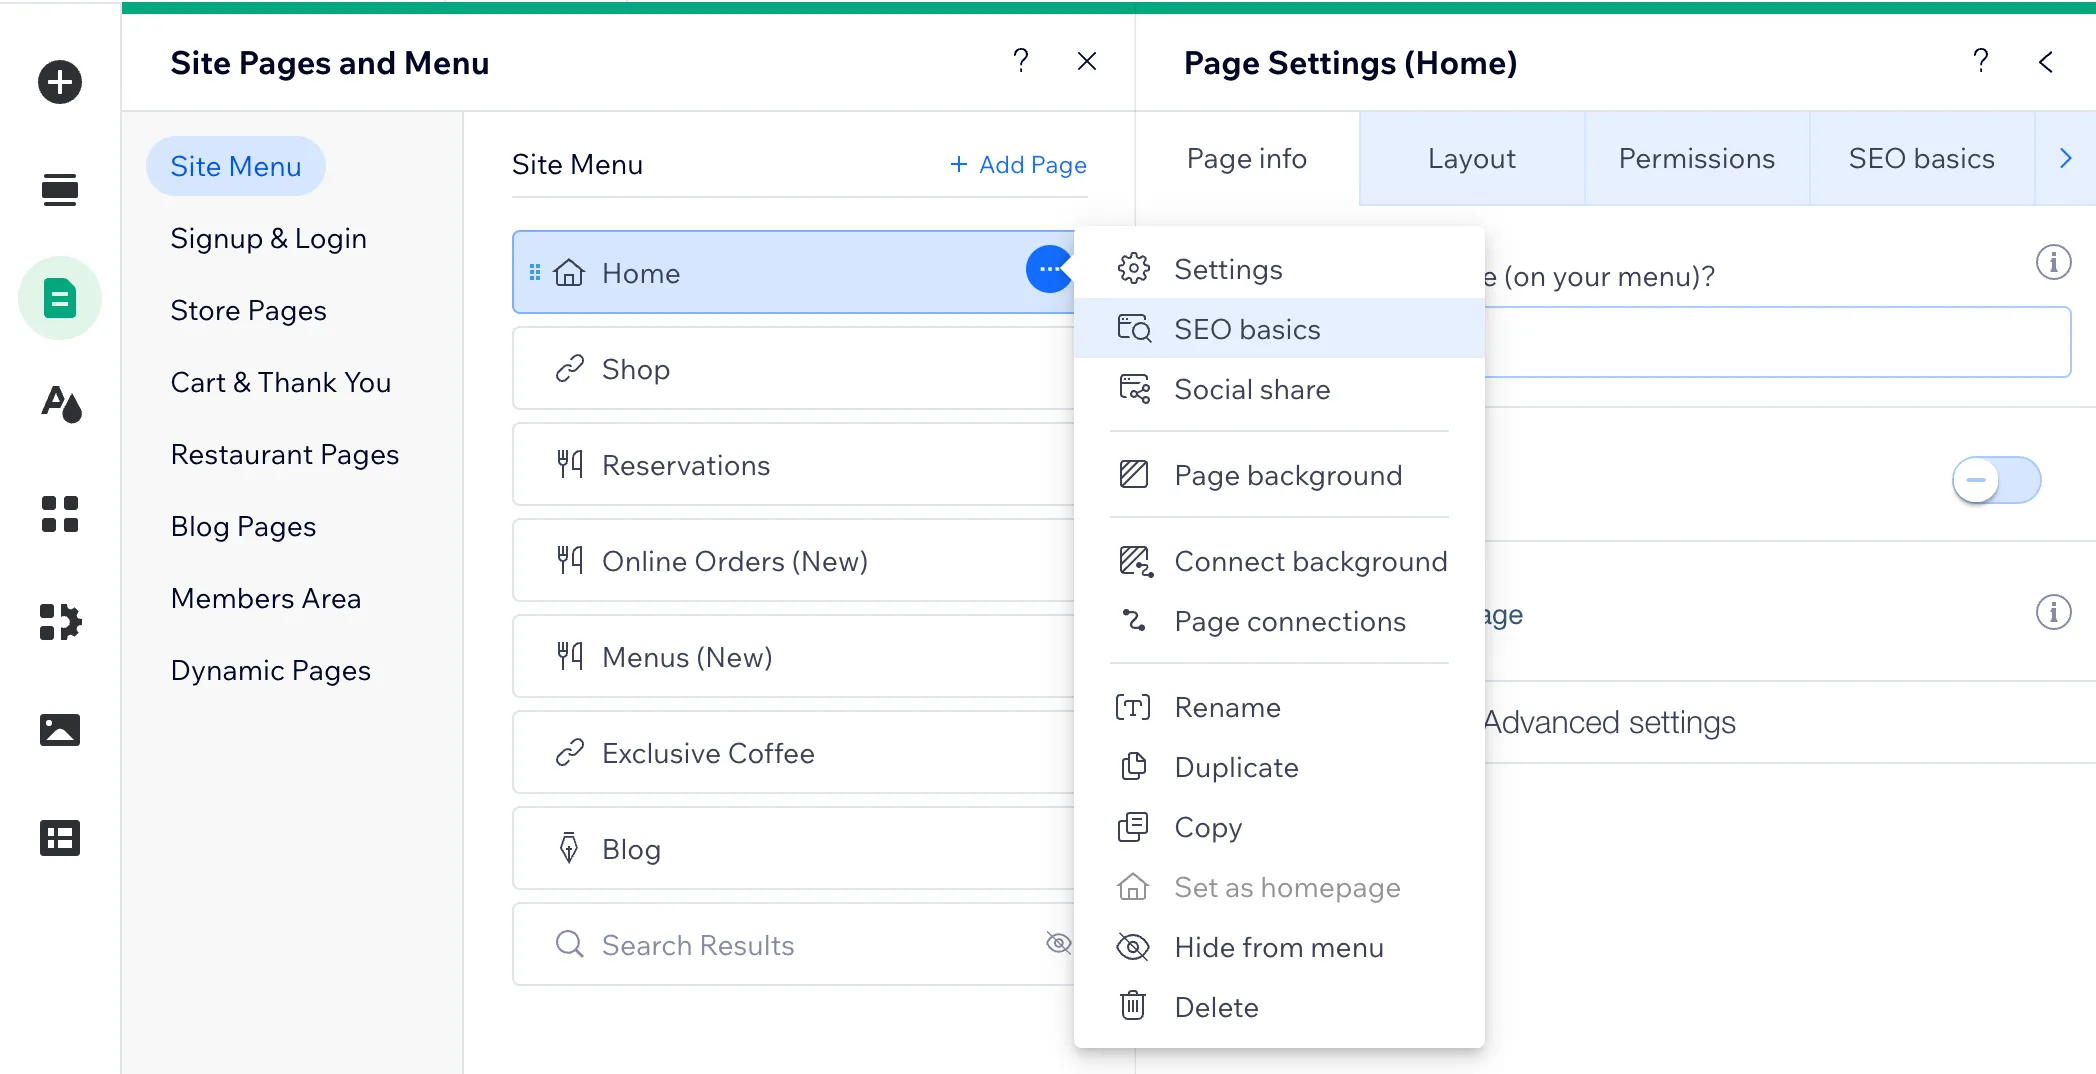
There are 3 main SEO sections related to your website that you can edit:
- SEO (Google): SEO factors displayed on Google search page.
- Social Shares: Content that will be shared on social media channels.
- Advanced SEO: Structured data and meta tags edition (Wix recommends that only SEO experts can modify these tags).
For adjusting SEO components while creating or editing a blog post, just select ‘SEO’ on the left menu bar. Next, you can start modifying the SEO factors.
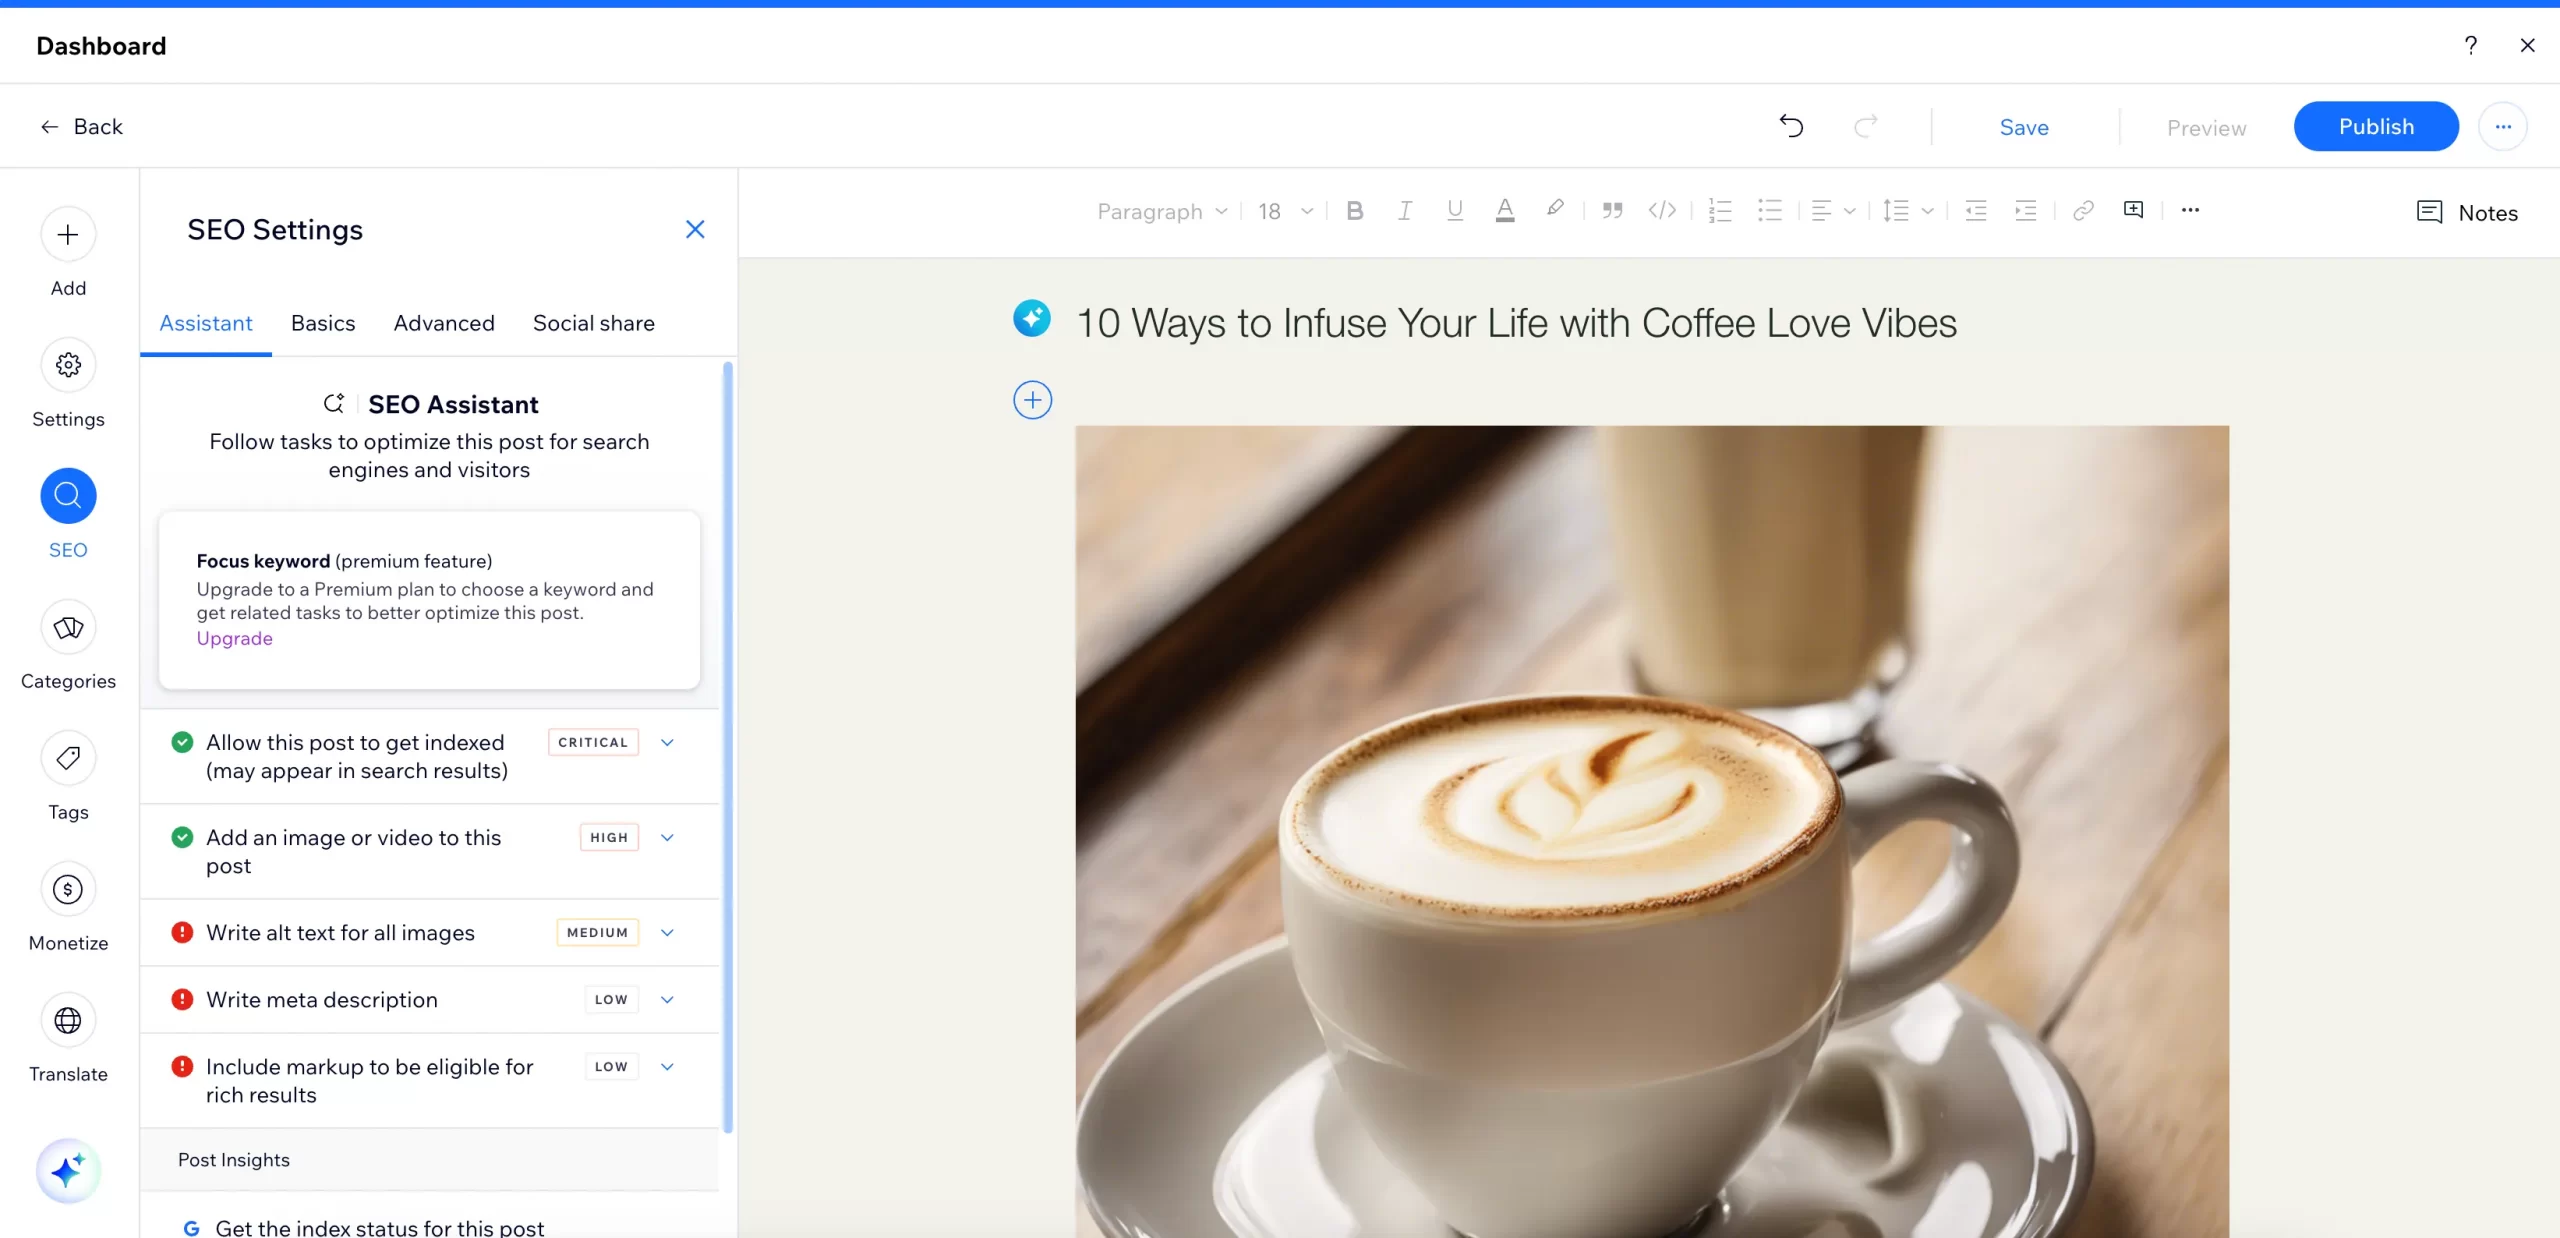
When you click on an image within your post, you can add a title and alternative text to it by selecting the small gear-shaped icon on the horizontal bar.

Similarly, this method can be applied to other images on various pages of your website.
Based on my experience with Wix, here are some key tips for optimizing Wix SEO:
- Use Wix's SEO tools for title tags, meta descriptions, etc.
- Do keyword research to integrate relevant terms into your content naturally.
- Ensure clear site structure and navigation.
- Optimize images with smaller file sizes and descriptive alt text.
- Double-check mobile design for responsiveness.
Step 3: Choose a custom domain
A good domain name will reflect your brand and be simple, short, and easy to remember. A domain name meeting the criteria above will help customers type the exact URL and find your website quickly.
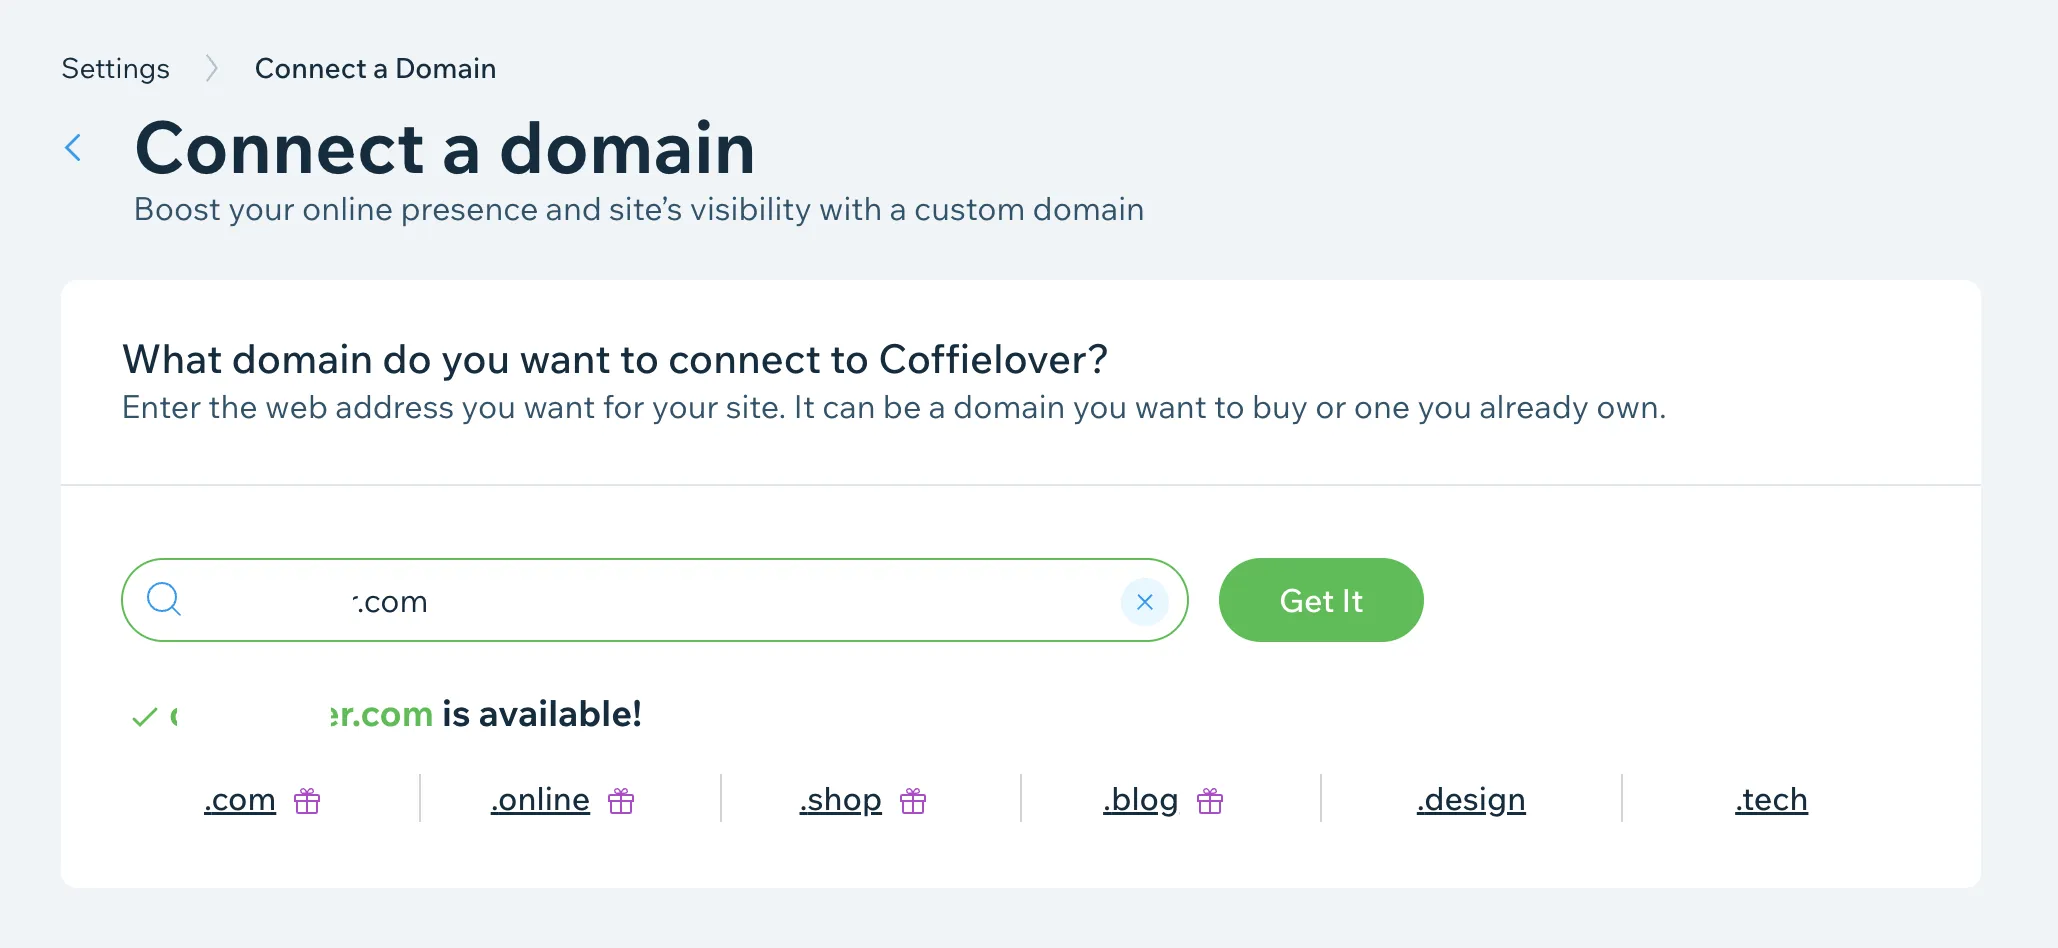
If you haven't come up with your business name yet, now is the time to do it. If you already have a domain, Wix helps you connect it with just a click. In fact, Wix users can purchase a domain either from Wix or another provider after checking the domain availability.
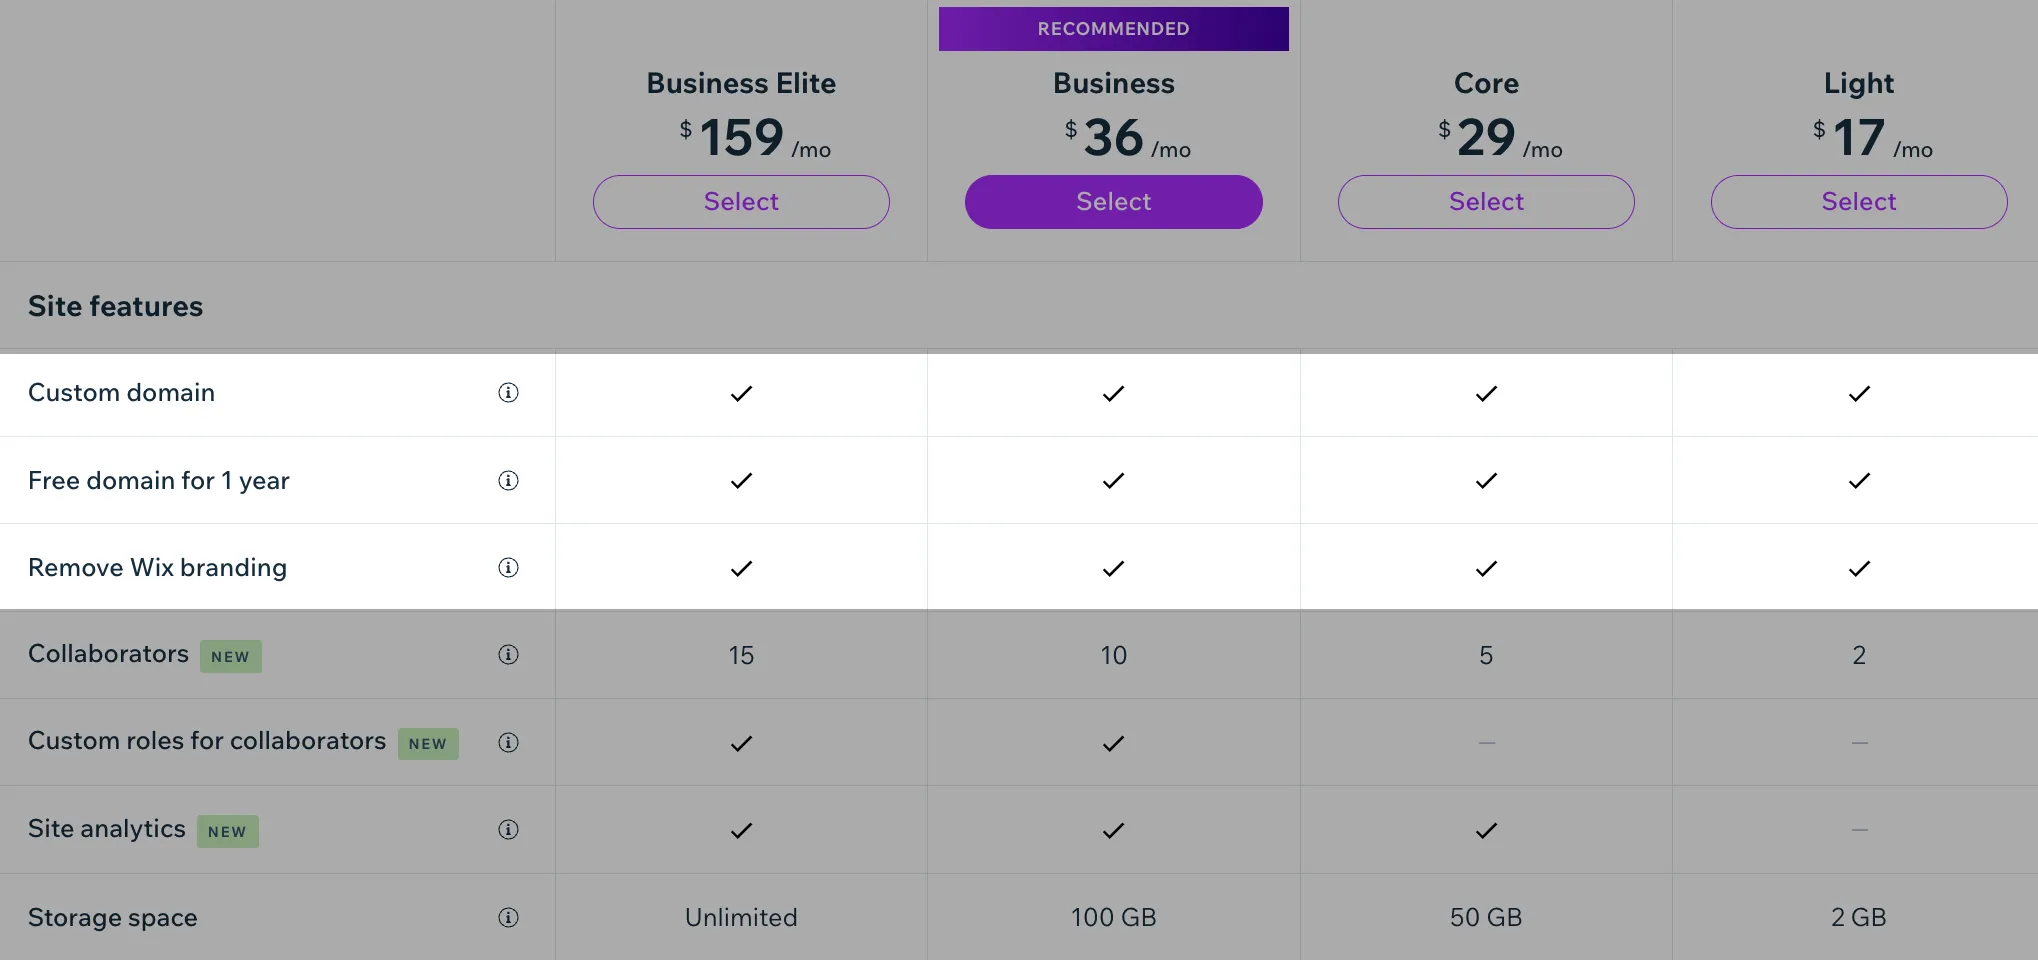
Once you upgrade to a premium plan, you can get a free domain for 1 year with the following domain extensions: .com, .net, .org, .info, .biz, .rocks, .pictures, .co.uk, .club, .space, .xyz.
Step 4: Select a paid plan & Publish your Wix site!
Before making your website live, use the ‘Preview‘ option to ensure everything is set up correctly.
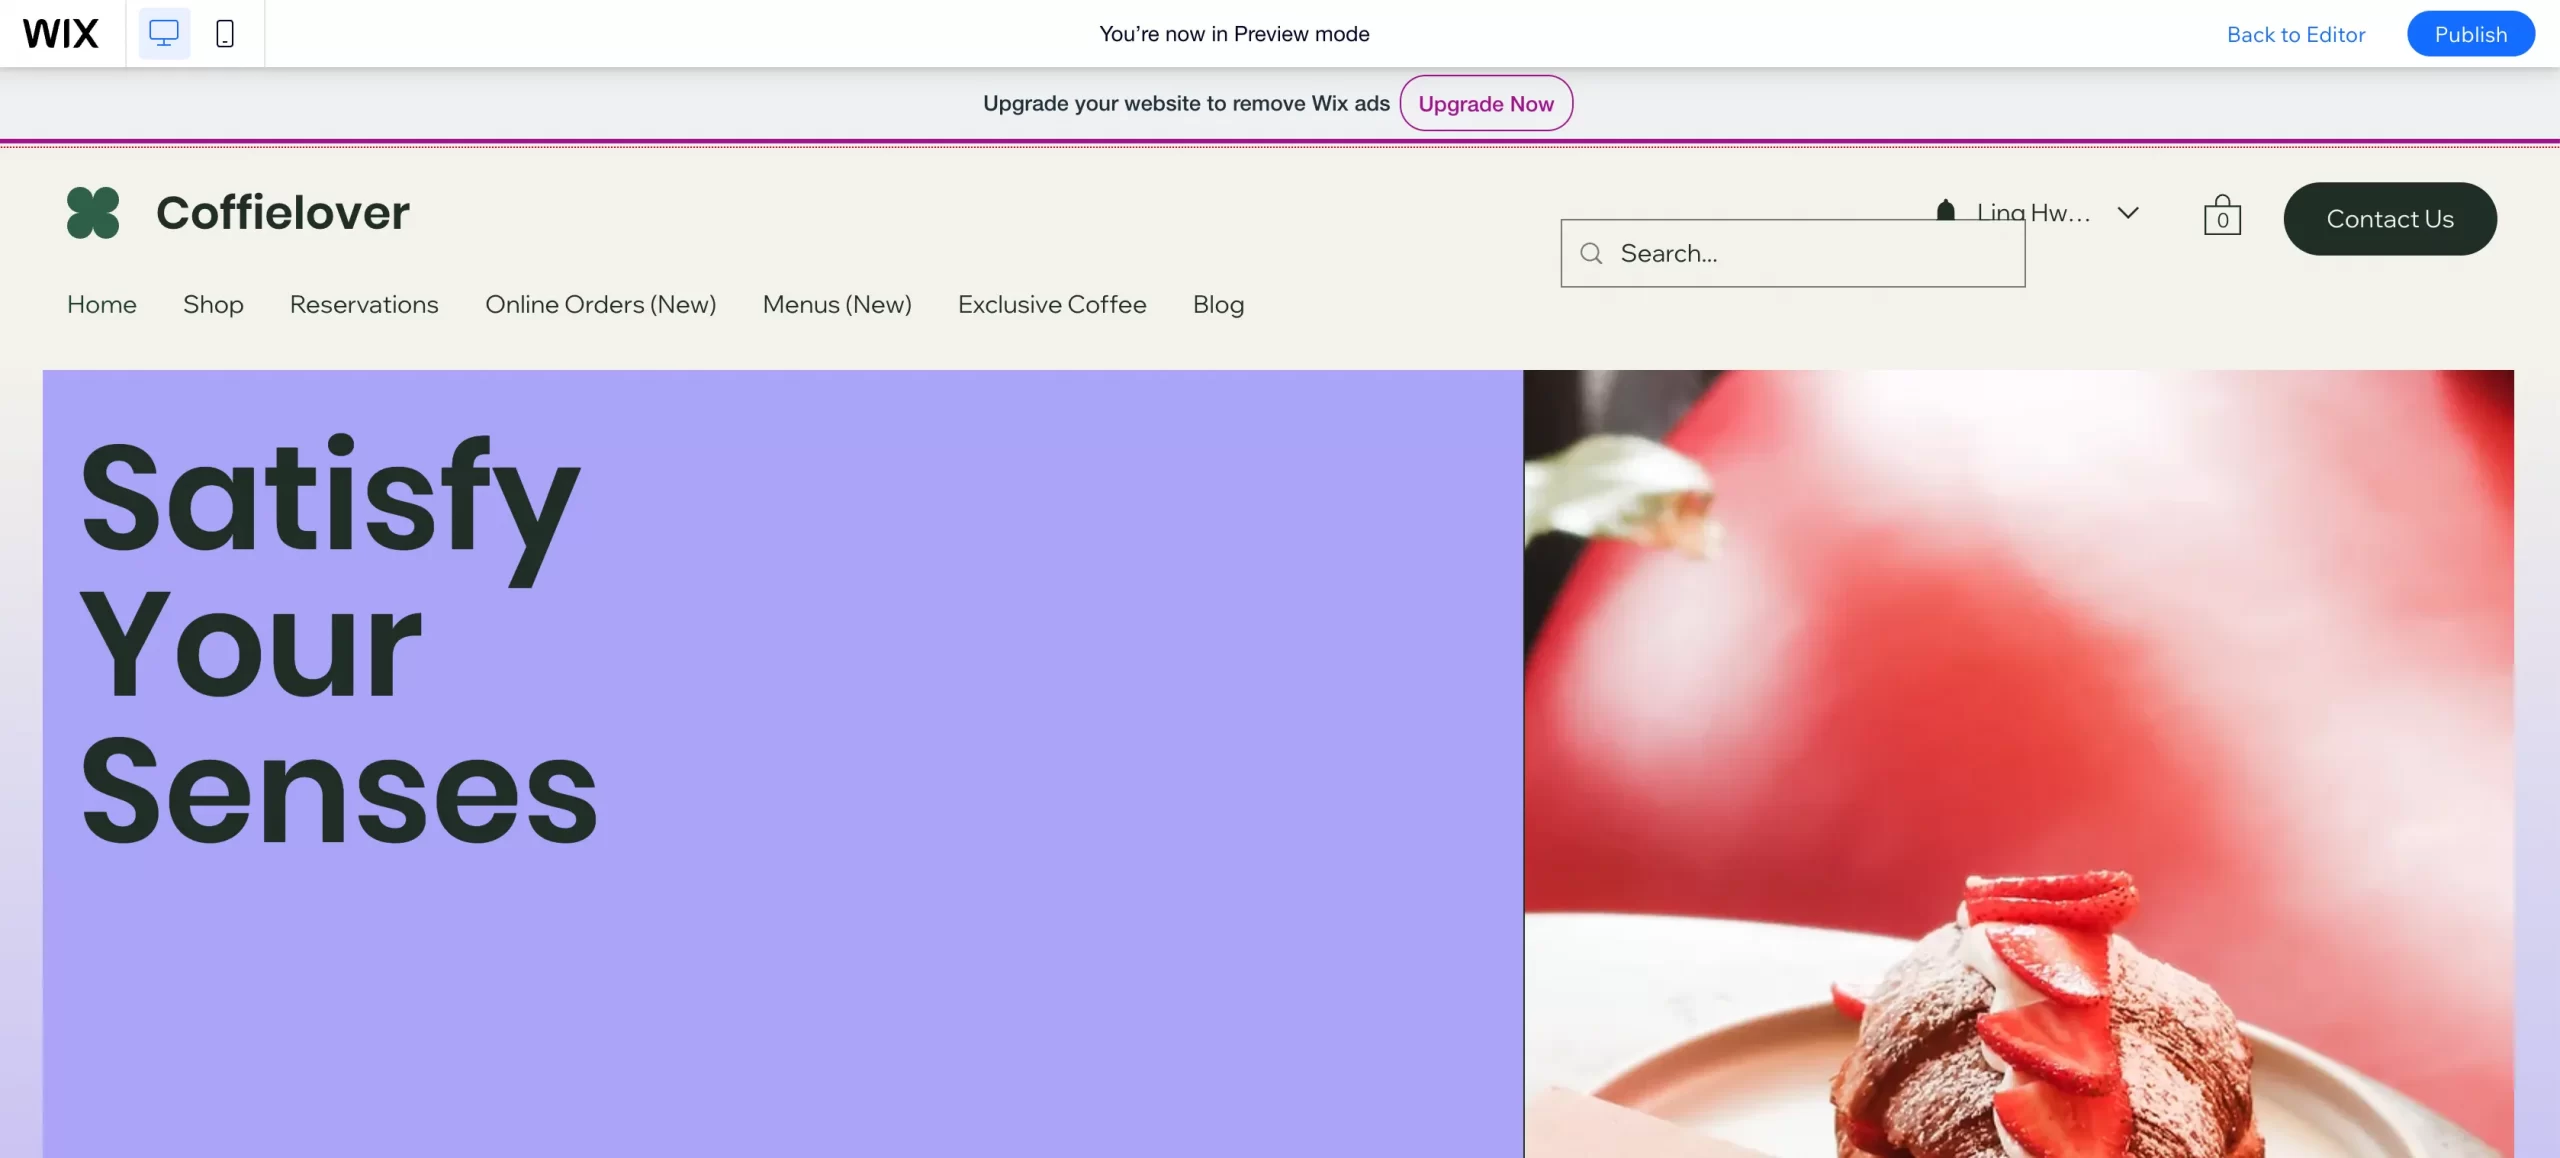
Next on Wix tutorials, if everything is perfect, then choose a suitable pricing plan to publish your site.
How much is a Wix website? Is Wix free to use? Actually, yes, if you don't mind the Wix ads, banners, and an uneditable part in your domain.
Alternatively, Wix offers five different website plans that range from $17 to $159 per month. The higher the plan you choose, the more advanced features you will have access to.
If you want more detailed information on Wix pricing, you can check out our article.
Once you have completed all the necessary steps, click the ‘Publish‘ button to launch your website officially. And that's all for our Wix website tutorial today!
Congratulations! Your Wix website is ready now!
Top 10 Stunning Wix Website Examples for Inspiration
Our Wix tutorials article is incomplete without examples of stunning sites for your reference. If you are curious about how other websites look like and looking for inspiration, discover the list of dazzling Wix website examples below and know how to create a Wix website.
- Animal Music
- Izzy Wheels
- Kunstrukt
- Sonja van Duelmen
- TerraLiving
- Hila Rawet Karni
- Valeria Monis
- Mariela Mezquita
- Tobias Becs
- Carousel Restaurant
Wix Tutorials: FAQs
What is the downside of Wix?
Wix has limited customization options compared to coding from scratch and templates can feel restrictive. Additionally, there are extra fees for eCommerce, booking, appointments, etc., beyond the basic website.
Is Wix good for beginners?
Yes, Wix is great for beginners. The drag-and-drop interface makes it very easy to use, with no coding experience required.
How long does it take to learn Wix?
It typically takes a few hours to familiarize yourself with the interface and basic site-building. Simple sites can be made in 1-2 hours. More complex sites may take 10-20 hours to design and optimize fully.
Does Wix have training?
Yes, Wix offers various training resources:
- Tutorial videos on their website cover all aspects of site building.
- Online help center with guides and answers to common questions.
- Community forums to ask other Wix users for help.
- Free live and on-demand webinars on specific topics.
How to change Wix template?
Once you choose a template on Wix, you cannot switch. However, you can move any elements on your existing site to simulate the template you like.
Final Words on Wix Tutorials 2024
Wix is a user-friendly website builder that requires little time and effort to create a website. Even beginners can easily use it without any difficulty. We hope that our Wix tutorials did provide you with valuable information on how to develop your website.
If migrating from the current eCommerce platform to Wix is too complicated for you, then let LitExtension – #1 Shopping Cart Migration Expert can quickly handle this task. We will support you 24/7 and make sure your migration process will occur in the most seamless way so don't hesitate to contact LitExtension support team!
Lastly, to learn more about eCommerce, visit the LitExtension Blog and join our community on Facebook for tips and news.

