Transfer domain to Shopify can seem like a complex task, but it doesn't have to be! With our comprehensive guide, you can move your domain smoothly and efficiently without breaking a sweat.
So, how to transfer a domain to Shopify from another registrar? Here are 3 simple steps you can follow:
- Step 1: Prepare your domain for transfer
- Step 2: Initiate the transfer in Shopify admin
- Step 3: Approve and complete the transfer
We'll also cover how to connect a third-party domain to Shopify and troubleshoot common domain issues later in this guide, so keep reading!
Prerequisites Before Transferring Domain to Shopify
Before you transfer a domain to Shopify, it's important to make sure your domain and Shopify store meet a few requirements. Taking a few minutes to prepare now can help you avoid transfer delays, failed requests, or unexpected downtime later on.
1. Ensure your domain is eligible for transfer
Not every domain can be transferred immediately. According to ICANN regulations, your domain must be at least 60 days old from its initial registration date or from a previous transfer. In addition, the domain should not be locked, suspended, involved in a dispute, or placed under a transfer restriction by your current registrar.
If you've recently changed the domain owner's contact information, some registrars may also apply a temporary 60-day transfer lock. It's worth checking your registrar's transfer policy before proceeding.
2. Prepare access to your domain account
To initiate a Shopify domain transfer, you'll need access to the account where the domain is currently registered. This allows you to unlock the domain and obtain the authorization (EPP) code required for the transfer process.
You should also make sure you can access the domain's administrative email address, as transfer approval requests and important notifications will be sent there.
3. Review your email and DNS settings
If your domain is connected to third-party email services such as Google Workspace or Microsoft 365, take note of your existing DNS records before starting the transfer. While the domain transfer itself typically doesn't affect your website content, DNS records may need to be reviewed or reconfigured afterward.
It's also recommended to use an email address that doesn't rely on the domain being transferred. For example, if you're transferring example.com, avoid using an email address like [email protected] for transfer communications.
4. Gather the required transfer information
Before transferring your domain to Shopify, make sure you have everything needed to complete the process:
- The domain is unlocked at your current registrar.
- WHOIS privacy protection is disabled if required by your registrar.
- The authorization (EPP) code is available.
- The domain extension is supported by Shopify's transfer service.
Having these details ready can significantly speed up the transfer process.
5. Make sure your Shopify store is ready
Domain transfers can take several days to complete. During this time, it's a good idea to have your Shopify store already configured with its theme, products, pages, and key settings.
Once the transfer is finalized, you can immediately connect the domain and set it as your primary domain without delaying your store launch. Remember that only the Shopify store owner can perform certain domain management actions, so make sure you're signed in with the appropriate account.
How to Transfer Domain to Shopify in 3 Steps
Once you've confirmed that your domain meets Shopify's transfer requirements, you're ready to start the process. The steps below in this Shopify tutorial section will show you how to transfer domain to Shopify from another registrar.
Step 1: Prepare your domain for transfer
Start by logging in to your domain provider account and locating the domain you want to transfer. From there, obtain the authorization (EPP) code that Shopify will use to verify the transfer request. Depending on your registrar, you may find this option under settings such as Transfer Domain, Transfer Out, or Get Authorization Code.
Once you have the EPP code, you're ready to initiate the transfer in Shopify.
Step 2: Initiate transfer in Shopify admin
Next, log in to your Shopify admin and start the transfer request.
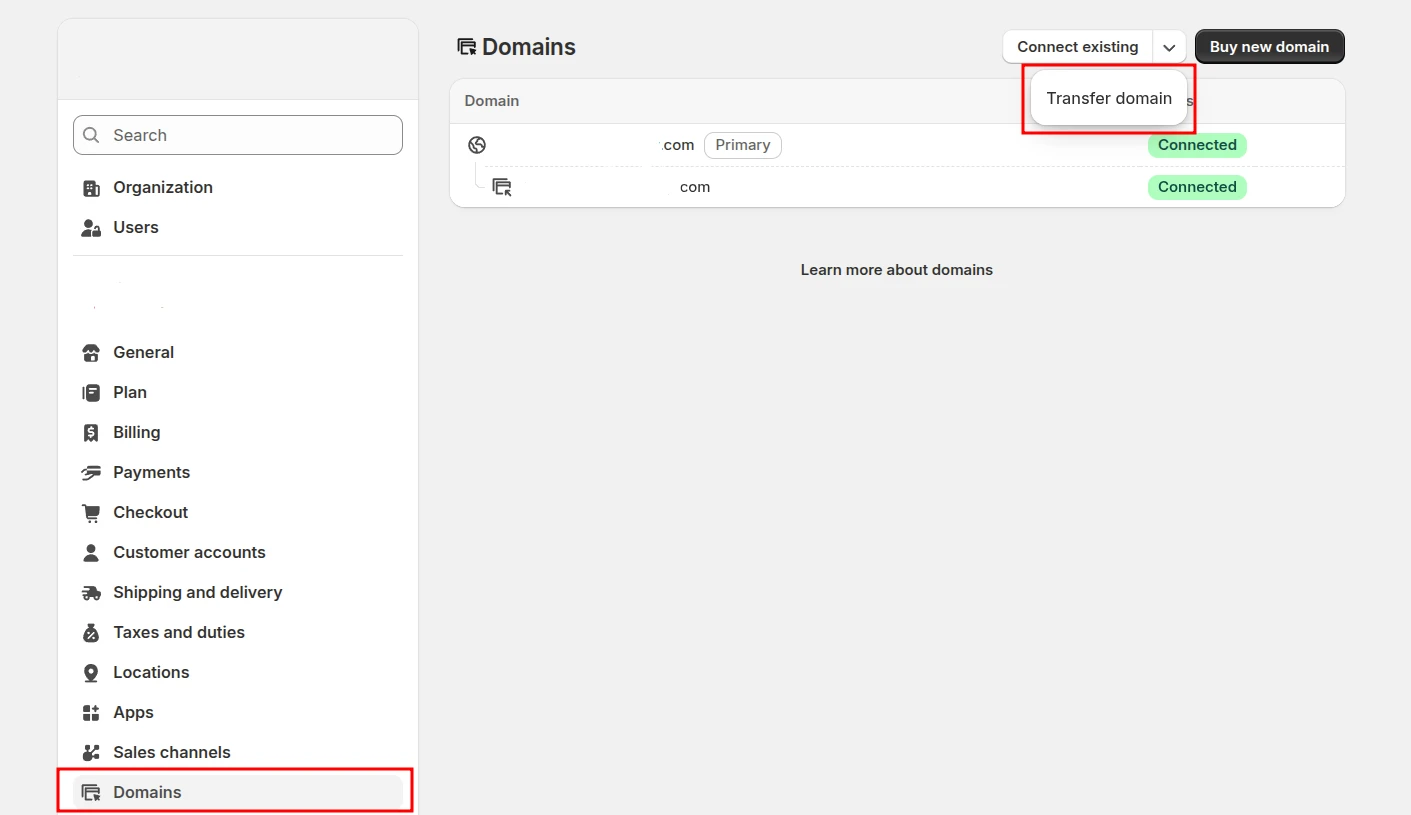
1. Go to Settings > Domains. Click Transfer domain button from the Connect existing dropdown.
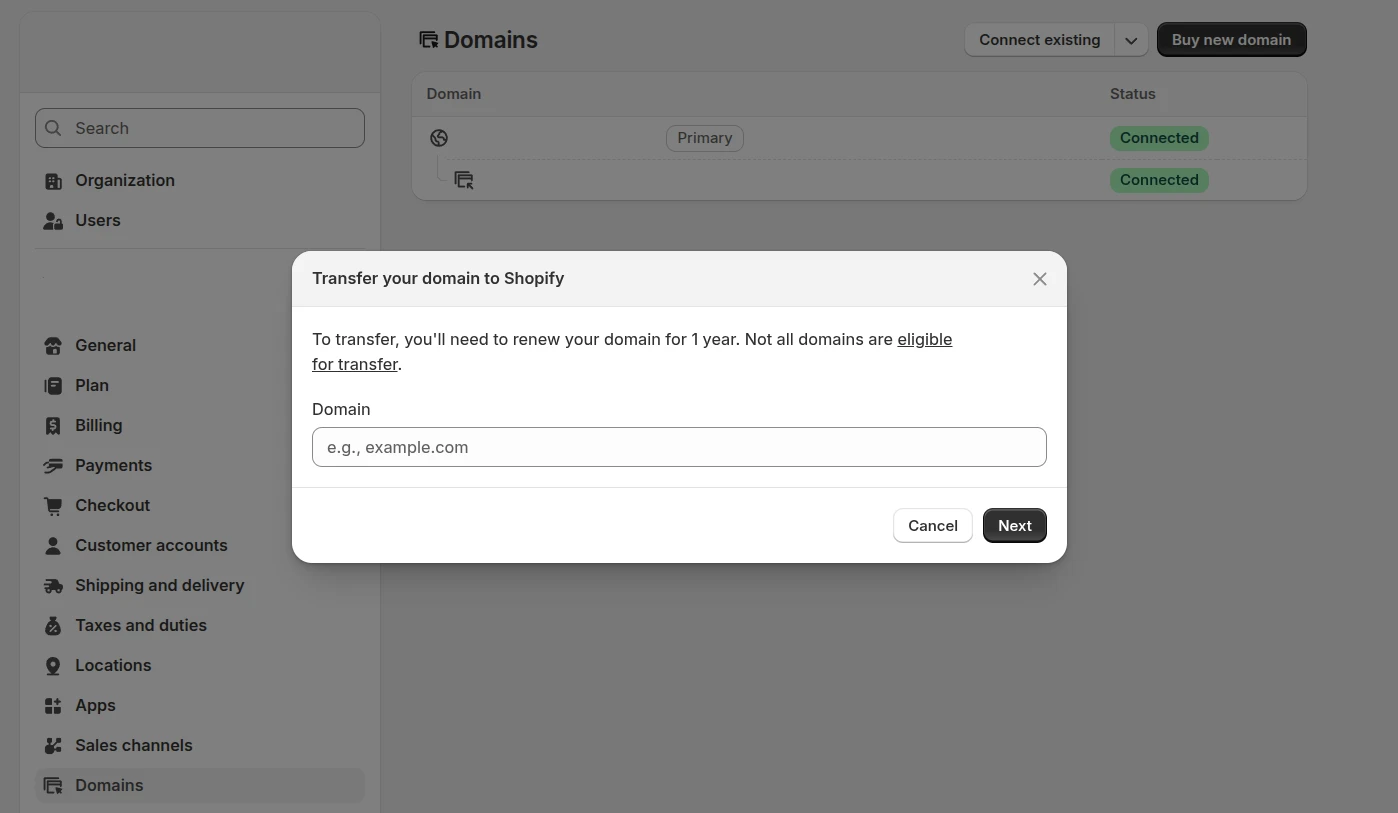
2. Enter the domain name you want to transfer (Remember to not include the “www” part) and click Next.
3. Paste the authorization (EPP) code from your current registrar.
4. Click Verify domain.
Shopify will then check whether the domain is eligible for transfer. If everything looks good, you'll be asked to review the domain details, contact information, and renewal settings.
Carefully review the information displayed on the screen, then approve the transfer domain to Shopify request and associated renewal fee to continue.
Step 3: Approve and complete transfer
After Shopify submits the transfer request, you'll need to approve it through your current registrar.
Check the administrative email address associated with your domain and look for a transfer approval message. Open the email and follow the instructions to authorize the transfer. This step is required; otherwise, the transfer request may remain pending or eventually expire.
When the process is finished, your domain will appear under Settings > Domains in Shopify.
If you're planning a full migration from other platforms (Wix, WordPress, WooCommerce, etc.) to Shopify, don't stop at the domain. You'll also need to move products, customers, orders, and other important store data. That's where LitExtension comes in!
Shopify Migration Made Easy With LitExtension!
LitExtension offers great migration solutions that help you transfer your data from the current eCommerce platform to Shopify accurately, painlessly with utmost security.

How to Transfer Shopify-Managed Domain to Another Store?
In case your domain was purchased through Shopify, you can transfer it directly to another Shopify store without moving it through a third-party registrar – an essential task often included in a store setup or Shopify launch checklist.
Step 1: Verify ownership and permissions
Before starting the transfer domain to Shopify store process, make sure you're signed in as the store owner of the current Shopify store. Only the store owner can initiate a Shopify-managed domain transfer.
You should also confirm that the store owner's email address is up to date, as Shopify will send the transfer request to that email.
Step 2: Send the transfer request
In your Shopify admin, navigate to Settings > Domains and select the domain you want to transfer.
Next, click Domain settings > Transfer to another Shopify store. Review the store owner email address, then click Send transfer link.
Shopify will send an email containing the transfer request and instructions for completing the process.
Step 3: Accept the transfer in the destination store
Open the email and click the transfer link. To accept the transfer domain to Shopify, you'll need to login to Shopify at the destination store as either:
- The store owner, or
- A staff member with permission to transfer domains between Shopify stores.
After the transfer is accepted, Shopify will begin moving the domain to the new store. In most cases, the process is completed within 24 hours.
Once finished, the domain will appear in the destination store's Domains settings, where it can be configured as the primary domain if needed.
How to Connect Third-party Domain to Shopify
If you don't want to transfer domain to Shopify, connecting it is a great alternative. This allows you to keep the domain registered with your current provider while using it as the primary address for your Shopify store.
Depending on your domain provider, you can either connect the domain automatically through Shopify or manually update your DNS records.
Connect automatically (GoDaddy, Google Domains, 1&1)
Shopify supports automatic domain connections for select providers, making the setup process much easier. Instead of manually editing DNS records, you simply authorize Shopify to access your domain settings.
To connect your domain automatically:
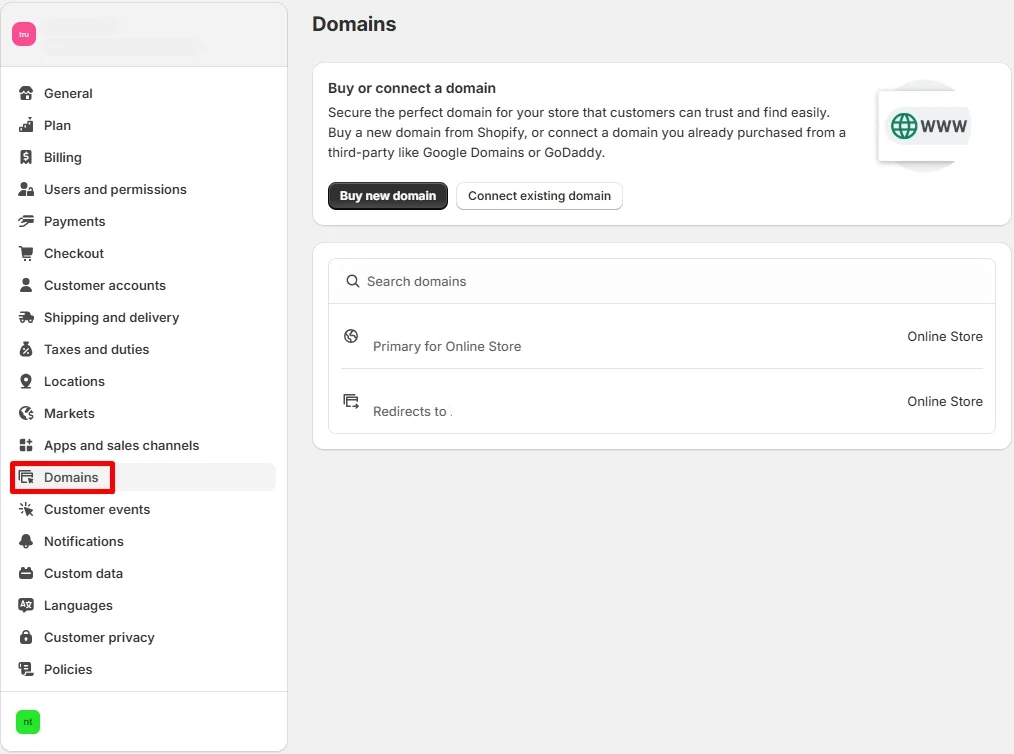
- In Shopify admin, go to Settings > Domains.
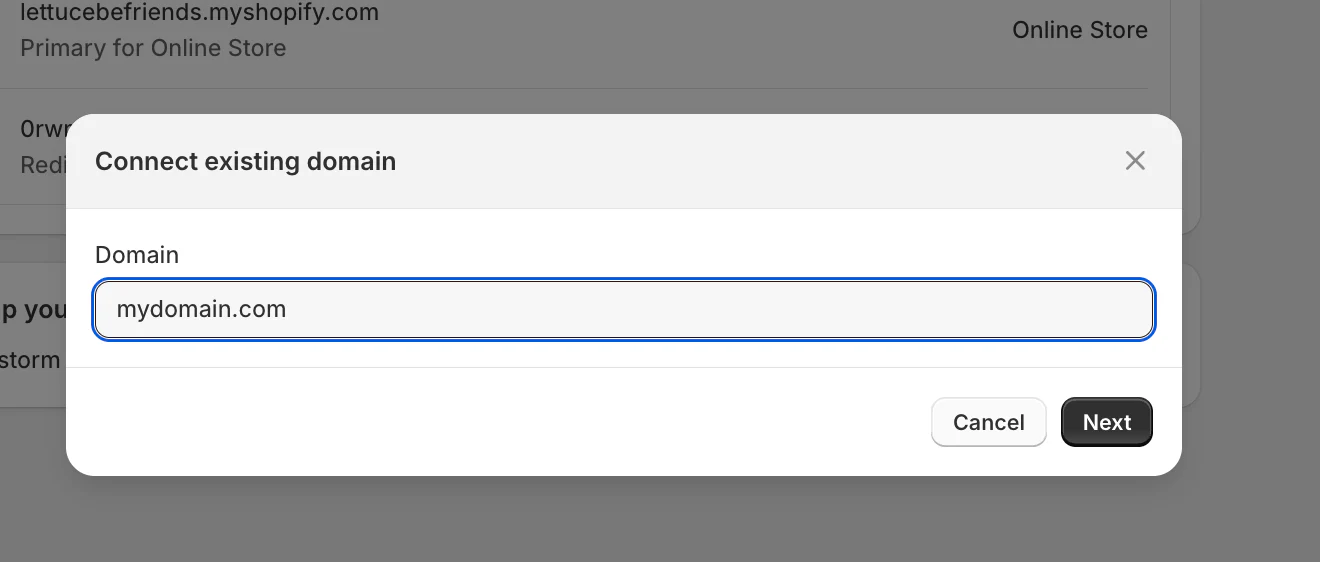
- Click Connect existing domain. Enter your domain name and click Next.
- Select Connect automatically when available.
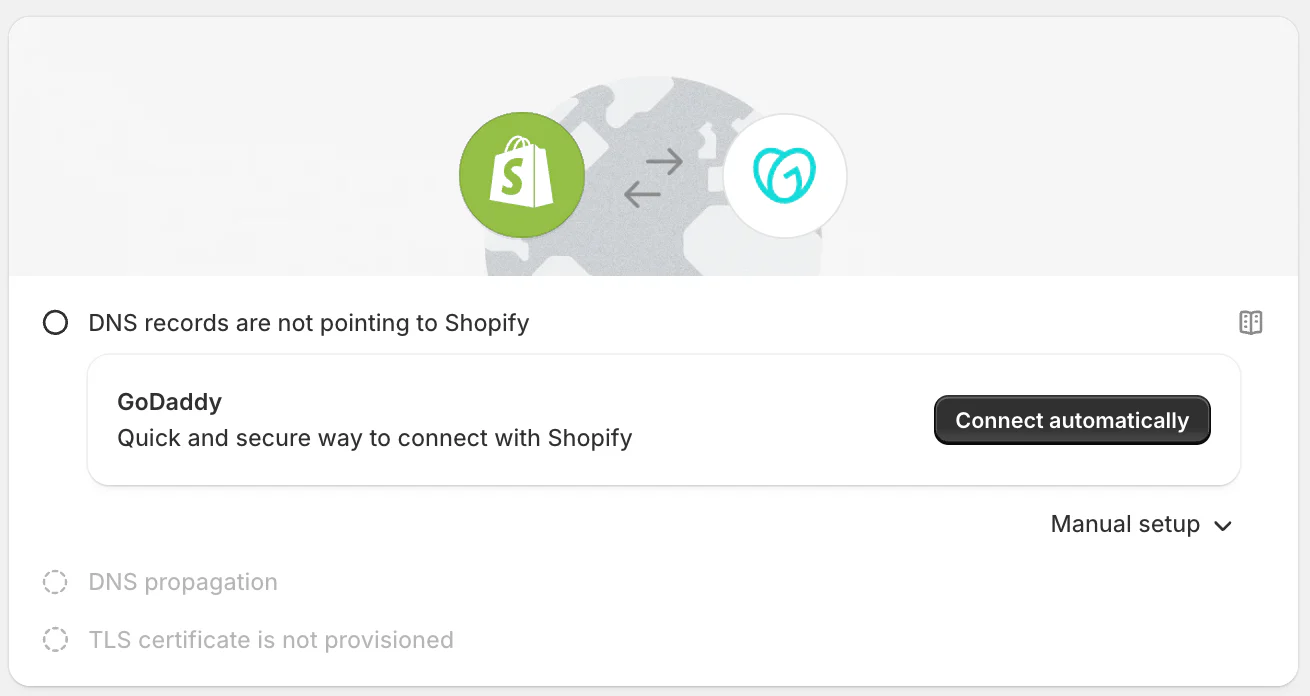
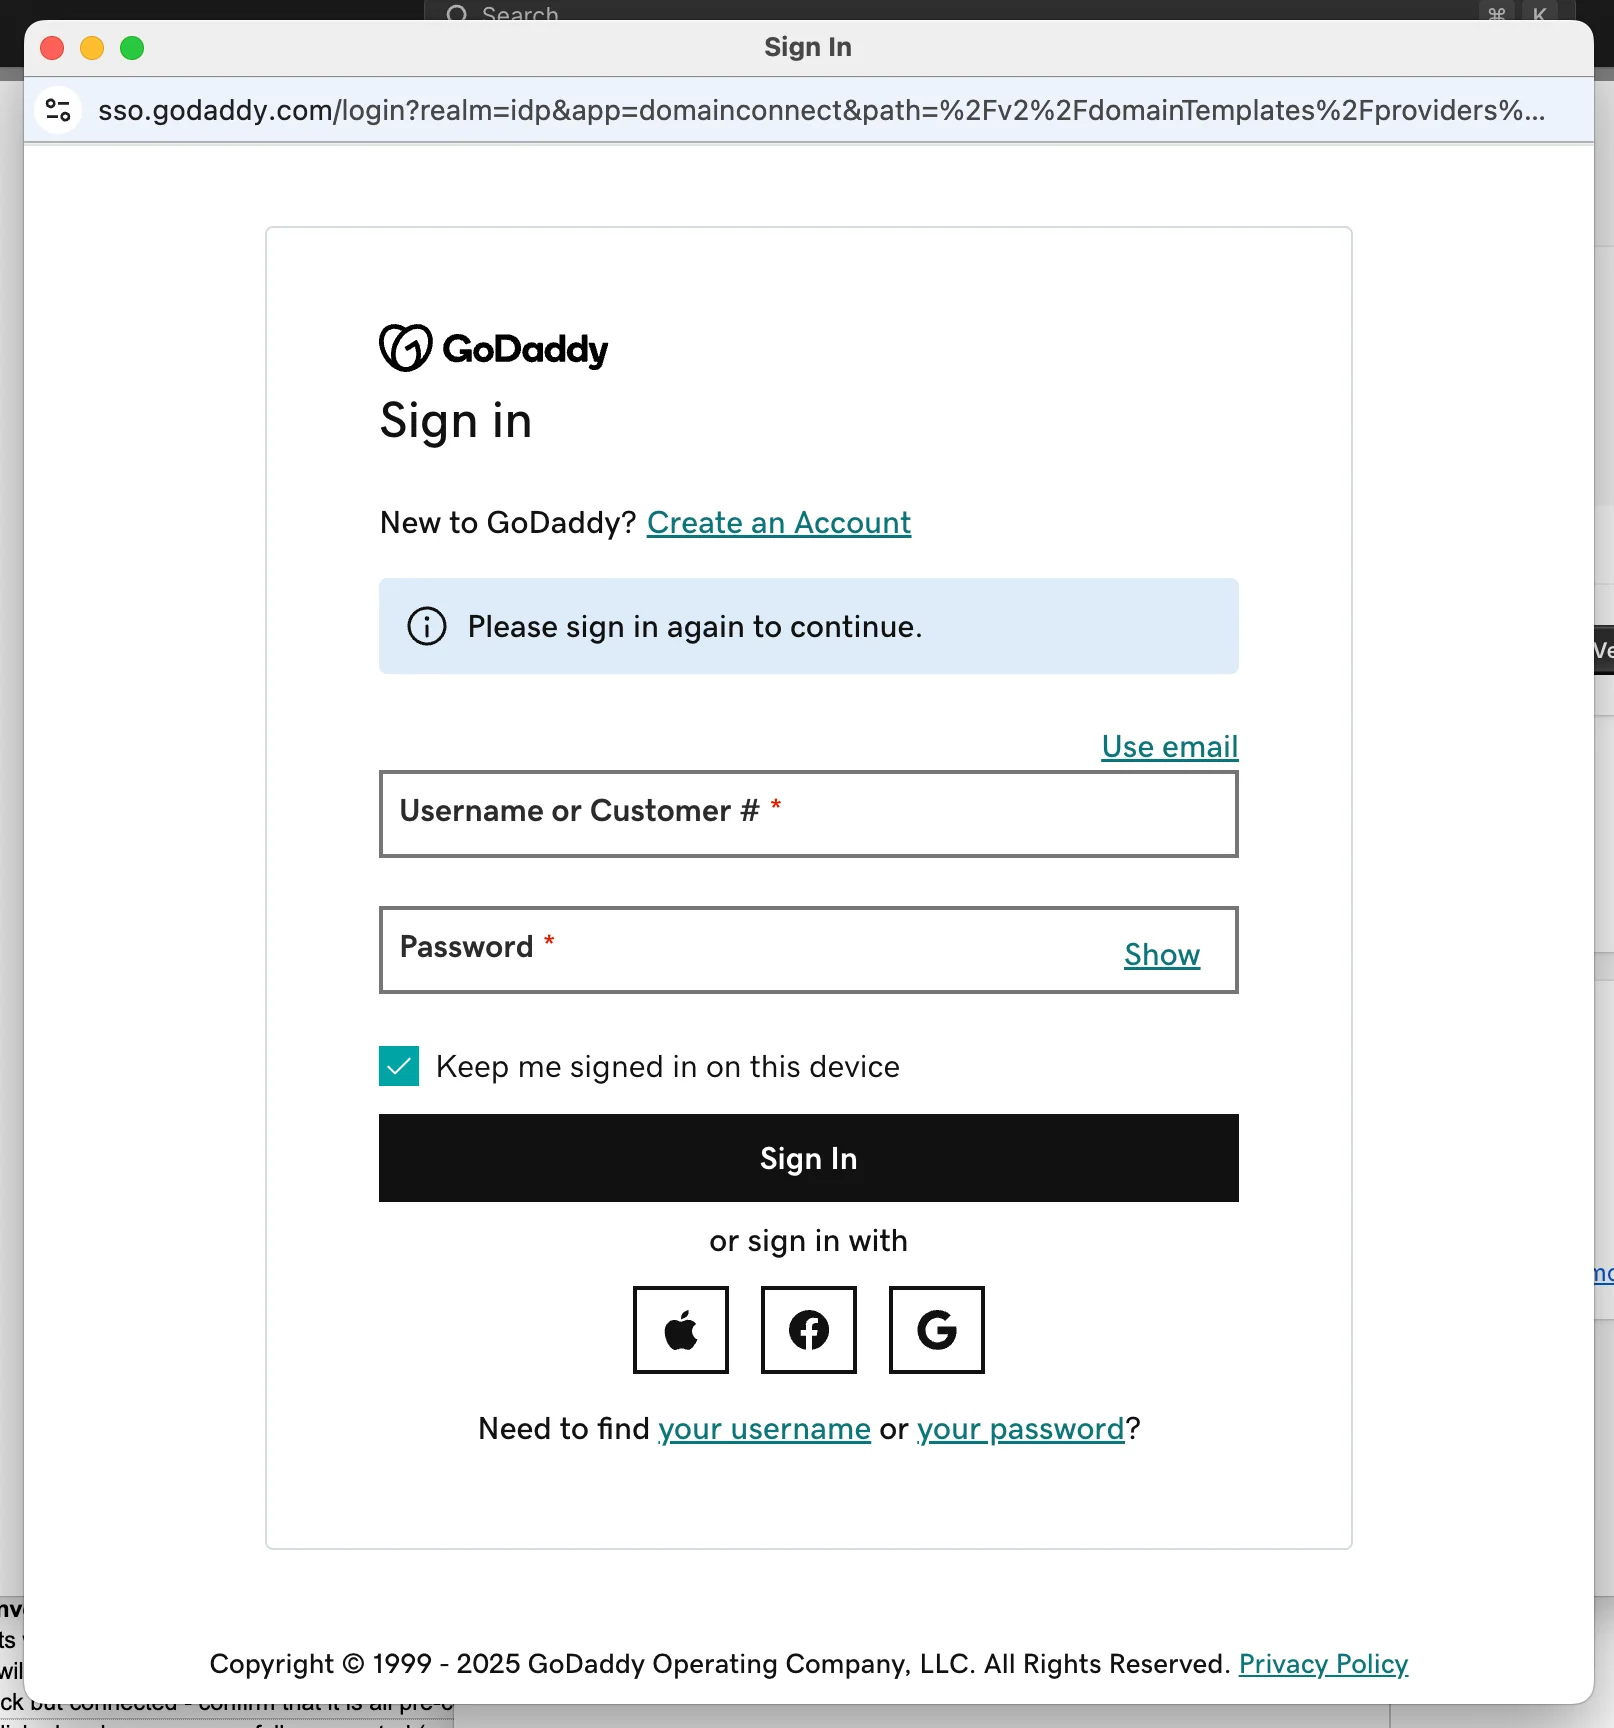
- Log in to your domain provider account and authorize the connection.
Once connected, Shopify will automatically configure the necessary DNS records for your store. This is typically the fastest and most beginner-friendly way to connect a domain without having to transfer domain to Shopify immediately.
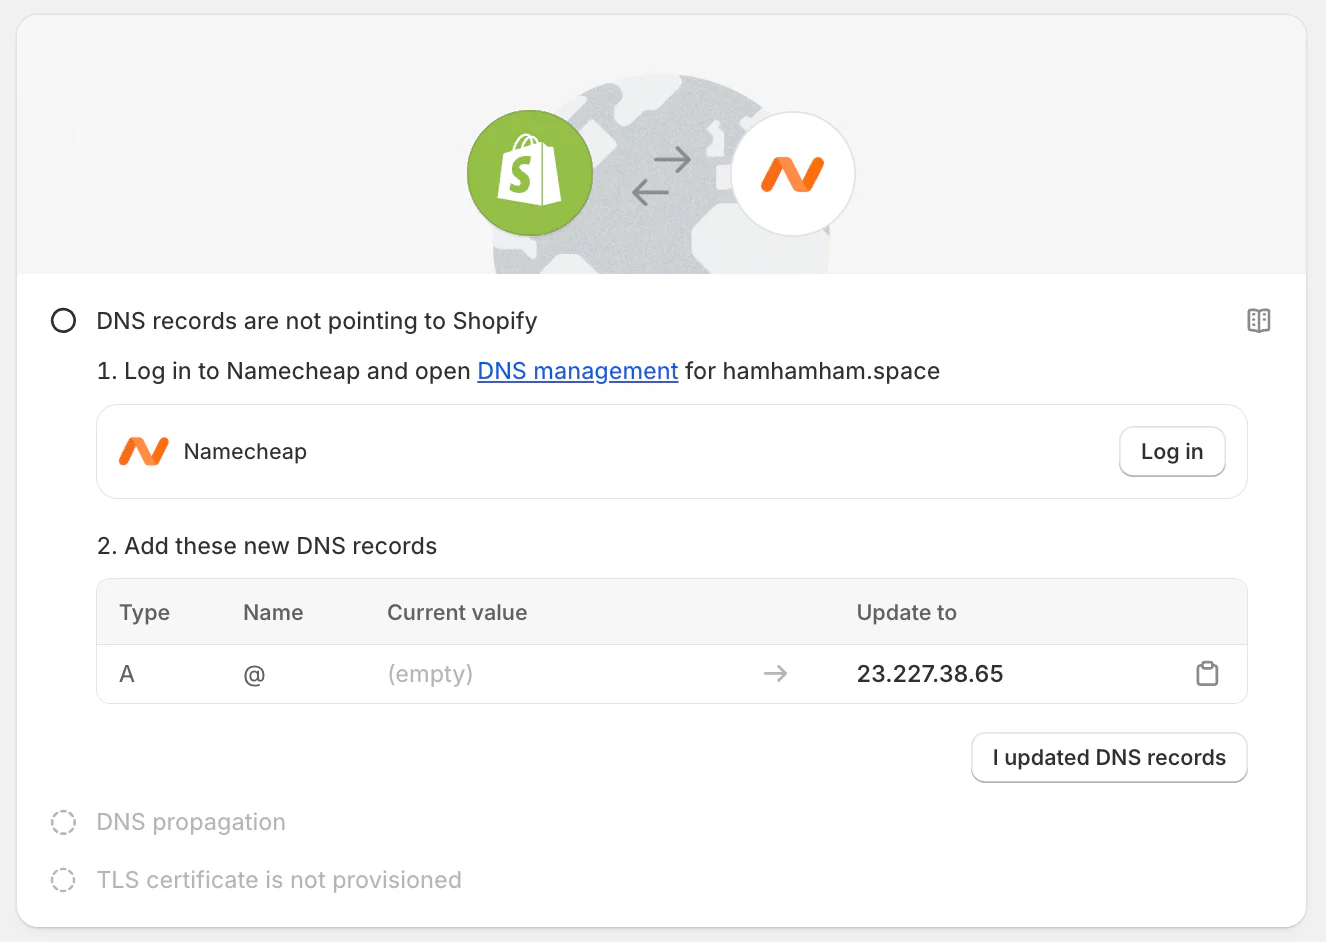
Connect via DNS settings
If your domain provider doesn't support automatic connection (for instance, when handling a manual Wix to Shopify domain transition), you'll need to connect the domain manually through DNS settings.
Before you begin, make sure your domain's NameServer settings are managed by your domain provider rather than custom or external NameServers, as incorrect NameServer configurations can prevent the connection from working.
1. Update DNS records at your domain provider
First, log in to your domain provider account and locate the DNS management section. Then update the following DNS records:
- Point the A record to Shopify's IPv4 address: 23.227.38.65.
- Point the AAAA record to Shopify's IPv6 address: 2620:0127:f00f:5::.
- Point the www CNAME record to shops.myshopify.com. (including the period at the end, if required by your provider).
If your domain already has existing A, AAAA, or www CNAME records, replace them with the Shopify values above. Save your changes once the updates are complete.
2. Connect the domain in Shopify
Next, as you set up Shopify store after migration, perform the following steps in your Shopify admin:
- Go to Settings > Domains and click Connect existing domain.
- Enter your root domain (for example, example.com) and click Next
- Then select Connect domain.
3. Wait for Shopify to verify the connection
DNS changes can take time to propagate. While many connections are completed within a few hours, it may take up to 48 hours for Shopify to verify the domain and for the connection to become fully active.
Common Shopify Domain Transfer Issues and How to Fix Them
Even if you follow the correct steps to transfer domain to Shopify or clone Shopify store environments for testing, you may still run into a few issues. Here are the most common problems and their solutions.
1. Transfer stuck or pending too long
Shopify domain transfers usually take 5–7 days to complete. If the transfer has been pending longer than that, try the following:
- Check your inbox for any transfer approval emails from your current registrar.
- Verify that the domain is unlocked at your current registrar.
- Confirm that you've entered the correct authorization (EPP) code in Shopify.
- Contact your registrar to see if there are any transfer restrictions on the domain.
2. Not receiving confirmation emails
Without the confirmation email, the transfer cannot be approved.
To fix this issue:
- Check your Spam and Junk folders.
- Verify that the domain's administrative contact email is correct.
- Resend the transfer request if available.
- Contact your registrar if you no longer have access to the registered email address.
3. DNS not propagating correctly
If some visitors can access your Shopify store while others cannot, DNS propagation is usually the cause.
To resolve this:
- Wait up to 48 hours for DNS propagation to complete.
- Clear your browser cache and DNS cache.
- Test the domain from a different network or device.
- Use a DNS checker tool to confirm that the latest records are being propagated globally.
4. Store not loading after domain change
If your Shopify store doesn't load after connecting or transferring a domain:
- Go to Settings > Domains and verify that the domain is connected.
- Check that the A record points to Shopify's IP address.
- Confirm that the CNAME record points to Shopify's designated address.
- Remove any conflicting DNS records that may be overriding Shopify's settings.
5. Domain still pointing to old website
Sometimes the domain continues displaying your previous website even after the transfer is complete, which can temporarily disrupt your Shopify SEO migration plan if search engines index the wrong URLs.
Try these steps:
- Remove any old DNS records from your previous hosting provider.
- Check for domain forwarding or redirect rules at your registrar.
- Wait for DNS propagation to complete if changes were made recently.
- Verify that the domain is set as the primary domain in Shopify.
6. Mixed content warnings and HTTPS issues
If browsers display security warnings after the domain change:
- Wait for Shopify's SSL certificate to finish provisioning.
- Ensure all images, scripts, and other assets are loaded via HTTPS instead of HTTP.
- Update hardcoded URLs in your theme if necessary.
- Recheck the site after SSL activation is complete.
In most cases, Shopify automatically configures SSL once the domain is successfully connected.
Transfer Domain to Shopify: FAQs
Should I transfer my domain to Shopify?
If you prefer having your store and domain managed from a single dashboard, transferring your domain to Shopify can simplify administration, billing, and DNS management.
However, if you're happy with your current registrar or use advanced DNS configurations, you may prefer to keep the domain there and simply connect it to Shopify instead.
Can I transfer a subdomain to Shopify?
No. Shopify only supports transferring root domains (such as example.com) between registrars. Subdomains like shop.example.com or store.example.com cannot be transferred separately.
If you want to use a subdomain with Shopify, you can create and connect it through your DNS settings at the domain registrar.
What is the difference between transferring a domain to Shopify and connecting it?
In short, transferring changes who manages the domain, while connecting only changes where the domain points.
- When you transfer a domain to Shopify, Shopify becomes the domain registrar and manages the domain's billing, renewals, and DNS settings.
- When you connect a domain, the domain remains registered with your current provider, while Shopify simply uses it to direct visitors to your store.
Which DNS records must I change when moving my domain to Shopify?
If you're connecting a third-party domain to Shopify, you'll typically need to update:
- The A record to point to Shopify's IP address.
- The www CNAME record to point to Shopify's designated hostname.
Some providers may also support IPv6, in which case you'll need to update the AAAA record as well.
If you use email services such as Google Workspace or Microsoft 365, be careful not to modify your existing MX records unless necessary.
How can I safely rehearse a domain transfer to Shopify before going live?
The safest approach is to set up and test your Shopify store before changing the live domain.
You can use your Shopify-generated URL (such as your-store.myshopify.com) to review your storefront, products, navigation, checkout settings, and apps. Once everything is working correctly, proceed with the domain transfer or connection.
Should I migrate my store data or transfer my domain to Shopify first?
In most cases, migrate your store data first and transfer the domain last. With LitExtension, you can move products, customers, and orders to Shopify while keeping your current store live. After testing everything, transfer or connect your domain to Shopify.
Conclusion
We hope this guide has given you a clear understanding of how to transfer domain to Shopify. By following the steps outlined above, you can ensure a smoother transition and get your store running without needing to close your Shopify store down due to domain errors.
For more Shopify tips and migration guides, be sure to explore our blog and join the community group to connect with fellow merchants and eCommerce experts!

