One of the best things about Shopify is that it lets online merchants import products and customers in bulk using a simple Shopify CSV import file. However, Shopify import products might be tedious if you are doing it manually.
Fortunately, LitExtension – #1 eCommerce Migration Service has just the right and simple way for you to do so. In today’s article, we will guide you through the following key points:
- Possible ways to import products to your Shopify store
- Guidelines on how to import Shopify products with CSV
- 4 steps to Shopify CSV import with LitExtension
- Robust tools to help you perform Shopify import products
- Several useful tips on Shopify bulk upload products via CSV file
- Understanding Shopify import products
And now, without further ado, let's get the show rolling!
Possible Ways to Import Products to Shopify
Want to know how to add products to Shopify store? In general, Shopify import products can be done in a number of different ways, and we will analyze the pros and cons of each method. There are 3 main methods for you to choose from when importing products to the new Shopify store:
1. Upload Manually
In this method, merchants upload the products one by one to Shopify. The step is quite easy and does not require high technical expertise.
However, it is only suitable for stores with a limited number of products. We would not recommend this method if you are selling a wide range of products with multiple variants since the time and effort needed are considerable. And that does not include filling in the details of each item so that it matches both your and Shopify's requirements.
For a detailed tutorial, refer to our blog on How to add products to Shopify.
2. Use Shopify CSV files
Compared to the manual method, importing your products with the Shopify files is a more time-saving alternative. The reason why we say this is that it supports moving your product data between Shopify and another platform in bulk.
It does not require highly advanced technical knowledge yet focuses more on your meticulousness. The steps from configuring the Shopify import orders CSV file format to matching the product variants might take days to finish. If things go wrong after uploading the file, you must modify all products repeatedly.
3. Go with a migration expert
Outsourcing the work and obtaining expert support would be a much better way for Shopify import products. A reliable, well-established service like LitExtension will streamline the procedure and eliminate possible technical issues.

With 10+ years of working in the industry, our Shopify migration team is guaranteed to have in-depth knowledge of the features of Shopify. This means we can minimize the potential for data inconsistencies and maximize efficiency.
Based on our guide and your specific requirements, identify the most efficient strategy for your store. At the end of the day, what we’re looking for is the one that fits in.
Shopify CSV Import Made Easy!
Let our experts handle the migration while you focus on growing your business.
CONTACT US NOW
How to Import Products to Shopify Manually
Manual product upload means you'll need to go through the same set of steps for EVERY single product you want to sell. That said, if you've only got a small catalog and want full control over how each product looks and reads, this method gets the job done without needing any tech skills:
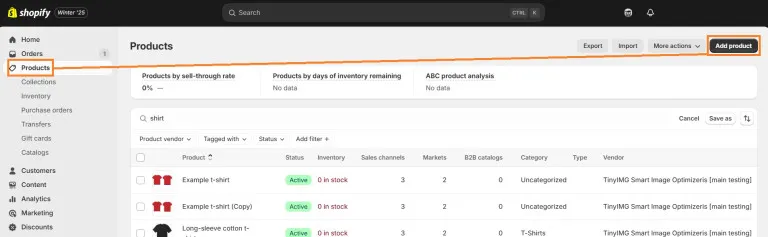
Step 1. Open the product editor
First, log into your Shopify admin. From the left-hand sidebar, click “Products” and then hit the “Add product” button. This step takes you to a blank canvas where you'll start crafting your product listing.
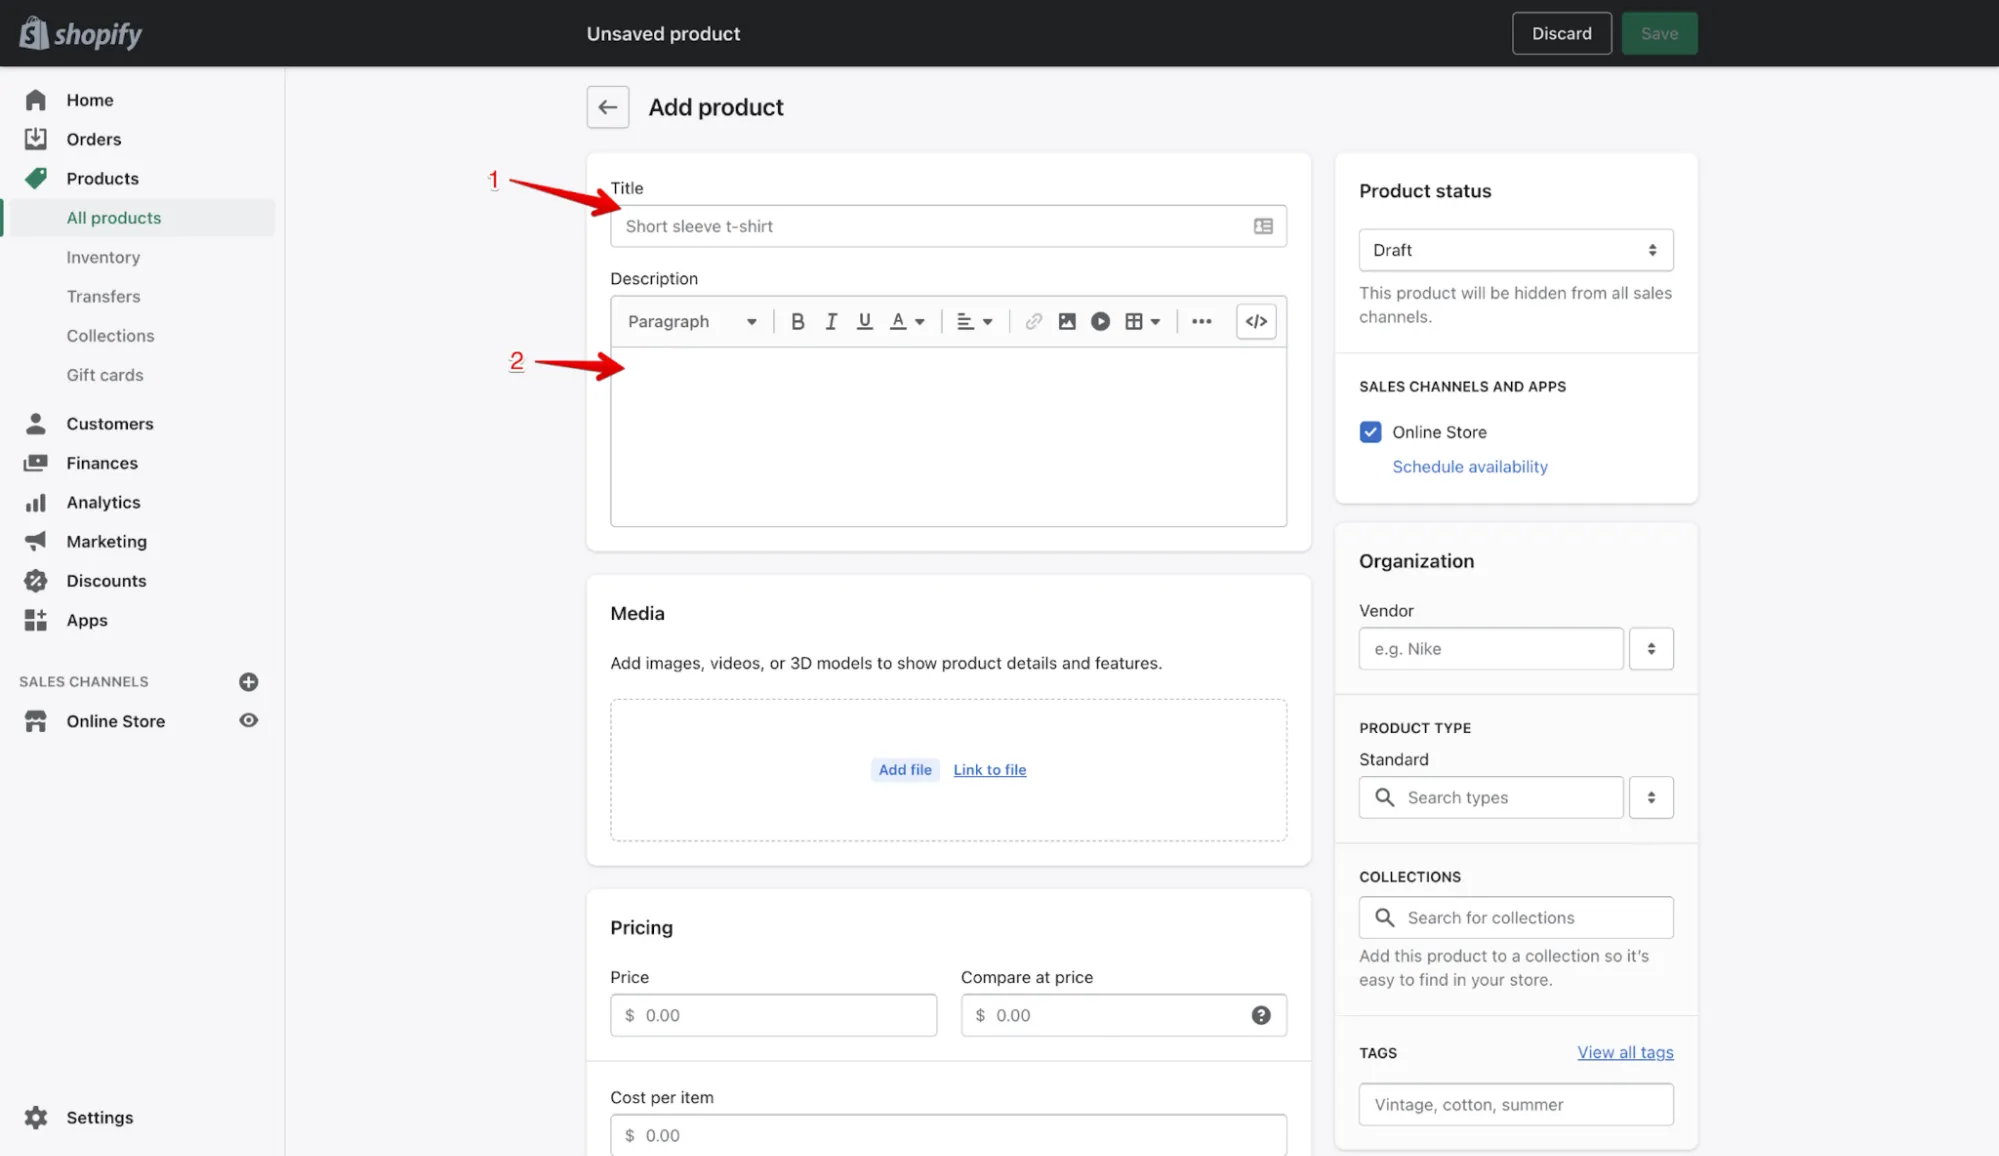
Step 2. Fill in the title and description
Now, enter a clear product title, then use the description box to highlight key features, benefits, and any extra details your customers should know. Don't forget to upload one or more high-quality images; your visuals are just as important as your words when it comes to selling.
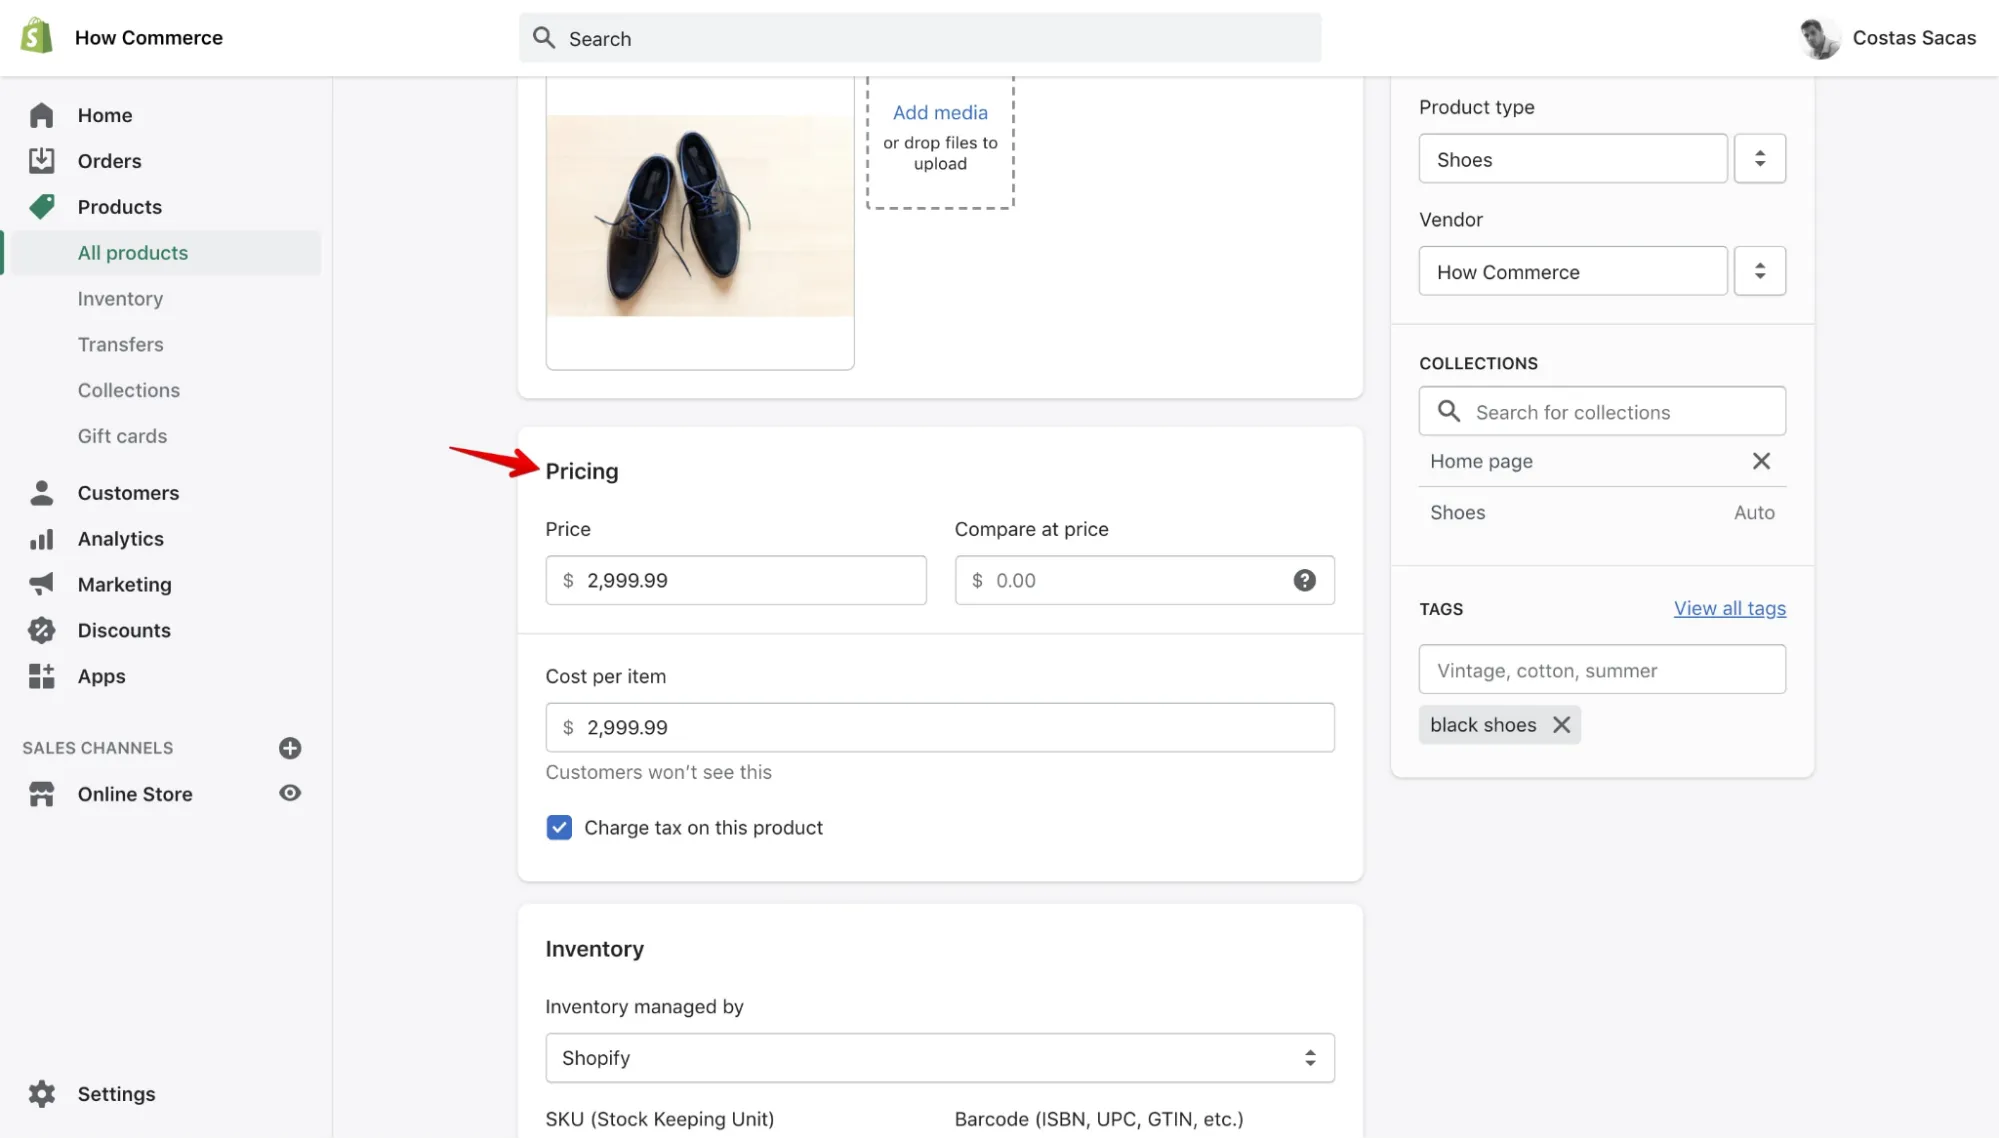
Step 3. Set up pricing, stock, and shipping info
Next, scroll down to the Pricing section and add how much you want to charge. If you track your profit margins, you can also enter your cost per item.
Under Inventory, assign an SKU and quantity so that Shopify knows how much you have in stock. Then, head to the Shipping section to enter your product's weight — this helps determine accurate shipping rates at checkout.
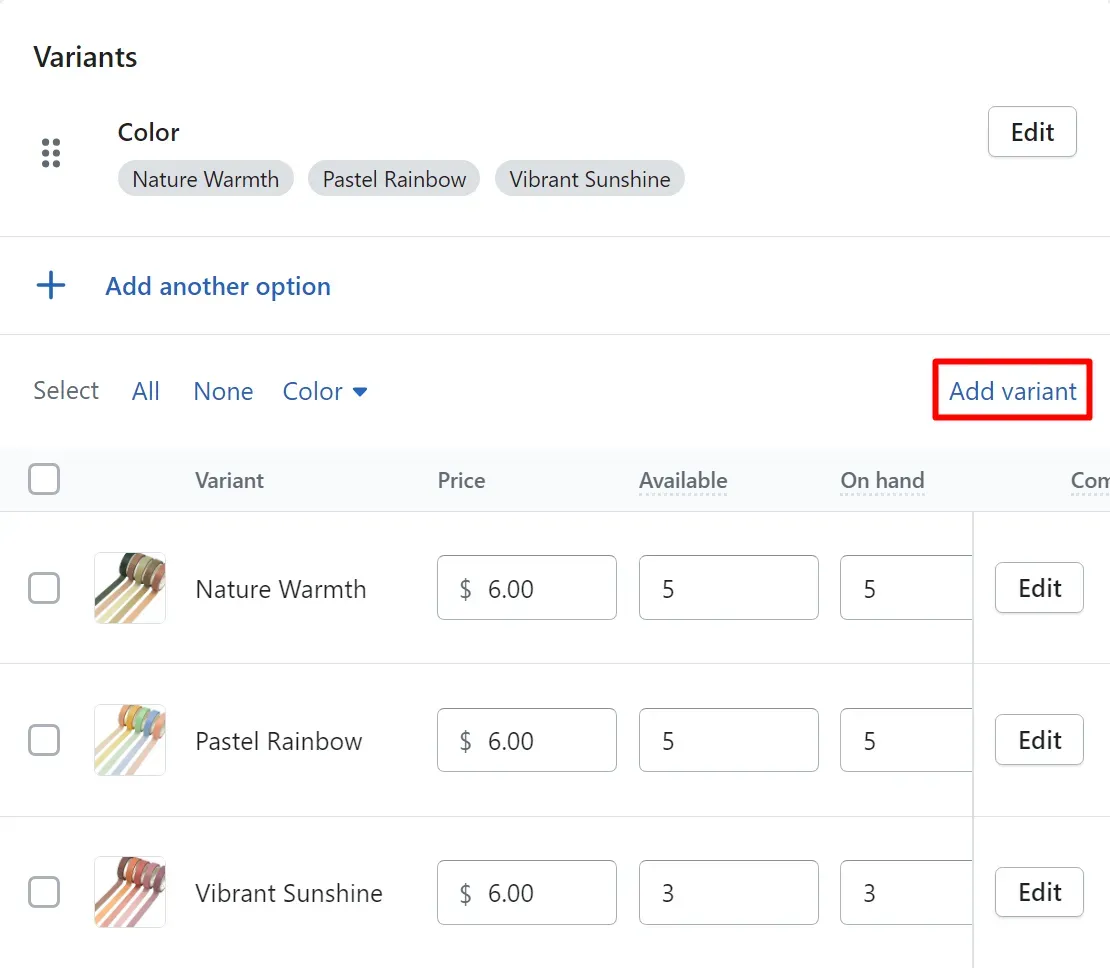
Step 4. Add product variants (optional)
Selling a T-shirt that comes in different sizes or colors? In the Variant section, click “Add variant,” then input the option names (like Size or Color) and their values (e.g., Small, Medium, Large). Shopify will automatically generate variants for you, and you can customize each one's price, image, and stock level separately.
Step 5. Choose visibility
Before wrapping up, decide if you want the product to go live now or keep it in Draft mode for later. Check the sales channels where you want it to appear and make sure everything looks right. Finally, click “Save” and get ready to repeat this process for your next product.
Want a quicker way to handle bulk uploads or a hands-off option? Stay tuned; we will cover that in the next Shopify CSV import methods!
How To Import Products to Shopify in Bulk with CSV File?
As mentioned previously, you can perform Shopify import products by manually customizing the CSV file for your own store. Even though the process is more time-consuming due to its complicated nature, it still cuts down costs for online merchants. Use our reliable process to import products into your Shopify store or watch the video below for step-by-step instructions:
Step #1. Download a sample CSV file
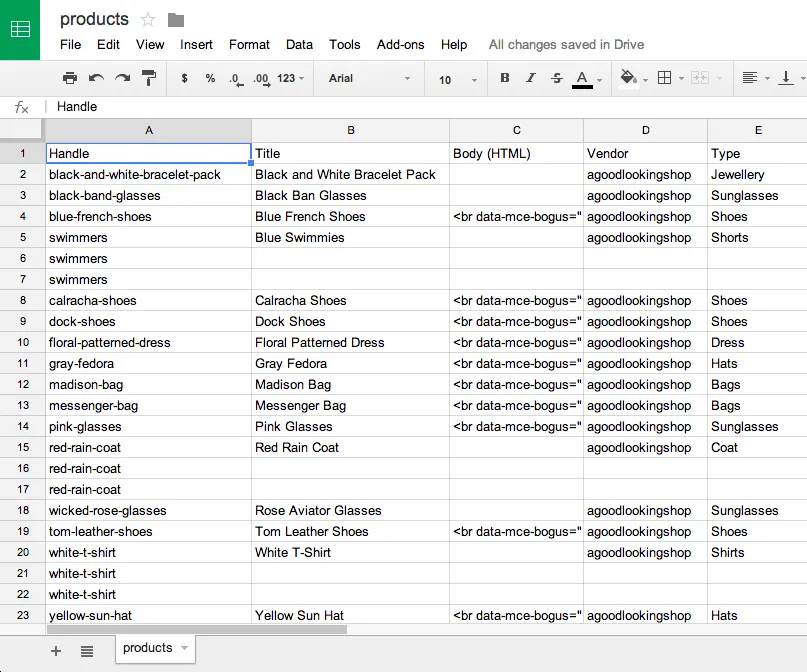
To start with, download a Shopify import products CSV file template and make changes to the file. The sample data set includes an example field with its related information. Before generating your import file, remember to delete the sample so it doesn’t mix up with your actual items.
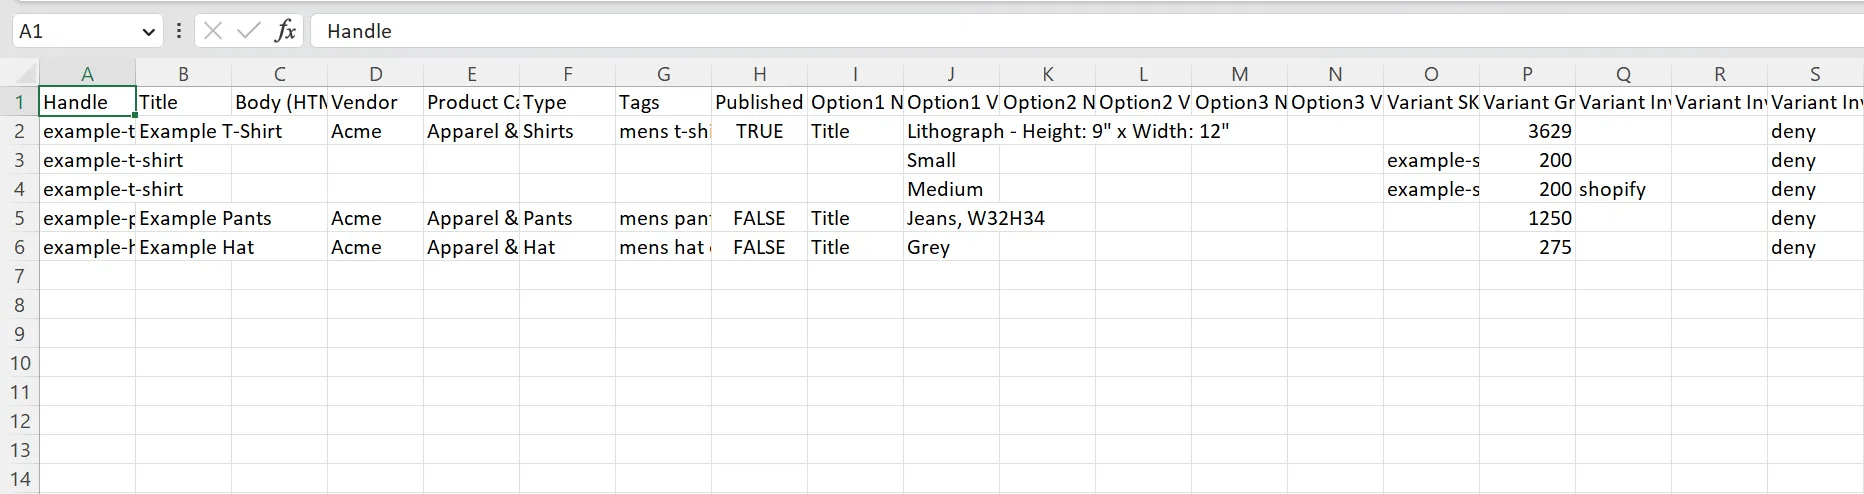
For instance, with the product import Shopify file, the sample data set includes a product and its variants. Meanwhile, the file format for Shopify import customers contains two default customer profiles with their email addresses and phone numbers.
Step #2. Format your CSV file
Make sure your Shopify import products file satisfies the following conditions so it may be used correctly:
- The column headings for each field in your products import file must be filled on the first line.
- When exporting a Shopify file from Excel, double-check the options to ensure that commas will be used to separate the data.
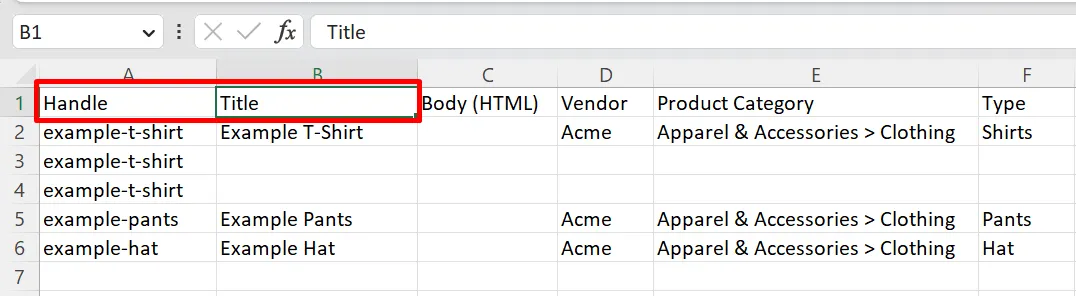
When uploading your products to the Shopify import file, the two columns “Title” and “Handle” are necessary.
The “Email” column must be included in the Customers file, but the value may be left blank. If this column is absent, your CSV file import will fail. Moreover, CSV file headers are case-sensitive, so be careful when you enter the value.
Step #3. Include the required columns
Next up, specify your data sets by adding value to the columns. Below is a full list of required columns that you must include in your Shopify import file for products, customers, Shopify order history, etc. Otherwise, you might run into trouble while performing Shopify CSV import.
Import type | Required columns |
Products |
|
Customers & Orders |
|
For more details, you can check out Shopify’s guidelines on how to import products and customers to Shopify.
Step #4. Upload CSV file to Shopify
Once you have finished creating or editing the Shopify import products file, let’s upload it to the system. However, please make sure that your file fulfills the following requirements:
- Customer CSV files must be less than 1 MB in size to be imported.
- The size limit for your product CSV is 15 MB.
From your Shopify dashboard, navigate to the Products or Customers page, where you can quickly notice the “Import” button right at the top. Click on “Add file” and choose the CSV file you want to import.
For Shopify update purposes, you can select the overwriting options. Then click on “Update & Continue”.
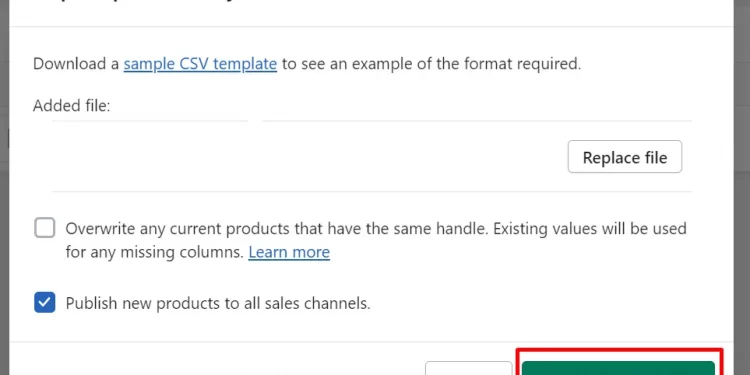
Review your file before hitting the “Import” button!
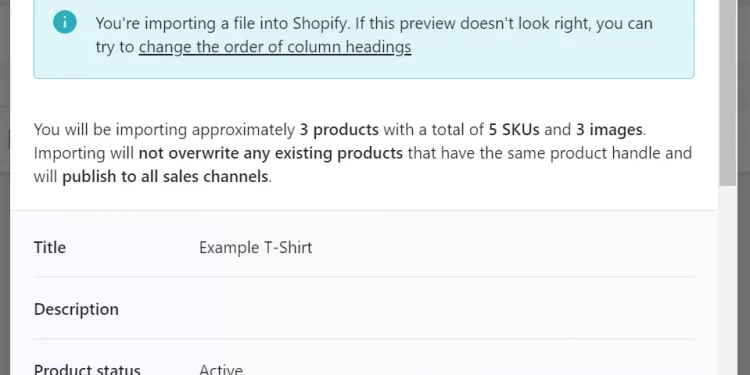
And that's how you can manually import your products to Shopify via CSV file.
Related post: How to Easily Shopify Import Orders and Customers.
How To Shopify CSV Import With LitExtension In 4 Steps?
With the manual method, when importing products to Shopify, you will have to deal with a wide range of challenges to get to the final result. In short, it is much more time-consuming and prone to human errors.
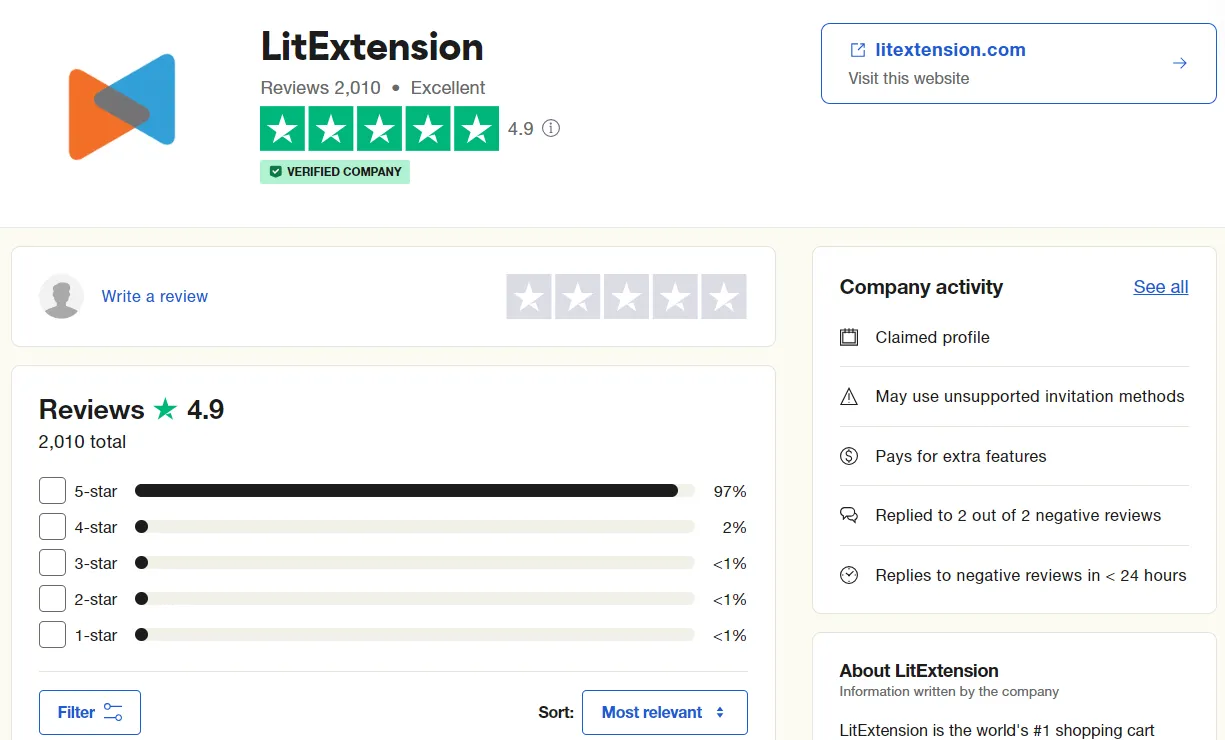
A great way to avoid exhaustion from repeatedly modifying the Shopify import products file is to go with a reputable Shopify product upload service. While there are plenty of options out there (such as Matrixify, Plytix, or Firebear Studio), LitExtension stands out as one of the most trusted and dependable solutions. Over the years, we have earned a 4.9/5 for the customer satisfaction score on Trustpilot. Also, we have been listed as a reliable Shopify partner for migration services.
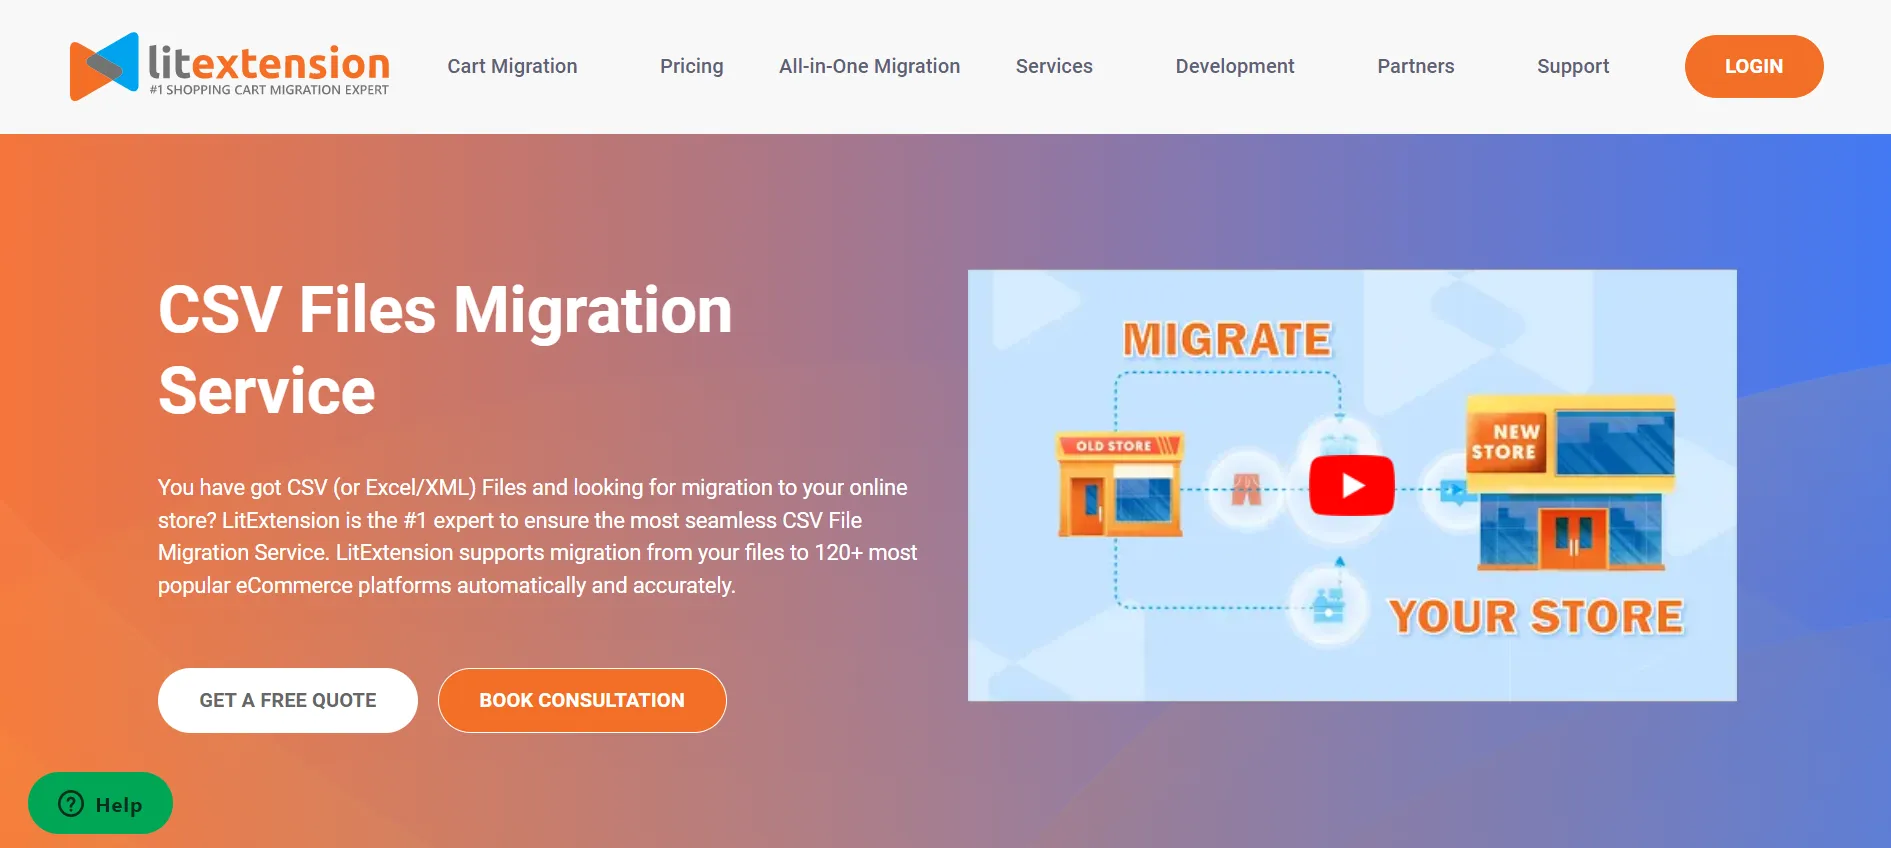
Upon choosing our CSV Files Migration service, we will assign a Personal Assistant to take care of your Shopify import products. They are responsible for keeping track of the whole project as well as answering any of your questions within 12 hours. What’s more, you also gain free access to all the premium options such as SEO URLs Migration, Customer Password Migration, etc.
Before getting started, here’s a quick recap of all the steps needed:
- Step 1: Send your file to our experts
- Step 2: Customize your CSV file
- Step 3: Run Full Migration
- Step 4: Start your new journey
Not gonna let you wait any longer, it’s time!
Step #1. Send your file to our experts
Initially, our experts will need to collect your CSV file and understand the specific requirements of the task. To do so, LitExtension will schedule a 1-1 consultation session to ensure we fully comprehend your migration project. It is important that we’re on the same wavelength since the final result is directly related to the effectiveness of teamwork.
Upload your CSV file to Google Drive or Dropbox and share access with LitExtension. We will then collect your file and move to the next step of the Shopify import products.
Step #2. Customize your CSV file
With the gathered CSV file, now leave it to the LitExtension experts. No need to format the file; we’ll do it for you. Our technical specialists will modify all files to meet your specific needs, conduct a demo, and then double-check the demo results to ensure a smooth Shopify import products via CSV process.
Step #3. Run Full Shopify CSV import
Once you approve the demo results, our professionals will start to import products from any website to Shopify while keeping a tight eye on everything that goes on. LitExtension Smart Controller will identify any occurred problems, and our team will promptly address them.
Rest assured that your migration project is in good hands. You can solely focus on thriving your business, and we will notify you when the migration is completed.
Step #4. Start selling on Shopify
Before we give over your data, our Quality Assurance Executive will double-check the final migration results to guarantee they meet your standards.
Furthermore, since your existing store will continue to function normally throughout the Shopify import products with the CSV file, there’s a higher chance that there will be new data updated or modified. To deal with this, LitExtension also offers post-migration activities, including:
- Recent Data Migration: migrate all newly created data during the CSV import process to Shopify seamlessly.
- Re-migration: import the CSV file to Shopify again in case there are errors happening or you’re not satisfied with the result.
- Smart Update: update only the new data appearing after the last CSV import.
For customers utilizing our CSV Files Migration Service, these are entirely free of charge in the first 3 months.
Your Shopify CSV Import, Done Right!
With LitExtension’s experts by your side, you can migrate safely and keep your business running flawlessly.
CONTACT US NOWTools to Import Products to Shopify
1. DSers Import Products to Shopify for Dropshipping

Dropshipping refers to a selling method without storing the inventory yourself. Dropshipping on Shopify is a growing business thanks to its ease of setting up. However, dropshipping store owners cannot perform the Shopify import products process via CSV files.
You cannot export data to CSV files for the following reasons:
- Product links will be broken
- Orders are not sent to the Oberlo app
- Prices are not updated
- The inventory is out of sync
Let’s take DSers, a drop shipping app, as an example. This is exclusively built for Shopify merchants, allowing them to process hundreds of orders within a few minutes. Not to mention their wide range of cost-effective suppliers and products from across the globe.
2. Shopify Transporter App
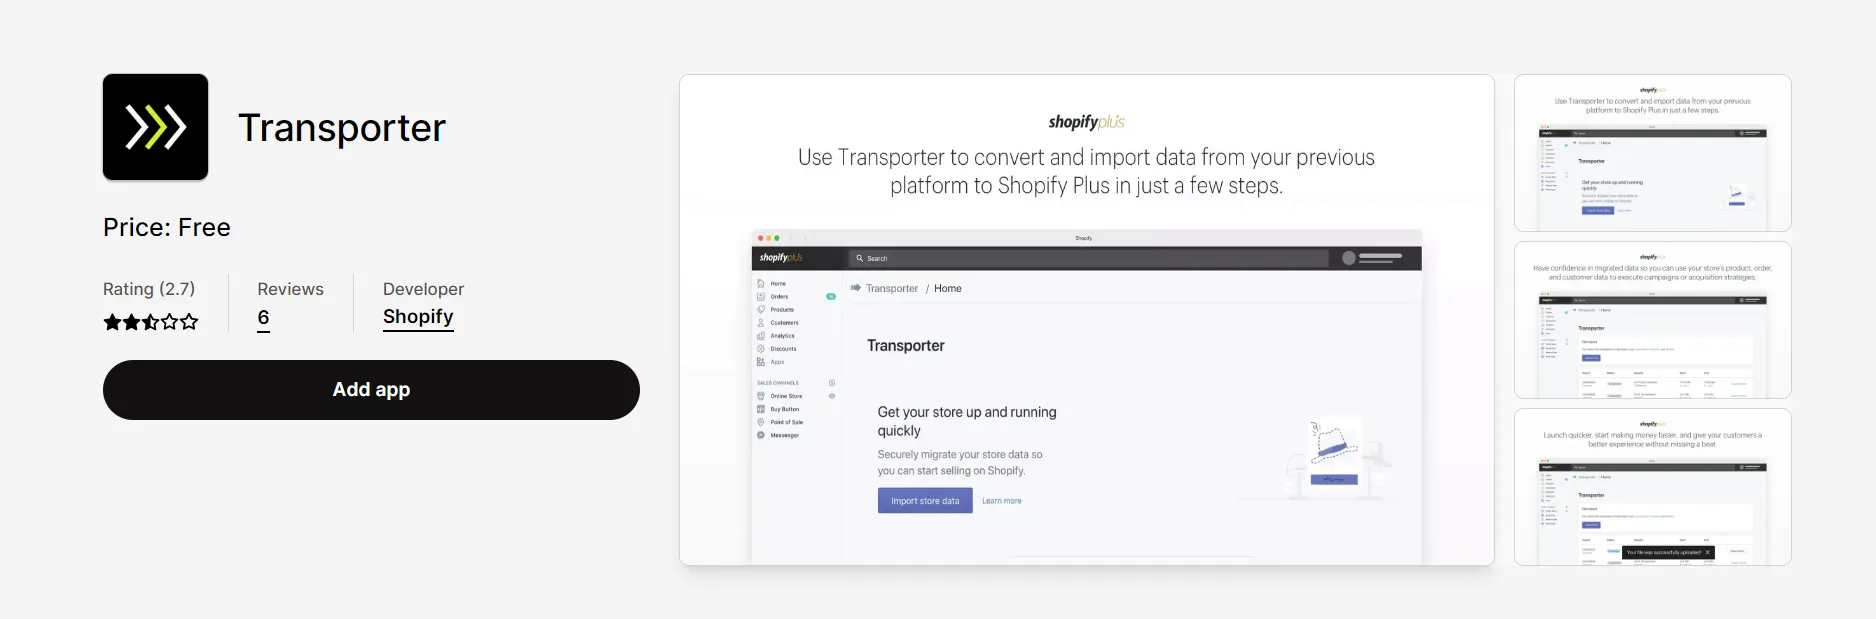
For those large-size businesses with Shopify Plus plan, the Transporter app is designed to help fasten up the migration process.
To start with, the Transporter command line tool can be utilized to convert data from your previous platforms into a single CSV file. Don’t worry because you can easily adjust the source files at any time you want. What we even love more about this application is that this command-line tool can be freely downloaded and installed from github.com/Shopify/shopify_transporter.
After that, the app will upload the exported Shopify products CSV files to your current Shopify store. With a few simple clicks, you can import everything from products, and customers to orders.
3. Store Importer app
Important Note: Shopify has stopped providing support for the Shopify Importer App. Please refer to other methods to import products to Shopify.
Store Importer app is a free app that Shopify offers by default. You can use this app to migrate from a Shopify store to another one, or from another platform to Shopify. However, this app only supports importing certain data including products, customers, and inventory.
If you choose Store Importer app to carry out Shopify import products, you should pay attention to these things:
- You still need to export data into CSV files and edit these files to match the requirements of the Shopify CSV file format. However, editing is complicated and you must have enough tech skills to do this.
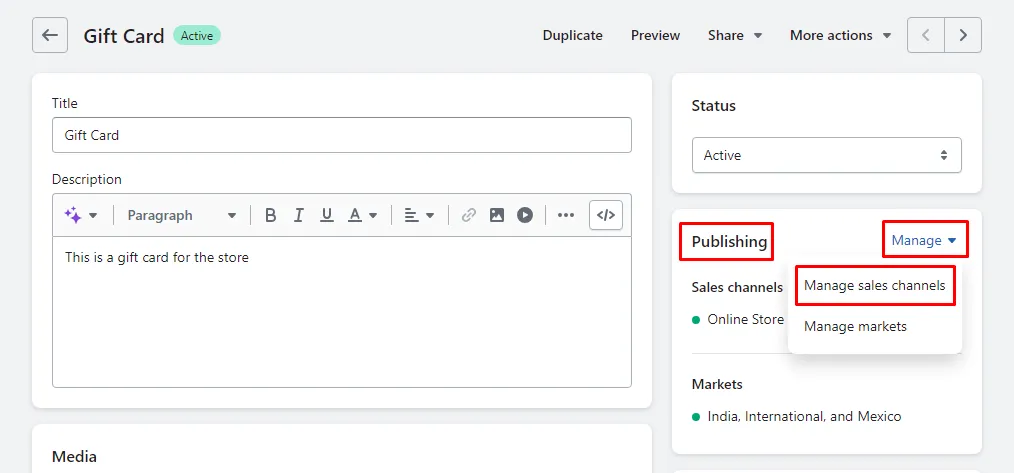
- Import Store cannot import all of your product data. You have to create gift card products manually. Some of your products did not import, so you must add them manually. Another case is that products are imported successfully but aren’t available on your Shopify store. In this case, let’s make products available on your sales channels.
Here come the steps to import your products to the Shopify store by using the Import Store app:
- Export product data into CSV files and ensure the data is in the correct CSV format. (Same as you do manually).
- From the Shopify Admin, go to Apps > Import store.
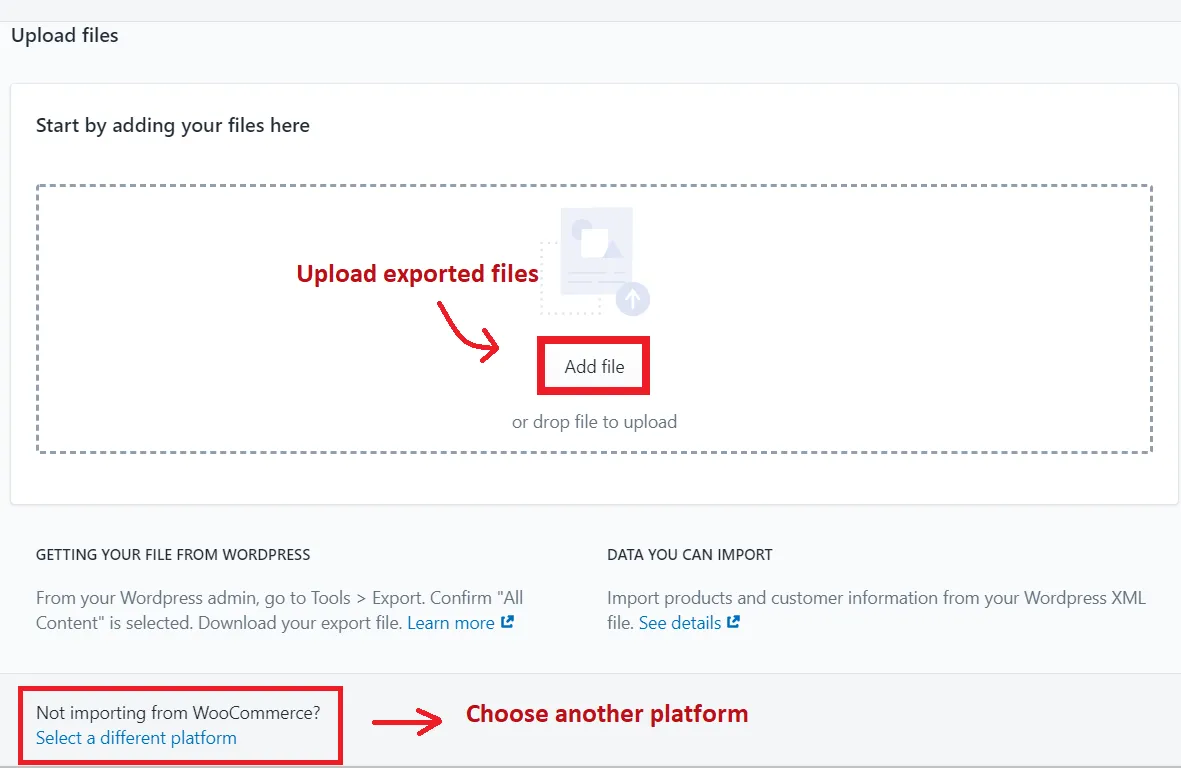
- In the Upload files section, click “Add file.” When you migrate from a certain platform to Shopify, the Import store app chooses a platform automatically for you. Thus, if this platform is different from your one, you can scroll down and then click Select a different platform.
- Choose your exported files > Continue import > Import.
Common Errors with Shopify CSV Import and How to Solve Them
Quick Shopify CSV import can be a huge time-saver, but only if the file is formatted correctly. Otherwise, the platform will flag it with an error message, and you won’t be able to complete the import until it’s resolved!
Fortunately, most of these issues are easy to fix once you know what to look for. Below are some of the most common CSV problems and how to troubleshoot them:
Issue | What It Means | How to Fix It |
Missing Required Fields | Essential columns like Title, Handle, or Variant Price are blank or removed. | Double-check your CSV to ensure all required fields are included and filled out. |
Incorrect Data Format | Values like prices, options, or inventory numbers don’t follow Shopify’s format. | Refer to Shopify’s CSV template to match the correct format for each field. |
Duplicate Handles | The Handle field (used to create product URLs) appears more than once. | Make sure each product has a unique handle, especially if you're importing new ones. |
Invalid Characters | Special characters or symbols can break the upload. | Avoid using unsupported characters in fields like handles or tags. |
Tips for Successful Shopify CSV Import
Since the manual guide for Shopify CSV import requires multiple steps to complete, there are a few tips that we think might be helpful for you:
- Make two copies of your CSV so that you may make changes to one while keeping the other as a backup.
- If there are any mistakes in your CSV file import, Shopify will replace the original products, and you will lose them forever.
- How about the CSV image? For your information, the images associated with your products are not duplicated when you save a CSV. Hence, we recommend storing an extra copy of the product images in another folder just in case the worst scenario happens.
- Ensure that your Shopify CSV import file has been accurately formatted. Otherwise, Shopify won’t be able to read CSV files and handle your data.
- You cannot import products via a CSV file manually when using a dropshipping app. The issues that might happen are missing links, outdated pricing, out-of-date stock, and orders not delivered to the supplier.
Why Do You Need Shopify Import Products?
In short, Shopify product import entails the action of incorporating or uploading products into a Shopify store. When you perform this task, you are transferring all product data and specifics from an external origin, such as a Shopify CSV import file or another eCommerce platform.
This enables you to efficiently fill your store with a variety of products without the need to input each item individually. The imported product data typically encompasses details such as product names, descriptions, prices, images, variations (like various sizes or colors), inventory quantities, and additional information.
A Shopify CSV file (comma-separated value) is a text file in which commas separate individual data points. Each line represents a new row in an Excel spreadsheet, and commas separate data sets within each row.
Using the CSV file, you can effortlessly import/export a vast number of items along with their details to your Shopify store. Also, in our analysis, this file type makes it easier to move between two platforms, either from or to Shopify.
Shopify CSV Import: FAQs
How do I add a collection to Shopify CSV?
To import a CSV file and create a collection in Shopify, there are several steps:
- Go to the Products > Collections section of your Shopify admin panel.
- Click the "Import" button.
- Select your CSV file.
- Map the CSV columns to the corresponding fields in Shopify.
- Review the import summary.
- Hit the "Import" button.
What is the size limit for CSV files in Shopify?
If you are importing Customers/Orders information, the CSV file size can’t exceed 1MB. At the same time, the size limit for your product CSV is 15 MB.
Why are my imported Products not showing up in Shopify?
Products imported from another platform may not appear in Shopify if there are import problems. These include inaccurate visibility settings (make sure they are set to "Visible"), erroneous categorization, or incompatible collection filters.
To avoid such a problem, these criteria should all be double-checked.
What is the fastest way to upload Products to Shopify?
From our point of view, manually uploading products to Shopify requires an enormous amount of time to set up your CSV file. Therefore, if you are scared of doing everything alone, LitExtension’s CSV File Migration Service ensures the most seamless import process.
Final Thoughts
In conclusion, Shopify CSV import is crucial whether you're looking to migrate from other platforms to Shopify or are just getting started with eCommerce. Depending on the database size, the procedure may require a lot of time, technical expertise, and data corruption.
Hope this Shopify Tutorial will help you import products to Shopify easier. For more information on how to add inventory to Shopify, check out our LitExtension Blog or join the Facebook Group Community now.
You may also like:
- How To Do Shopify Data Export Manually & Automatically
- How to Add Products to a Page on Shopify | 2024 Guideline
- How to Add Personalization Option on Shopify | 2024 Updated

