Are you a Shopify merchant struggling with Shopify export products? You’re not alone. Whether you need product data for migrations, backups, or sharing with a team, the export process can feel overwhelming at first. But no worries; our guide will walk you through the steps on how to export products from Shopify quickly and efficiently.
There are many methods for you to consider based on your unique needs and data complexity. For smaller databases, you may find the manual method for Shopify export products beneficial:
- Step 1: Open the Export products section;
- Step 2: Configure settings for your CSV file;
- Step 3: Decide the CSV type;
- Step 4: Hit the Export Products button.
How to Perform Shopify Export Product Manually
Shopify has a built-in feature to support you exporting products easily. However, we only recommend this method for stores with quick data download, including no customized product fields.
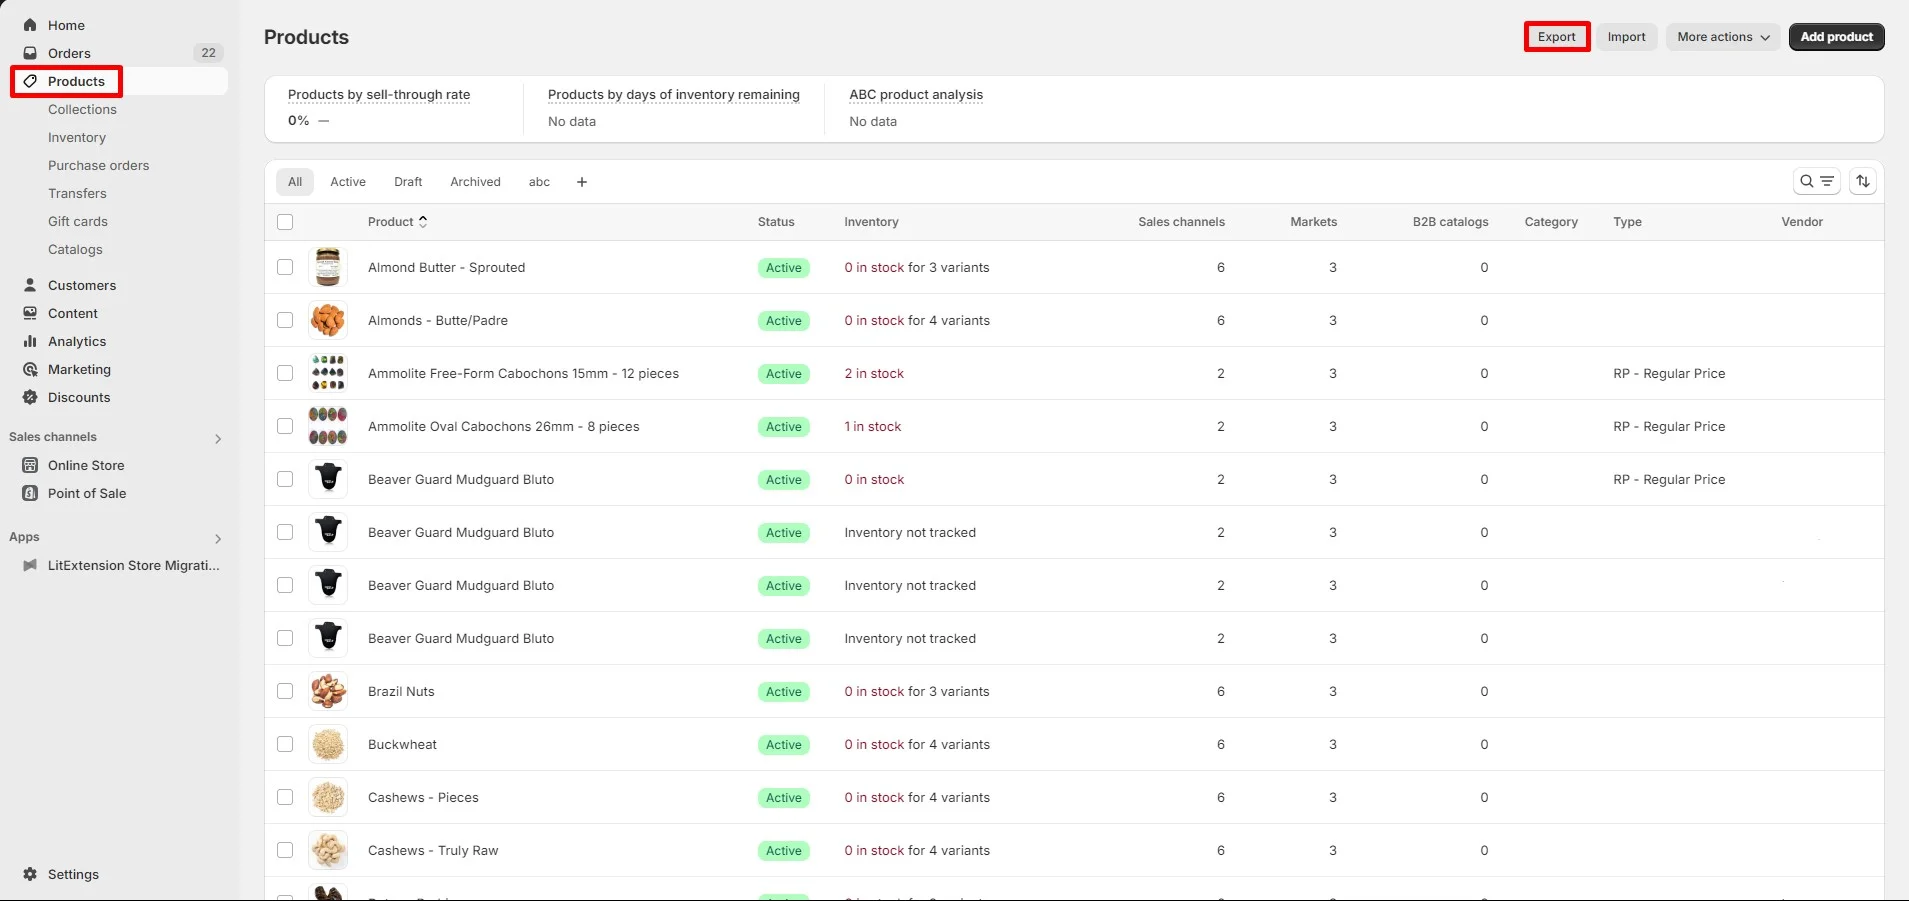
Step 1: Click Export Shopify products
First, from your Shopify admin dashboard, go to “Products” and choose “Export”.
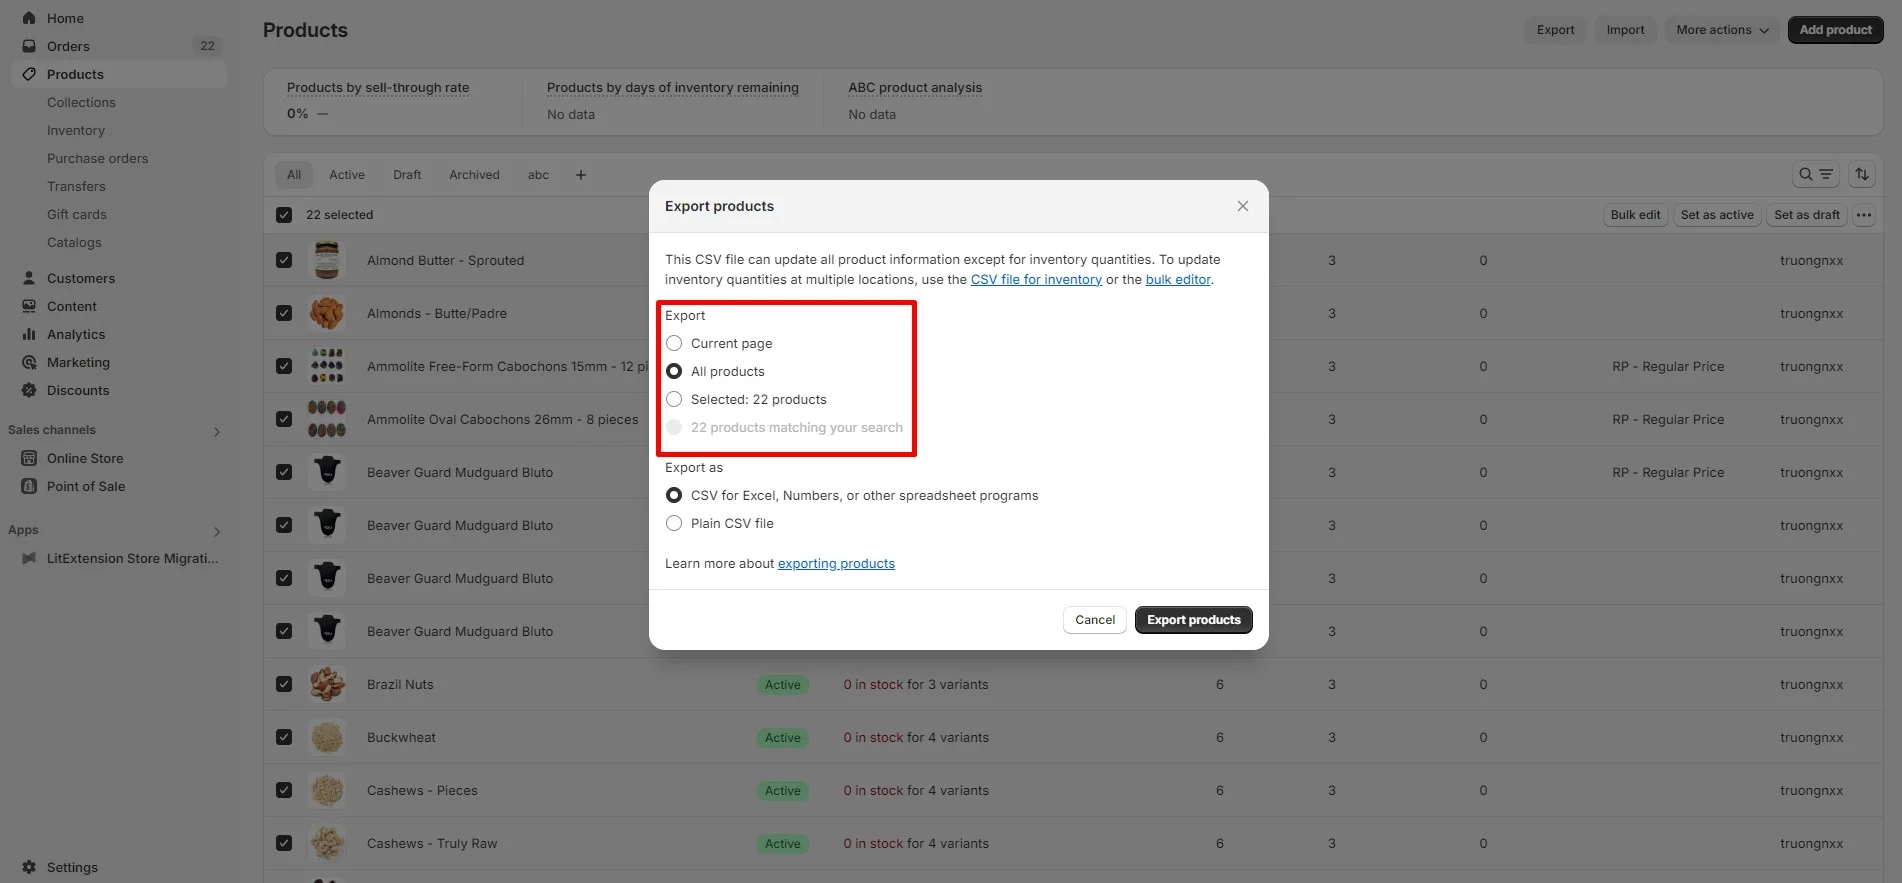
Step 2: Configure CSV file settings
In the pop-up dialogue, tick what you want to export from Shopify. It could be:
- The current product page you are on;
- All products in your inventory;
- Only selected products;
- Products that match your search.
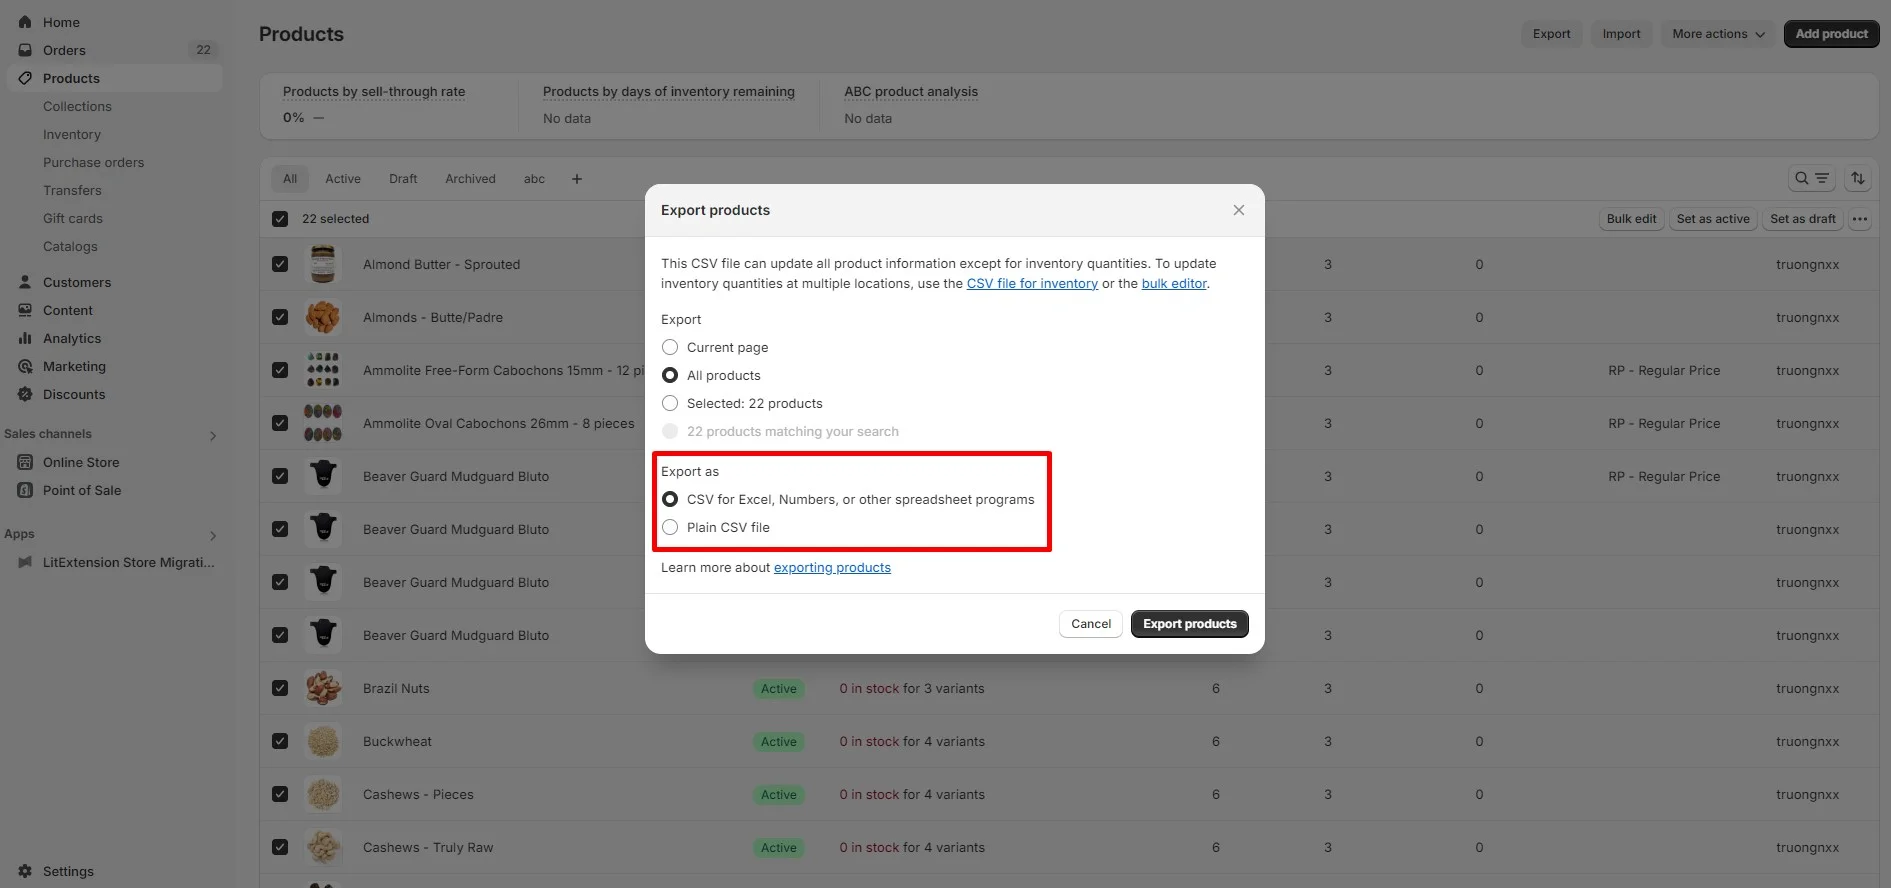
Step 3: Decide the CSV file format
From the same dialogue as above, there are 2 CSV exported file types for you to choose from:
- CSV file for Excel, Numbers, or another spreadsheet program: Ideal for editing your product CSV file using a spreadsheet program.
- Plain CSV file: Best suited for modifications using plain-text editors like Visual Studio Code or Sublime Text.
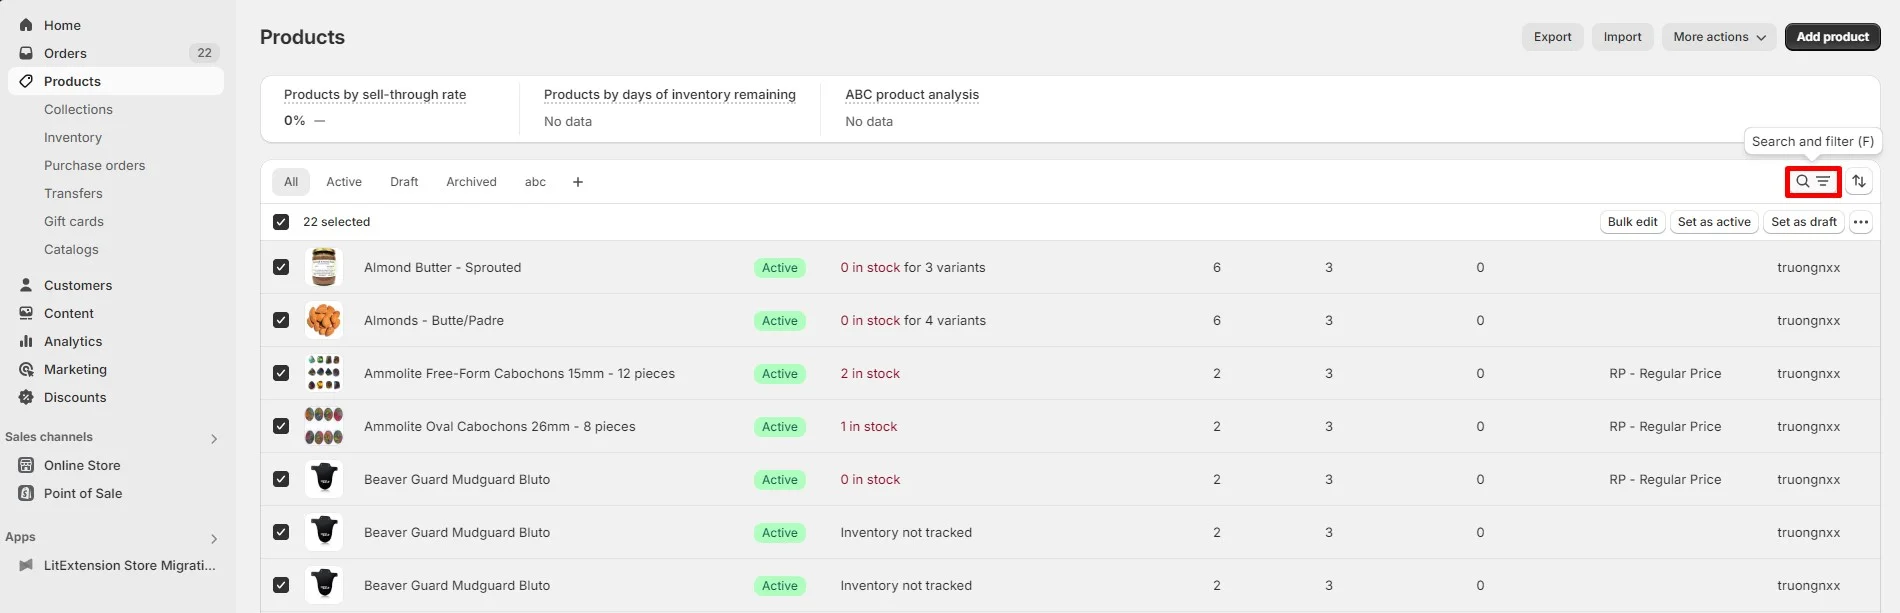
For those who want to include only specific products in the exported file, you can click “Search and Filter” before hitting “Export”. This will allow you to set a filter (Product vendor, status, tagged with, etc.) and tick next to the products you want to export on Shopify:
Step 4: Export Shopify products
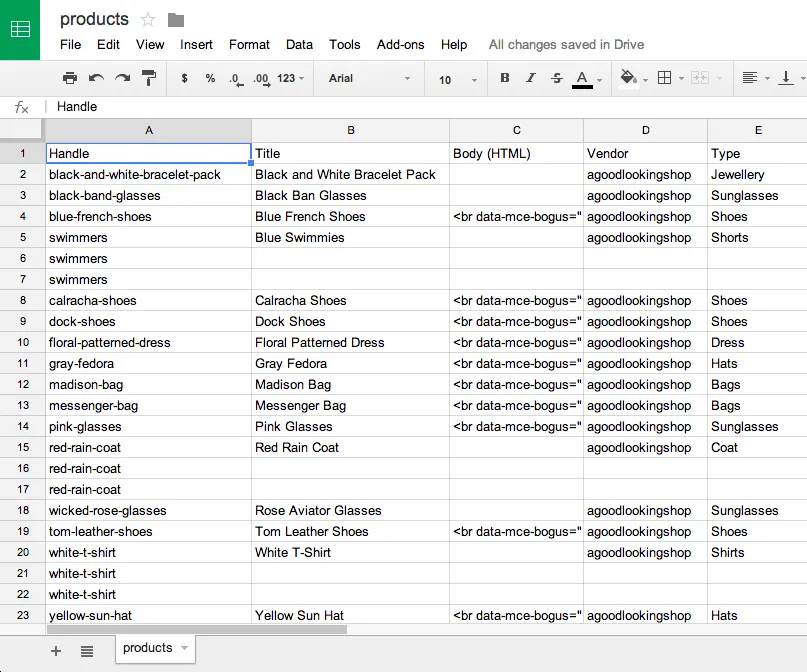
When everything is ready, hit the “Export products” button to finish. This will generate a CSV file that you can format using a text editor to meet your specific needs. As you format the file, keep the following considerations in mind:
- Column headers should be separated by commas (e.g., First Name, Last Name, Email, Company, Address1).
- Tags must be enclosed in quotation marks (e.g., “tag1,tag2,tag3”).
- Tags are not case-sensitive.
- Each record should be separated by a line break.
If the number of products you want to export is less than 50, you can download the CSV file directly on your browser. In other cases, the Shopify export products file will be emailed to you.
How to Export Shopify Products Using Apps
The manual Shopify export products method, as explained earlier, generates a file with only basic information. If you need more specific fields, you must add them manually, which may cause bugs and errors when you want to re-import the file.
In this case, you may want to consider working with third-party apps. There are many popular options for you to choose from, such as Matrixify, Exportier, and EZ Exporter, etc. Unfortunately, most apps struggle with handling large-scale exports or managing complex data structures like custom fields and metafields. This can be a real problem and frustration if you have a complicated database.
From our experience, Matrixify addresses these issues more effectively than others. Its ability to process large datasets without restrictive row limits makes it a standout choice for store owners managing significant inventories.
However, you should be aware that this app slows significantly for any export exceeding 30,000+ products. During testing, we also encountered occasional bugs like incomplete exports and data mismatches, which require manual fixes. This eventually led to longer processing times that may disrupt your workflow, especially if you are working under tight deadlines.
If the drawbacks mentioned above don’t bother you, follow our guide below to learn how to export products from Shopify with Matrixify:
Step 1: Create new Shopify export products file
To start with, you will have to install the Matrixify app in your Shopify store. Then, from the home screen of Matrixify, click the “New Export” button as follows:

Step 2: Configure your file
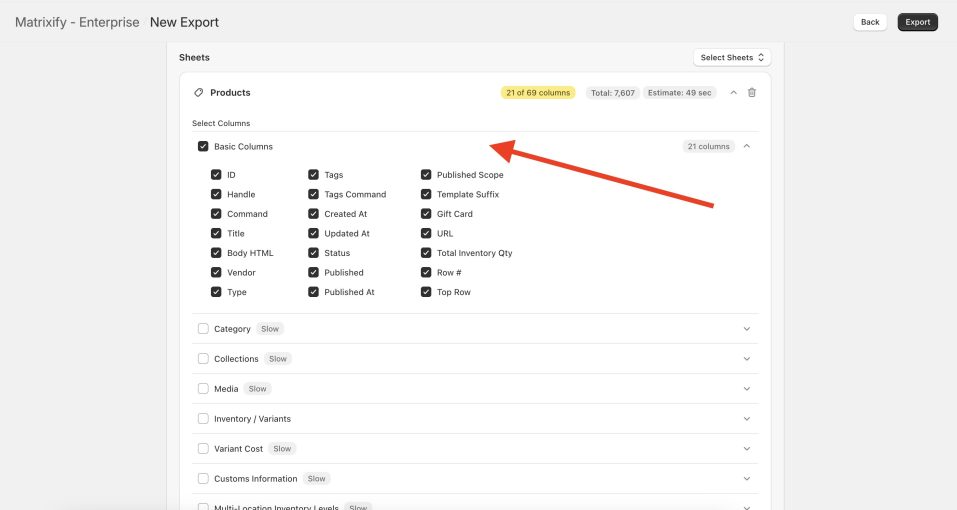
At this step, you will be taken to the Shopify export products file configuration page. Here, click the “Select Sheets” button and check the box for “Products”. There will be a list of checkboxes to specify the custom fields in the export:
In the first section – Basic Columns, you will be able to view the default columns included in the export. Feel free to check or uncheck any columns you would like to include in your file:
Scroll to the bottom of the page, where you will see the “Customise Columns” section. To rearrange the export field order, drag the columns using the six-dot icon next to each field. Also, you can adjust the custom fields by checking or unchecking them in the dropdown or clicking the “X” on a field tag to remove it.
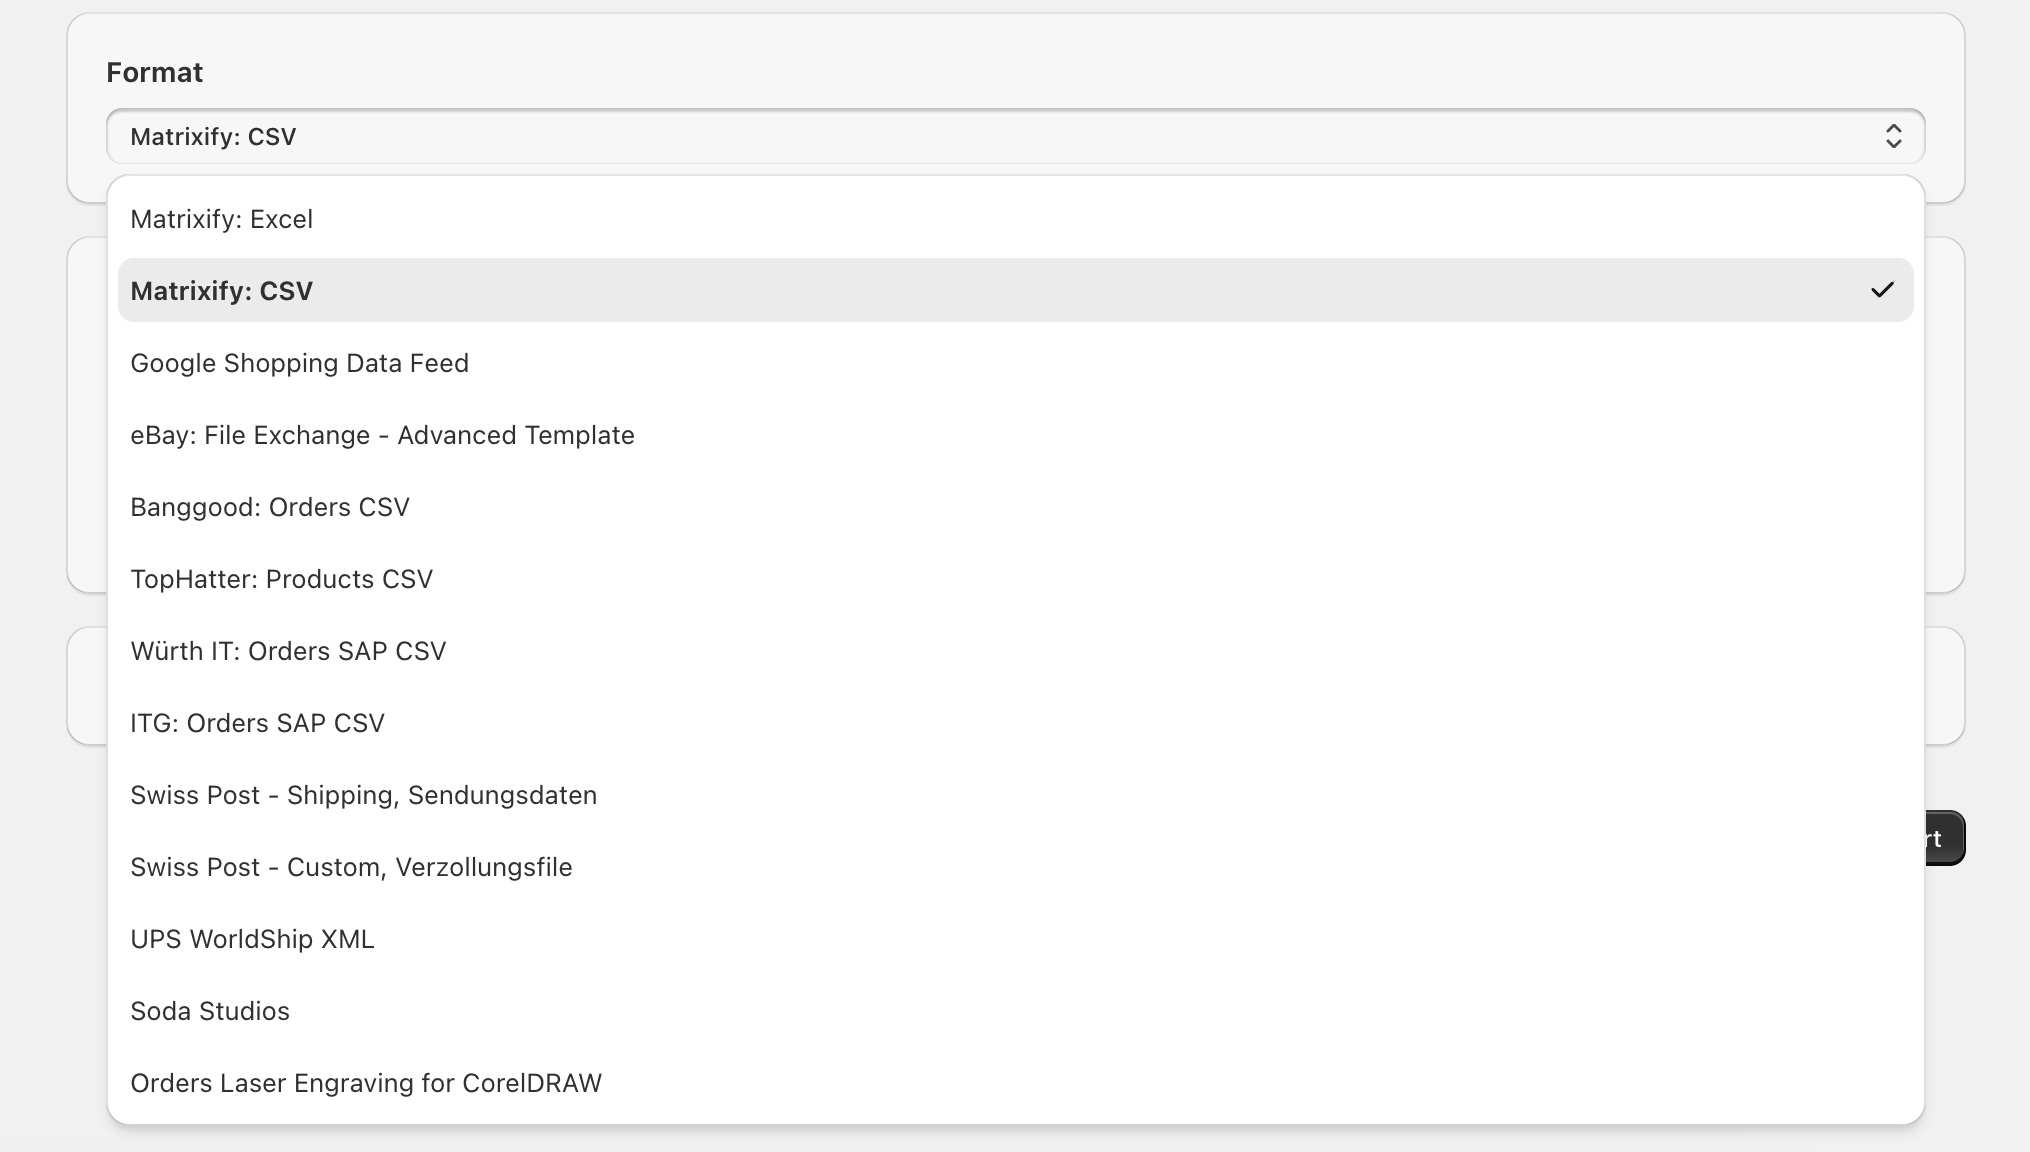
After choosing the data you want to export, scroll down to the “Options” and “Format” sections. In the Format section, select the file format for your export. Besides the CSV file, you can export your Shopify products in formats compatible with other platforms. Just simply pick the appropriate format from the dropdown menu.
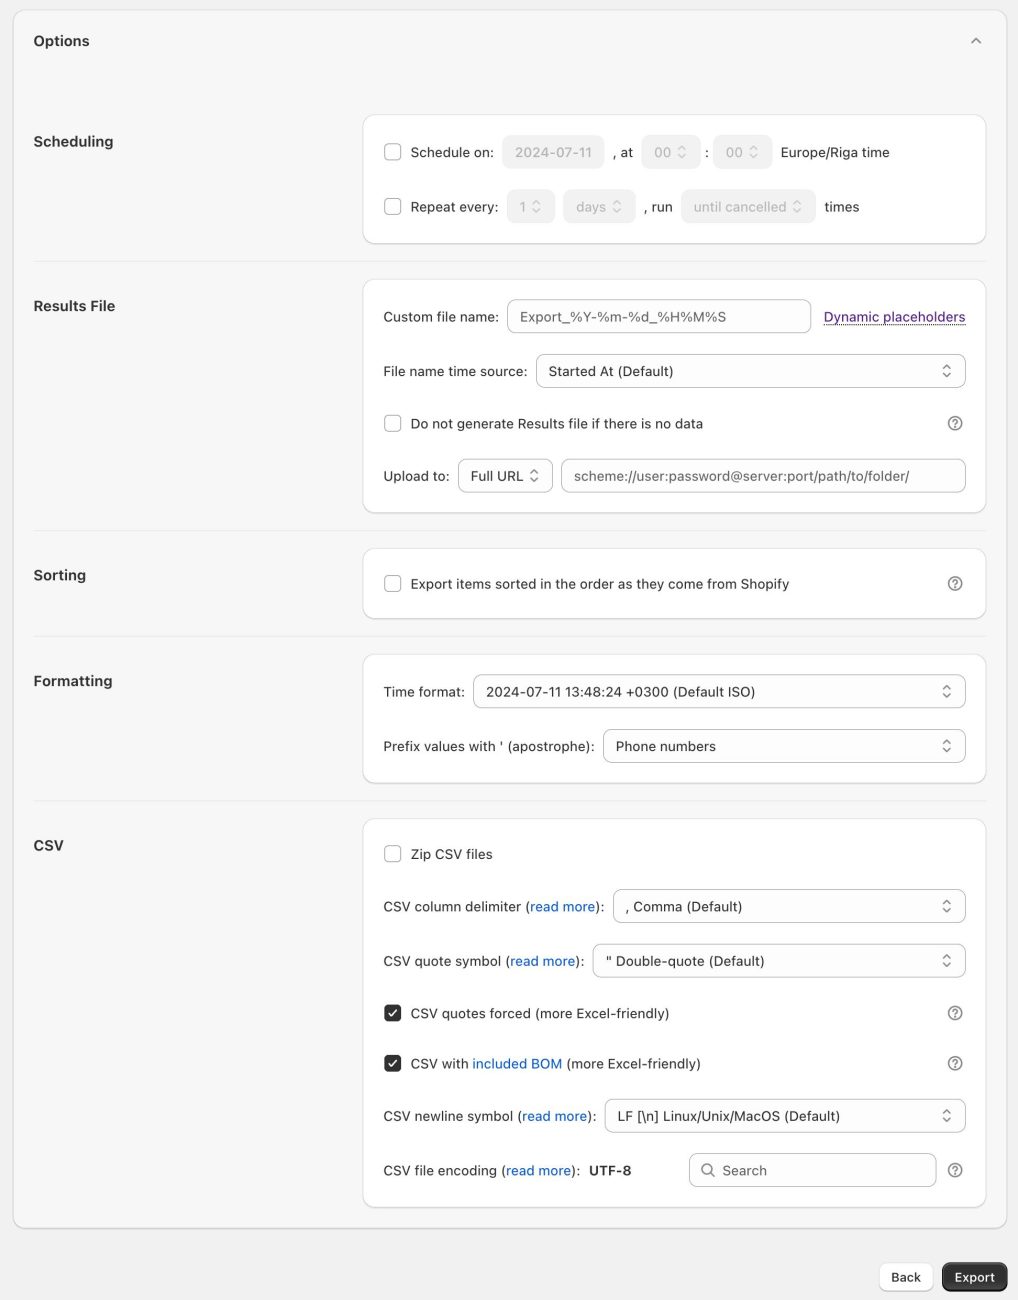
In the Options section, you can configure various settings for your Shopify export products file, such as:
- Scheduling: Set a specific time for the export to run.
- Results File: Assign a custom file name to ensure the exported file URL remains consistent.
- Sorting: Choose the option to “Export items sorted in the order as they come from Shopify” to maintain the sequence returned by the Shopify API.
- Formatting: Adjust settings like time format or prefix values.
- CSV Format Options: Configure additional export options specific to CSV files.
To initiate the export, press the “Export” button once all settings are configured.
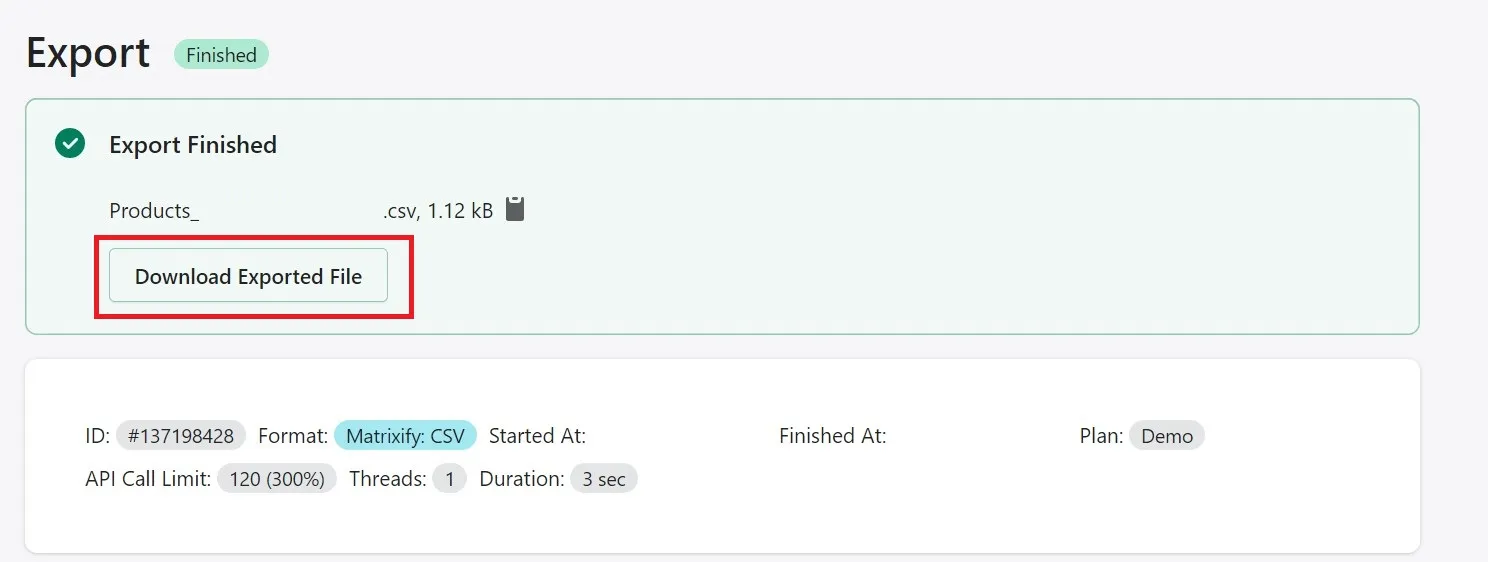
Step 3: Download the exported file
You can then track the export status, view the filters used, and check all options on the export page.
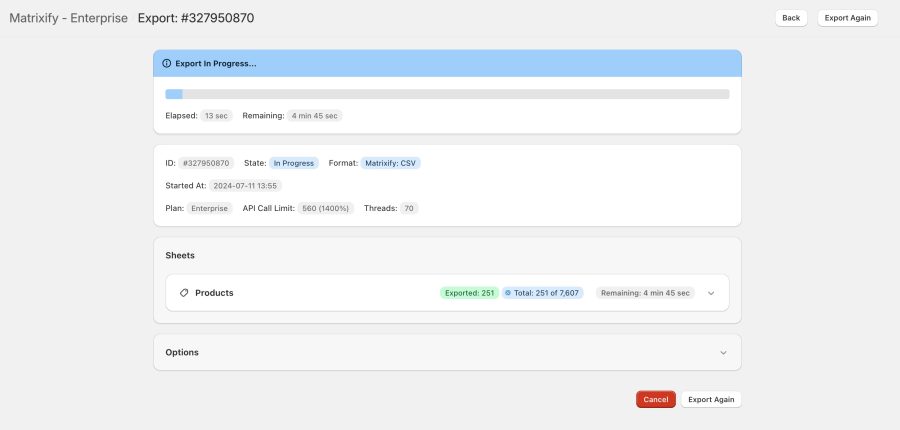
When the export finishes, you can download the file by selecting the “Download Exported File” button. Wait for a few minutes and you are good to go!
How to Export Shopify Products with LitExtension
For those of you who want to export over 30,000 products without sacrificing speed, our LitExtension Shopify Migration is the best option. With advanced migration service, we are committed to migrating a large number of products seamlessly and with utmost accuracy. In addition, we also support migrating other data types like passwords, blog posts, and taxes seamlessly.
We offer two solutions for Shopify export products and other data: the Automated Migration Tool and the All-in-One Migration Service. Let’s walk you through how to use each of them.
Automated Migration
Let’s start with our Automated Migration Tool – perfect for those who want full control and love a hands-on approach.
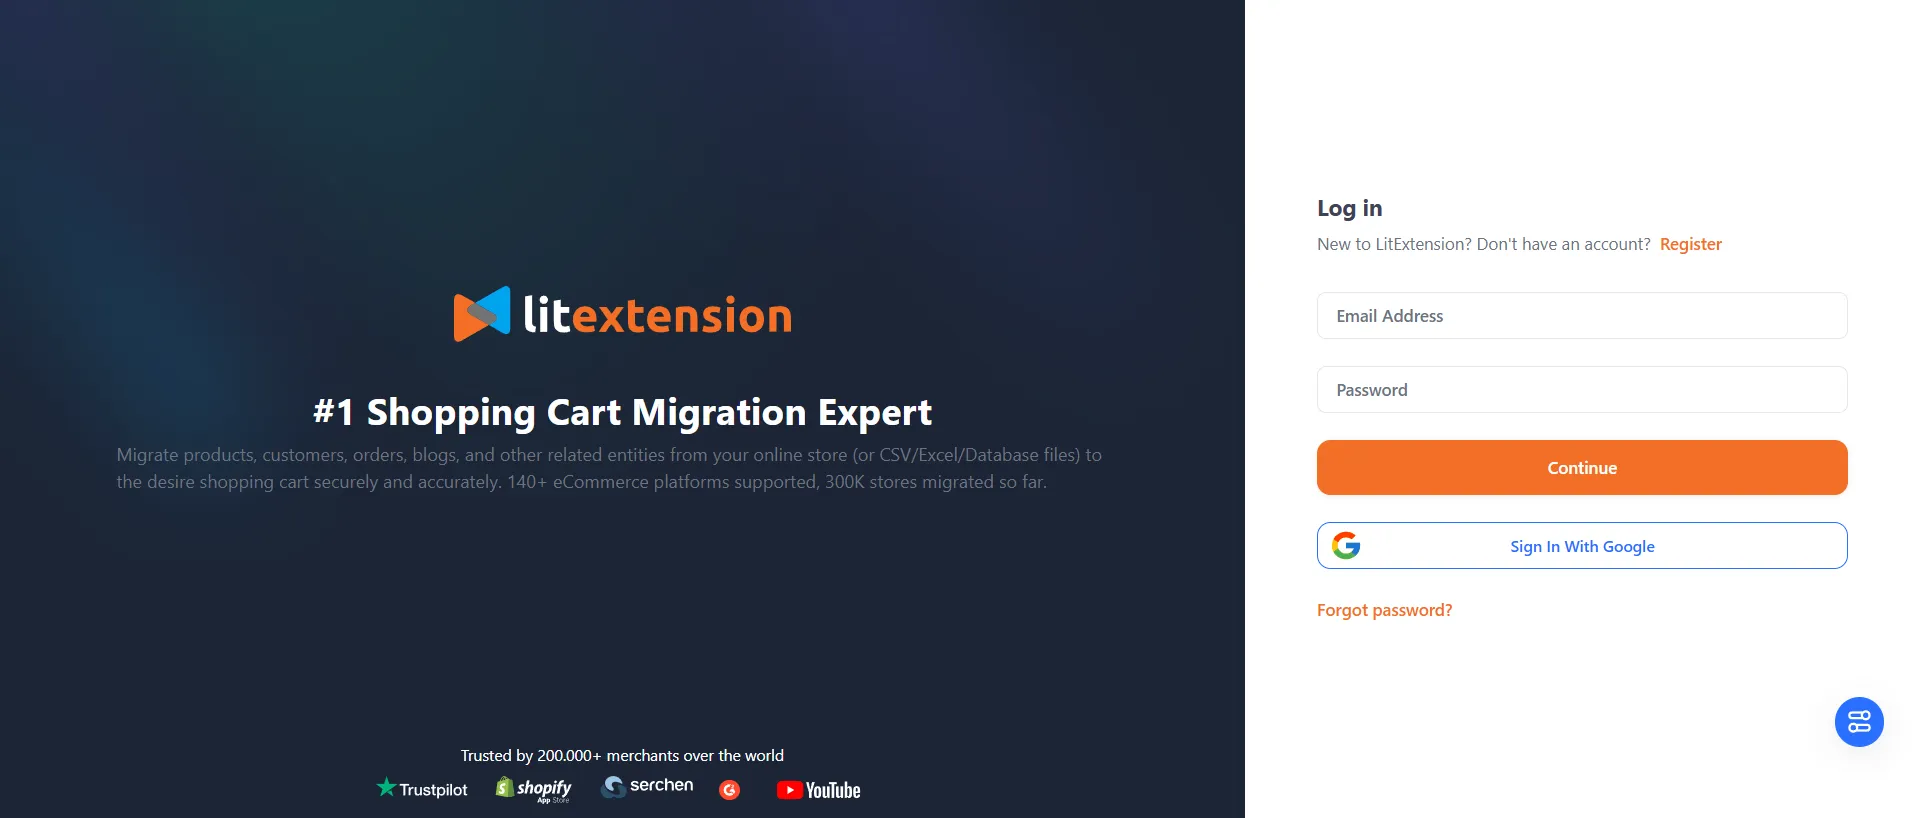
Before going into the steps, you need to create a LitExtension account first (in case you haven’t had one). All you have to do is enter your name, email, and password into the blanks. Or else, you can sign in with Google for quick registration.
Step 1: Set up the Source Cart and Target Cart
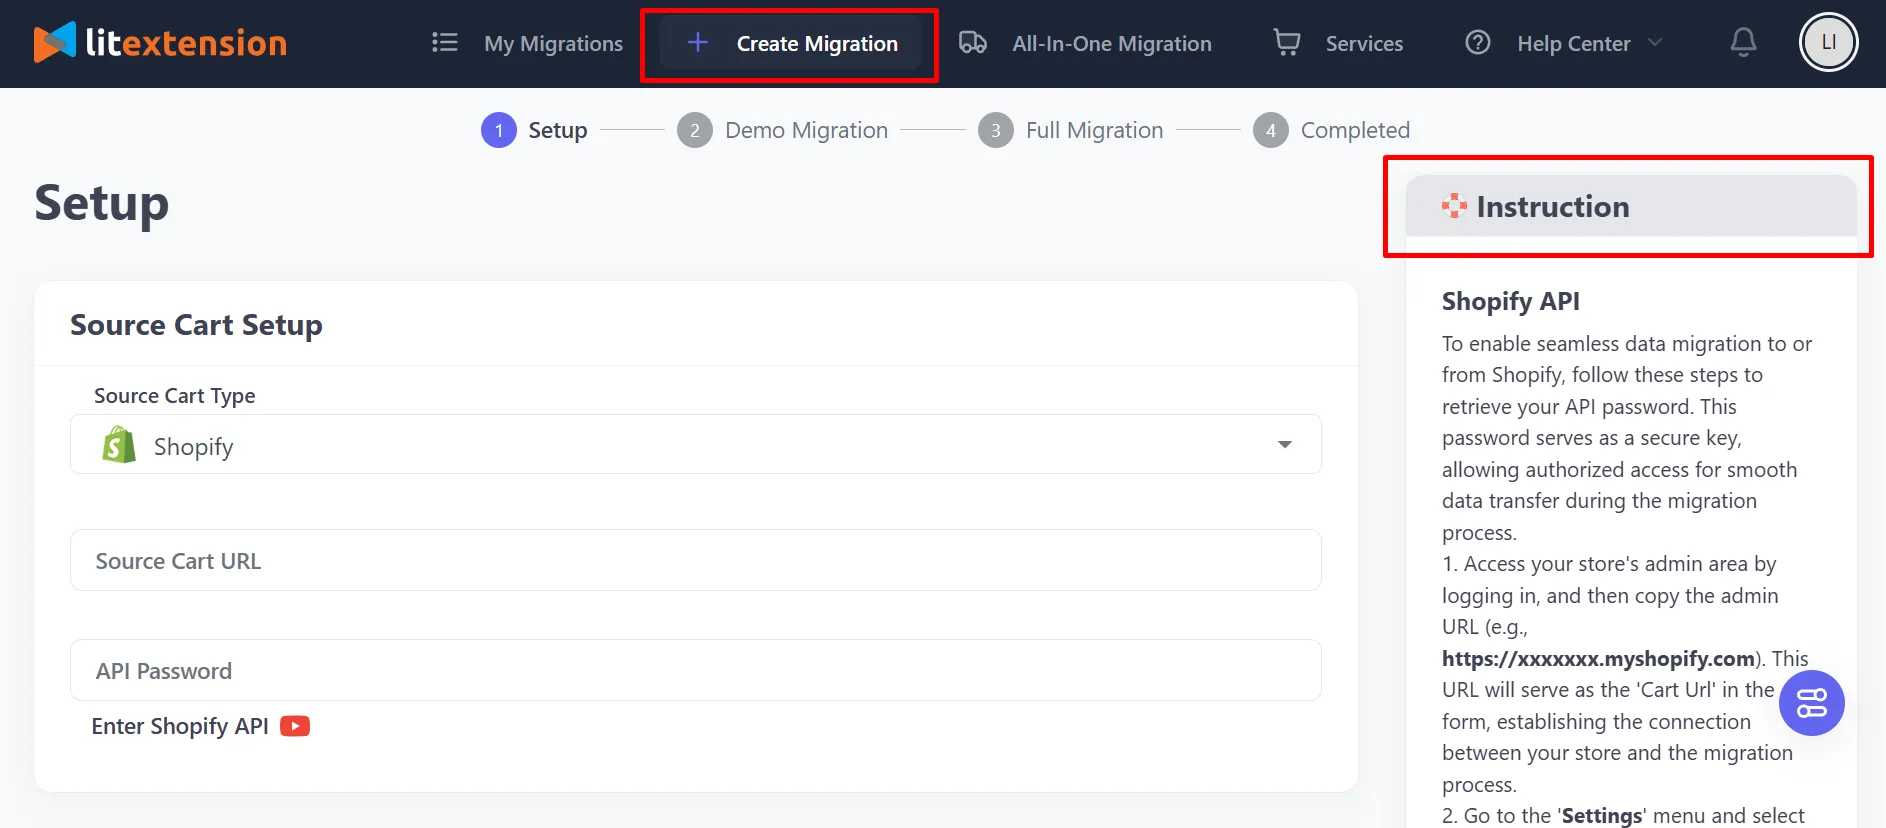
Now, you are standing at the LitExtension migration homepage. Continue by clicking on the “Create Migration” tab at the top of the screen.
Next, select Shopify as your Source Cart and enter the API keys to connect your store. You should follow the on-screen instructions or the video that LitExtension has provided to get your Shopify API key.
Moving on, it’s time to set up your Target Cart. Choose your target platform (e.g. WooCommerce), provide the URL, and connect it to LitExtension. As with the previous step, we will provide detailed on-screen instructions for you to follow!
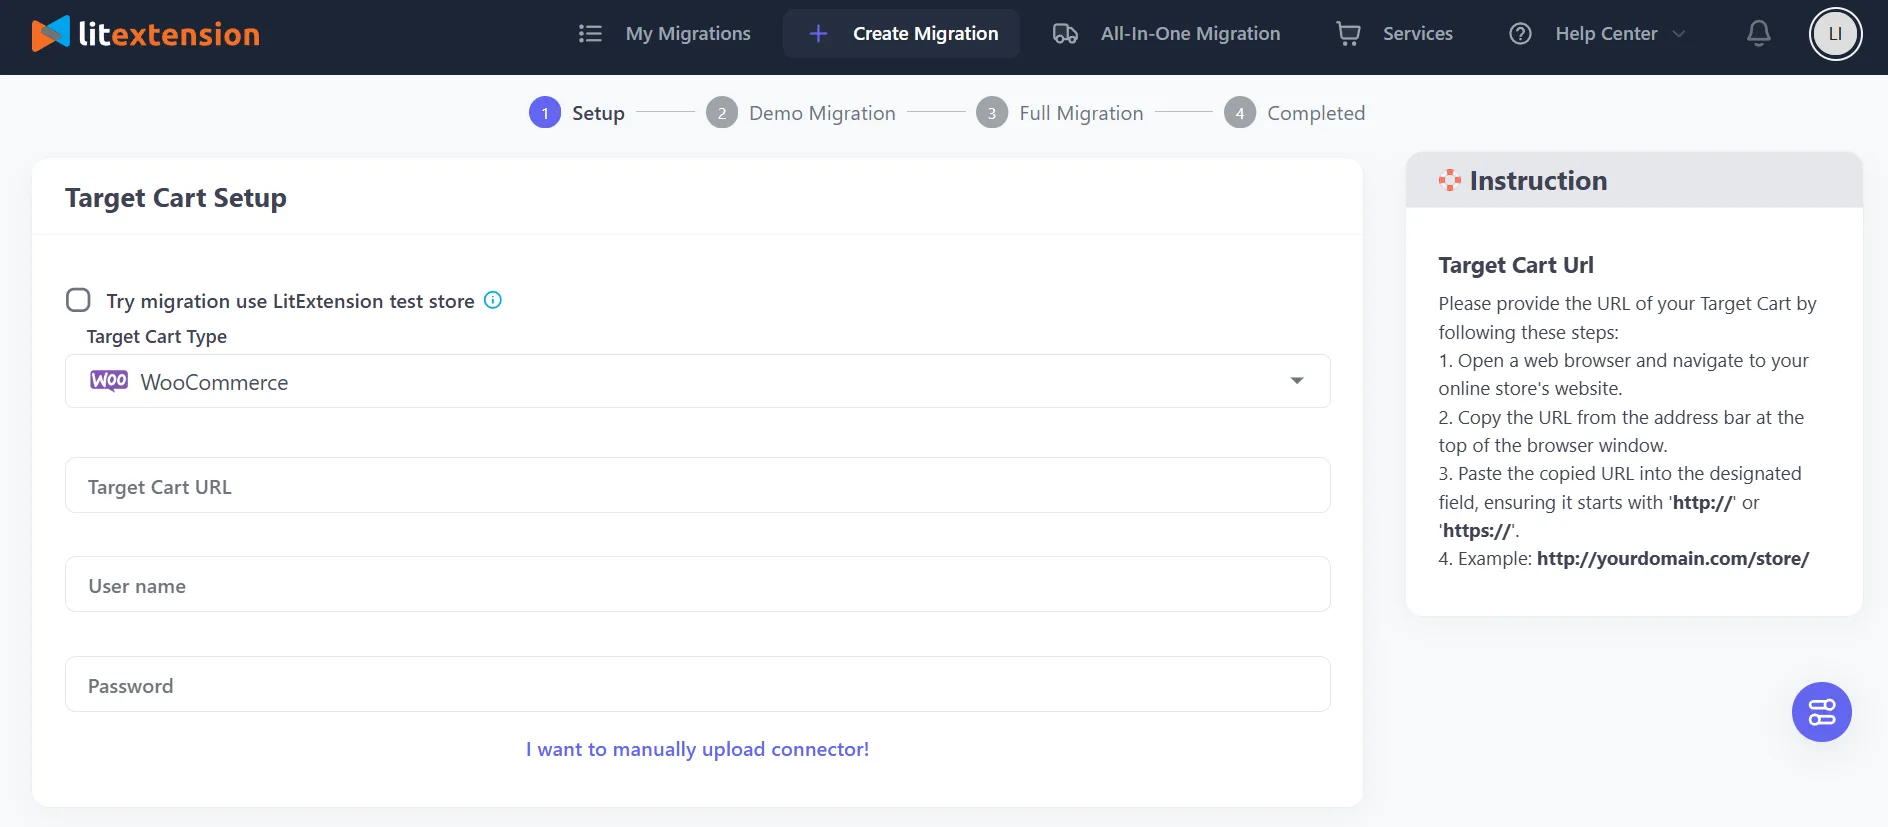
When you finish, click “Next: Configure your migration” to move on to the next step.
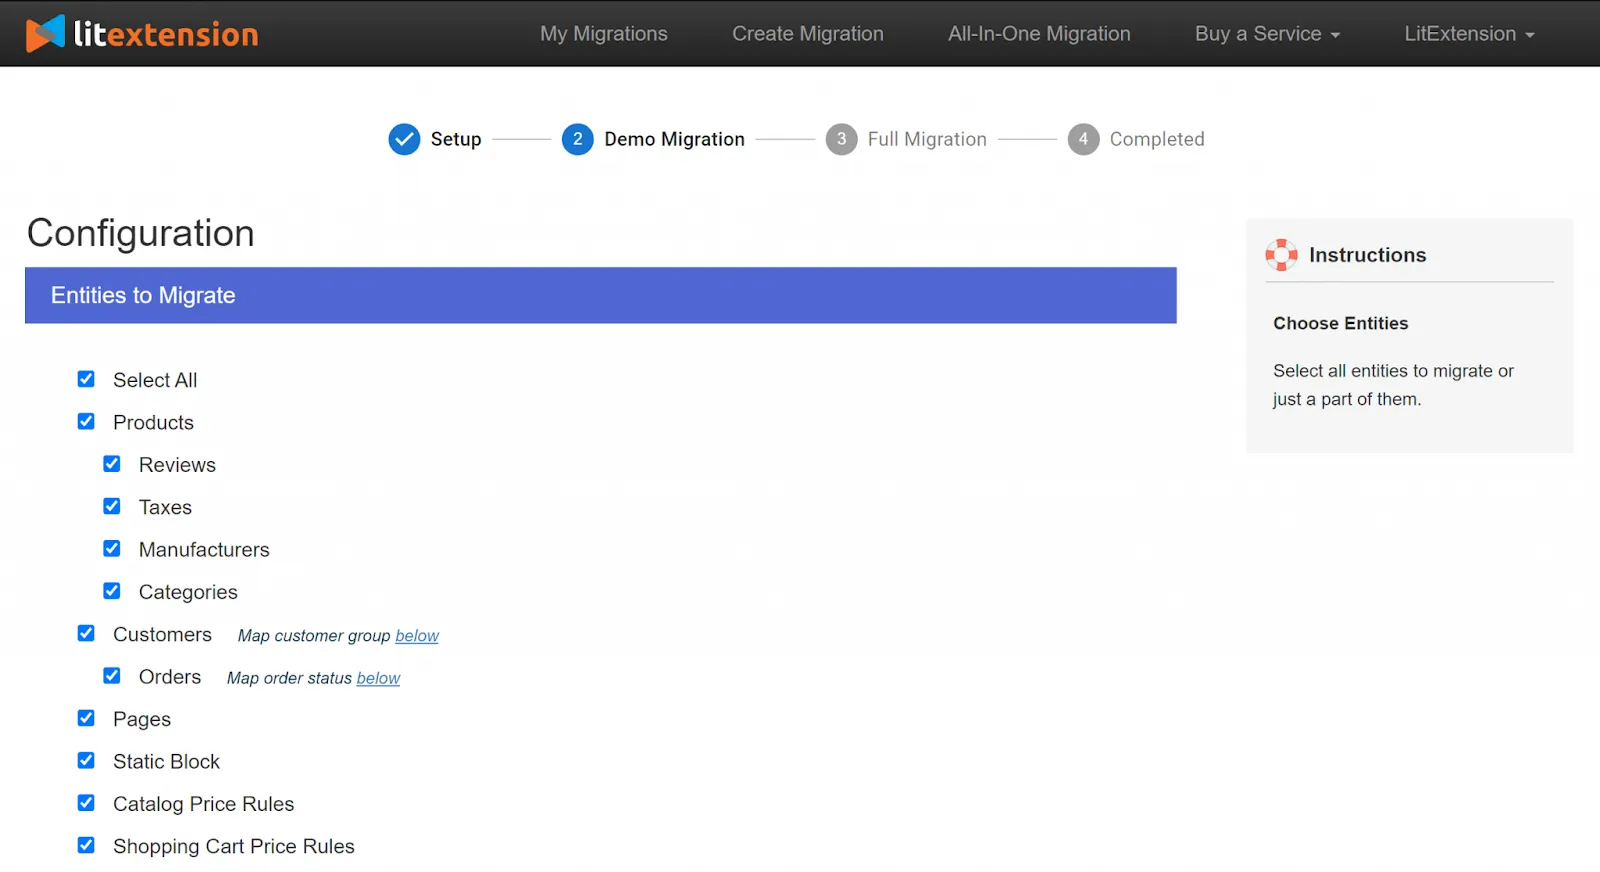
Step 2: Select data to migrate
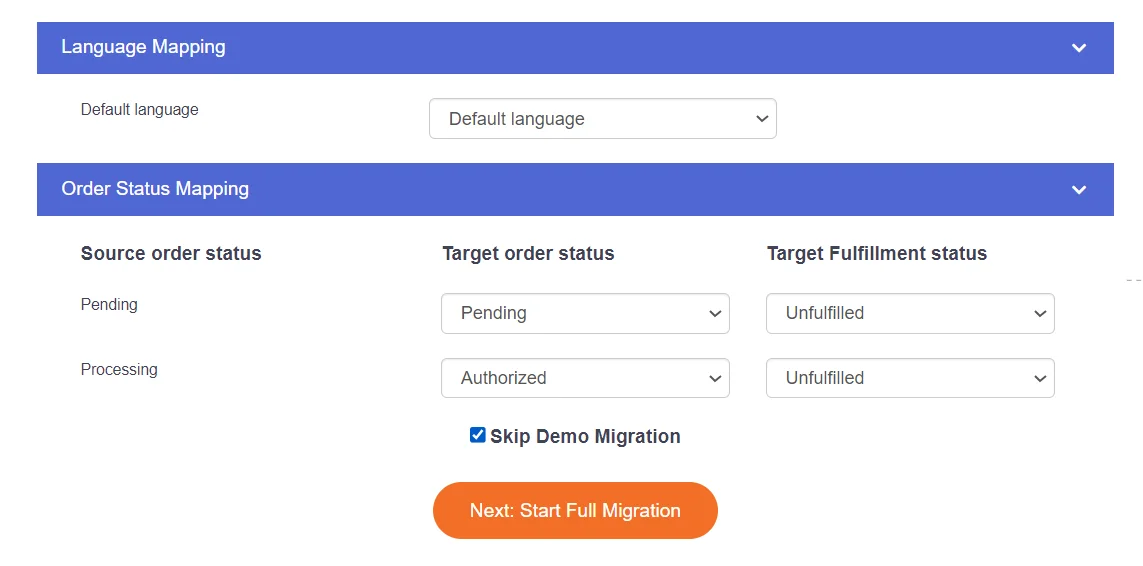
Here’s where you can customize your migration to fit your exact needs. To start with, you need to decide which data types to migrate. For example, select “Products” if that's all you need, or click “Select All” to migrate everything. For further customization, you can also map details like store settings, customer groups, order statuses, and languages.
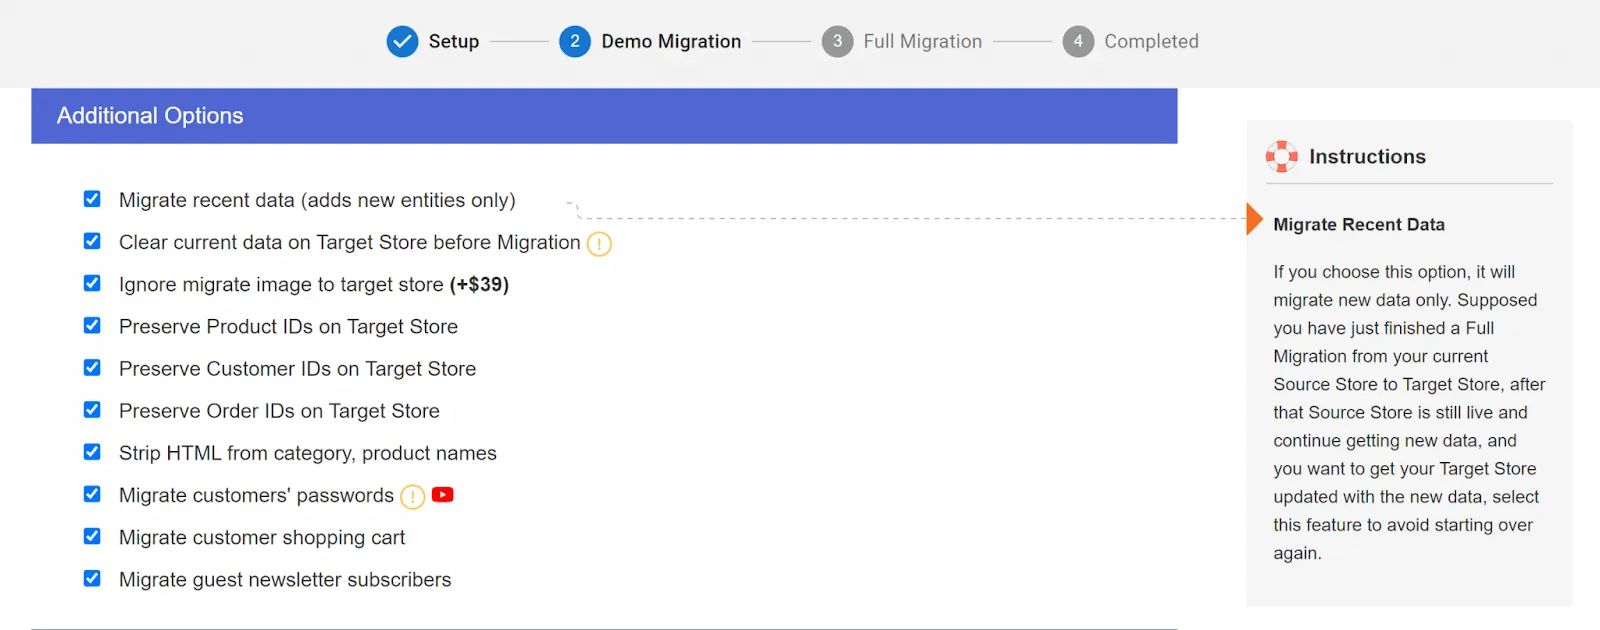
If you’re after even more flexibility, LitExtension provides some Additional Options (both free and with extra charges), as in the image below:
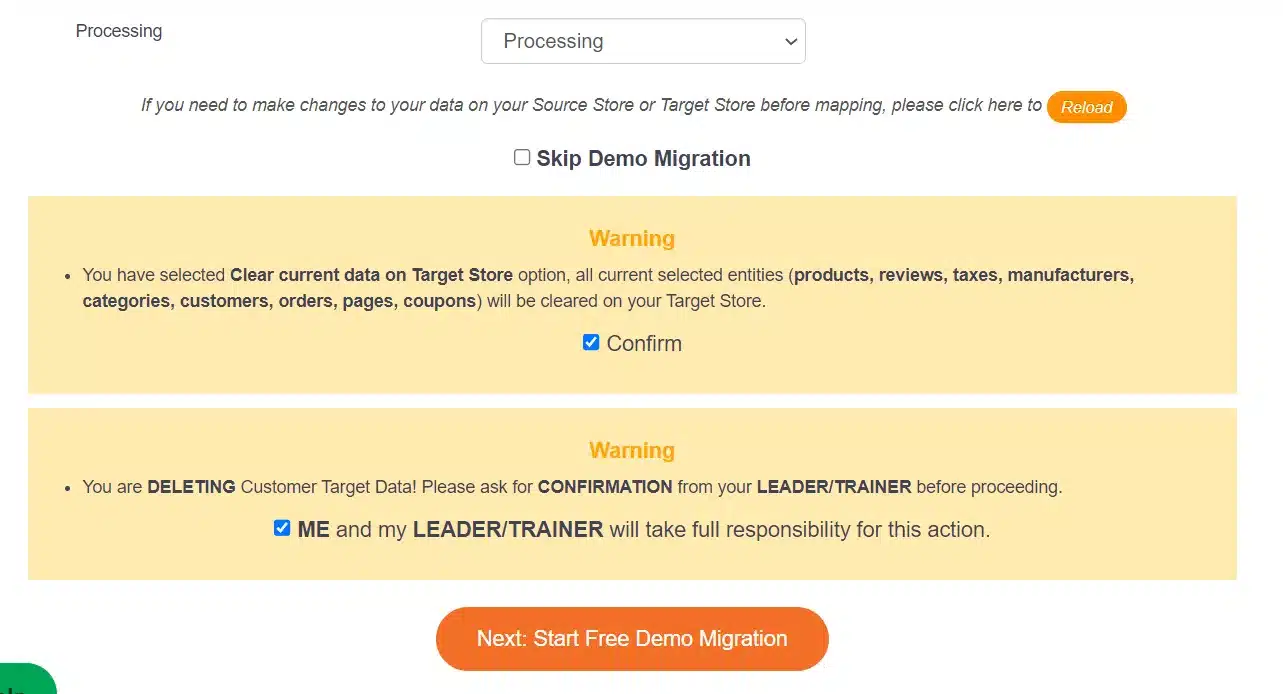
Step 3: Perform the full migration
Once you have done with the configuration, click the “Start Free Demo Migration” button at the bottom to activate the Demo Migration. This demo allows you to transfer up to 20 items for free, giving you a chance to test the process and ensure everything works smoothly.
When the demo is completed, you’ll receive an email detailing the data that was successfully migrated. If everything checks out, return to the Configuration page, complete your payment, and launch the full migration to transfer all your data.
For those of you who want to head right to the Demo Migration, please select “Skip demo migration” and proceed directly to “Start full migration”. With just one click, your migration begins.
Since our tool runs on a cloud-based system, you can turn off the device and operate your Shopify store normally, guaranteeing 100% uptime. When the migration finishes, you’ll get an email confirming that all your data has been successfully transferred.
But what about any new data added to your store during the migration? Don’t worry—we’ve got you covered with our post-migration services:
- Recent Data Migration: Transfer any new data added to your source store after the initial migration as long as it is less than 5% of the total amount of data within 60 days after full migration is started.
- Smart Update: Sync updates or changes made to your source store’s data during migration within 60 days after full migration is started.
- Re-Migration: Start the migration process again if needed to ensure all data is accurately transferred. You can perform the task unlimited times within 90 days after full migration is started.
These services ensure that your store stays complete, accurate, and fully up-to-date!
All-in-One Migration Service
Overall, the Automated option is easy to use, but you'll still need to handle each step yourself. And if your needs are complicated, a more comprehensive solution like our All-in-One Migration service will be much better.
With this service, your project is handled by a dedicated Personal Assistant (PA) who will manage every step of the Shopify products export process. Plus, you’ll get to enjoy free Additional Options to enhance the experience even further!
Below is a detailed guide to how LitExtension experts can help you:
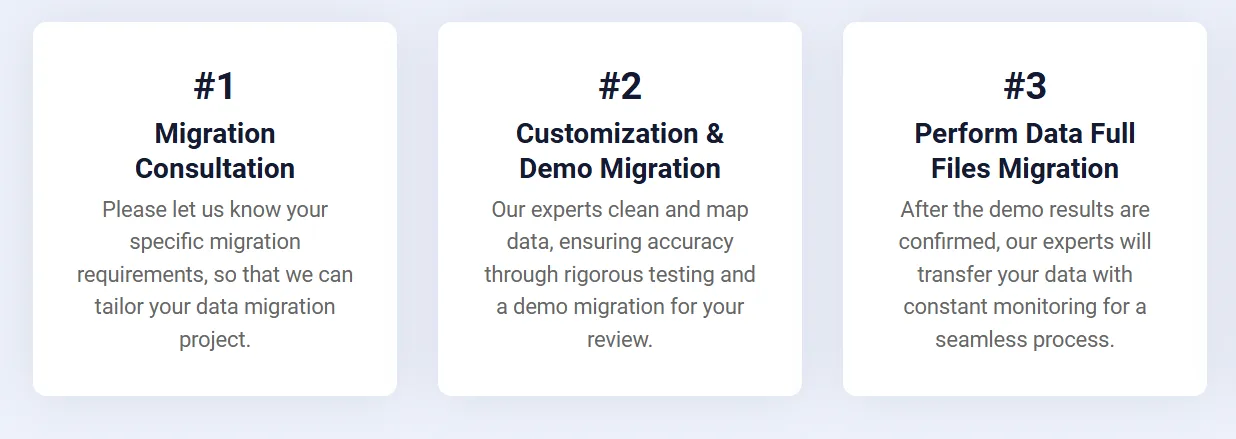
Step 1: Consultant by LitExtension experts
First, schedule a meeting with our LitExtension experts at a time that works best for you. Be sure to book at least two hours in advance and share your request in detail so we can prepare thoroughly for the project.
During the meeting, we’ll dive into your migration requirements to ensure we fully understand your goals. We’ll also provide complete transparency by outlining all service options and pricing, helping you make an informed decision.
Once everything is agreed upon, sign the SLA, complete the payment, and leave the rest to us. We’ll handle the entire process while you relax!
Step 2: Data mapping and setting by experts
At this point, our team will handle all the preparations for your Shopify export products to new platform. More specifically:
- Setting up your new store for a smooth start;
- Tidying up old data to ensure a clean transition;
- Adding essential plugins to maintain optimal functionality;
- Creating 301 redirects to guide your customers effortlessly.
The best thing about this service is that all additional features, like 301 redirects, are built into the package – no extra costs. This means that you can freely request any options to fulfill your advanced migration requirements.
After the setup is complete, you’ll have the chance to review the migration results with demo migrations. There is no limit to the number of your requests as long as you’re fully satisfied before moving on to the full migration.
Step 3: Perform full eCommerce replatforming
Your full migration is here! We’ll manage the entire process and keep you updated throughout. Priority support is included, with fast responses within 12 hours, compared to 24 hours of the Automated Migration package.
Before delivering the final result, our experts will carefully review your new store’s data to ensure everything has been transferred accurately. This process includes a two-phase testing system for thorough verification. Unlike the Automated Package, which relies solely on manual testing, this process combines both manual and advanced automated testing for optimal accuracy.
After completing your migration, you can enjoy our FREE and UNLIMITED post-migration services to ensure your store remains up-to-date within the following conditions:
- Recent data migration: The total entities are less than 5% of the initial migration within 30 days of completion.
- Re-migration: Available within 30 days of completing the migration.
- Smart update: Offered within 90 days of migration completion.
Shopify Export Products: FAQs
What are export products?
Exporting products refers to the process of downloading your store’s product information into a file, such as CSV or Excel. This file contains details like product titles, descriptions, prices, inventory, and images, which can be used for backups or migration.
Can I export inventory from Shopify?
Yes, Shopify allows you to export inventory levels along with product details. The inventory data is included in the exported file and can be used to track stock or transfer inventory information to another system.
Can you export Shopify orders to Excel?
Yes, Shopify orders can be exported to Excel using built-in features or third-party apps like Matrixify and LitExtension. The exported file includes order details such as customer information, products ordered, totals, and statuses, all formatted for easy viewing in Excel.
What data can you export from Shopify?
Shopify allows you to export various types of data, including:
- Products: Titles, descriptions, prices, inventory, and images.
- Customers: Names, contact details, and purchase history.
- Orders: Order IDs, customer info, order details, and statuses.
- Collections: Names and product associations.
Final Thoughts
That’s a wrap! We’ve covered all three methods for Shopify export products in detail. With this knowledge, you can now choose the best option for your business needs.
Overall, while Shopify’s built-in export tool and the Matrixify app offer valuable features, they can’t match the fulfillment of LitExtension’s migration packages. With over 12 years of expertise and over 200,000 successful migrations, we’re a trusted choice for businesses worldwide. Let us handle your migration with efficiency, security, and complete peace of mind.
To learn more, explore our Shopify guides and become a part of our Facebook Community now!

