Shopify combines powerful eCommerce features with built-in blogging tools, making it a popular choice for WordPress users who want to bring their content and online store together. However, since the two platforms use different content structures, there is no native option to migrate WordPress blog to Shopify in bulk.
In this guide, we will walk you through 3 practical migration methods:
- Migrate your blog with LitExtension experts;
- Use a dedicated Shopify import plugin;
- Transfer WordPress blog posts manually.
Let’s get started!
How to Migrate WordPress Blog to Shopify With LitExtension Service
Since WordPress and Shopify are built on entirely different content models, it may not be straightforward to migrate WordPress blog to Shopify. As highlighted in any comprehensive guide for an eCommerce migration, differences in URL structures, image paths, internal links, and SEO metadata can make manual methods both time-consuming and error-prone.
To minimize the risk of data loss or SEO disruption, working with seasoned migration professionals is often the safer choice. With 15+ years of experience, the LitExtension team can manage the entire process through our All-in-One Migration Service, from initial preparation to post-migration support.
Step 1: Technical consultation
The process begins with a free consultation to understand your current WordPress blog and what you expect from the new Shopify store. Simply share your source website, target store, and specific migration requirements with us. Our experts will then review your blog structure, identify the data that can be transferred, and provide a tailored migration plan with a clear quotation.
Step 2: Pre-migration preparation
Next, we will move on to preparing your Shopify store and configuring essential settings based on the standard shopping cart migration instruction so that it can receive your WordPress blog data smoothly. We will take a closer look at your blog posts, pages, images, categories, authors, URLs, and other relevant data.
This step allows us to configure the migration based on your actual website structure and address potential compatibility issues before any data is transferred.
Step 3: Demo WordPress to Shopify blog migration
Before you fully migrate WordPress blog to Shopify, we will transfer a selected portion of your content as a sample. This preview lets you check how your content, formatting, and metadata appear on Shopify before moving forward.
The goal of this preview is to confirm how your content appears on Shopify and that formatting and metadata behave as expected. It also gives us an opportunity to address potential issues, if any, before actually scaling up into the full migration.
Note: For WordPress sites with fewer than 2,000 blogs, this demo step is optional and only performed upon request.
Step 4: Full WordPress to Shopify blog migration
Once you are satisfied with the demo results, our experts will begin the Full Migration. We will migrate WordPress blog to Shopify according to the approved configuration, including all selected content and related data. The migration runs securely in the background, so your existing WordPress website can remain available to visitors throughout the process.
Step 5: Quality assurance after migration
After the migration is completed, a comprehensive review will be conducted to verify results. Every content type (posts, media assets, metadata, and links) will be thoroughly checked to confirm it has been transferred correctly. And if any discrepancies are found (though that’s often unlikely), you can trust us to handle them right away.
Step 6: Post-migration services
Beyond the initial migration, LitExtension provides technical support for up to 60 days to help resolve applicable migration-related issues. During this period, you can also use the following post-migration services:
- Recent Data Migration allows newly created or updated WordPress blog content to be transferred again after the main migration, with no limit on the number of runs (as long as the added data does not exceed 5% of the original volume).
- Re-migration gives you the option to request up to two complete re-migrations at no additional cost if refinements are needed.
- Smart Update enables on-demand synchronization of changes from WordPress to Shopify after the migration has finished.
Alongside these services, a 60-day technical support period is included, during which our experts assist with troubleshooting where applicable.
Step 7: Contact customer support
Our assistance does not end as soon as the migration is completed. If you notice an issue with the transferred data or need clarification after reviewing your new Shopify blog, you can contact your Personal Assistant (PA) for further support. The LitExtension team will continue working with you to ensure the final migration results meet the agreed requirements.
Need Help to Migrate Your Store from WordPress to Shopify?
Our LitExtension migration service transfers products, customers, and orders from WordPress to Shopify – fast, accurate, and hassle-free.
How to Migrate WordPress Blog to Shopify with Dedicated Import Plugin
All in all, working with reputable migration experts like LitExtension remains the safest option when you migrate a WordPress blog to Shopify.
That said, if you prefer a hands-on, DIY approach and are comfortable troubleshooting issues independently, an import plugin can also get the job done. However, you will be responsible for resolving any formatting errors, missing data, failed imports, or other issues that may occur.
Several dedicated import apps are currently available on the Shopify App Store, with popular options including Matrixify, BlogFeeder, and Blog Importer, etc. While their features and supported data types vary, most follow the same general migration process outlined below.
Step 1. Install an import plugin on Shopify
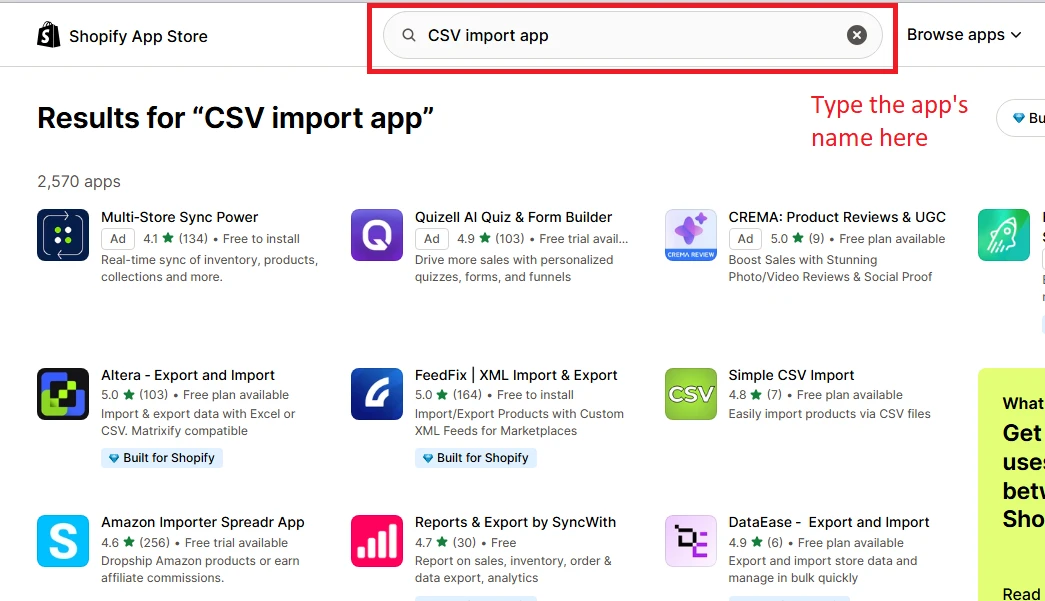
First, go to your Shopify admin panel and open the Shopify App Store. Then, search for a blog or content import app and install the one that best fits your needs.
Step 2. Export your WordPress blog data
Next, go to the WordPress dashboard and navigate to Tools > Export in the left-hand menu.
An Export screen will appear. Here, you can choose to export “All content” (including pages, comments, and custom post types) or select “Posts” specifically.
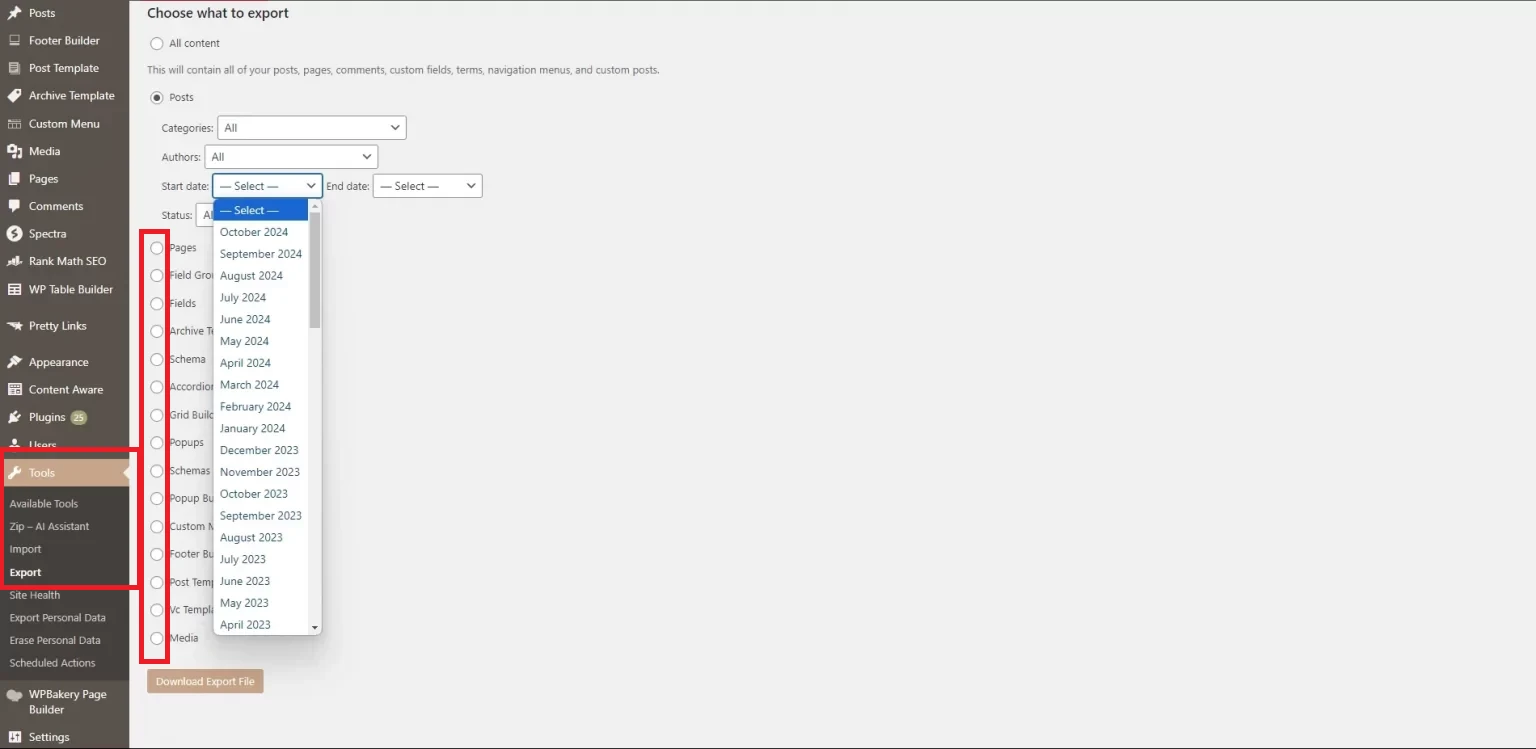
After choosing your desired options, click the “Download Export File” button. A WordPress Extended RSS (WXR) file, in XML format, will be downloaded to your computer.
Step 3. Customize the export file
Now, before importing the file into Shopify, you will need to review and modify this XML file manually (usually into CSV with appropriate columns) so it matches the format expected by your chosen Shopify import app.
To avoid errors, it’s best to access the import app’s dashboard on Shopify and download a sample CSV file; most import apps usually provide one.
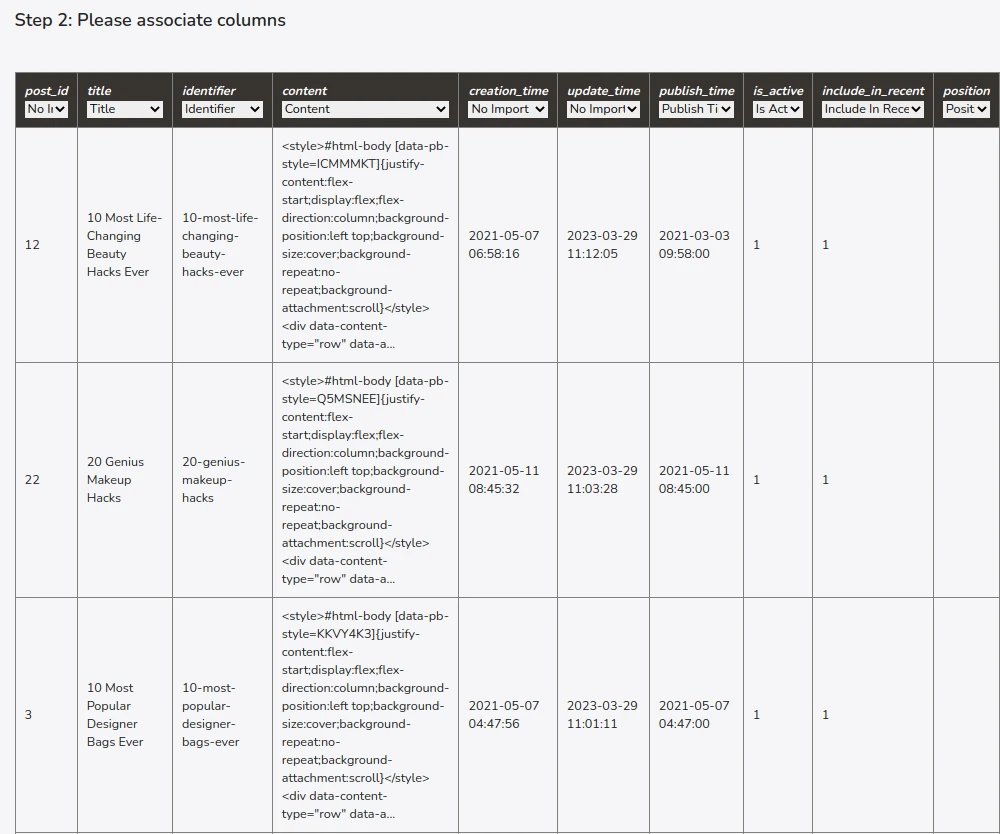
Then, use this sample as a reference and adjust your WordPress export file accordingly. For instance, for blog posts, typical required fields include ID, title, content, excerpt, publish date, permalink, categories, tags, and any custom fields you want to keep.
Step 4. Import the file into Shopify
Lastly, once the CSV file has been properly adjusted, return to your Shopify import app and locate the Import function. Then, upload the finalized CSV file and start the import process. And that’s how to import blog from WordPress to Shopify!
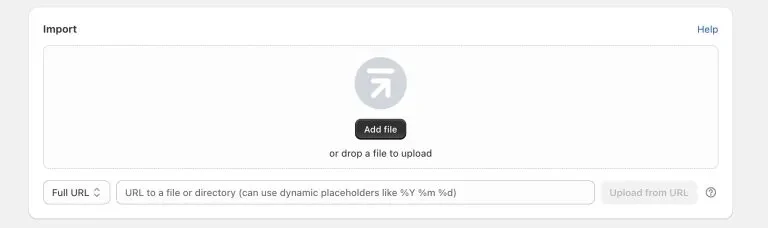
Remember, after the import is completed, you should take time to review the results directly on your Shopify blog. Any issues discovered at this stage will need to be fixed (manually, of course) to avoid further troubles down the line.
How to Migrate WordPress Blog to Shopify Manually?
For a small number of blog posts, you can manually migrate WordPress blog to Shopify by copying each post individually. This approach gives you full control over the transferred content, but it can become time-consuming if your blog contains many posts, images, internal links, or custom formatting.
Step 1: Back up your WordPress blog
Go to Tools > Export > Posts and download the XML file as a backup. Shopify cannot import it directly, but you can use it as a reference.
Step 2: Add Shopify blog manually
In Shopify, go to Content > Blog posts > Add blog post and create a new blog if needed.
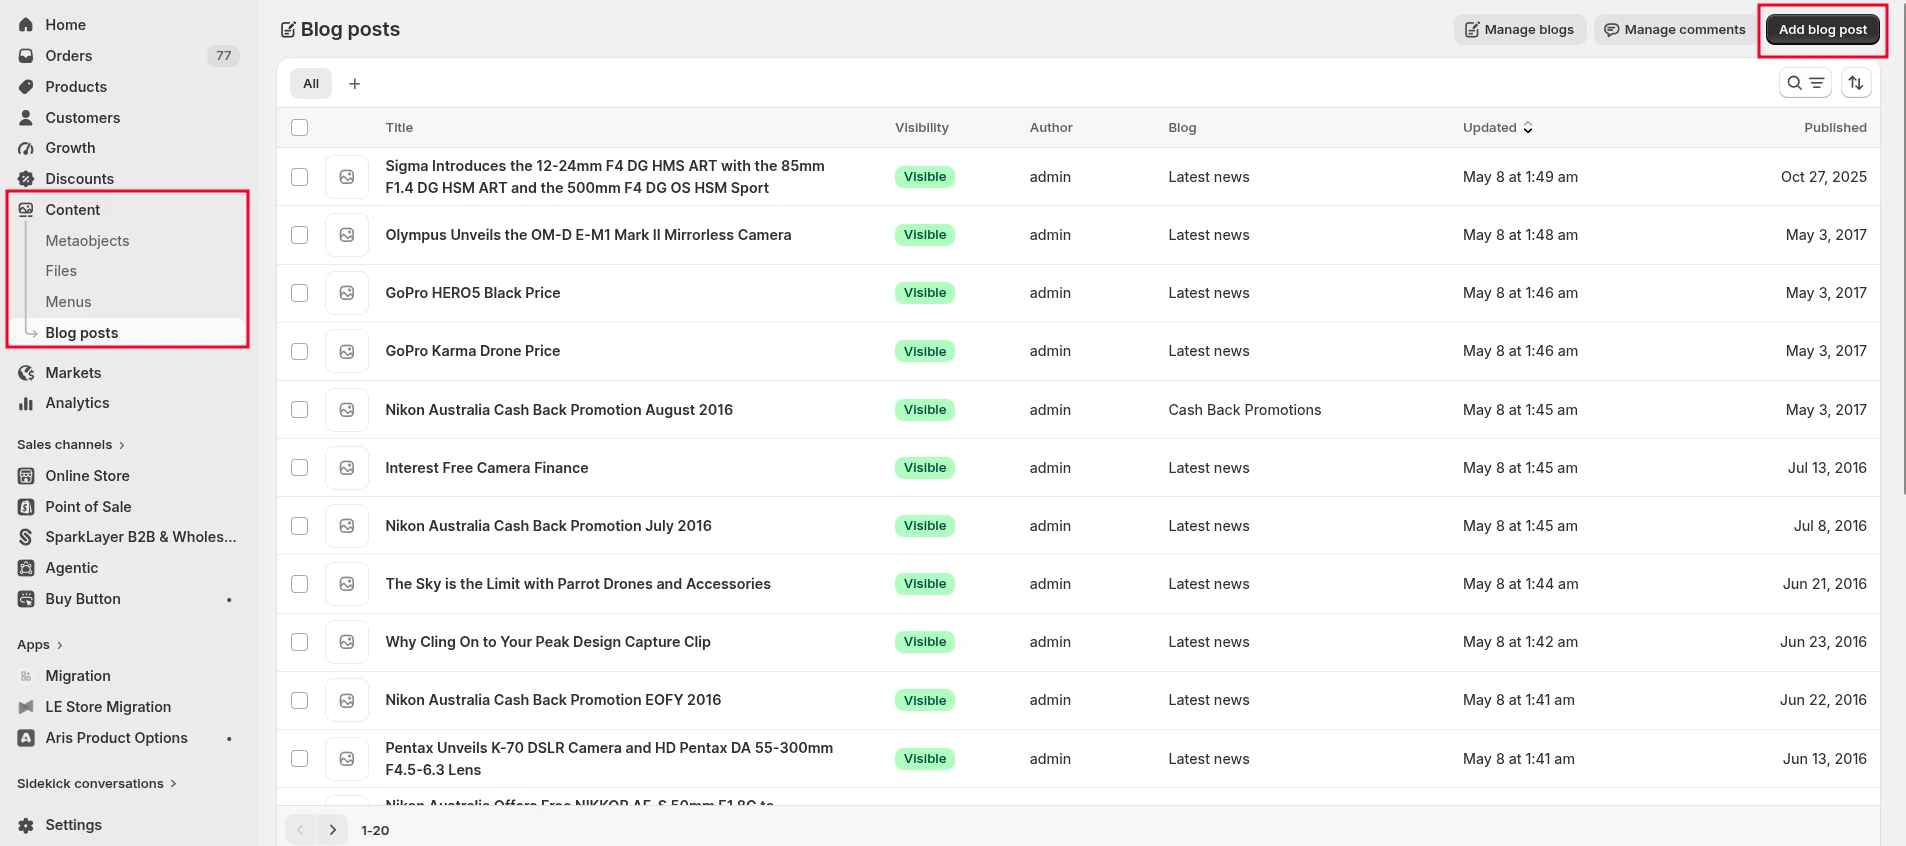
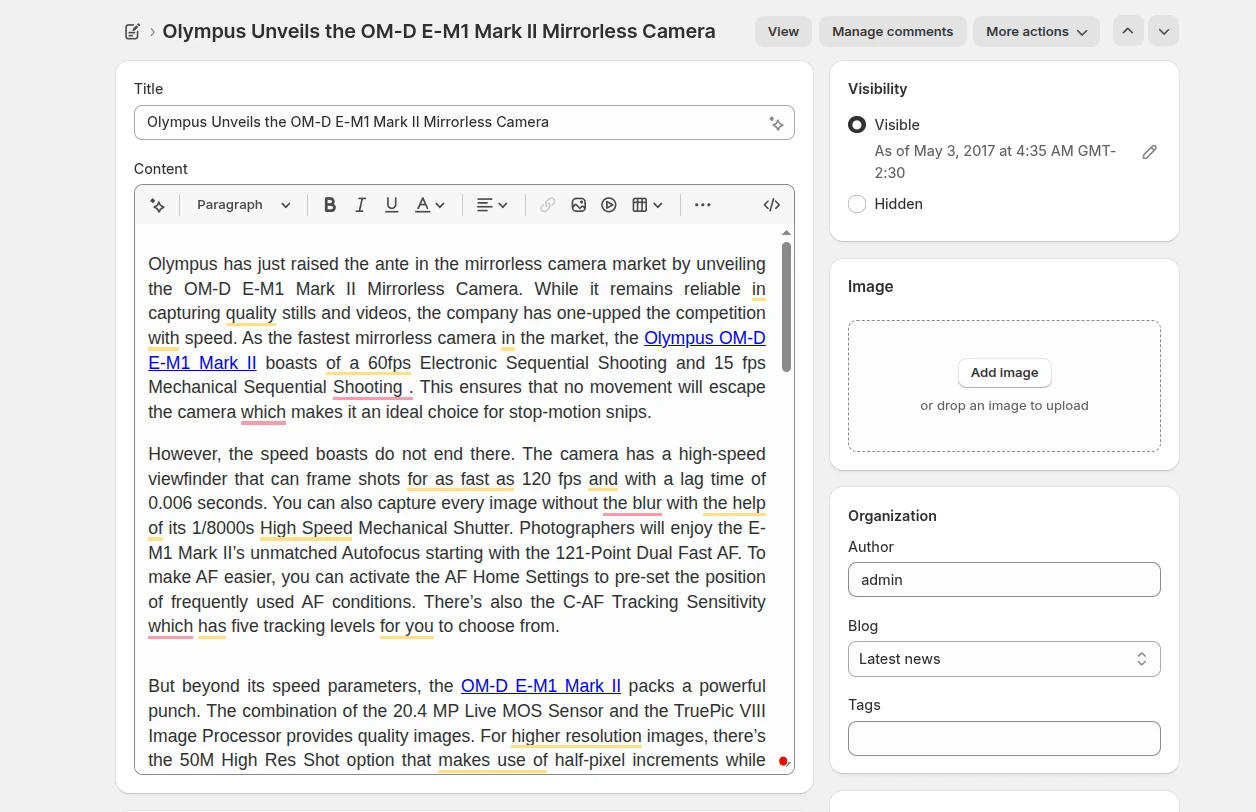
Copy each post’s title and content to Shopify, then upload its images and recreate details such as tags, author, excerpt, and publication date. Reformat any WordPress elements that Shopify does not support.
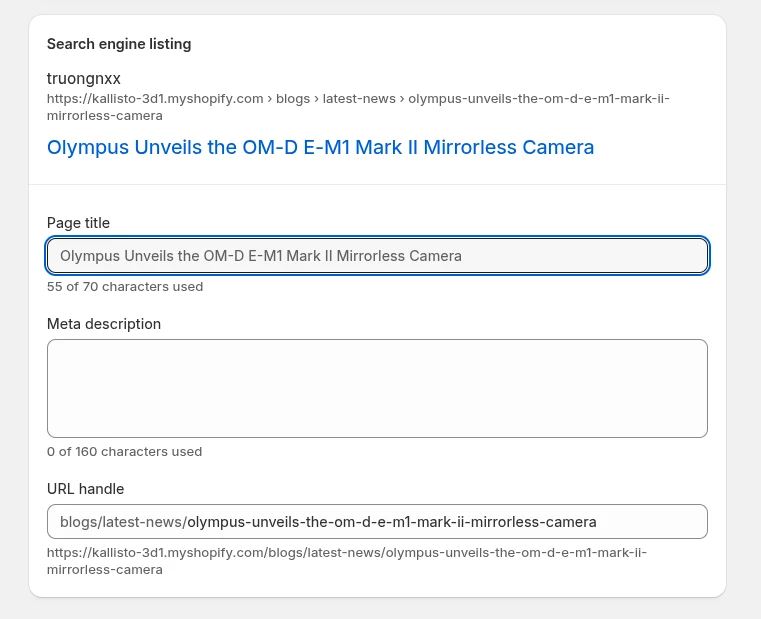
Step 3: Update SEO settings and links
Under the Search engine listing section, add the SEO title, meta description, and URL handle for each post. Keep the new handle as close to the original one as possible, although Shopify’s default /blogs/[blog-name]/[post-handle] structure means the full URL will still change.
Step 4: Review and publish
Preview each post on desktop and mobile. Once the content, formatting, images, links, and metadata are correct, publish it on Shopify.
Overall, this method offers full control but can become time-consuming for blogs with many posts or complex formatting.
How to Preserve SEO After Migrating WordPress Blog to Shopify
After you migrate WordPress blog to Shopify, several SEO elements still require attention. Since Shopify uses a different URL and content structure, follow the steps below to help search engines discover the new pages and retain the authority built by your original blog.
For a more detailed walkthrough, follow our Shopify SEO migration checklist to protect your traffic, rankings, and revenue throughout the transition.
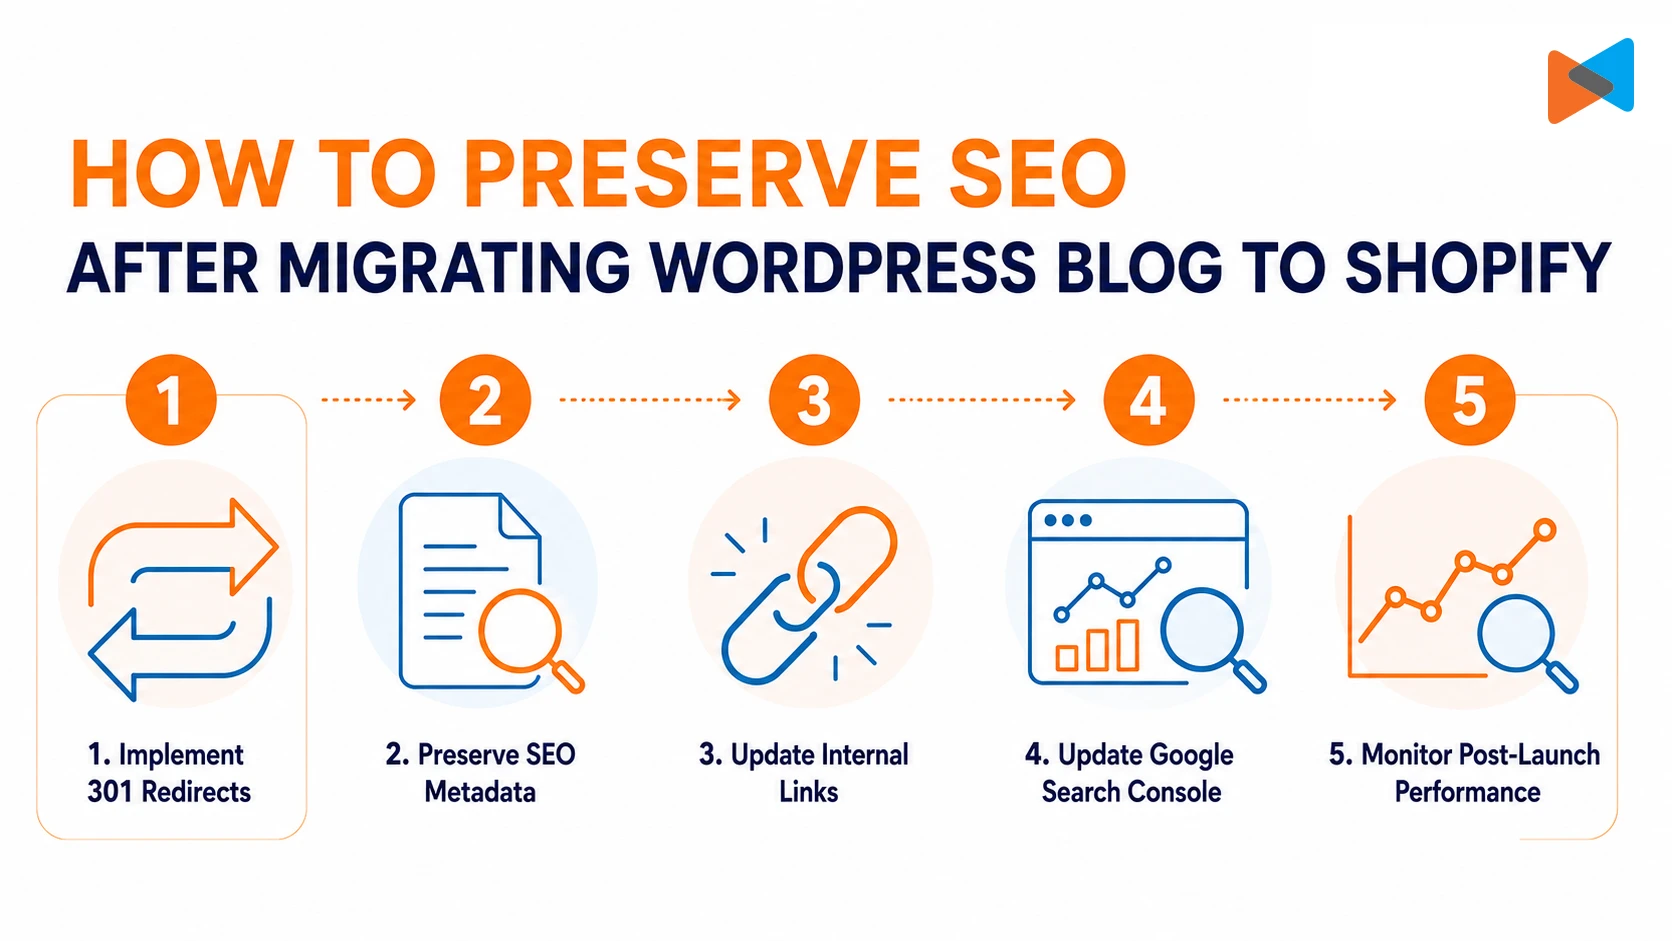
1. Implement and test 301 redirects
Create a URL mapping between every old WordPress post and its corresponding Shopify post. Then, set up permanent 301 redirects so visitors and search engines are automatically directed to the correct new URLs.
Pay particular attention to:
- High-traffic and high-ranking blog posts
- Posts with backlinks from external websites
- Category, tag, author, and pagination URLs
- Images or downloadable files whose URLs have changed
After setup, test the redirects to ensure they lead directly to the intended Shopify pages without redirect chains or loops.
2. Preserve important SEO metadata
Check that each migrated post retains its SEO title, meta description, heading structure, image alt text, and canonical tag. You should also confirm that no important post has been accidentally set to noindex.
Where possible, keep the original URL handle. However, Shopify will still add its default /blogs/[blog-name]/ path, so the complete URL usually cannot remain unchanged.
3. Update internal links and navigation
Replace WordPress URLs within your blog content, menus, related-post sections, and CTA buttons with their new Shopify equivalents. This helps visitors navigate the new site without relying on redirects and allows search engines to crawl your Shopify blog more efficiently.
4. Update Google Search Console
Verify your Shopify store in Google Search Console and submit the new sitemap, usually available at yourdomain.com/sitemap.xml. If the migration also involves a domain change, use the Change of Address tool to notify Google.
After submission, check that important Shopify blog URLs are indexable and request indexing for priority posts where necessary.
5. Monitor SEO performance post-launch
SEO performance may fluctuate temporarily while search engines process the new URLs. Therefore, after you migrate WordPress blog to Shopify, monitor the following metrics during the first few weeks:
- Organic traffic and keyword rankings
- Indexed and excluded pages
- Crawl errors and broken links
- 404 pages and redirect issues
- Core Web Vitals and mobile usability
Compare these results with your pre-migration benchmarks. If a high-performing post loses traffic, review its redirect, metadata, internal links, content, and indexability to identify the cause early.
Migrate WordPress Blog to Shopify: FAQs
Can I directly transfer my entire WordPress site to Shopify?
Not through a native one-click transfer. WordPress and Shopify use different content structures, so blog posts, pages, images, products, and SEO data may require separate handling. You can migrate them manually, use an import app, or work with LitExtension for a fully managed migration.
Will my blog rankings drop after migration?
A temporary fluctuation may occur while search engines crawl and index your new Shopify URLs. However, you can minimise SEO disruption by preserving metadata, setting up 301 redirects, updating internal links, and submitting your new sitemap to Google Search Console.
Can I keep my old WordPress domain while migrating to Shopify?
Yes. You can connect your existing domain to Shopify by updating its DNS settings. Once the migration has been reviewed and your Shopify store is ready, the domain can direct visitors to the new site instead of WordPress.
How long does the migration take?
The timeline depends on the number of posts, pages, images, and other data you need to transfer, as well as your chosen migration method. A small blog may take a few hours, whereas a large or complex website may require several days for migration, testing, and SEO setup.
Final Words
We hope this article has helped you understand how to migrate WordPress blog to Shopify and choose the right method for your needs.
For a smoother transition with less manual work and fewer risks to your data and rankings, LitExtension can handle the entire process for you. Explore our WordPress to Shopify migration service to see how our experts can support your migration from start to finish.
For more tips and guidance, check our other eCommerce blog posts as well!