Migrating from Magento 1 to Magento 2 is no longer optional for most store owners since Magento 1 officially reached end-of-life in June 2020. To replace, Magento 2 will deliver significantly faster page load speeds, a streamlined checkout experience, a modernized admin interface, and full mobile responsiveness out of the box. Therefore, making the move from Magento 1 to Magento 2 is necessary for your business growth. To help you upgrade Magento with ease, we will walk you through the entire migration process from start to finish, including:
- Step 1. Prepare for the Magento 1 to Magento 2 migration
- Step 2. Transfer data from Magento 1 to Magento 2
- Step 3. Run through post-migration activities
Let's get started!
Step 1. Prepare for the Magento 1 to Magento 2 Migration
Before touching a single line of code or clicking any migration button, preparation is the most important phase of the entire process. Skipping it is the number one reason migrations fail, result in data loss, or cause extended downtime. A well-prepared migration is a smooth migration, so take the time to work through each of the following steps carefully.
Analyze your Magento 1 store
Assessing and evaluating your Magento 1 store to determine what elements should be retained is the first step of the whole process. Why do we say so? It's possible that you have obsolete data or plugins that are not compatible with the updated version.
Here are the aspects you should be taking a look at:
- Extensions: you should be aware of the must-have plugins for your new Magento 2 store. Then, remove those unnecessary and incompatible plugins. Also, do a further review of the custom code within plugins for the highest assurance.
- Theme: If your Magento 1 theme doesn't work with the new Magento 2 store, you can develop a strategy for customizing the new theme and website design, covering elements like site buttons, homepage, checkout process, and more.
- Outdated data: Eliminate inessential data from the database, such as logs, website content, recently viewed items, and product comparisons.
- SEO: Use Google Analytics to monitor essential components like high-performing keywords, fix 404 errors, update robots.txt and sitemap.xml files, manage canonical tags, review metadata, and ensure the accuracy of product details.
Backup Magento 1 data
Data on your source store will stay unchanged before, during, and after the upgrade Magento 1 to Magento 2 process with LitExtension. We only copy them from one shopping cart to another.
However, it’s recommended to back up everything before you perform any major changes, as you can secure that you have a fallback option in case of any unforeseen issues during the upgrade. Your file should include your database, files, images, and any customizations you've made.
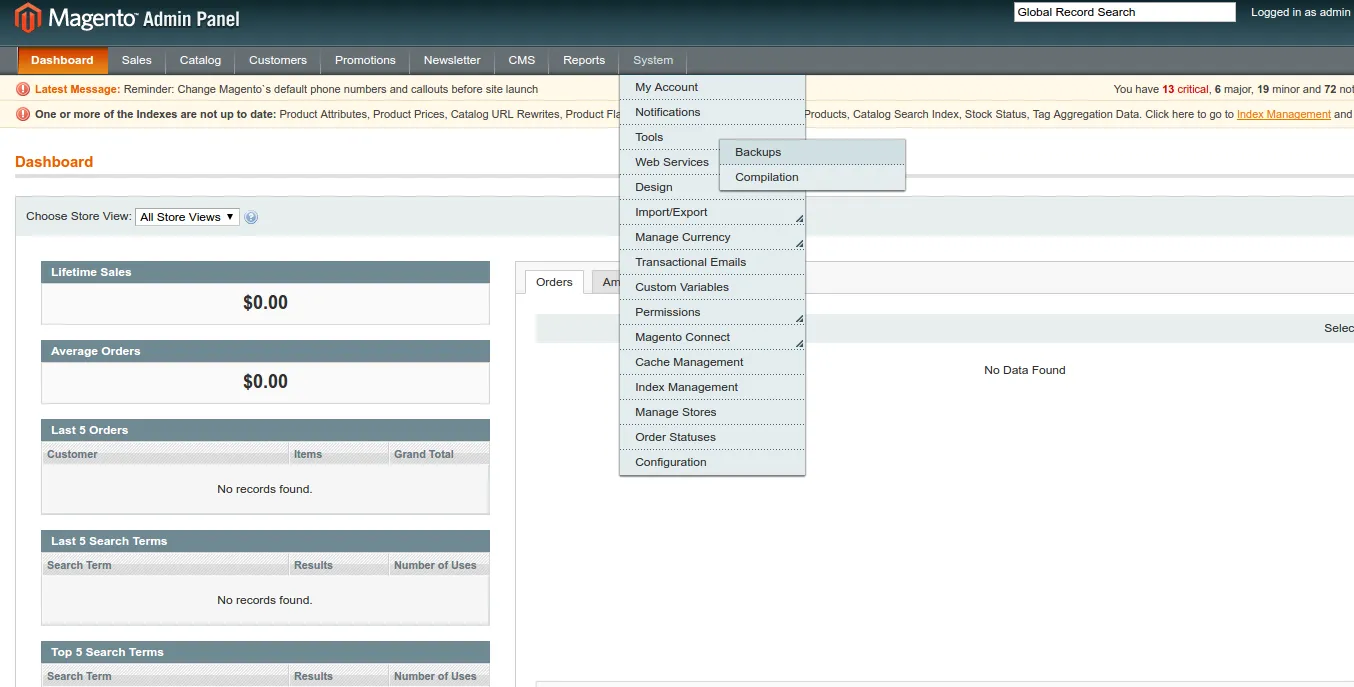
To save your backup file, navigate to the Magento admin panel, then open the Settings > Backups section.
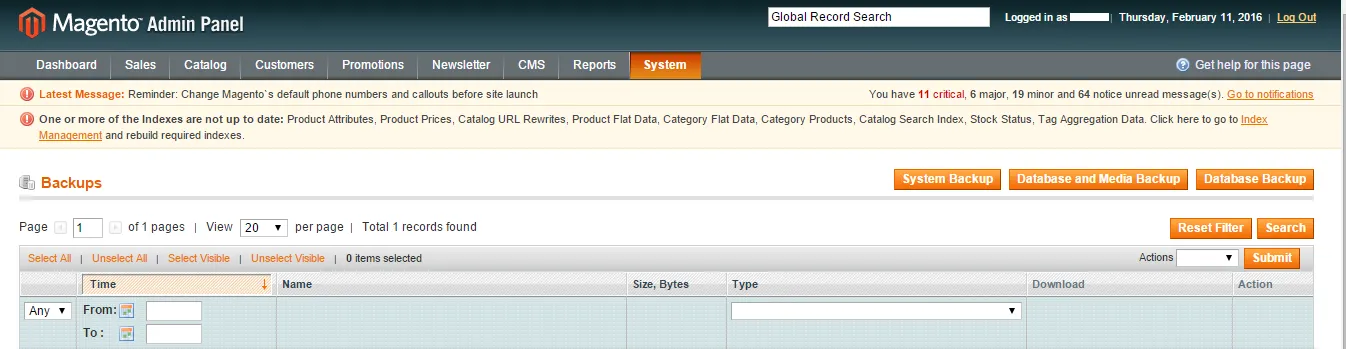
Next, select the most suitable backup type, carefully read the notes, and click “OK” on the pop-up box.
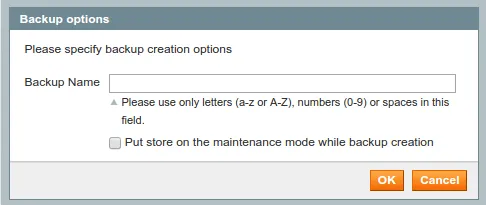
If you choose Database and Media Backup, or Database Backup, this box will appear. In case you want to change your store into maintenance mode, tick Put store on maintenance during backup creation. After that, customers can not access your site or place any orders during the backup process.
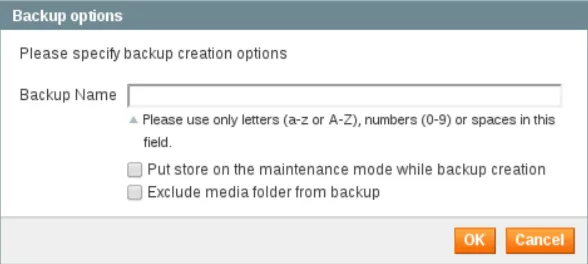
In case you choose System Backup, there is an additional option for you to “Exclude the media folder from backup”.
Finally, you will receive a notification when the backup process finishes and the list of files will be shown in the table.
Set up Magento 2
As the discrepancy in database structure between the two versions is significant, the procedure for migrating Magento 1 to Magento 2 does not happen within a few clicks. For this reason, you still need to install the Magento 2 store on your server or hosting environment before activating the migration process.
To set forth it, ensure you're using a clean and compatible environment that meets Magento 2's system requirements. You can either choose a fresh installation or set up a staging environment for testing purposes.
Step 2. Perform the Magento 1 to Magento 2 Migration
Now that your data and new store are ready, let's move on to the actual migration. There are two main approaches you can take: using an automated migration tool like LitExtension for a fast, code-free experience, or using Magento's official Data Migration Tool if you prefer a hands-on, developer-driven method.
Both approaches will move your products, customers, orders, and store data from Magento 1 to Magento 2, so the right choice simply comes down to your technical comfort level and budget.
Method 1. Using LitExtension Automated Migration Tool
We built LitExtension to make store migration accessible to everyone, no coding skills, no server configuration, and no risk of manual errors. With our automated migration tool, you can move all your products, customers, orders, CMS pages, and more from Magento 1 to Magento 2 in just a few clicks. Keep scrolling for the full guide!
Step 1: Set up Source and Target Cart
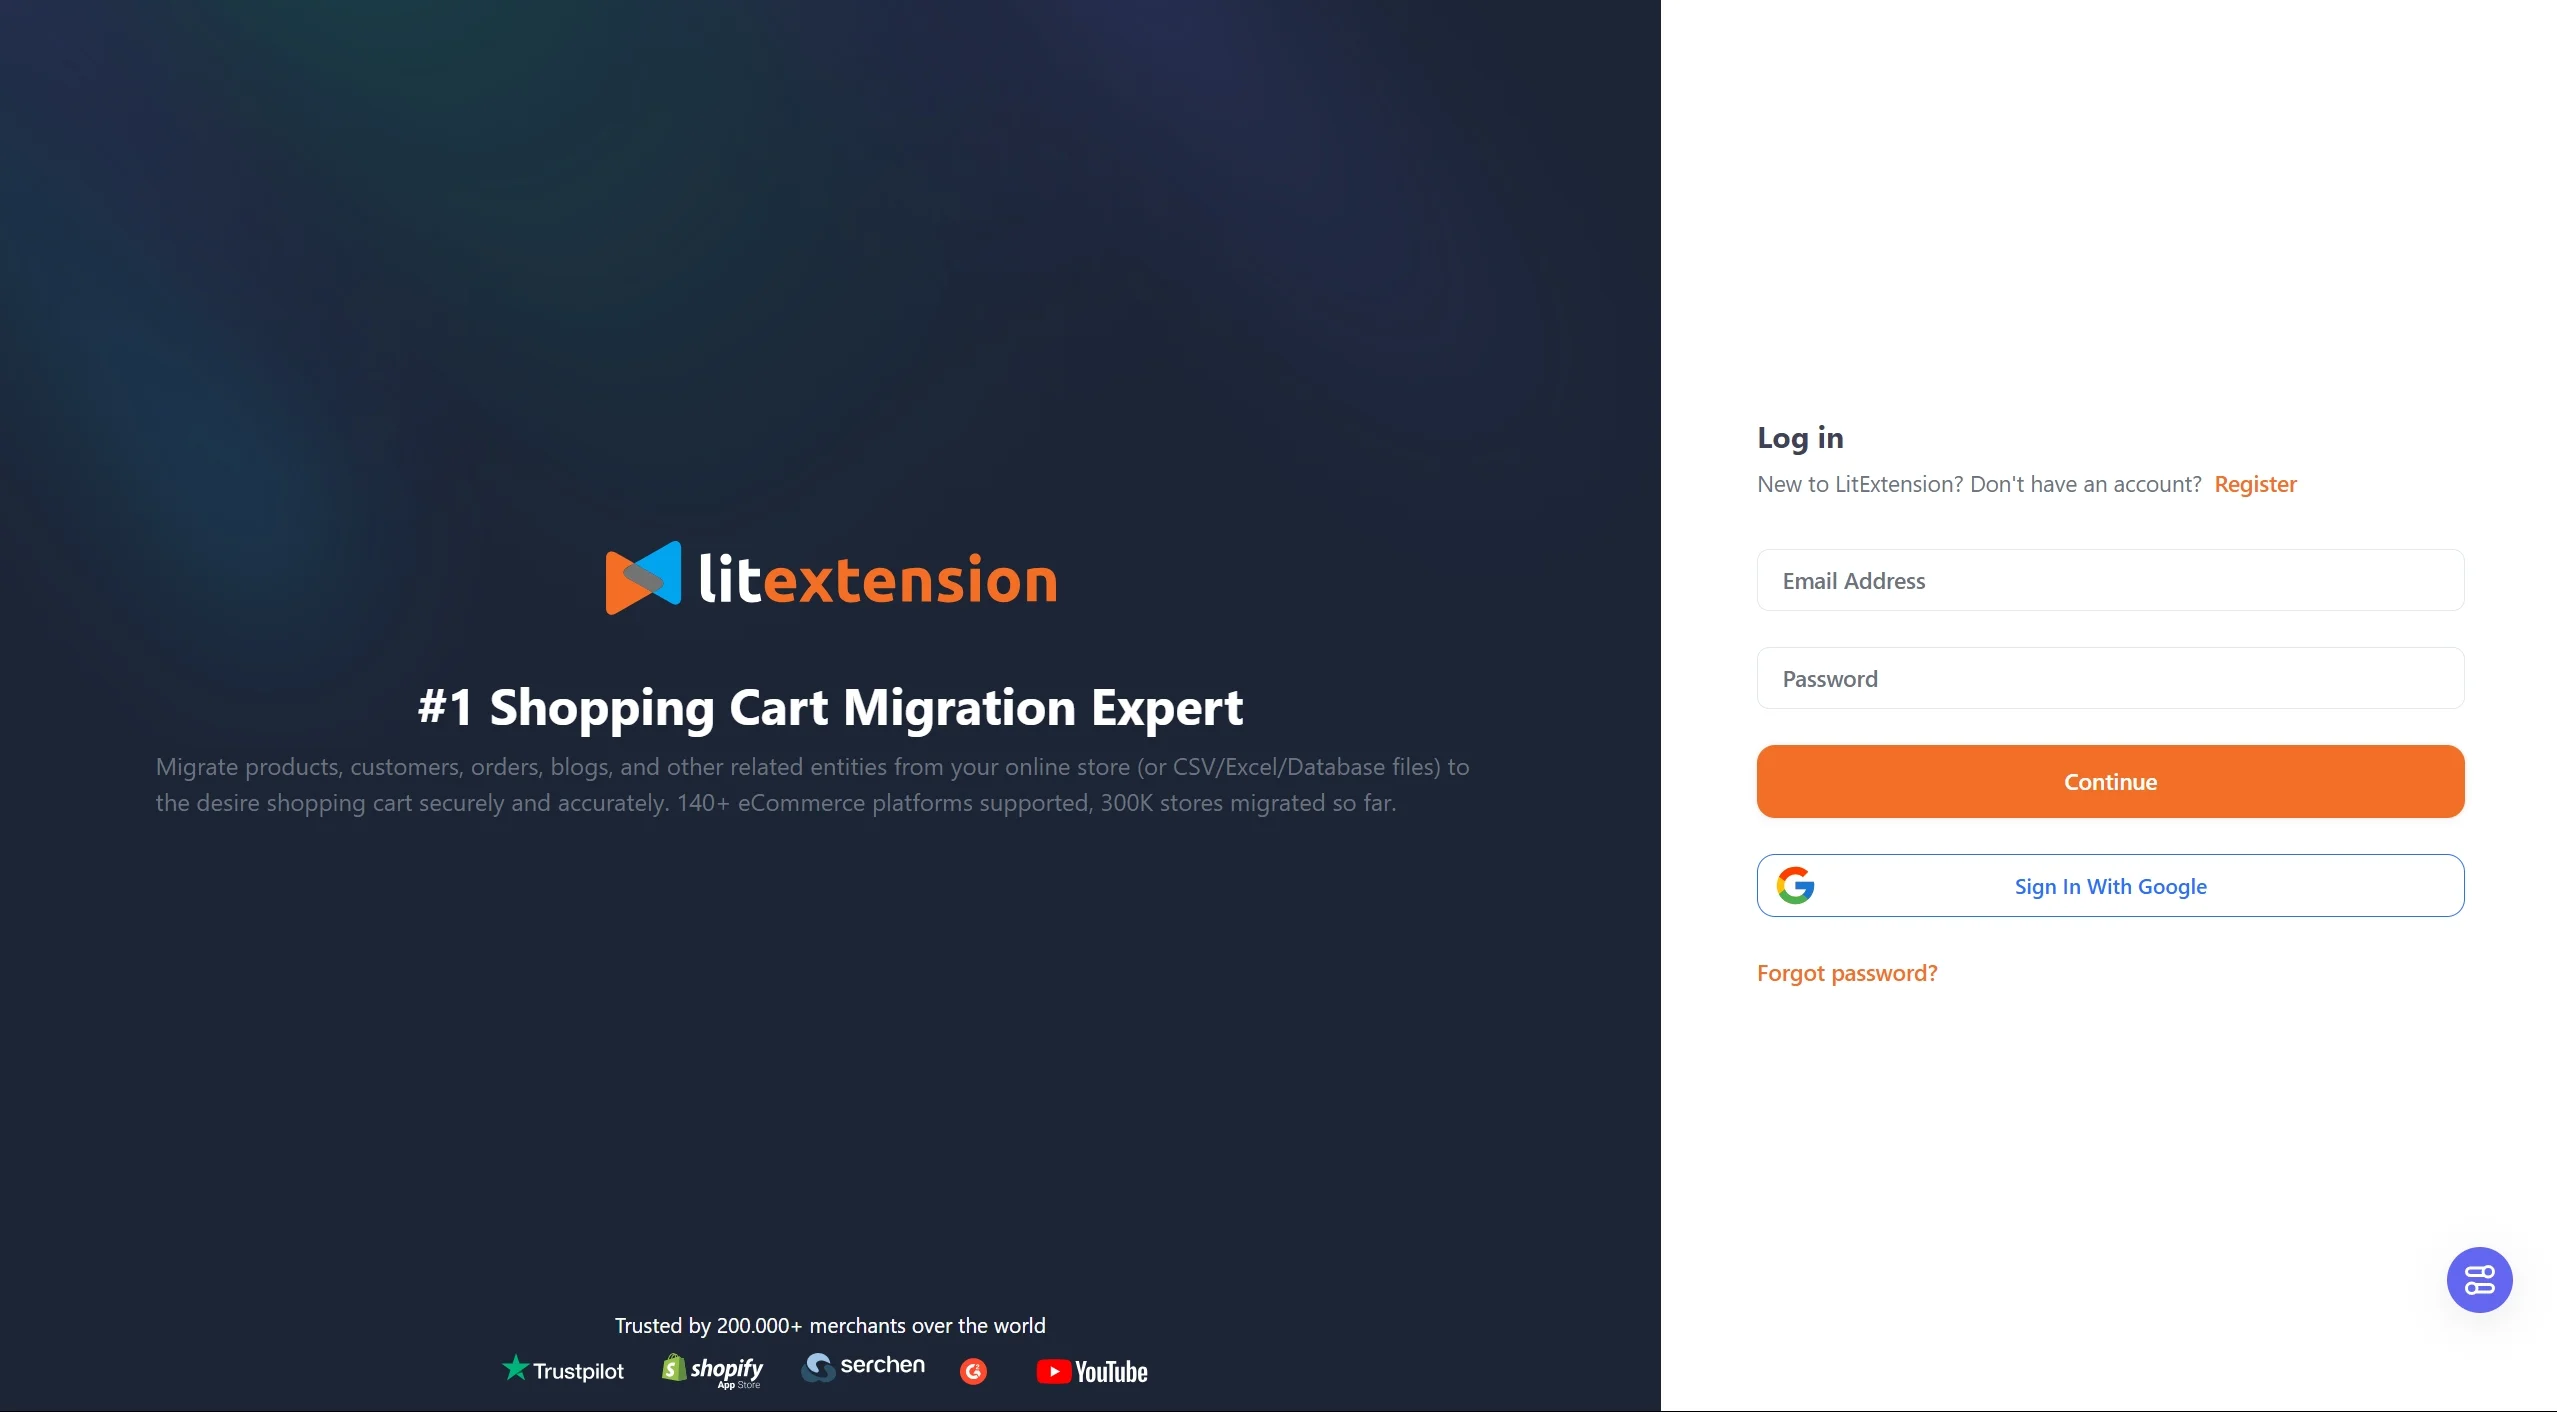
First, create your account on the LitExtension page with your email and password or through your Google account.
On the Migration Page, click New Migration at the top right button on the screen. Then, choose Magento as your source cart and fill in its URL in the corresponding field. You can choose to set up manually or through FTP/FSTP.
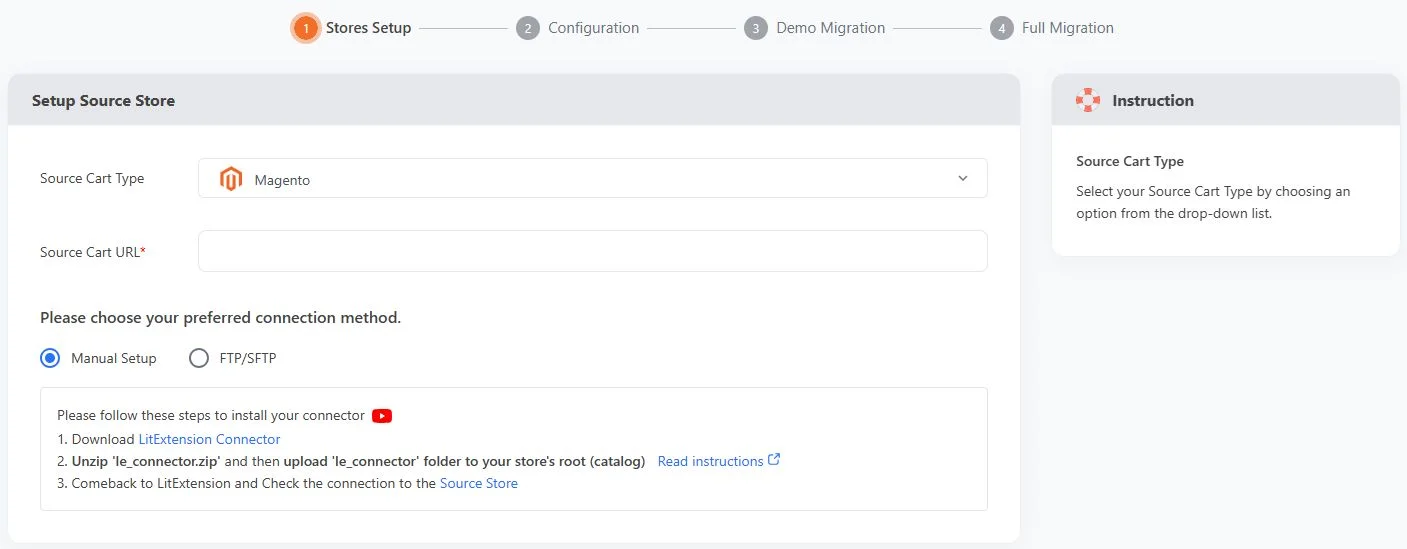
Then, repeat the same setting procedure of the Target Store–Magento 2.
Step 2: Select entities to migrate
To continue, it's time to pick out the data you wish to migrate Magento 1 to Magento 2, such as products, customers, pages, blog posts, etc. You can either choose all your data by ticking the “Select All” checkbox or only choose the necessary ones.
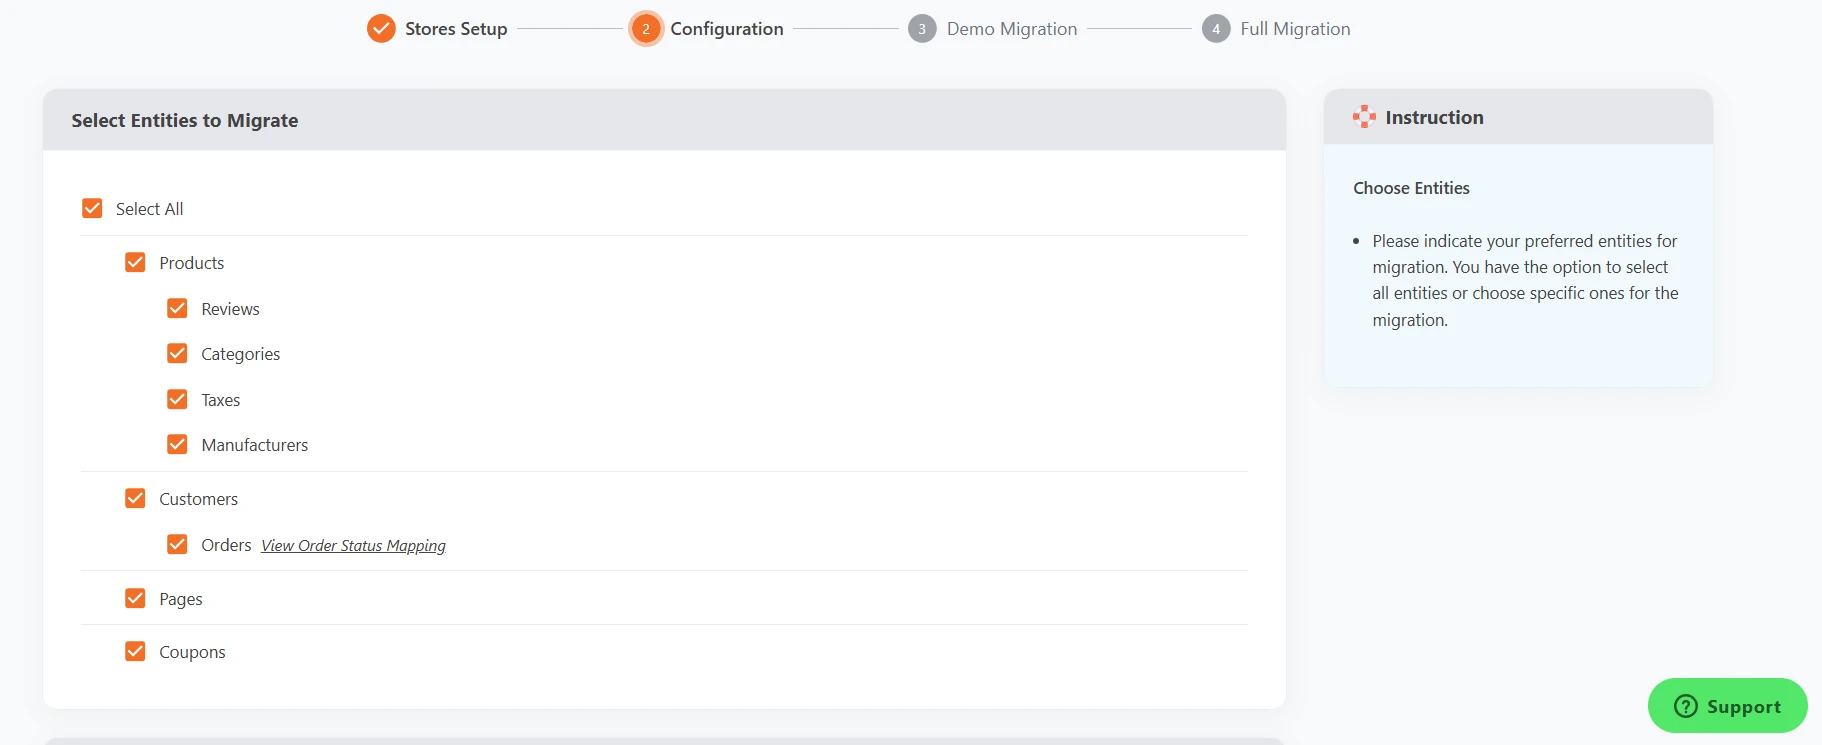
LitExtension also offers Additional Options, allowing you to perform more advanced tasks related to the migration. Based on your selection, our team will charge different fees ranging from $19 to $39. For further information, please check out our list of additional options here.
Then, don't forget to map order statuses and customer groups afterward. This enables you to match the necessary data between Magento 1 and Magento 2.
Step 3: Perform Full Migration for Magento 1 to 2
To see how our migration service actually works, you can start a demo migration with a limited number of entities. Or, you can skip this step by clicking the “Skip Demo Migration” button to move forward with migrating Magento 1 to Magento 2 immediately.
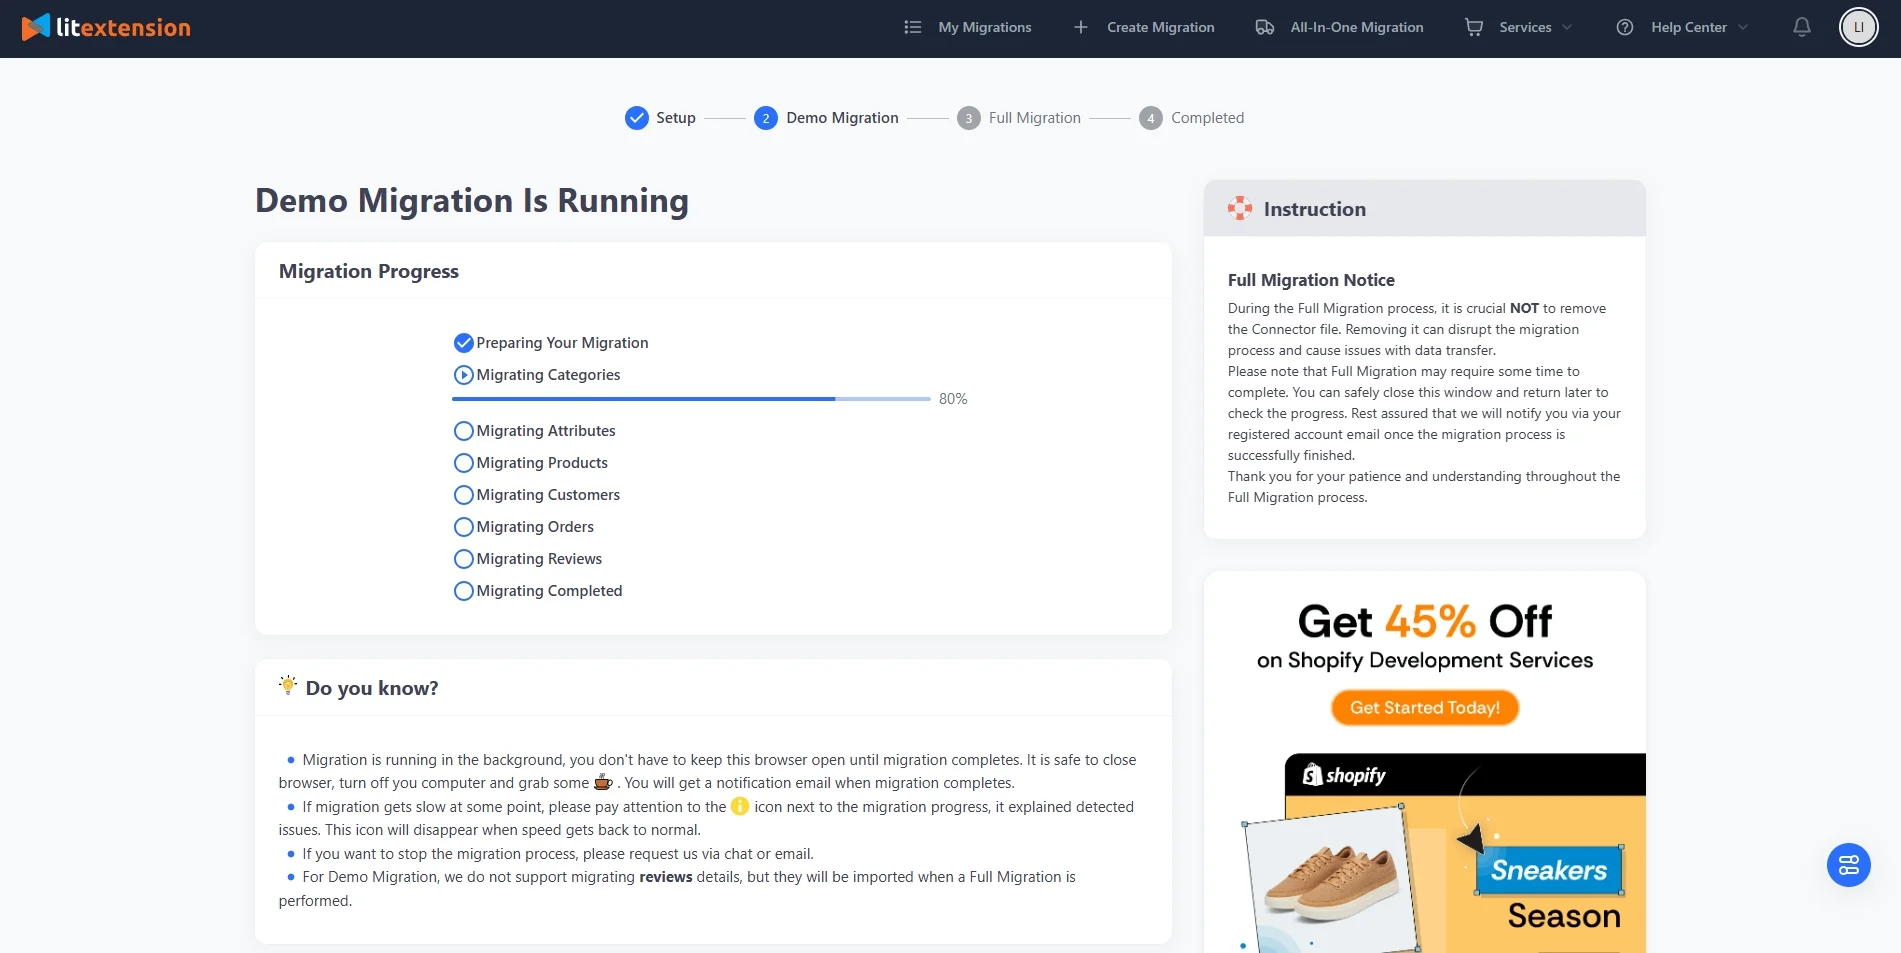
Once the migration is running, there is no need to keep your PC running the whole time! Enjoy a cup of coffee, and we will notify you when the migration completes via email. After that, you can proceed to check out the result on your new Magento 2.
Need Help to Migrate from Magento 1 to Magento 2?
LitExtension Automated Migration Tool transfers products, customers, and orders from Magento 1 to Magento 2—fast, accurate, and hassle-free.

Keep up with Magento trends:
- What Is Magento? All About Magento Need To Know
- A Complete Magento Tutorial & Guidelines For Beginners
Method 2. Using the Magento data migration tool
To migrate from Magento 1 to Magento 2, you may utilize a command-line interface (CLI) called Data Migration Tool. Data transfer status may be monitored, logs can be generated, and tests can be done to ensure data integrity between Magento 1 and 2.
There are 3 working modes for the tool, including:
- Settings: the settings for migrating configuration.
- Data: bulk migrating your main data.
- Delta: migrate incremental data updates during the previous migration modes.
Step 1: Install Data Migration Tool
Before going any further, you need to ensure that you are using the same version for both your Magento 2 Store and Data Migration Tool. Only in this way can the migration process runs properly.
To install the extension Data Migration Tool, there are two ways for you to choose: updating composer.json from your Magento root folder or using Github. Either way carries the same tutorial steps as below:
- Sign in to your Magento server or open the file system owner.
- Navigate to the Magento 2 root folder.
- Fill in the below commands:
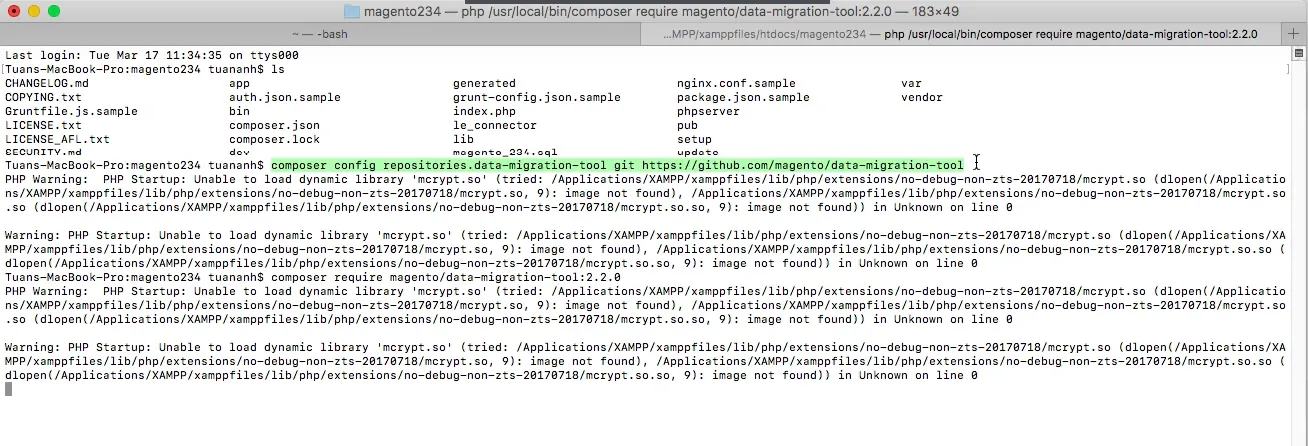
- Enter your authentication keys, where the public key is your username, and the private key is your password.
Step 2: Configure the Data Migration Tool
Similarly, you can also choose from 3 methods of configuring the Data Migration Tool. Based on our experience, we recommend using a separate module to perform the task.
Using a separate module
- Insert source code to create a new Magento 2 module. For each folder, please paste in the code that we have included below.
/app/code/Vendor/Migration/composer.json
{

"name": "vendor/migration",

"description": "Providing config for migration",

"config": {

"sort-packages": true

},

"require": {

"magento/framework": "*",

"magento/data-migration-tool": "*"

},

"type": "magento2-module",

"autoload": {

"files": [

"registration.php"

],

"psr-4": {

"Vendor\Migration\": ""

}

},

"version": "1.0.0"

}
/app/code/Vendor/Migration/registration.php
\Magento\Framework\Component\ComponentRegistrar::register(

\Magento\Framework\Component\ComponentRegistrar::MODULE,

'Vendor_Migration',

__DIR__

);
/app/code/Vendor/Migration/etc/module.xml
xmlns:xsi="http://www.w3.org/2001/XMLSchema-instance"

xsi:noNamespaceSchemaLocation="urn:magento:framework:Module/etc/module.xsd">

name="Vendor_Migration" setup_version="1.0.0">
name="Magento_DataMigrationTool"/>
- Copy the config.xml.dist file.
- Set up detailed access for Magento 1 and Magento 2 databases as well as the encryption key.
- Map your configuration files to Magento 1 customizations.
Using vendor folder
- Log in to your Magento server or switch to the File System Owner mode.
- Navigate to this directory:
<your Magento 2 install dir>/vendor/magento/data-migration-tool/etc/<migration edition>/<ce or version>
- Create a config.xml file by entering this sample snippet:
cp config.xml.dist config.xml
- Fill in the access details for Magento 1 and Magento 2 in the config.xml file:
<source>
<database host=”127.0.0.1″ name=”magento1″ user=”root”/>
</source>
<destination>
<database host=”127.0.0.1″ name=”magento2″ user=”root”/>
</destination>
<options>
<crypt_key />
</options>
As you can see from our example, there are several optional parameters you can insert into the database:
- Database user password: password=<password>
- Database custom port: port=<port>
- Table prefix: <source_prefix>, <dest_prefix>
Using TLS Protocol
The TLS protocol (i.e., with public/private cryptographic keys) is another option for establishing a connection to a database. To the database element, add the following fields:
The TLS protocol (i.e., with public/private cryptographic keys) is another option for establishing a connection to a database. To the database element, add the following fields:
- ssl_ca
- ssl_cert
- ssl_key
Step 3: Modify migrate settings
Stores, websites, and system configurations like shipping, payments, taxes, and more are all migrated with the help of the Settings mode. Initiate the configuration transfer by running this line of code:
bin/magento migrate:settings [-r|--reset] {<path to config.xml>}
[-r|--reset]is an optional parameter that initiates migration from scratch. You can also make use of it to run a testing migration.[-a|--auto]is an optional input that keeps migration running even if an integrity check fails.{<path to config.xml>}is a parameter that specifies the full, unresolved path to the config.xml file used by the migration program.
After a successful transfer of preferences, a notification that the migration is complete will be shown.
Step 4: Migrate main data
You can start migrating data by running:
bin/magento migrate:data [-r|--reset] [-a|--auto] {<path to config.xml>}
where:
[-a|--auto]is used to bypass integrity check failures and continue the migration process.[-r|--reset]restarts the migration process from the very beginning. This line of reasoning may be used to verify migration.{<path to config.xml>}specifies the full, unqualified path to the to config.xml file.
Here, the Data Migration Tool adds support for the migration tables in the Magento 1 database by generating new tables and triggers. They'll be put to use throughout the Magento 1 to Magento 2 migration's incremental/delta phase.
These auxiliary tables are populated by database triggers, which store information about any new operations done on the primary table (record addition, modification, or deletion) to the auxiliary table. If there are any unprocessed entries in these tables, the Data Migration Tool will move them to the Magento 2 database as part of the delta migration process.
Step 5: Migrate additional changes
During the data transfer, the incremental migration tool creates delta log tables in the Magento 1 database (with the prefix m2_cl_*) and triggers monitoring changes. To avoid duplicating any old data, only the changes made to Magento 1 since the previous migration should be copied over using the delta log tables and triggers.
Copy the following source code to activate the changes migration on your Magento 2 store:
bin/magento migrate:delta [-r|--reset] [-a|--auto] {<path to config.xml>}
where:
[-r|--reset]is an optional argument that starts migration from the beginning. You can use this argument for testing migration.[-a|--auto]is an optional argument that prevents migration from stopping when it encounters integrity check errors.{<path to config.xml>}is the absolute file system path to config.xml; this argument is required.
And that's how to migrate Magento 1 to Magento 2 using the Magento Data Migration tool.
Step 3. Perform Post-migration Activities
Migrating your data from Magento 1 to Magento 2 is a major milestone, but it's not the finish line. Before your store is ready to go live, there's a series of critical post-migration activities you need to work through to ensure everything functions properly. Work through each task below:
Update the database
During the migrate Magento 1 to Magento 2 process with LitExtension, your old store still stays active and keeps receiving new entities, or you can make new updates. Therefore, it’s certainly important to transfer all the new entities and updates to the target store in order to keep it up-to-date.
If you choose to transfer with LitExtension, we offer three post-migration services, including:
- Recent Data Migration: This function enables you to automatically transfer all the data that appears in your source store after the complete platform switch.
- Re-Migration: This option helps you to transfer everything all over again. Thus, this includes data that has been transferred before, data that recently appeared in your source store, and data that has been updated.
- Smart Update: It updates data that has been modified and transfers data that recently appeared in your Source store after the migration. This option can solve the problem better and quicker than a Re-migration.
Display data on frontend
In order for the data to show on the front, you need to run the command line (login with SSH) to resize images, reindex, and clear the cache as follows:
Note: Out-of-stock products are disabled on the Magento store by default. This means they will not be shown on the front end and not be visible to your customers.
Therefore to display these products, go to System > Configuration > Catalog > Inventory > Stock options > Choose “Yes” in Display Out of Stock Products and click “Save config”.
Install themes & extensions
To tell you the truth, it’s impossible to move your theme and extensions when running Magento 1 to 2 migration. Instead, developing a new one with the same appearance or designing a new website is a more possible choice.
Here we suggest two options to create a theme on Magento 2:
- Download and install one of the best Magento themes.
- Re-create a similar theme to work properly with Magento 2 structure.
After that, you just install the extension on your new store and simply leave the rest for the team to carry on! We will custom code and move all the corresponding data of extensions to migrate Magento 1 to Magento 2.
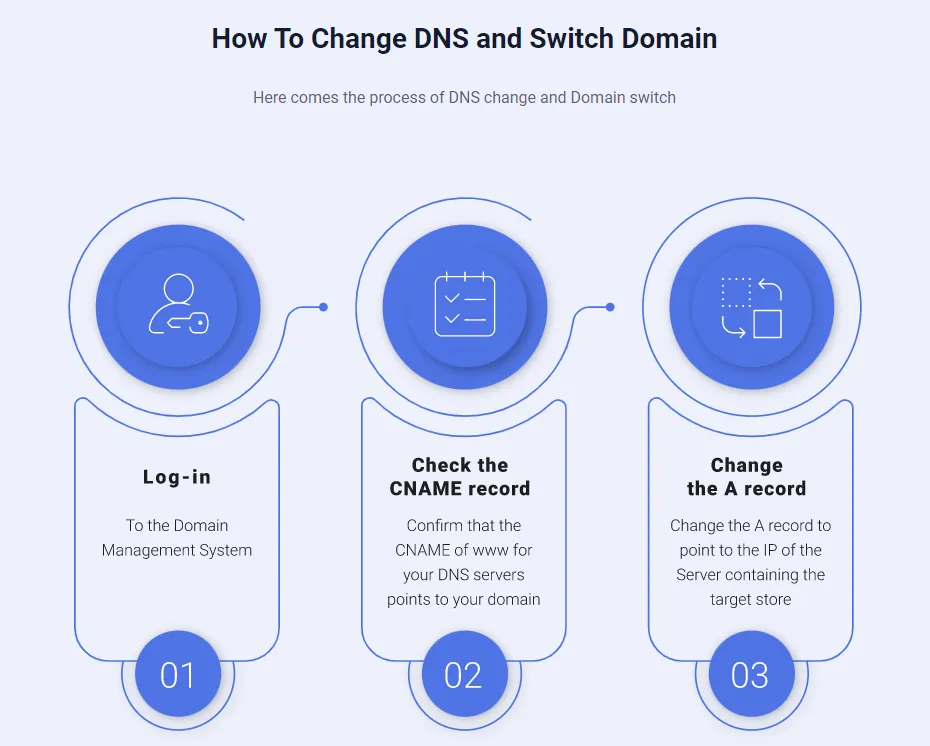
Change DNS & switch domain
Now you just move to a new domain name site, and definitely, you’re afraid of losing all the popularity of the domain promotion of your source store? We don’t think that is what you want. Surely, after Magento migration from 1 to 2, you want to retain your old domain name. For this reason, changing the DNS needs to be done.
Magento 1 vs Magento 2 – Why Make The Upgrade
If you're still on the fence about migrating, a direct comparison makes the case hard to ignore. Magento 2 wasn't just patched on top of Magento 1; it was rebuilt from the ground up to meet the demands of modern eCommerce.
Feature | Magento 1 | Magento 2 |
Official support | End-of-life (June 2020) | Actively maintained |
Page load speed | Slower, limited caching | Up to 50% faster with full-page cache |
Mobile responsiveness | Requires manual configuration | Fully responsive out of the box |
Checkout experience | Multi-step, clunky | Streamlined 2-step checkout |
Admin interface | Outdated, harder to navigate | Modern, intuitive dashboard |
Security patches | No longer issued | Regularly updated |
PWA support | Not available | Supported via PWA Studio |
Extension ecosystem | Shrinking | Large and actively growing |
From a security standpoint, continuing to operate on Magento 1 is a serious liability. Without official patches, any newly discovered vulnerabilities go unaddressed, leaving your store — and your customers' data — exposed. This also creates PCI compliance challenges for stores handling card payments, which can result in fines or losing the ability to process transactions altogether.
Beyond security, the Magento 1 extension ecosystem has largely dried up. Developers have moved their support and new releases exclusively to Magento 2, meaning your existing plugins will become increasingly outdated and incompatible with modern payment gateways, shipping providers, and marketing tools. Migrating to Magento 2 isn't just about keeping up–it's about keeping your business competitive and your customers' trust intact.
What to Consider When Migrating Magento 1 To Magento 2
A successful Magento 1 to Magento 2 migration isn't just about moving data–it's about making the right decisions before you start. From budget to SEO continuity, each of the factors below can significantly impact how smooth your migration goes and how quickly your store returns to full operation.
- Budget: Determine whether you'll use an automated tool, hire a Magento developer, or work with a migration agency. Costs can range from a modest tool subscription to several thousand dollars for full custom development, depending on your store's complexity.
- Data complexity: Take stock of how many SKUs, customer records, orders, and CMS pages your store holds. Larger, more complex stores take longer to migrate and are more prone to data mapping errors that need manual review.
- Custom code and customizations: Any custom modules, checkout logic, or backend workflows built for Magento 1 will need to be rebuilt for Magento 2 — they cannot be directly ported. Audit all customizations early so you can budget time and resources accordingly.
- SEO continuity: Magento 2 often generates different URL structures, which can wipe out years of built-up search rankings if not handled correctly. Plan your 301 redirect mapping in advance and verify that metadata, canonical tags, and sitemaps transfer correctly.
- Downtime planning: Even with the best tools, your store will experience some downtime during the final cutover. Schedule the migration during your lowest-traffic window typically late at night or on weekends, and communicate expected downtime to your customers in advance.
- Staging environment: Never migrate directly to a live production environment. Set up a staging server to run the full migration, conduct thorough testing, and resolve all issues before switching your domain over.
- Extension and theme compatibility: Virtually all Magento 1 extensions and themes are incompatible with Magento 2. Research and source Magento 2-compatible replacements for every plugin and visual component your store relies on before you begin.
- Timeline: Be realistic about how long the migration will take. A small store with minimal customization might be completed in a few days, while a large enterprise store with heavy customization can take several weeks or even months to migrate fully.
Troubleshoot Common Magento 1 to Magento 2 Errors
Even with careful preparation, errors during and after migration are common. Below are the most frequently encountered issues, what causes them, and how to fix them.
Error | Cause | How to Fix |
PHP memory limit exceeded | Default PHP memory allocation is too low for migration workloads | Set memory_limit = 2GB in your php.ini file |
Integrity constraint violations | Duplicate entries or missing data dependencies in the Magento 1 database | Scan and remove duplicate records before migration; validate all product attributes, categories, and customer data |
Missing products, categories, or customers | Incomplete mapping files or unresolved data issues in the source store | After migration, identify missing entities and ensure all mapping files are complete; run pre-migration data validation |
404 errors for scripts and CSS | Incorrect base URL configuration or broken static file paths after domain switch | Verify web/unsecure/base_url in the core_config_data table matches your new domain; flush cache with php bin/magento cache:flush |
Extension incompatibility | Magento 1 extensions use a completely different architecture and are not compatible with Magento 2 | Find Magento 2-compatible replacements for each extension; do not attempt to directly port M1 extensions |
Theme incompatibility | Magento 1 themes cannot be transferred to Magento 2 due to structural differences | Rebuild your theme from scratch using Magento 2's architecture, or purchase a compatible M2 theme |
Frontend doesn't reflect backend changes | Cached data preventing new content from displaying | Run php bin/magento cache:flush and php bin/magento cache:clean, then reindex via php bin/magento indexer:reindex |
Magento 1 to 2 Upgrade – FAQs
How much does it cost to migrate from Magento 1 to Magento 2?
The cost varies depending on your specific requirements and the complexity of your store. For those of you who can't perform the task manually, it will cost ,b>between $50 and $80 per hour to employ a developer. With the LitExtension service, the price starts at $59, which can help online merchants save up to 88% of the total fee.
Why should you migrate to Magento 2?
Magento 1 has reached its end of life and will no longer get new versions or security upgrades, leaving your website open to new vulnerabilities. Second, the speed and scalability of Magento 2 have been enhanced, allowing for quicker page loads and more orders to be processed. In addition, Magento 2 has numerous enhancements and new features that may improve the shopping experience for customers and simplify store administration for shop owners.
How do I import new products into Magento 2?
To import new products to your Magento 2 store, you can make use of the built-in functionality following these steps:
- Create a CSV file with all product-related data.
- Upload the file to Magento 2 admin panel.
- Check out the new products on your store front.
How do I migrate my Magento site?
To migrate your Magento site, start by backing up your data and selecting a new hosting environment. Install Magento on the new server, migrate your data using migration service like LitExtension, and thoroughly test the site before updating DNS settings and launching the migrated site.
Final Words
The decision to level up your store with migrate Magento 1 to Magento 2 is very critical therefore requires time and effort to figure out the most optimal way for it. Although the process itself is not an easy task, with an appropriate plan and an appropriate method, you can upgrade your Magento store on time, on budget, and effectively.
In conclusion, LitExtension, with its powerful automated migration tool that supports smooth transition, has been the best pick for almost every business that wants to upgrade its Magento store.
If you like this article, feel free to visit our LitExtension Blog and Resources to get more expert tips and insights.
Explore the latest Magento features:
- How to Migrate From OpenCart To Magento (3 Steps Only)
- How to Migrate WooCommerce To Magento
- Magento 2 Migration Checklist: All 12 Complete Steps

