Almost 21 years after its release, WordPress still manages to attract thousands of new users on a daily basis. The only issue is that many of those newcomers are struggling to find a simple WordPress tutorial to get started.
If you're one of them, then you're in the right place! In this article, we will cover:
- An overview of WordPress
- A quick WordPress tutorial
- Advanced WordPress settings to optimize your stores
- Bonus: WordPress courses to enroll
About WordPress
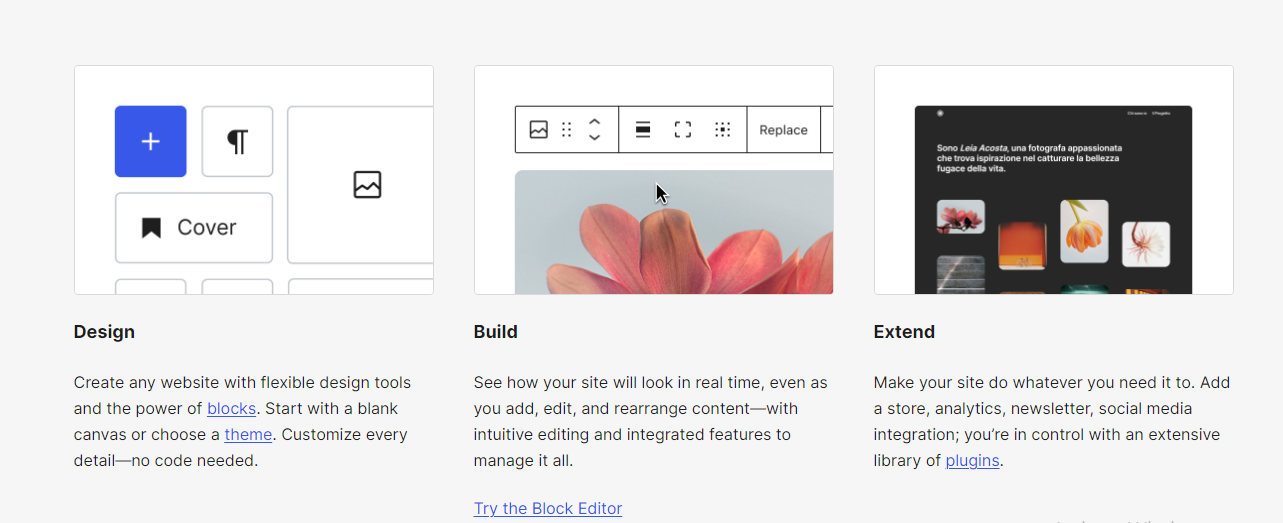
WordPress started as a simple tool mainly for creating blogs, but that's changed significantly over time. Now, with major updates to its core features and a huge collection of plugins and themes, it's become a powerful CMS (content management system) that can build almost any kind of website, such as:
- eCommerce store
- Portfolio
- Social network
- Blog
- Resume
- Forum
- Membership site.
Currently, there are two main versions of WordPress:
- WordPress.org (the self-hosted WordPress): You can download this free software and install it on your own web hosting server. This gives you complete control over your site, allowing you to customize everything to your liking with thousands of plugins and themes.
- WordPress.com (the hosted WordPress): In contrast, WordPress.com is a user-friendly paid service based on the WordPress software. It takes care of hosting, security, and updates for you, though that means you'll have much fewer customization options. Plus, some features are only available on more expensive plans.
Want to Migrate to WordPress?
If you intend to migrate to WordPress , LitExtension offers a great migration service that helps you transfer your data from the current eCommerce platform to a new one accurately, and painlessly with utmost security.
A Quick WordPress Tutorial for Beginners
Now that you have a basic understanding of WordPress, let's explore how to set up and run your own site! Keep in mind that our tutorials focus on WordPress.org, the self-hosted version.
How to install WordPress
Obviously, it would be impossible to proceed to the rest of our WordPress tutorial if you haven't installed WordPress yet! Don't worry; we'll walk you through it quickly:
Step 1. Download WordPress
First, click this link to download WordPress, then unzip the package on your computer. For those who are comfortable with shell access, we recommend directly downloading and extracting WordPress on your server using the following commands:
wget https://wordpress.org/latest.tar.gz
tar -xzvf latest.tar.gz
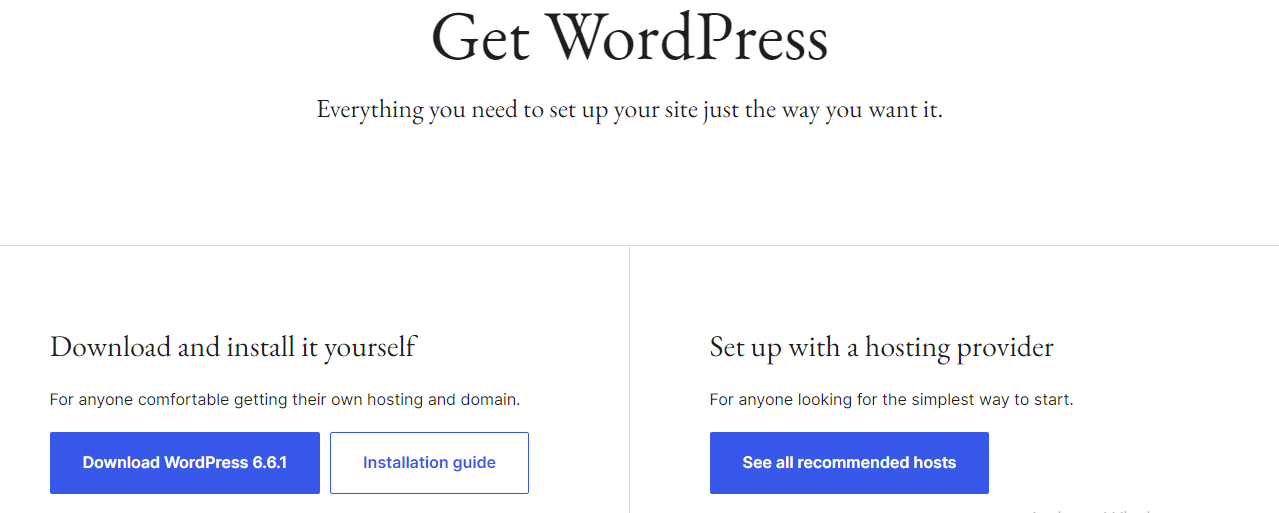
The package will be extracted into a new folder named “wordpress.”
Step 2. Set up the database
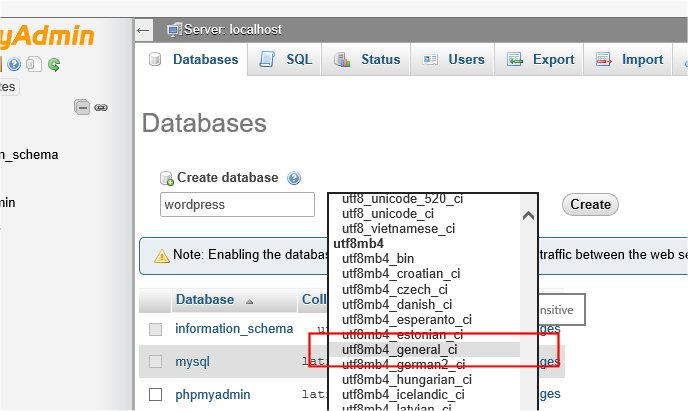
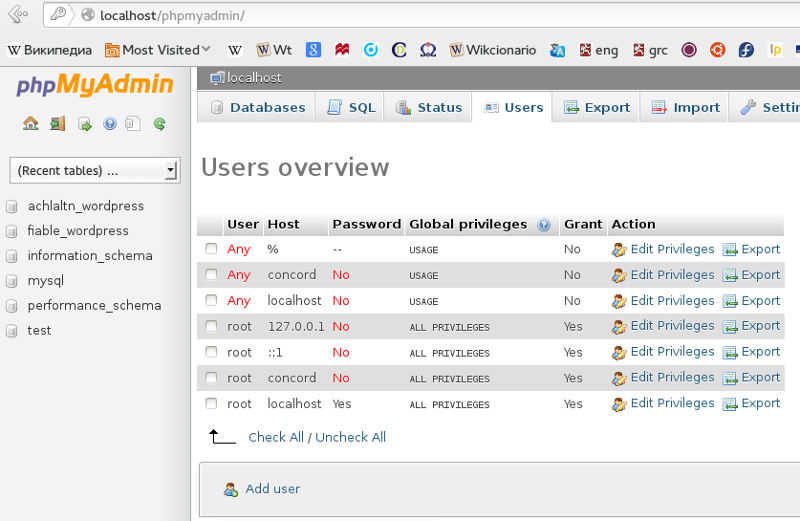
Next, check if your hosting provider has already set up a WordPress database for you. If yes, that's fantastic! But if not, you'll need to create one manually using phpMyAdmin and set up the database with the appropriate name and collation (usually utf8mb4_general_ci).
After that, go back to the main page and click ‘Add User’:
- Create a new user with a secure password.
- Then, in the “Database-specific privileges” section, choose the database you just created for WordPress from the “Add privileges to the following database” dropdown menu, then click ‘Go.’
- The page will update to show the privileges for that database. Select ‘Check All’ to grant all privileges, and click ‘Go’ again.
Step 3. Configure wp-config.php
In this step, rename wp-config-sample.php to wp-config.php and open it in a text editor. Then, fill in the database name, user, password, host (usually localhost), charset (utf8mb4), and collation in the appropriate fields.
Remember to add unique authentication keys for added security! Once you finish, save the file.
Step 4. Upload the WordPress files
Now, it's time to decide where you want your WordPress site to be located: the root directory or a subdirectory. There are two common scenarios:
- If using FTP, upload all the contents of the wordpress directory (not the directory itself) to the chosen location on your server.
- If using shell access, move the contents or the entire directory to the desired location.
Step 5. Run the Install script
In this step, open your web browser and navigate to the installation script URL:
- For root directory installation: https://example.com/wp-admin/install.php
- For subdirectory installation: https://example.com/blog/wp-admin/install.php
If WordPress can't find the wp-config.php file, it will prompt you to create and edit it automatically (just like Step 3). You can input the database details here if needed.
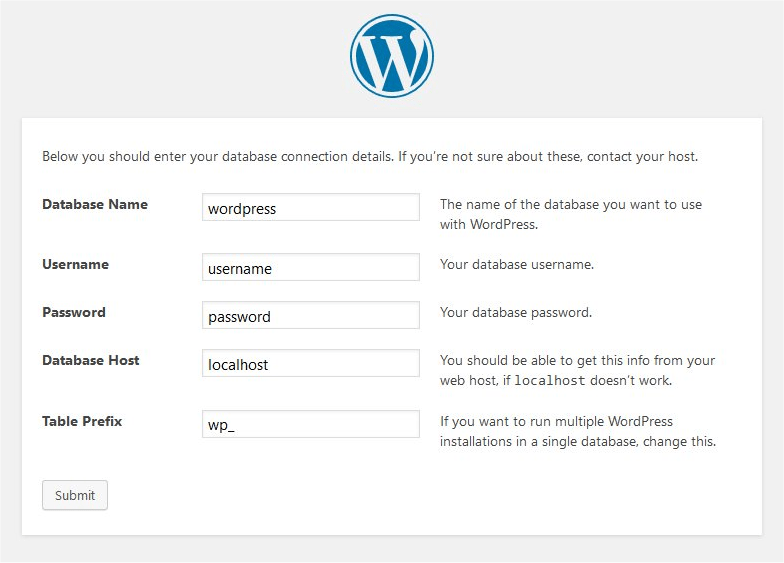
After that, fill out the site title, admin username, password, and email. (You can also choose whether to make your site visible to search engines). Finally, click ‘Install WordPress.’
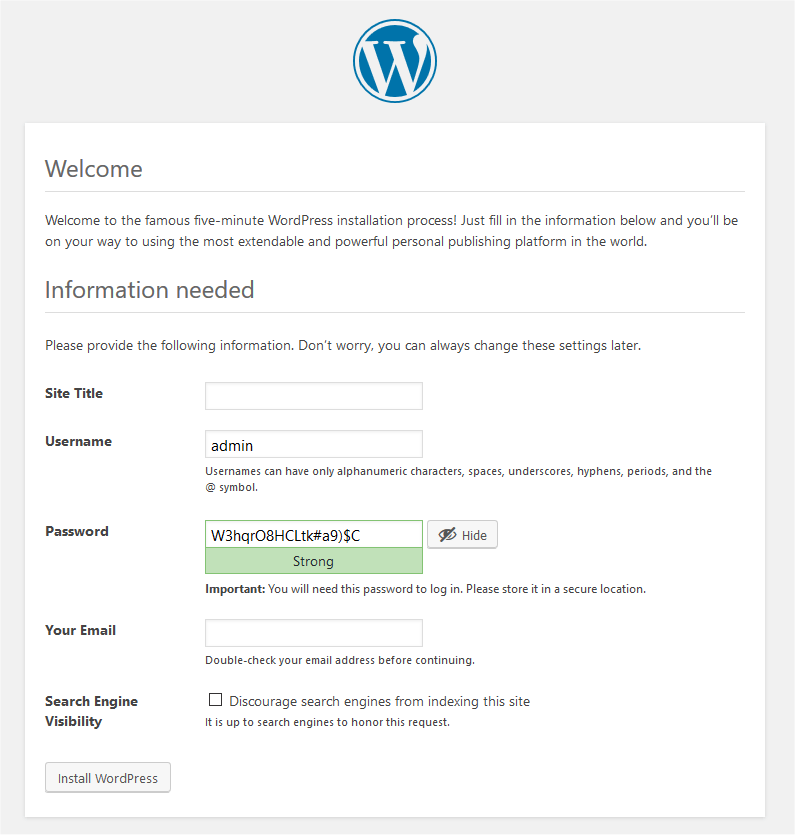
A login prompt will appear on the screen once this installation is completed. Otherwise, if you encounter database errors, make sure the WordPress user has the correct permissions and confirm the database server is running.
How to choose and install WordPress themes
The first part — installing WordPress — is finally behind us! Now, we can move on to a much simpler stage in this WordPress tutorial: picking and installing the best theme for your site. Let's see how you can do it:
Step 1. Install a theme
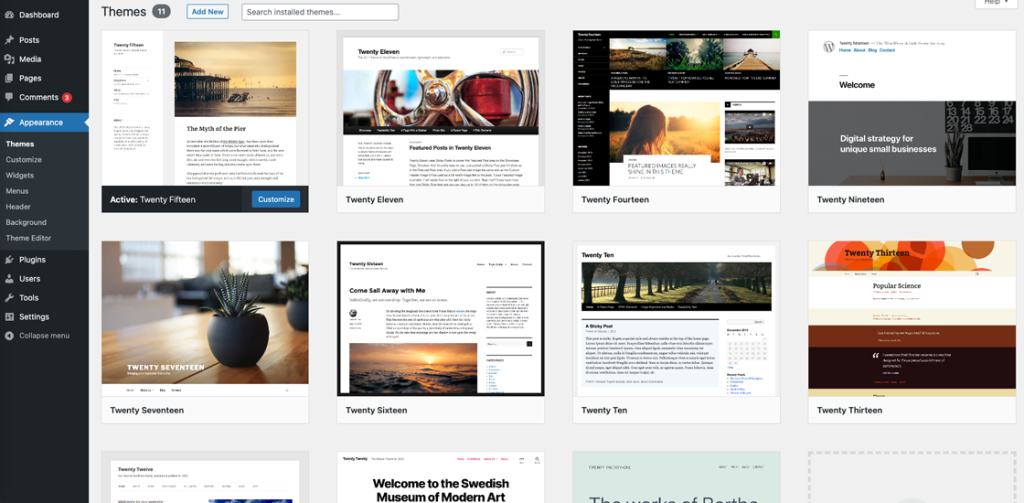
For starters, you need to install a WordPress theme! Go to your WordPress dashboard, then click Appearance > Themes > Add New. A variety of themes will be displayed.
Now, click ‘Install’ to install a theme directly from this page. Another alternative is to click ‘Details & Preview’ for more information and install the theme from there.
Step 2. Activate the theme
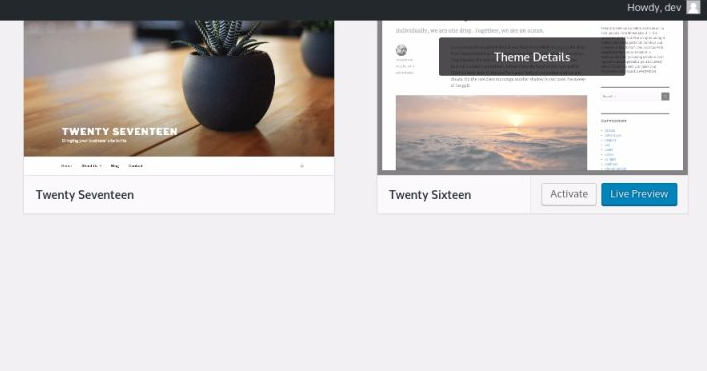
Once the theme is installed, click on the ‘Activate’ button. This step will make the theme live on your site, and you'll be returned to the Themes dashboard (where you can see the currently active theme).
Step 3. Set up your new WordPress theme
After installing the theme, you'll need to set it up. The setup process differs slightly depending on whether you're using a block theme or a classic theme.
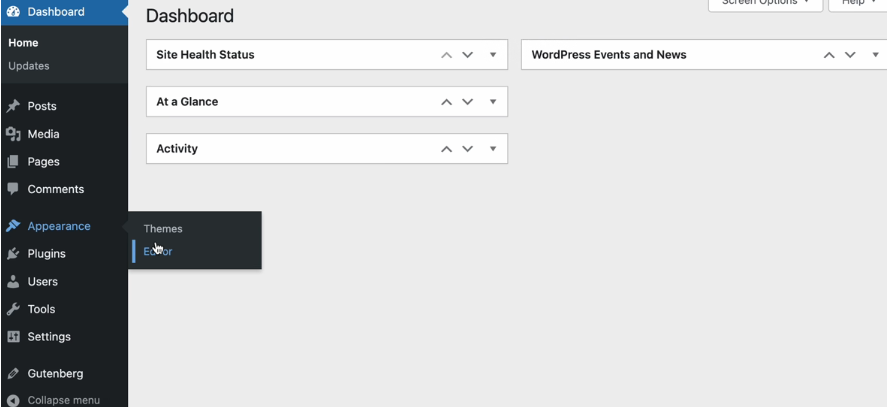
- If using block themes: Use Site Editor to set up block themes, then go to Appearance > Editor (beta) and customize the style settings, theme blocks, and templates to your liking.
- If using classic themes: Use Customizer to set up classic themes. After that, navigate to Appearance > Customizer to adjust the site's color scheme, upload header and background images, and set up widget areas and site menus.
How to set up WordPress plugins
Once you've installed and set up your theme, you can actually start running your website right away.
Still, if you want to add more functionality and features to the site, WordPress has plenty of options for you! With 59,000 free plugins available in the WordPress Plugin Directory and 5,200+ paid plugins on CodeCanyon, there are over 64,600 plugins to choose from.
In this WordPress tutorial, we will explain how to pick and set up the right plugins for your site in just three steps:
Step 1. Search for a new plugin
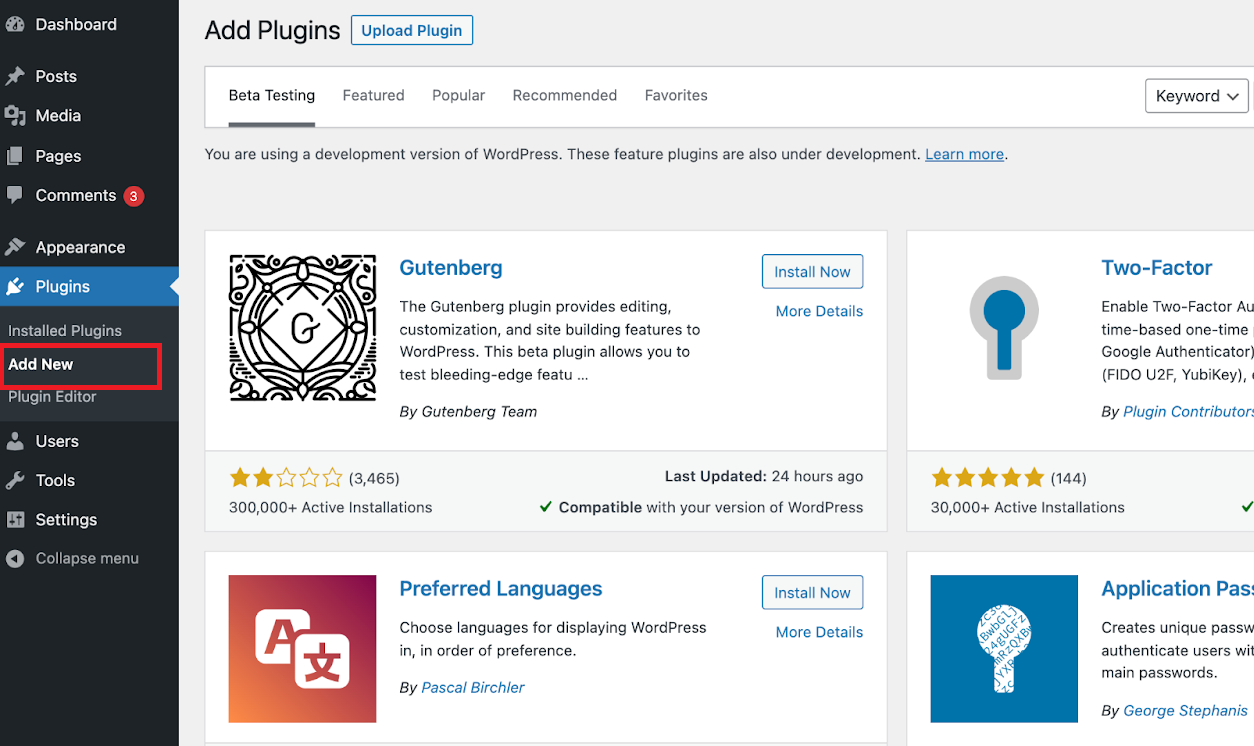
From your WordPress Dashboard, navigate to Plugins > Add New. You can search for a specific plugin by type or name (or simply browse the available categories or tags).
Step 2. Review the plugin
I know you cannot wait to install the plugin, but wait! Before doing so, it's a good idea to check out the plugin details and answer a few important questions, such as:
- When was it last updated?
- How many people have downloaded it?
- Is it compatible with your version of WordPress?
Step 3. Install
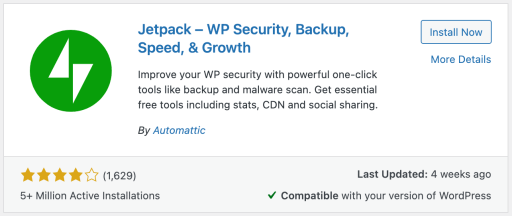
If everything looks good to you, click the ‘Install’ button. Once the installation is completed, hit ‘Activate’ to start using it.
How to publish new WordPress posts
The installation, site theme, and plugins are all set; you can start creating blog posts and articles now! Just make sure to keep this WordPress tutorial in mind, and you're golden:
Step 1. Create a new post
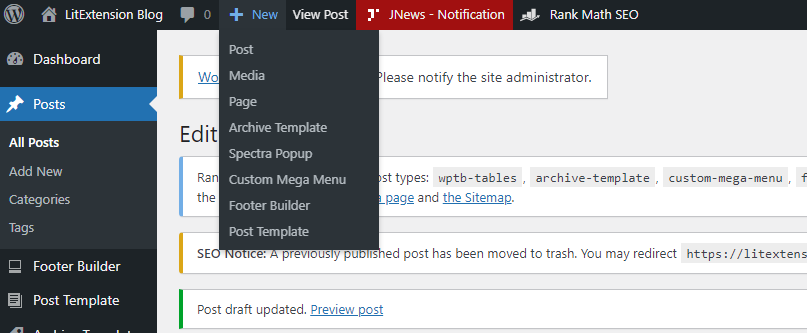
Hover over the ‘+ New’ button on the top toolbar and select ‘Post’ from the dropdown menu. This step will take you to the Add New Post screen! Another alternative is to navigate to Posts > Add New on your sidebar to create a new post.
Step 2. Write your post
Next, use the post-editing screen to write your content. For advanced text formatting, you can click the ‘Kitchen Sink’ icon to reveal additional formatting options! Click ‘Publish’ once you finish to make the post live.
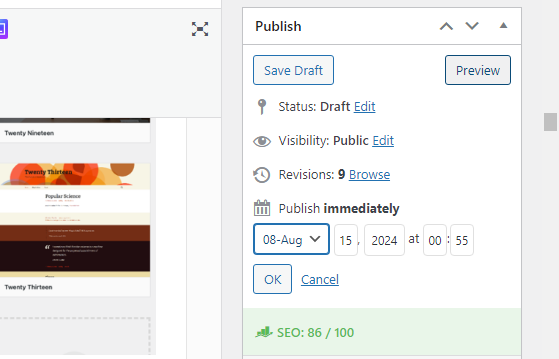
Some other features to consider:
- ‘Preview’ the post before publishing
- ‘Schedule’ the post for future publication
- ‘Add categories and tags’ for organization
- ‘Assign a post format’ (if your theme supports it)
- ‘Add a Featured Image’ (if your theme supports it)
Step 3. (Optional) Edit or delete posts
Many WordPress users often revisit their published posts to edit or delete them. This step is also quite straightforward:
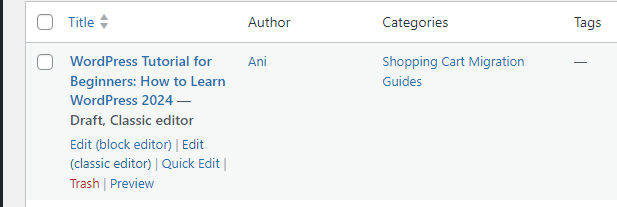
- Go to Posts > All Posts to view a list of all posts.
- Click ‘Edit’ under a post’s name to make changes.
- To delete a post, click ‘Trash.’
How to start selling on WordPress (for store owners)
If your WordPress site is designed as a blog, an informational hub, or serves non-eCommerce purposes, then you can start generating content right away. But if you aim to sell actual products through your site, we've prepared another useful WordPress tutorial to guide you through the process:
Step 1. Install WooCommerce
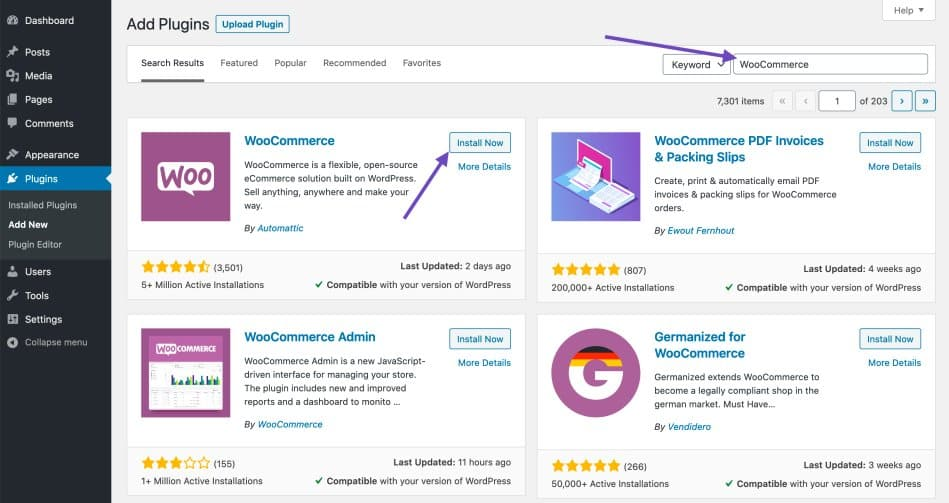
The first step is to install the WooCommerce plugin. You can refer back to our Plugin Setup tutorial above or follow the quick WordPress guide below:
- Go to your WordPress dashboard and navigate to Plugins > Add New.
- In the search bar, type “WooCommerce.”
- Click the ‘Install Now’ button next to the WooCommerce plugin.
- Once the installation is complete, click the ‘Activate’ button.
Step 2. Complete the Setup Wizard
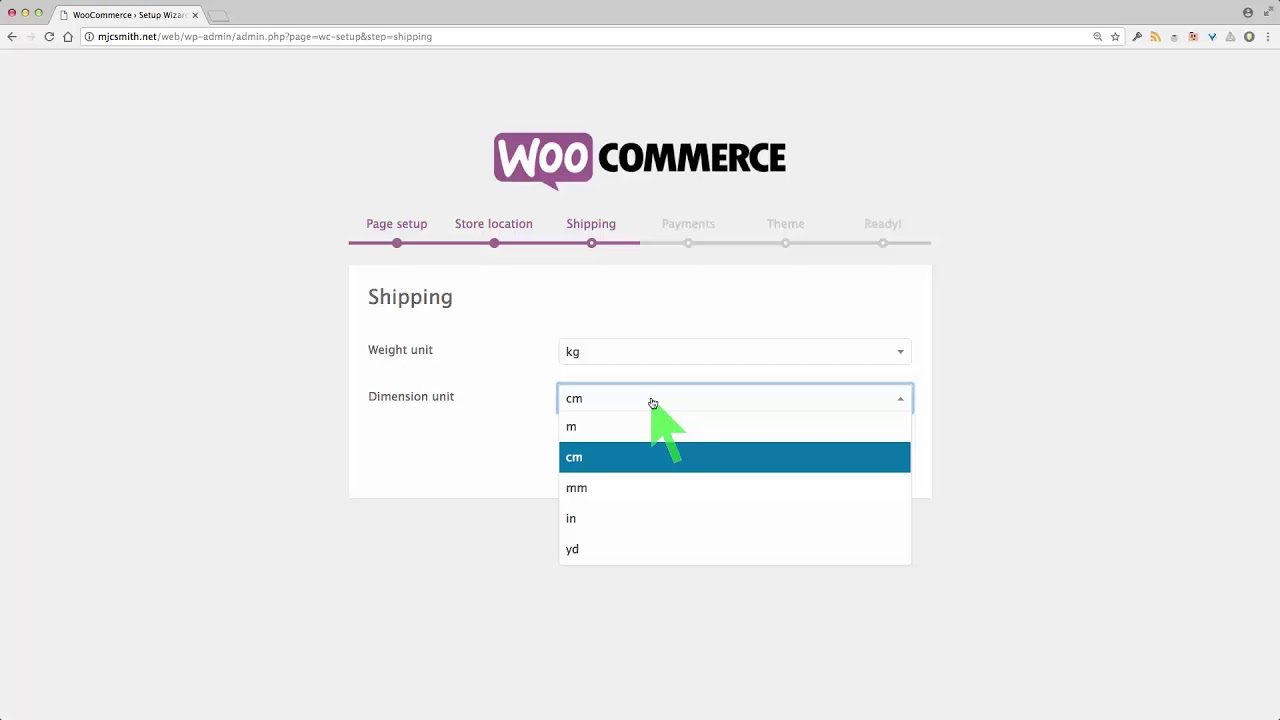
After activation, you'll be directed to the WooCommerce setup wizard. Here's where you need to configure essential store options such as:
- Measurement units: Choose the units for your store (e.g., pounds, inches).
- Store currency: Select your store's currency (e.g., USD, EUR, AUD,…).
- Payment options: Set up the payment gateways you'll accept (e.g., PayPal, Stripe,…).
- Shipping zones: Define your shipping zones and methods.
- Extra settings: Adjust other store preferences as needed.
Complete the setup wizard to finalize your store settings.
Step 3. Add your products
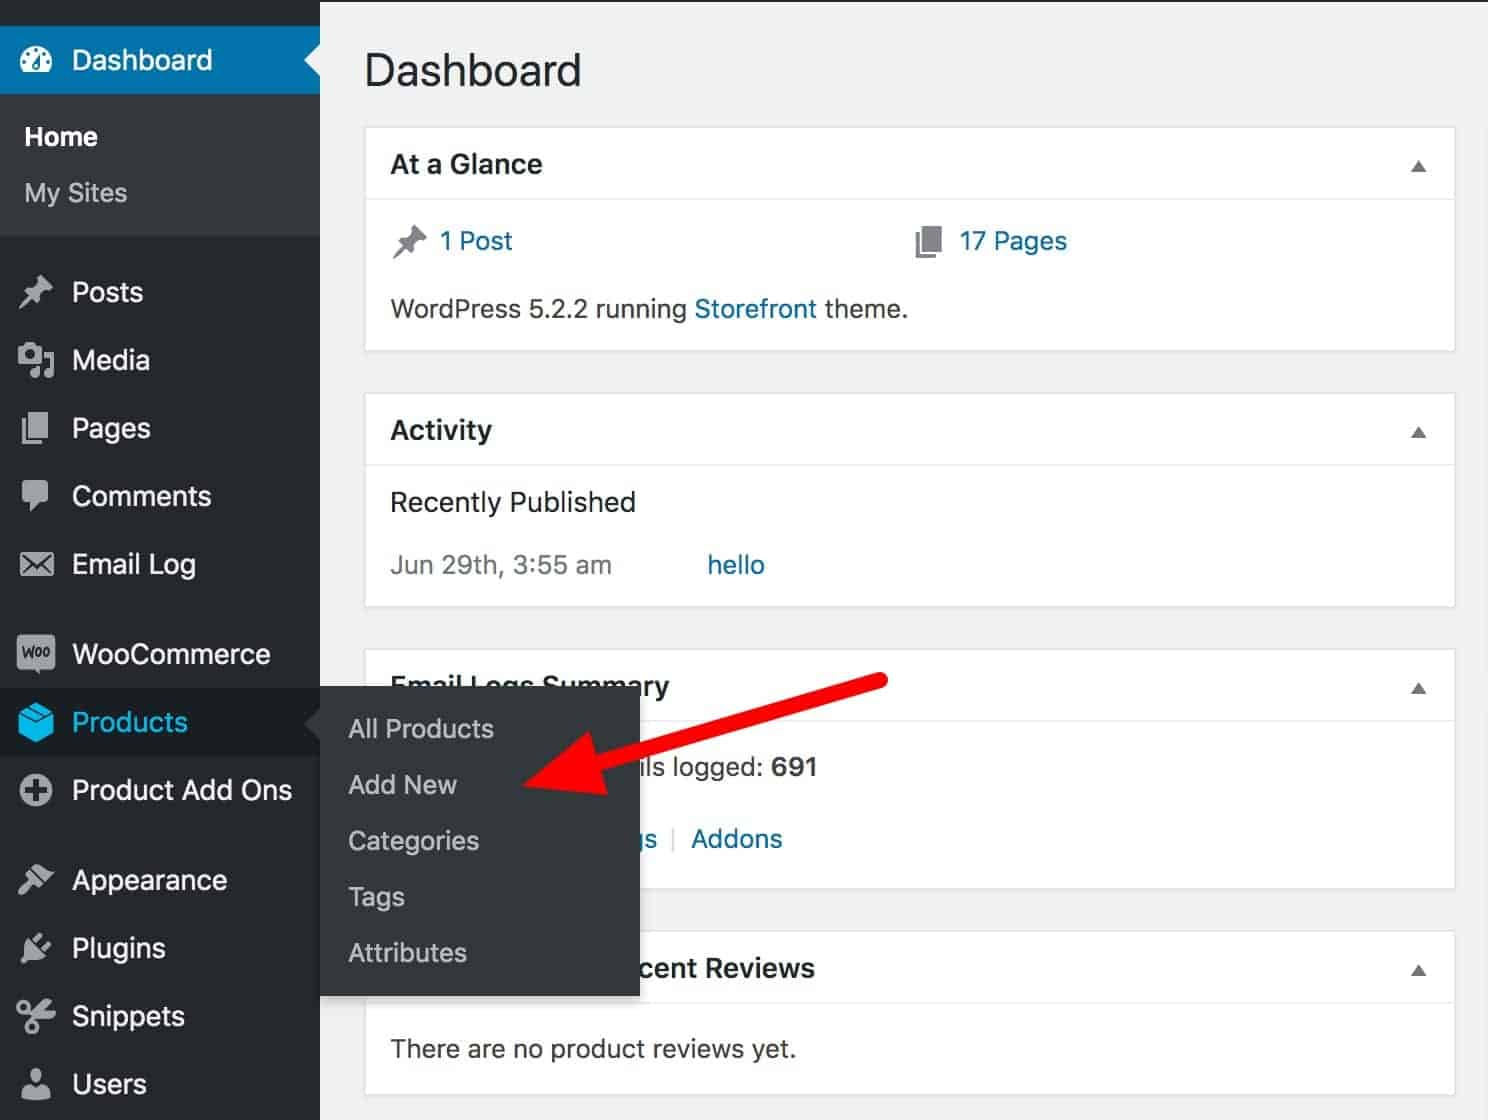
Once setup is complete, go to Product > Add New. Enter the name of your Product, add a detailed description, and upload relevant images.
- If you're selling a digital product, mark the checkboxes indicating whether the Product is ‘Virtual’ (non-physical) or ‘Downloadable.’
- If your Product has variations, click the ‘Attributes’ tab and define attributes (such as color or size), then go to Variations > Create variations from all attributes > Go to generate variations based on those specified attributes. Lastly, set the price for each variation.
Step 4. Publish your product
Now that all product details are entered, click the ‘Publish’ button to make the Product live in your store. Repeat these steps to add other products you like to sell!
How to migrate to WordPress (from another platform)
If you're looking to set up your eCommerce store directly on WordPress, then the WordPress tutorial above is perfect for you. But what if you already have a shop on another platform (like Shopify) and want to move it to WordPress? That's where our LitExtension #1 eCommerce Migration Expert team comes in – we're here to make that transition smooth and easy for you.
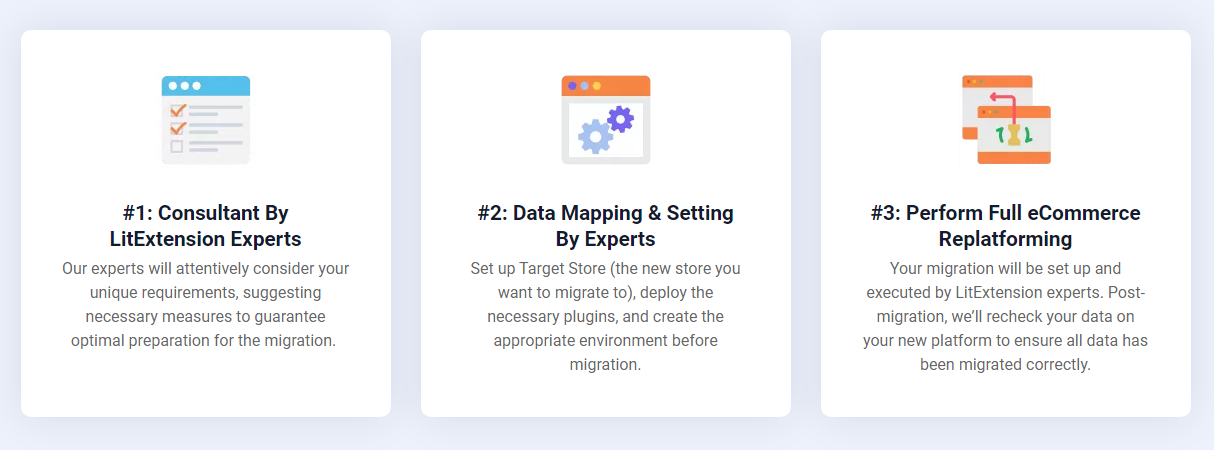
Step 1. Consultant by LitExtension experts
The first step is to contact our team. During the follow-up discussion, we'll take the time to understand exactly what you need for the migration. You can discuss everything with us — what platform you're moving from, where you're moving to, the data you'd like to migrate (like products, orders, and blog posts), and any other specific requests.
We'll walk you through the services we offer and provide a clear pricing overview. Once you've made your payment, just sit back and let us handle the rest.
Step 2. Data mapping and setting by experts
With all your requirements in mind, our team will start setting up everything for a smooth migration.
This step involves configuring your new WordPress store, installing necessary plugins, creating 301 redirects, and clearing out any sample data. If you'd like to see how the migration works, we're happy to offer a free demo to give you a better idea of what to expect.
Step 3. Perform full eCommerce replatforming
Finally, our team will carry out the full migration and keep you updated until everything is successfully moved over. We will ensure all the data is correctly transferred and address any issues that might come up.
And that's not all. Even after the migration, we will provide thorough support until you can start running the business on your new WordPress store 100% hassle-free.
Ready to Migrate to WordPress?
If you want to migrate to WordPress , LitExtension offers a great migration service that helps you import your data from the current eCommerce platform to a new one smoothly.
Advanced WordPress Settings to Optimize Your Stores
We have just guided you through a beginner-friendly WordPress tutorial that, hopefully, helps you get a good grasp of the platform. If you now feel comfortable enough to start experimenting with other more advanced settings, we've got your back:
Improving SEO rankings
Imagine spending months perfecting your WordPress site, only to find out it doesn't appear on Google search results! To help you prevent such frustration, we've put together a few straightforward yet powerful SEO (Search Engine Optimization) tips in this WordPress tutorial:
Ensure Your Site Is Indexable
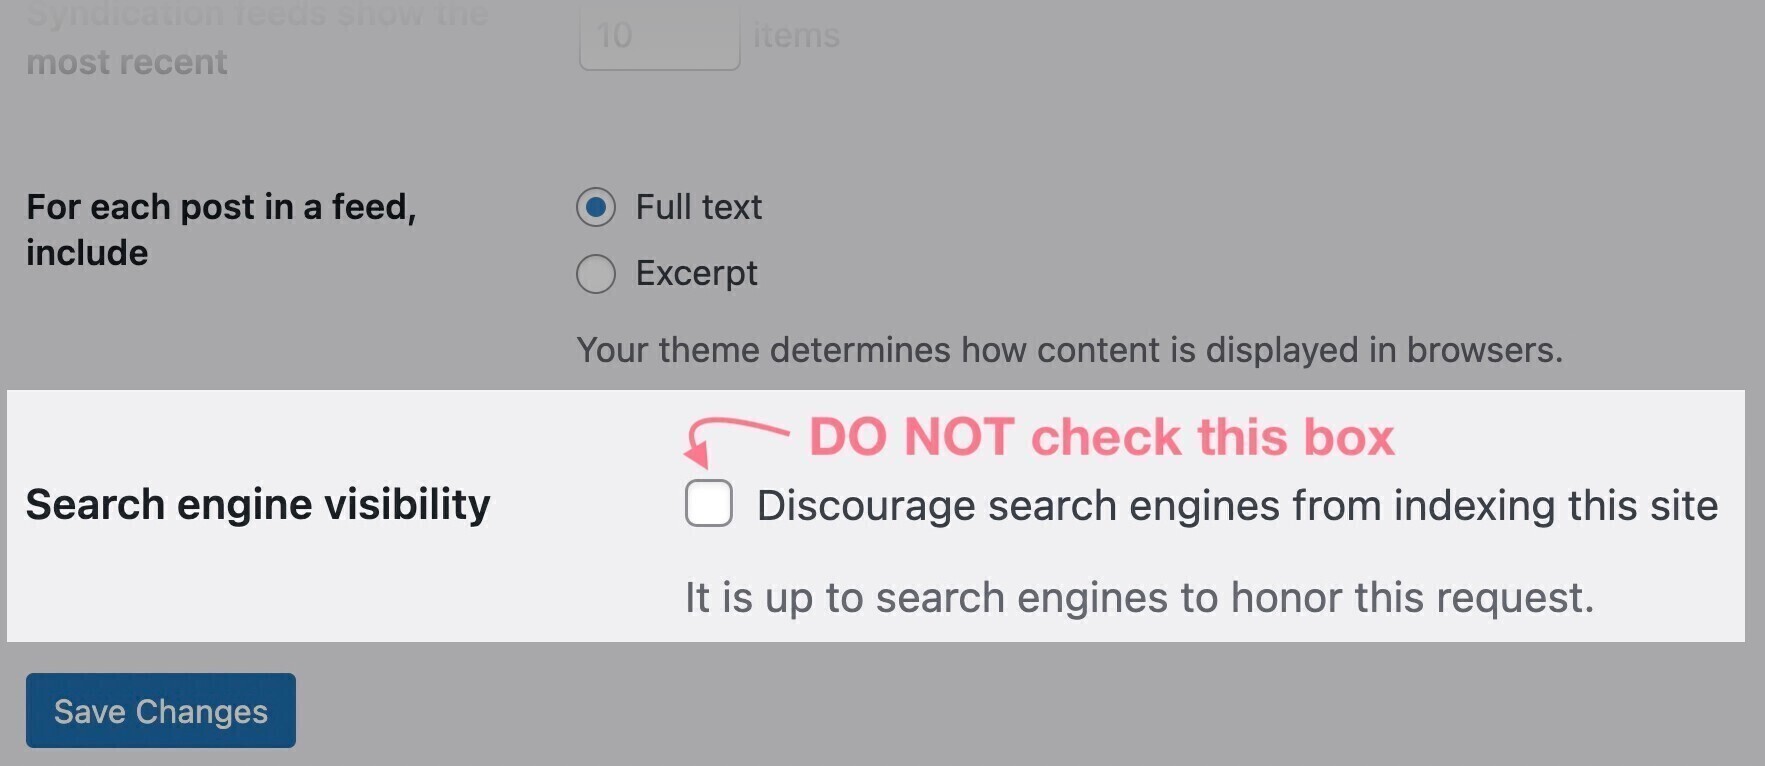
One of the most important tasks is to double-check the site's indexability. You just need to follow these three simple steps:
- Go to your WordPress dashboard, then navigate to Settings > Reading.
- Scroll down to the “Search engine visibility” section.
- Ensure the checkbox next to “Discourage search engines from indexing this site” is unchecked.
Set up An SSL Certificate
Another essential task is to ensure your website uses a secure HTTPS connection for better Google ranking. Otherwise, the site will show up as “Not Secure” in most web browsers!
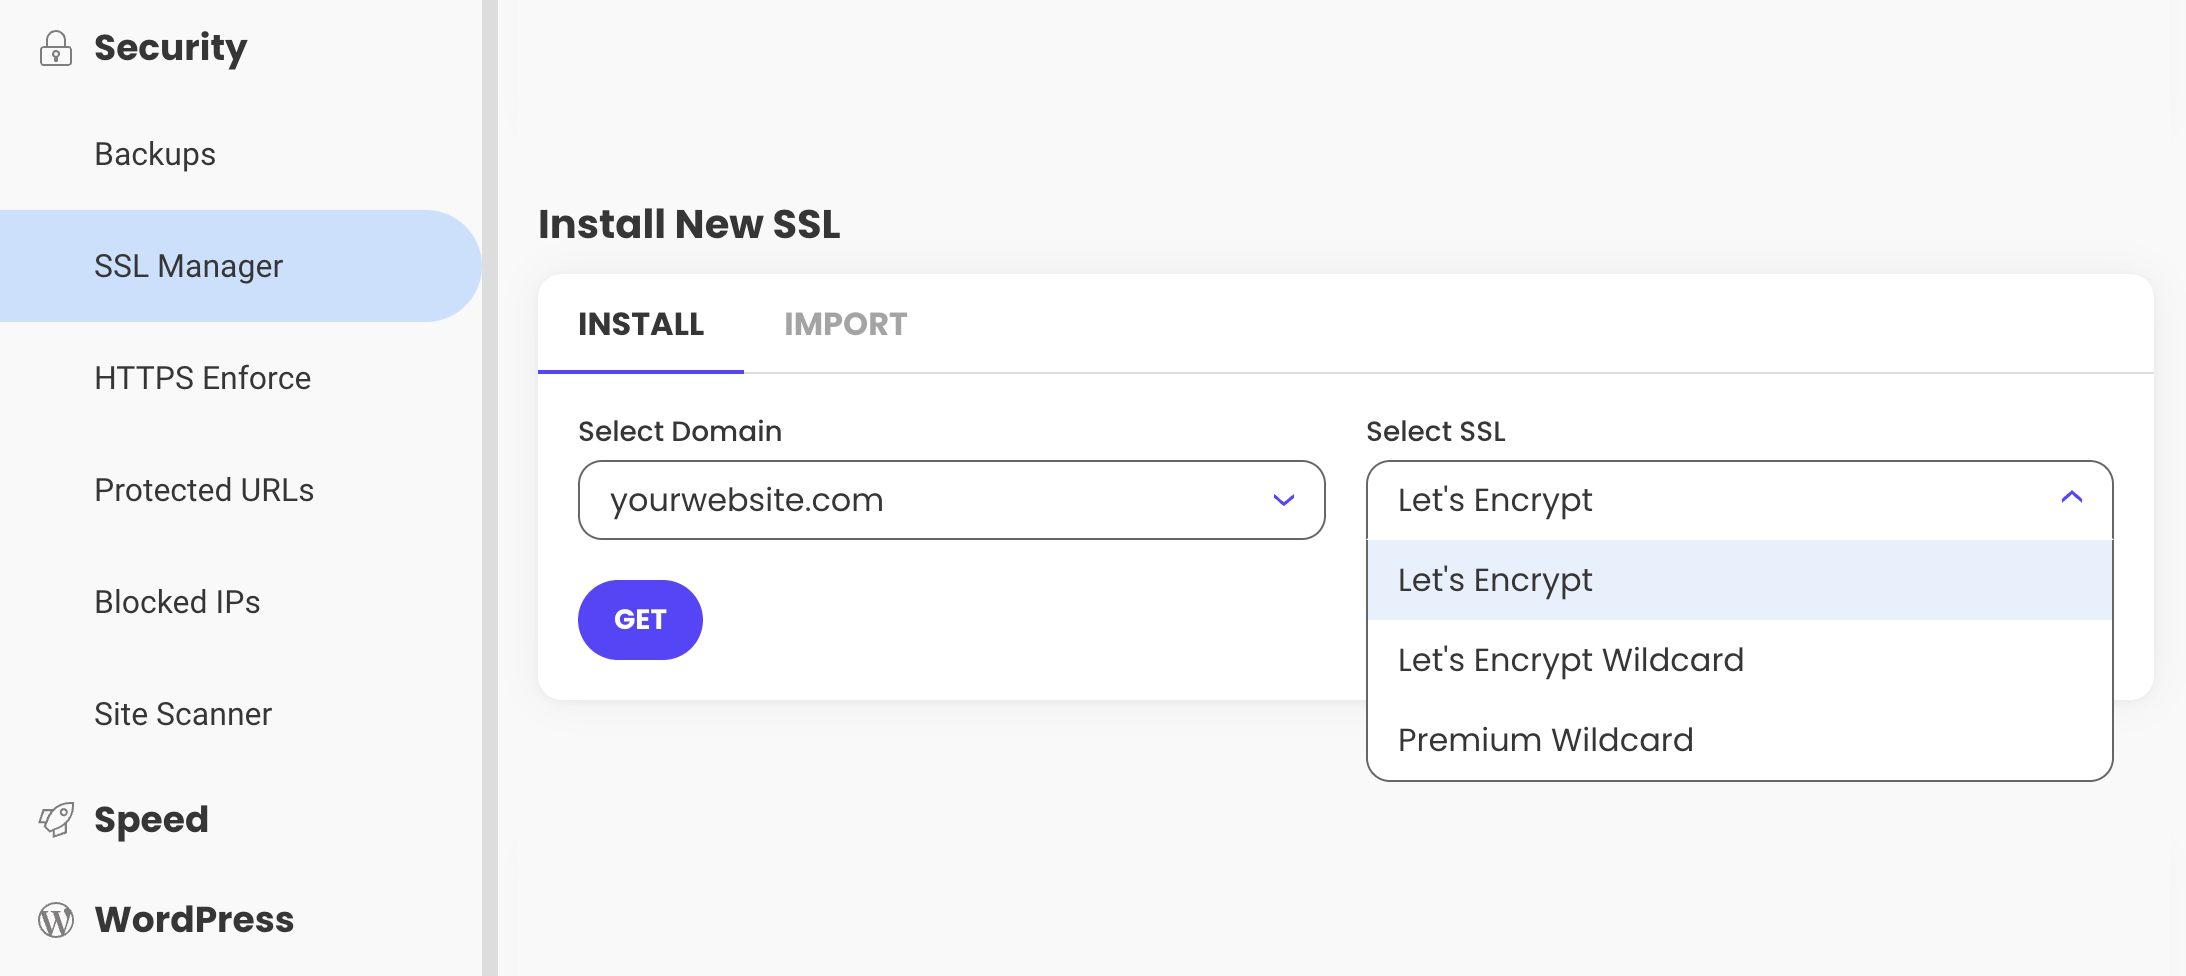
To set up the SSL certificate, follow our simple WordPress tutorial:
- Log in to your hosting provider's admin panel.
- Locate the “Security” or “SSL certificate” settings. If you can't find it, search for “[Your host's name] SSL certificate settings.”
- Select the SSL certificate option (usually ‘Let's Encrypt’ – 100% free), and install it.
Install a WordPress SEO Plugin
And don't forget that WordPress platform has over 64,000 plugins, many of which are designed to help you adhere to best SEO practices!
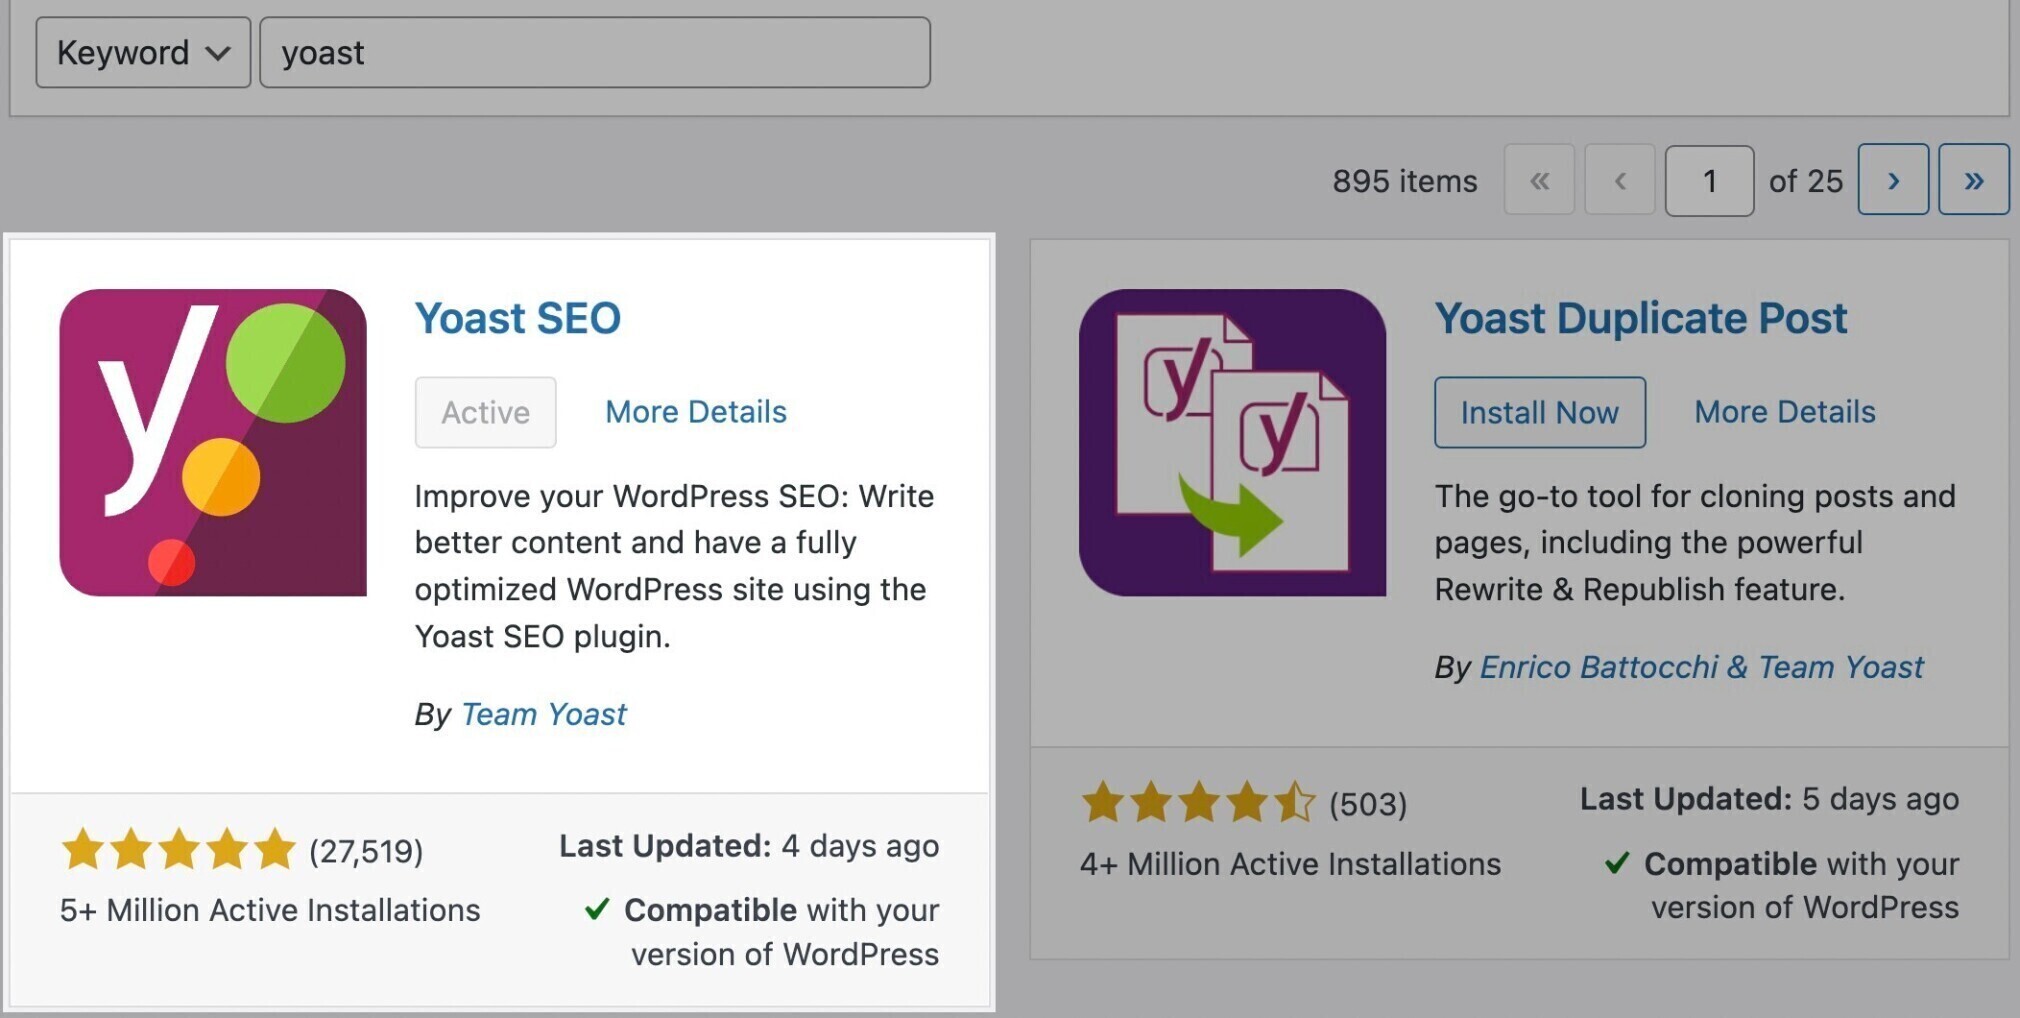
Some of the top SEO plugins for WordPress are Yoast SEO, Rank Math, and All-in-one SEO. Even better, if you're an eCommerce merchant, we already have a compilation of 35 best WooCommerce plugins that you might find helpful for your store.
Strengthening cybersecurity
From our research, a common error among many WordPress users is to choose weak usernames like “admin” or “test,” which increases the chances of the site falling victim to brute-force attacks. Our WordPress tutorial will explain how to create a more secure username for your admin account:
- In your WordPress Dashboard, go to Users > Add New.
- Set up a new user, assign them the Administrator role, and choose a strong password (at least 12 letters). This password should include a mix of symbols, numbers, and both lowercase and uppercase letters.
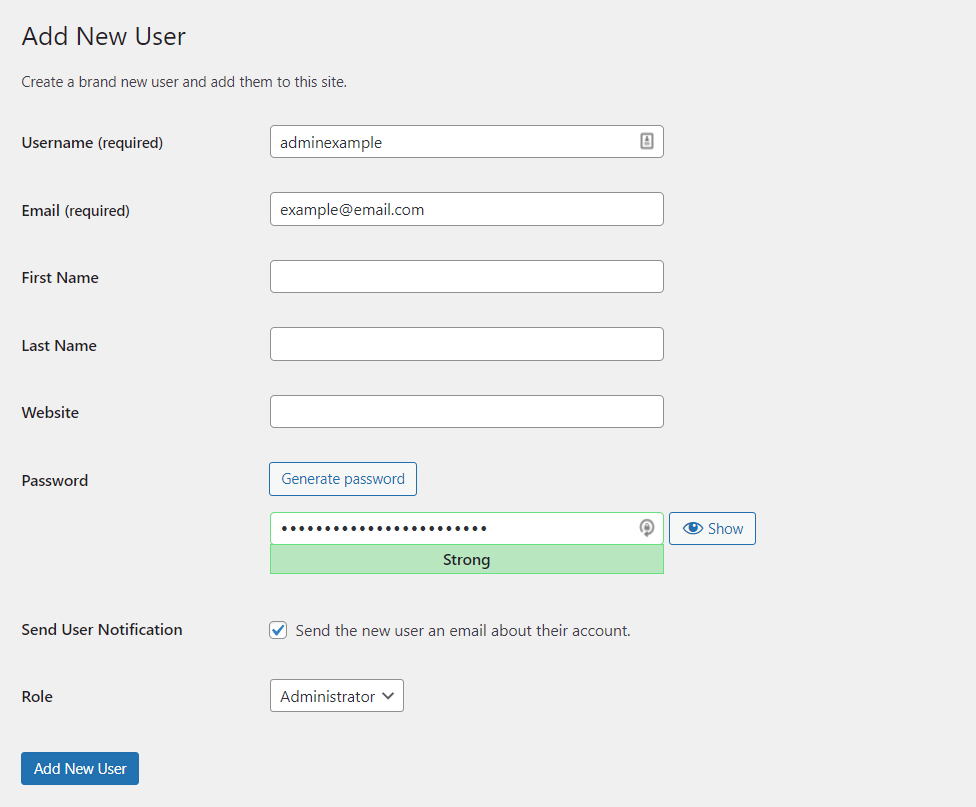
Once your new admin account is created, the next task is to delete your old one:
- Log in using your new admin account.
- Navigate to Users > All Users.
- Find the old admin account you want to remove. Select it, choose ‘Delete’ from the Bulk Actions dropdown menu, and click ‘Apply.’
Also, remember to always use WordPress themes and plugins from trusted sources. Be sure to remove any unused ones (especially if they haven't been updated recently) to minimize the risk of security vulnerabilities.
Troubleshooting common WordPress errors
Even if setting up your site is a breeze, you might still encounter technical problems once it's up and running. While this WordPress tutorial cannot cover every possible error (that's a topic for another time), we'll examine some of the most common issues and how to solve them:
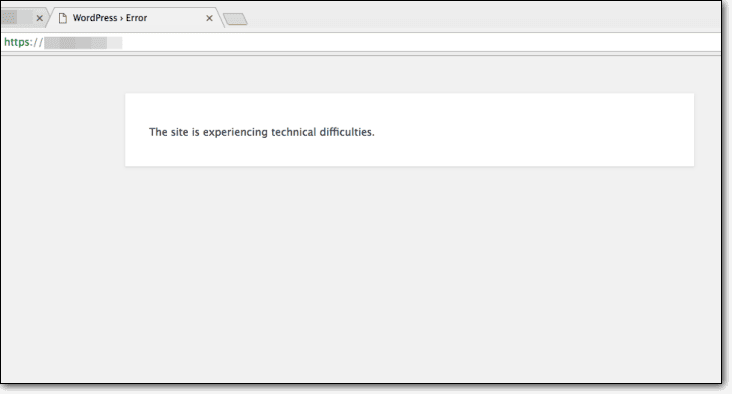
“This Site Is Experiencing Technical Difficulties” error
Cause:
This error occurs when WordPress encounters a fatal error (incompatible plugins, corrupted files, limited memory, etc.)
Solution:
Fortunately, starting from version 5.2, WordPress introduces a fatal error protection feature. When this error occurs, a full report will be sent to your admin email, along with a link to access the site's backend. Click that link to access the backend and resolve the issue based on the error details.
Parse Error/Syntax error
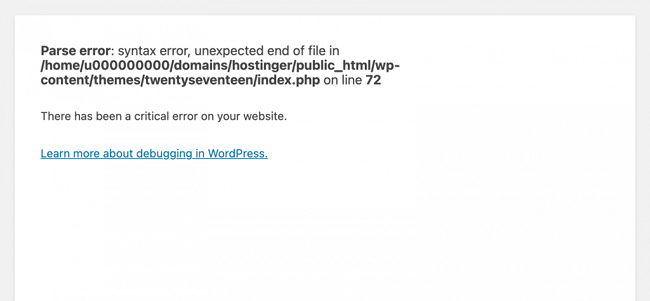
Cause:
This happens when there's an issue with your site's code, often due to incorrect syntax in a code snippet, usually in the functions.php file.
Solution:
First, access the site's backend using the SFTP credentials that your web host provided. Locate the file mentioned in the error message, then right-click on the file, select ‘View/Edit,’ and find the exact line of code causing the issue.
Correct the syntax error (for example, add a missing parenthesis). Then, save the file and replace the existing file on the server. Don't forget to check if your site is functioning properly afterward.
400 Bad Request errors
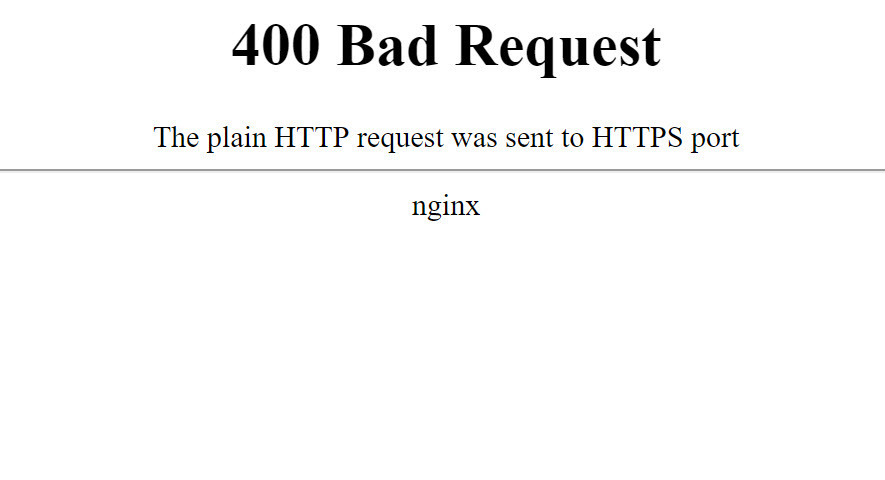
Cause:
A 400 Bad Request error occurs when the server cannot process the request because the client (usually your web browser) sent something that the server doesn't understand or can't process correctly.
This can happen due to malformed URLs, corrupted cookies, corrupt file uploads, or incorrect syntax in the request.
Solution:
To make sure you cover all possible causes of the errors, it's a good idea to try all these suggestions:
- Check the URL for typos and correct them.
- Clear your browser cache and cookies to remove any corrupted data.
- Clear your DNS cache to ensure you're accessing the most recent version of the site.
- Deactivate browser extensions that might be interfering with the site.
Bonus: WordPress Courses to Sign up for
Still eager to learn more after our WordPress tutorial above? Then, the best place to do so is from WordPress itself; both the .org and.com versions offer many practical crash courses about WordPress for beginners to help you make the most of your own website’s features:
- Quick Launch: This course aims to help you design your website, which is usually quite challenging if you're not a designer. For example, should you use columns? Where should you place a heading? How do you create an eye-catching CTA? Quick Launch will guide you through all those decisions.
- Unlocking The Power of AI: The course covers a detailed introduction to AI-driven content creation. You'll learn how to use tools like ChatGPT effectively, explore their practical applications, and understand the ethical considerations involved.
- Intro to SEO: You can boost your site's visibility with this SEO course! Beyond the basic settings (already mentioned in our tutorial above), you'll also discover how to use keywords, create optimized content, and draw more attention to your site.
WordPress Tutorials for Beginners: FAQs
Absolutely! Our WordPress tutorial already covers the basics. Plus, there are plenty of courses available (including some from WordPress itself) to help you explore more advanced features.
WordPress is relatively easy to pick up; however, if you’re 100% new to it, you might still have a lot of questions at earlier stages. Luckily, as mentioned, there are plenty of resources and courses available to help you along the way.
Overall, WordPress is a popular content management system (CMS) that lets you create and manage websites using these basic features:
- Dashboard: The control center for managing your website
- Posts: Short, time-stamped articles or blog entries
- Pages: Static content like About Us, Contact, or Home pages
- Themes: Pre-designed templates for the overall look and feel
- Plugins: Extend functionality with added functionalities
As of this writing, WordPress remains one of the most popular solutions (especially for small businesses or entrepreneurs) thanks to its affordability and diverse features, extensions, and plugins.
Final Conclusion
This WordPress tutorial has covered all the essentials you need to get started; you should be able to set everything up from the ground up! Plus, there are plenty of official WordPress courses available to help you take your site to the next level.
And the best part: aside from those starting fresh on WordPress, we also cater to people who want to migrate here from other platforms. With over 12 years of experience, our team has completed hundreds of thousands of successful WordPress migration processes, boasting a 99% satisfaction rate! You can trust our 24/7 support team to guide you every step of the way.
For more information, join our Facebook Community Group or schedule a call with us.
You may also like:
- How to Completely Uninstall WordPress
- How to Manage Multiple WordPress Sites from a Single Dashboard
- WordPress Alternatives: Top 7 Sites You Shouldn't Miss
- WordPress Reviews 2024: Everything You Need to Know
- WordPress Cost Breakdown: Updated Pricing for 2024
- Discover WordPress Features: Powerful Tools for Your Website

