As one of the longest-standing CRM (customer relationship management) platforms, Salesforce continues to attract a growing number of merchants switching from other systems. Nevertheless, many still find themselves stuck trying to figure out how to upload CSV to Salesforce.
No worries; we’re here to make it easy! In this guide, we’ll walk you through everything you need to know, including:
- How to import data into Salesforce from Excel (basic)
- Steps to upload CSV via Data Import Wizard
- Advanced import with LitExtension
- How to upload the CSV to Salesforce into one single object
- Six bonus apps to import data into Salesforce
Ready? Keep scrolling!
How to Prepare Your CSV Files for Upload
Before you upload CSV to Salesforce, the very first step is obviously preparing your CSV files correctly! By doing so, you'll save yourself a lot of troubleshooting later:
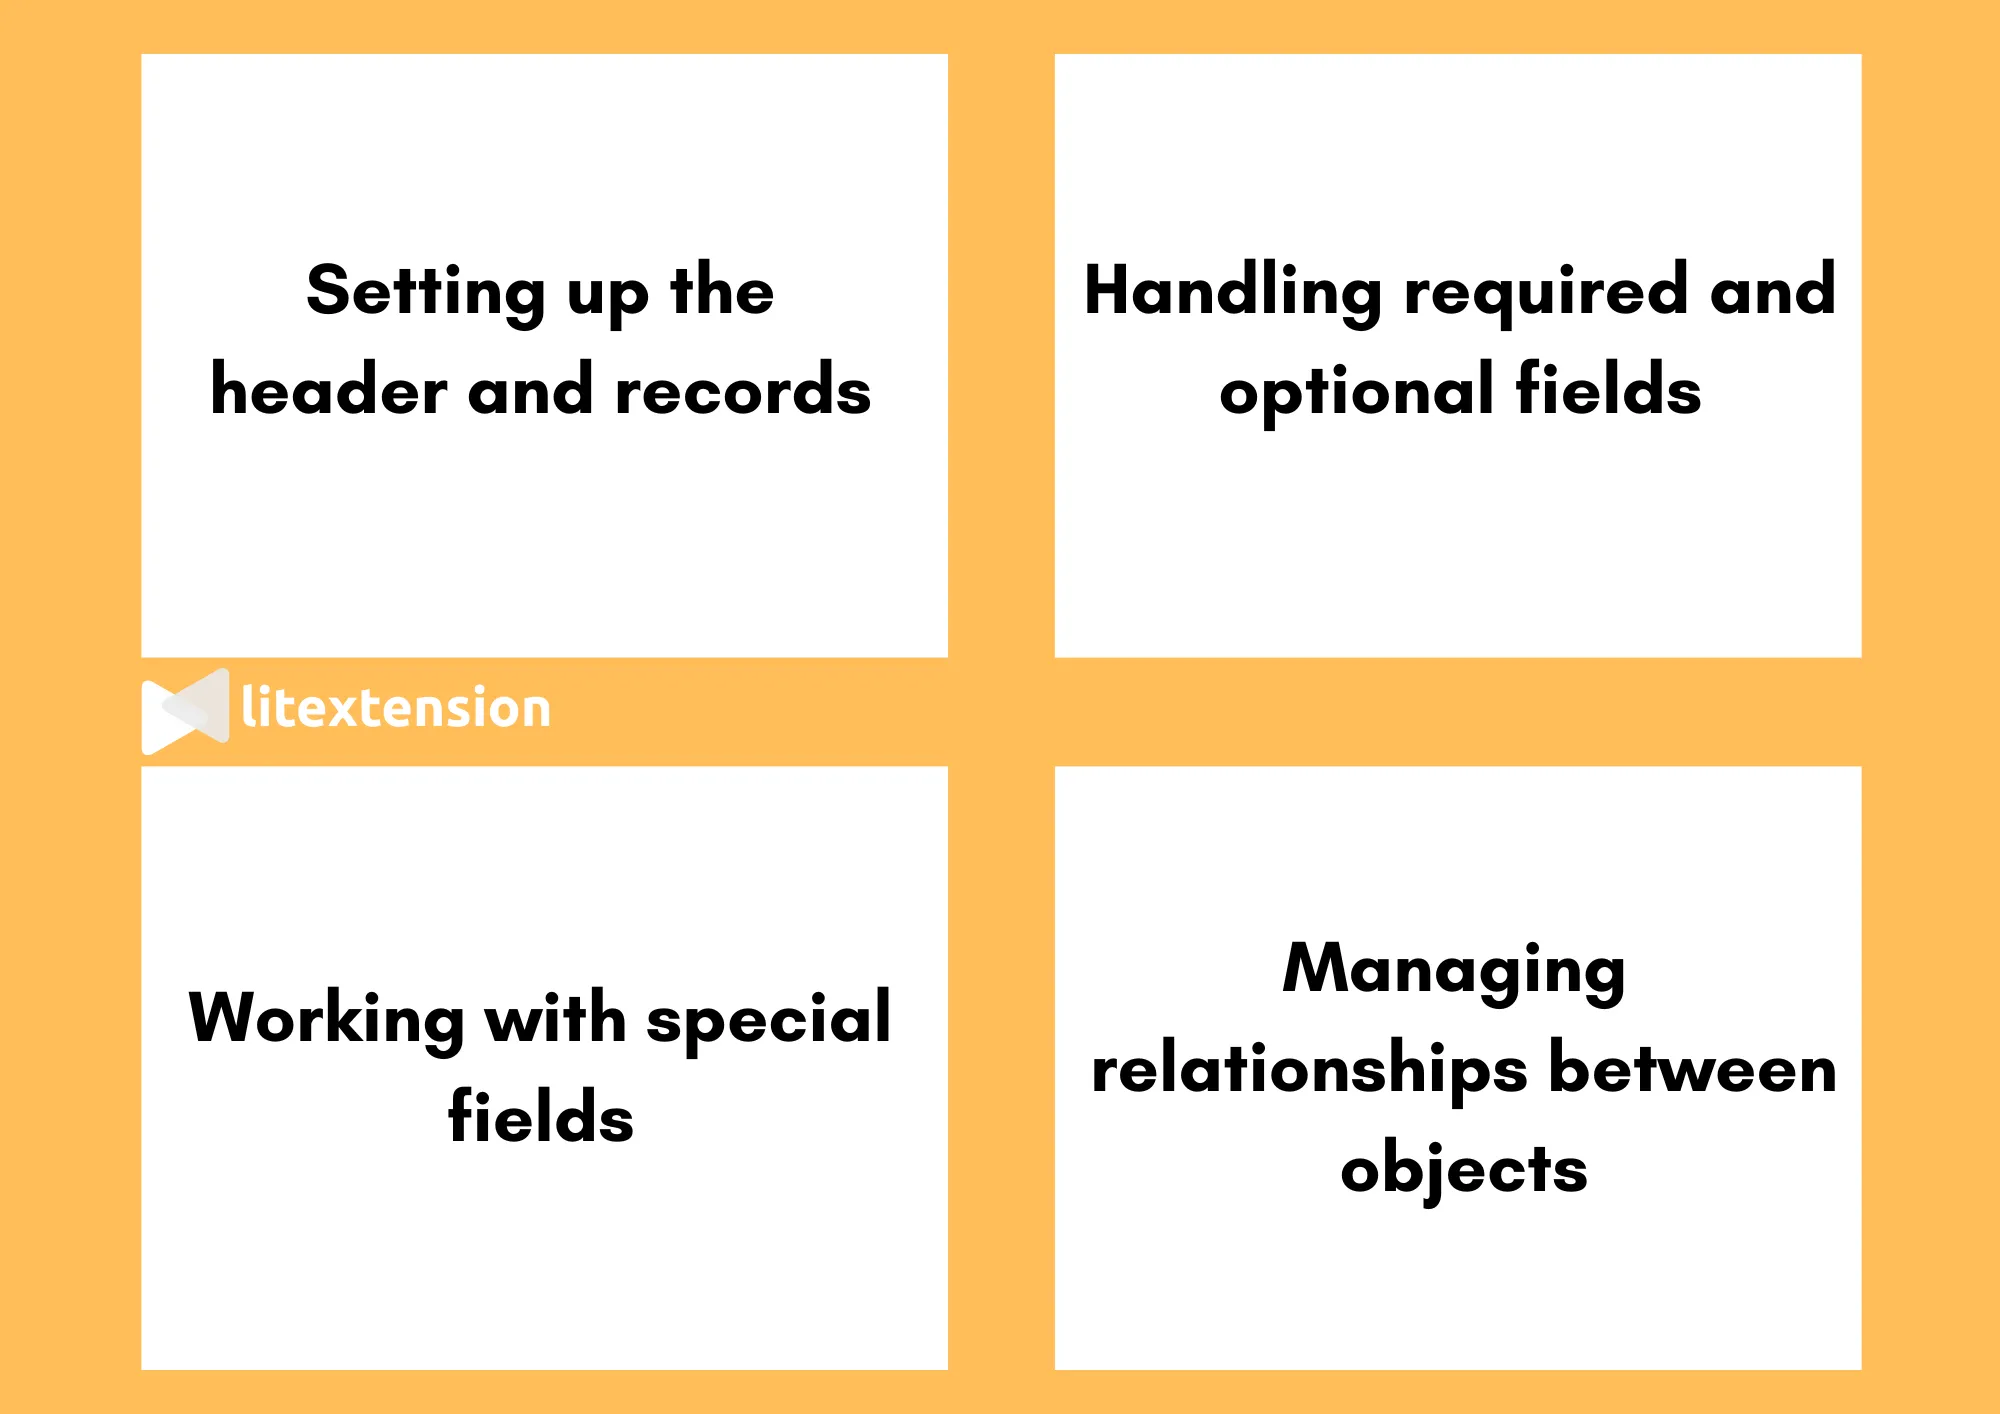
Setting up the header and records
First, keep in mind that every CSV file starts with a header row, which defines the field names for the object you want to work with. Each line after the header represents a single record, and the values in that record are separated by commas.
A key rule here is consistency: all records in one file must belong to the same Salesforce object. For instance, if you're uploading Contacts, the entire file must only include Contact records. When you create an import job, Salesforce requires you to specify the object, and mixing objects in the same file will cause the process to fail.
Choosing the right file format
Since Salesforce is strict about file structure, your CSVs must be encoded in UTF-8 and must use commas as delimiters.
On some international computers, Excel may default to semicolons instead of commas. To confirm, open your CSV in a text editor like Notepad: if you see rows such as Tom;Jones;[email protected], then your delimiter is wrong. You'll need to replace all semicolons with commas. On Windows, this can be done easily with the Find and Replace function (CTRL + H).
Once corrected and saved, your file will be ready for Salesforce to read.
Handling required and optional fields
When inserting new records, you must include every field Salesforce marks as required. If those are missing, the record will be rejected.
For updates, Salesforce processes only the fields you provide and ignores the rest, so you can safely update selected attributes without affecting others. This flexibility is useful, but it also means you must plan carefully which fields to include to avoid incomplete or inconsistent data.
Managing relationships between objects
Salesforce objects are often linked to each other, and your CSV can reflect those connections.
For example, Contacts are typically tied to Accounts. In your header row, you can represent this relationship with a syntax like RelationshipName.IndexedFieldName. So if you want to reference a Contact's parent Account by its external ID, your header could read Account.External_ID__c.
For custom objects, Salesforce uses __r to indicate relationships—so a field like Mother_Of_Child__c would become Mother_Of_Child__r.External_ID__c in your header. This way, your import not only creates records but also preserves the correct parent-child links.
Working with special fields
Certain field types in Salesforce come with formatting rules you can't ignore.
For instance, lookup fields must use valid Salesforce IDs – either 15-character case-sensitive or 18-character case-insensitive alphanumeric strings. Picklist fields must match an existing value exactly; if your CSV includes a value that doesn't exist, Salesforce won't add it but will instead reject the record.
Date and DateTime fields are particularly sensitive. Salesforce accepts the YYYY-MM-DD format for dates – for example, 2025-09-08 for September 8, 2025. For a combined date and time, you must use the ISO 8601 format YYYY-MM-DDThh:mm:ssZ. An example would be 2025-09-08T14:30:00Z, representing 2:30 PM UTC. The “T” separates the date and time, and the “Z” indicates UTC.
Meanwhile, Boolean fields only accept true or false. These values control checkbox fields, so true will check the box while false leaves it unchecked. For currency fields, do not include symbols or commas; enter only the numeric value. Salesforce automatically formats these according to your organization's currency settings.
Last but not least, email addresses must follow international standards (RFC 5321). That means one and only one @ symbol, no consecutive dots, and no illegal characters like spaces or unescaped quotes. [email protected] is valid, but [email protected] or a@b@[email protected] will fail.
Now you are ready to upload CSV to Salesforce!
How to Upload CSV to Salesforce for Contacts and Leads
Are you looking to import JUST contacts and leads into Salesforce? There's a handy built-in tool for Professional and Enterprise edition users that allows uploads of up to 50,000 records at a time. All it takes is a quick chat with your Salesforce admin to turn on the Basic Data Import feature. Once it's enabled, follow their guidance to learn how to import contacts into Salesforce from CSV.

That said, this option does come with some obvious limitations — it doesn’t support the Essentials, Starter, or Pro Suite editions and is restricted to only two data types. So, if you need another more inclusive built-in approach to upload CSV to Salesforce, the Data Import Wizard below is a better alternative to consider.
How to Upload CSV to Salesforce with Data Import Wizard
Just like the Contacts/Leads import tool, the Data Import Wizard allows you to upload up to 50,000 records at once. But this time, it’s not just limited to contacts and leads! You can import four more data types, including person accounts, campaign members, solutions, and custom objects. Plus, this solution is accessible across all Salesforce editions except Personal.
Of course, six data types are far from enough to cover the basic needs of a medium or large store. But if you still decide to try it out, here’s what you need to do to upload CSV to Salesforce:
Step 1. Create the import file
First, create a clean bulk upload Salesforce file to prevent errors and duplicate data. Check out a sample Salesforce import CSV here.

Next, go to “Salesforce Setup” > “Quick Find” and type “Data Import Wizard” in the box. Click “Launch Wizard” on the welcome page.

Step 2. Choose the data to import
Now, select the type of Salesforce import data:
- Click “Standard Objects” if you want to import accounts, leads, contacts, and Campaign Members. For other data types, choose “Custom Objects.”
- Choose “Add new and update existing records” to import new items and update existing ones simultaneously. For records updates only (no new items), tick”Update existing records.”
- If desired, specify matching criteria (e.g., by Name, which is case-sensitive for custom objects).
Once done, drag and drop your CSV file (from Step 1) into the upload area and choose a value separator (tab or comma).

Step 3. Map your data fields
After you upload the CSV file, the Data Import Wizard will automatically map as many fields as possible to Salesforce fields. Review and adjust them if necessary.
For the remaining unmapped fields, click “Map” next to the field and manually select up to 10 Salesforce fields to link. Or, save unmapped data in the “Contact Note” or “Account Note” fields.

Step 4. Start your Salesforce data import
Finally, confirm your mappings on the “Review” page (and return to make changes if needed), then click “Start Import” to begin your Salesforce bulk upload.

Don't forget to monitor the progress in one of the three following sections:
- The “Recent Import Jobs” chart on the Data Import Wizard homepage
- “Bulk Data Load Jobs” in Setup (though this section is not available in Professional Edition)
- Updates tabs (for Non-admins).

And that's it — your Salesforce CSV import is underway!
Import Data to Salesforce with LitExtension
The Data Import Wizard is a huge step from the Basic Import tool for Contacts and Leads when you need to upload CSV to Salesforce.
However, as mentioned earlier, imports of just six data types will definitely fall short when it comes to medium or large stores. Worse, each step only has up to two customization options at best. For more complex import or migration demands, the Wizard just won't cut it!
That's why LitExtension All-in-One is a much smarter and more inclusive choice. You can easily import customer data, orders, product variants, passwords, and a wide range of other intricate data types. Plus, with over 12 years of experience, we take little time to tailor the Salesforce migration to your unique needs. Why settle for less when you can have it all?
Without further ado, let us show you how to import data into Salesforce with LitExtension:

Step 1. Consultant by LitExtension experts
The first step is to get in touch with our team to schedule a consultation. During this session, we’ll explore all your specific import and migration needs, including categories, orders, products, customer information, or even custom features from your current eCommerce store.
Once your requirements have been thoroughly discussed and finalized, you only need to sign the Service Level Agreement (SLA) and complete your payment. We will take over the process from there.
Step 2. Data mapping and setting by experts
Next, our experts will do the following to prepare your new Salesforce store for migration:
- Configuring necessary redirects
- Securing your data with backups
- Organizing and optimizing your data for a clean transfer
- Installing additional extensions if required
- Adjusting advanced settings to match your needs
Throughout this step, we’ll offer unlimited demo migrations to give you full visibility into the progress and let you provide input whenever necessary.
Step 3. Perform full Salesforce migration
Once everything is ready, we proceed with the full-scale migration. You’ll receive regular updates from us, and any concerns or questions will be addressed promptly — always within 12 hours. Best of all, additional customization options (such as 301 redirects or recent transfers) are covered at no extra charge!
Ongoing Support Beyond Migration
After the migration is complete, our team will thoroughly review your new store to ensure it’s running smoothly and fully aligned with the goals we have established in the first step.
Furthermore, our support doesn’t stop there:
- Within 30 days after the migration is completed, we’ll offer re-migrations (free) and recent data updates (free if the new data accounts for less than 5% of the total).
- For 90 days, you’ll benefit from unlimited smart updates to your existing data. Again, this service is completely free.
Ready to Migrate to Salesforce?
LitExtension provides a well-optimized service to transfer all your data accurately.

How to Upload CSV to Salesforce into One Single Object
As you can see, the previous three methods allow you to bring CSV files straightforwardly into Salesforce. But what if you prefer a shorter process focused on just one object at a time? In that case, the following guide can be extremely helpful and ensure the information goes directly into the right place without extra complexity:
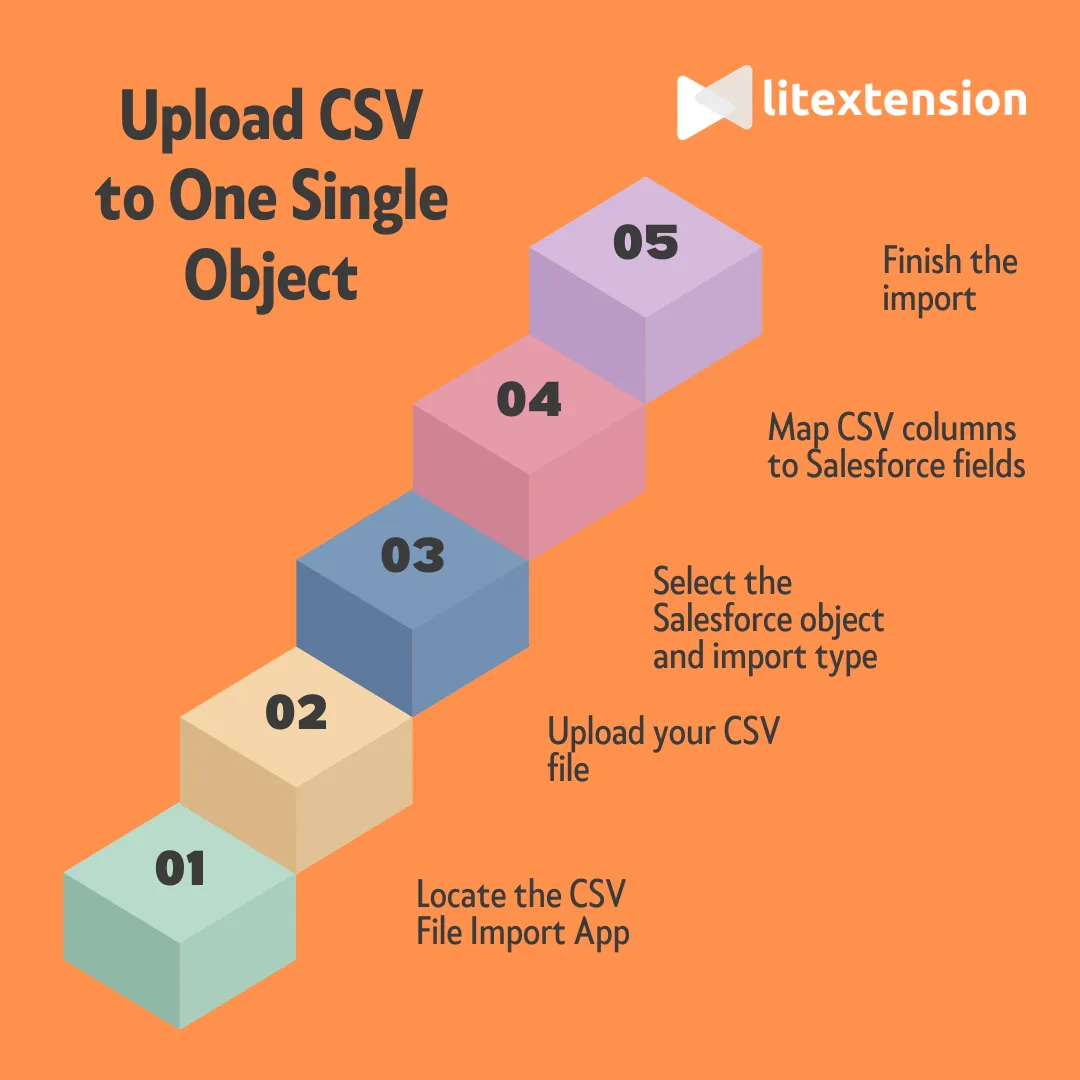
Step 1. Locate the CSV file import app
First, you need to go to the App Launcher and search for the CSV File Import app (and if it doesn't appear in your options, adjust the profile settings in your organization before checking again). After locating the app, open it and click on “Import” to begin.
Step 2. Upload your CSV file
You will then be requested to upload your CSV file. After uploading, Salesforce shows you the file size and provides a preview of the first ten rows so you can verify that the correct file has been chosen. After making sure everything looks accurate, click “Next.”
Step 3. Select the Salesforce object and import type
At this point, choose the Salesforce object that will hold your data. You'll also need to decide the type of import you want to carry out, such as adding new records, updating existing ones, or both. With these options selected, confirm your choice by clicking “Next.”
Step 4. Map CSV columns to Salesforce fields
Salesforce now attempts to map the CSV file's columns to the appropriate object fields automatically.
If your column headers are identical to the field names in Salesforce, much of this mapping will already be done. However, you should carefully review each field and manually map any unmatched data to ensure accuracy.
And if you'd like to save time for future imports, you can store this mapping configuration for reuse. Likewise, for those who already have a saved mapping, simply select it here to streamline the process.
Step 5. Finish the import
When your mappings are finalized, click “Next” one final time and then choose Import. Salesforce will carry out the operation automatically, transferring your CSV data into the selected object.
Once the process is complete, check the import logs. These logs confirm whether you have successfully managed to upload CSV to Salesforce objects and highlight any errors or issues you may need to address.
Bonus: 6 Apps to Upload CSV to Salesforce
Aside from LitExtension, you might want to consider installing one of the six third-party apps below to import CSV into Salesforce. Although they certainly cannot match the top-notch results you'd get with LitExtension, these apps still offer more flexibility and customization than Salesforce's basic import tools or the Import Wizard!
We've put all six apps through their paces during the past three months. Here's a quick rundown of their pros and cons to help you decide which to use to upload CSV to Salesforce:
App Name | Pros | Cons |
Dataloader.io (4.5/5) | - Drag-and-drop design with excellent usability | - Limited data capacity |
Lingk.io (4.0/5) | - Advanced data transformation capabilities | - Low-code platform requires SQL knowledge |
Skyvia (4.0/5) | - Fully cloud-based with no local installation required - Supports data integration, backup, and import/export - Easy-to-use interface with scheduling capabilities | - The free version has limited features - Can be slow for processing very large datasets |
Workbench (3.8/5) | - Supports comprehensive operations (query, import, export, delete, etc.) | - Limited to community support |
Jitterbit Cloud Data Loader (3.5/5) | - Handles diverse operations like queries, upserts, and bulk data processing | - Requires local installation |
SimpleImport (3.3/5) | - Free version available | - Lacks scalability for large-scale data imports |
Upload CSV to Salesforce: FAQs
Can you upload a CSV file to Salesforce?
Yes. You can upload a CSV file to Salesforce using the Basic Data Import (for contacts and leads) or Data Import Wizard.
How do I upload an Excel spreadsheet to Salesforce?
Launch Data Import Wizard, choose the data you want to import, and then drag your prepared Excel spreadsheet to the upload area. Please refer back to our guide above for more detailed instructions.
Which CSV format to use for Salesforce?
Salesforce supports comma-delimited CSV formats only as of our writing.
How to bulk upload data to Salesforce?
To bulk upload data to Salesforce, create a clean CSV file with your data, then use either the Salesforce Data Import Wizard for smaller, simpler imports of standard and custom objects or the more powerful Data Loader for large datasets and complex imports using the Bulk API.
How do I upload data from Excel to Salesforce?
To upload data from Excel to Salesforce, save your Excel file as a CSV, then use either the Salesforce Data Import Wizard (for standard objects and up to 50,000 records) or the Salesforce Data Loader (for large datasets or custom objects) by launching it from Salesforce Setup.
How to import contacts into Salesforce from CSV?
To import contacts from a CSV file into Salesforce, prepare a CSV file with your contact data, then log into Salesforce, go to Setup, search for the Data Import Wizard, and follow the prompts to select your CSV, map the fields, and start the import process.
Final Words
All in all, Salesforce's built-in importer is a solid option if you want to upload CSV to Salesforce. Nevertheless, given its clear limitations for complex needs, we highly recommend LitExtension as the ultimate alternative.
With over 12 years of expertise and 300,000+ successful migrations across 100+ countries, we're here to ensure your Salesforce migration is not just smooth but completely hassle-free. Trust us to handle ALL the heavy lifting so you can focus on growing your business!
For more information, check out our Salesforce guide and join our Facebook community.

