
You can import HTML to WordPress in several ways, whether you need to add a custom code section, upload a standalone HTML page, or move an entire static website. Choosing the right method helps preserve your existing content and design while making the website easier to manage through WordPress.
In this article, we will guide you through the WordPress import HTML in 4 different methods:
- Use WordPress admin dashboard to import HTML;
- Use a plugin or page builder to import HTML;
- Import HTML using FTP or cPanel;
- Convert HTML website to WordPress theme.
Let’s get started!
Can You Import HTML Directly into WordPress?
Not exactly. WordPress does not have a built-in tool that can import a complete HTML file or static HTML website and automatically turn it into editable WordPress pages. Instead, the right approach depends on what you want to bring into WordPress.
For a small section of HTML, you can paste the code directly into a Custom HTML block or the Classic Editor. If you need to keep HTML, CSS, and JavaScript together, a plugin or page builder such as Elementor or WP Coder can help. For a standalone HTML page, you can upload the files to your hosting server through FTP or cPanel and access them separately from your WordPress content.
If your goal is to turn an entire static HTML website into a fully manageable WordPress site, simply uploading the files is not enough. You’ll need to convert the HTML structure into a WordPress theme and connect its content to WordPress templates. This gives you access to WordPress features such as editable pages, posts, menus, and other dynamic functionality.
WordPress Migration Made Easy With LitExtension!
LitExtension offers great migration solutions that help you transfer your data from the current eCommerce platform to WordPress (and vice versa) accurately, painlessly with utmost security.

Importing HTML to WordPress: Quick Checklist
Before (and even after) importing your HTML website, use this checklist to make sure important content, assets, and functionality are not lost:
- Back up your existing website: Save all HTML files, images, CSS, JavaScript, fonts, and other assets before making changes. Check out how to back up WordPress site here!
- Map your website structure: List existing pages, URLs, navigation menus, media files, internal links, forms, and custom scripts. Here’s a quick WordPress tutorial for beginners if you need some assistance.
- Choose the right import method: Decide whether you only need to add HTML snippets, upload standalone pages, or convert the entire site into a WordPress theme.
- Check URLs and assets: Update image, CSS, JavaScript, and internal-link paths to match the new WordPress structure.
- Review page SEO: Set the correct page titles, slugs, and meta descriptions in WordPress rather than relying on static HTML metadata.
- Test functionality: Check forms, buttons, sliders, menus, scripts, and other interactive elements after the import.
- Check responsive design: Test imported pages across different browsers, screen sizes, and devices.
- Fix redirects and 404s: Make sure old URLs point to the correct WordPress pages and refresh permalink settings if necessary.
- Review security: Remove untrusted scripts or external resources and make sure WordPress, themes, and plugins are updated.
- Submit your sitemap: Resubmit the updated sitemap in Google Search Console so new or migrated pages can be discovered and indexed.
Method 1: Add HTML to a Page or Post on WordPress Dashboard
Unfortunately, WordPress doesn’t support direct import HTML file to WordPress via its built-in Import tool. You’ll need to manually copy your HTML code and paste it into the HTML section of your WordPress page.
In your WordPress admin dashboard, you can import HTML to WordPress using different tools: Classic Editor and Block Editor.
Please note that this method works best for HTML content placed inside the <body> section. A complete HTML document containing elements such as <html>, <head>, or <body> should not be pasted directly into the page editor.
1. Use Classic Editor
If your website already uses the Classic Editor, follow these steps:
- From the WordPress dashboard, go to Pages > Add New or Posts > Add New.
- Select the Text tab in the upper-right corner of the editor. Paste your HTML code into the editing area.
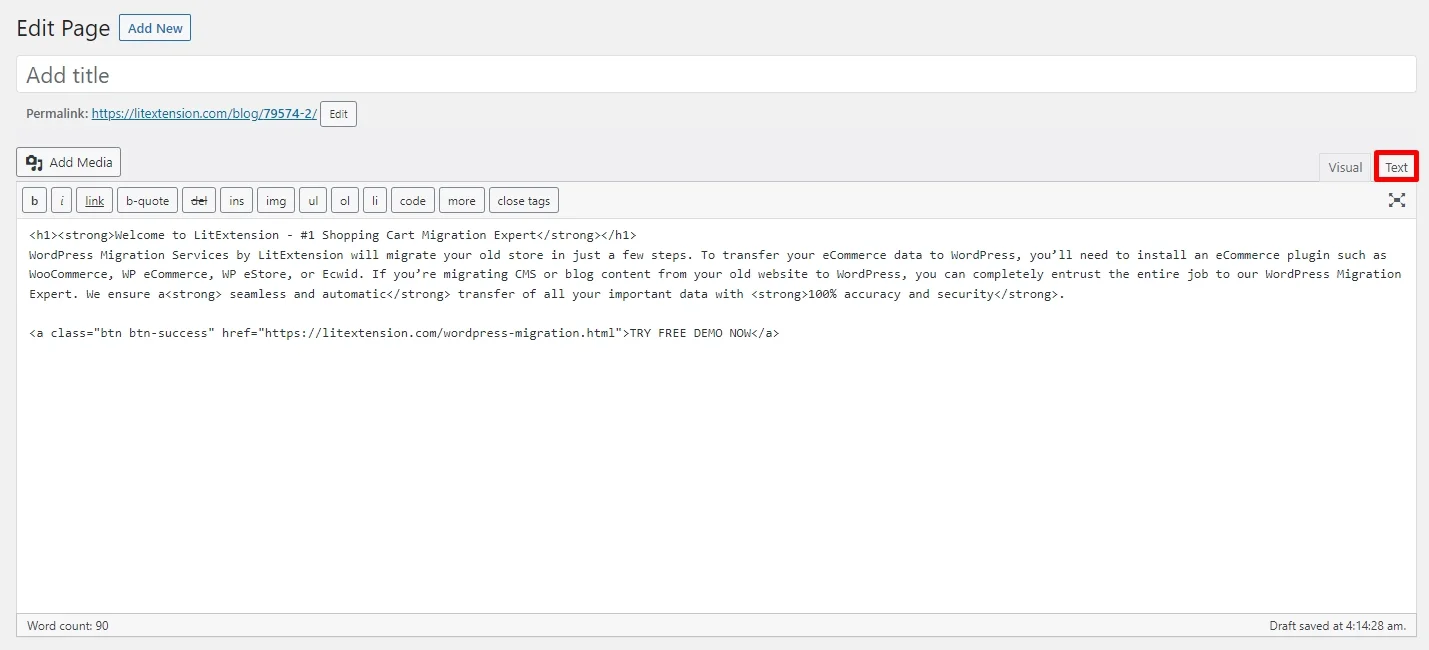
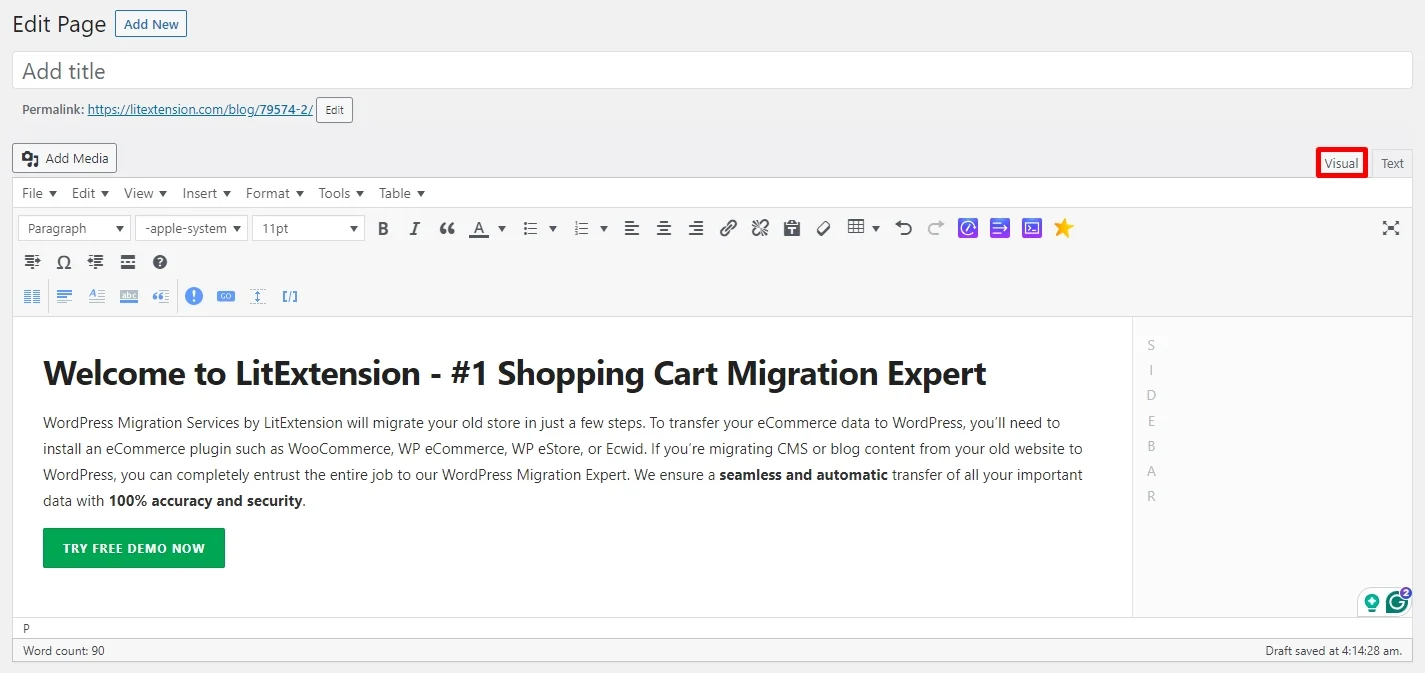
- To preview how your HTML file looks, simply switch back to the Visual tab.
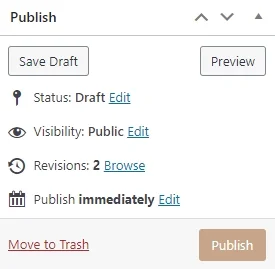
- Click Save Draft if you want to continue editing later, or select Publish when the page is ready.
2. Use Block Editor
- From your WordPress dashboard, go to Pages > Add New or Posts > Add New.
- Click the + Block Inserter and search for Custom HTML. You can also type /html into an empty block and press Enter.

- Step 3. Import HTML to WordPress by filling in the blank. Here, you can see how your code looks by clicking the “Preview” button.
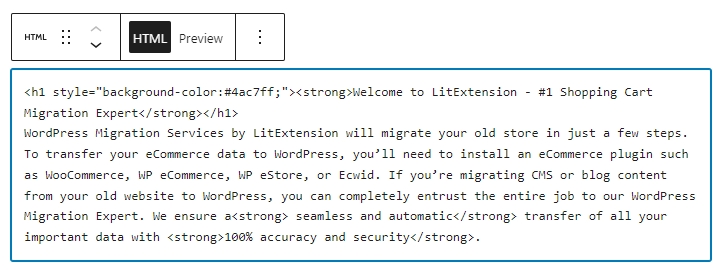
- Select Preview in the block toolbar to check how the code is displayed. You can also use the page-level Preview option to view the complete page.
- Once everything looks correct, click Save draft or Publish.
Keep in mind that this method only adds HTML to the page content. Stylesheets, JavaScript files, images, fonts, and other external assets may still need to be uploaded or connected separately.
Method 2: Import HTML Page to WordPress with a Plugin or Page Builder
If you want to manage HTML, CSS, and JavaScript together, a plugin or page builder can make the process more convenient. However, these tools usually embed code within a WordPress page rather than convert a complete HTML file into native, editable WordPress content.
From our experience, here are some of our recommended add-ons for you to import HTML to WordPress:
- Elementor lets you place HTML code directly within a visual page layout.
- WP Coder stores HTML, CSS, and JavaScript as reusable snippets that you can display using a block or shortcode.
Neither option is designed to bulk-import an entire HTML website as separate WordPress pages.
1. Using Elementor page builder
Elementor is a visual page builder that lets you create layouts using drag-and-drop widgets. If you already use Elementor, its HTML widget provides a simple way to add custom HTML to a particular area of your page.
- From your WordPress dashboard, go to Plugins > Add New Plugin. Search for Elementor Website Builder, then click Install Now and Activate.
- Go to Pages > Add New Page, or open an existing page. Click Edit with Elementor to launch the Elementor editor.
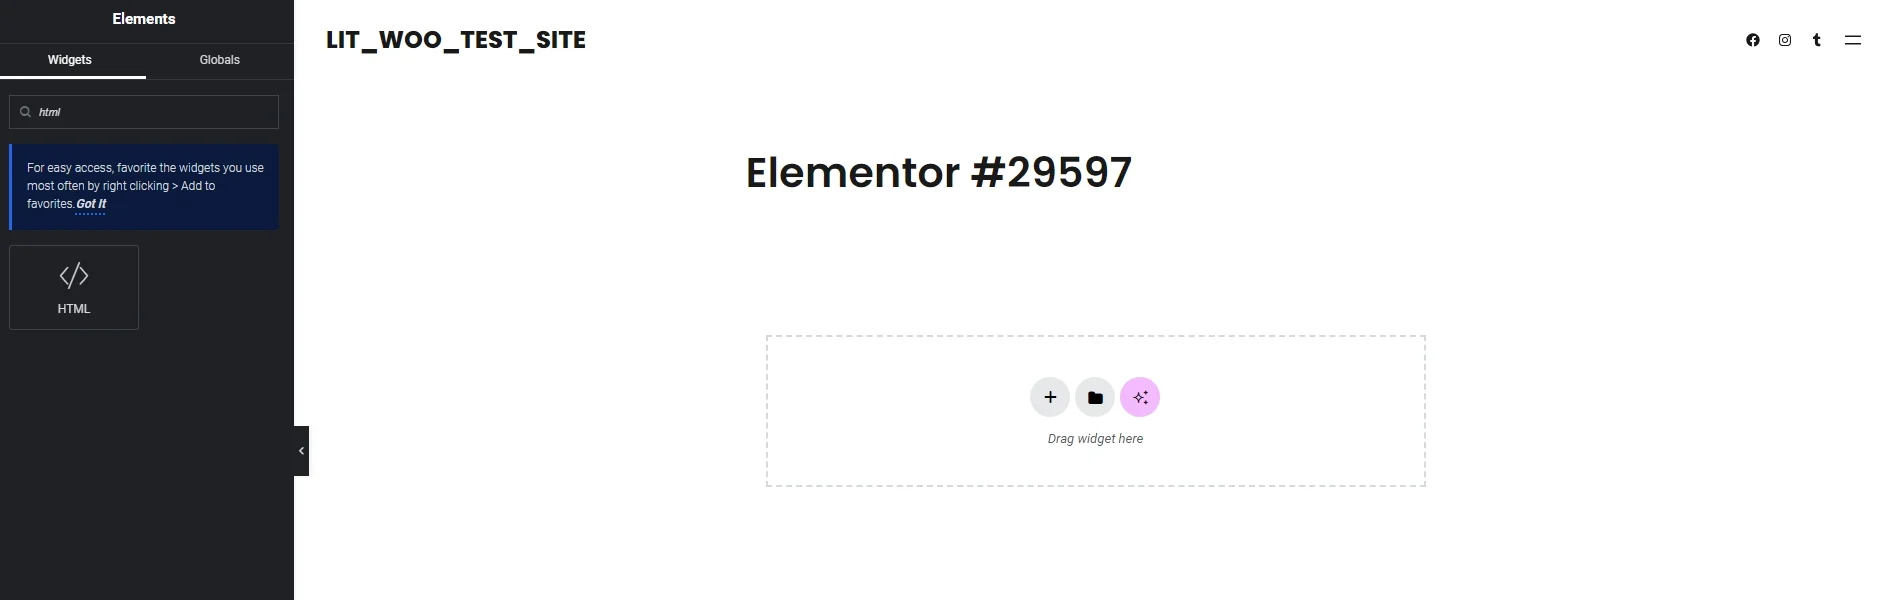
- In the Elementor panel, search for the HTML widget. Drag and drop it into the desired position on your page.
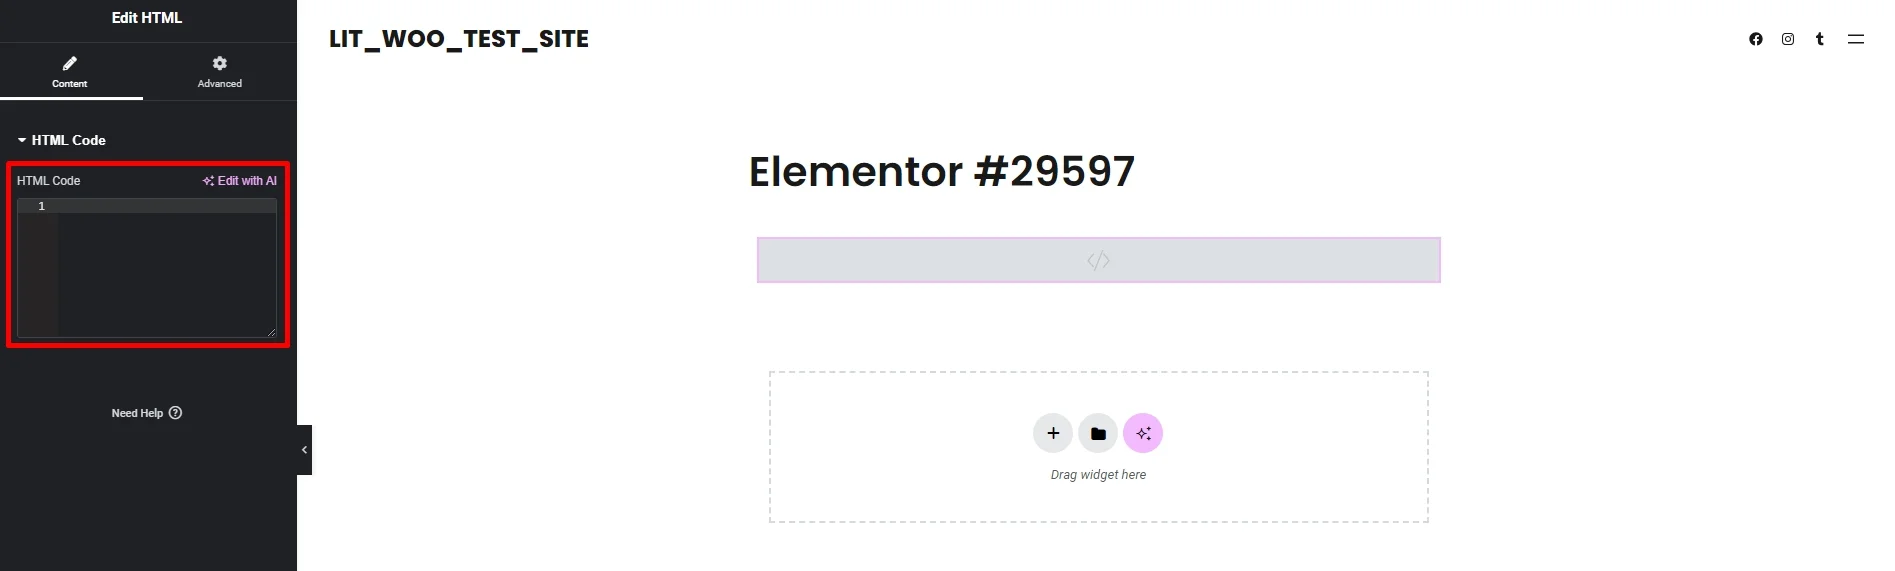
- Paste your HTML into the HTML Code field under the Content tab. Elementor will display the output directly on the canvas where possible.
- Preview the entire page to check its layout and functionality. Once everything looks correct, click Publish or Update.
2. Using WP Coder plugin
For HTML sections that you want to manage centrally or reuse across multiple pages, WP Coder offers a more practical workflow. The plugin stores your HTML, CSS, and JavaScript together as a snippet, which you can display anywhere using a shortcode or Gutenberg block.
- From the WordPress dashboard, go to Plugins > Add New Plugin. Search for WP Coder, then click Install Now and Activate.
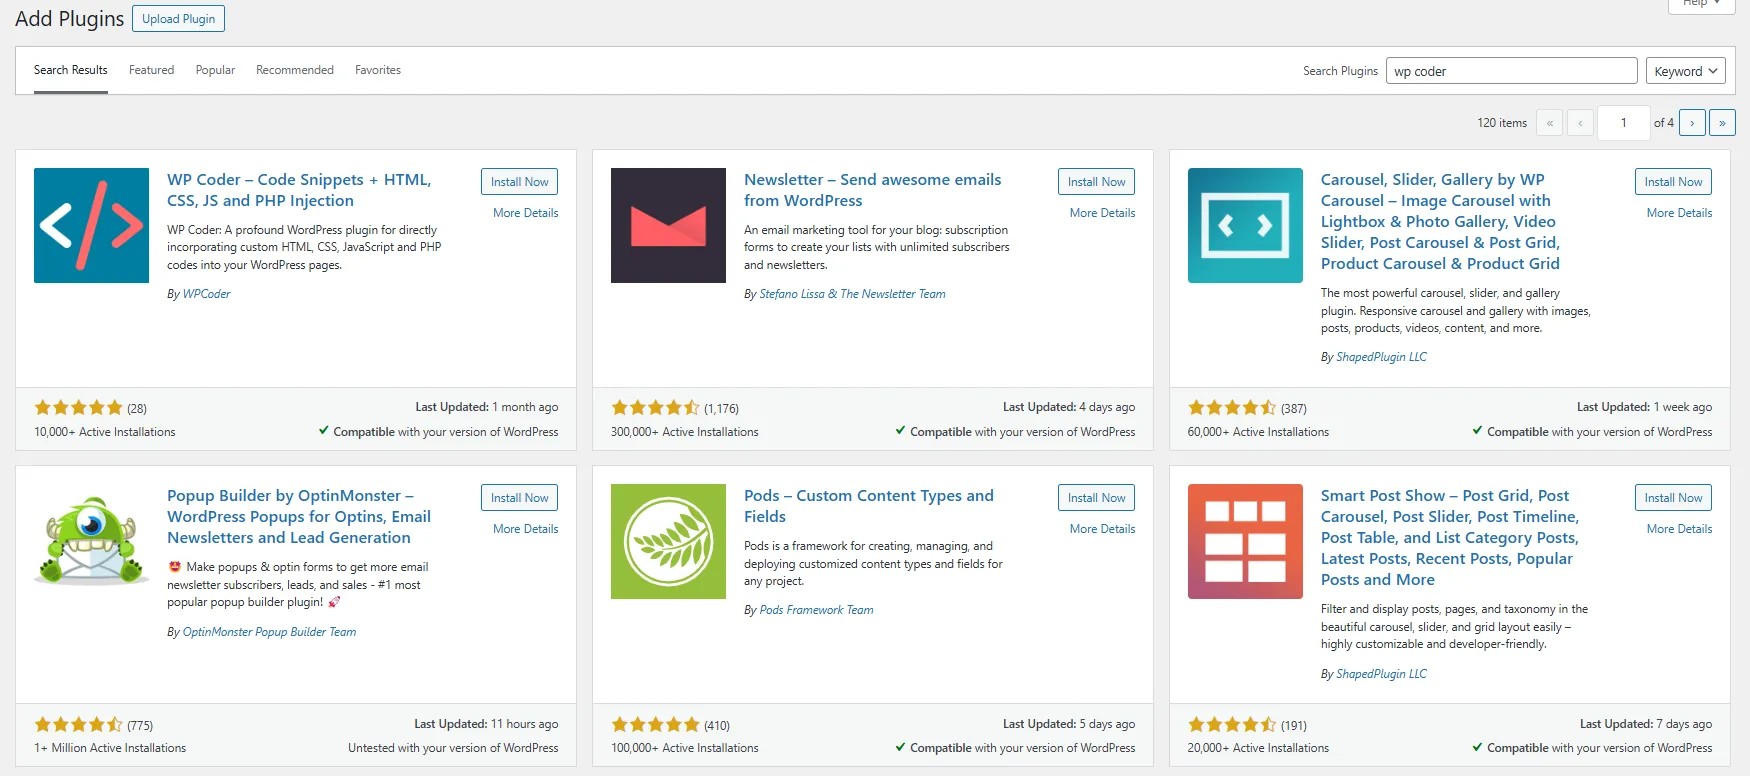
- Navigate to Wow Plugins > WP Coder and select Add New Snippet.
- Enter a clear title for the snippet. Then, add your HTML to the HTML editor.
- If the HTML requires custom styling or functionality, add the relevant code to the CSS and JavaScript editors. You can also include external CSS and JavaScript libraries through the available settings.
- Review the publishing and loading options, then preview the snippet to check its appearance.
- Save or publish the snippet. WP Coder will generate a shortcode in the format [wp_code id=”X”].
- Open the page or post where you want the HTML to appear. Add a Shortcode block and paste the generated shortcode. Alternatively, insert the WP Coder Snippet block and select your saved snippet.
- Preview the page on the front end. If the content displays correctly, click Publish or Update.
Method 3: Import HTML to WordPress using FTP or cPanel
You can also import HTML to WordPress by uploading the files directly to your hosting server. This method works well for standalone pages that do not need to be edited through the WordPress dashboard. The uploaded content will remain static rather than become a native WordPress page.
- Prepare the HTML file and all related CSS, JavaScript, images, and fonts in one folder.
- Connect to your server using an FTP client such as FileZilla, Cyberduck, or WinSCP. Alternatively, sign in to cPanel and open File Manager.
- Locate your website’s document root, which is commonly
public_html. Create a separate folder, such ashtml-files, and avoid uploading the files towp-admin, wp-includes, or over existing WordPress files.
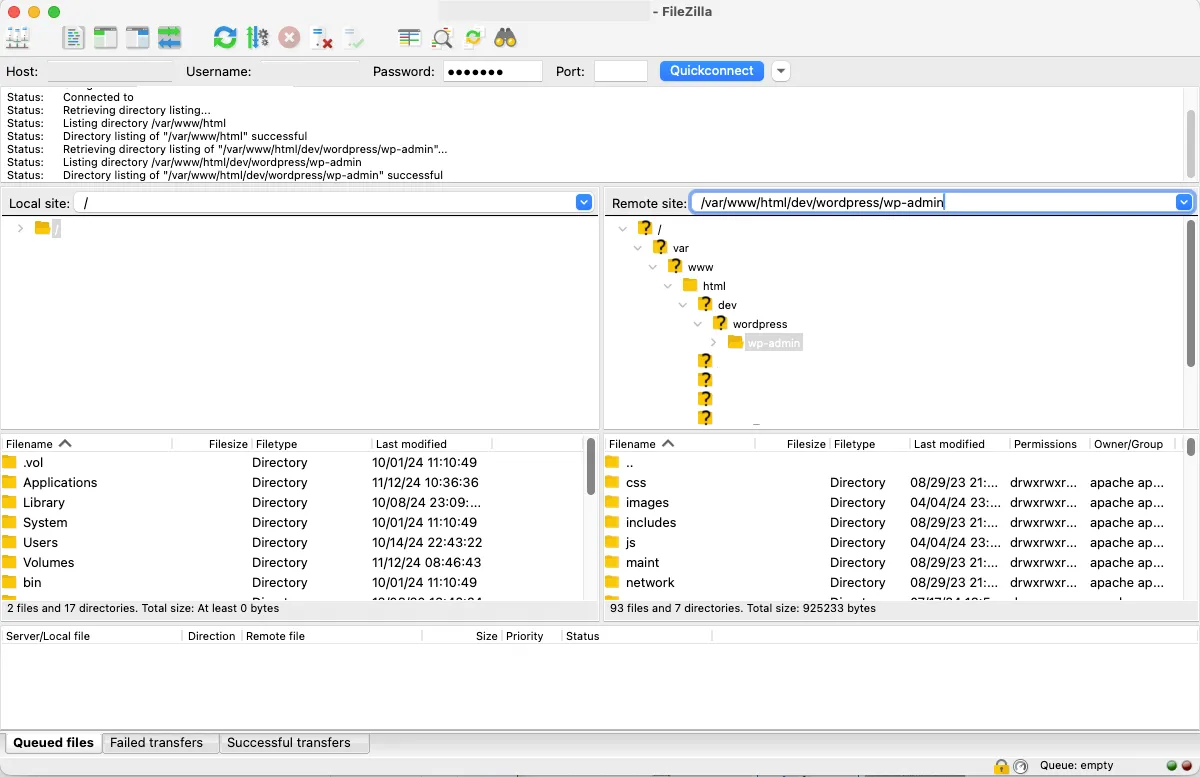
- Upload the complete HTML folder. If you use cPanel, compress the folder into a ZIP file, upload it, and select Extract. Keep the original file structure intact:
/uploads/html-files/
    index.html
    /css/
        styles.css
    /js/
        scripts.js
    /images/
        image1.png
- Open the page at a URL such as https://yourwebsite.com/html-files/. Check that its layout, links, images, and scripts work correctly.
- To make the page accessible from your WordPress website, add its URL as a custom navigation link. Depending on your theme, go to Appearance > Menus or Appearance > Editor > Navigation.
If any assets fail to load, you should check the paths used in the HTML file. Remember that this method does not apply your WordPress theme or turn the uploaded content into a native WordPress page.
Method 4: Convert HTML website to a WordPress theme
To turn a complete static website into a dynamic WordPress site, you can convert its HTML layout into a WordPress theme. Unlike uploading standalone files, this method lets you manage pages, posts, menus, and other content from the WordPress dashboard.
You can either build a custom theme from scratch or use a child theme based on an existing design.
1. Build a theme manually
This option gives you full control over the website design and works best when you want to preserve a custom HTML layout. For a classic WordPress theme, you need at least style.css and index.php. You can then add files such as header.php, footer.php, page.php, and single.php to manage different parts of the site.
Follow these steps to import HTML to WordPress as a custom theme:
- Go to
wp-content/themes/and create a new folder for your theme. - Add a style.css file with a valid theme header so WordPress can recognize it.
- Move the header, footer, sidebar, and main content from your HTML into the corresponding PHP template files.
- Replace static content with WordPress template tags, such as
get_header(), get_footer(), the_title(), and the_content(). - Add a
functions.phpfile to enqueue your stylesheets and scripts correctly. - Upload your images and other assets, then update their file paths.
- From the dashboard, go to Appearance > Themes and activate the new theme.
- Review every page and check its layout, navigation, links, and responsive design.
A basic index.php file may look like this:
<?php get_header(); ?>

<main class="site-main">

    <?php

    if ( have_posts() ) :

        while ( have_posts() ) :

            the_post();

            the_title( '<h1>', '</h1>' );

            the_content();

        endwhile;

    endif;

    ?>

</main>

<?php get_footer(); ?>
WordPress uses its template hierarchy to decide which file displays each type of content. Adding specific templates, such as front-page.php, page.php, or single.php, therefore gives you more control than relying on index.php alone.
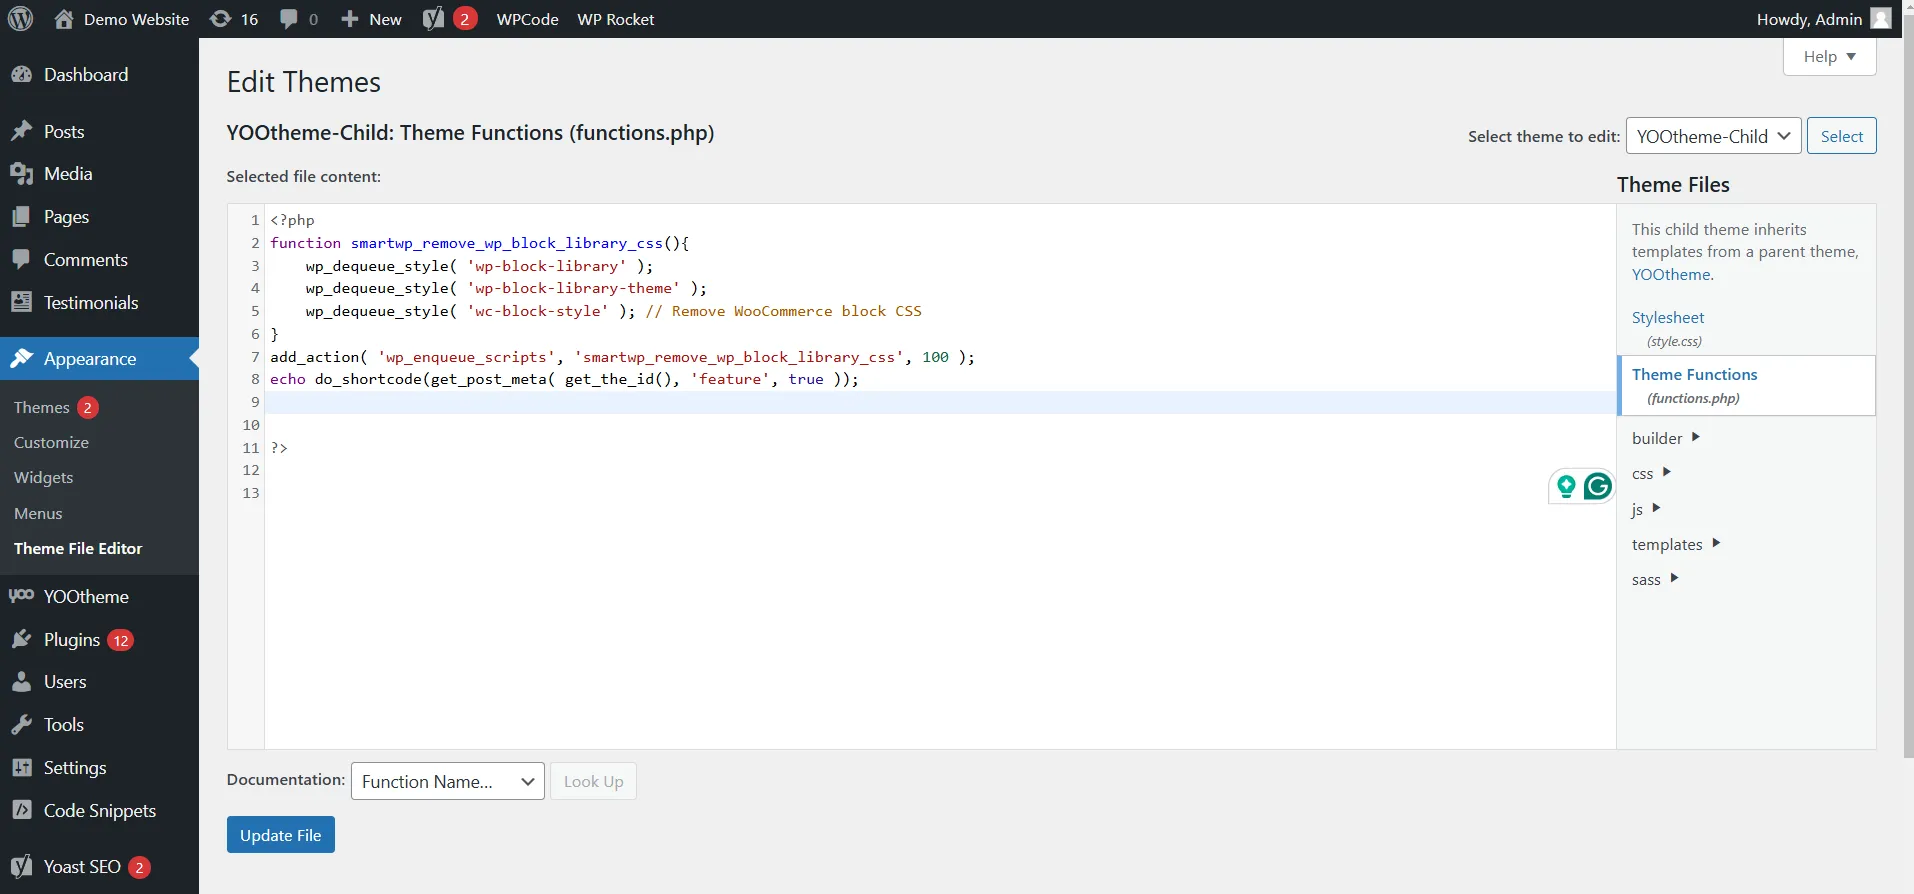
2. Use a child theme
If an existing WordPress theme already resembles your HTML design, creating a child theme may require less development work. The child theme inherits the parent theme’s features and styling while keeping your customizations separate, so parent theme updates will not overwrite them.
Here is the general process:
- Choose and install a parent theme that closely matches your intended layout.
- Create a new folder under wp-content/themes/ for the child theme.
- Add a style.css file containing the child theme details. The Template value must match the parent theme’s folder name exactly.
- Add a functions.php file if you need to load custom styles or add theme functions.
- Copy the relevant HTML design into new or overridden template files.
- Go to Appearance > Themes and activate the child theme.
- Test the website after activation to make sure the parent theme and your custom files work together correctly.
For example, the style.css header may look like this:
/*

Theme Name: My HTML Child Theme

Template: parent-theme-folder

Version: 1.0

*/
The files you override depend on the parent theme. Classic themes mainly use PHP templates, whereas block themes use HTML templates and block-based files. A child theme is therefore most practical when the parent theme already provides much of the structure you need.
Now that we’ve covered all four methods to import HTML to WordPress, you can choose the approach that best fits your content. If you need to migrate CMS pages or blog posts from another platform, LitExtension ensures a secure and accurate migration.
Seamlessly migrate to WordPress!
With the All-in-One Migration Service, our experts take care of everything, ensuring a seamless and stress-free migration.
Post WordPress Import HTML Actions
Once you successfully import HTML to WordPress, the work isn’t quite done. The follow-up steps below will ensure everything looks right, functions properly, and is ready for visitors and search engines.
- Check rendering across browsers and devices to catch layout breaks or unsupported tags that may display fine in one browser but break in another.
- Re-link all internal URLs to use absolute WordPress paths instead of relative ones to avoid broken images and dead links.
- Re-enqueue CSS and JavaScript via functions.php using wp_enqueue_style() and wp_enqueue_scripts() instead of hardcoded <link> and <script> tags to prevent theme conflicts and incorrect load order
- Set the page title, slug, and meta description in WordPress using the editor or an SEO plugin like Yoast to avoid static HTML meta tags being ignored or overridden.
- Test all interactive elements, such as forms, buttons, modals, and sliders, to catch JavaScript conflicts with your theme’s existing scripts or jQuery version.
- Add the page to your WordPress navigation menu under Appearance → Menus to ensure it’s accessible within your site structure.
- Resubmit your sitemap in Google Search Console to get the new page indexed promptly and avoid delays in search visibility.
Troubleshooting Issues During WordPress HTML Import
Even with careful planning, problems can happen when importing HTML into WordPress. Common issues include restricted file types, broken styles, missing features, and security risks. This section describes these problems and offers practical solutions to fix them.
1. File type not permitted
When uploading an HTML file, font, SVG, or another uncommon format, you may see the message: “Sorry, this file type is not permitted for security reasons.” This happens because the extension or MIME type is not on WordPress’s allowed list. Your hosting provider or Multisite settings may also restrict it.
To fix this issue:
- Use a trusted plugin such as File Upload Types to allow only the required extension.
- For Multisite, add it under Network Admin > Settings > Upload Settings.
- Contact your host if the file remains blocked at the server level.
2. CSS or JavaScript not rendering
Your imported page may load without its original styling or interactive features if WordPress cannot find or run its CSS and JavaScript files. Common causes include outdated URLs, incorrect relative paths, mixed HTTP and HTTPS content, or interference from caching and optimization plugins.
To fix this issue:
- Use your browser’s Developer Tools to identify missing or blocked files.
- Update asset URLs and paths to match the new WordPress structure.
- For a custom theme, load files with
wp_enqueue_style()andwp_enqueue_script(). - Clear the cache and temporarily disable CSS or JavaScript optimization to check for conflicts.
3. 404 errors on imported pages
A page may return a 404 error even when its content has been imported successfully. This often results from outdated permalink rules, an incorrect slug, unpublished content, or a conflict with a theme, plugin, or custom post type.
To fix it:
- Confirm that the page is published and its slug matches the URL.
- Go to Settings > Permalinks and click Save Changes to refresh rewrite rules.
- Check for conflicting pages, redirects, plugins, or custom post types.
- Review .htaccess and its permissions if the issue continues.
4. Security concerns
Imported HTML may contain scripts, forms, iframes, or external resources that introduce security risks. WordPress may automatically remove some of this code to reduce cross-site scripting and injection attacks.
To fix it:
- Remove unknown scripts and untrusted external resources.
- Rebuild important forms or functions using trusted WordPress tools.
- Limit custom HTML and script permissions to administrators.
- Update WordPress, themes, and plugins, then run a security scan.
Treat imported HTML like third-party code, even when it comes from your old website. Reviewing only the elements you still need makes the new WordPress site easier to maintain and reduces unnecessary risks.
Import HTML to WordPress: FAQs
How to open an HTML file in WordPress?
WordPress does not open an HTML file as an editable page automatically. You can paste its body content into a Custom HTML block, upload the file through FTP or cPanel for standalone access, or convert it into a WordPress theme.
How do I add HTML to WordPress?
Open a page or post in the Block Editor, add a Custom HTML block, and paste your code. Classic Editor users can add it through the Text tab. For reusable HTML, CSS, and JavaScript sections, you can use WP Coder or a page builder such as Elementor.
How do I upload an HTML file as a website?
Upload the HTML file and all supporting assets to a dedicated folder in your hosting account using FTP/SFTP or cPanel. Name the homepage index.html, preserve the original folder structure, and access it through a URL such as https://yourwebsite.com/html-site/. This creates a static website rather than an editable WordPress site.
Does WordPress have a built-in HTML importer?
No. WordPress does not include a built-in importer that converts HTML files or a static HTML website into native WordPress pages. You must add the code manually, use a plugin or page builder, upload the files as static pages, or convert the HTML design into a WordPress themes.
Can I import HTML code directly into WordPress?
Yes. If you only need to add a specific HTML section, you can paste the code into a Custom HTML block in WordPress Block Editor or the Text tab in Classic Editor. This works best for HTML inside the <body> section rather than a complete HTML document.
Can I import an entire HTML file into WordPress?
Not as a native WordPress page. WordPress does not automatically convert an uploaded .html file into an editable page. You can either paste its HTML content into a page, upload the file and its assets to your server as a standalone page, or convert the HTML into a WordPress theme.
Will my SEO be preserved when I import HTML to WordPress?
Not automatically. You should review your existing page titles, meta descriptions, URLs, internal links, and other SEO elements after the import. Static HTML metadata may need to be recreated using WordPress or an SEO plugin, and the updated sitemap should be submitted to Google Search Console.
How do I migrate HTML URLs to WordPress?
First, map your existing HTML URLs to their new WordPress URLs. Then set the appropriate WordPress slugs and redirects for changed URLs, and check the migrated pages for 404 errors. Refresh Settings > Permalinks if WordPress does not recognize the new URLs correctly.
Can I keep my existing HTML design after migrating to WordPress?
Yes. If preserving the existing design is important, you can convert the HTML layout into a custom WordPress theme. If an existing WordPress theme already resembles your design, a child theme may require less development work.
Final Words
Importing HTML into WordPress caters to a variety of needs, from replicating existing designs to accelerating the development process with pre-built templates. We hope that this article has guided you to import HTML to WordPress with ease.
If you like this article, don’t forget to take a look at other articles related to WordPress on our website to get more insights and expert guides.


