For the past years, the point of sales (POS) system has become increasingly common, and it's easy to feel overwhelmed with so many options to choose from. However, one thing is for certain: the Shopify POS system remains the crowd's favorite. This is rather unsurprising, given that it's backed by Shopify itself, one of the biggest eCommerce platforms to date!
Still trying to figure out what makes Shopify POS special? We're here to clear it all up for you. Our article will summarize:
- An overview of Shopify POS
- 6 key Shopify POS features
- How much it costs
- A step-by-step setup guide
- The best non-native POS system compatible with Shopify
Without further ado, let's get started!
Shopify POS System: A Quick Glance
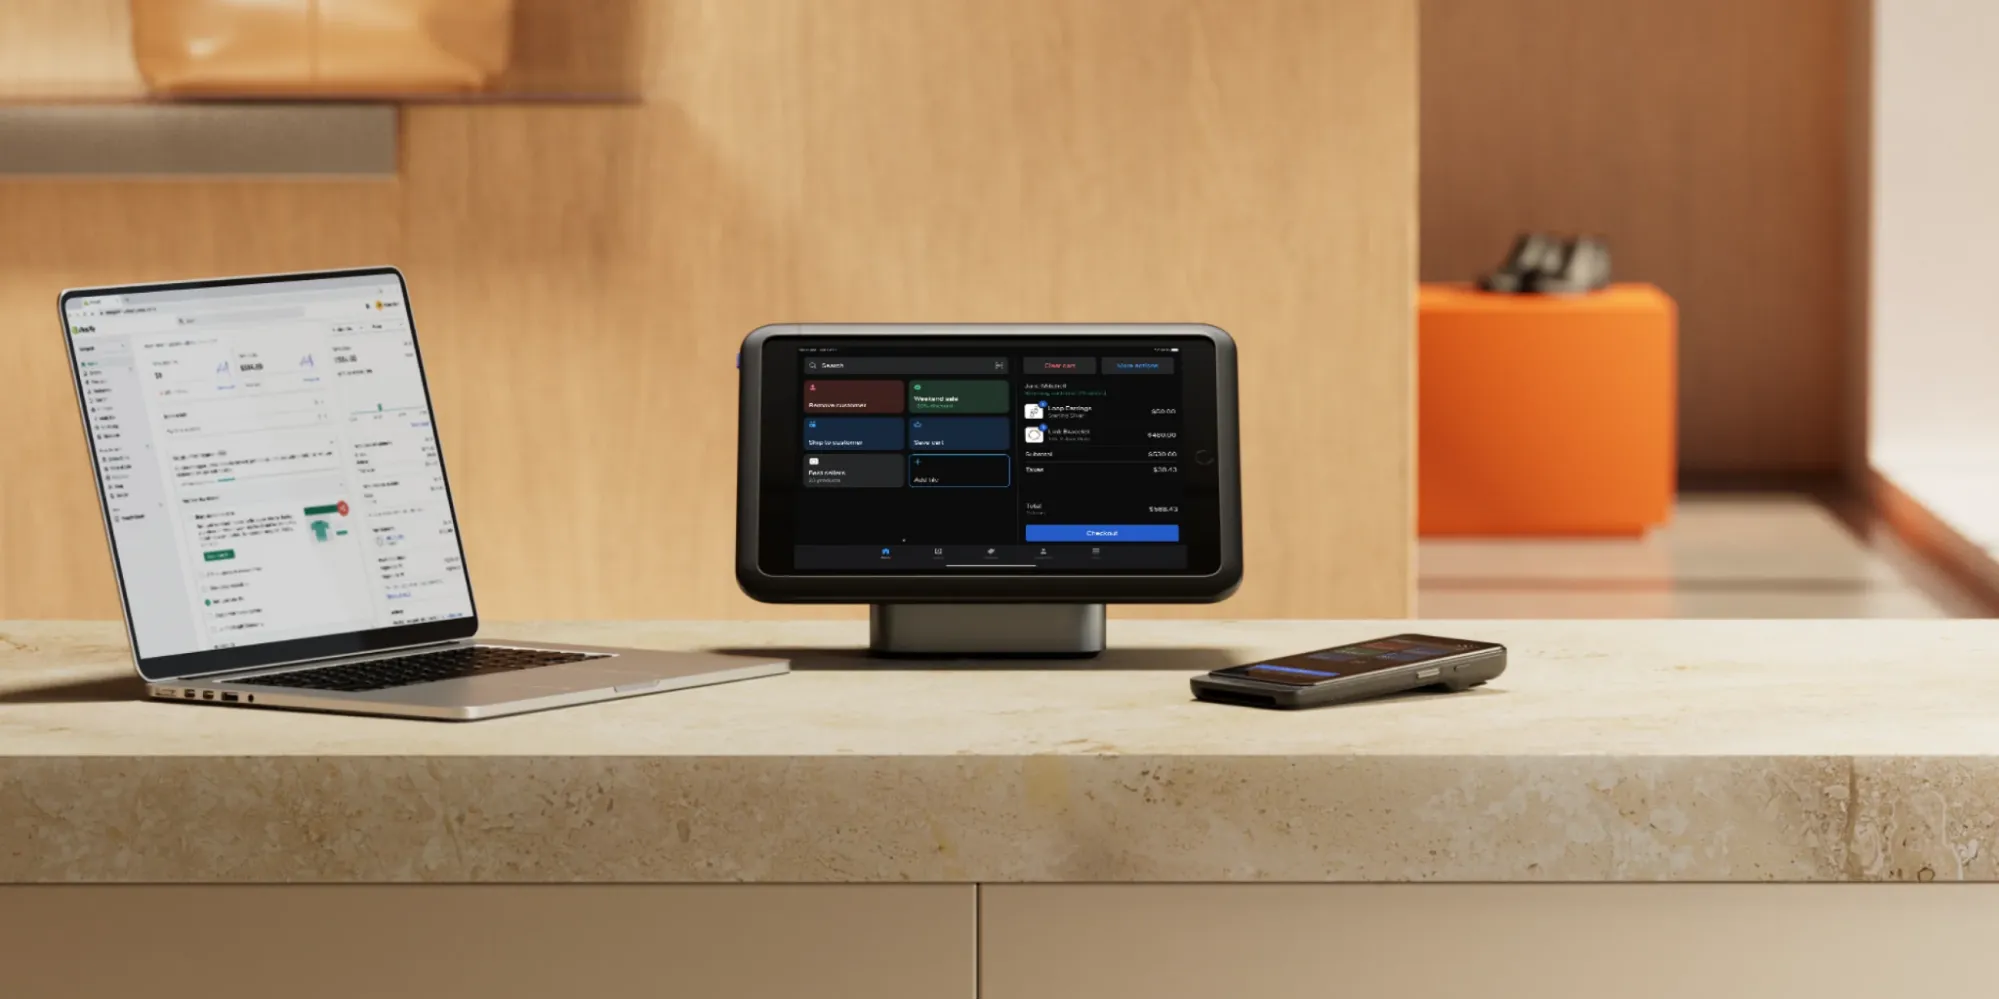
Does Shopify have a POS system? The answer is Yes. However, before we jump into the specifics of Shopify POS features, let's first get a clear picture of what the system promises to offer.
Simply put, Shopify POS is a user-friendly mobile app (available on both iOS and Android) that connects your online Shopify store with your physical shop. As a result, you can manage everything (from product listings to sales and orders) in one place and sell online and in-store simultaneously. It's basically the ultimate toolkit to grow your Shopify business in every direction!
6 Key Features of Shopify POS System
Although the overview above has touched on the system's main capabilities, it only scratches the surface of what Shopify POS can do. We will dig deeper into its key features in the following section:
Multi-location management
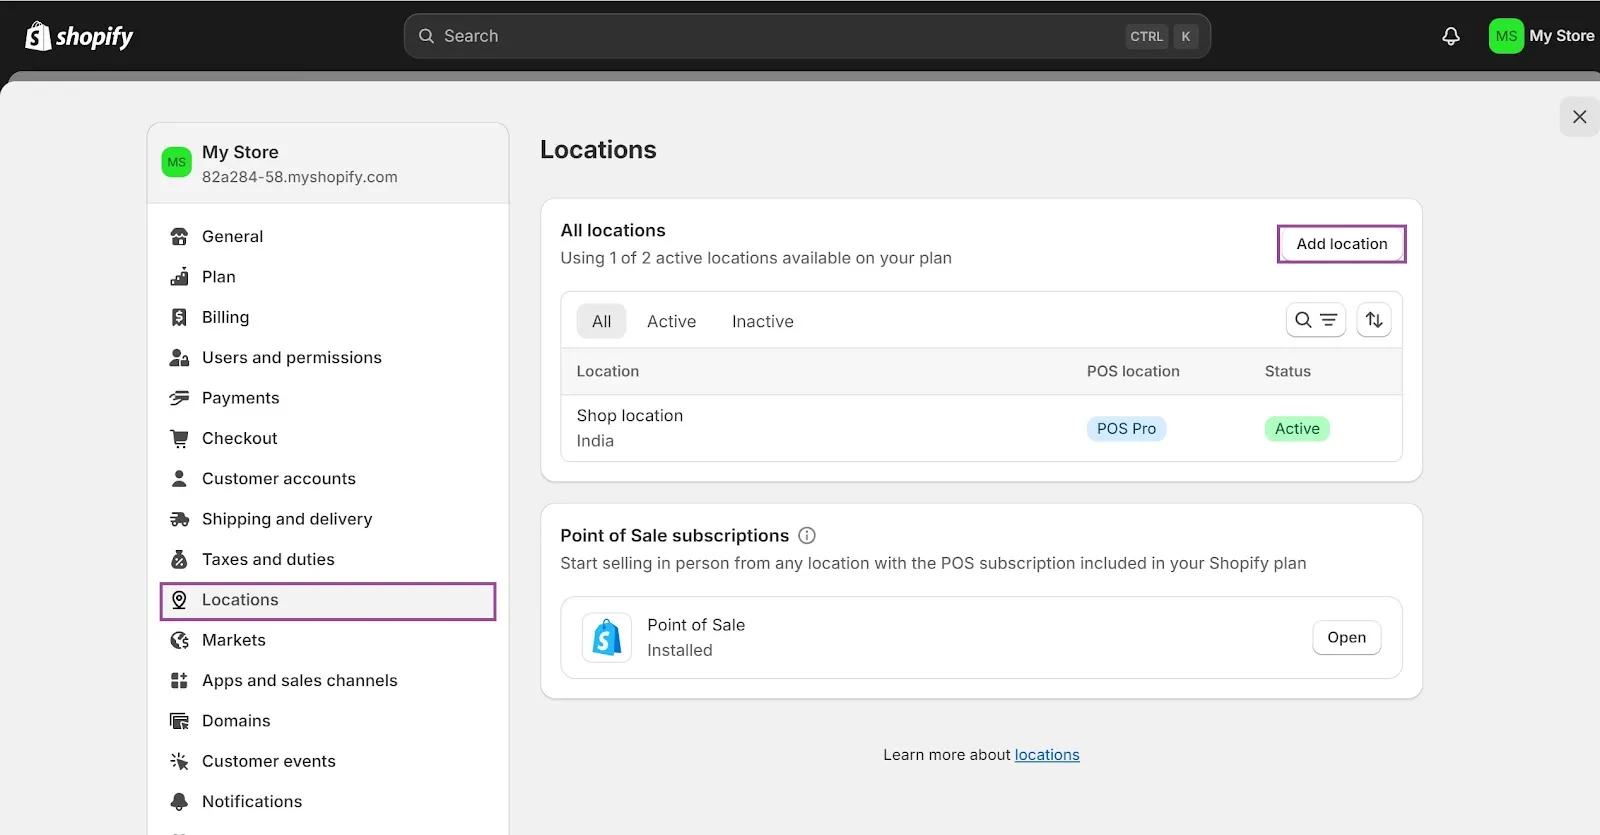
First and foremost, Shopify POS truly gives retailers with multiple stores unmatched control over their business. You can now oversee inventory for all your locations in just one place, which saves both time and headaches! Specifically, once you navigate to the “Inventory” page in your admin dashboard, it will be a breeze to:
- Check stock levels
- Adjust products counts
- Create transfers between stores
- Track the history of every inventory change
- Enable inventory tracking for any product directly from its page.
Even better, you can set each POS device to its current store address (say, one for New York and one for L.A.) to make sure the right taxes are applied based on the location. Plus, the inventory for that specific location will be updated automatically whenever a product is sold or restocked. Long story short, you never have to worry about manual tracking or inaccurate stock levels!
Seamlessly migrate your store to Shopify!
LitExtension can safely transfer your products, customers, and orders to unlock more growth on Shopify.
Custom printed receipts
As another outstanding Shopify POS highlight, this feature gives you the power to turn something as simple as a receipt into a key part of your brand experience. Instead of plain, generic themes, you may now create polished receipts that leave a lasting impression on your customers and help build the brand’s identity!
Feel free to add your business logo, contact details, or even a special message in the header and footer for a more personal touch. Not to mention, you can also control how many copies are printed by default to smooth out the checkout process without extra hassle.
And the best part? Shopify POS gives you options to tweak these customizations even further to your liking:
- The visual editor lets you apply the settings to all of your store locations or a list of chosen ones, depending on your needs.
- Prefer deeper control? In that case, the code editor allows you to modify the receipt settings for each location individually.
Camera barcode scan
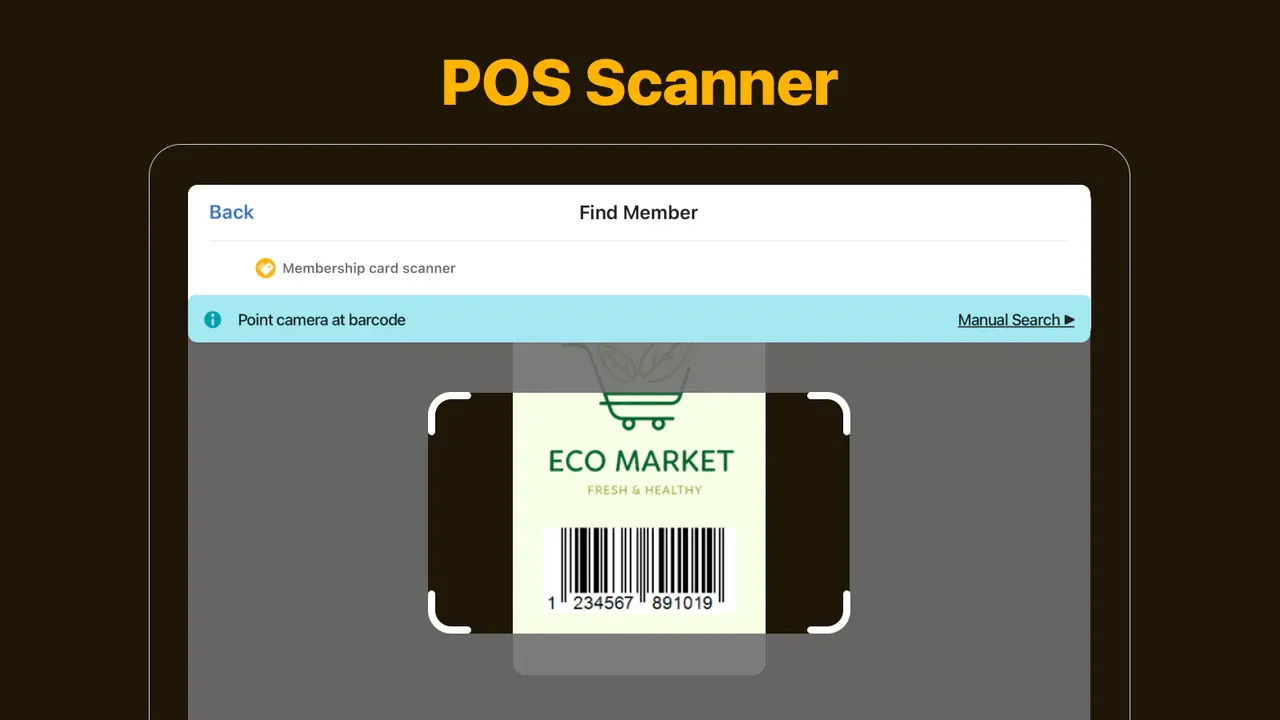
We are also very impressed with the barcode-scanning feature, which truly takes the checkout process to the next level. As long as you use a Shopify-supported Bluetooth barcode scanner, it's a breeze to add any item to the cart instantly. Even better, you can move around the store freely with a cordless scanner – up to 100 meters from the iPhone – ideal for extremely large setups!
There's also the flexibility to work with either 1D or 2D barcodes, depending on your preferences:
- 1D barcodes are classic lines you see on most product packaging. You can easily create barcode labels for your items, and then scan them with either a scanner or your device's camera to add products to the cart.
- On the other hand, 2D barcodes consist of black-and-white square patterns. You may scan a gift card's 2D barcode to add it to the cart, or simply redeem it at checkout when a customer presents the card or a printed copy of the barcode.
In-app retail store analytics
Now, let's face it: it's impossible to run a successful business if you don't even know how well your store is performing each day. That's why Shopify POS includes an easy-to-use Analytics screen where you can quickly view your Daily Sales report and assess all crucial stats as follows:
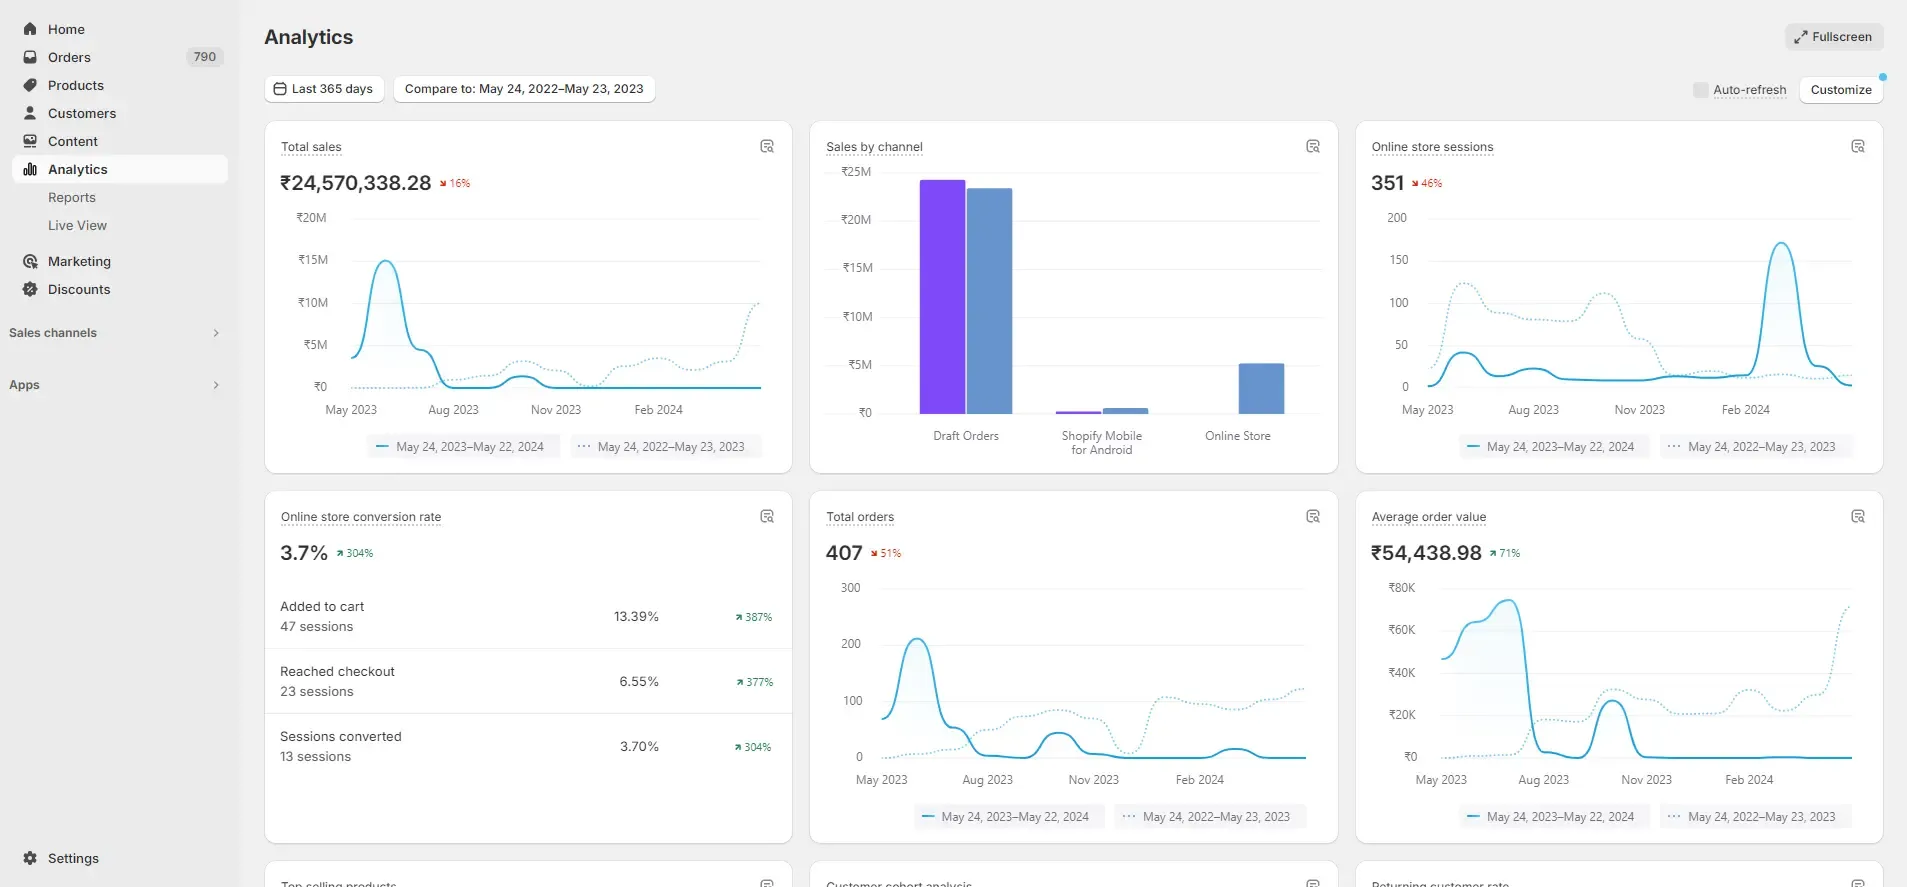
- Net sales: The total amount your store brought in for the day (after accounting for returns and other deductions).
- Average order value: How much each customer spends per transaction on average.
- Items per order: The number of products your customers typically buy per visit.
- Top products by net sales: Top three product variants that are flying off the shelves for the day (the number of units sold and the revenue each brought in).
- Top product types by net sales: Top three product categories that are driving sales the most.
- Top staff at register by net sales: Highlighting the top three staff members based on the number of orders they processed and the total sales they made.
Most importantly, this report isn't just a quick snapshot of the current date; it also gives you a side-by-side comparison with last week's performance. That way, if things are not going as planned, you'll have all the insights you need to adjust your campaigns accordingly and stay ahead of the game!
Cash tracking
Aside from product and order management, keeping tabs on the daily cash flow is also a real challenge for merchants juggling multiple stores. Fortunately, the POS system for Shopify takes the stress out of the process for you!
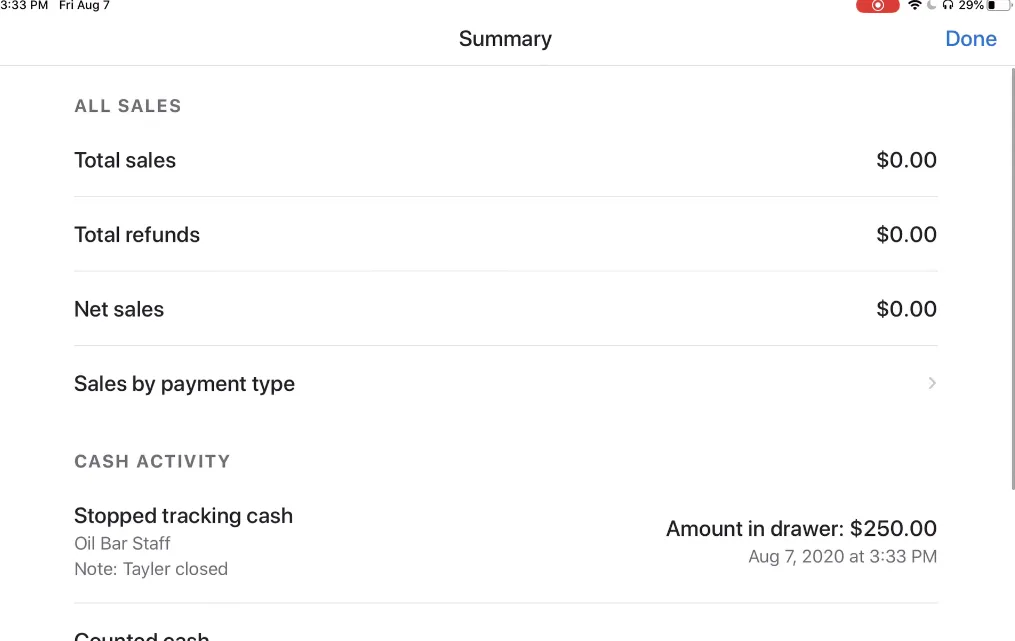
With the Register screen, you can set up and review cash tracking sessions effortlessly. Each session lets you see a clear snapshot of your daily cash transactions, along with any adjustments made by your staff. Here are some key details you'll always have instant access to:
- The exact date the session started
- Total sales for that particular session
- The name of the staff member who opened the session
- The starting amount of cash in the drawer
- Adjustments if any (e.g., when a staff member uses personal cash to make a change).
Integrated payment with Shopify Payments
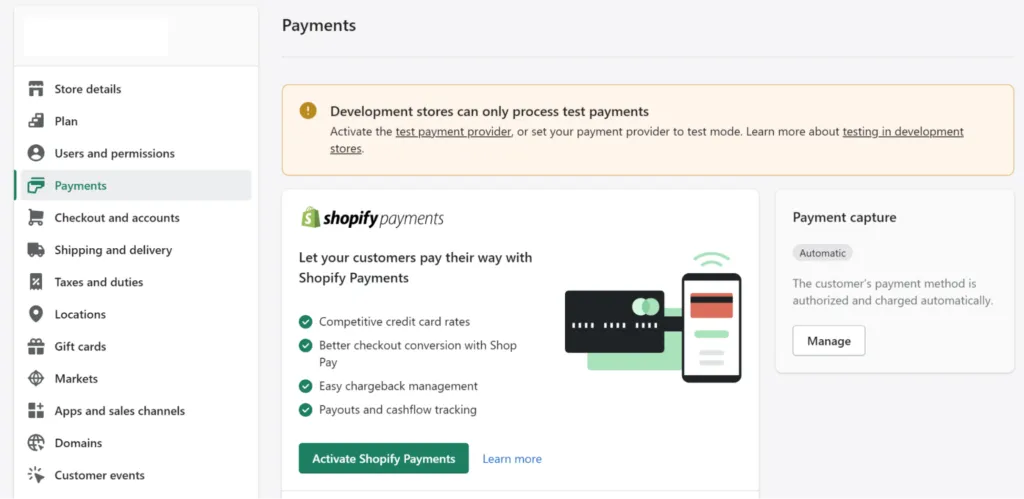
Speaking of cash flow, what really sets Shopify apart from other platforms is its built-in Shopify Payments. Forget the hassle of setting up a third-party payment provider; Shopify Payments will handle it all for you in just a few clicks and keep everything under one roof!
And that's not all. Once Shopify Payments is properly set up for your store, you can start accepting credit card payments in person using the Shopify POS system:
- Open the Shopify POS app and go to “Settings”> “Payment types.”
- Under “Default payment types,” make sure Credit/Debit shows as “Accepted.”
That's it. Now you're all set to take payments on the go, with no fuss, no extra steps, and no stress!
Shopify POS System Pricing
All the Shopify POS features above are amazing, but you're probably wondering, “What's this going to cost me?” So, let's break it down! As of this writing, you've got two options:
- Starter plan (for social selling): This plan costs only $5 a month. You'll get 1 POS login, and card rates start at 5% when using third-party payment providers.
- Retail plan (for physical stores): The Retail plan will cost you $89 a month. Along with unlimited POS logins, card rates now drop to just 2% – much less than Starter. Plus, you also unlock extra order management options (ship-to-home, in-store pickup, and local delivery) and get total control over staff permissions.
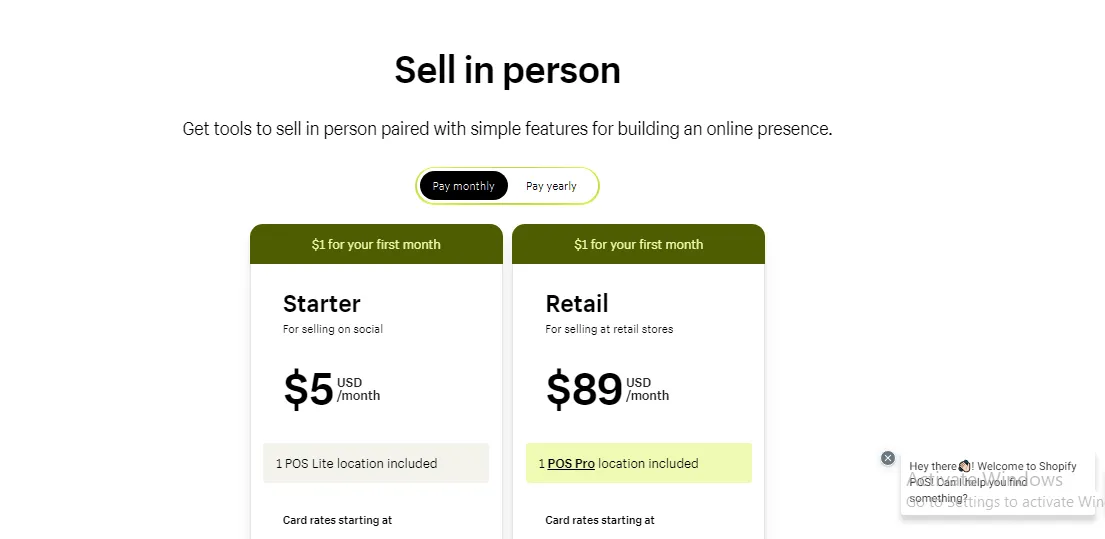
Whether you're just getting started or ready to scale your retail operations, there's a plan perfectly tailored to your needs! Once you've nailed down your budget and found the most suitable plan, it's time to move on to the setup process below.
How to Set Up Shopify POS System
In this section, we will detail all the steps necessary to set up the Shopify POS system once you have chosen your pricing plan. Overall, the steps are straightforward and don’t require much complex preparation (minus some hardware):
Step 1. Choose your hardware
First thing first, let's get your hardware sorted. Since we already mentioned that POS works with both iOS and Android devices, you can use your smartphone or tablet as your POS terminal. Even better, iPhone users will be able to accept payments directly (no card reader needed). Simply ask customers to tap their payment method on their iPhone, and the Shopify POS app will process the transaction immediately.
Some other hardware we strongly recommend:
- Barcode scanners
- Shopify retail kit (including the tap and chip card reader, dock, retail stand, and mounting kit)
- Shopify POS Go (a handheld device with a built-in scanner and card reader)
- Shopify dock for tap & chip reader (to keep your car reader charged).
You can purchase all these accessories from Shopify itself, but feel free to use compatible third-party options if that's what you prefer!
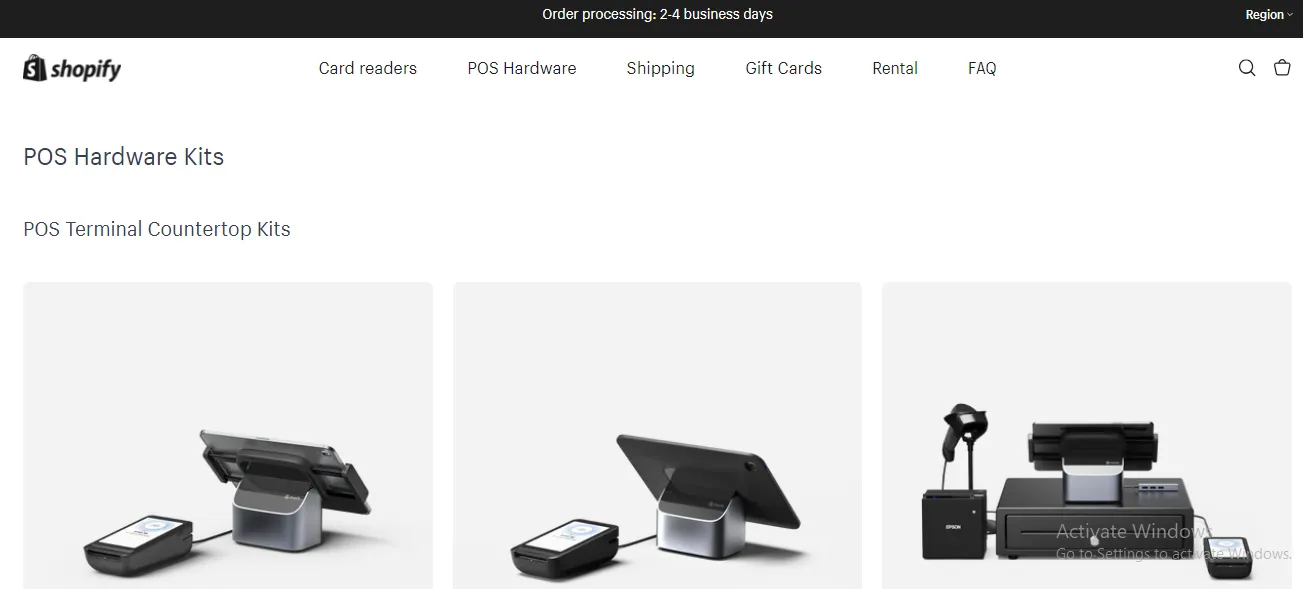
Each item comes with a handy guidebook and step-by-step instructions, so setting it up is quite a breeze. And even if you still need a hand, the support team is likely just a call away.
Step 2. Set up the Shopify POS app
With all the hardware ready, let's get the Shopify POS app on your device! Both iOS and Android versions are available; make sure you download the POS app and not the Shopify eCommerce one.
Once installed, log in to the app (using your existing Shopify account credentials) to get to the home screen. Here's where you can further customize your checkout and register management:
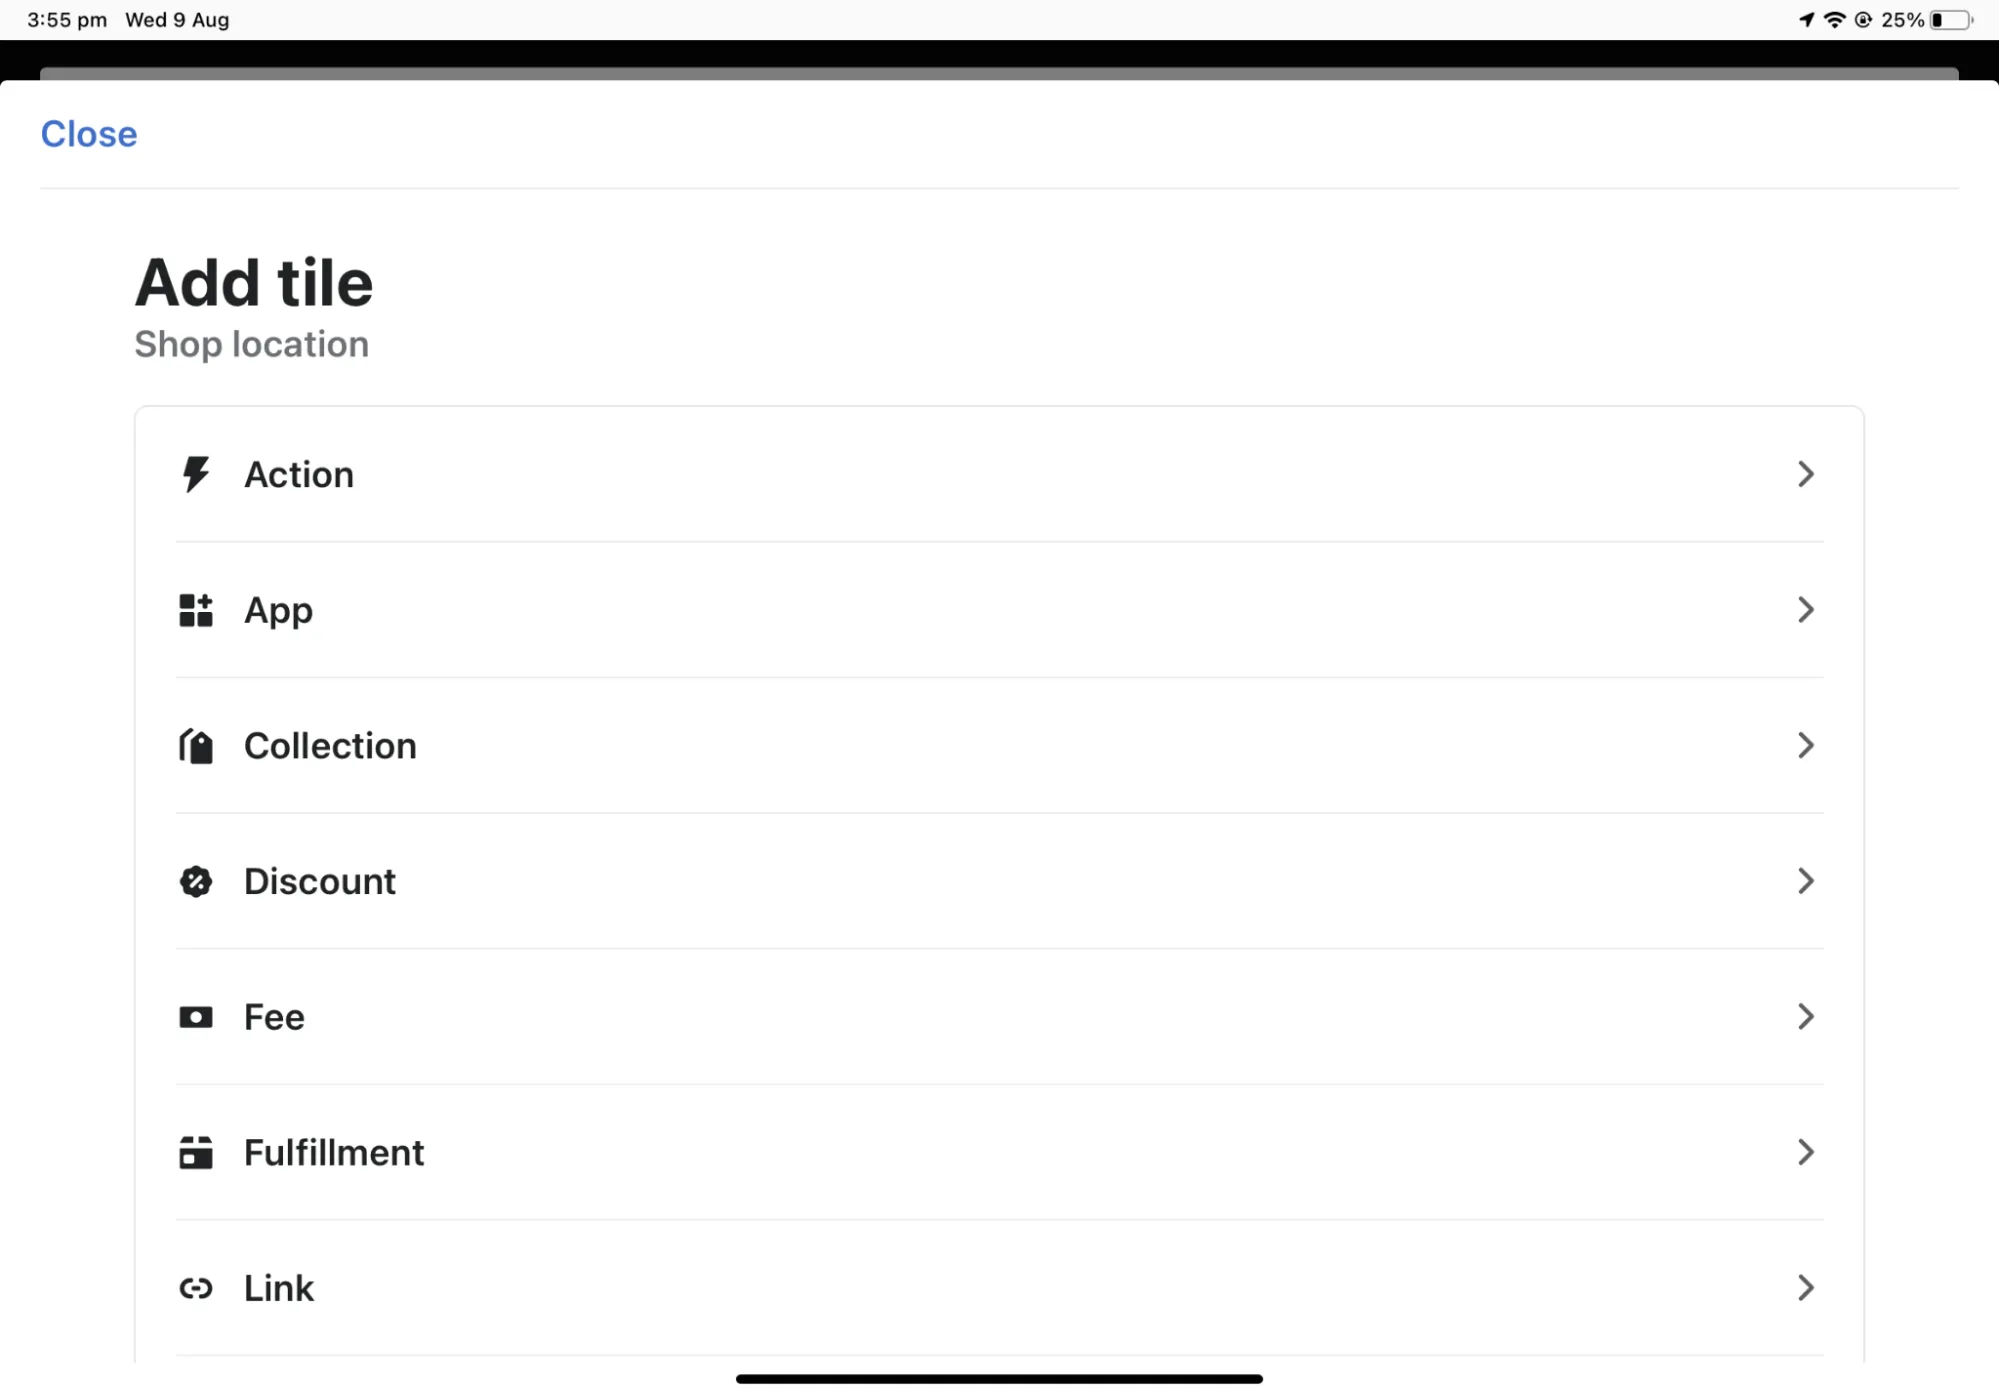
- Tap “Add tile” on your home screen, then select all the items that you want to show up on the checkout screen. Shopify POS will add them to the screen immediately.
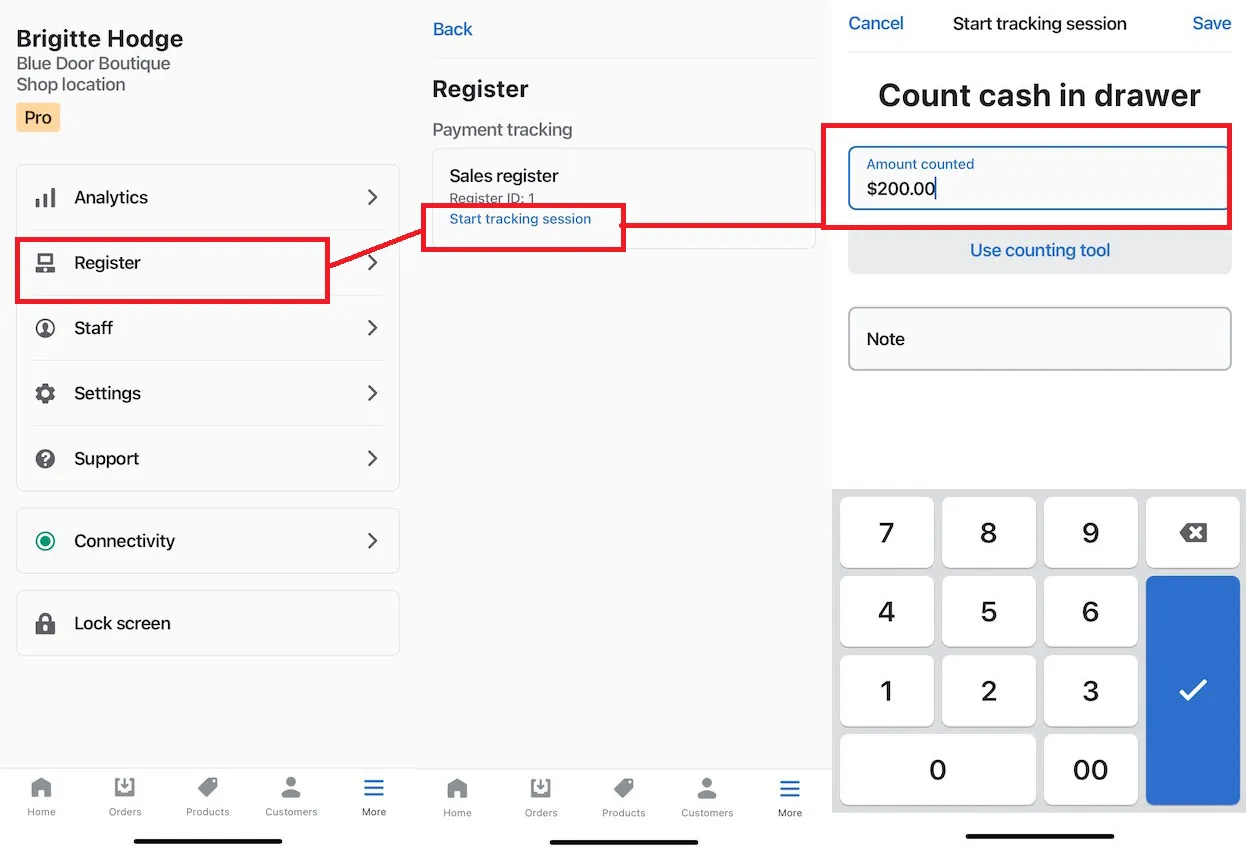
- To access register management (only available with POS pro), go to “Settings” > “Register” to start a tracking session. After you enter the opening amount in your cash drawer, Shopify POS will keep track of it and note all the discrepancies or cash removals (if any).
Step 3. Configure payment settings
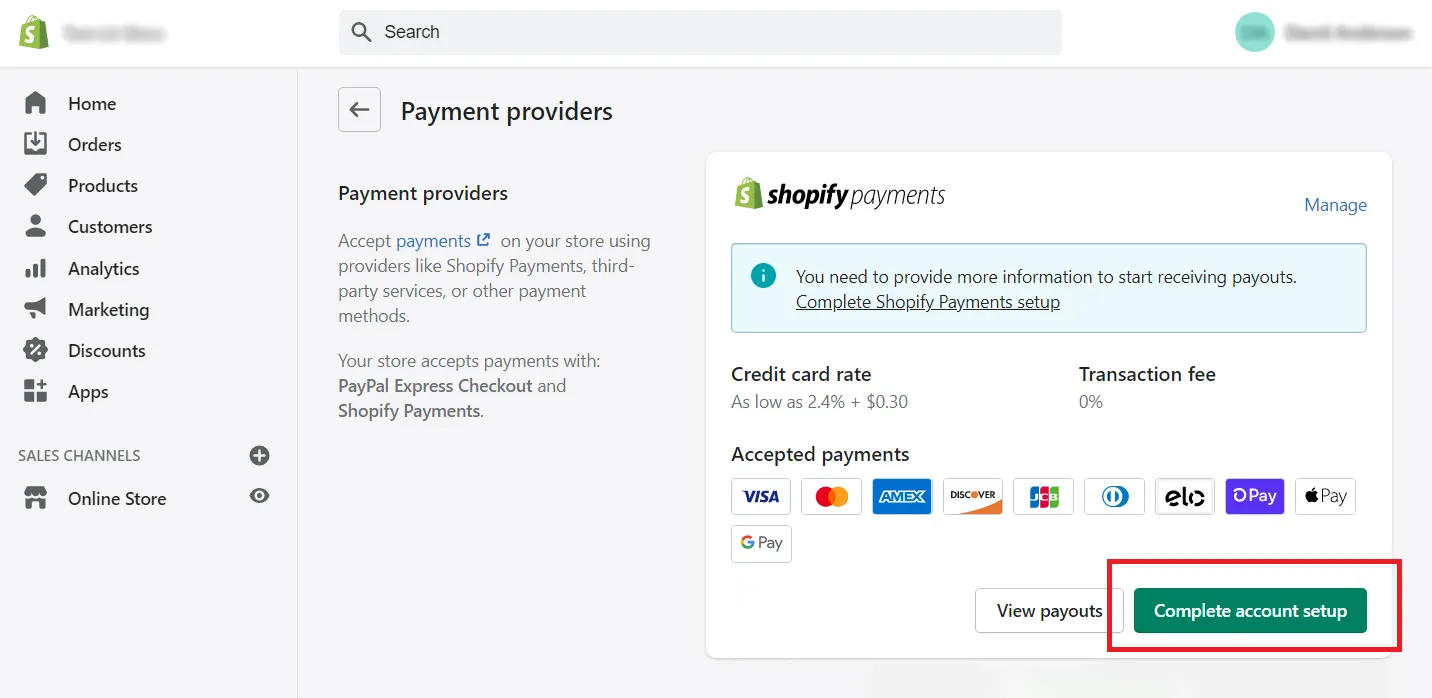
Finally, let’s move on to the payment settings for your POS system. In fact, Shopify Payments is already set up as the default, so all you need to do is click “Complete Account Setup.” Fill in your business info (e.g., your ID, tax info, and bank details), and you’re good to go!
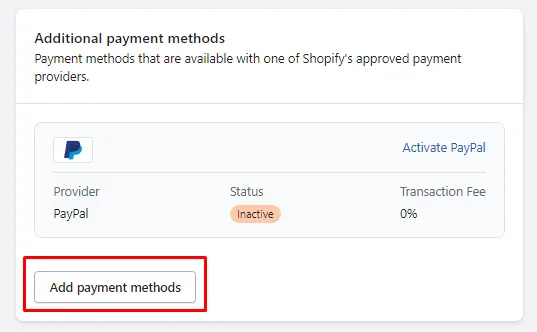
But what if you still want to offer more ways for customers to pay? In that case, tap the “Add payment methods” button at the bottom of the screen. You’ll unlock a whole range of options, including popular buy-now-pay-later choices like Affirm, Klarna, Zip, and Afterpay.
Step 4. Run your Shopify POS system
Now that your hardware, app, and payment settings are ready, you can start using the POS system right away. Note that if you ever need to adjust the settings, you may always jump back in to reset them whenever you want.
Plus, all important data (e.g., inventory, products, and taxes) is also manageable right from the Shopify dashboard and not just the POS app. After all, they will all sync automatically once you click “Save,” no matter where you choose to make the updates!
What Is The Best POS System for Shopify?
Our team has covered everything there is to know about the native Shopify POS system. How about other non-native options that also work with Shopify?
No worries; we've got you covered there as well. Below is our curated list of top POS systems that integrate with Shopify:
POS system | Key Features | Pricing | Pros | Cons |
Magestore POS for Shopify |
|
|
|
|
Lightspeed POS |
|
|
|
|
Square POS |
|
|
|
|
EPOS Now |
|
|
|
|
Curious to learn more? Check out our detailed review of the best POS systems for Shopify right here.
Shopify POS System: FAQs
Can you use Shopify as a POS system?
Yes! Shopify's built-in POS system makes it very easy to connect all the hardware you need and accept payments in person.
How much does Shopify POS cost per transaction?
Shopify offers two POS plans: Starter and Retail. If you're on the Starter plan, the transaction fee is 5% (with no additional charge). For the Retail plan, that drops to 2%.
Do you have to pay extra for Shopify POS?
If you have already subscribed to a Shopify eCommerce plan (Basic, Shopify, Advanced, or Plus), you'll get some POS features included for free. However, for more advanced features to facilitate in-person sales, you may consider paying extra for the POS Starter plan ($5/month, with a 5% transaction fee) or the POS Retail plan ($89/month, 2% transaction fee).
What POS hardware can I use with Shopify?
Shopify supports a wide range of hardware, from card readers and barcode scanners to receipt printers and cash drawers. To learn more about the specific models and color options that are compatible, check out Shopify's hardware guide!
Final Words
All in all, Shopify is one of the top eCommerce platforms that offers truly powerful and feature-packed POS benefits. We’ve covered everything you need to know about the Shopify POS system, from key features and pricing to all the required setup steps!
Excited to move your business to Shopify and unlock all these amazing POS bonuses? LitExtension is here to make it happen! With over 12 years of expertise and 300,000+ successful migrations under our belt, we’ll ensure your switch to Shopify is smooth, effortless, and 100% stress-free.
For more information, check out our Shopify guides and join our Facebook Community.

