If you're already running a Shopify store and managing physical stock, keeping inventory levels accurate is a must, especially as your product catalog grows or sales channels expand. This guide is designed to help you manage Shopify import inventory using a CSV file effortlessly.
We'll walk you through the detailed guidelines on the following tasks:
- How to import your Shopify inventory;
- How to export inventory from Shopify to CSV file;
- How to troubleshoot the Shopify import & export errors.
⚠️ Important: The Shopify import inventory task is only for managing stock quantities across locations. If you're trying to add or edit products themselves (titles, descriptions, prices, etc.), please refer to importing Shopify products with CSV instead.
Let’s get started!
How to Perform Shopify Import Inventory with CSV Files?
Here's how to prepare your file and complete the Shopify import inventory process step-by-step:
Step 1: Download sample CSV file
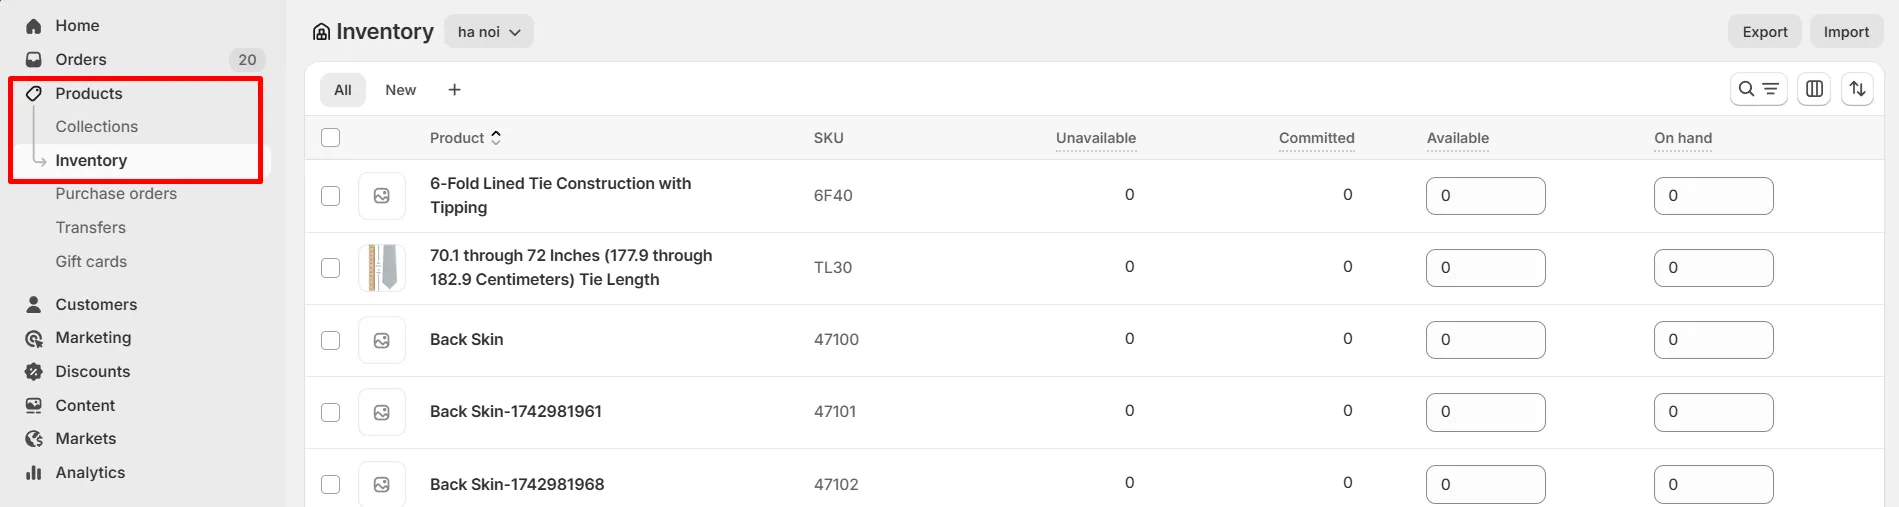
From your Shopify dashboard, go to Products > Inventory in the left-hand sidebar. This is where you can gain an overview of your Shopify inventory management system.
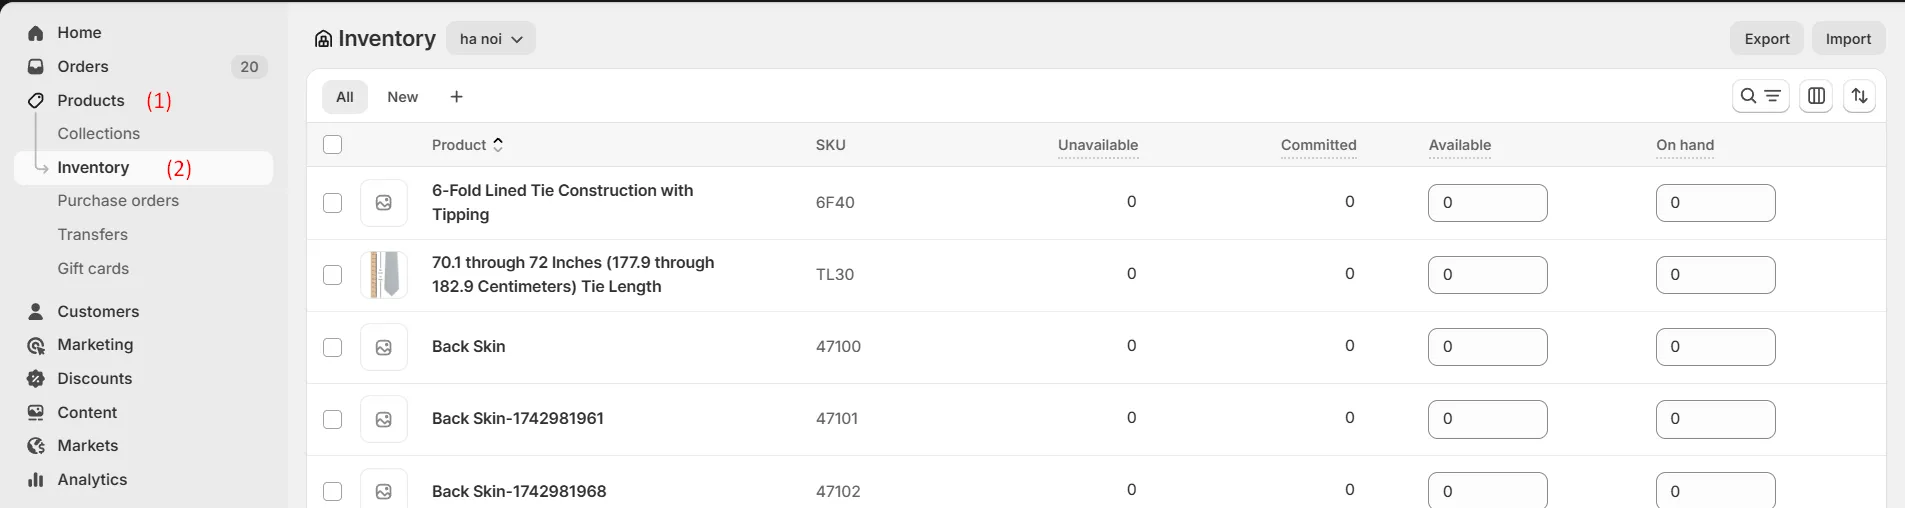
At the top of the screen, hover over the “Import” button. You'll see a pop-up with the option to download a sample CSV file provided by Shopify. Or you can download it here.
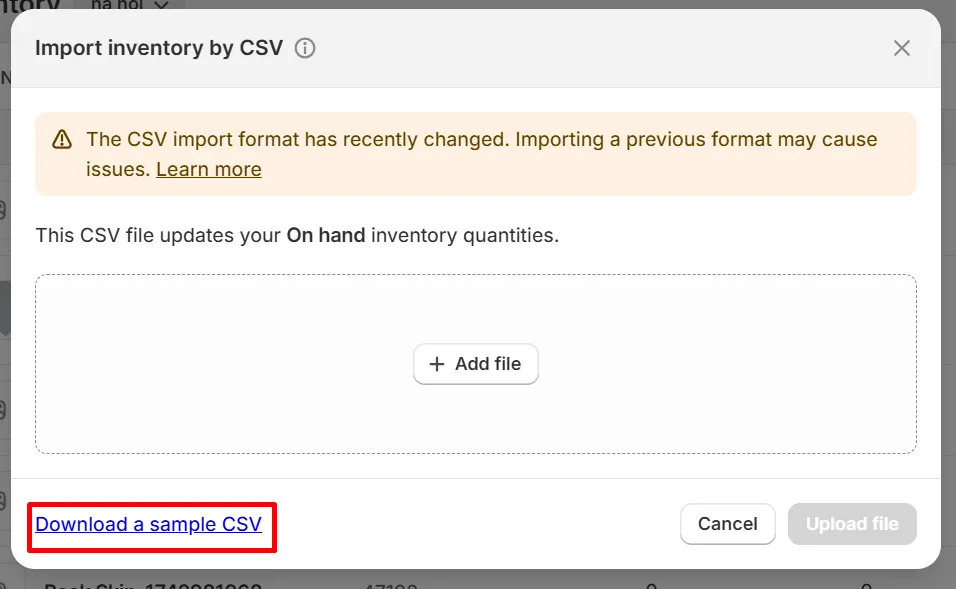
Shopify provides this sample file to help you follow the correct structure when preparing your inventory data. It ensures that the system reads your stock levels properly during the import process.
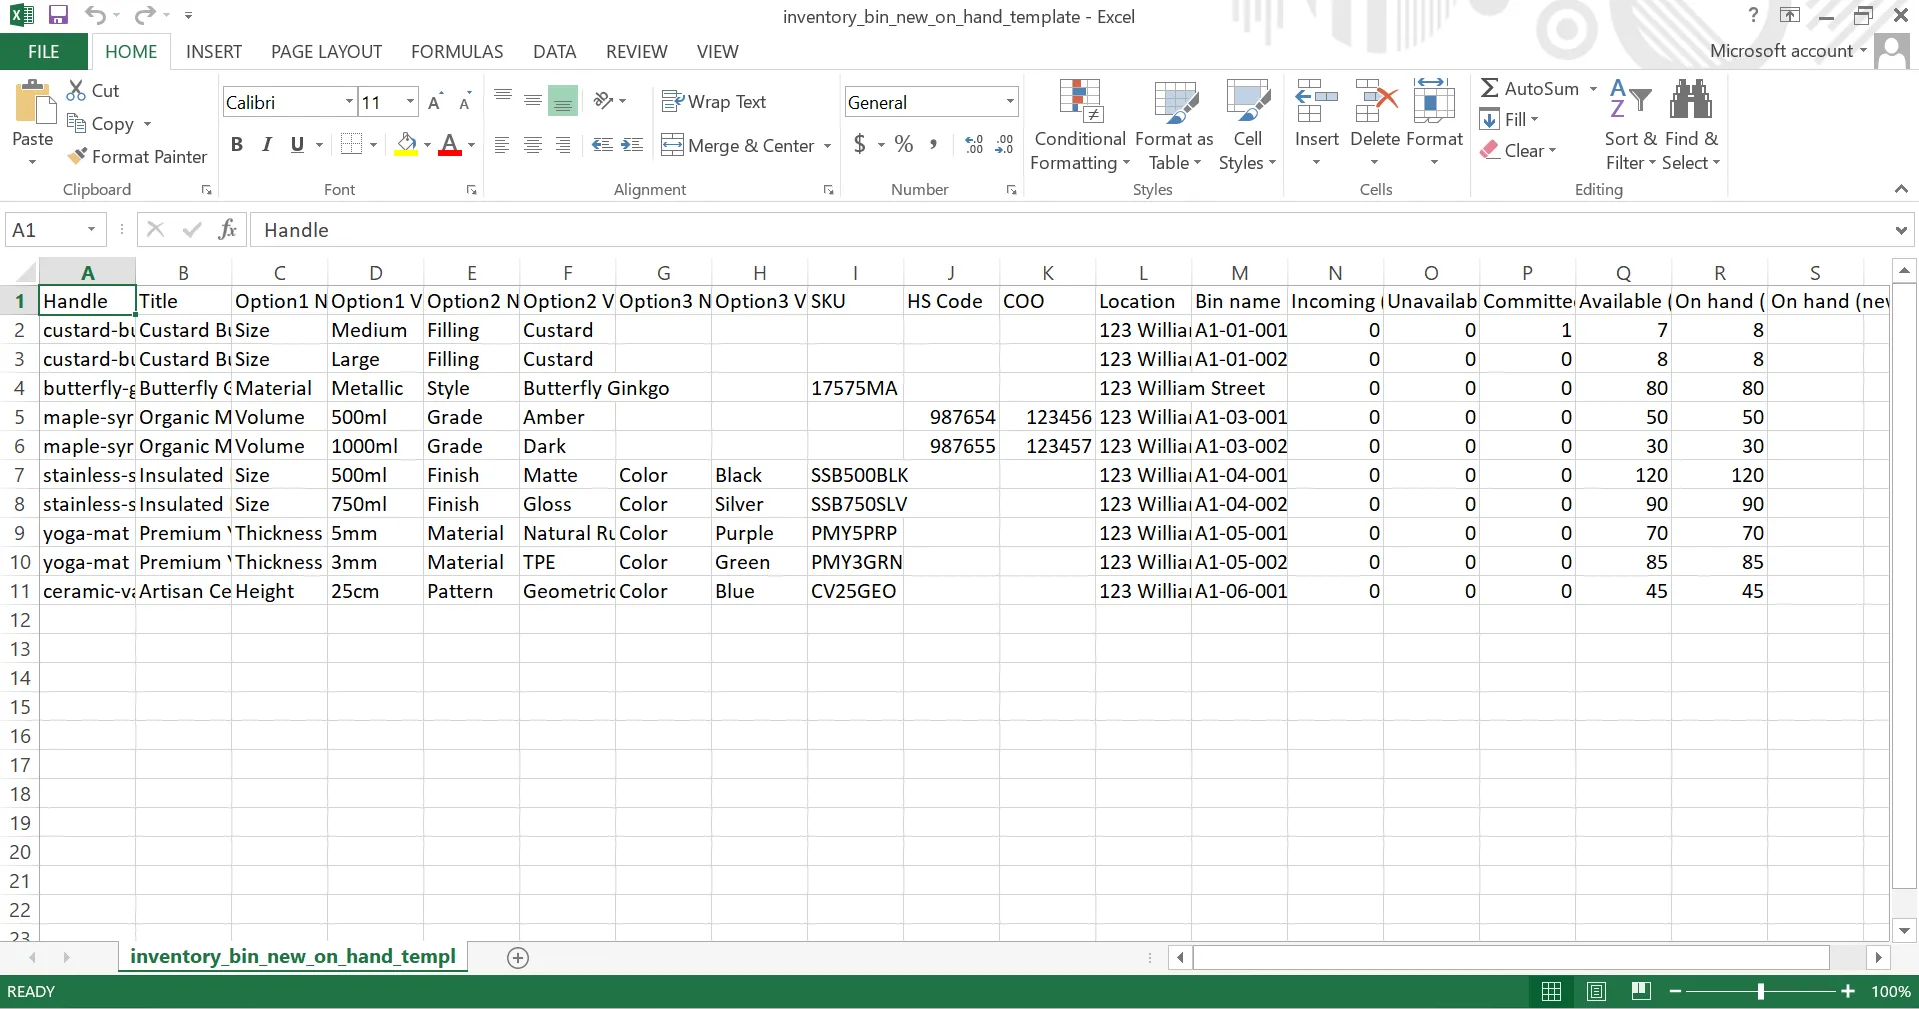
Step 2: Format your file properly
Once you’ve downloaded the sample file, it’s time to edit it to match your actual inventory data. Shopify uses specific column names in the inventory CSV Shopify file. Each one serves a different purpose, and getting them right helps your import run smoothly without errors.
To begin with, the following columns are required in your Shopify import inventory file:
- Handle: A unique identifier for each product
- Location: The name of the location where the inventory is stored
- SKU, or Option1 Name and Option1 Value: Used to identify specific product variants
If you want to add more information, here are the extra columns you can use:
Column | Description |
Handle | The unique name for each product. Handles can contain letters, dashes, and numbers, but no spaces. A handle is used in the URL for each product. |
Title | The product title. This column is optional and can be blank. |
Option 1 Name | The first option name, such as Color. If a product has no options, then enter Title. |
Option 1 Value | The first option value, such as Blue. If a product has no options, then enter Default Title. |
Option 2/3/4 Name | The second option name when a product has multiple options. |
Option 2/3/4 Value | The second option value when a product has multiple options. |
SKU | The product identifier for inventory tracking. This column is required when you use SKU instead of options to identify product variants. |
Location | The names of each of your locations. The location name is case sensitive and must match your Shopify location name exactly.
|
Bin name | The specific shelves, racks, or compartments of your inventory within your physical location. |
On hand (current) | The number of units that you had at a location when you exported the CSV file. This column provides a snapshot of your inventory levels at the time of export and ensures safety validation during import.
|
On hand (new) | The new inventory quantity that you want to set. Leave empty when you don't want to change quantities. |
Let’s say you sold 8 red T-shirts and now need to update your inventory count. In this case, your CSV file will have the following format:
SKU | Location | Bin name | On hand (current) | On hand (new) |
TSHIRT-RED-M | Warehouse-A | A-2-3 | 150 | 142 |
Note: When your Shopify inventory spreadsheet includes both On hand (current) and On hand (new) columns, like in the example above, Shopify adds a safety layer to protect your data. For more details, if the current stock in Shopify doesn’t match your file, the update is skipped to avoid overwriting recent changes. You’ll get an email with details if this happens.
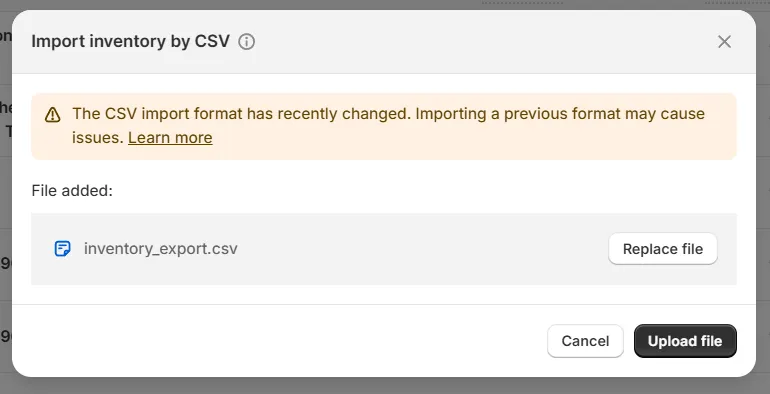
Step 3: Upload your file
Once your CSV file is ready and properly formatted, return to the Shopify import inventory pop-up, as described in step 1. This time, click “Upload file”, then select your updated CSV file from your computer.
Note: Make sure your Shopify import inventory CSV file is no larger than 15 MB when uploading.
After uploading, you’ll see a summary of your inventory updates. Take a moment to review the details and ensure everything appears correct. When you’re ready, click “Start import” to begin updating your inventory.
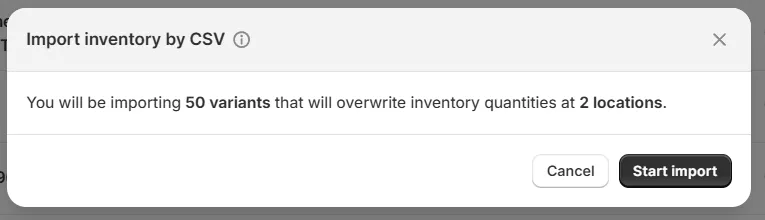
Wait for a few minutes, and your inventory will be successfully imported or updated on Shopify!
Seamlessly migrate your store to a more robust place!
LitExtension can safely transfer your data to unlock more growth on the new platform.

How to Export Shopify Inventory with CSV Files?
Besides Shopify import inventory, you can also export your current inventory data from Shopify. This is useful for creating a template for bulk updates or using the data in other systems.
Follow our steps below to learn how to Shopify export CSV file!
Step 1: Go to Inventory dashboard
From your Shopify admin, navigate to Products > Inventory tab.
Step 2: Specify your export needs
In the top right corner, click the “Export” button. A popup window will appear, allowing you to customize your export options before downloading the file.
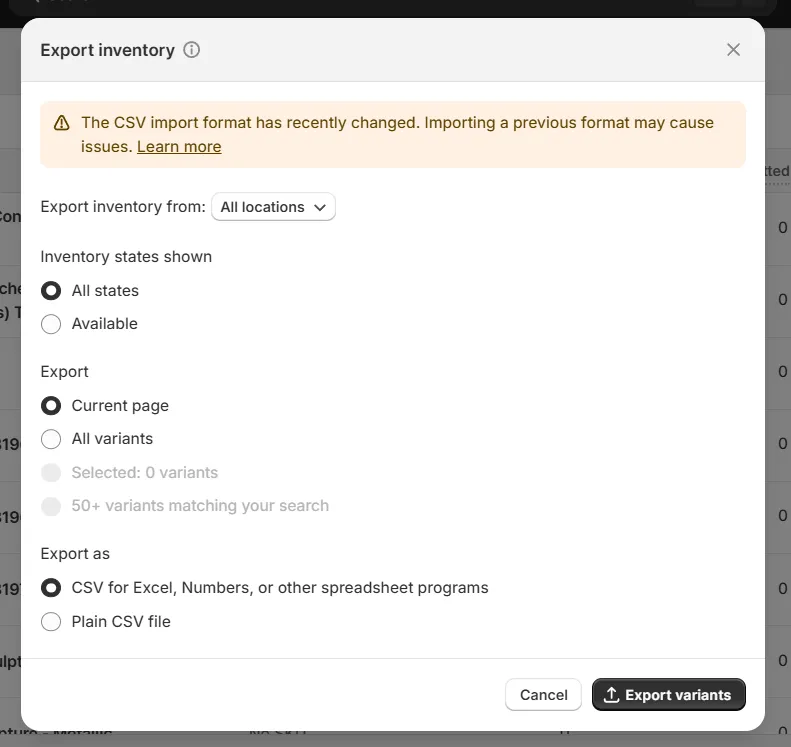
- Export from: Choose a specific location or select All locations.
- Inventory states shown:
- Choose All states (recommended) to include all inventory details with overwrite protection. If you plan to update inventory quantities and re-import the file, this option will be safer as it helps Shopify catch and prevent accidental overwrites caused by outdated files.
- Choose Available to export only current stock levels (no overwrite protection).
- Export: Select which product variants to include:
- Current page
- All variants
- Selected variants
- Variants matching your search
Step 3: Download your CSV file
Next, under Export as, choose the file format you prefer, typically CSV for Excel or other spreadsheet programs. Then, click “Export variants”.
Step 4: Update the inventory amounts (optional)
After exporting your inventory CSV file, you can use it to make bulk changes to inventory quantities or related data. The file includes key product identifiers (such as SKU and variant options) to ensure your updates apply to the correct products and locations.
When updating inventory, keep the following in mind:
- Use whole numbers only, no decimals like 1.5.
- You can enter positive, negative, or zero values.
- Use “Not stocked” for products that have never been stocked at that location.
- If you're not changing the quantity of a product, simply leave the “On hand (new)” column blank.
Now, here are the steps to update your Shopify inventory quantity in the CSV file:
- Open the exported CSV file in a spreadsheet tool like Excel or Google Sheets.
- Update inventory quantities based on your export format:
- If you chose All states, update the On hand (new) column.
- If you chose Available, update the available quantities listed under each location name.
- Save your updated CSV file when you're done.
Troubleshooting Shopify Import & Export Inventory
Even with a correctly formatted CSV file, you might run into errors during import or export of Shopify inventory. Below are common issues and how to fix them:
1. Rows failed validation after import
After Shopify import inventory, you might receive an email from Shopify saying that certain rows failed validation. This usually happens when the On hand (current) value in your file doesn’t match the actual stock level in Shopify at the time of import. It’s Shopify’s way of protecting you from accidentally overwriting recent inventory changes.
To fix this, go back to your Shopify admin and export the most recent inventory file. Then, update your CSV file using the latest stock data before re-importing it. This ensures that Shopify can safely apply your updates without rejecting any rows.
2. Inventory not updated or rows skipped
If you notice that some inventory rows weren’t updated after your import, or if certain rows were skipped entirely, it’s often due to missing or incorrect values. Shopify requires valid fields like SKU, product handle, and location name to match exactly with what’s already in your store.
Double-check your CSV file to make sure:
- Each row includes a valid SKU or product identifier
- The location name matches exactly with how it appears in your Shopify settings
- The product and variant exist in your store
Even a small typo in a location name or SKU can cause Shopify to skip the update silently.
3. File format not accepted
If your file won’t upload or triggers a “file format” error, it likely means the structure of your CSV doesn’t match Shopify’s requirements, or it’s simply too large. Shopify only accepts inventory files up to 15 MB, and the columns must follow the correct format.
To resolve this, download the most up-to-date inventory CSV template from Shopify and structure your file accordingly. If your file is too large, consider splitting it into smaller batches. Also, make sure your file is saved as CSV UTF-8 format.
4 “Not Stocked” isn’t working properly
If you're trying to mark a product as “Not stocked” at a certain location but it's not being applied, there are two things to check.
- First, make sure the location is active and enabled in your Shopify settings.
- Second, confirm that the phrase “Not stocked” is spelled exactly right in your file – no extra spaces, typos, or formatting issues.
This input needs to match Shopify’s system exactly for it to be processed correctly.
5. Inventory numbers updated incorrectly
One of the most common mistakes is entering inventory quantities in the wrong column, especially when using the All states export format. If you update the On hand (current) column instead of On hand (new), Shopify will ignore your changes because it assumes you’re just reporting the current quantity, not replacing it.
To avoid this, always enter your updated stock counts in the On hand (new) column. If you don’t want to change a product’s quantity, just leave that column blank for that row. This way, your non-quantity changes (like bin names or metadata) will still go through.
Shopify Import Inventory: FAQs
Can you import inventory into Shopify?
Yes, you can import inventory into Shopify using a CSV file to update stock levels in bulk across products and locations. Shopify provides a sample CSV template to help you format your file correctly before importing. Then navigate to the Products > Inventory > Import section to complete your import.
Can you scan inventory into Shopify?
Yes, but Shopify doesn’t have built-in barcode scanning for inventory management in the standard admin. To scan inventory, you’ll need to rely on third-party Shopify inventory apps. Some recommended names are Stocky, EasyScan, SKULabs, etc., which are all available on the official Shopify App Store.
How to transfer inventory on Shopify?
To transfer inventory between locations in Shopify:
- Go to Products > Transfers in your admin.
- Click Create transfer.
- Select the source and destination locations.
- Add the products and quantities you want to move.
- Mark the transfer as received once the stock arrives.
This helps you track movement between warehouses, retail stores, or fulfillment centers.
How to bulk import products into Shopify?
To bulk import products:
- Prepare a product CSV file following Shopify’s required format.
- Go to Products in your Shopify admin.
- Click Import, then upload your CSV.
- Review the data preview and click Import products.
This process lets you add or update multiple products at once, including titles, descriptions, prices, SKUs, and more.
Conclusion
This guide has walked you through everything you need to complete Shopify import inventory confidently. By understanding how the import and export process works and how to format your data correctly, you can save time, avoid manual errors, and keep your inventory accurate at every stage.
We have prepared more Shopify blog posts to help you get the best out of your online store. Or, you can join our community group to exchange ideas with other peers!

