Welcome to the OpenCart tutorial 2024! This guide is designed to equip you with the knowledge and skills to build and launch your own eCommerce website using OpenCart, known for its user-friendly interface, robust features, and extensive customization options.
In this tutorial, we'll guide you step-by-step through the entire process:
- Install OpenCart
- Set up your online store on OpenCart
- Explore some frequently asked questions surrounding OpenCart tutorials.
By the end of this tutorial, you'll have the knowledge and skills to launch your own successful eCommerce business. Let's get started!
OpenCart Tutorial: How to Install OpenCart
Step 1. Choosing a Hosting Provider
Your hosting provider is the foundation upon which your OpenCart store will be built. So, what should you look for in an OpenCart hosting provider?
Features | Why does it matter? |
cPanel | A user-friendly control panel for managing your hosting environment, databases, and email accounts. |
MySQL Support | OpenCart requires a MySQL database, so ensure your hosting provider offers this. |
Performance Metrics | Look for providers that offer performance monitoring tools and guarantees, such as uptime and server response time. |
OpenCart Compatibility | Some hosts specialize in OpenCart hosting and offer optimized environments for the platform. |
Here are a few reputable hosting providers I can recommend for you since they all provide good OpenCart support:
- A2 Hosting: Optimized OpenCart hosting plans with excellent performance and support.
- SiteGround: Known for its speed, security, and reliable customer support.
- InMotion Hosting: Provides various hosting options suitable for OpenCart, as well as helpful resources and tutorials.
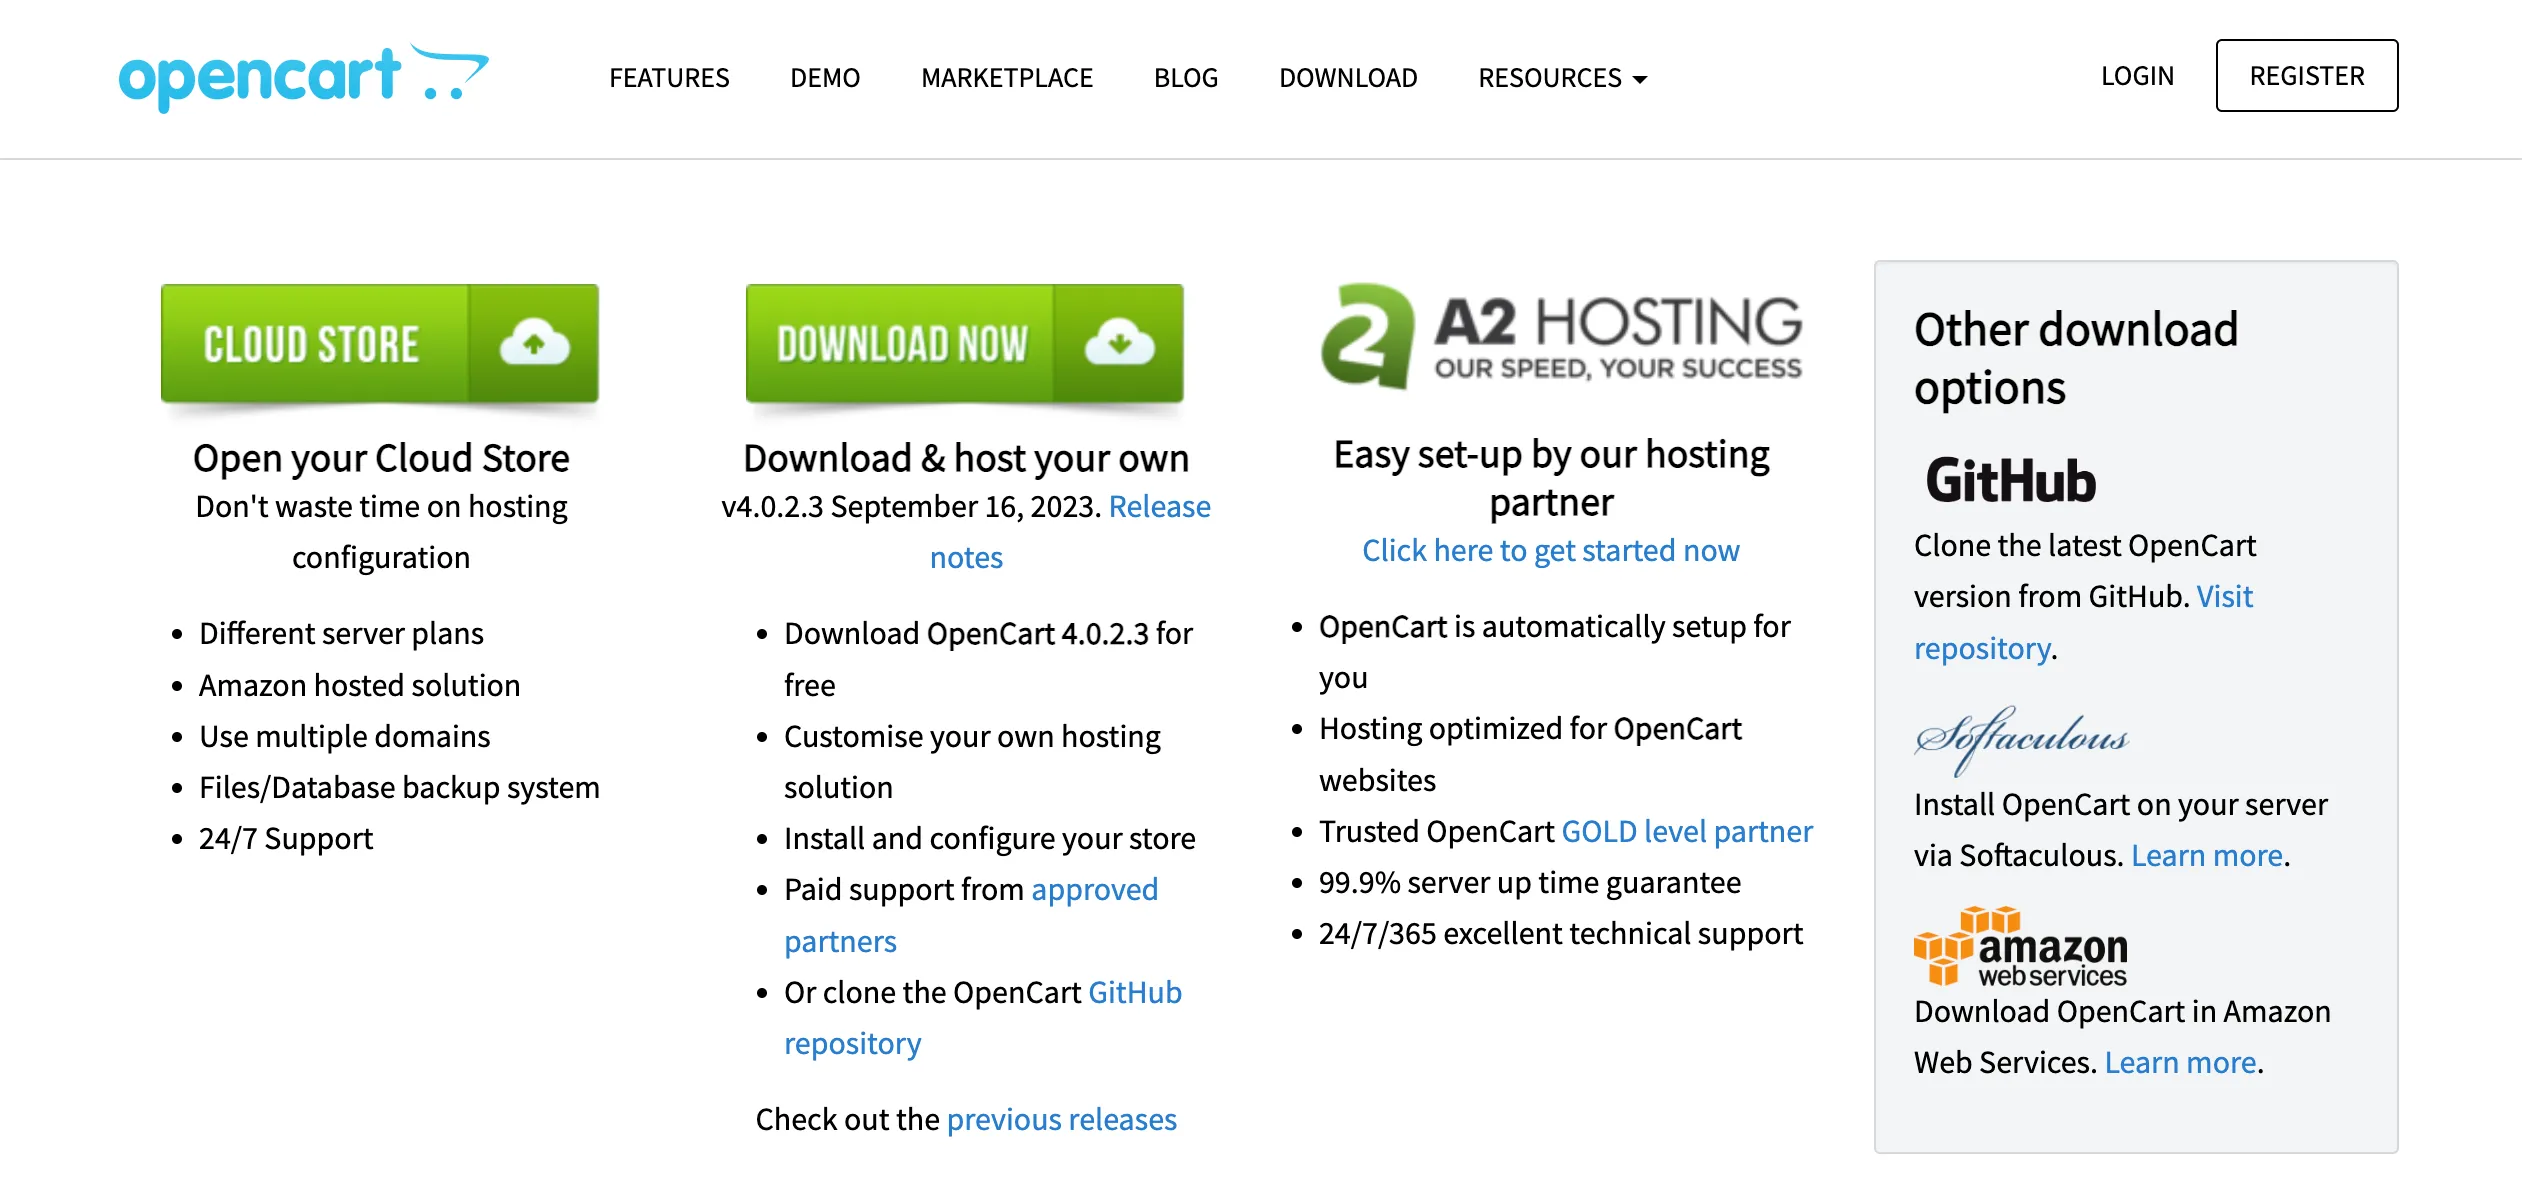
FYI: Many people choose A2 Hosting because the OpenCart hosting partner automatically sets up the OpenCart store.
Step 2. Downloading OpenCart
Once you've secured a reliable hosting provider, it's time to download and install OpenCart. Visit the official OpenCart website to download the latest stable release. The download file will commonly be in .zip format. Then, save the downloaded file to your computer.
Important note:
The version of OpenCart can significantly affect the installation process and overall experience. Older OpenCart versions like 3.0.3.7 may not support PHP 8, while newer versions (3.0.3.8 and above) work with PHP 8.0, 8.1, and 8.2. This affects installation, as users need to ensure their server's PHP version aligns with the chosen OpenCart version.
But don’t worry; while the version of PHP is a significant factor, the overall installation process for OpenCart remains largely consistent with the core steps involved in our OpenCart tutorial.
Step 3: Extracting Files and Uploading to the Server using FTP
Now, let's extract the downloaded OpenCart zip file to extract the contents of the downloaded archive. Then, you can use an FTP client, and here, I use FileZilla to connect to the web server.
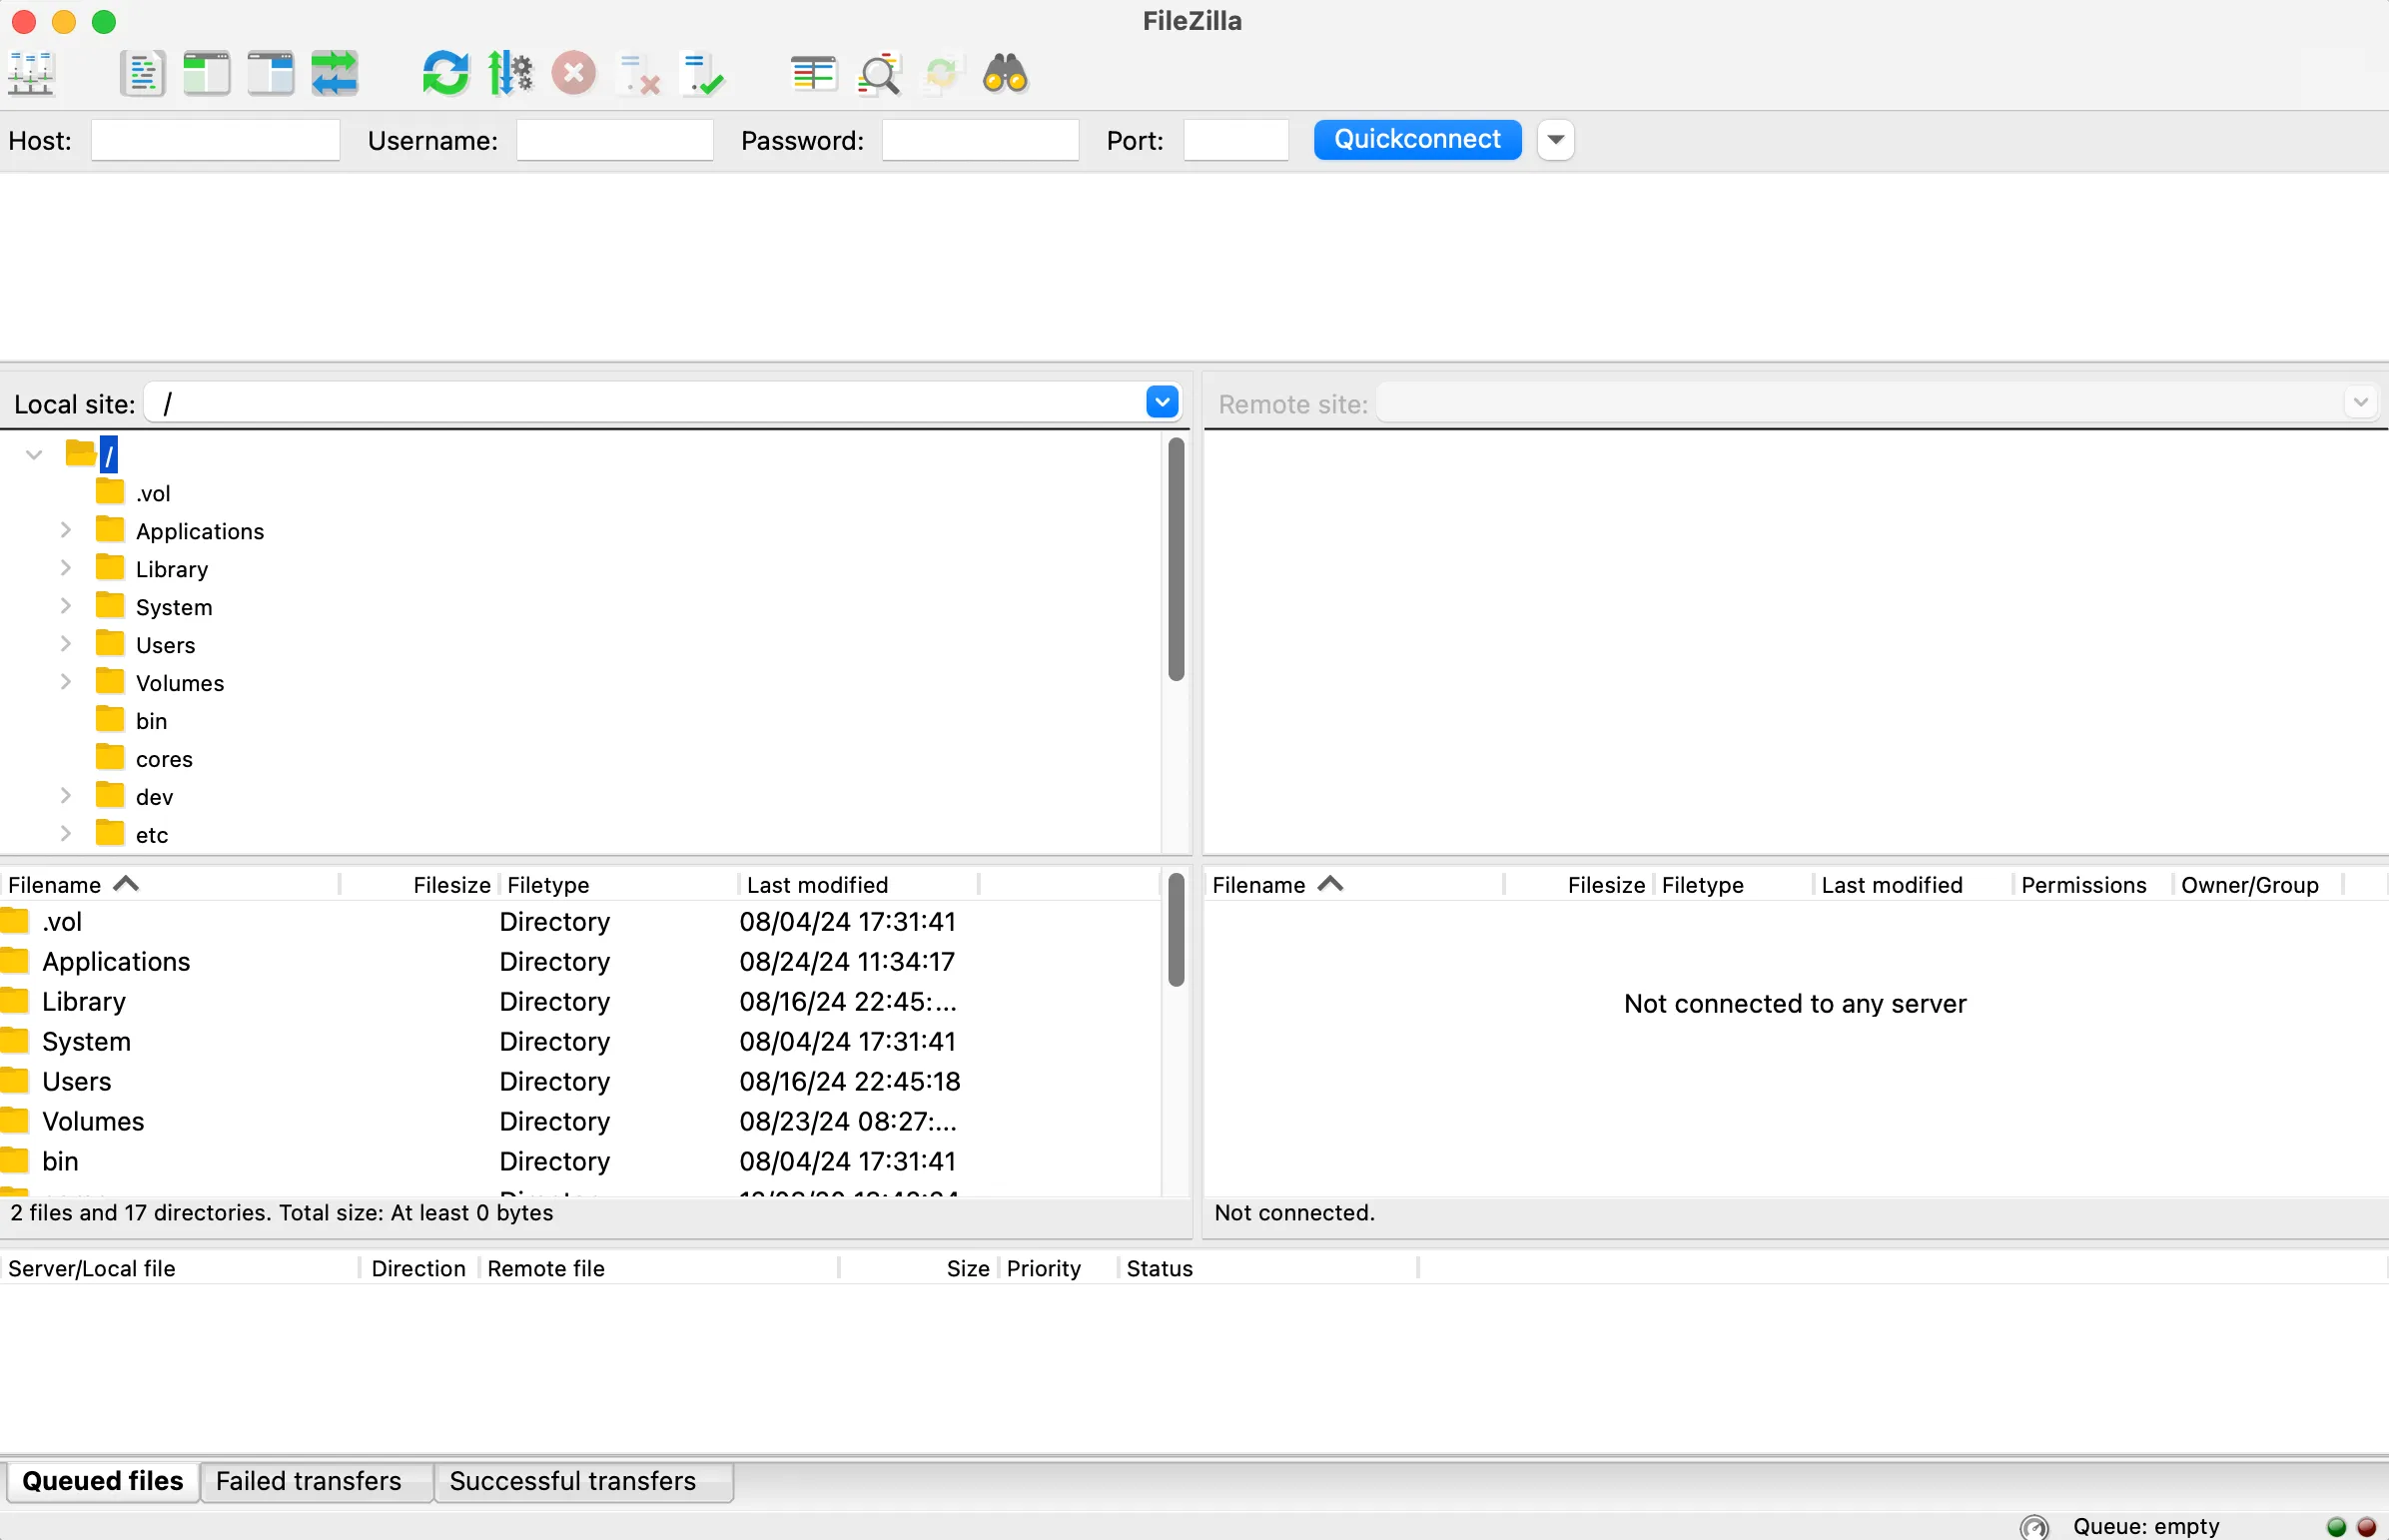
Then, navigate to the public_html or www directory (or as instructed by your host) and upload all the contents of the extracted OpenCart folder.
Important note:
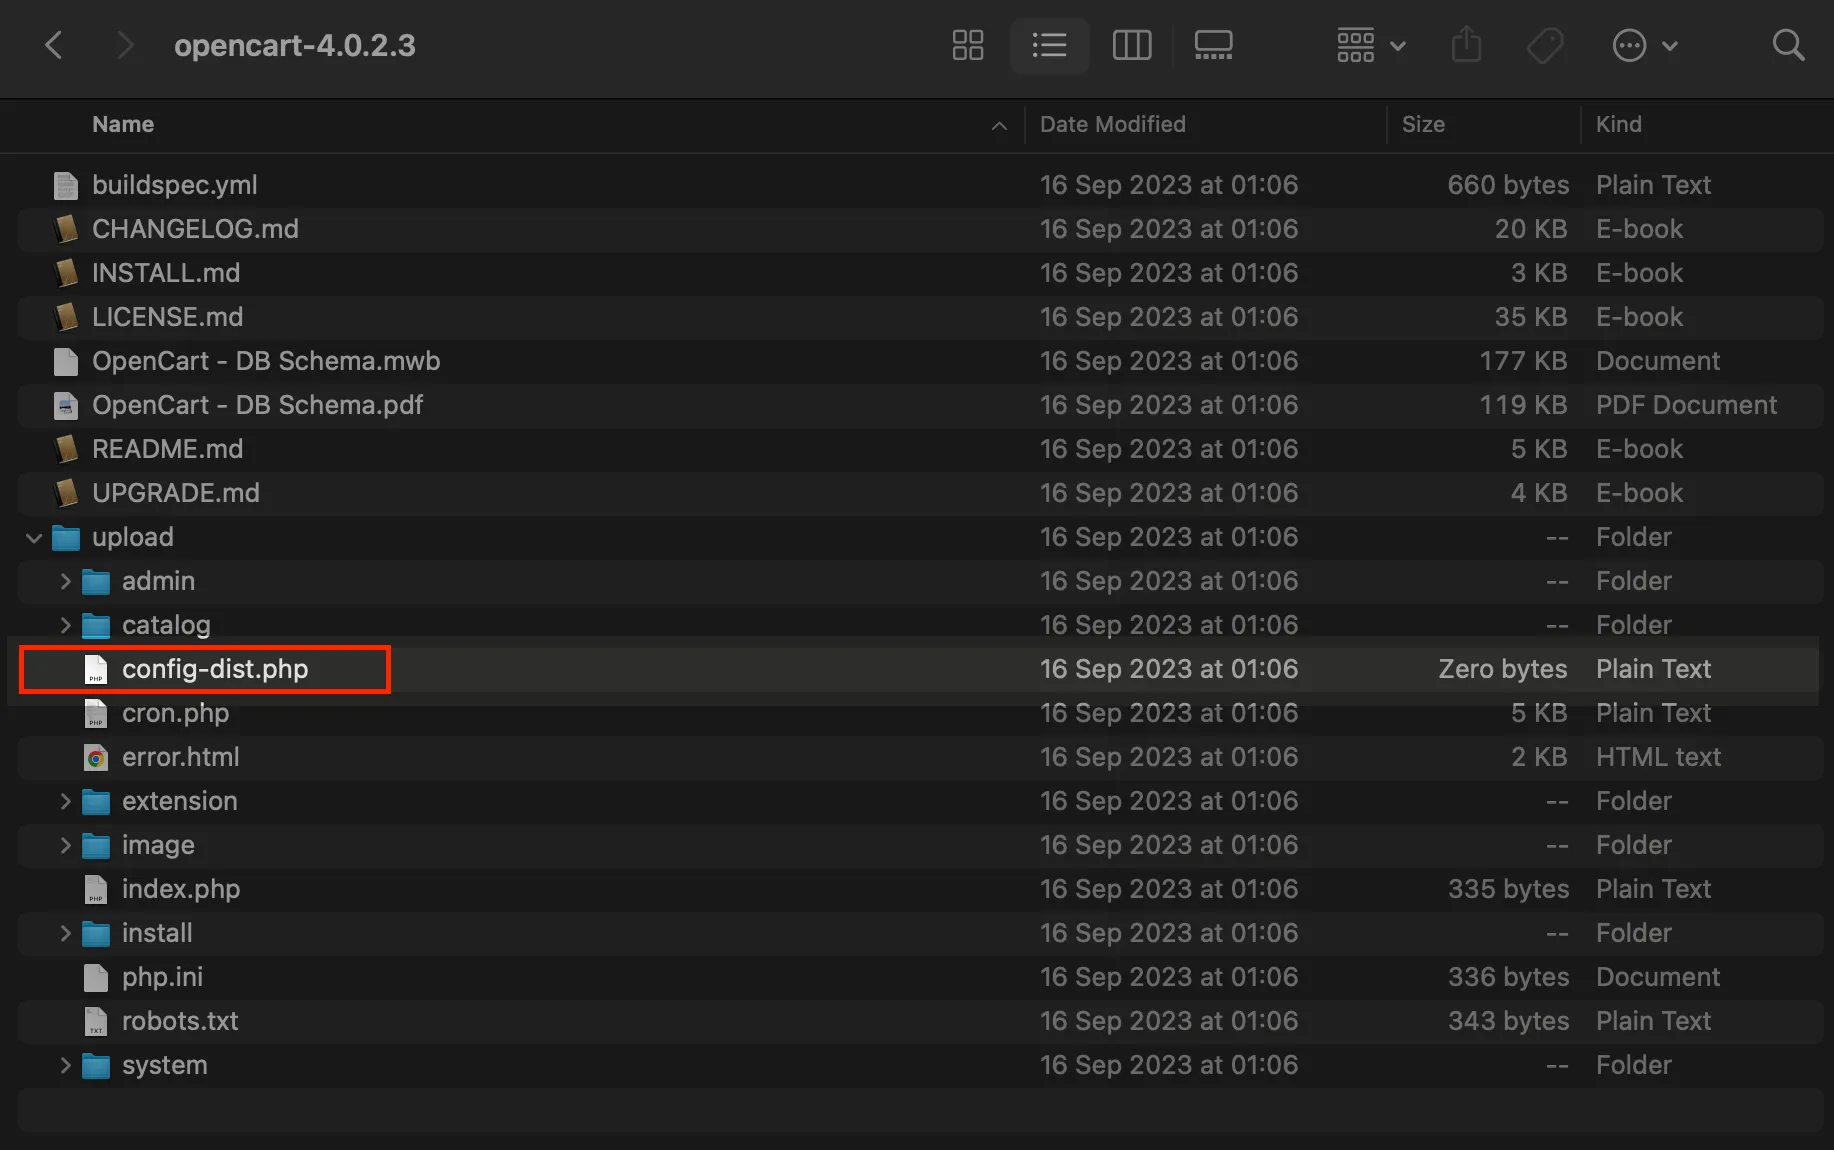
Before proceeding, locate the ‘config-dist.php’ file in both the root directory and the admin directory and rename them to ‘config.php’. This crucial step allows OpenCart to access your custom configuration settings and securely store sensitive information like database credentials.
Step 4: Creating a MySQL Database and User via cPanel
To set up a MySQL database and user using cPanel, access your cPanel dashboard and navigate to the MySQL Databases section.

Then, you will now create a new database with a unique name and a new user with a strong password, ensuring that the new user is granted all privileges to the database.
Step 5: Running the Installation Script
With the database ready, you can run the OpenCart installation script. Open your web browser and type your domain name, which will redirect you to the installation wizard. If not, try accessing yourdomain.com/install. The wizard will guide you through pre-installation checks, database configuration (using the details you created earlier), and setting up your admin login credentials.
Step 6: Completing the Installation
After completing the installation, remember to delete the install directory from your server for security purposes. You can now access your OpenCart admin panel by going to yourdomain.com/admin and logging in with your admin credentials.
How to Set Up an eCommerce Store on OpenCart
Step 1. Navigating the Admin Panel
To access the admin panel, add ‘/admin’ to the end of your domain name in your web browser. For example, if your domain is www.yourdomain.com, you would access the admin panel at ‘www.yourdomain.com/admin’. You'll be prompted to enter the admin username and password you created during installation.
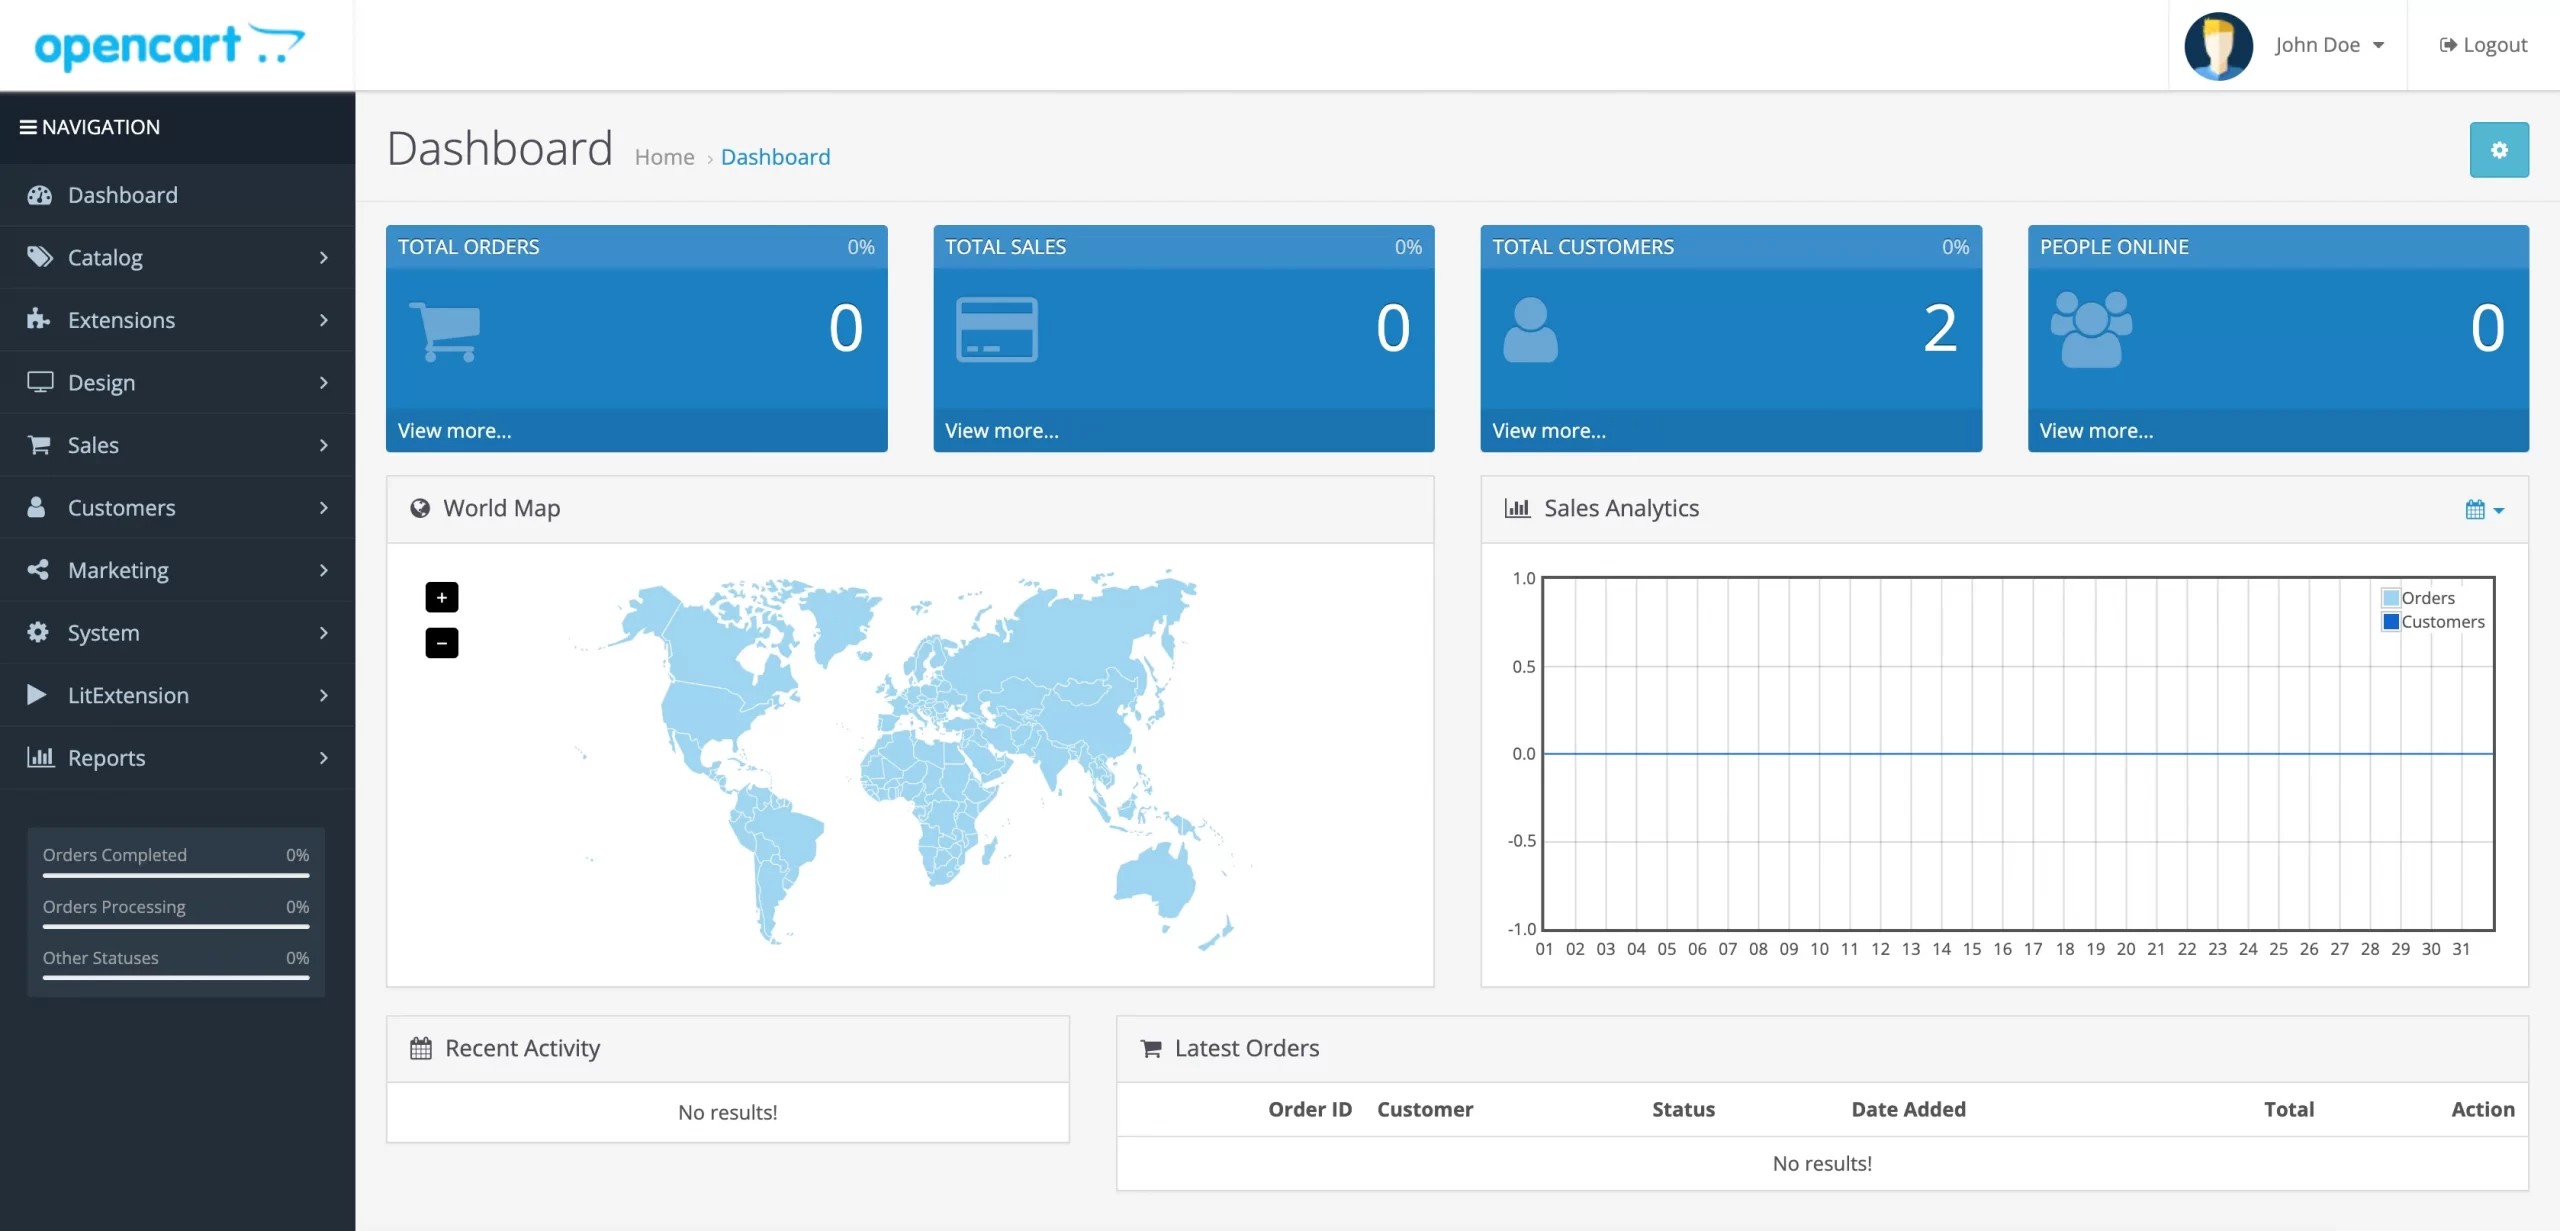
The dashboard overviews key metrics, including sales analytics, customer activity, and recent orders. If you're starting out, let's familiarize yourself with the main sections:
- Catalog: Manage products, categories, and manufacturers.
- Sales: View and manage orders.
- Customers: Access customer accounts and groups.
- Extensions: Install and manage modules to enhance store functionality.
Step 2. Managing Products
To add a new product, navigate to the Catalog > Products section in the admin panel. Then, click the Add New (or +) button to access the product creation form.
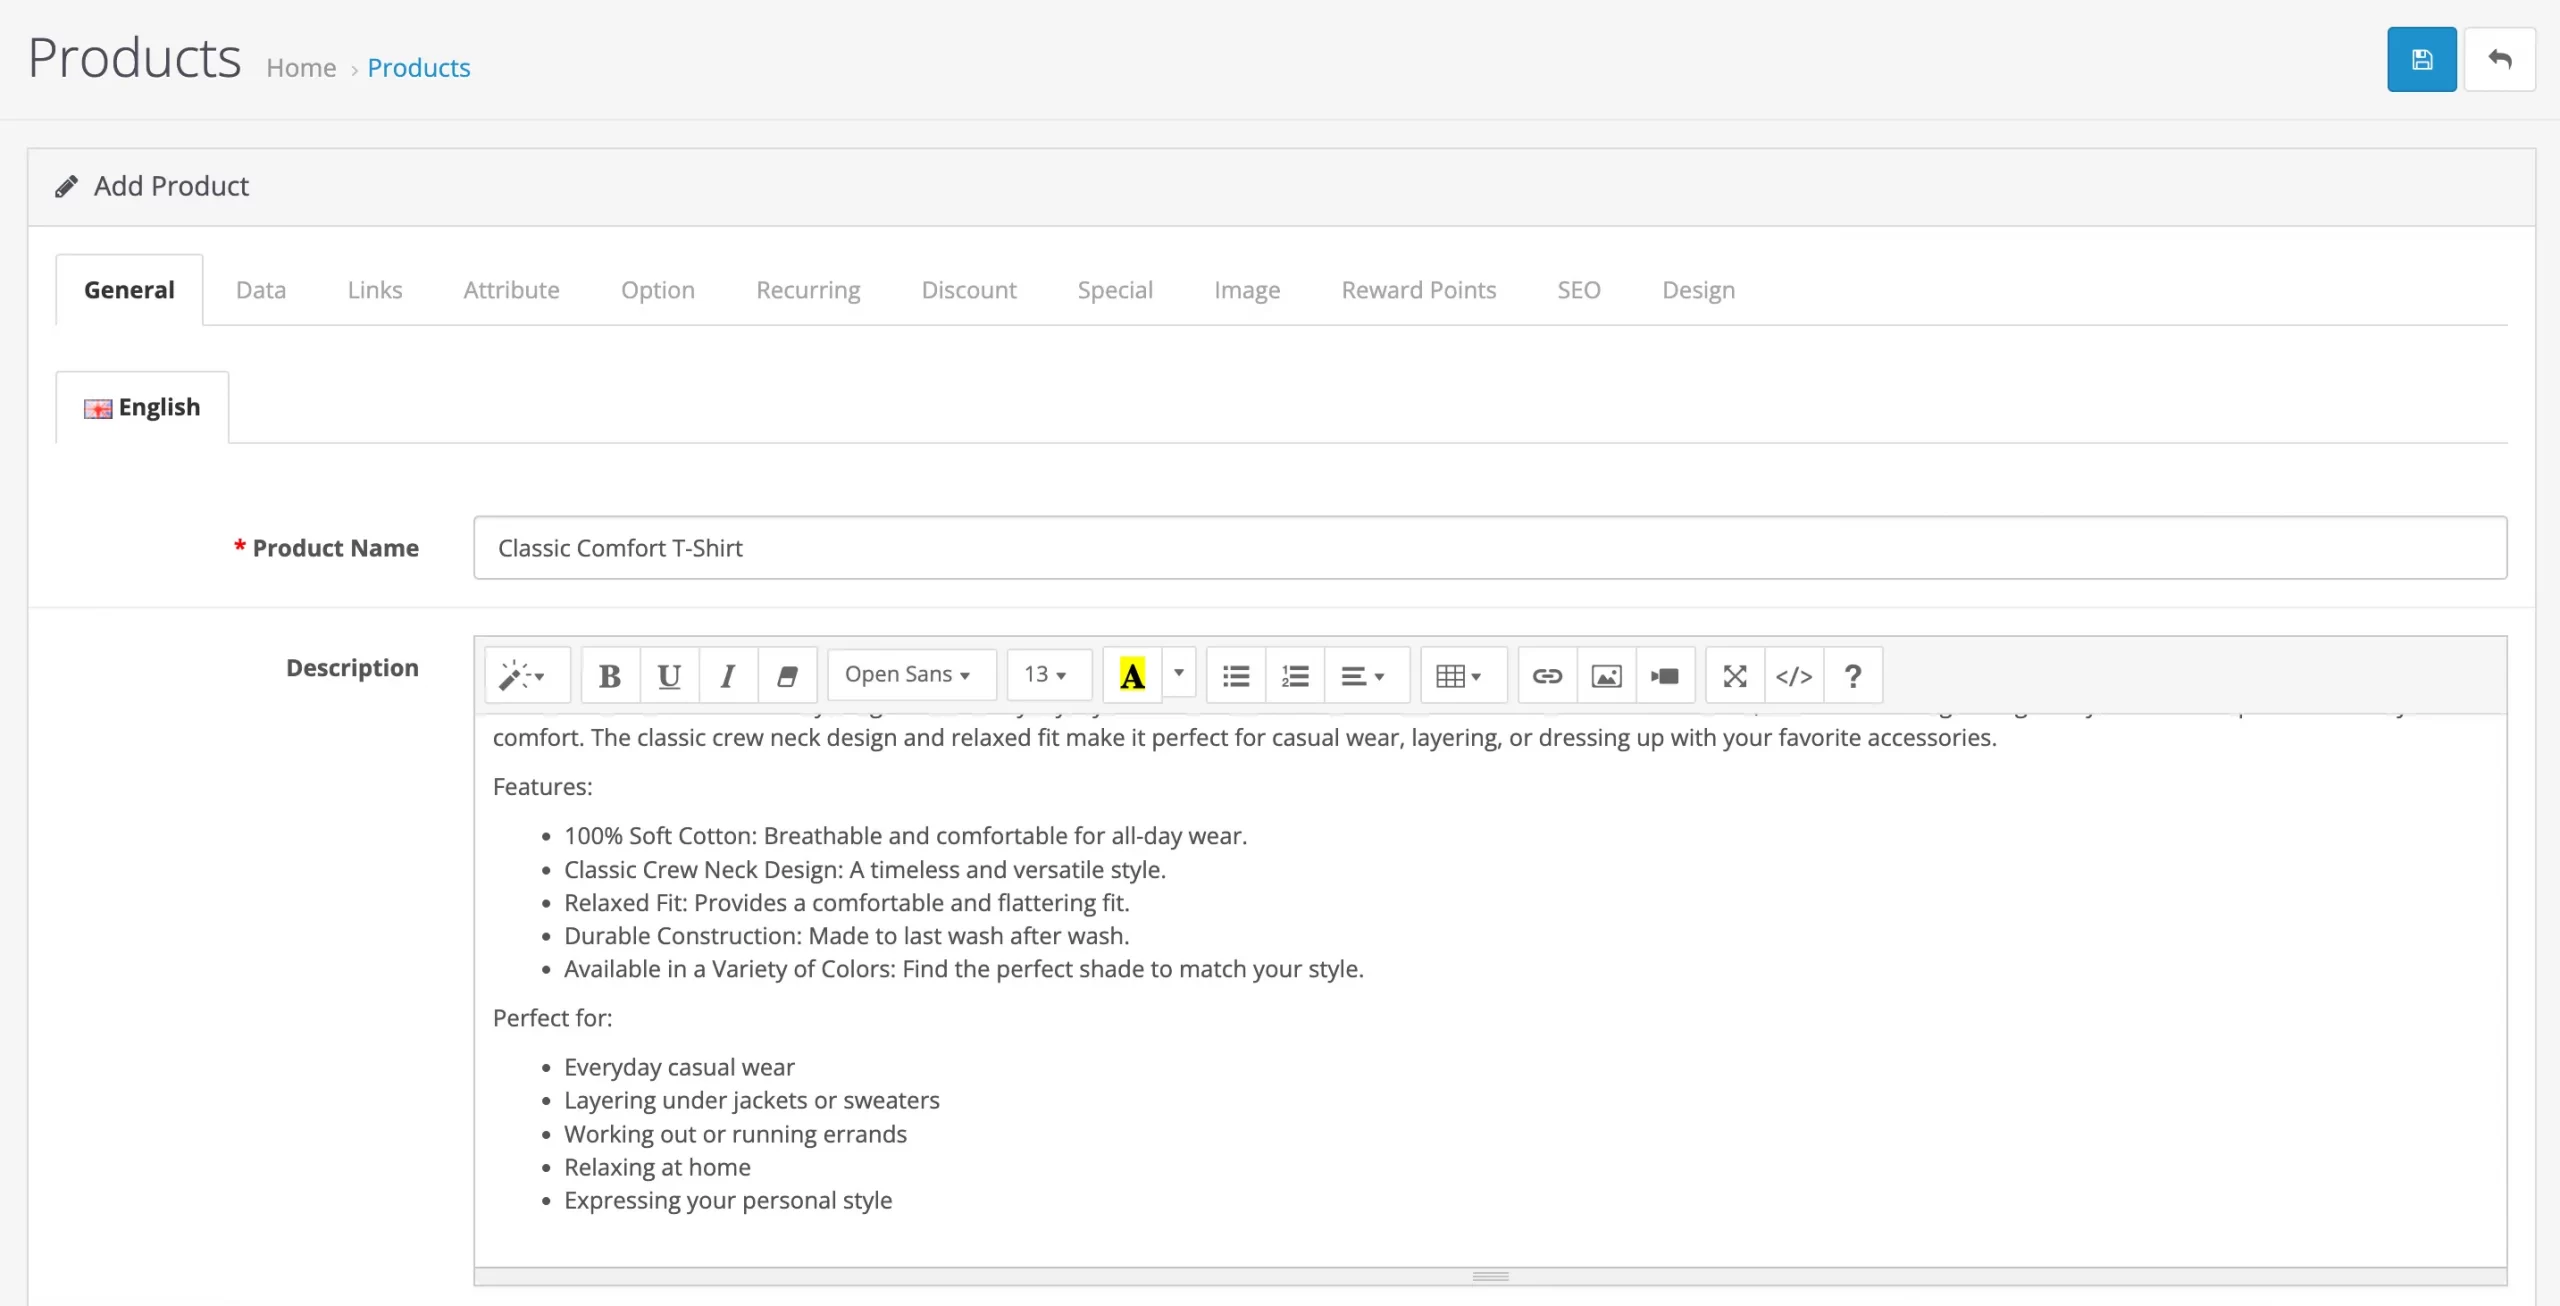
Here, you'll be able to enter essential details such as:
Attribute | Description |
Product Name | A clear and descriptive name for your product. |
Description | A detailed and engaging description highlighting the product's features and benefits. |
Meta Tag Title | Important for SEO, this title helps search engines understand what your product is about. |
Meta Tag Description | A brief summary for search engines that describes the product, enhancing its visibility. |
Data | Information like model, SKU, UPC, and location, which provides essential details about the product. |
Images | Upload high-quality images of your product from various angles to showcase it effectively. |
Price | Set the price for your product, including any special prices or discounts. |
When adding a new product, include its name, description, price, and multiple images. Furthermore, I recommend you assign the product to relevant categories, which you can create and organize using Catalog > Categories.
In addition to these details, you can utilize attributes (found under Catalog > Attributes) to define specific characteristics like size, color, or material, enabling customers to filter products effectively. Finally, you can consider offering options and variants to allow for customization and a more comprehensive selection for your customers.
Step 3. Customizing Your Store
OpenCart has many cool themes that you can use to change the look of your store. You can find both free and premium themes in the OpenCart Marketplace.
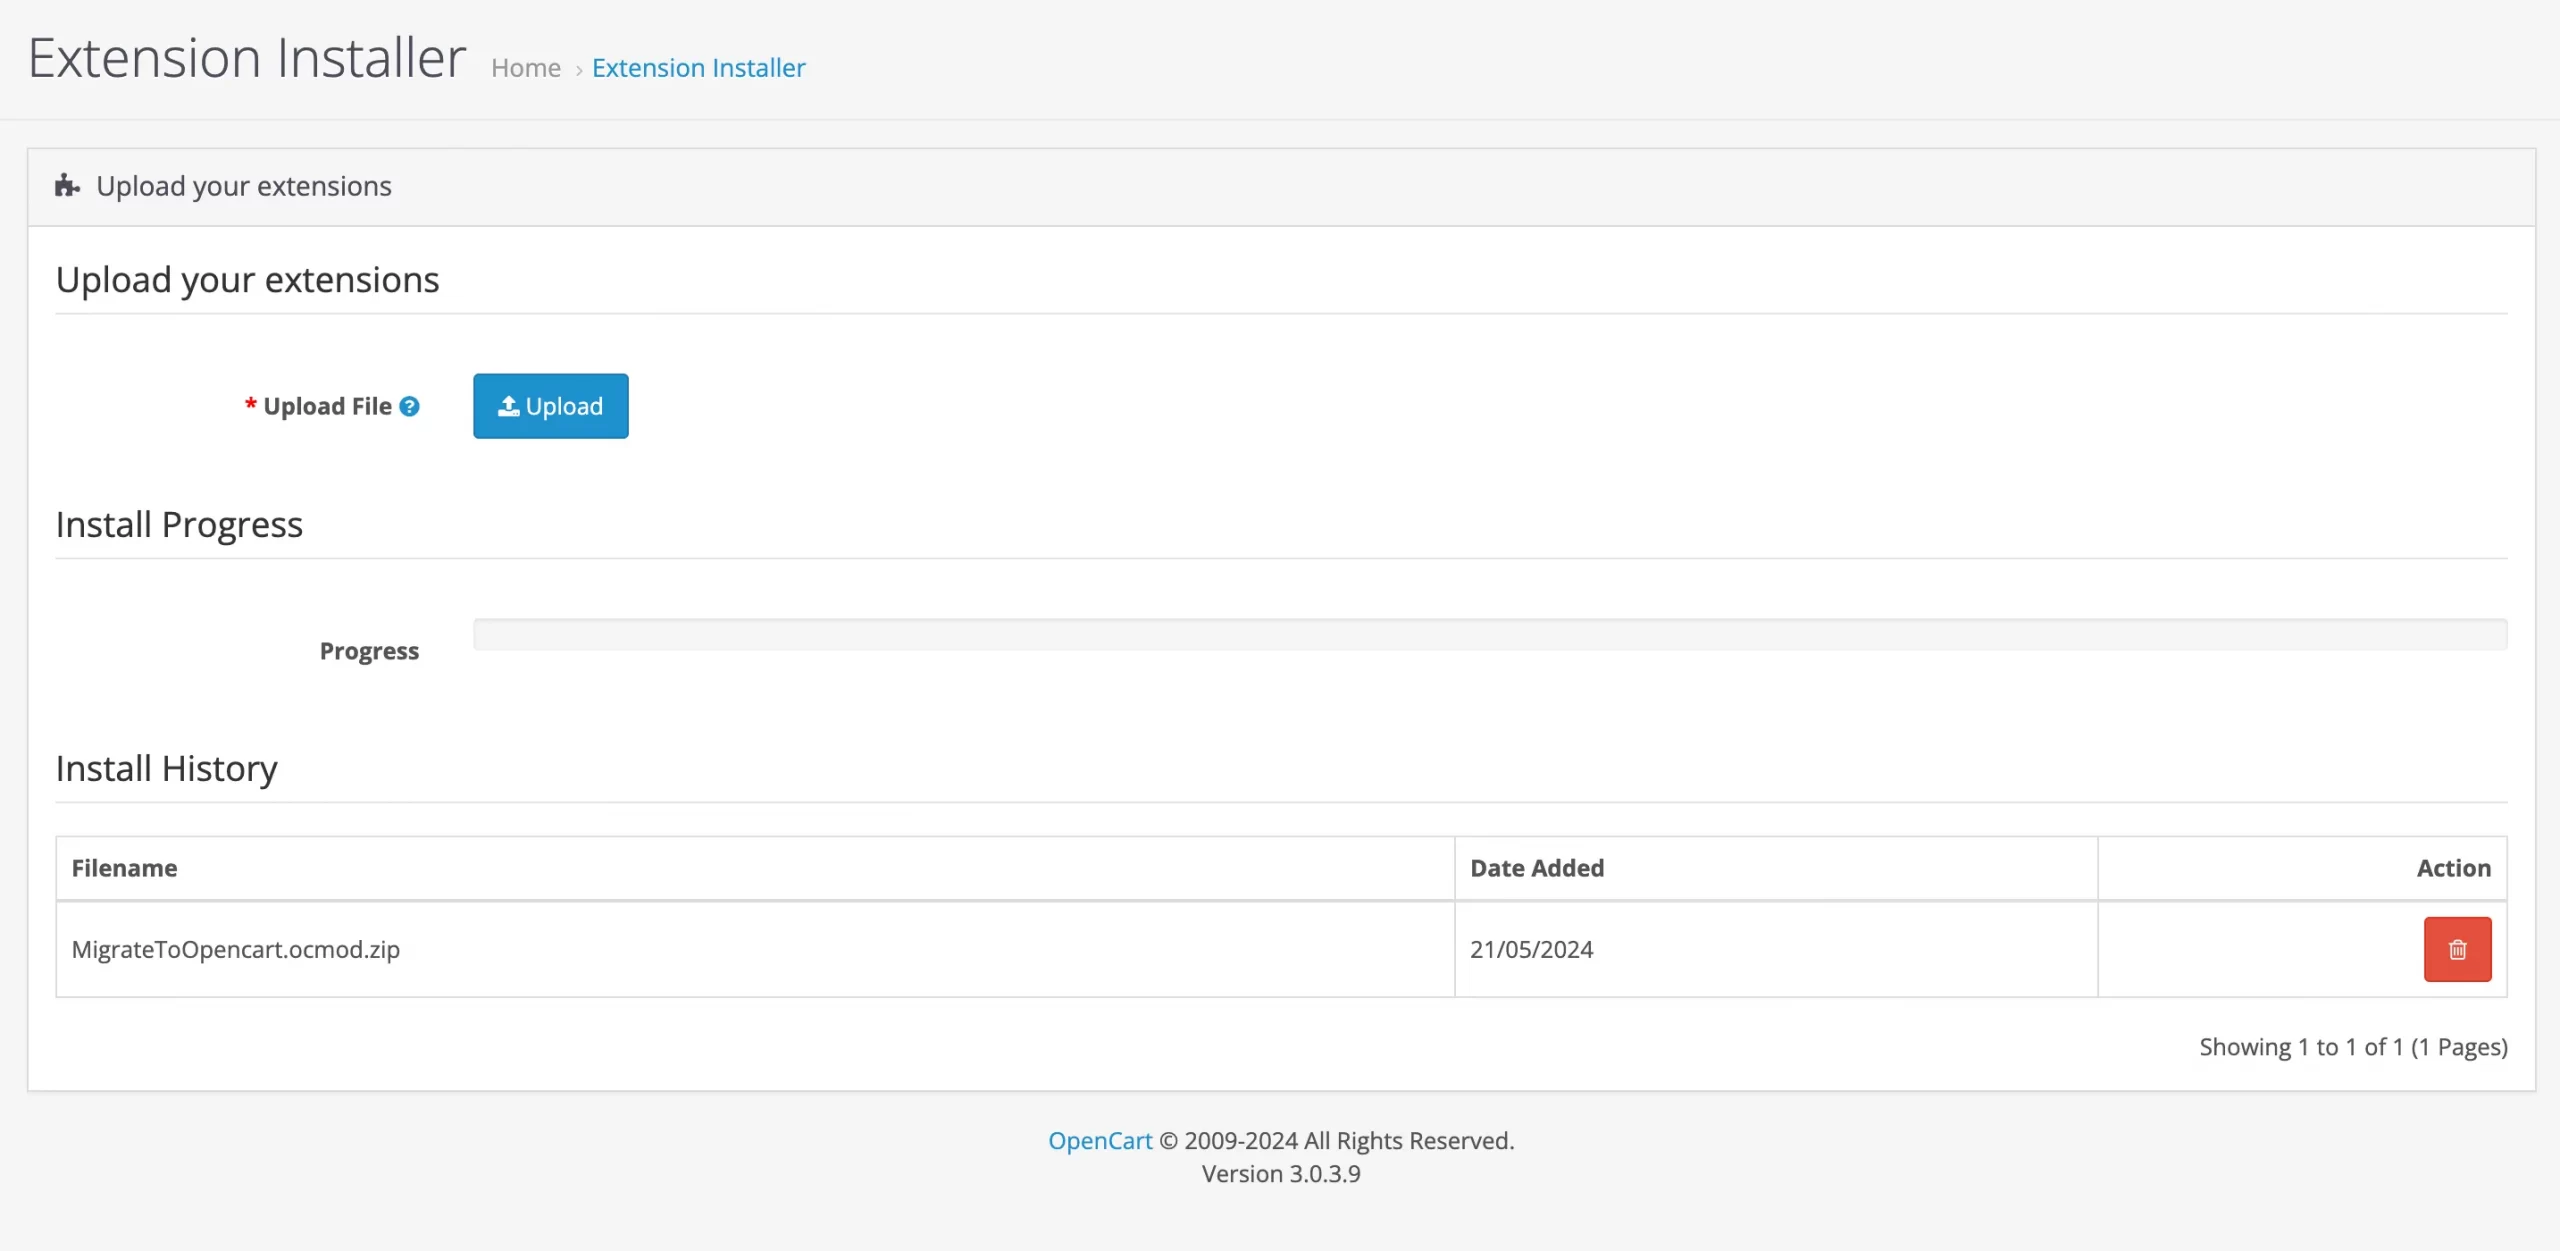
When you've picked a theme, just go to the Extensions > Installer section in the admin panel to install it. After that, activate the theme by going to Extensions > Extensions and selecting “Themes” from the dropdown menu.
With OpenCart's built-in editor, you can spice up your store's pages by adding text, images, videos, and other elements to create awesome content.
If you want to get really creative, you can add your own custom CSS and JavaScript code to your theme for some serious customization. You can do this through the Design > Theme Editor or by directly editing the theme files via FTP.
Step 4. Managing Orders and Customers
To manage orders, visit Sales > Orders in your admin panel. You can view a list of all orders, click on an order to see details, update order status, generate shipping labels, track shipments, and manage returns and refunds.

To manage customers, go to Customers > Customers. Click on a customer's name to access their account details, including contact information, order history, and any associated customer groups. You can also update customer details, track purchase history, and create customer groups for targeted promotions and discounts.
Step 5. Optimizing for Search Engines
If SEO is not your focus, you can skip this step. However, I always recommend optimizing for SEO since it's not just about achieving a high rank on the search result pages; it's also about enhancing the user experience on your site.
You can start by optimizing your product pages by navigate to Catalog > Products. Under the SEO tab, you can customize the keyword for that product url.

My tips for you: When adding or editing products, you can customize the URL alias to make it more descriptive. For example, instead of using a default URL like http://yourdomain.com/index.php?route=product/product&product_id=123, you can create a URL like http://yourdomain.com/your-product-name.
For advanced tracking of your store using Google Analytics. With Google Analytics, you can keep an eye on important metrics like page views, bounce rates, and conversion rates to better understand how visitors engage with your site and find ways to improve it!
Step 6. Maintenance and Security
I know the importance of regularly backing up your store data to prevent any potential data loss. You have the option to perform backups manually or use automated backup services. It's always a good idea to back up your store before making any updates.
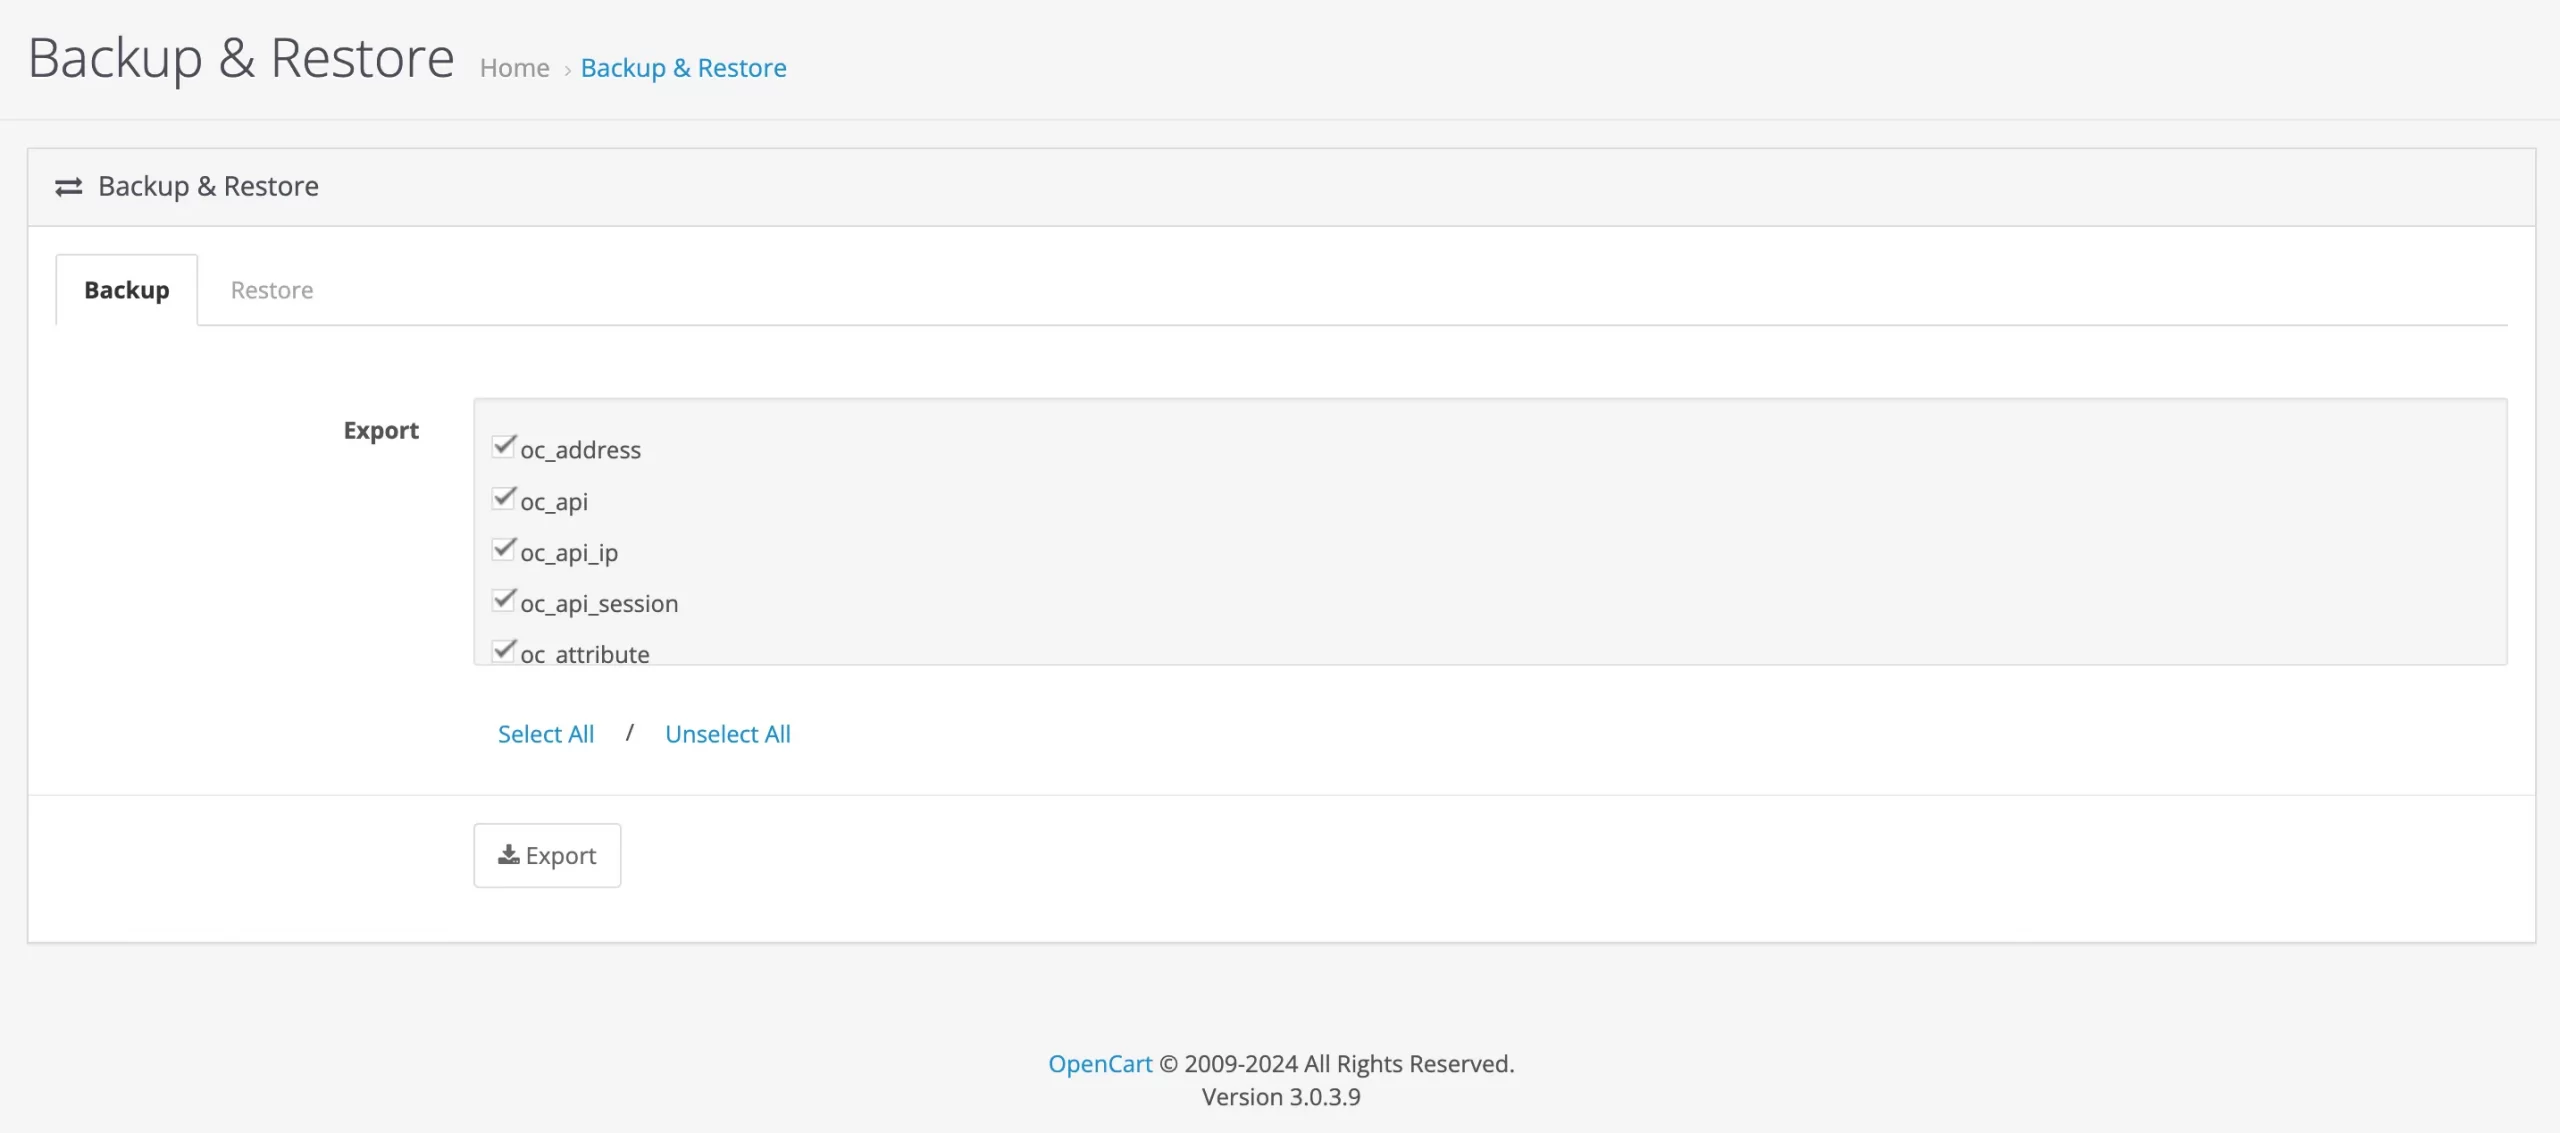
For added security, it's essential to use strong passwords, install security extensions, and regularly conduct security audits. Limiting access to the admin panel, ensuring correct file permissions, and using security extensions to monitor user activity are also important.
Remember, building a successful online store is an ongoing journey, so keep discovering OpenCart's features and staying informed about the latest eCommerce trends and best practices.
OpenCart Tutorial: FAQs
OpenCart is user-friendly, with an intuitive interface and comprehensive documentation for setup and management. While some technical knowledge is helpful for customization and advanced features, many users find it easy to learn and use.
You can install OpenCart with these 6 essential steps below:
- Step 1. Choosing a hosting provider
- Step 2. Downloading OpenCart
- Step 3: Extracting files and pploading to the Server using FTP
- Step 4: Creating a MySQL Database and User via cPanel
- Step 5: Running the installation script
- Step 6: Completing the installation.
Yes, OpenCart is open-source software, meaning it's free to download, use, and modify. However, if you require them, there may be costs associated with extensions, themes, or professional support services.
Of course! OpenCart is still a popular and relevant eCommerce platform, with over 200,000 websites currently using it.
Here are some friendly tips to help boost the performance of your OpenCart store:
- Compress images without compromising quality to speed up page loading.
- Use caching to store frequently accessed data and ease the strain on your server.
- Look for a hosting provider that offers optimized performance for OpenCart.
- Cut down on the number of elements on your pages to make them load faster.
- Spread your content across multiple servers to improve loading speeds for users in different locations.
Conclusion
Congratulations on starting your journey toward building your own successful eCommerce business with OpenCart! From choosing the right hosting provider to setting up your store for search engines, you've gained valuable knowledge to kickstart and manage your online store effectively.
Building a store from scratch using the OpenCart open-source platform can be quite a challenge, but with this OpenCart tutorial, we're here to guide you every step of the way.
If you're considering migrating to OpenCart, please feel free to contact our support team. LitExtension is here for you 24/7 via our Ticket System, email, and live chat. You can also join our friendly Facebook community and check out our OpenCart section for more eCommerce insights.

