Although WordPress is undoubtedly a favorite for millions of website owners, Squarespace has been making waves lately with its intuitive, feature-rich design. It’s no surprise, then, that more and more are considering making the switch from WordPress to Squarespace!
But the question is: How does moving from WordPress to Squarespace work? To guide you through the process, our team will discuss:
- Step 1. Prepare your WordPress site
- Step 2. Create your Squarespace account
- Step 3. Export your content from WordPress
- Step 4. Import content to Squarespace
- Step 5. Design your Squarespace site
- Step 6. Optimize for SEO
- Step 7. Test and launch your site
Ready? Let's jump in!
Why Should You Transfer Domain from WordPress to Squarespace?
Note: Before we start, please keep in mind that this article focuses solely on WordPress.org (open-source), not WordPress.com (the hosted version).
Although both WordPress and Squarespace have strong followings, more and more eCommerce merchants are starting to make the move to Squarespace — and for good reason:
- Squarespace is widely recognized for its user-friendly, all-in-one platform that's a breeze to manage. WordPress.org, on the other hand, requires you to jump through technical hoops right from the installation. Not to mention, keeping your business running smoothly often calls for third-party plugins.
- The built-in eCommerce setup is another of Squarespace's charms. It offers two native eCommerce plans: Commerce Basic at $28 per month (billed annually) and Commerce Advanced at $52 per month. On the contrary, WordPress site owners must install yet another plugin (WooCommerce) to transform their website into an online store.
- And last but not least, customer support is another area where Squarespace shines! It offers 24/7 support via email and live chat during the week (from 4 a.m. to 8 p.m. in English and 10 a.m. to 4 p.m. in German and French). Meanwhile, WordPress.org users have to rely on community support and forums — and let's be honest, they can sometimes be hit or miss.
For a closer look at the core differences between the two platforms, check out our comparison between Squarespace vs WordPress here.
What You Need to Consider When Migrating?
We know you're excited to make the leap from WordPress to Squarespace. But before getting started, there are a few things you should keep in mind:
- Content compatibility: WordPress.org gives way to all types of custom content, ranging from events to portfolios and personal listings. On the other hand, Squarespace has a more structured, template-driven approach, which means some of WordPress's custom flexibility won't directly translate to the new store.
- SEO consideration: Although Squarespace has built-in SEO tools, they are not exactly as flexible as WordPress. And don't forget about broken links – one of the biggest SEO pitfalls! Without proper setup, your old WordPress URLs will lead to 404 errors, which significantly affect both your traffic and total rankings.
- Feature differences: Even for similar features, the two platforms handle the options and settings differently. For example, WordPress gives you 6 pre-defined user roles, while Squarespace offers 15+ different levels of access and permissions! Depending on your team's goal, you might need to adjust your workflow to match Squarespace's options.
- Design flexibility: Though both Squarespace and WordPress themes are customizable, they aren't exactly interchangeable. Hence, if you don't want to lose your current WordPress design, be sure to pick a Squarespace template that's a close match or use custom CSS to get it right.
- Backup and security: The last thing you want is to lose important content during the migration process, so remember to back up everything on your WordPress site first. Plus, since the security settings you have fine-tuned on WordPress won't carry over, you'll need to spend extra time double-checking and optimizing them on your new Squarespace site.
Moving from WordPress to Squarespace in 7 Steps
With all things considered, let's discuss how to move your site from WordPress to Squarespace. This migration method doesn't require any third-party installation — ideal for small stores with simple setups and little to no plugin content!
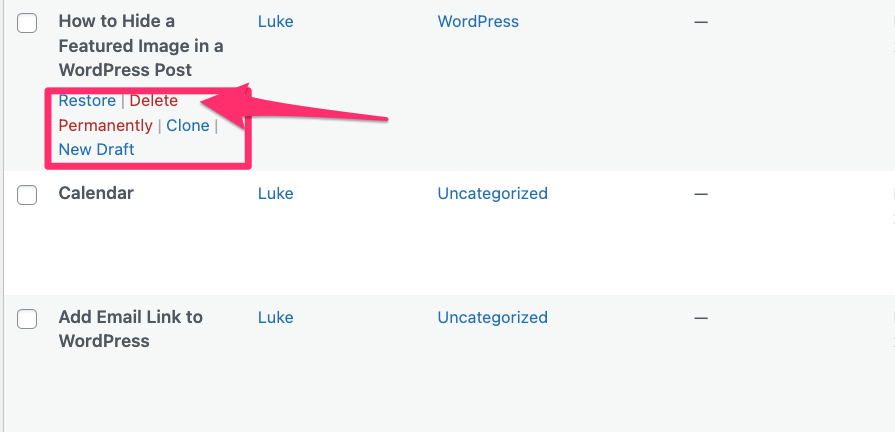
Step 1. Prepare your WordPress site
First, take a moment to do a “spring cleaning” of your current WordPress website. Is there any duplicate or outdated content that no longer fits into the bigger picture? Get rid of them all! Keep reviewing what you have on your site until everything is neat and organized.
Step 2. Create your Squarespace account
Needless to say, you'll need a Squarespace account to start the migration! Feel free to skip to Step 3 if you already have one, but if not, complete the following tasks to set it up:
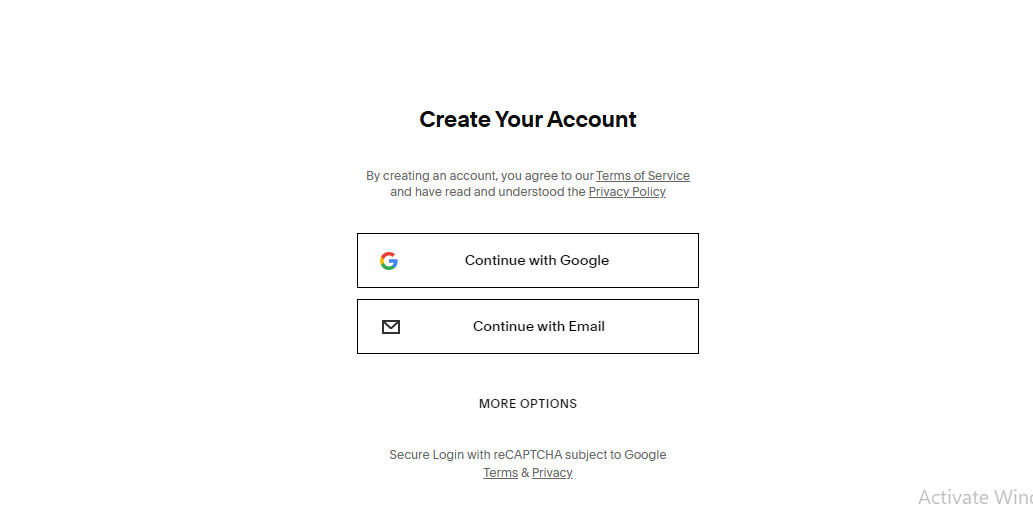
- Create a Squarespace account
First, click this link and choose “Continue with Google” (recommended if you already have an existing Gmail) or “Continue with email” to create an account manually. Once your account is ready, you'll automatically get a 14-day free trial to explore the core features before committing.
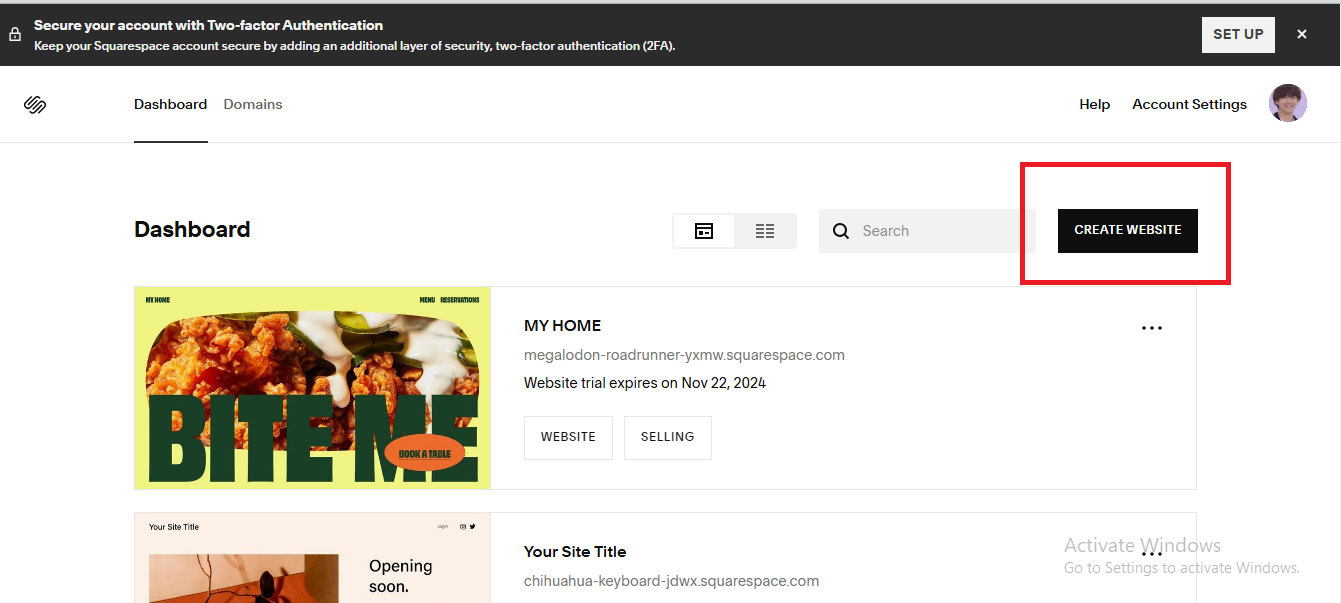
- Next, click “Create website” on your admin dashboard.
- Squarespace will redirect you to its collection of store templates; pick the one that suits your style best and click “Edit.” From here, you can use the drag-and-drop editor to adjust the site name, sections, and layouts. Don't forget to save your changes when satisfied.
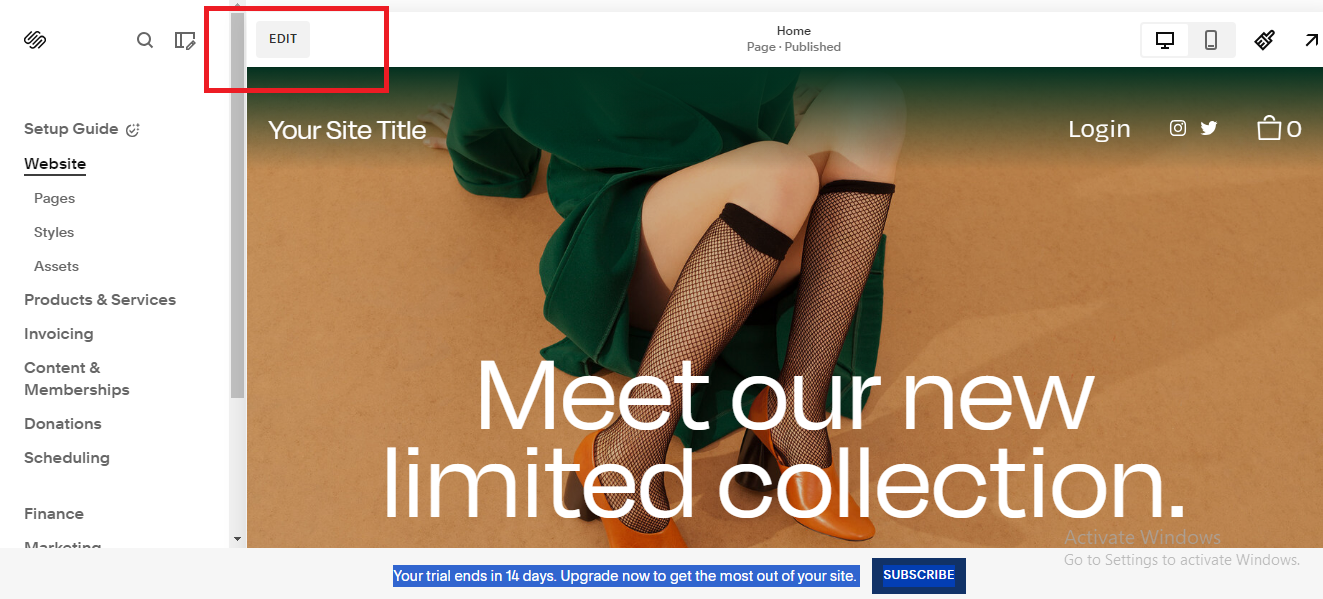
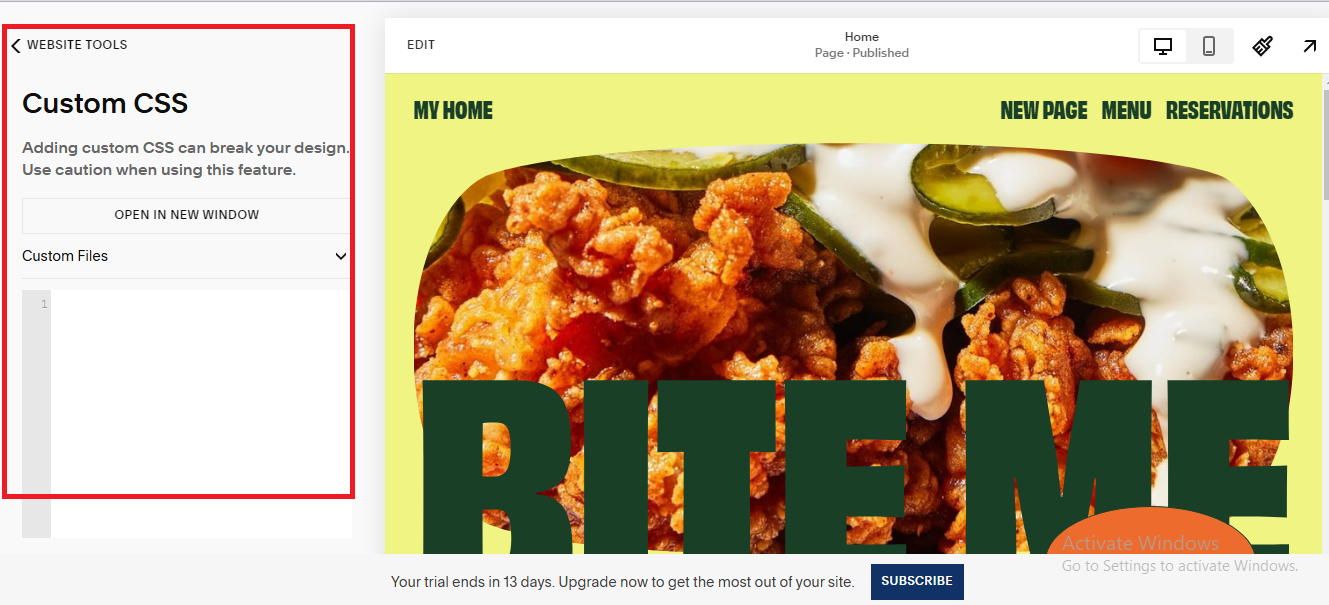
And what if you prefer to use custom CSS for the edits? No problem; simply access the CSS panel (only accessible when you stay logged in) to add your custom file.
Nevertheless, we do recommend you focus on basic settings for now. You can always return to polish the website further (in Step 5) once the migration concludes.
Step 3. Export your content from WordPress
It's time to download your WordPress content!
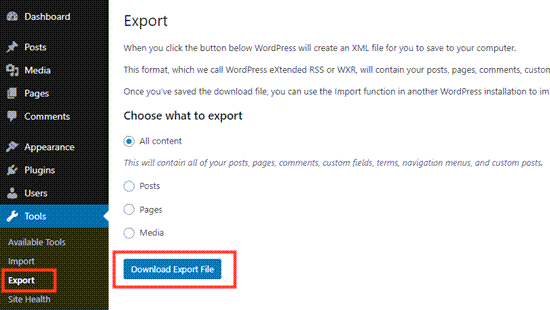
Go to “Tools” > “Export” in your WordPress admin dashboard, then choose the “All Content” option to include all core data types (pages, posts, categories, comments, etc.) After that, click “Download Export File” to save the XML file to your computer. Easy!
Step 4. Import content to Squarespace
Now that your WordPress content has been properly exported, the next step is to bring it over to Squarespace:
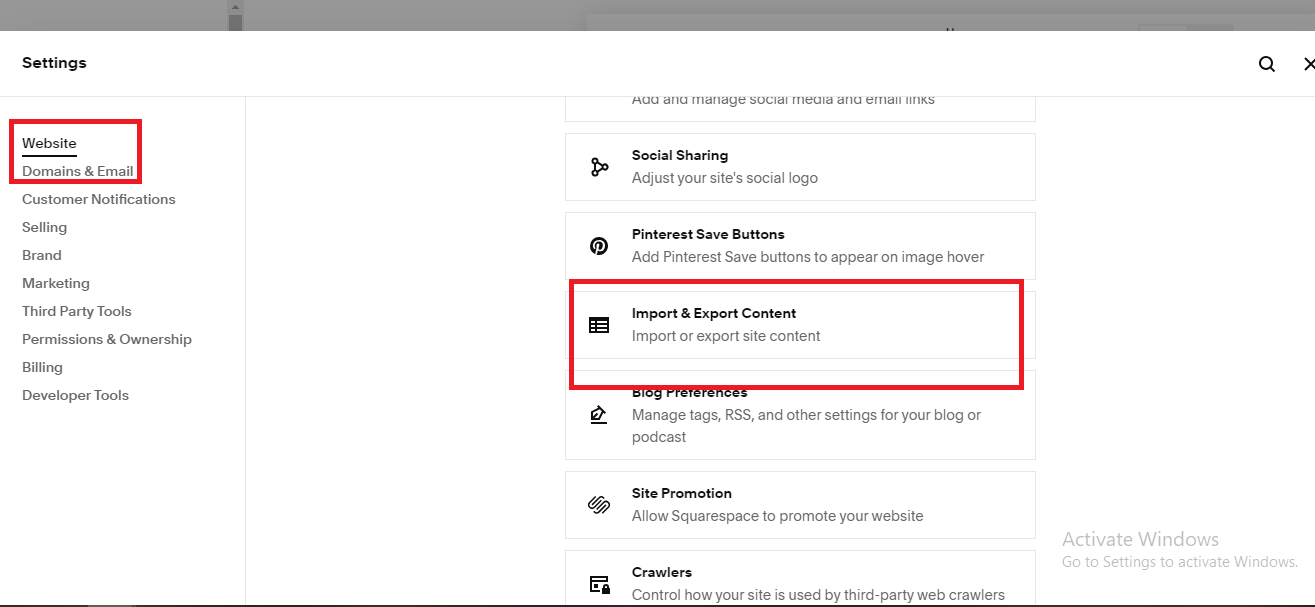
- First, log in to Squarespace (in case you have logged out) and navigate to “Website” > “Import & Export content.”
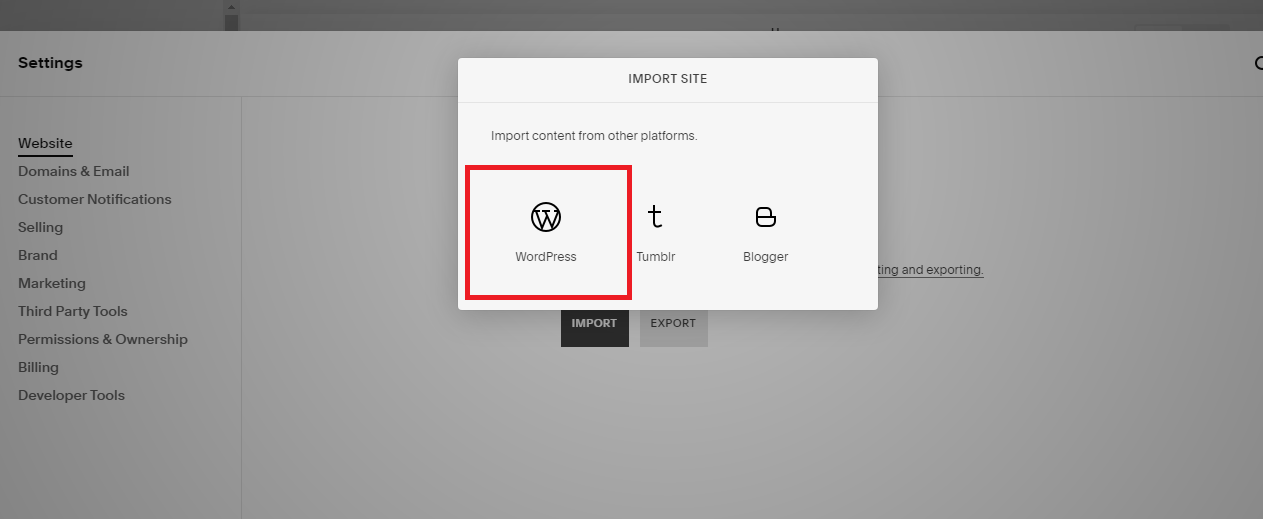
- Next, click “Import.”
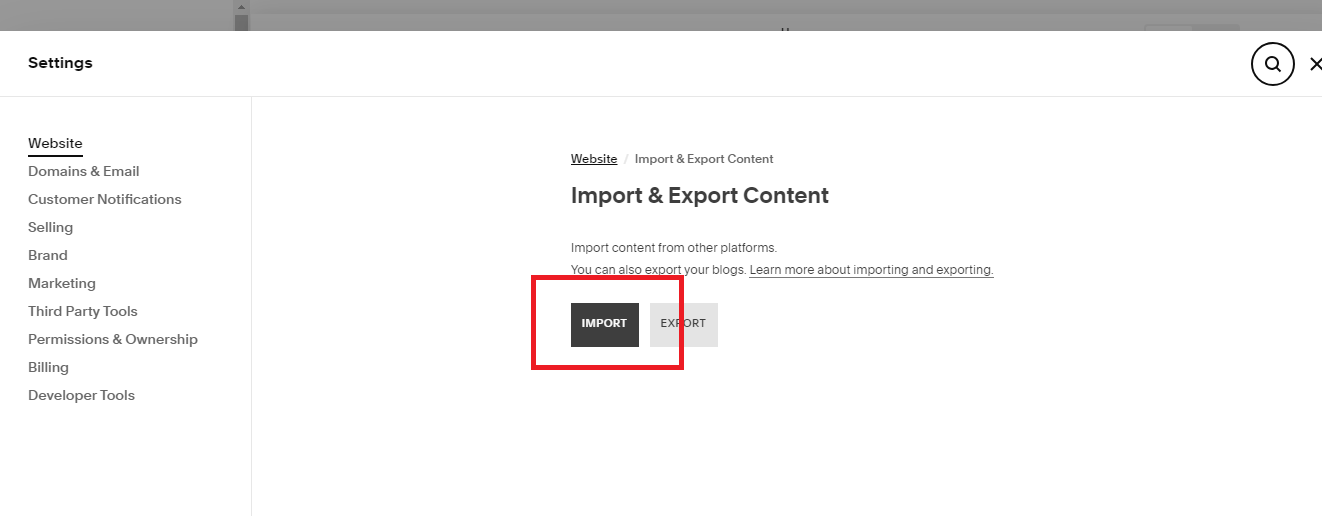
- Now, click “WordPress.”
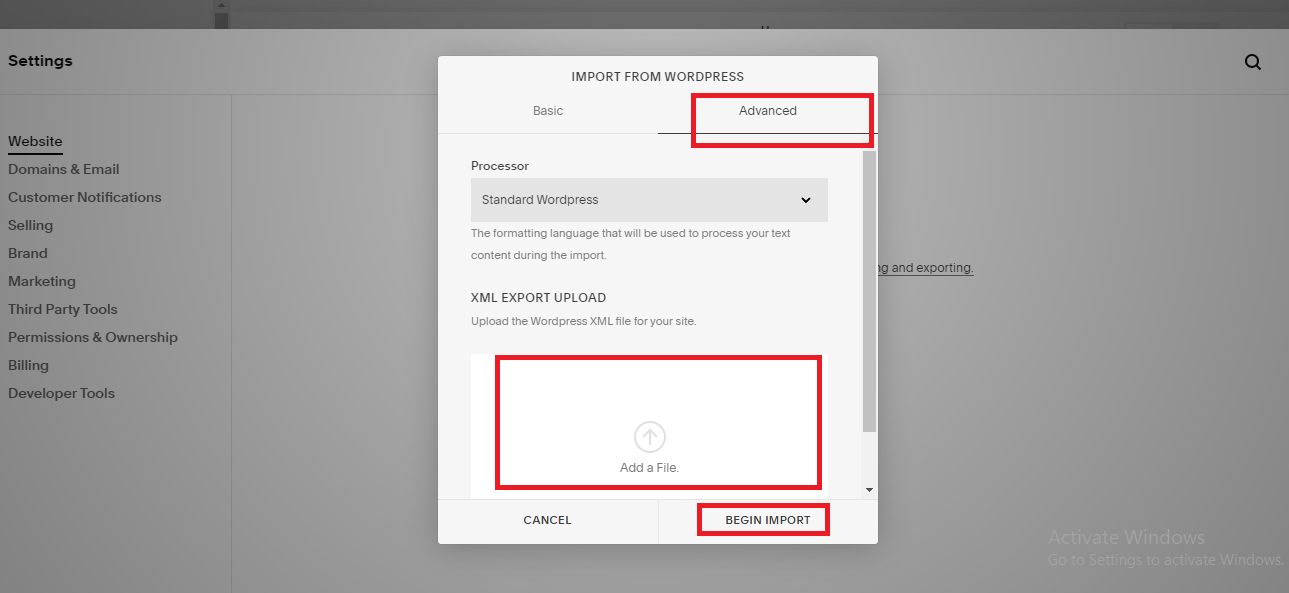
- Then, select “Advanced.” Here, you can drag and drop your XML file (from Step 3) or click “Add a File” to upload it.
- Finally, click “Begin import” to let Squarespace handle the rest!
Step 5. Design your Squarespace site
As mentioned earlier, some WordPress features and plugins will not likely transfer over after the migration. That's why you need to take some extra steps to finesse your new site:
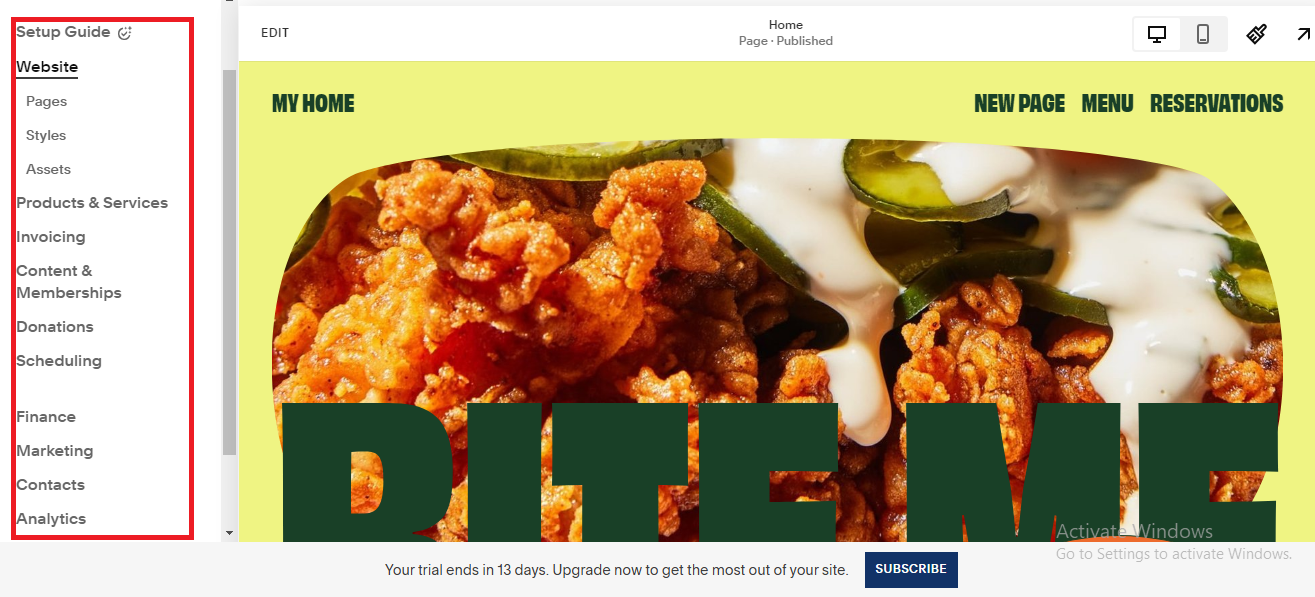
- To adjust built-in settings, use the menu on the left to modify the options for each category. Again, remember to save your changes once you are satisfied.
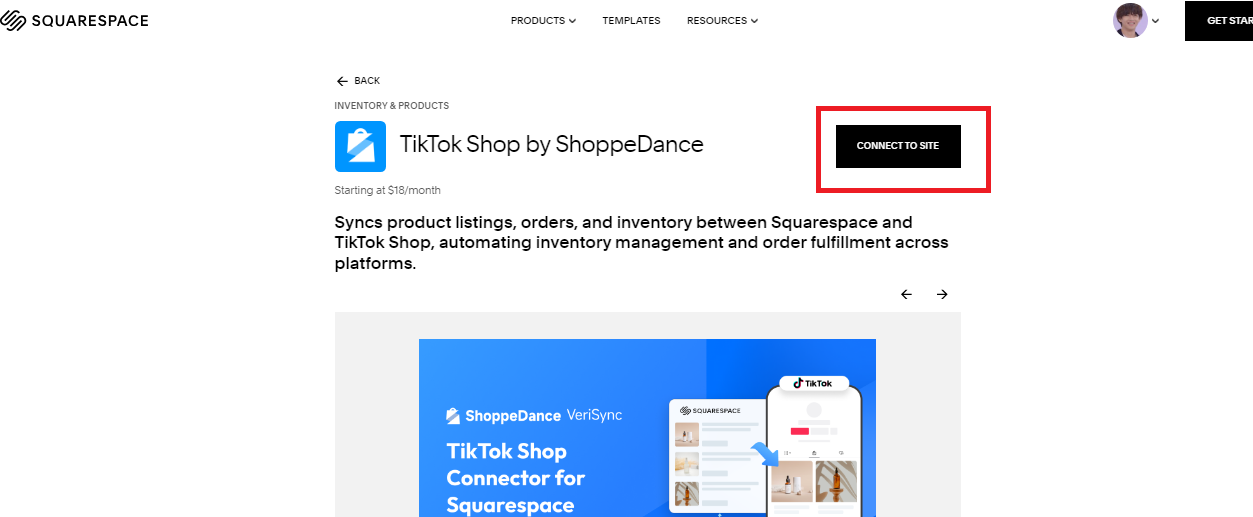
- How about adding plugins or extensions? Head to the Squarespace extension store, click on your preferred app, then hit “Connect to site.”
Step 6. Optimize for SEO
Obviously, you cannot let years of SEO efforts go to waste after the migration! Our simple checklist below should keep you on the right path:
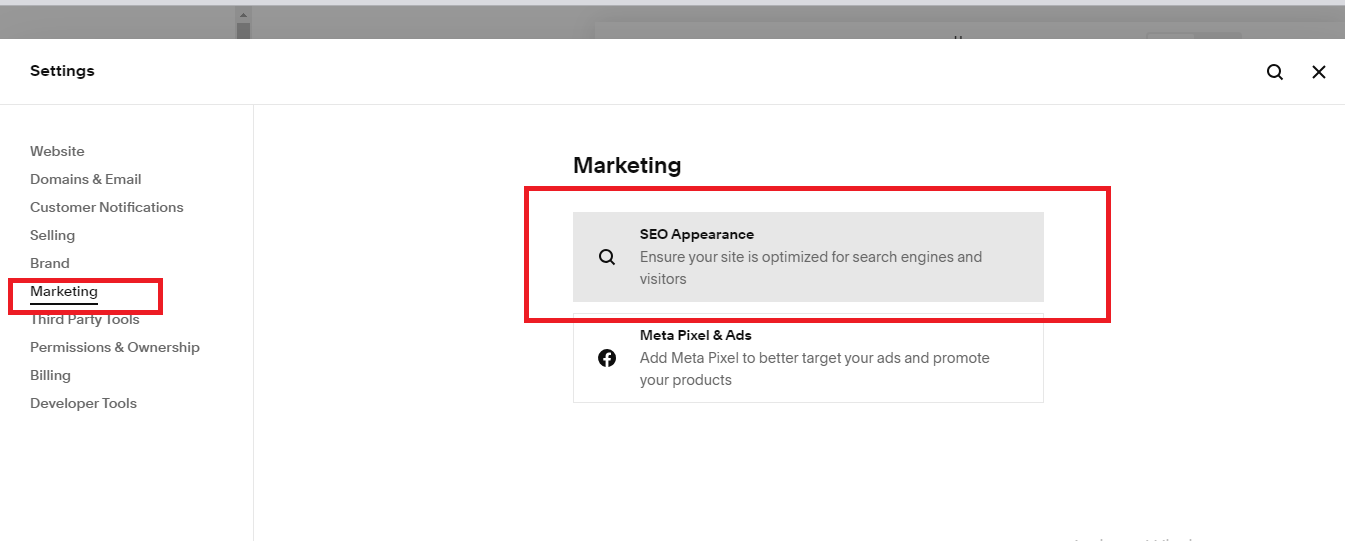
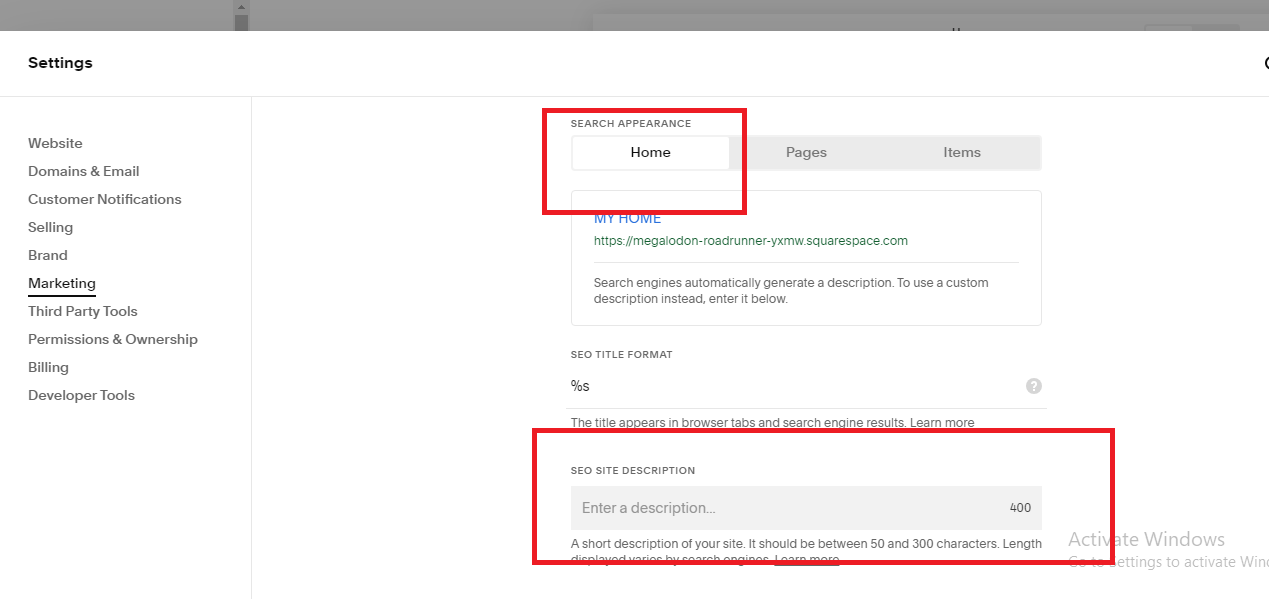
- To add an SEO site description, go to “Marketing” > “SEO Appearance”.
- Click the “Home” tab to add your description here. Click “Save” when you're done with this!
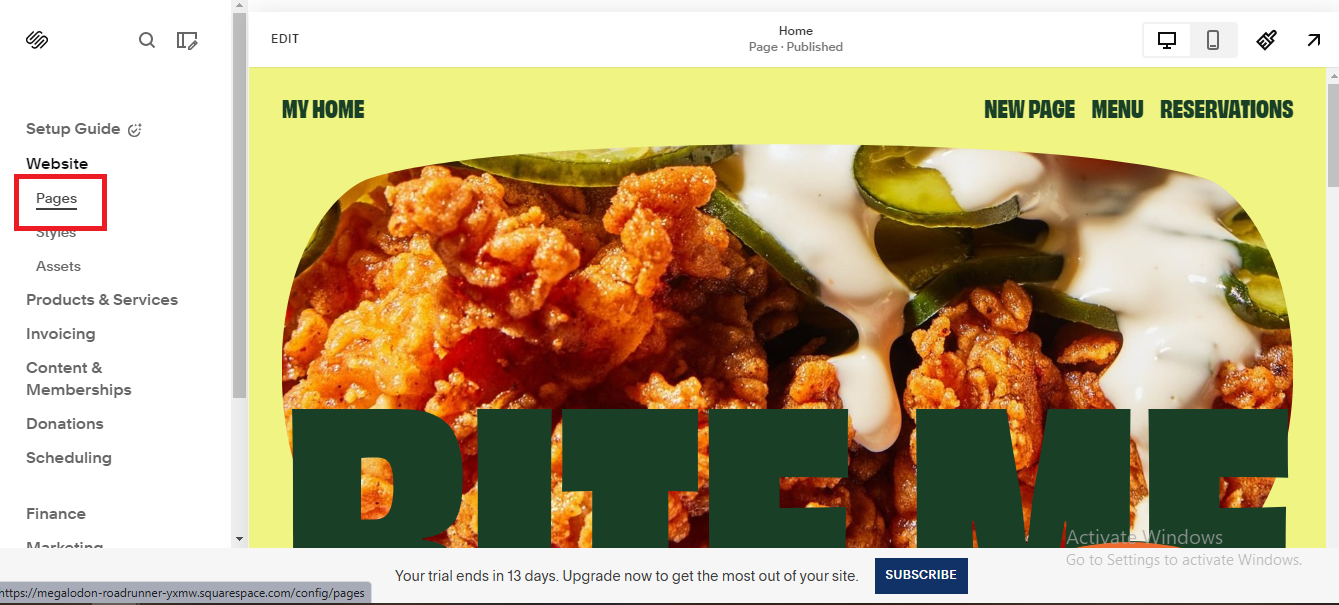
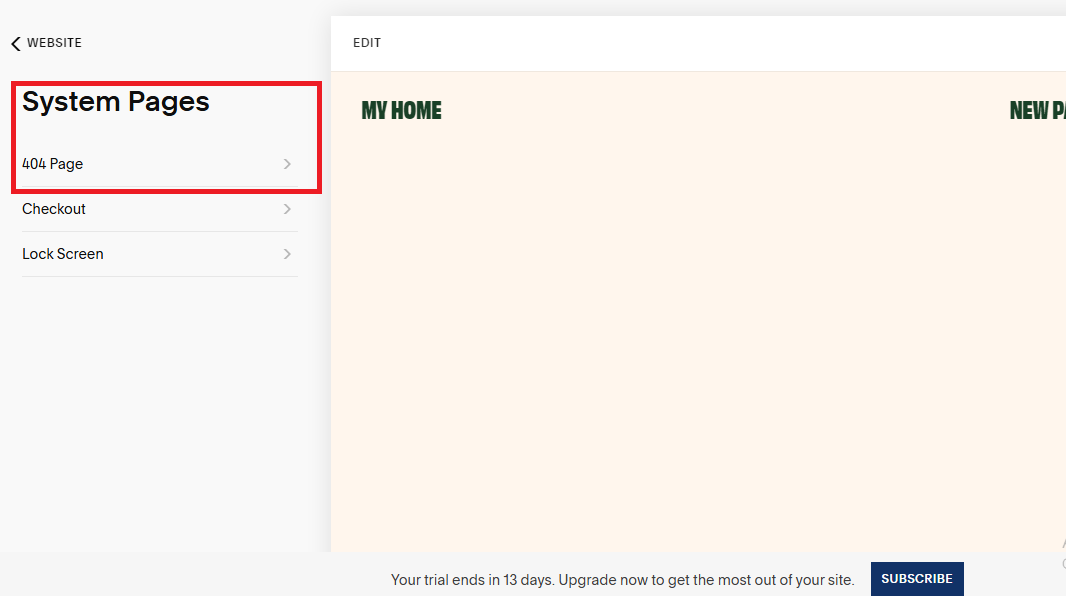
- For custom 404 pages, you can go to the “Pages” panel and scroll to “System Pages.”
- Select “404 Page” from here, then customize it using the theme editor (just like what you did with your store theme in Step 2).
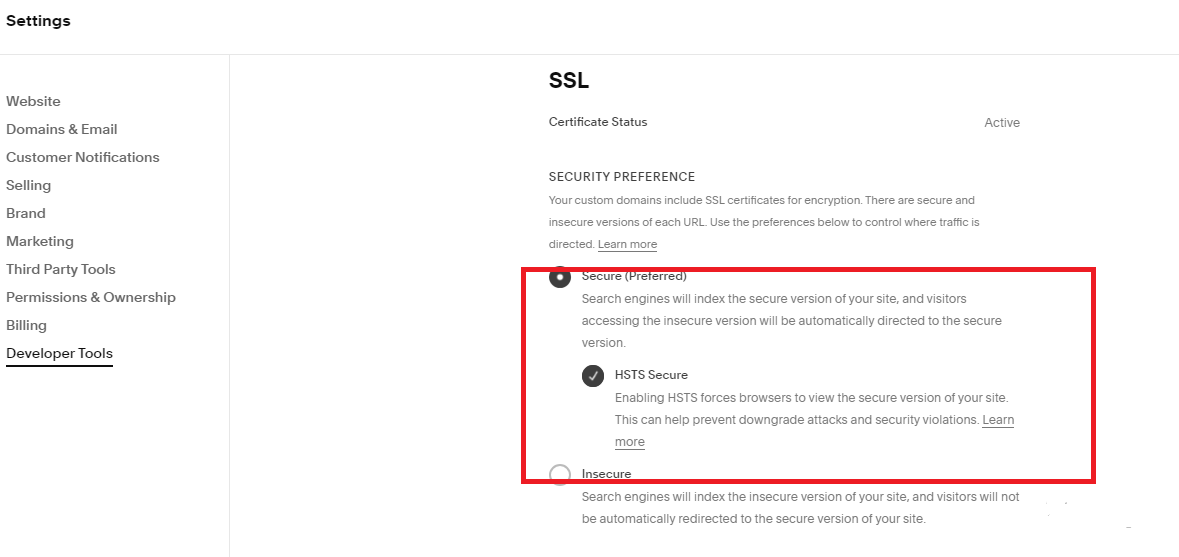
- Next, don't forget to enable the SSL. Go to “Developer Tools” > “SSL,” select your security preferences (make sure you tick “Secure” and “HSTS secure”), and save.

- Last but not least, fine-tuning existing content is extremely important. Make sure your keywords are in place and posts and products are properly tagged/categorized! Plus, all the images must have appropriate alt text as well.
Step 7. Test and launch your site
You must be excited to run your business immediately after completing the six steps above, but hold off! Before you go live:
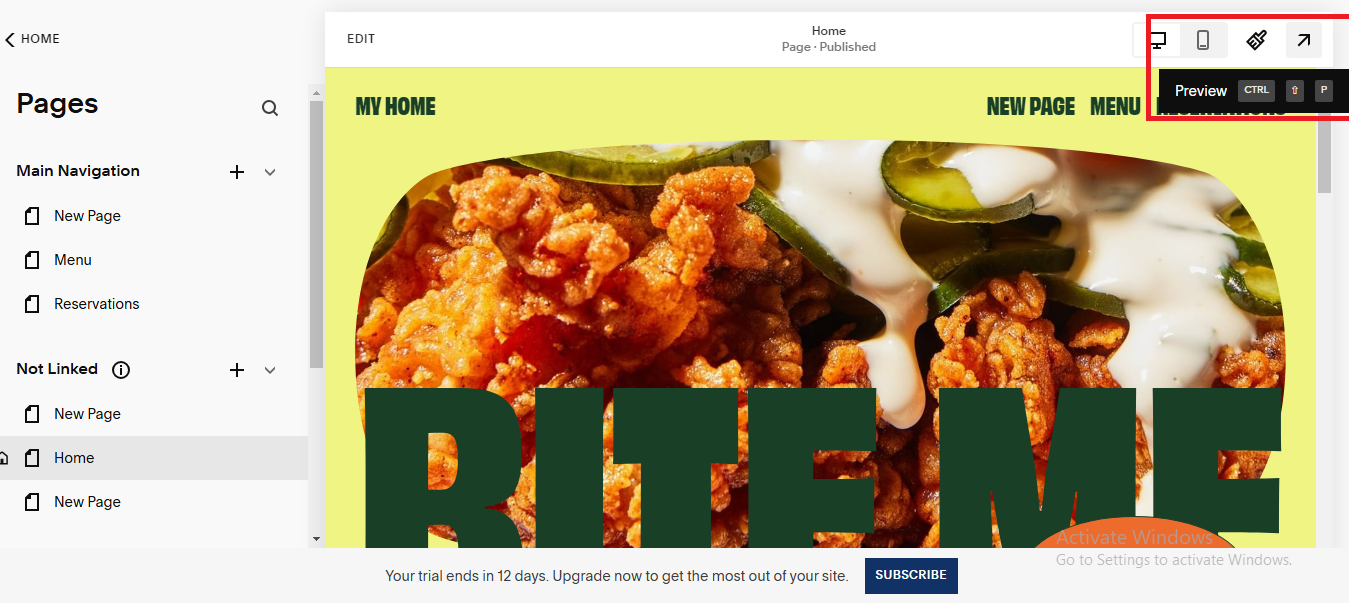
- Click the arrow at the top right corner, then choose “Preview” to observe the website from a visitor's perspective.
- If you spot any issues, jot them down to make some final adjustments later on.
- Repeat all these double-checking steps until you are 100% certain every part of your new site is ready.
And there you have it! You can now resume your ongoing business without any major disruption.
Advanced WordPress to Squarespace Migration with LitExtension
We have just covered the migration procedure from WordPress to Squarespace using the built-in tools of both platforms. Nevertheless, keep in mind that this method is mostly suitable for extremely small stores; plus, all the plugin content and custom modifications will be left behind during the process. Quite a significant drawback, isn't it?
But don't worry — there's a better solution: the LitExtension All-in-One Squarespace Migration. Once signing up, all you need to do is discuss your requirements with our team of experts, and we'll take care of everything else. No technical stress, no obstacles!
Curious about how it works? Let us walk you through it all step-by-step:

Step 1. Consultant by LitExtension experts
To get started, you can schedule a consultation with our specialists. During this discussion, we'll take the time to understand your specific needs and identify what you want to migrate. Is that product listings, customer data, orders, or any other exclusive features of your current WordPress store? Just tell us everything!
Once we've signed the Service Level Agreement (SLA) and the payment is settled, you can sit back and relax. We'll handle everything from that point onward.
Step 2. Data mapping and setting by experts
Next, our team will prepare every part of your new store thoroughly. This critical stage involves:
- Setting up essential redirects for Squarespace
- Adding any necessary plugins and extensions
- Cleaning up and creating secure backups
- Fine-tuning additional settings for a smoother transition
Want to check on how things are progressing? We will offer as many demo migrations as you'd like, so you can review the updates firsthand and ensure everything looks right.
Step 3. Perform full eCommerce replatforming
Now that everything is set, our team will move forward with the complete migration. As already discussed, we will manage the entire process for you while keeping you informed with real-time updates and quick responses (typically within 12 hours). Plus, additional options (such as 301 redirects) come included at no extra charge!
After the migration wraps up, we will conduct a comprehensive review to make sure your new store is functioning perfectly.
And that's not all; for 30 days post-migration, we'll continue to assist you with re-migrations (100% free) and recent data updates (free if the extra data is less than 5% of your total). There are also UNLIMITED, free smart updates for your existing data during the next 90 days as well!
FAQs
Can I transfer a WordPress website to Squarespace?
Yes, you can transfer a WordPress website to Squarespace by manually migrating content. Export your WordPress data, then import it into Squarespace using their import tool. Customize your design, re-add plugins or features, and verify SEO settings. Some advanced functionality may require adjustments as Squarespace has different capabilities than WordPress.
Can I move an existing website to Squarespace?
Yes! Feel free to take advantage of the built-in import and export tools if you currently run a small-scale site (with simple setups) on WordPress, Tumblr, or Blogger. For more complex requirements, though, we recommend you contact LitExtension’s All-in-One service and leave everything to our technical experts.
Is it better to use Squarespace or WordPress?
Squarespace is ideal for beginners seeking an all-in-one platform with beautiful templates and ease of use. WordPress offers unmatched customization, scalability, and plugin options, making it better for complex or large-scale projects. Choose Squarespace for simplicity and design, and WordPress for flexibility and advanced functionality tailored to your needs.
Final Words
This article has discussed how to migrate from WordPress to Squarespace.
For smaller sites (with little to no customization), the built-in tools can easily get the job done. However, if you work with a large volume of data or need to keep plugin content and complex add-ons intact, LitExtension is a much better alternative! With over 12 years of experience and more than 300,000 successful migrations under our belt, we’re here to make your Squarespace migration smoother and more stress-free than ever.
For more information, check out our Squarespace guides and join our Facebook Community.