Magento can feel complex and resource-heavy for many merchants. Meanwhile, WordPress offers a more flexible and easier-to-manage alternative. If you’re planning to migrate from Magento to WordPress, you’re in the right place!
In this article, we will walk you through the following key points:
- Preparation process for migrating from Magento to WordPress;
- Step-by-step data migration workflow using LitExtension;
- Essential post-migration checklist for your new WordPress store.
Migrating a Magento store to WordPress can be a challenging process. But, if you follow these simple steps, it’ll be just like a doddle. So, let’s get the ball rolling!
Preparation Before Migrating Magento to WordPress
Proper preparation will help ensure all the crucial data are secured. Let's see what we must prepare for a Magento to WordPress data migration.
1. Run backup for your Magento store
It's always a good idea to have a database backup before making any changes to your Magento store. Thankfully, the Magento backup process is short and straightforward for new store owners and sellers to follow.
- First, visit your store's Magento backend (or admin panel).
- Next, navigate from the side menu dashboard through Systems, then Tools, and click on Backups.
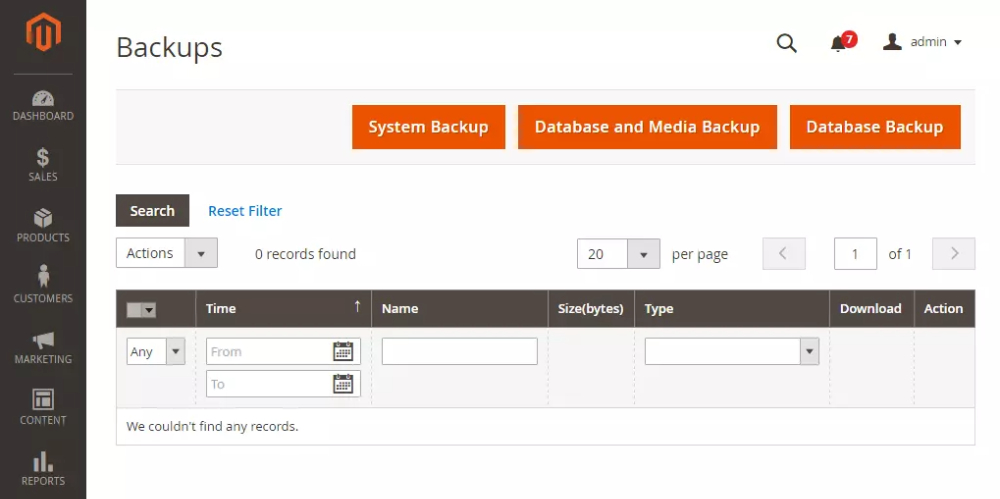
On the dashboard right now, there’re 3 large buttons with options. Simply select a suitable backup option and set a name for the newly generated backup file.
- System Backup: archive the source code to make a backup.
- Database and Media Backup: save all available database and media content.
- Database Backup: back up the entire store data dump.
To ensure the backup process runs smoothly, you can turn on the Maintenance mode. Besides, you can also exclude the media files if necessary by ticking the respective option. After the backup is finished, your maintenance mode will be turned off automatically.
2. Prepare your new WordPress website
Assume you already prepare:
- A trusted hosting service optimized for WordPress websites.
- A domain name for your store's directory.
Then, log in directly to WordPress to configure the settings for your new site. However, if you already use another hosting service that doesn't support WordPress, then you might have to manually install the platform.
To continue, we will briefly guide you through the process of setting up an eCommerce store on WordPress. WooCommerce is the most widely used solution, but it is not the only option. Alternatives such as SureCart are also available, depending on your business model and preferred setup.
If you decide to use WooCommerce, you can check out our video tutorial to quickly set up a new WooCommerce store.
First, look at the side menu from the WordPress dashboard, go to Plugins, then click Add news to make the plugin marketplace appear on your screen. Simply type WooCommerce in the search box, download and install the plugin. Don't forget to turn on the plugin by pressing Activate.
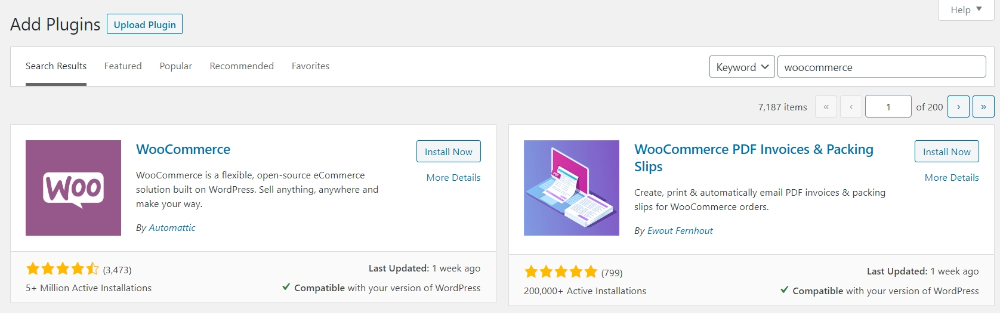
Moving to the next stage, you should start WooCommerce Setup Wizard. Here, you must enter some necessary data to activate the plugin, such as Store Details, Working Industry, Product Types, Business Details, and Theme.
How to Migrate Magento to WordPress with LitExtension
LitExtension – Experience #1 eCommerce Migration Services provides the quickest and most secure data migration service. With the help of our expertise, you can migrate your Magento store to WordPress without hassle.
To get a sense of how the process works, you can watch this tutorial video:
Let's begin by registering a new account on the LitExtension website. You can either register with an email or log in directly via Facebook or Gmail in merely seconds.
To continue, quickly press the Create new migration button. The LitExtension dashboard will appear on your screen with a total of 4 migration stages, which are:
- Setup.
- Demo Migration.
- Full Migration.
- Completed.
Step 1: Setup source cart and target cart
Firstly, we need to set up the Source and Target cart for the data migration. In the Source Cart Type, select Magento from the dropdown list, then add your store's current address into the Source Cart URL field.

Next, you need to install the LitExtension connector, which acts as a bridge between Magento and our app for the data migration process. To help you out, we have prepared a detailed video tutorial so you can easily follow and perform the steps.
Once you are done, Connection was successfully installed – this line of text will notify you on the screen. That's all we need to do for the Source cart.
To continue, select WordPress from the Target Cart Type drop-down menu and fill in your target cart URL. Similar to the Source cart setup, you also need to install the LitExtension Connector for your WordPress store.
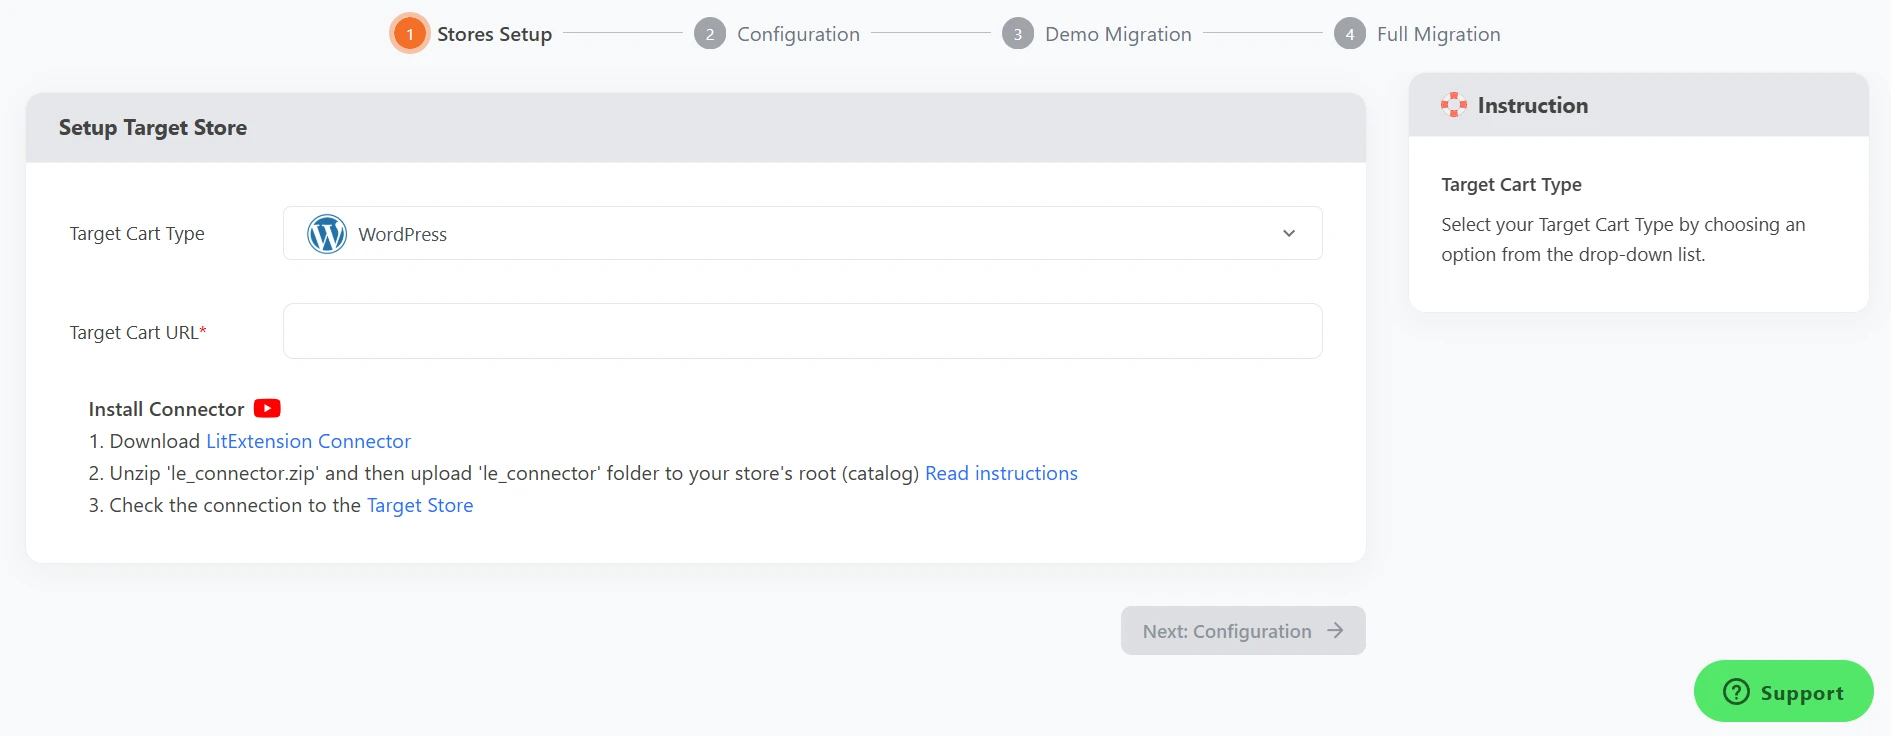
Once you finish filling every blank field, simply click Configure your Migration to move on to the next step
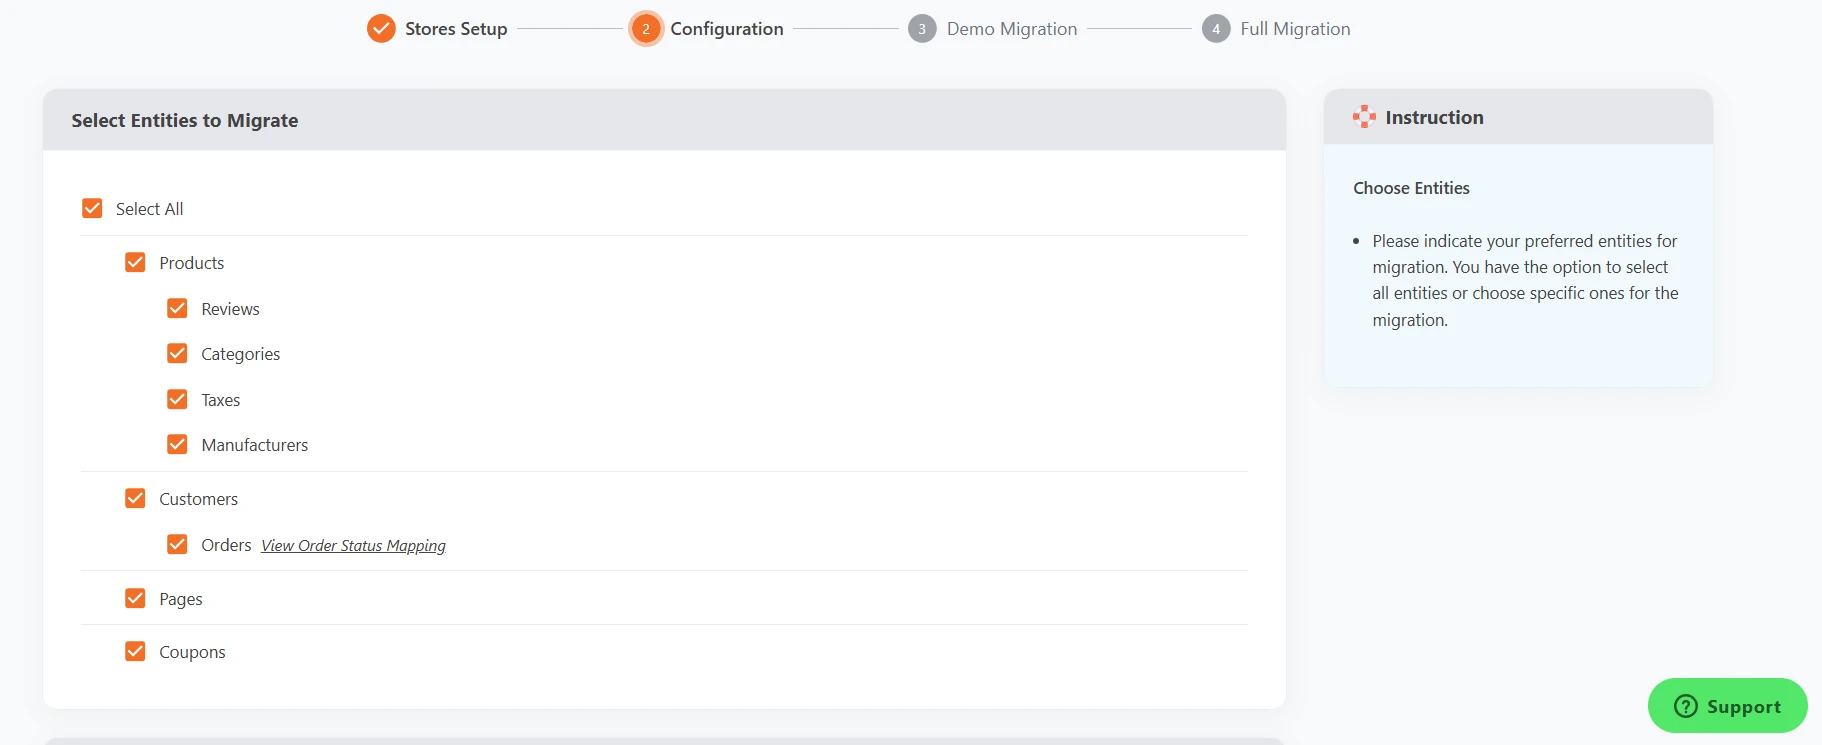
Step 2: Configure migration entities
Now the Configuration screen appears with a lot of options. Here, you can select the entities that you want to migrate from Magento to WordPress. LitExtension supports almost all types of data required.
Simply tick the corresponding entity checkboxes. You can also click Select All to move all data at once, or choose Products, Customers, Pages, and Coupons only.
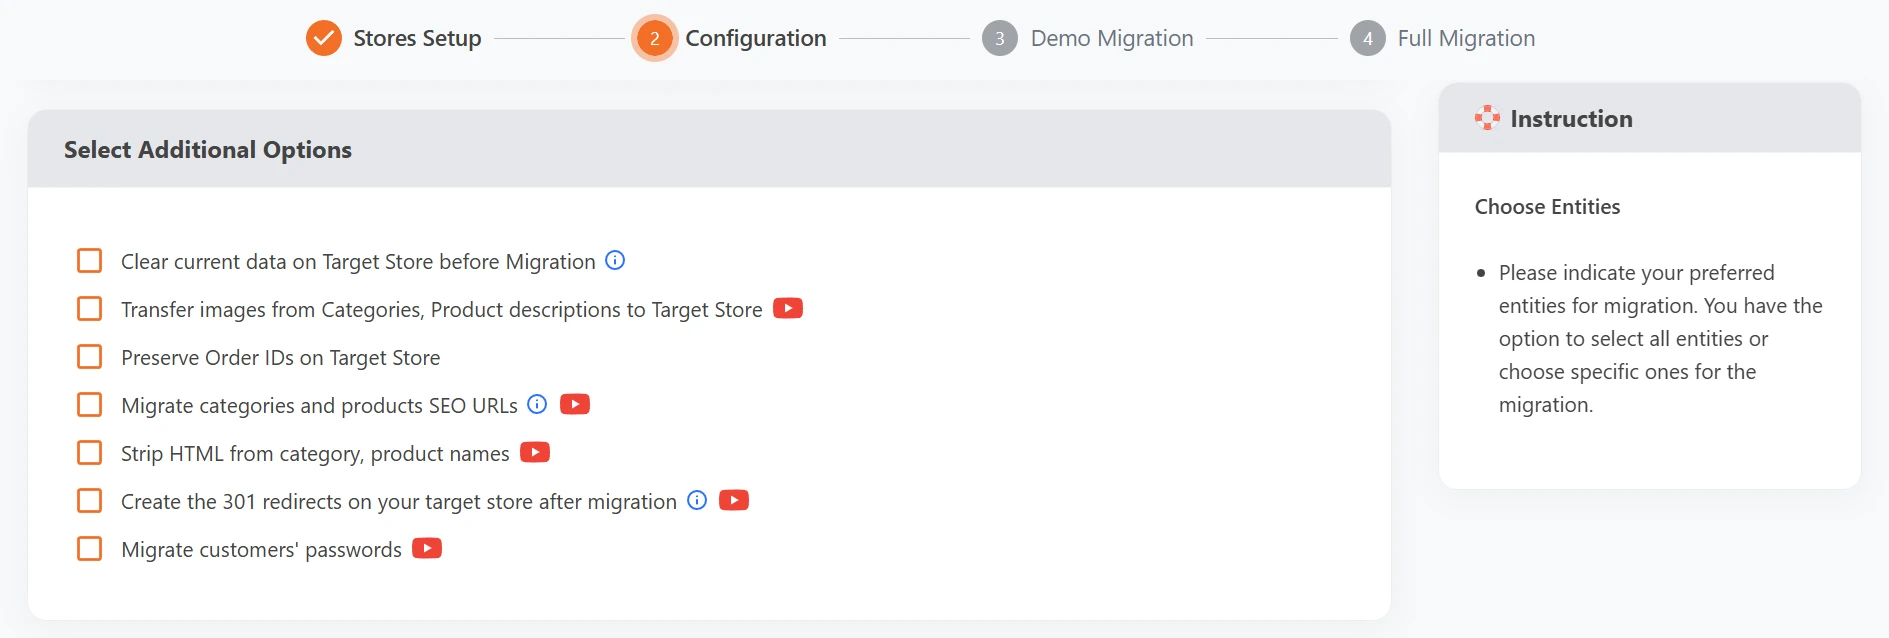
Apart from that, we also provide many Additional Options to meet your preferences, such as transferring product and category images to the target store, preserving order IDs, and so on. Just hover your mouse on each feature, and the side notes will tell you what they mean.
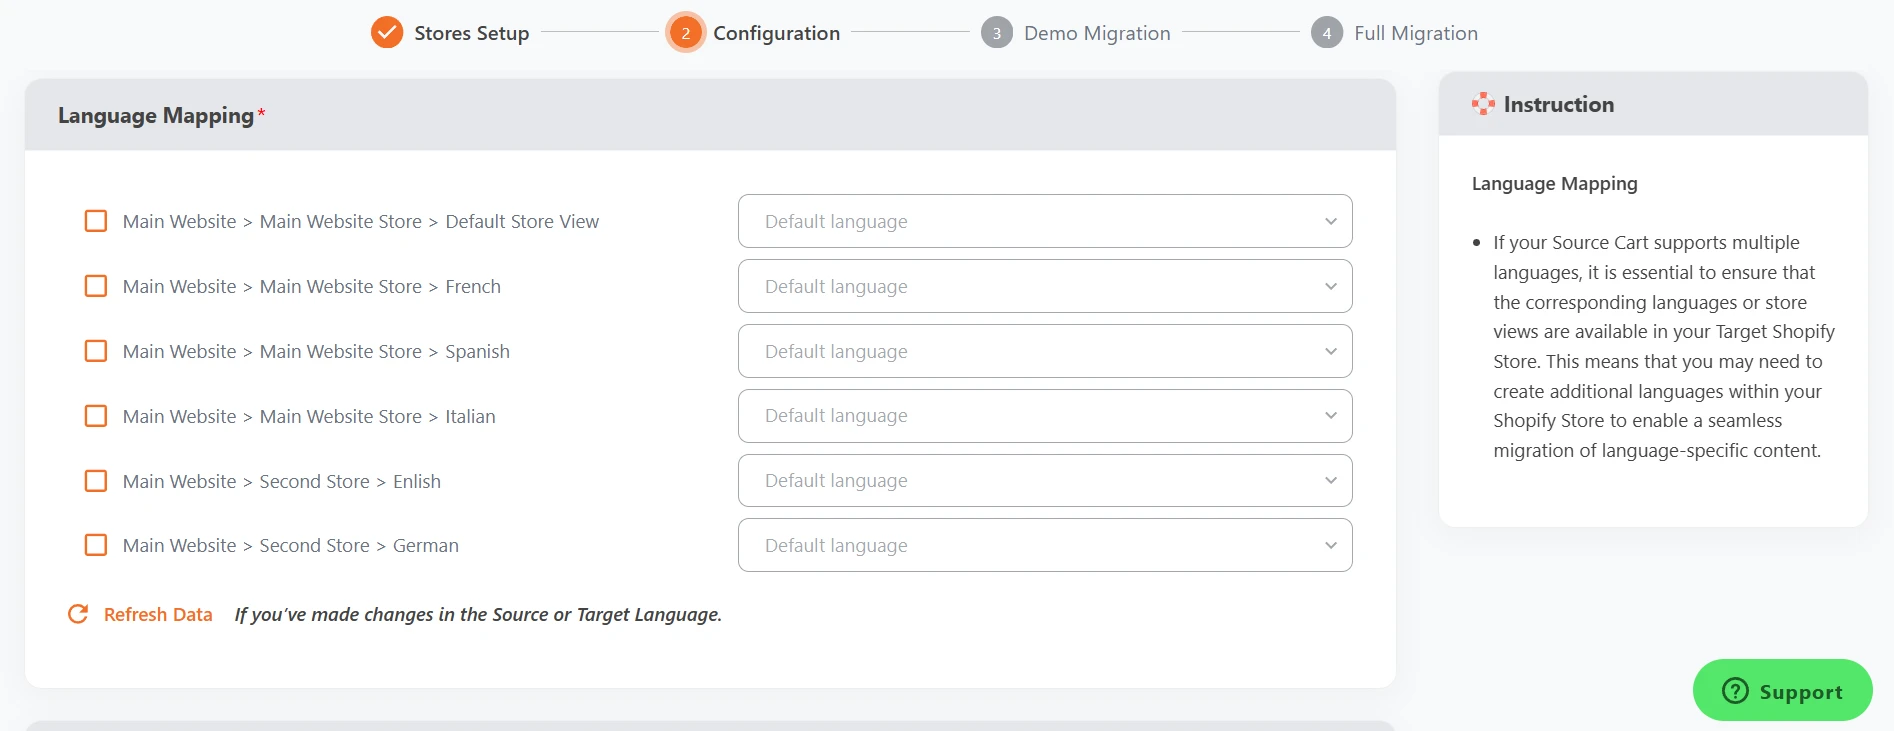
Don't forget to map the language and order status between the two stores so that it will display correctly on your new WordPress site.
You can also Skip Demo Migration, which saves you time if you've already tried it out before. For newcomers, we still recommend trying out our Demo Migration to get a feel of how our solution works.
Done selecting options? Remember to click the Start Full Migration button to start the cart-to-cart migration process.
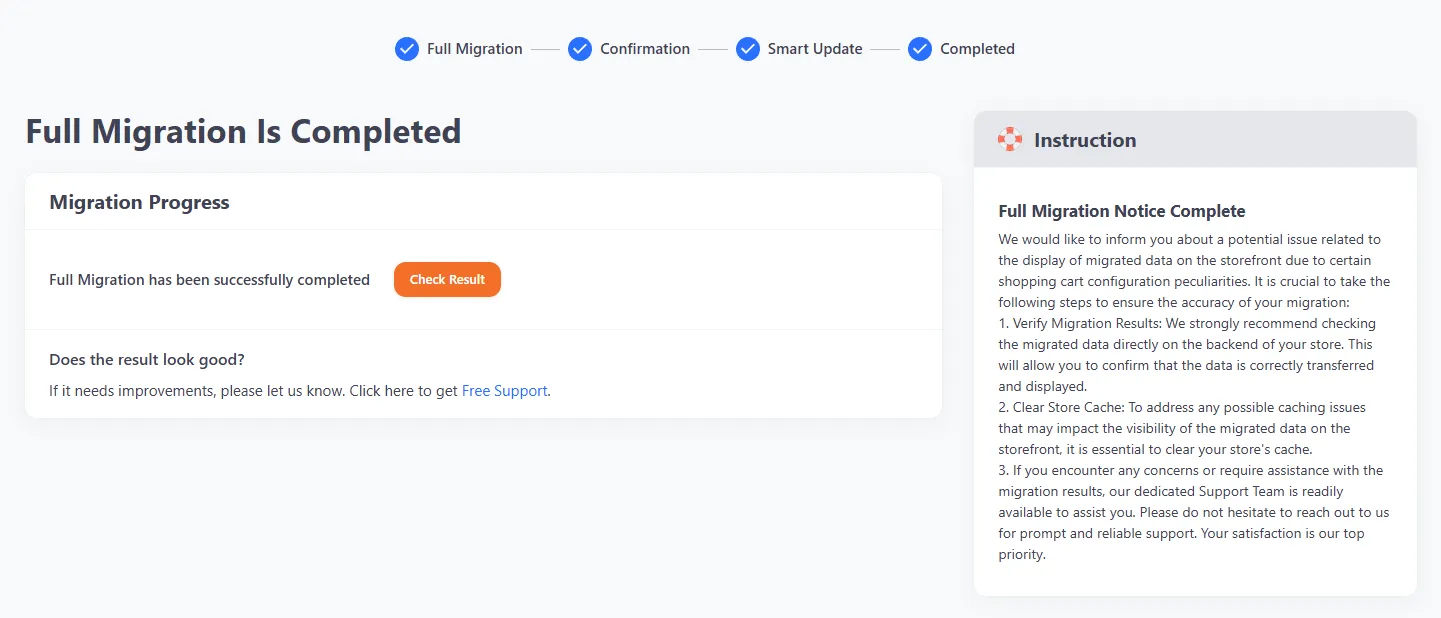
Step 3: Run Magento to WordPress migration
Since our service runs seamlessly on our cloud server, you can still manage your Magento store and continue making profits during the data migration process.
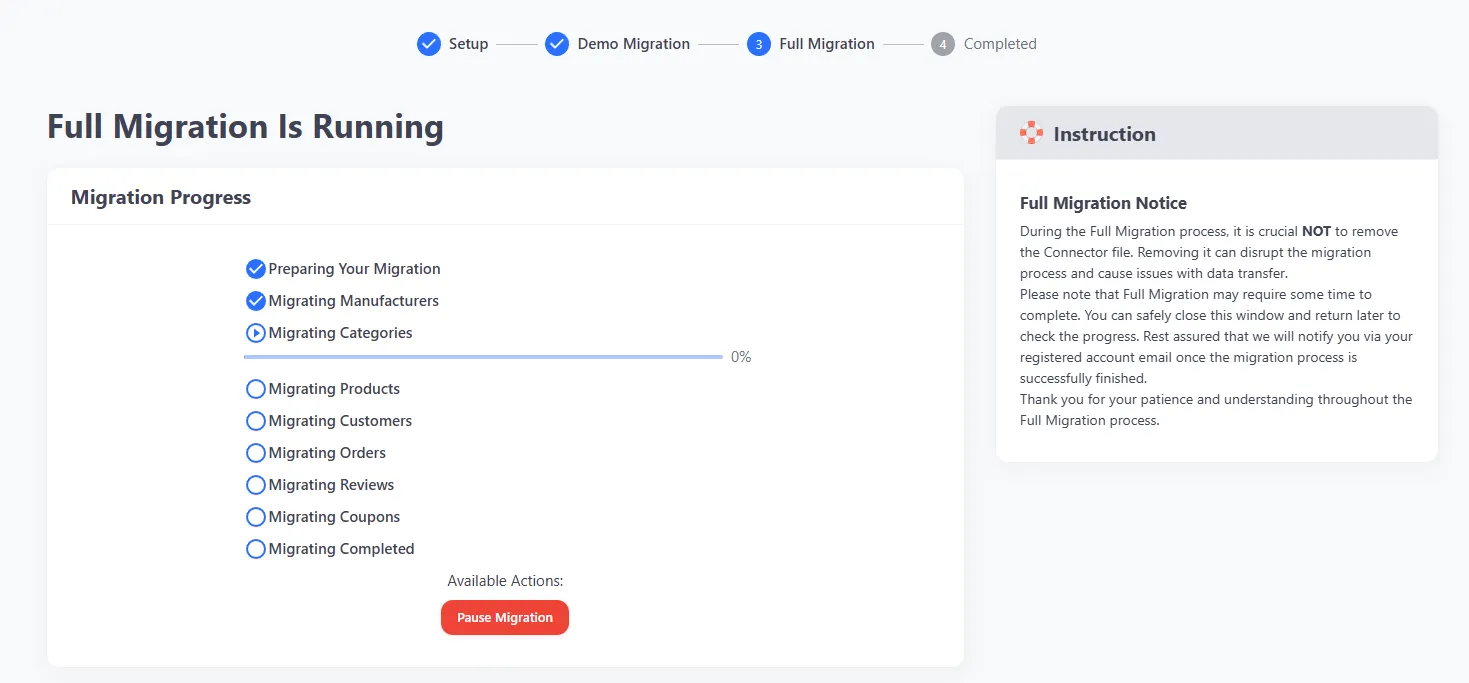
Once everything is done, LitExtension will send an email notification so that you can conveniently check the whole result. To grab a better view of the details, simply click Check Result to view the final result on your target cart.
Besides Magento, LitExtension also supports migrating data from many other platforms to WordPress. Contact us now to get started with a smooth and hassle-free migration.
WordPress Migration Made Easy With LitExtension!
LitExtension offers great migration solutions that help you transfer your data from the current eCommerce platform to a new one accurately, painlessly with utmost security.
MIGRATE NOW!
How to Migrate Magento to WordPress with All-in-One Migration Service
Besides our automated migration tool, we also provide an All-in-One Migration Service for merchants who prefer a fully managed approach. This service is ideal if your store has complex data, custom logic, or if you simply don’t want to handle technical tasks yourself.
With All-in-One Migration Service, your entire migration project is managed end-to-end by a dedicated Personal Assistant (PA). From initial planning and technical setup to testing and post-migration support, everything is handled for you.
Below is our Magento to WordPress migration workflow:
Step 1: Consult with LitExtension experts
Every migration needs clarity before execution. If we don’t fully understand how your Magento store is structured, there’s a high risk of misaligned data on WordPress later. That’s why this step focuses on defining scope, expectations, and technical feasibility before any configuration begins.
At this stage, we will:
- Review your Magento data structure (products, attributes, customers, orders, custom fields).
- Evaluate your WordPress environment readiness.
- Identify complex product logic, dependencies, and potential risks.
- Define migration scope, timeline, and responsibilities.
- Document everything clearly under SLA.
By the end of this step, the migration plan is fixed and aligned.
Step 2: Set up pre-migration
Once the scope is confirmed, we move into technical preparation. This step ensures that WordPress is structurally ready to receive Magento data. Proper configuration at this stage prevents broken variations, missing attributes, or SEO issues later.
Here’s what we handle:
- Verify admin credentials for both Magento and WordPress.
- Install and validate the LitExtension Connector on both platforms.
- Configure data mapping between Magento and WordPress.
- Rebuild product attributes and variation logic in WordPress.
- Prepare URL structure and SEO-related settings if required.
- Validate the configuration before demo migration.
This creates a stable technical bridge between the two stores.
Step 3: Run demo migration
Before migrating your entire database, we test the configuration with a controlled data sample. This allows us to verify that mapping rules, attribute logic, and data relationships behave correctly on WordPress.
During the demo, we will:
- Migrate up to 200 entities per data type.
- Check product variations, SKUs, images, and order structure.
- Perform automated and manual validation.
- Share demo results for your review.
- Adjust configuration if refinements are needed.
This step minimizes risk before full execution.
Step 4: Perform full migration
After demo approval, we proceed with the complete data transfer. Since all configurations have been validated, this stage focuses on executing the migration safely and accurately without interrupting your Magento store.
We will:
- Transfer all products, categories, customers, and orders within scope.
- Map custom attributes into WordPress equivalents.
- Preserve SEO metadata if selected.
- Execute additional options such as 301 redirects or keeping Order IDs.
- Monitor migration in real time and resolve issues immediately.
- Provide live progress updates.
Your Magento store remains operational during this entire phase.
Step 5: Test the migration results
Once full migration is completed, verification becomes the priority. Even with validated configurations, structured auditing ensures the final result matches the approved scope and functions correctly on WordPress.
We will:
- Run automated system validation.
- Manually review complex product and order structures.
- Confirm data completeness and integrity.
- Deliver a quality assurance summary.
This gives you full visibility before moving forward.
Step 6: Perform post-migration tasks
During the transition period, your Magento store may still generate new orders or customer updates. Without synchronization, this could create data gaps. That’s why post-migration support exists – to keep both systems aligned while you fully switch to WordPress.
We provide:
- Unlimited free Recent Migration within 30 days (≤ 5% new data).
- Unlimited free Smart Updates within 90 days.
- Two free Re-migrations within 30 days (within agreed scope).
- Up to 60 days of technical support.
This ensures continuity even after the main migration is done.
Step 7: Contact support (optional)
Even after everything is completed, we’re still here for you. Your assigned Personal Assistant remains your main contact point. You can reach them via ticket, email, call, online meeting, or Slack.
We respond within 12 hours during working time. So whenever you need support, you won’t be left waiting.
Post Migration Checklist for Magento to WordPress Migration
Once your Magento store has been moved to WordPress, several important tasks remain to ensure stability, performance, and revenue continuity. This checklist outlines the key actions you should take after migration to make sure your new WordPress store operates smoothly and is fully ready for growth.
1. Secure the new site
After migration, your WordPress site is already holding real customer data, order history, and possibly payment integrations. So before focusing on marketing or traffic, make sure the foundation is protected.
The SSL certificate must be active and properly configured across all pages. A reliable security plugin should be installed to protect against malware and unauthorized access. All administrator passwords need to be updated, and unused accounts should be removed to reduce risk exposure. A structured backup system should also be activated, with daily backups recommended for active stores.
2. Optimize performance
Once security is stable, performance becomes the next priority. A WordPress store may look visually complete after migration, but loading speed and server response time determine how customers actually experience it.
Several elements deserve attention at this stage:
- A properly configured caching system that improves page delivery speed.
- Image compression to reduce file size without sacrificing quality.
- A CDN if your customer base is international.
- Removal of unnecessary plugins that increase server load.
3. Configure store settings
Once performance is stable, store operations must be validated. Migration transfers data, but store settings determine how transactions actually work.
All core configurations require review:
- Currency and tax settings must match your business model
- Shipping zones and rates should reflect your real logistics setup
- Payment gateways need live transaction testing
- Email notifications must trigger correctly
- Inventory rules should deduct stock properly
Operational accuracy ensures that customers can browse, purchase, and receive confirmation without friction.
4. Set up analytics and tracking
Tracking systems must be restored immediately after migration. Without reliable data, performance evaluation becomes guesswork.
Google Analytics or GA4 should record traffic accurately. Conversion events need verification. Advertising pixels such as Meta Pixel must fire correctly during checkout. The XML sitemap should be resubmitted to Google Search Console to maintain search visibility.
Accurate tracking allows you to monitor traffic, revenue, and campaign performance without disruption.
5. Integrate marketing
At this stage, the foundation is stable. Now the focus shifts toward growth.
Marketing tools connect your WordPress store to customer communication channels. Email automation, CRM systems, and abandoned cart flows depend on clean data integration. Even small synchronization gaps can affect campaign performance.
Instead of rushing campaigns immediately, integration testing ensures:
- Customer data flows correctly into email platforms.
- CRM systems receive updated order information.
- Abandoned cart automation triggers properly.
- SEO plugins maintain meta structure and schema consistency.
Growth becomes sustainable when systems communicate smoothly.
6. Monitor stability and revenue
The first few weeks after migration are critical. Real traffic often reveals issues that do not appear during testing.
Revenue trends should be compared with pre-migration benchmarks. Checkout completion rates require observation. Error logs and broken links should be reviewed regularly. Organic traffic changes need monitoring to detect potential SEO impact.
Consistent monitoring protects both performance and profitability during the transition period.
Magento to WordPress Migration: FAQs
Does Magento work with WordPress?
Magento and WordPress are separate systems and do not natively run together. Integration is possible through custom development, but it adds complexity. Many businesses choose to migrate fully to WordPress instead of maintaining both platforms.
Is Magento better than WordPress?
Magento is stronger for large, complex eCommerce operations. WordPress is more flexible, easier to manage, and more cost-effective. The better choice depends on your store size and technical needs.
Which is better, Magento or WooCommerce?
Magento suits enterprise-level stores with complex requirements. Meanwhile, WooCommerce works well for small to mid-sized businesses that want flexibility and lower costs. For most growing stores, WooCommerce is easier to manage.
Is Magento end of life?
Magento 1 reached the end of life in 2020 and is no longer supported. Magento 2 and Adobe Commerce are still actively supported and maintained.
Conclusion
Passing this article, we hope that you can finally understand how to migrate your Magento store to WordPress, as well as do a checklist to ensure everything works perfectly. Once again, if you want to migrate your Magento store to WordPress or the other way around, LitExtension is always ready to assist you.
Finally, got any questions? Don't hesitate to contact us, we’re happy to help. Also, let’s join our community to get more eCommerce tips and news!

