Importing and exporting customer data for various purposes (such as analysis, backups, or system transfers) is a common practice among eCommerce businesses, and Magento 2 users are no exception. So, if you’re just getting started with this platform and still unsure about the steps involved in Magento 2 import & export customers, this guide is for you!
In the following sections, we’ll walk through these topics to help you navigate the process with confidence:
- How to import customer data
- How to export customer data
- Common errors and how to solve them
- Advanced solutions with LitExtension
Let’s get started.
How to Import and Export Customer Data in Magento 2 Using Default Tool
For imports, you prepare your customer data using Magento’s sample format, configure the import behavior, upload the file, validate it, and run the process. Meanwhile, for exports, you simply select the customer entity, customize attributes or filters if needed, and generate a CSV file via the system queue.
The details are as follows:
Import Customers Magento 2
Step 1. Get your customer data ready
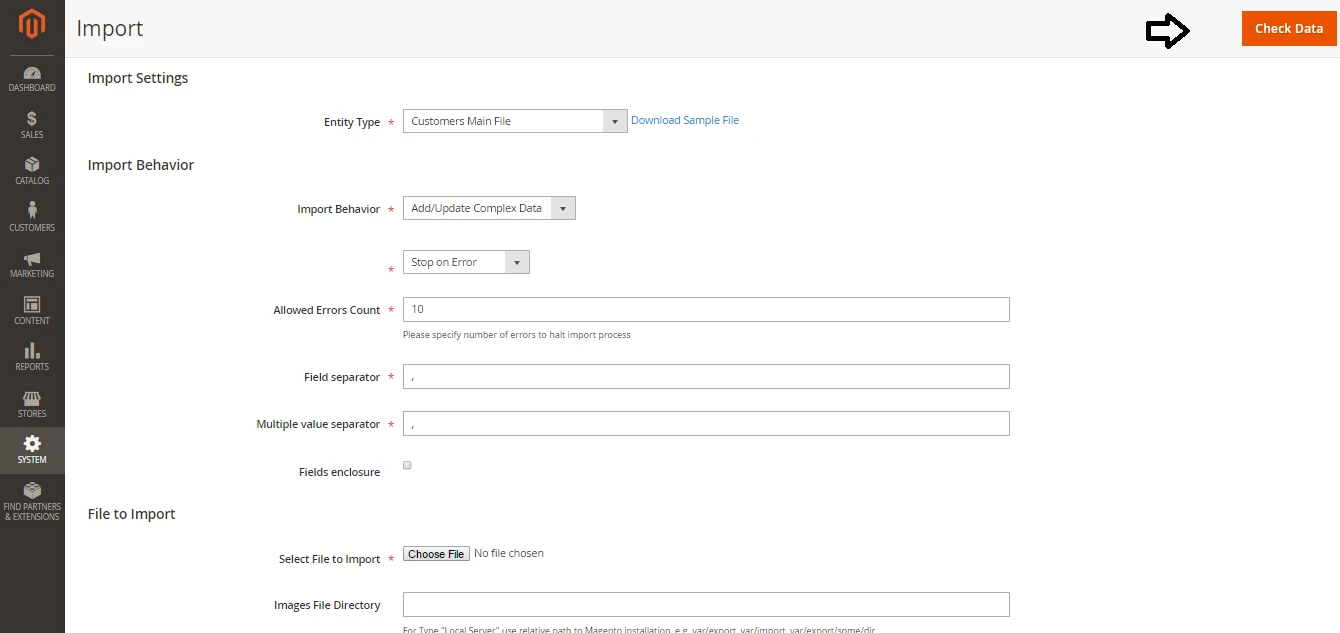
First, go to System → Data Transfer → Import from the Magento Admin panel.
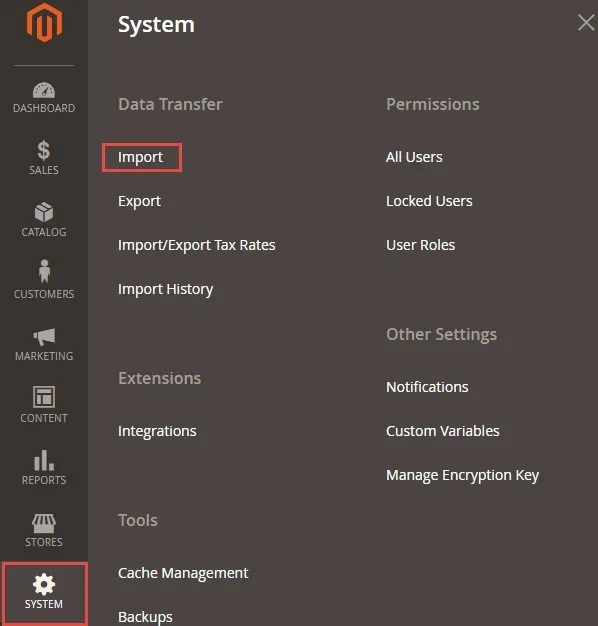
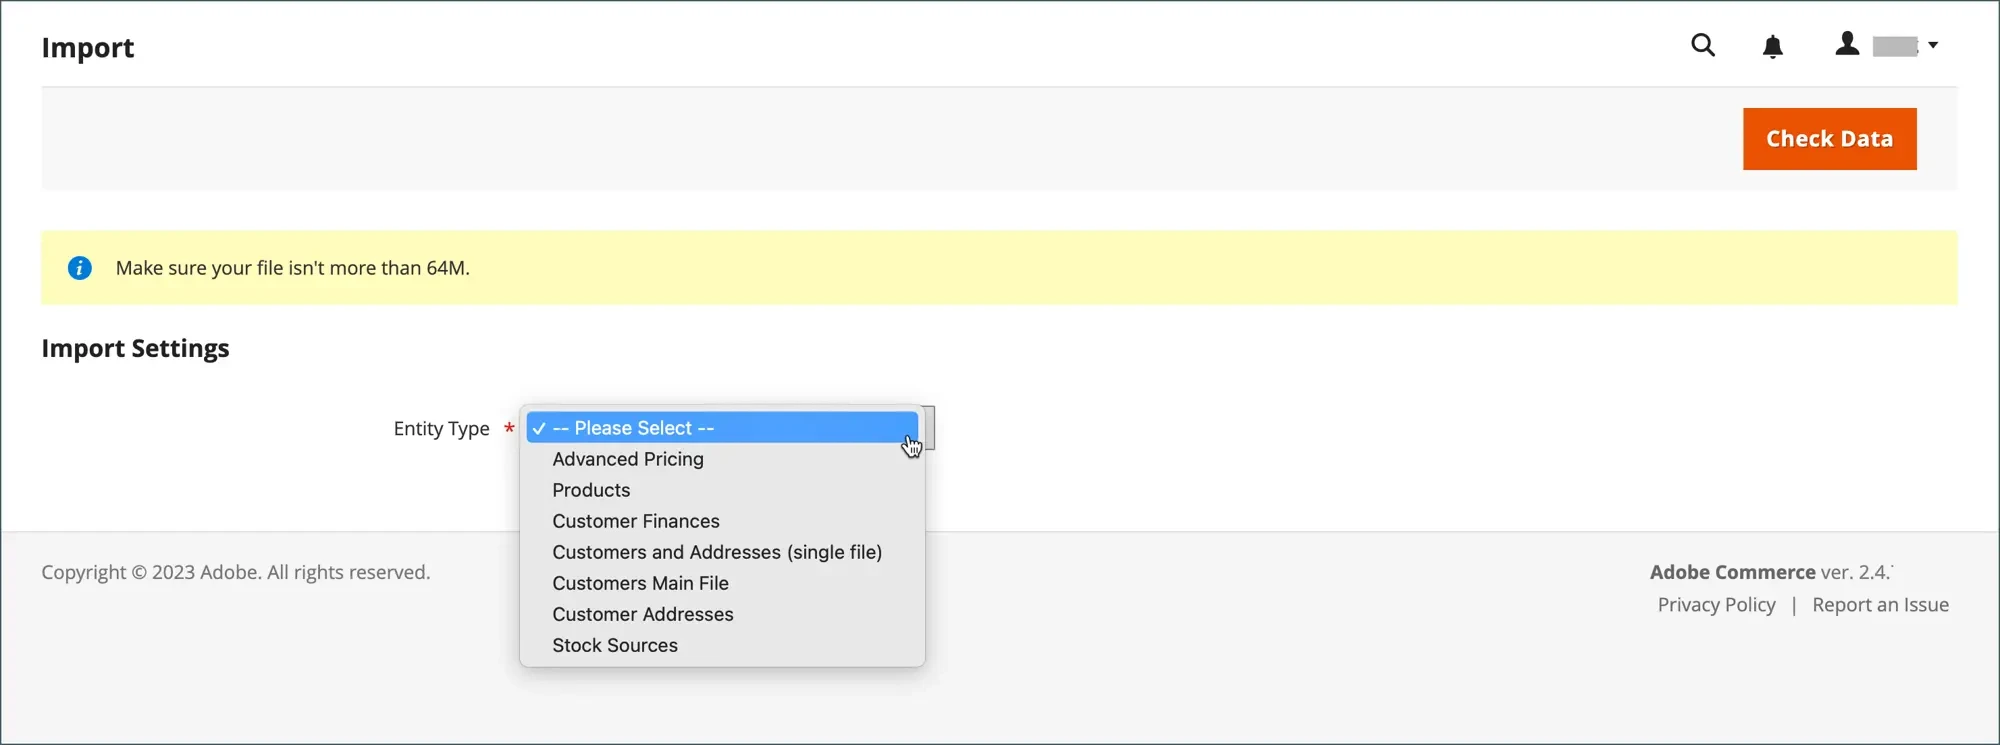
Then, in the Import Settings section, select the correct Entity Type based on the customer data you plan to upload. The most relevant options include:
- Customers Main File: Contains basic customer account details (name, email, group, etc.); no address data included.
- Customer Addresses: Includes customer address information (street, city, country, etc.); must be linked to existing customers.
- Customers and Addresses: Combines both customer accounts and their addresses in one file for full data import.
- Customer Finances (if applicable): Stores financial data like store credit or reward points, depending on your setup.
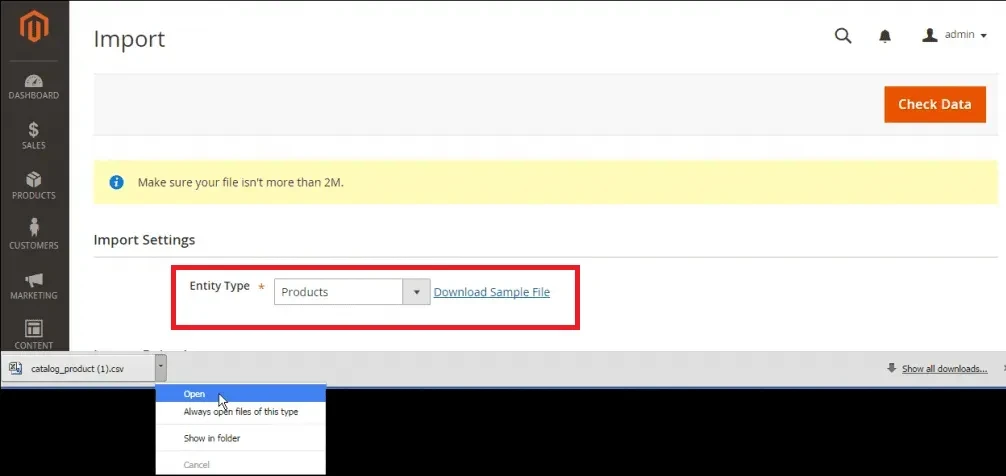
Once selected, click Download Sample File (right next to Entity Type). This file serves as a template and includes the correct column structure and example values. You can use this template to prepare your import CSV file and make sure it adheres to Magento’s formatting rules.
Note:
If your import includes references to assets (such as profile-related files, if applicable in custom setups), ensure those files are uploaded to the correct directory. By default, Magento stores import-related files in pub/media/import.
Step 2. Configure import behavior
Next, define how Magento should handle the incoming customer data.
Under Import Behavior, choose one of the following options:
- Add/Update: Inserts new customers or updates existing ones
- Replace: Overwrites existing records entirely
- Delete: Removes customers that match the data in your file
You’ll also need to decide how the system reacts to errors during the import process:
- Stop on Error: Halts the import immediately when an issue occurs
- Skip Error Entries: Continues importing while ignoring problematic rows
Also, you should set the Allowed Errors Count, which determines how many errors Magento will tolerate before canceling the import. The default is 10, but you can adjust this depending on your dataset.
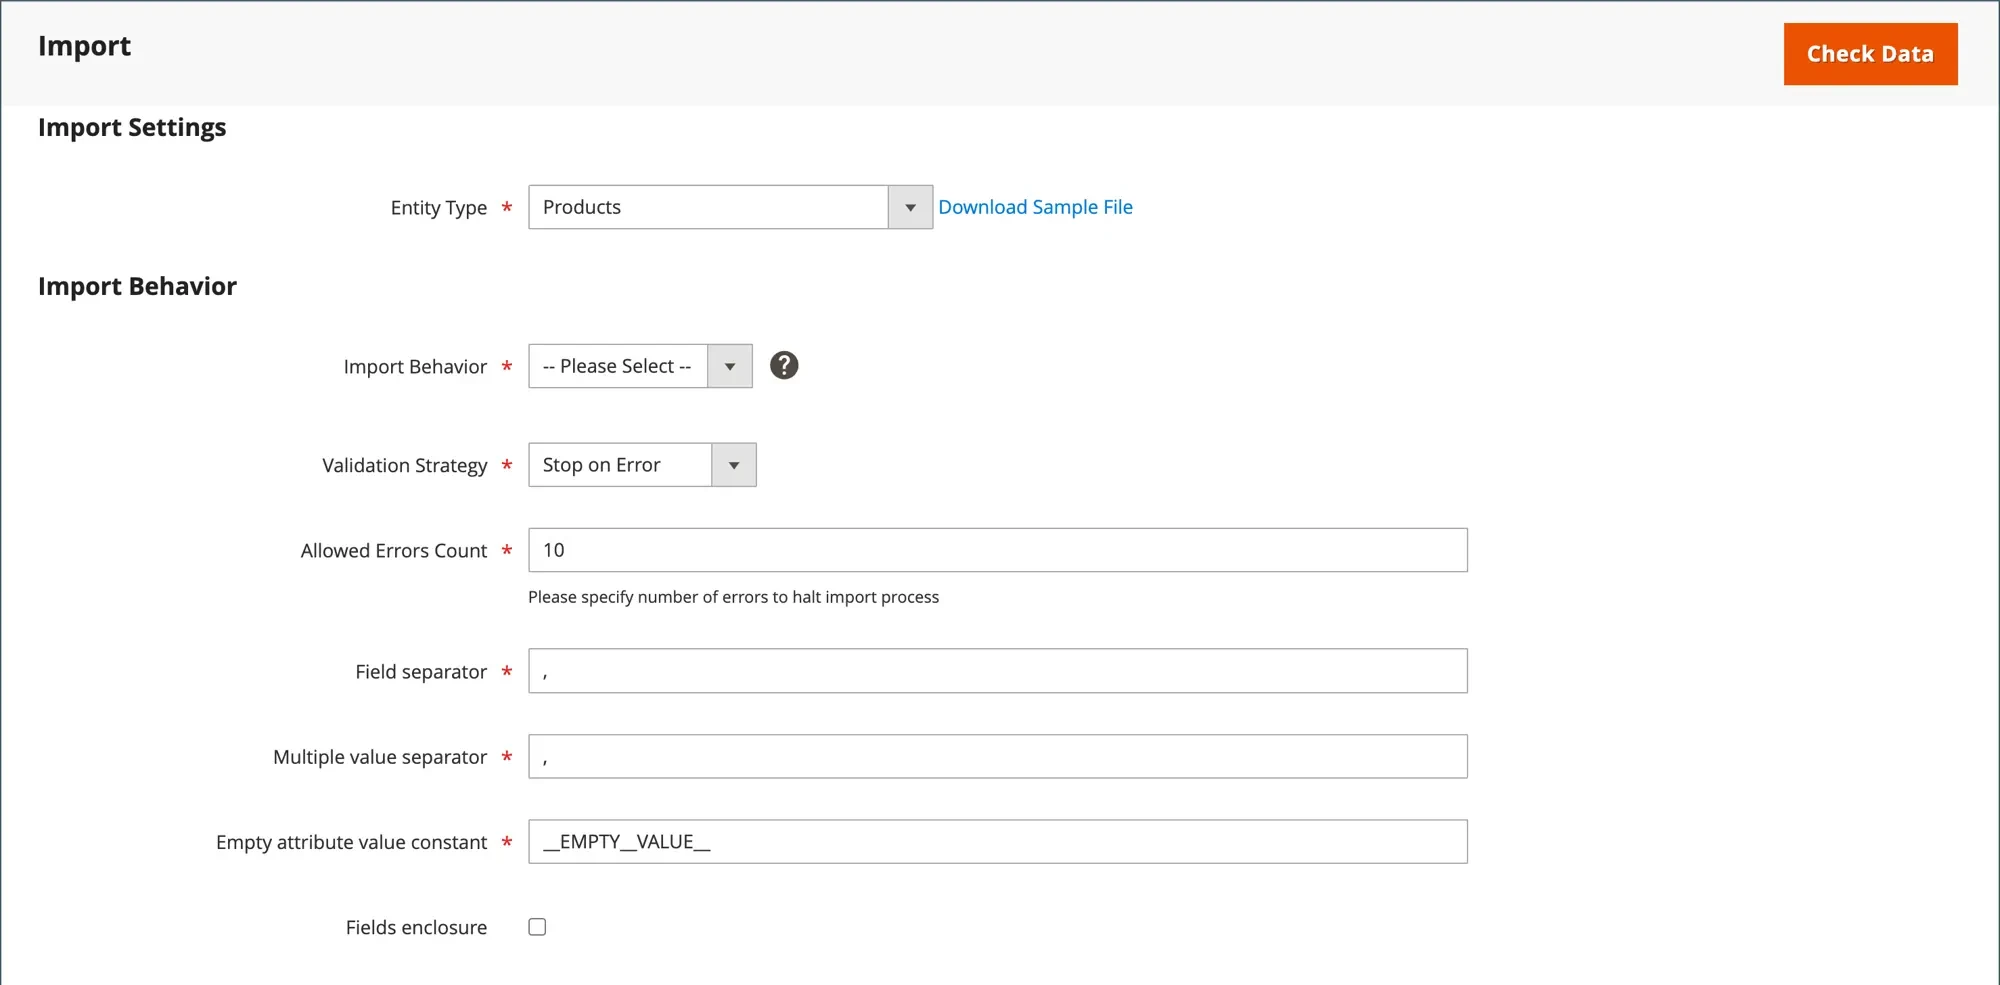
Other settings to keep in mind:
- For separators, Magento uses commas by default for both Field Separator and Multiple Value Separator. It’s best to keep these unchanged unless your CSV uses a different format.
- Leave the Empty attribute value constant as _EMPTY_VALUE_ unless you have a specific reason to modify it.
- If your dataset contains special characters, you can enable the Fields Enclosure option to ensure those values are properly interpreted during import.
Step 3. Upload your customer CSV file
Now, click Choose File and select the CSV file you’ve prepared. Once selected, Magento will recognize it as the source for your import.
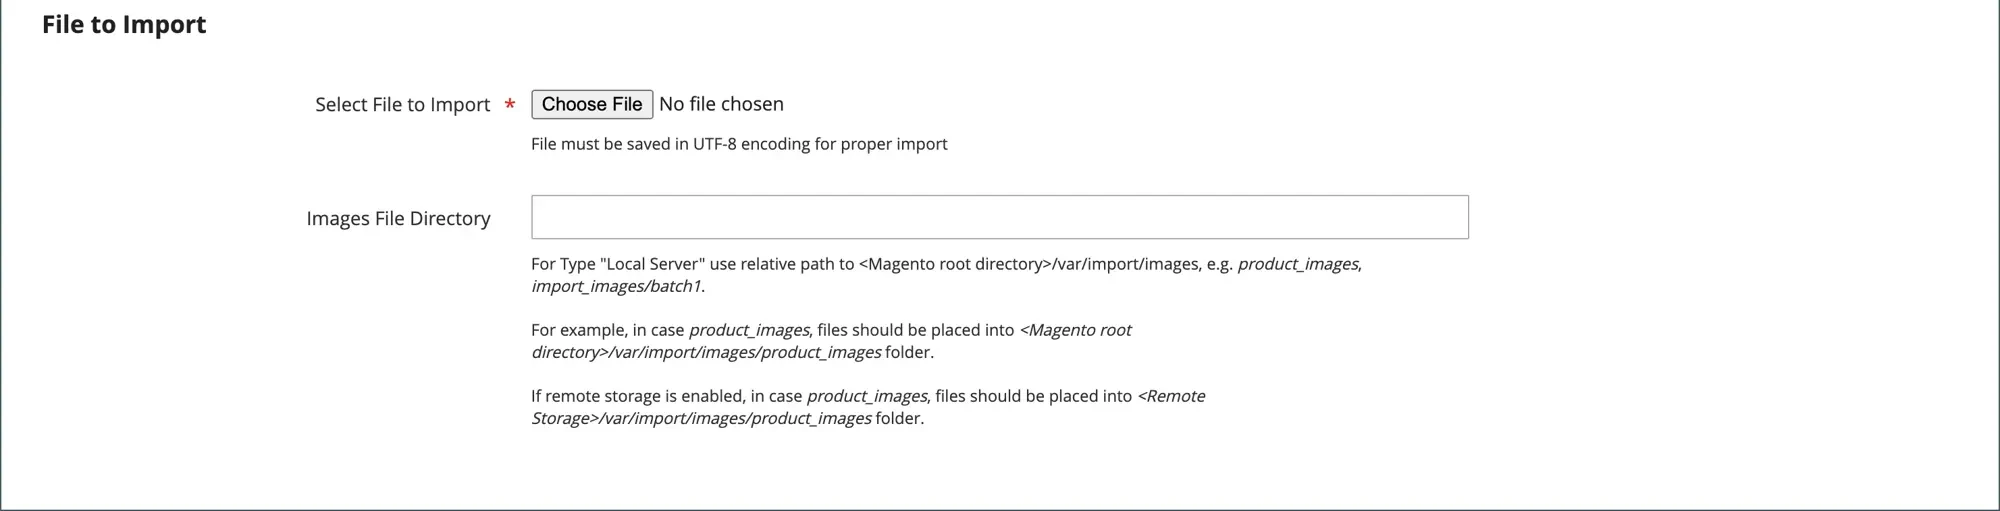
If your import involves any file paths (more common with product imports, but sometimes relevant in extended customer setups), specify the directory in the Images File Directory field. This should be a relative path on the server.
For example:
customer_assets
In newer Magento versions (from 2.3.2 onward), this path is appended to the base directory:
<Magento-root>/var/import/images/
So your files should be placed in:
<Magento-root>/var/import/images/customer_assets
If your store uses remote storage, the same structure applies within your remote storage root directory.
Step 4. Validate and run the import
Finally, before executing the import, click Check Data in the top-right corner. Magento will scan your file and validate its structure and content.
- If everything is formatted correctly, you’ll see a confirmation message indicating the file is valid.
- If errors are detected, Magento will display a list of issues. Review each one carefully, update your CSV file accordingly, and re-upload it for validation.
Once your file passes validation, click Import to begin the process. A confirmation message will appear when the import completes successfully, signaling that your customer data has been added to the system.

Export Customers Magento 2
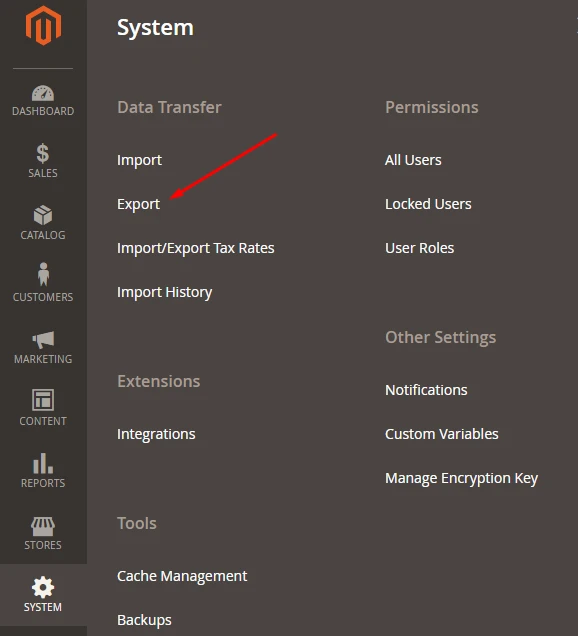
Step 1. Access the export tool
First, go to System → Data Transfer → Export from your Magento Admin sidebar.
Then, from the Export Settings section, choose the appropriate Entity Type depending on what customer-related data you want to extract. For customer exports, the most relevant options include:
- Customers Main File
- Customer Addresses
- Customer Finances (if needed)
By default, the Export File Format is set to CSV, which is the recommended format for compatibility and easy editing, so you can leave this as is. If your dataset may contain special characters, you can enable the Fields Enclosure option to ensure those characters are properly wrapped.

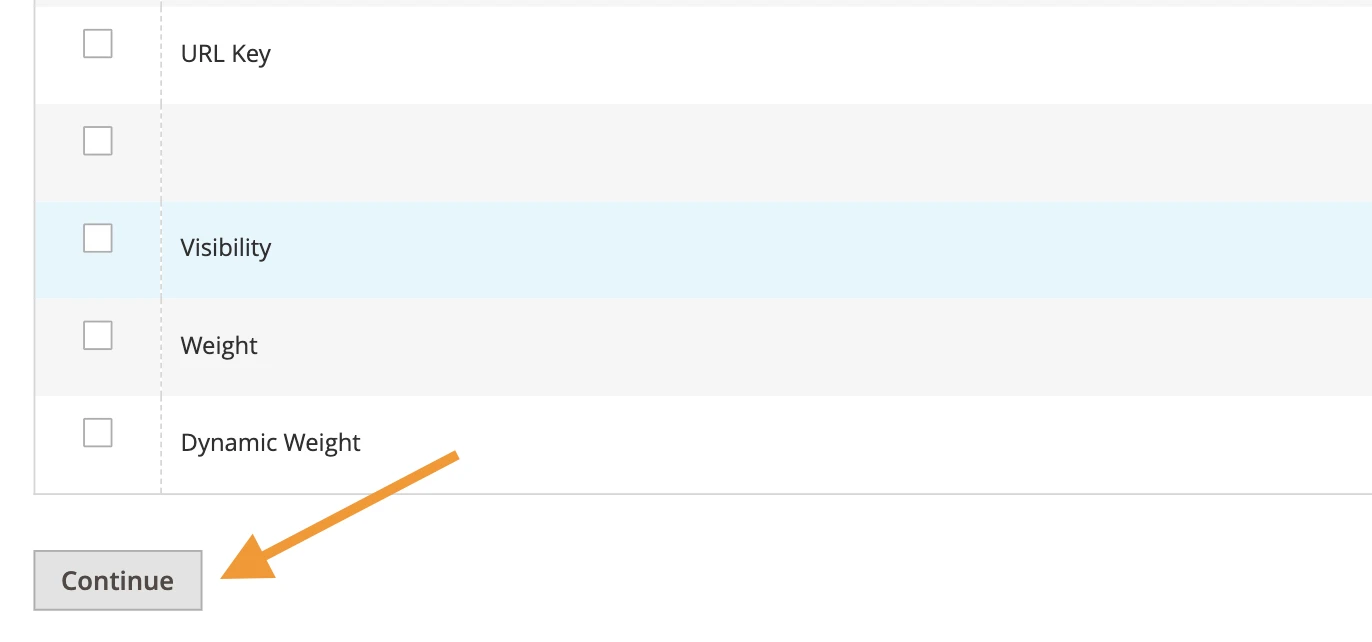
Step 2. Customize attributes and apply filters (optional)
Before exporting, you can control exactly which data gets included in your file.
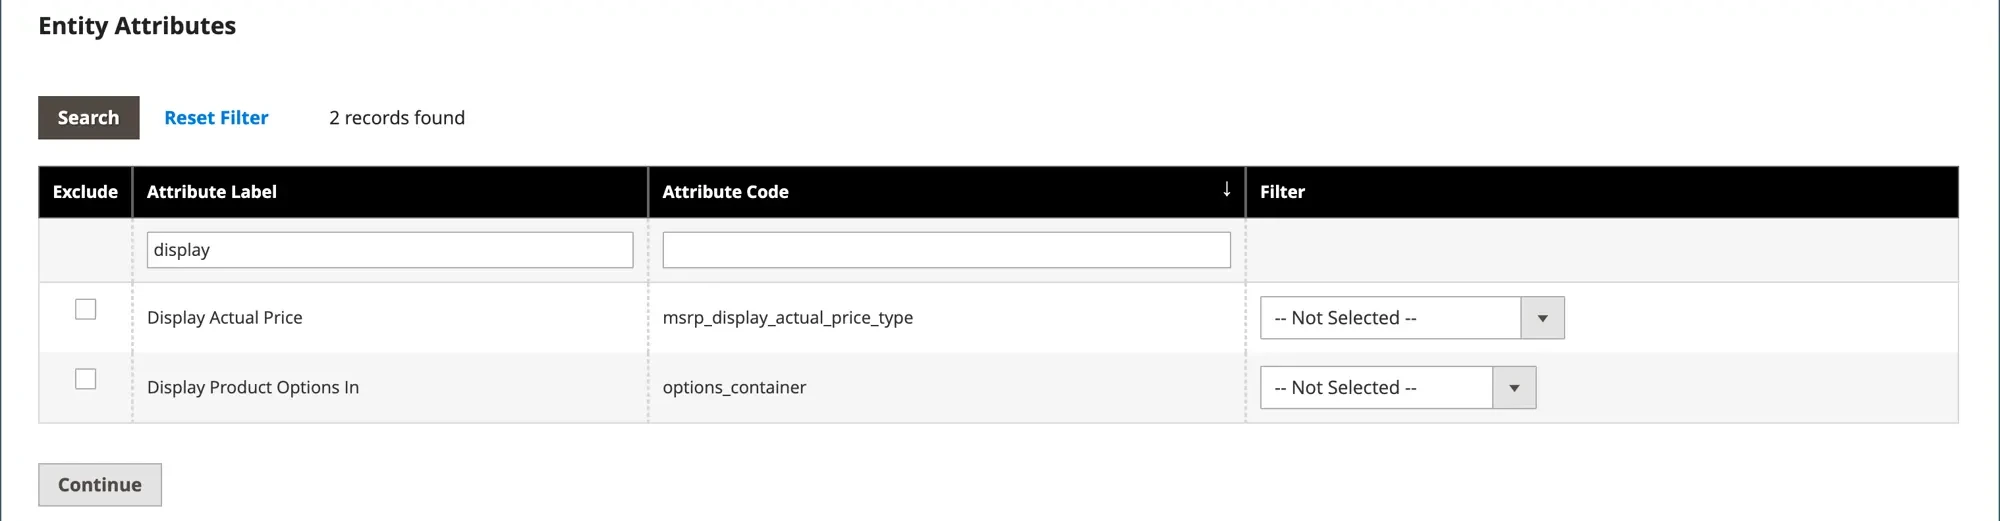
In the Entity Attributes section, Magento displays all available attributes in alphabetical order. You can use built-in tools like search and sorting to quickly locate specific fields. These controls only affect how the list is displayed; they don’t impact the export itself.
If you want to refine your export:
- Use the Filter column to export only records that match specific attribute values. For example, you could export only customers that meet certain conditions (similar to filtering by SKU in product exports).
- To exclude certain attributes, tick the Exclude checkbox next to those fields. Magento will still include the column in the CSV, but it will contain no data.
This flexibility is useful when you only need a subset of customer information (for example, exporting just email addresses and names instead of the full dataset).
Step 3. Generate the export file
Once everything is configured, scroll down and click Continue in the bottom-right corner of the page.
Magento will begin processing your export request. However, instead of generating the file instantly, the system sends the task to a message queue, so your cron jobs must be running properly to handle this process.
After completion, the exported file will be saved in the var/export/ directory.
Step 4. Download and use your customer data
When the export is complete, you can download the CSV file and open it in any spreadsheet tool, such as Excel or Google Sheets.
From there, you’re free to review, modify, or clean up the data as needed. Plus, if required, you can later import the updated file back into your Magento store using the import functionality.
5 Common Import & Export Errors
When working with customer data in Magento 2, most import and export issues tend to fall into a few common categories. Understanding these pitfalls upfront helps you quickly diagnose errors and keep your data transfer process running smoothly:
1. Invalid website code in the _website column
This error typically occurs when the value in the _website column doesn't match any existing website code configured in Magento 2. Magento does not recognize website names, only their internal codes.
To fix this, go to Stores → All Stores and check the Code column for your website. Use that exact value (for example, base) instead of the display name like “Main Website.” Otherwise, even a small mismatch will cause the import to fail.
2. Incorrect value in the group_id field
Similarly, if Magento throws an error related to group_id, it means the value provided doesn't correspond to any valid customer group in your system.
The good news: You can resolve this by navigating to Customers → Customer Groups and locating the correct numeric ID for each group. Make sure your CSV uses these IDs (not the group names) since Magento only accepts the numeric identifier during import.
3. Missing required customer attributes
In most cases, imports will fail if essential fields such as email, firstname, or _website are missing or left empty in your CSV file.
To avoid this issue, you must carefully review your dataset and ensure all required columns are present and properly filled in for every row. It's also important to verify that column headers are spelled exactly as Magento expects; any typo can break the import process otherwise.
4. Multi-value fields not interpreted properly
Sometimes Magento cannot correctly read fields that contain multiple values. This usually happens when the separator used in your CSV (such as ; or |) doesn't match Magento's default configuration.
Therefore, you need to ensure that the Field Separator and Multiple Value Separator settings in the import configuration align with your CSV format. If necessary, adjust your file to use standard commas or explicitly define the separators during setup.
5. Export file not showing after generation
In some cases, after exporting data, the CSV file doesn't appear even though Magento displays a message indicating the task was queued.
One possible cause is that you have enabled the “Add Secret Key to URLs” setting. Consider disabling this option under Stores → Configuration → Advanced → Admin → Security, then clear the cache and see if it resolves the problem.

Another solution is to manually trigger the export process. You can run the following command:
bin/magento queue:consumers:start exportProcessor
Plus, for stores that rely heavily on exports, it's important to confirm that cron jobs are properly configured so the queue runs automatically. Without an active queue consumer, Magento may generate the export task but never actually produce the file.
Advanced Magento 2 Import & Export Customers Solution with LitExtension
The native tools in Magento 2 are usually sufficient for simple export and import purposes. But what if you are planning to transfer data from Magento to another platform (or vice versa), and customer data is just one part of the migration project?
In that case, instead of piecing together separate import/export workflows, it's much better to adopt a comprehensive migration solution that manages all data types in one unified process. And that's where LitExtension comes in!
With over 15 years of experience in eCommerce data migration, our team provides two different migration approaches for different merchant needs:
LitExtension Automated Tool
For those who prefer a hands-on approach, the automated tool simplifies the process into three clear steps while still giving you full control. All you have to do is:
- Set up your Source Cart and Target Cart
- Select the data you want to migrate (such as customers, along with other entities if required) and configure additional options and mapping if needed.
- Launch the migration.
The system will handle the transfer automatically, moving your customer data and related information with minimal manual effort.
LitExtension All-in-One Migration Service
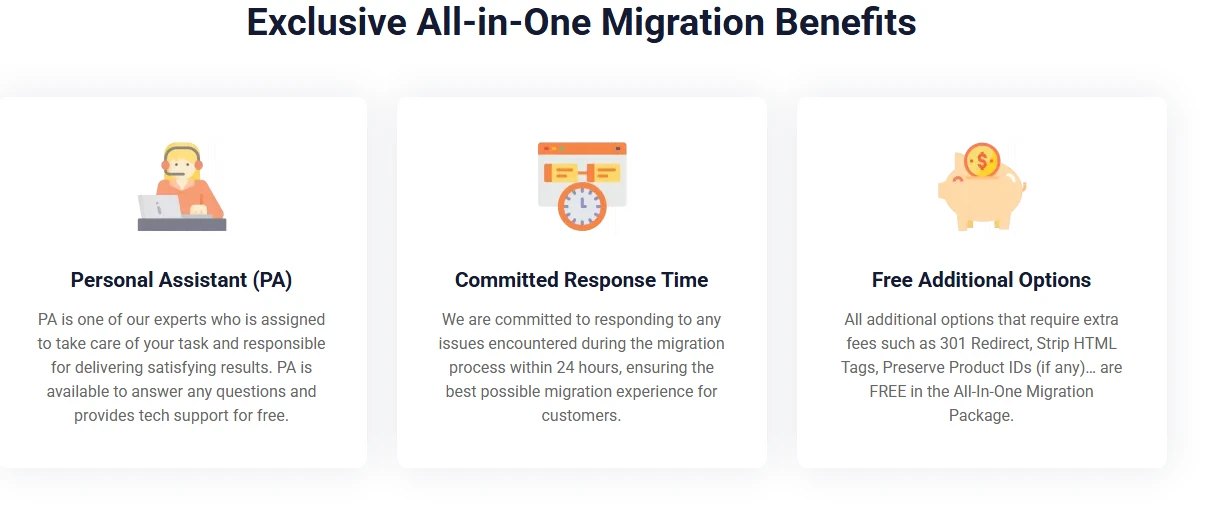
If you'd rather avoid the technical side altogether, the All-in-One service provides a fully managed experience.
With this option, LitExtension's experts will take care of the entire process for you, from initial setup and data mapping to execution and final validation. Not to mention, the service also covers custom requirements that go beyond standard data structures, such as unique fields or complex relationships that the Automated Tool may not fully support.
Note:
Most importantly, whichever approach you choose, LitExtension ensures your data remains accurate even after the initial migration is complete. Our post-migration services (with specific conditions applied) include:
- Recent Migration to capture newly added data
- Smart Update to sync changes without duplication
- Re-migration to rerun or refine the process when necessary.
All in all, when customer import/export is part of a broader platform transition, using a full-service solution like LitExtension provides a much smoother, more reliable alternative to manual workflows.
Migrate to Another Platform?
LitExtension provides a well-optimized All-in-One migration service for your data transfer!

Magento 2 Import & Export Customers: FAQs
How do I import customers in Magento 2?
To import customers in Magento 2, go to System > Data Transfer > Import, select "Customers Main File" as the entity type, and upload a prepared CSV file. Ensure your CSV uses Magento's required attributes, such as email, website_id, and group_id.
How can I export customers and their addresses in Magento 2?
To export customers and addresses in Magento 2, go to System > Data Transfer > Export in the admin panel, select "Customers Main File" or "Customer Addresses,” and export to CSV.
What are the key entity types for customer import/export in Magento 2?
The key entity types for customer import/export in Magento 2 are Customers Main File (general account data), Customer Addresses (shipping/billing info), and Customers and Addresses (combined data).
How can I export only specific customer data in Magento 2?
To export specific customer data in Magento 2, you can use the native export tool to filter by attribute values or exclude unnecessary columns.
Final Words
Once you understand the flow, the process for Magento 2 import & export customers can become much easier to manage!
And if you find yourself planning a full-store migration rather than just a simple import or export, it may be worth looking beyond built-in tools. Migration solutions like LitExtension can help streamline the entire process, allowing you to migrate customer data (and more) with greater efficiency and far less manual effort.
For more guidance or migration tips, check out our Magento blogs or join our Facebook Community.

