
OpenCart is one of the most popular eCommerce platforms to run an online business, with more than 190,000 live websites all over the world (Builtwith.com). If you are still running an older version of your store, an OpenCart upgrade is one of the most important steps to keep your store secure, fast, and compatible with the newest extensions. With the marked changes compared to the previous version, it is definitely reasonable to hit the nail on the head of how to perform an OpenCart upgrade without extensive hands-on work.
Here is the overall guidance for your OpenCart upgrade that you should keep in mind:
- Back up your current data and create a new OpenCart store.
- Perform data migration with LitExtension by filling in your store information and selecting the entities you want to migrate to the new OpenCart.
- Check the result after the OpenCart upgrade migration.
- Perform extra migration activities and be ready for action!
OpenCart Upgrade Made Easy!
Let our experts handle the migration while you focus on growing your business.

How to Perform an OpenCart Upgrade?
The very first question that pops into our head is, “How to upgrade OpenCart easily and speedily?” To answer this, we would like to bring up the three most common ways to perform an OpenCart upgrade:
- Manual Migration is the most secure and cost-free way to handle your OpenCart upgrade. However, you will have to spend a lot of time and effort moving your data to your new OpenCart. Furthermore, if you are not a tech-savvy person, there’s a high chance of unexpected errors during the upgrade process, and fixing them can be a nightmare.
- Professional Help is when you hire a web agency or developer to carry out the OpenCart upgrade and import data to your new store for you. The main drawback of this method lies in its steep price and possible issues during the process, since there is no guarantee that your web agency or developer fully understands the data structure of the platform. If this happens, you will have to foot the bill for extra time to fix it.
- Automated Migration Tool with LitExtension. This is considered the easiest way to complete your OpenCart upgrade in just a few hours. Our tool lets you transfer almost all types of data, including products, customers, orders, taxes, customers’ passwords, and much more. You can migrate to OpenCart using a database or CSV files, we cover it all.
How To Update OpenCart 3 to 4?
Before making any changes to your live site, it is crucial to prepare your environment. Follow these exact steps to ensure a smooth and secure upgrade process.
Backup Your Store
- You can back up the database through your hosting control panel (using tools like phpMyAdmin) or via the OpenCart admin panel under System > Maintenance > Backup/Restore.
- For the files, use an FTP client like FileZilla to download a copy of your entire store’s directory. Store these backups in a secure location, separate from your live server, before you start any OpenCart upgrade work.
Check Compatibility
- Review the extensions, modules, and themes used on your current OpenCart 3 store. Make sure they have updates or versions compatible with OpenCart 4.
- Disable or uninstall any extensions and custom themes that don’t support the new version. This reduces the risk of conflicts during the OpenCart upgrade.
- Contact the developers of any third-party extensions to confirm whether they have updates available for OpenCart 4, or look for alternatives that are already compatible.
Upload OpenCart 4 Files
- Download the latest OpenCart 4 version from the official OpenCart website.
- Use an FTP client to upload the new version’s files to your server, replacing the existing OpenCart 3 files. When prompted, choose to overwrite existing files.
- Be careful not to overwrite the
config.phpandadmin/config.phpfiles, as these contain your store’s configuration details. Alternatively, back these files up before the upload and restore them afterward.
Run the Upgrade Script
- Re-enable your extensions one at a time to check for compatibility issues. Update them if newer versions are available for OpenCart 4.
- Switch back to your custom theme if applicable, and confirm it functions correctly after the OpenCart upgrade. You may need to update the theme or tweak settings for full compatibility.
- Perform thorough testing across your store’s functionalities, including checkout, customer registration, and product pages. Check the error logs in the admin panel for any issues that need attention.
- Monitor the store for a few days to ensure the OpenCart upgrade didn’t introduce any bugs or performance issues.
Migration Preparation
Before executing the actual upgrade, establishing a secure foundation is essential to prevent any unexpected issues. Here are the necessary steps to get your current store ready for the transition.
1. Backup database of your OpenCart store
Firstly, it’s important to back up your data before any changes to your store. However, you do not need to worry about any distortion of your database when performing an OpenCart update with LitExtension.
Yet, in this article, we will still provide you with a guide on how to back up an OpenCart store. Please follow these steps:
- Log in to your OpenCart store and go to your store’s backend
- Go to System → Maintenance → Backup/Restore.
- Put a tick beside the file types you want to download. Select all options to allow you to export all data in your OpenCart store.
- Click Export.
As a result, the data you export is all the data tables in the MySQL database usable for download.
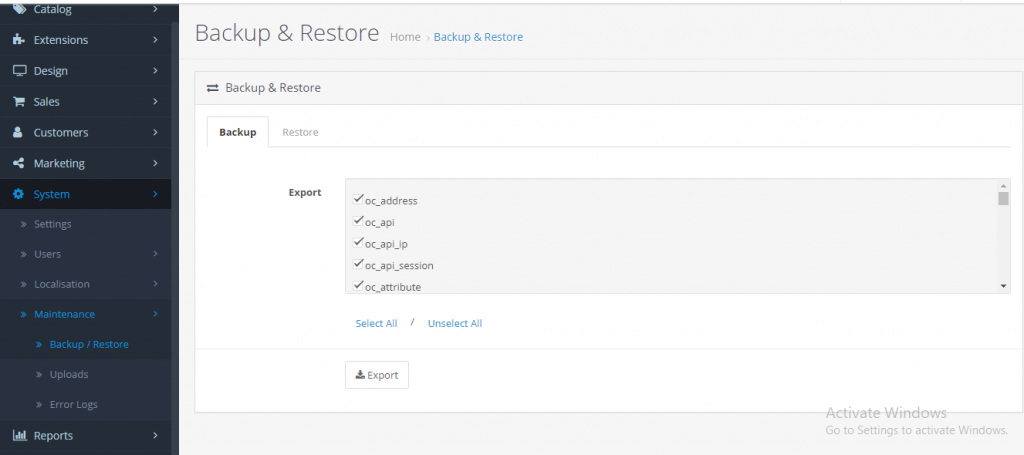
Note: If you need to restore a backup file that you saved on your computer, simply select Restore and choose the SQL file from your computer. Then, it will recover the database.
2. Create an OpenCart store in the latest version
To update OpenCart, of course, you need to download and install its latest version. At first, go to the official OpenCart Website and click to “download the file”.
Then, make sure you make a well-prepared plan for some database details, like:
- The hosting address of your database;
- The database name;
- A username with full access privileges to it;
- That user’s password.
Now, you have everything you need to start creating your own store. Open any browser and enter your OpenCart directory path in the address bar. You will see the OpenCart installation page:
- Installation license
- Pre-Installation
- Configuration
- Installation complete
Upgrade OpenCart with LitExtension
You can quickly perform an OpenCart upgrade with LitExtension in only 4 simple steps within a few hours.
1. Create an account on the LitExtension website
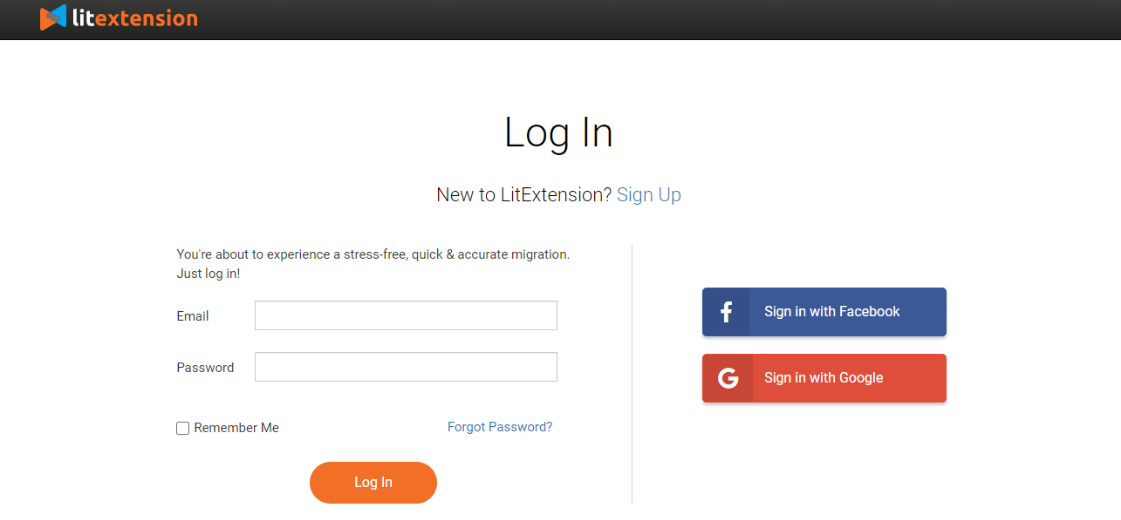
Firstly, you will need to register an account or sign in on the LitExtension site to create a new migration and perform your OpenCart upgrade.
2. Source Cart and Target Cart Setup
On the migration setup page, you need to enter your OpenCart source store info into the blank bar. Then, click LitExtension Connector to download the connector. After that, extract the zip file and upload the connector to the Source Store’s root folder.
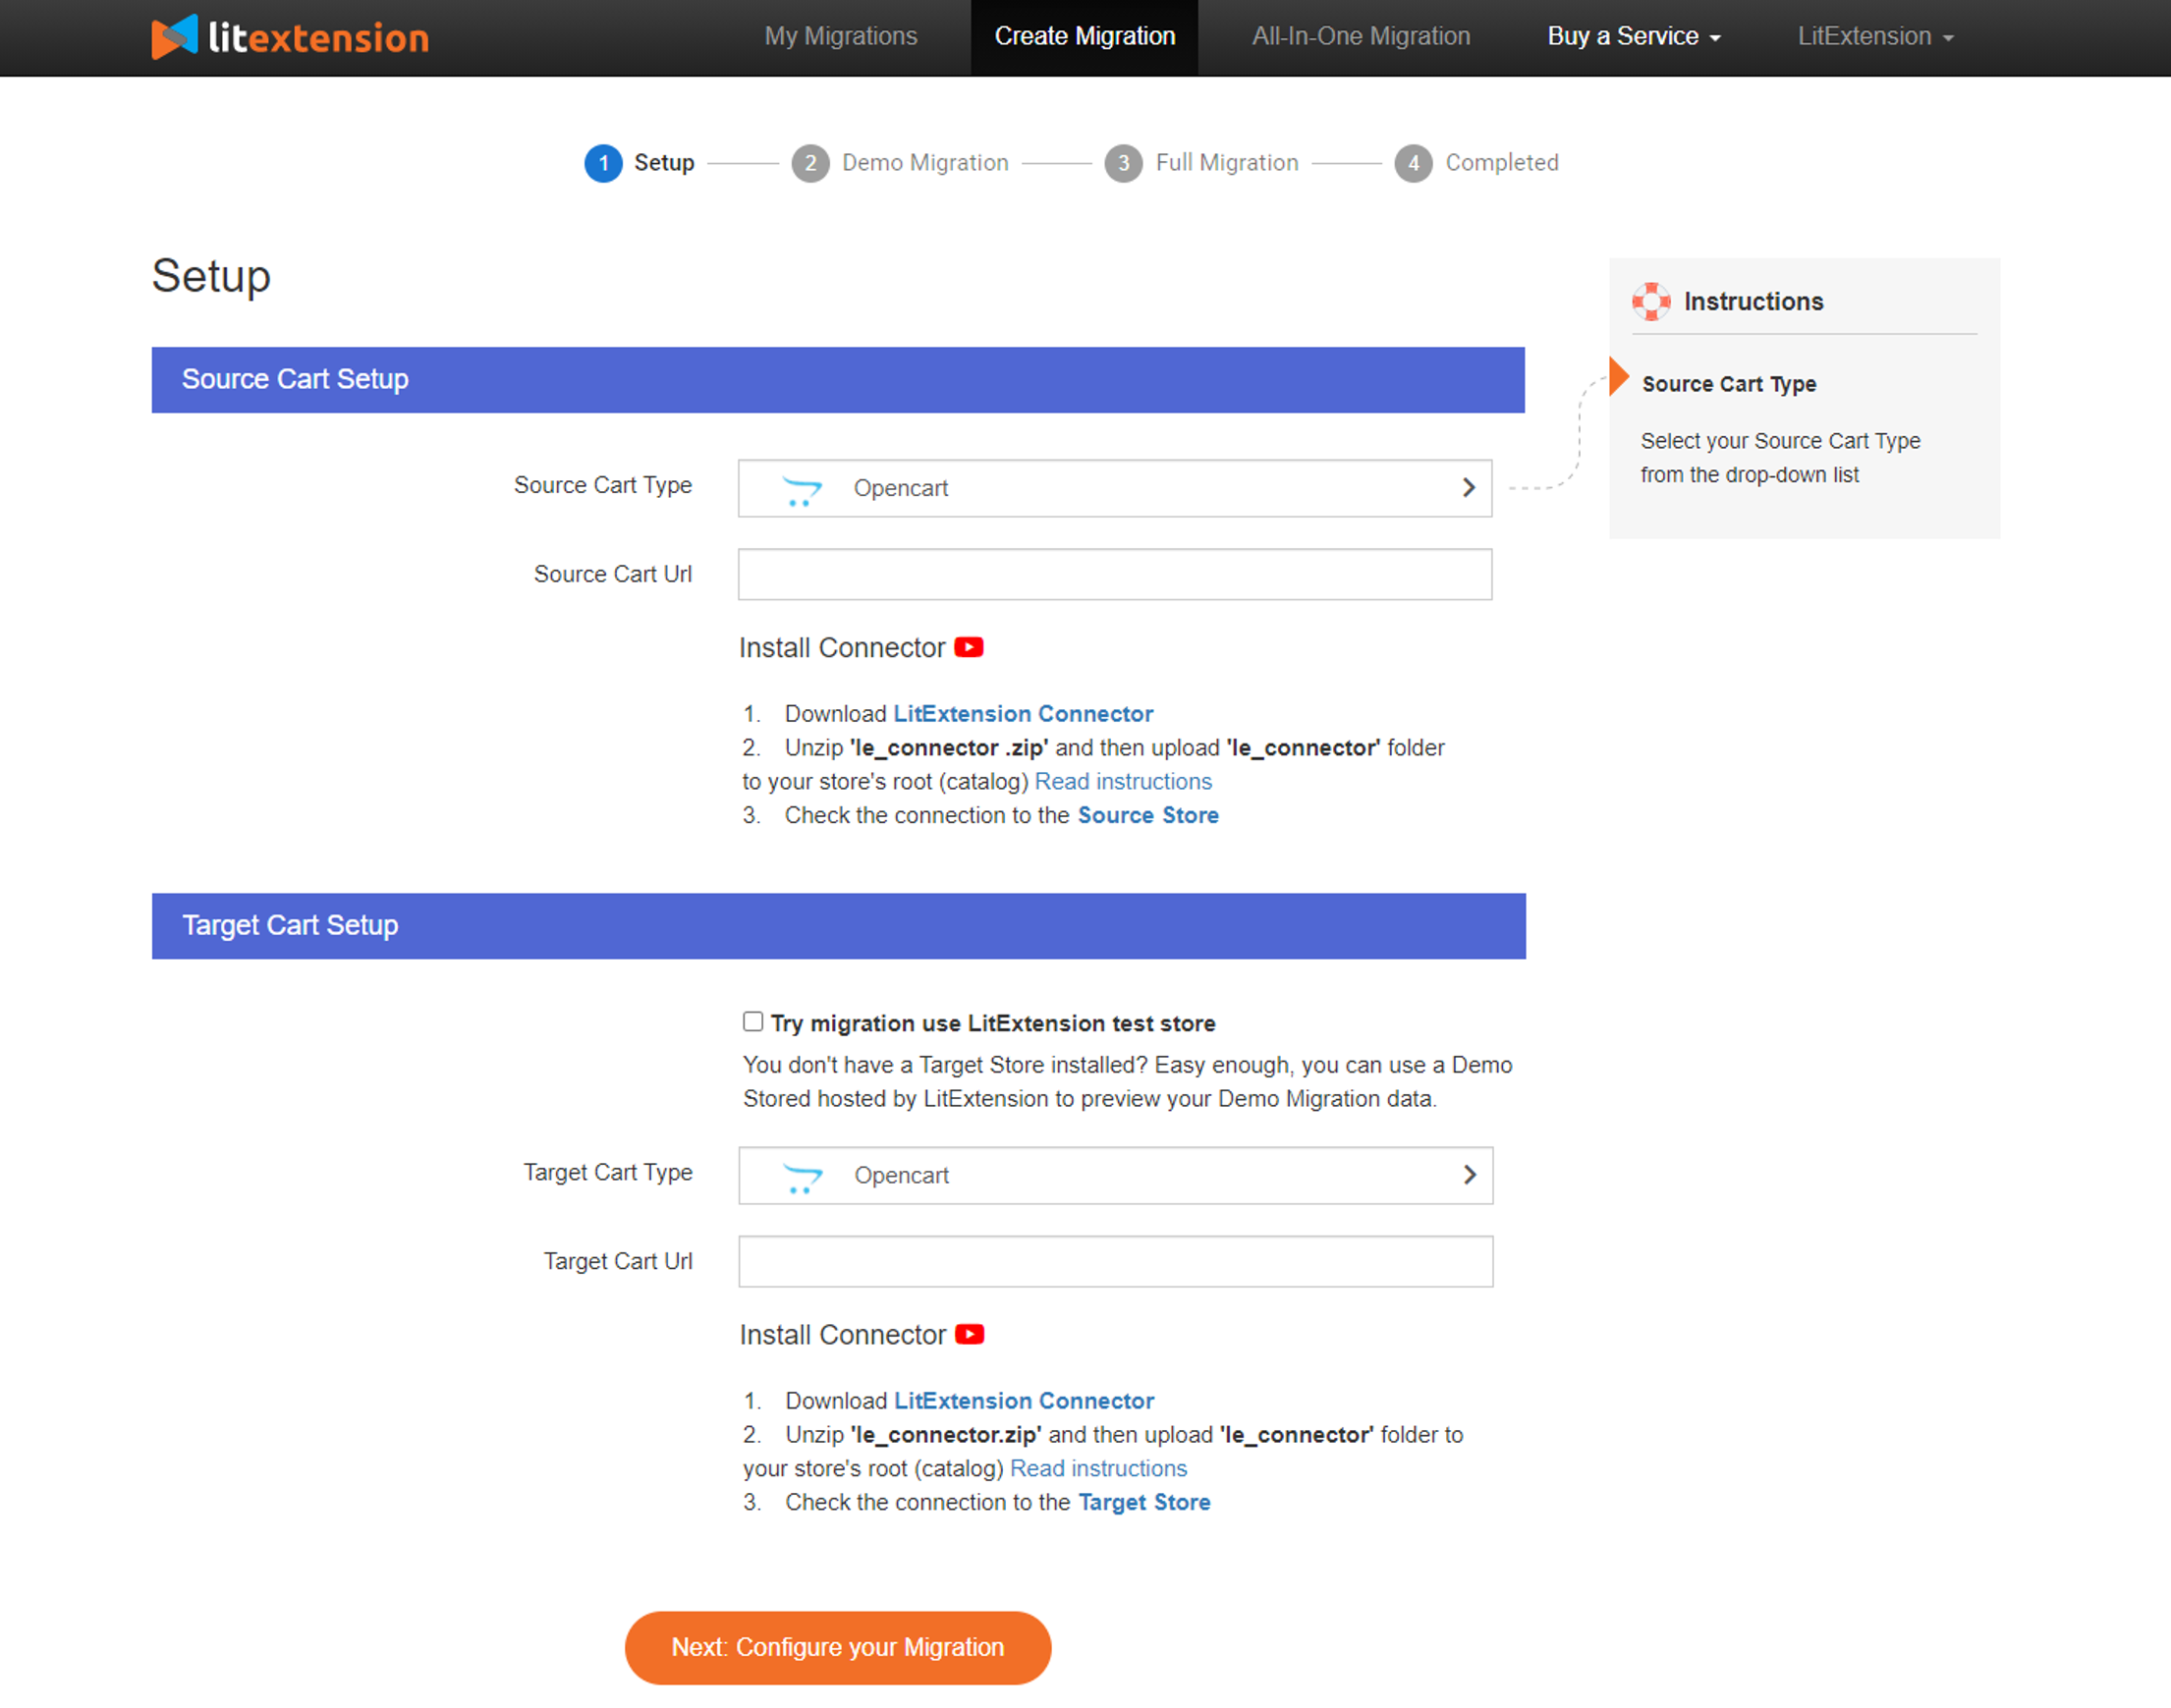
LitExtension Connector files are used to connect and make data exchange possible between your shopping carts. Actually, they are access gates that are fully secured by special LitExtension secured tokens.
The process is the same for macOS, Windows, and Linux users. You can use FileZilla or any FTP app (FileZilla, WinSCP, FileFTP, CuteFTP).
- Download the Connector to your computer.
- Upload the folder “le_connector” to your Source/Target store’s root folder via FTP.
- Once you’ve uploaded the connector properly, its installation status will be checked automatically and you will be informed by a message on the screen.
Here is the detailed step-by-step setup to help you install LitExtension Connector easier within 5 minutes.
3. Configure Your Migration
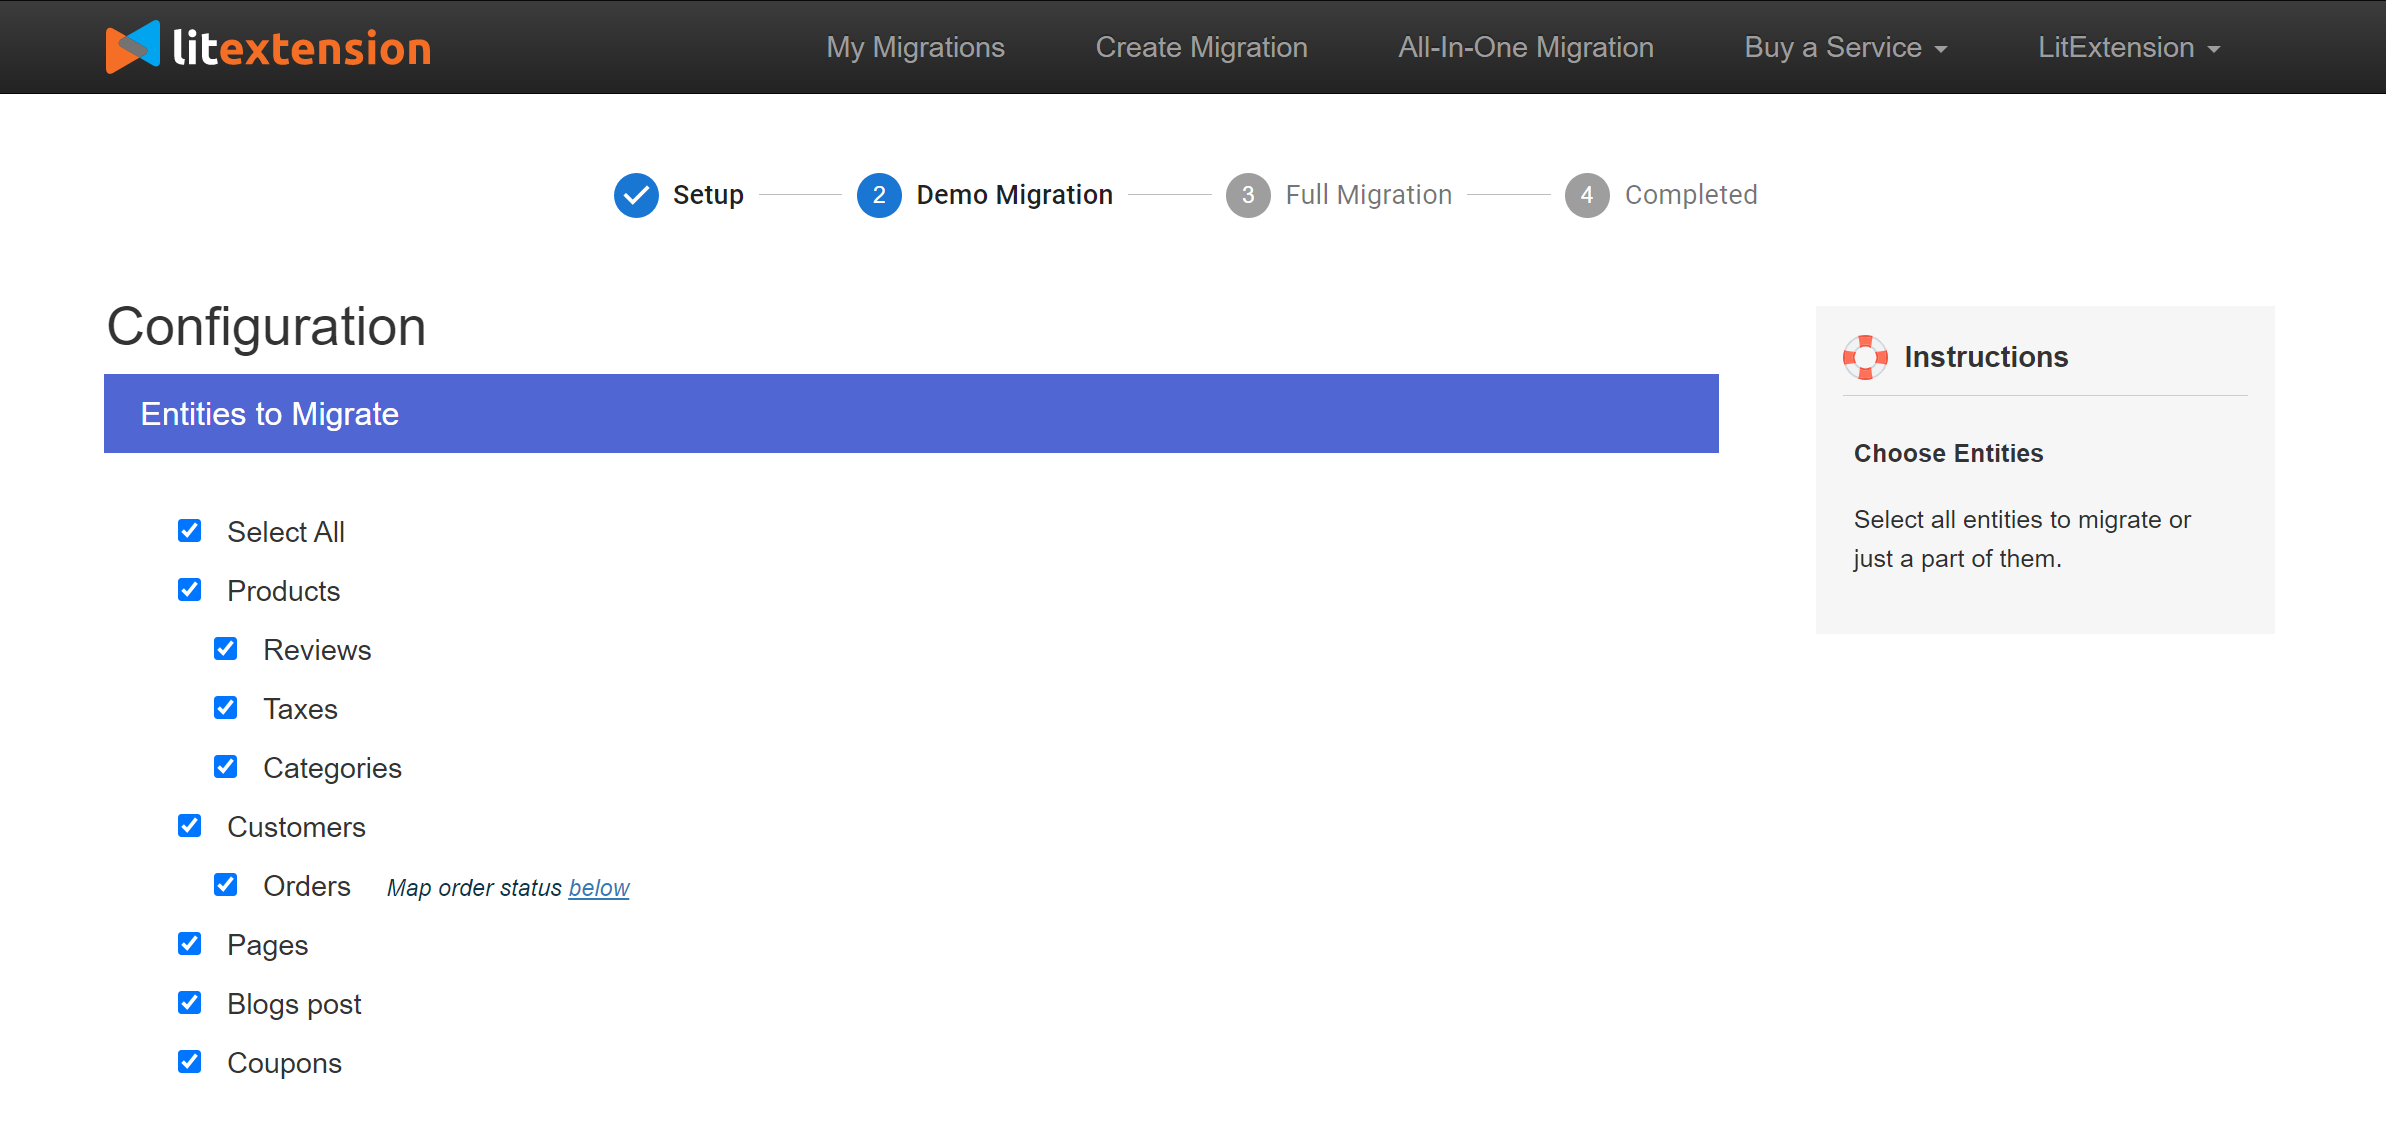
LitExtension’s OpenCart Upgrade Service allows you to transfer all of the important data from your old store to the new OpenCart. You can select either all of them together or certain data.
For example, if you only want to migrate Products, Customers, or Orders, just click on the data you want, as shown below.
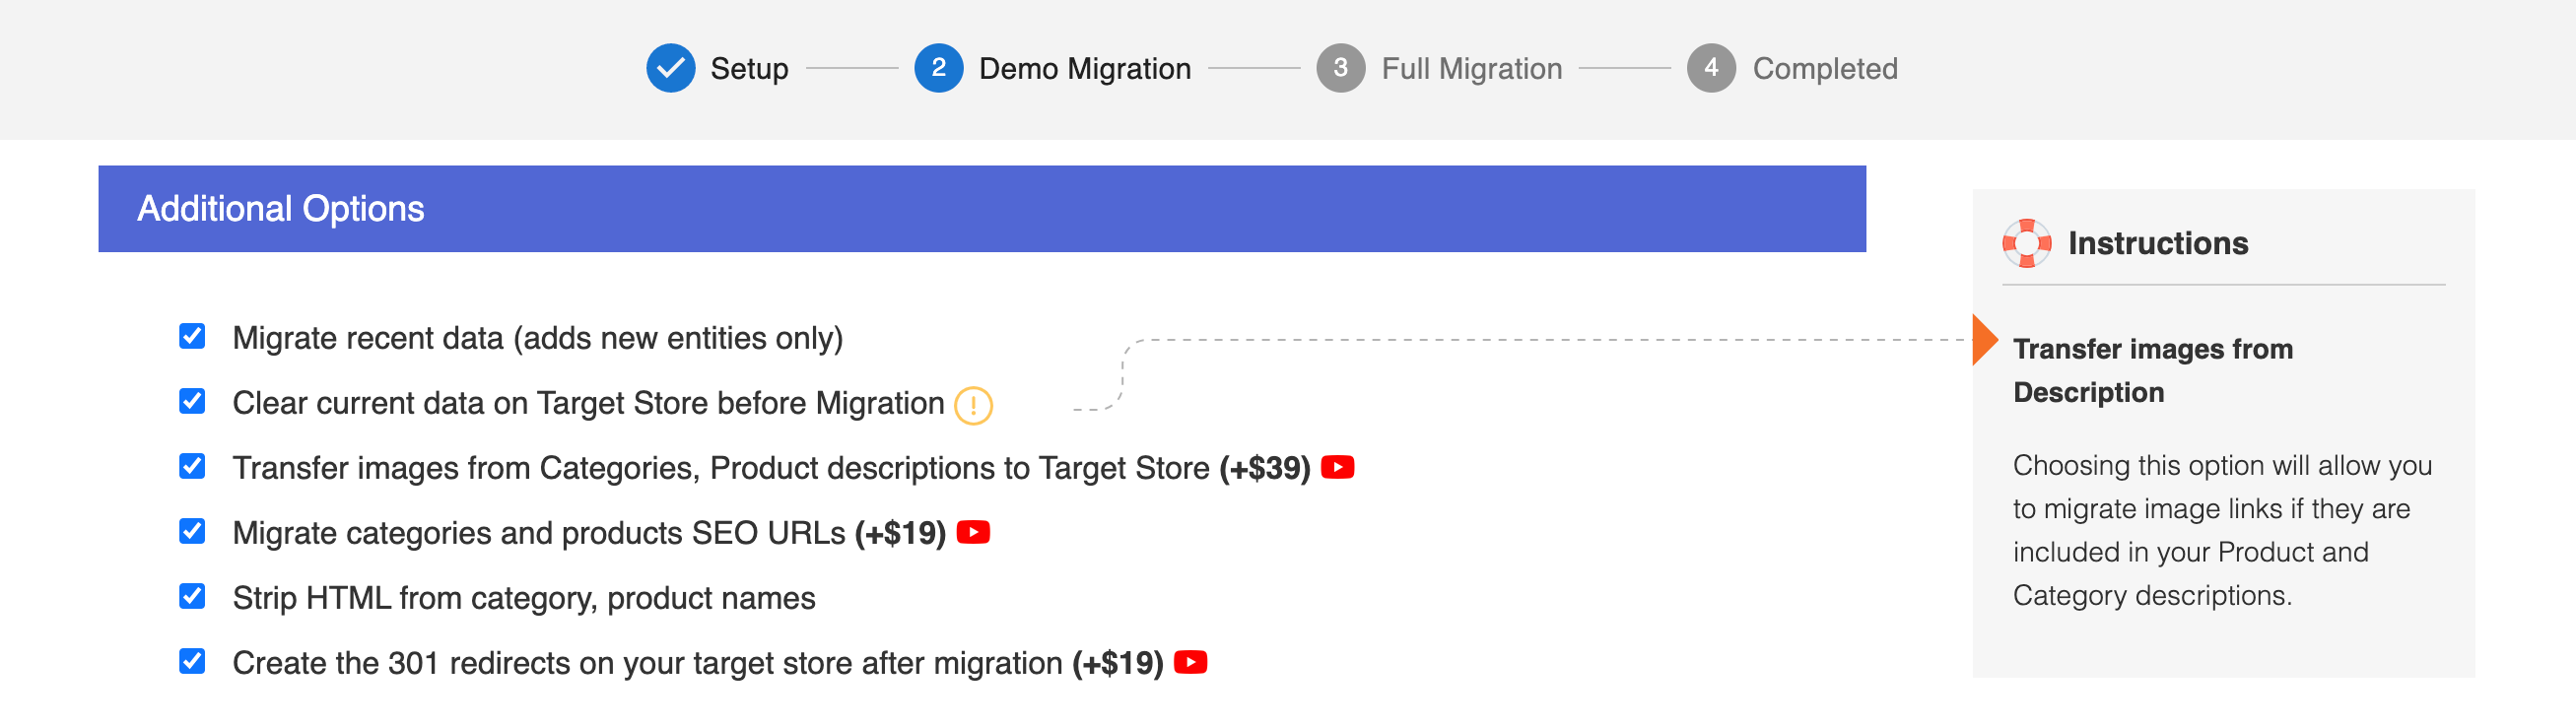
We also provide Additional Options here to extend your migration potential, such as 301 redirects, migrating customer passwords, and preserving orders, products, and customers IDs. Plus, Languages, Order Status, and Customer Group will be matched together to display consistently in the new store.
4. Perform migration
We highly recommend you try a demo first to see how our system works. Or else, you can run the full migration right away.
- To try the demo: Start your demo migration with a limited number of entities. You will see the same actions as the actual migration. After selecting entities and extra options, click “Start Free Demo Migration” to start migrating.
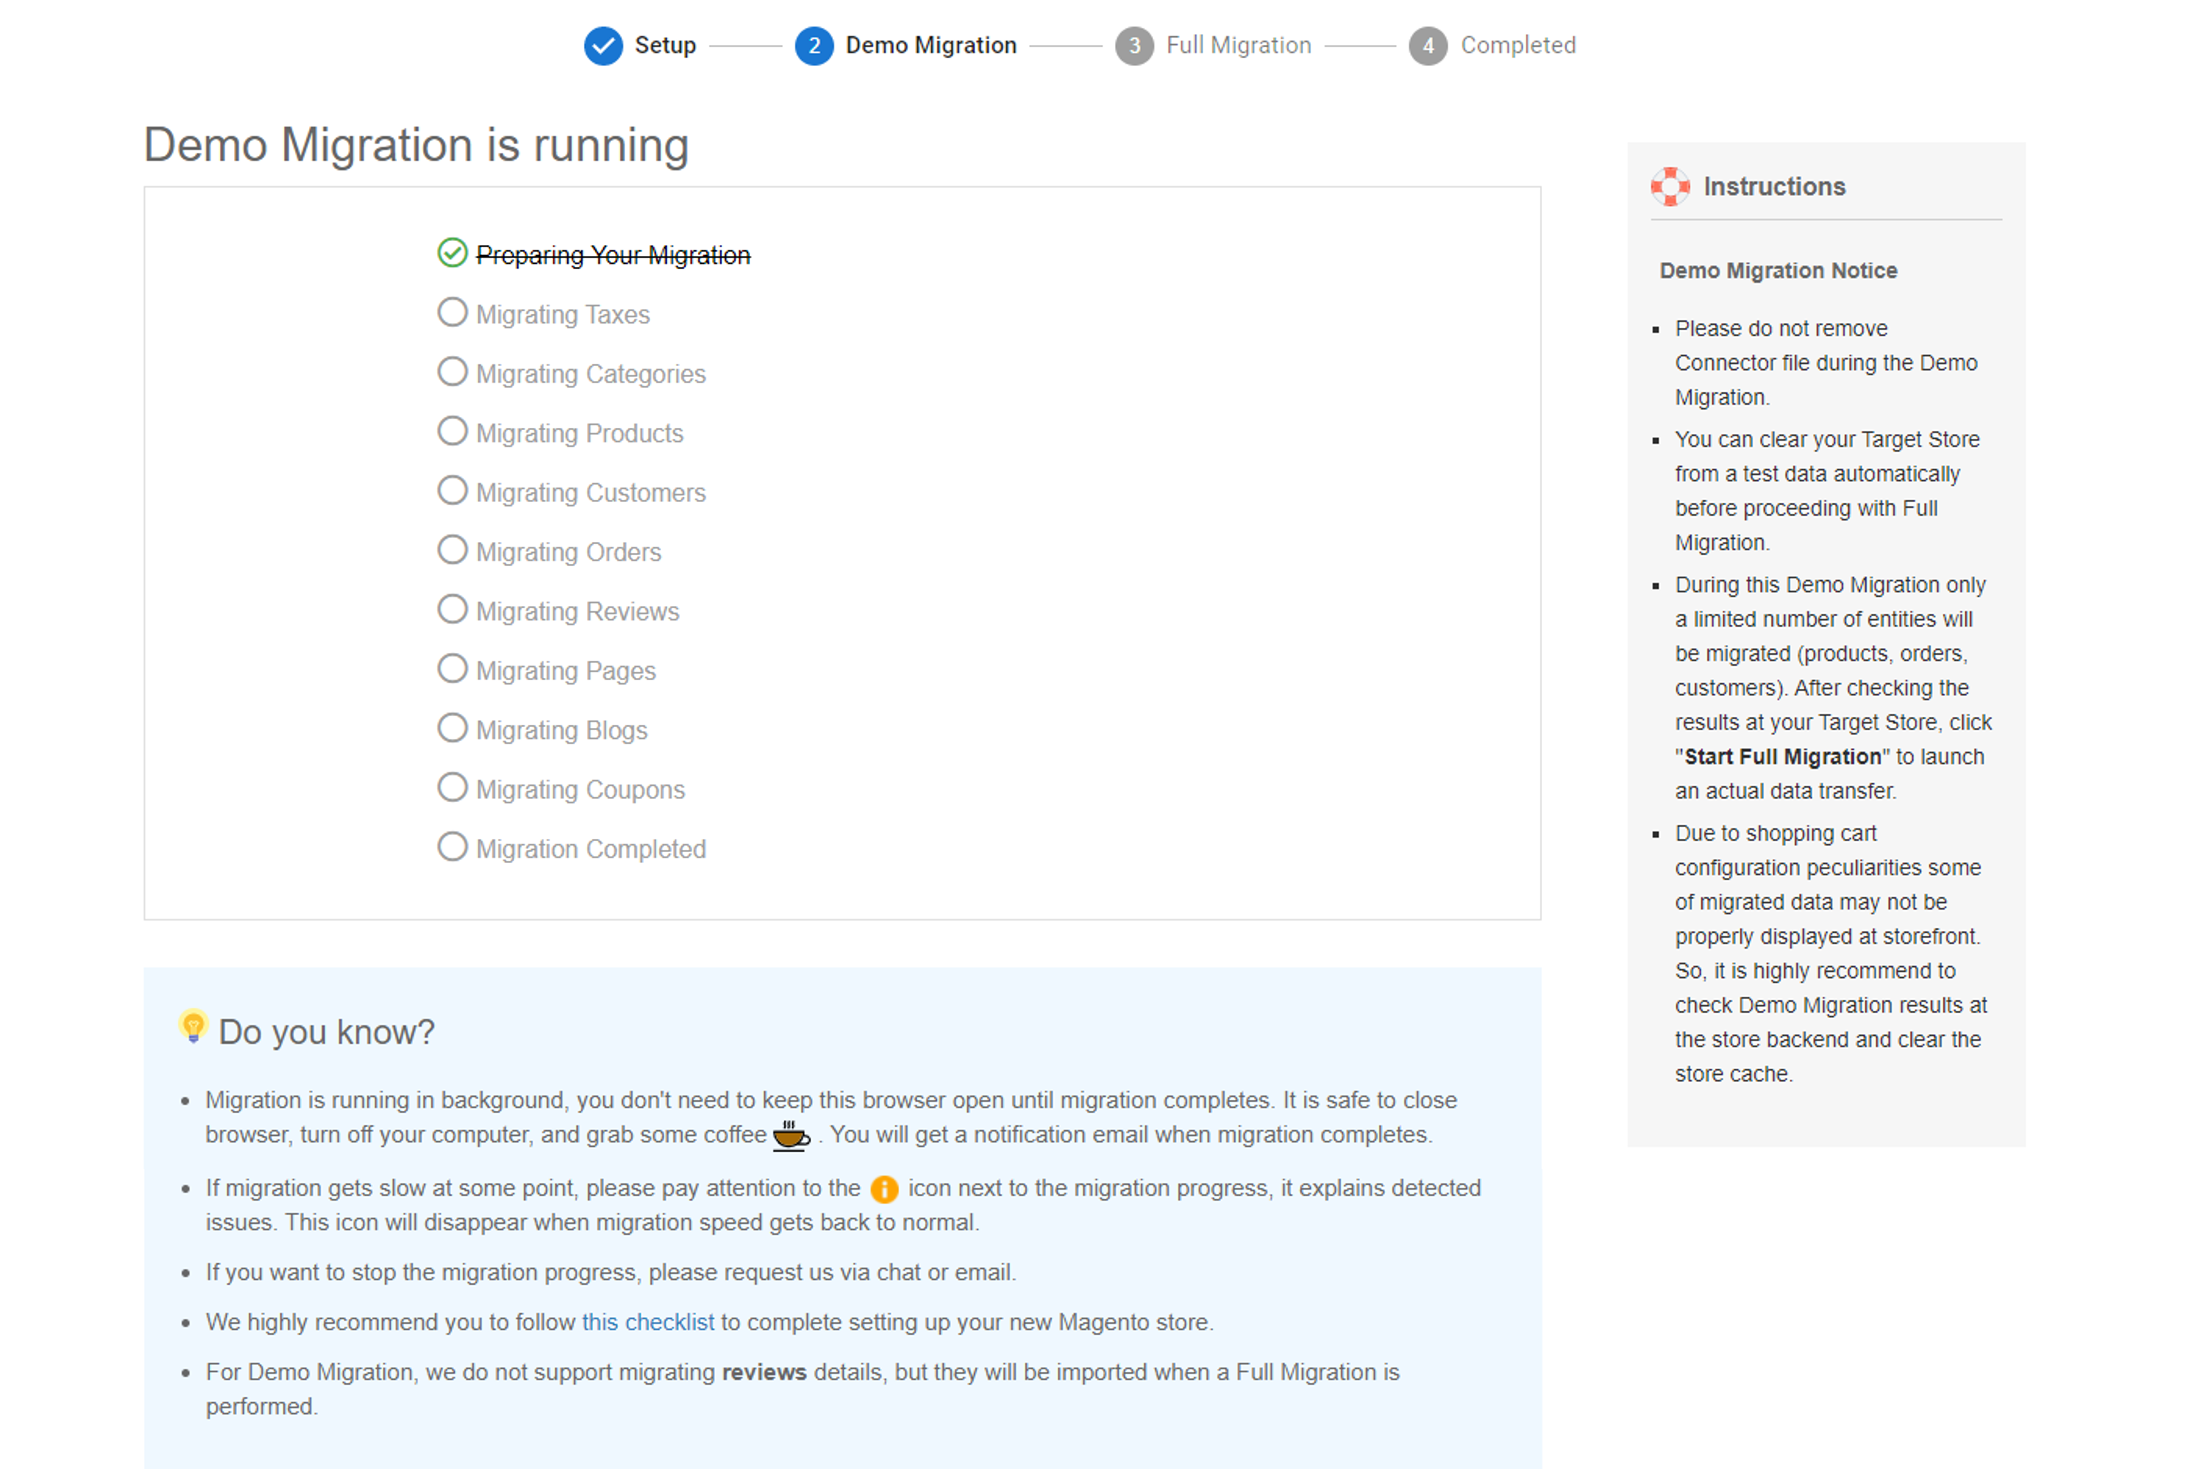
During the demo migration, you will see a progress bar showing the data transfer process. The test transfer will last no longer than 20 minutes, depending on how many entities you migrate. Once finished, you will get a notification email and can start your work, so there’s no need to sit and wait.
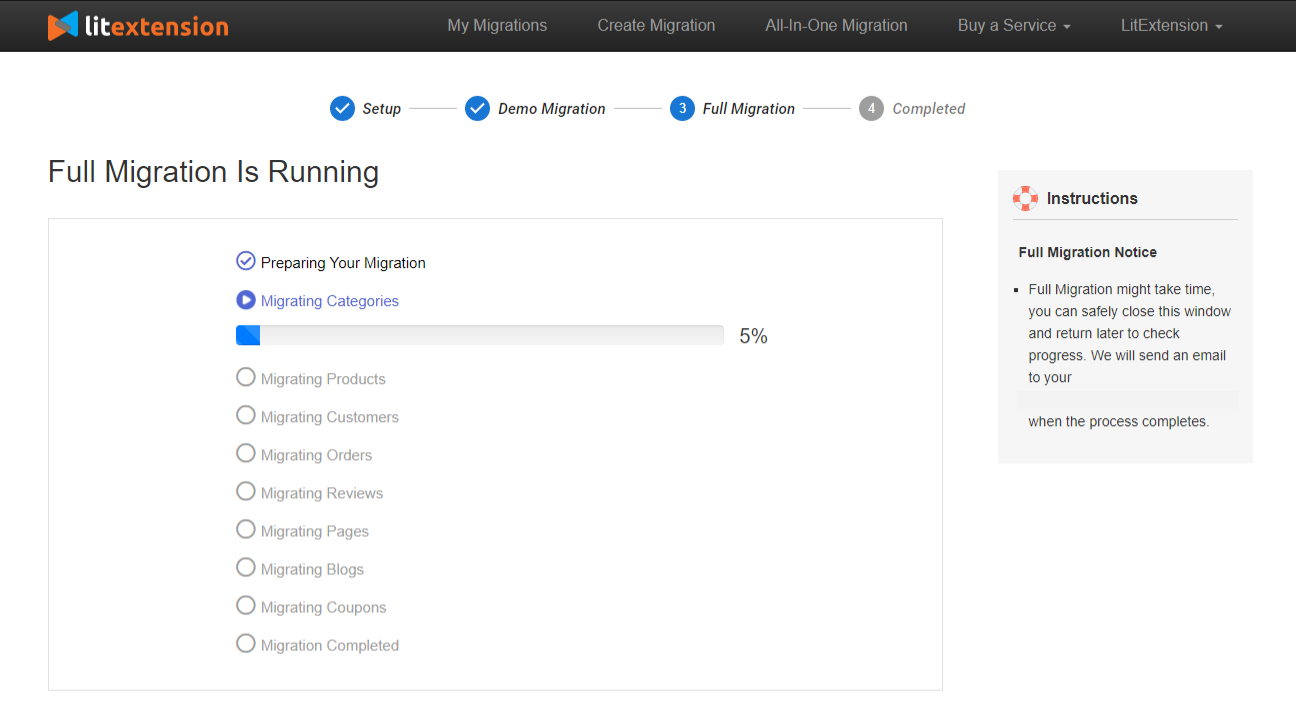
- To perform the full migration: Click on the “Skip Demo Migration” button to perform the full migration right away. Once the migration has started, it will run smoothly on the server. Therefore, there’s no need to keep your PC on while the data is being transferred. It’s completely safe to turn it off! Take a break, have a cup of coffee, and you’ll be notified via email when the process is complete.
Your OpenCart Upgrade, Done Right!
With LitExtension’s experts by your side, you can migrate safely and keep your business running flawlessly.
Technical Warning Checklist Before You Upgrade OpenCart
A manual OpenCart upgrade touches your core files, database, and third-party code all at once. Before you proceed, go through this checklist to avoid irreversible damage:
- Never upgrade directly on your live/production store. Test the OpenCart upgrade on a staging environment or a cloned copy first.
- Confirm PHP and MySQL version compatibility. OpenCart 4 requires a higher minimum PHP version than OpenCart 3, so check your hosting environment before uploading files.
- Do not skip the database backup, even if you only plan to update files. Schema changes between major versions can corrupt data if something fails midway.
- Watch out for custom-coded modifications (vQmod/OCmod overrides). These are a leading cause of white screens and fatal errors after an OpenCart upgrade, since the core files they modify may no longer exist or may have changed structure.
- Do not overwrite
config.phpandadmin/config.php. Losing these means losing your database connection settings. - Check write permissions on the
system/storageandimagedirectories after uploading new files, since incorrect permissions are a common cause of broken image uploads and caching errors post-upgrade. - Avoid running the upgrade during peak traffic hours. Downtime during the file-replacement step is unavoidable in a manual OpenCart upgrade.
- Have a rollback plan ready. If the upgrade script fails, you need your full backup (files + database) ready to restore within minutes, not hours.
If any of these steps feel out of your comfort zone, an automated OpenCart upgrade tool like LitExtension removes most of this risk, since it migrates your data into a freshly installed OpenCart 4 store instead of overwriting your live files.
Post-Migration Activities
1. Check results after migration
After the full transfer, click on “Check Result” to make sure everything is well migrated to your new OpenCart store.
All items in the catalog, categories, and onsite search can be seen on the front end. If any product from the source is not on display on the new one, you will need to check from the admin panel. Log into the back end and choose Catalog > Products to find the entity and make sure it is enabled.
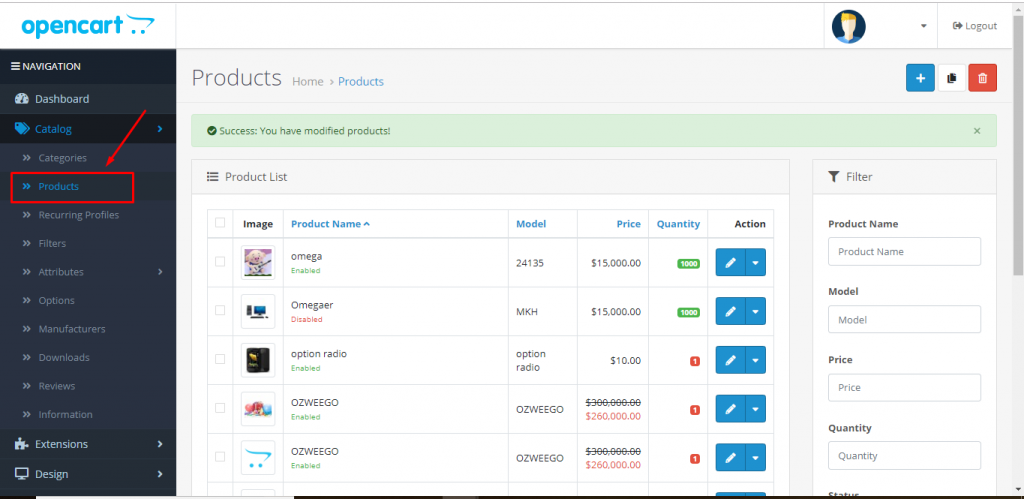
Note: Out-of-stock products can be disabled and not visible from the front office.
Finally, some steps need to be taken for your store to go live. Here is the checklist to set up your store after the OpenCart upgrade process.
2. Choose a theme for your OpenCart store
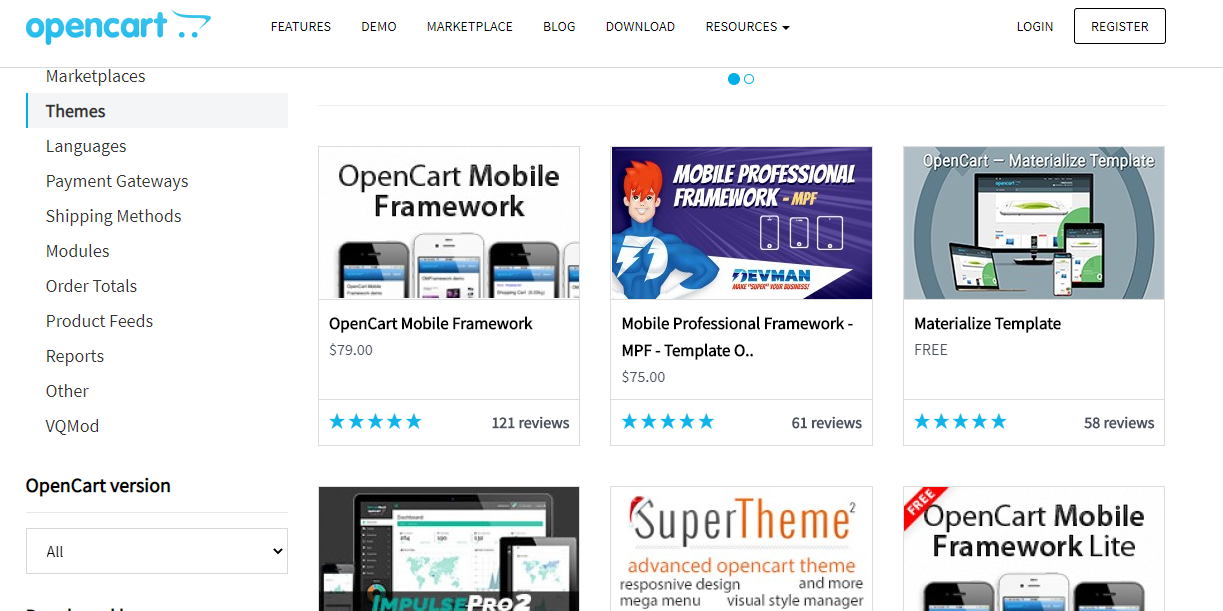
If you want to maintain the same design in your new OpenCart store, you should check whether the old theme is compatible with your current OpenCart version. Otherwise, contact your theme provider to ask for information on how to install OpenCart themes, or choose a similar theme instead.
OpenCart offers a variety of themes, both free and paid, for you to choose from. Check out our article here, we’ve listed the 8 best themes for OpenCart.
3. Add necessary extensions
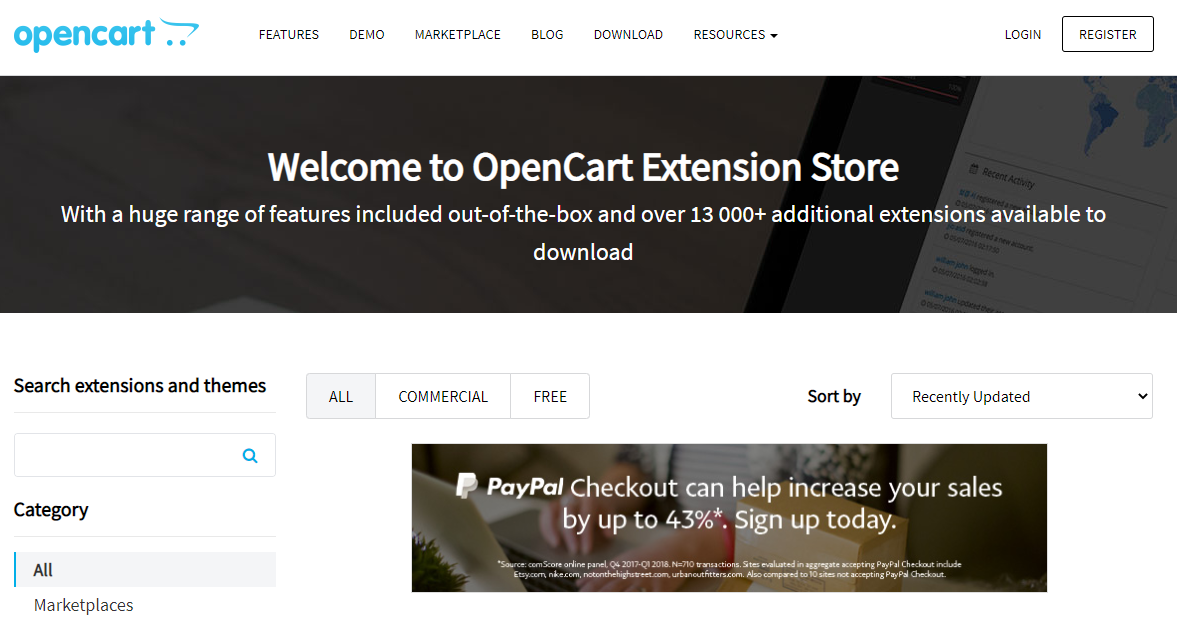
To power up your store, adding extensions can help enhance it in every aspect. There are more than 13,000+ additional extensions available in the OpenCart Marketplace for you to download.
4. Run recent data migration
When transferring data with LitExtension or configuring your new store, your source store will keep operating normally without any interruption. That means you can still receive new orders, customers, or add new products throughout the data transfer.
Recent Data Migration is a LitExtension function that lets you migrate newly-formed entities from your old OpenCart store to the new one.
This video will show you how to do it:
5. Change DNS and switch domain
The Domain Name System (DNS) is the phone book of the internet. Your DNS settings provide the link between your custom domain name and the IP address of the network. When setting this up, you will need to update your DNS settings to point to the new IP address. In fact, the easiest and fastest way to do this is to contact your old hosting provider.
Luckily, we also have clear guidance on switching domains after the migration. Check it out to get the job done easily.
Is Upgrading OpenCart Too Complicated for You?
Our All-in-One Migration Package will come and help you all the way! During the whole process (before, during, and after migration), you will have a Personal Assistant with you and give out ultimate support. What is more, you will enjoy all our Additional Options for free if choosing the AIO Package!
Final words
In summary, talking about how to update your OpenCart version, instead of using system upgrade methods, LitExtension’s automated migration tool is more effective and applicable to everyone.
Want to know more about our trustworthiness? LitExtension scores 4.8/5 stars with over 2,204 reviews on Trustpilot at the time of writing. Moreover, 96% of users report being happy with our service, according to Financesonline. You can also check out our customers’ testimonial videos on YouTube!
The LitExtension team is available 24/7 to help you in all cases, so just contact us! Join our community to get more eCommerce knowledge.

