A WooCommerce product page is the page where customers decide whether they want to buy your product or leave your store. The platform provides a standard layout, but it does not always reflect your brand or highlight what makes your product special. That is why many store owners customize their product pages to improve the shopping experience and increase conversions.
In this guide, we will cover 3 ways for WooCommerce customize product pages:
- How to use the Site Editor to build your product pages;
- How to customize the code for product pages;
- How to edit the product pages with WooCommerce extensions.
Let's get in!
Default Elements of A WooCommerce Product Page
A default WooCommerce product page already comes with several built-in elements to help you present your products and allow customers to make a purchase. These components create the basic structure of the page and make sure all essential product information is available to shoppers.
- Product title (1): The product name shown clearly at the top of the page so customers immediately know what they are looking at.
- Product images (2): A main image along with a gallery that lets shoppers view the product from different angles.
- Product price (3): Displays the regular price or sale price, helping customers quickly understand the cost.
- Short product description (4): A brief summary that highlights the product’s key features or benefits.
- Add to cart section (5): Includes the quantity selector and the Add to Cart button so customers can purchase the item easily.
- Product variations (6): If the product has options such as size or color, customers can choose them here.
- Product meta information: Additional details like SKU, categories, and tags.
- Product data tabs (7): Usually contains the full Description, Additional Information, and Reviews.
- Customer reviews and ratings (8): Helps build trust by showing feedback from other buyers.
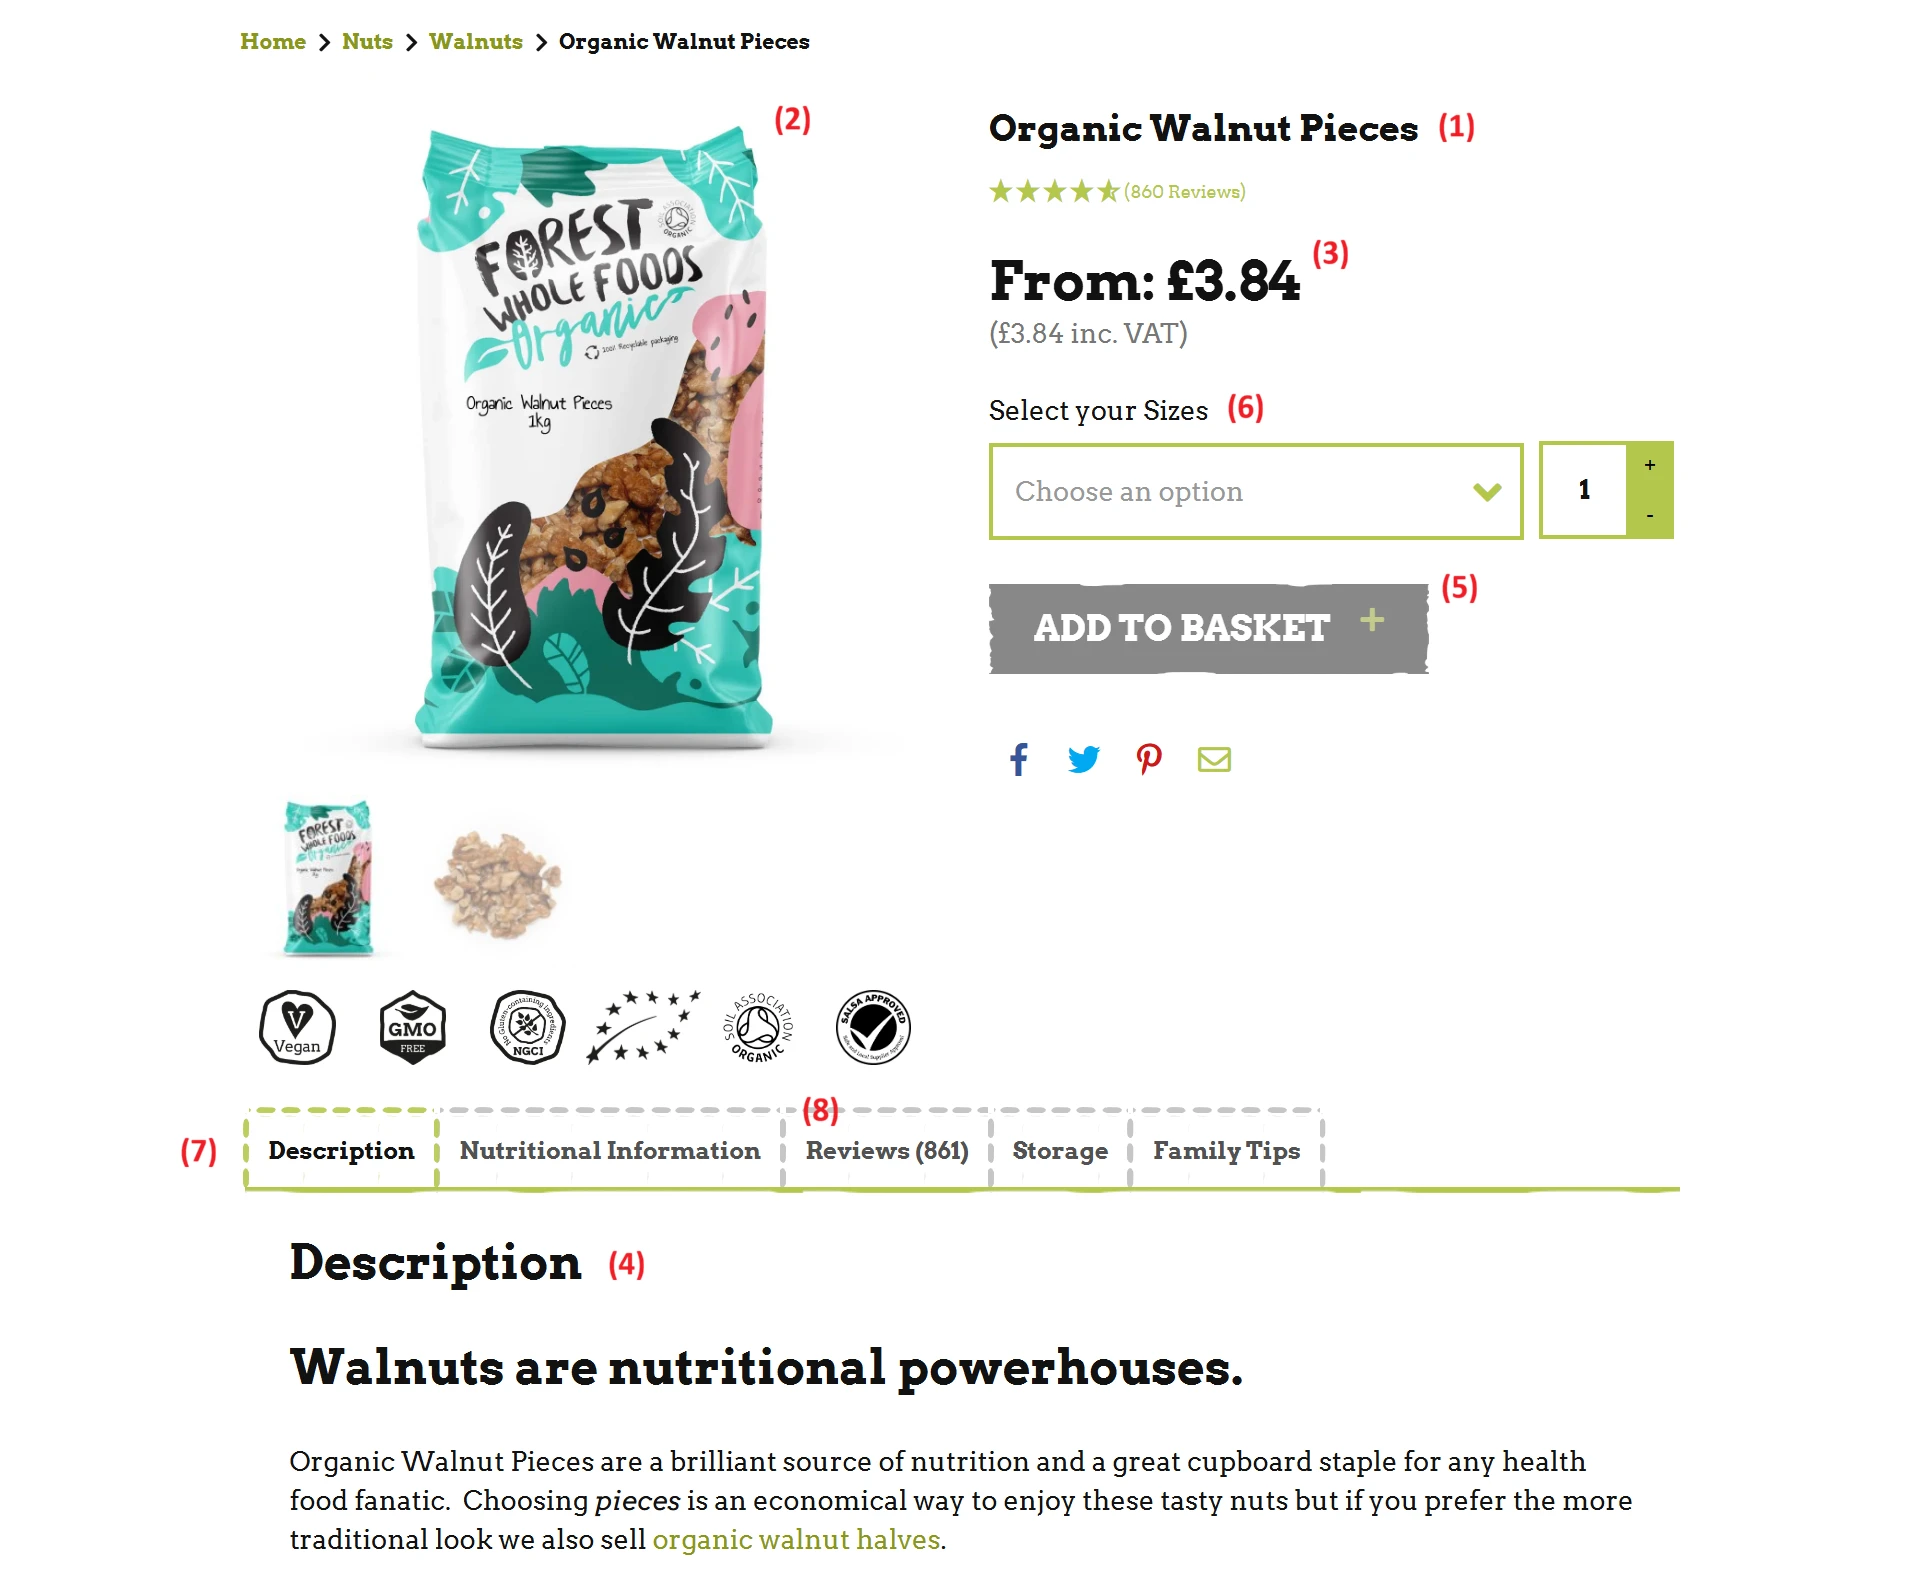
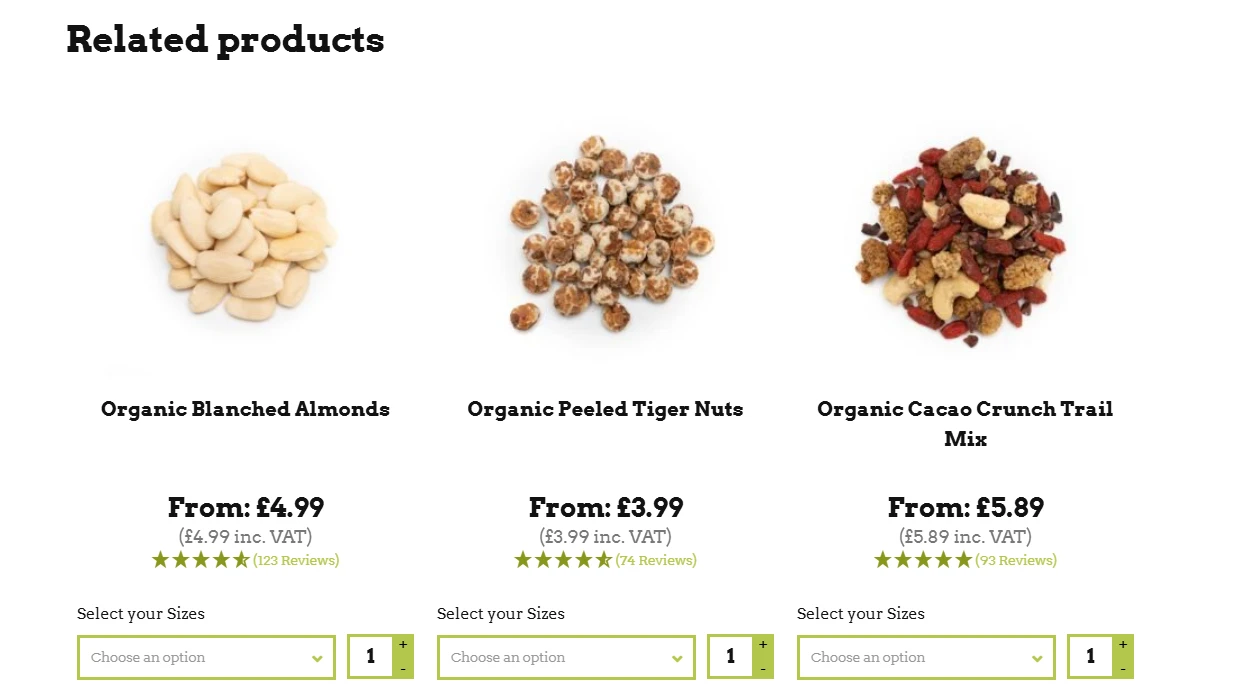
- Related products: Suggests similar items that customers might also be interested in.
These default elements already give you a solid foundation for a functional product page. However, many store owners find that the standard layout does not always highlight the most important information or create the best shopping experience. That is why customizing the WooCommerce product page becomes an important step for stores that want to stand out and convert more visitors into customers.
How to Customize WooCommerce Product Page Using Site Editor
The WooCommerce Site Editor is a built-in WordPress tool that makes it easy to customize product pages right from your dashboard. You can use blocks to change layouts, add new features, or remove elements you don’t need.
Keep in mind, the Site Editor only works with block themes. If you’re still on a classic theme, you’ll need to use the third method we explain in this guide to customize your WooCommerce product pages.
Step 1: Switch WooCommerce product page to blocks
Before you can start customizing, you’ll need to convert the default WooCommerce product page into blocks. This unlocks the full editing flexibility of the WooCommerce Site Editor. Here are the steps to do so:
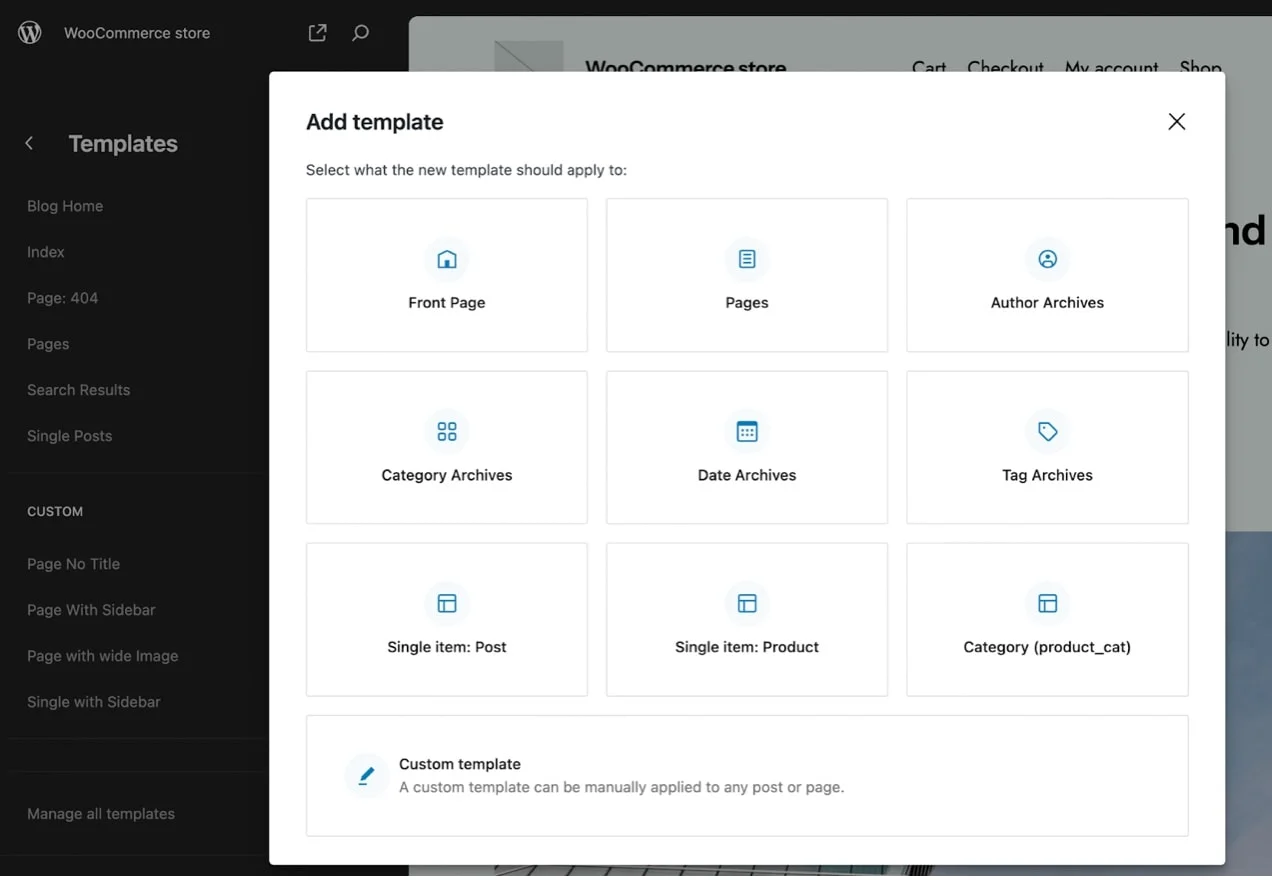
- From your WordPress dashboard, go to Appearance > Editor page.
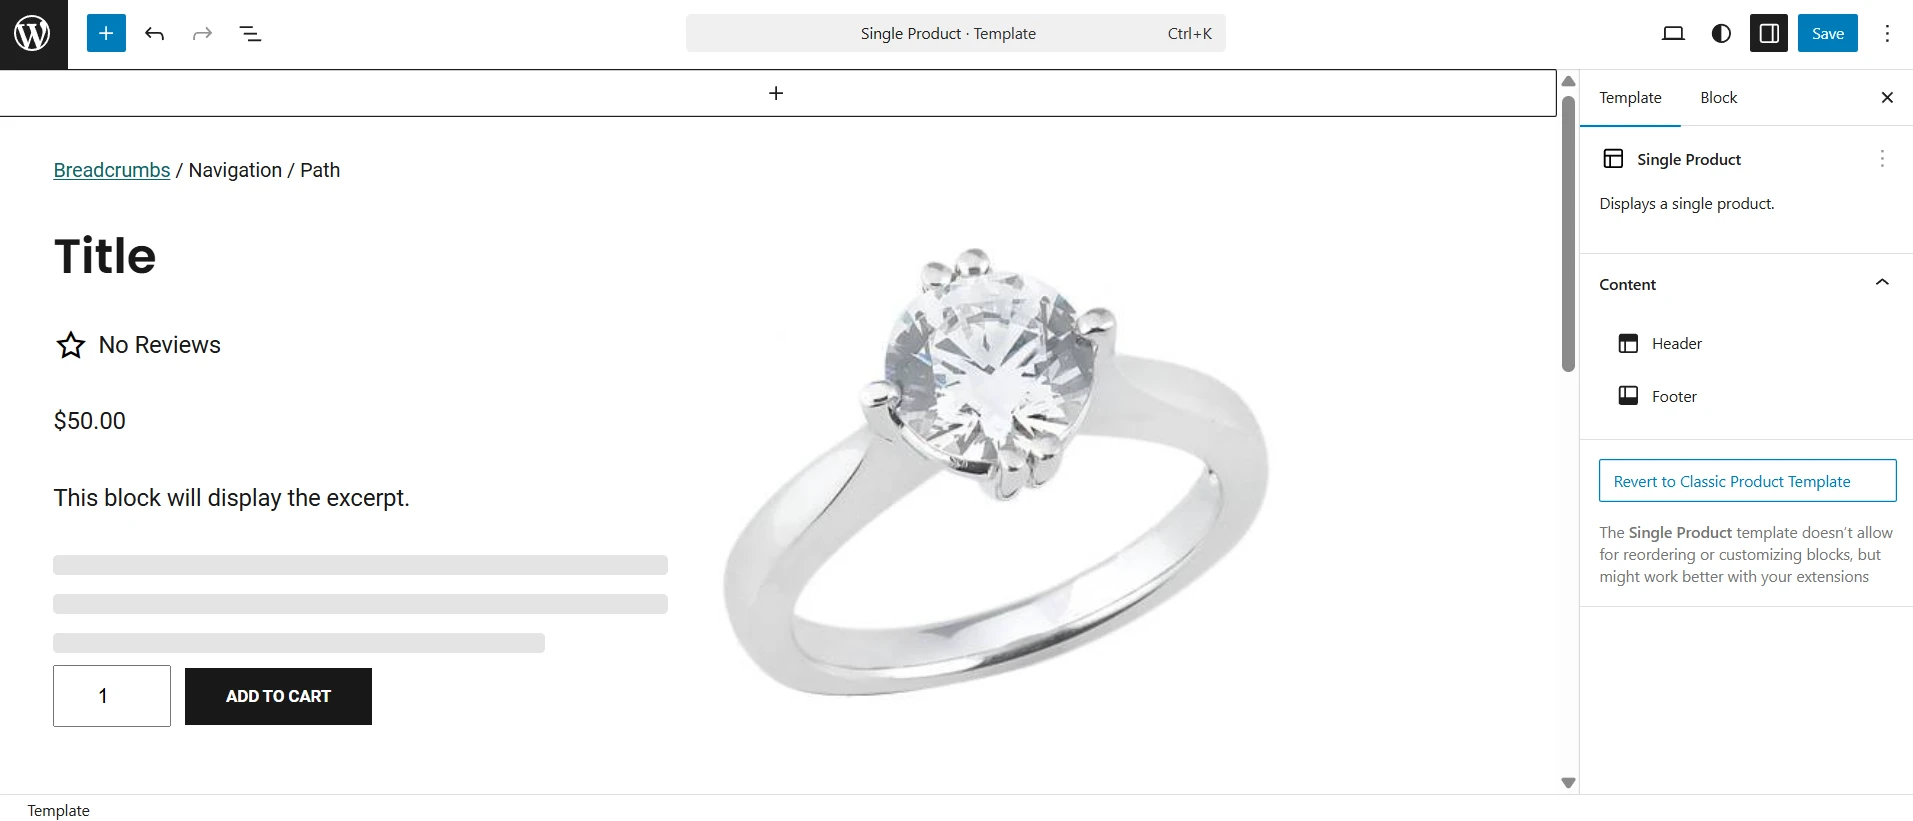
- Open the Templates section and scroll down to the WooCommerce area. Then, select the Single Product template.
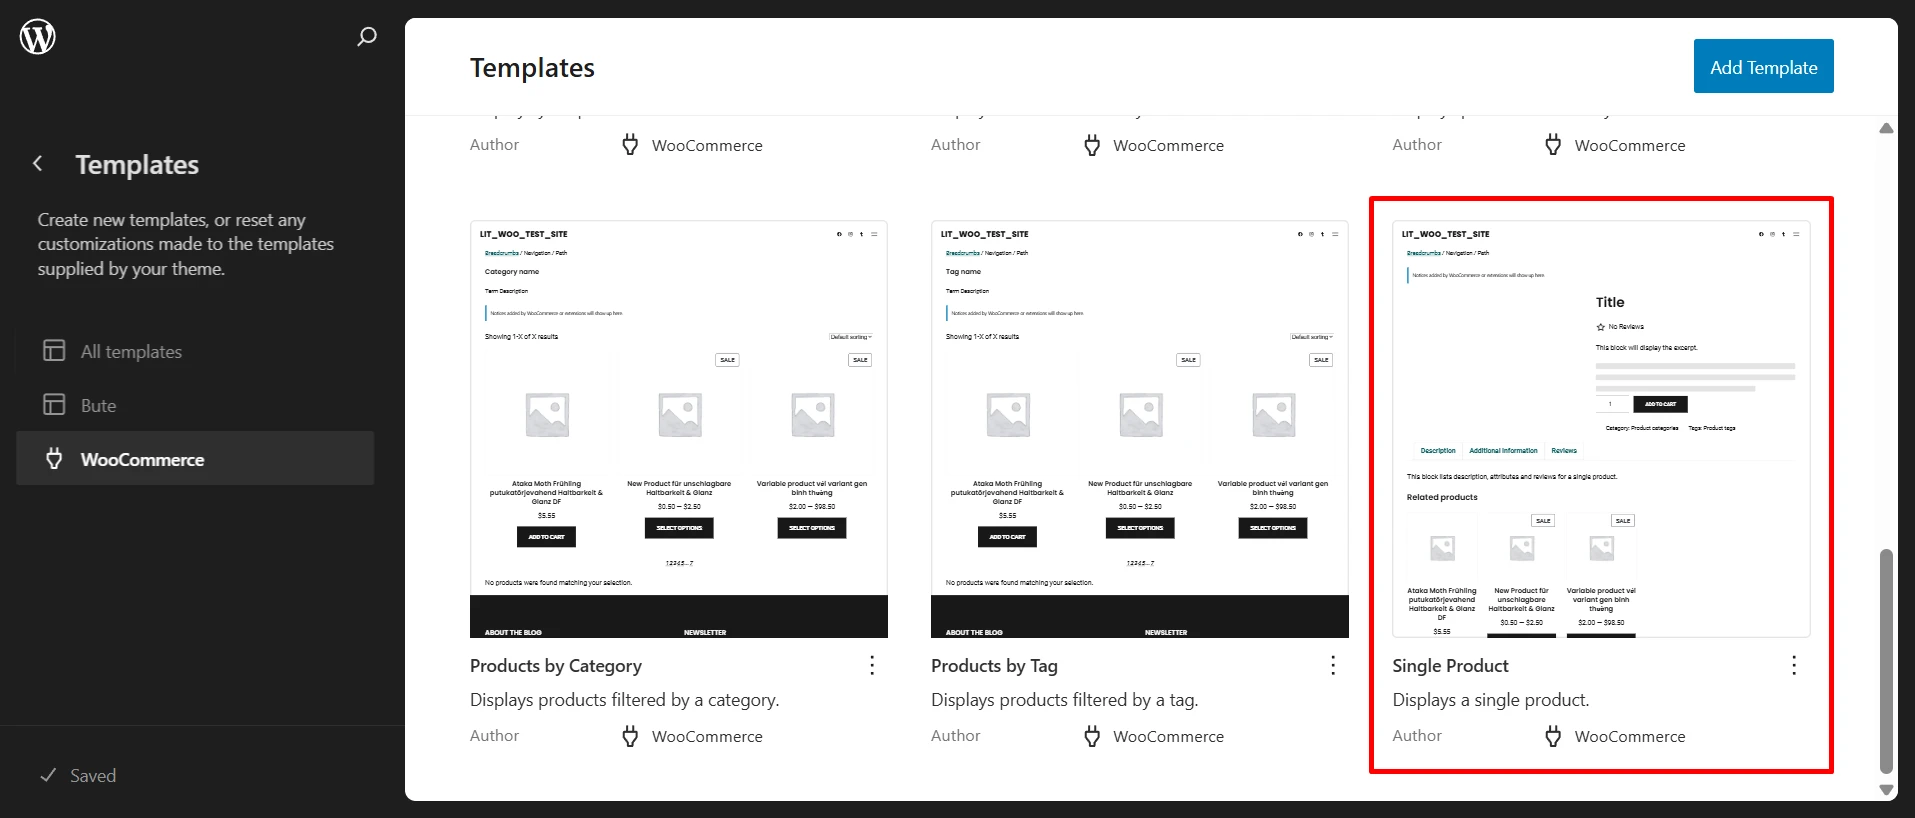
- Hit the pencil icon to open it in the editor. You’ll first see a grayed-out default template.
Step 2: Change the page layout
Once your template is block-based, you can start rearranging the layout to better showcase your products. Adjusting the layout lets you highlight the most important elements and create a design that feels natural for your brand.
- Click on a larger block and select its parent block to adjust bigger sections of the page.
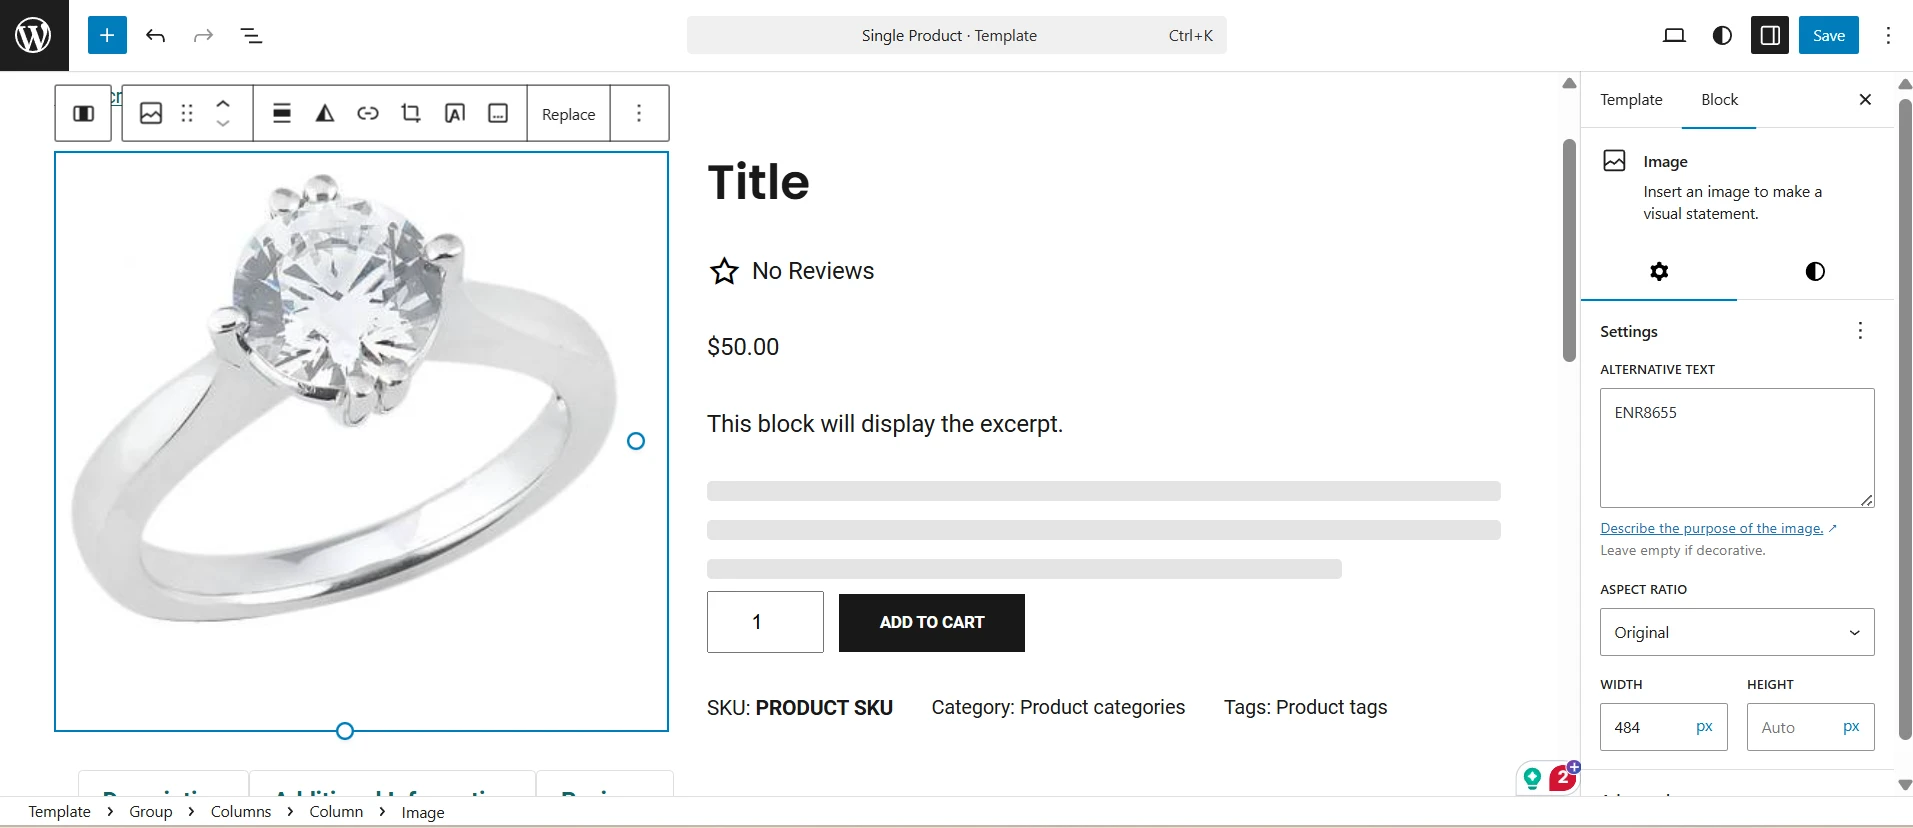
- Use the horizontal menu arrows to move a block left or right. You can also drag blocks up and down to reorder sections like descriptions or images.
- To add a new block, hover over the spot you want and click the plus (+) symbol. For bigger changes, add columns or groups to structure your layout more clearly.

- To make global layout edits, select the template and open your block settings.
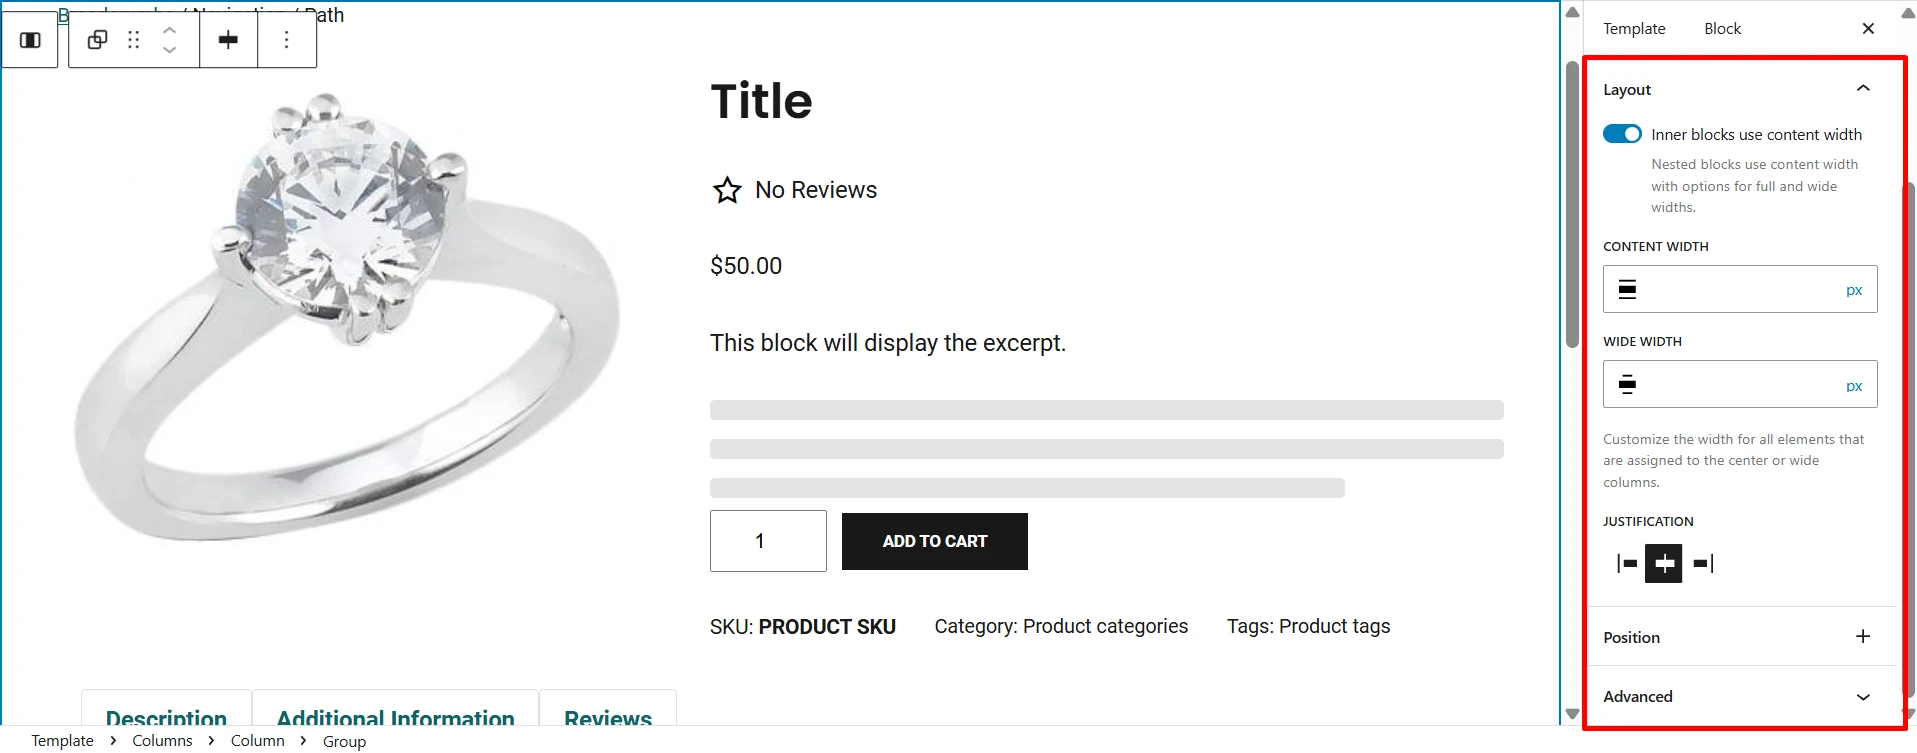
- Under Layout, adjust justification, positioning, or even make an element “sticky,” so it stays visible as visitors scroll.
- When you’re done, click Save at the top of the screen to lock in your changes.
Step 3: Adjust colors and typography
Now that your layout is in place, it’s time to enhance the look and feel. Adjusting fonts and colors ensures your product page reflects your brand’s identity and creates a consistent shopping experience.
- Select the element you’d like to edit and open the block settings on the right.
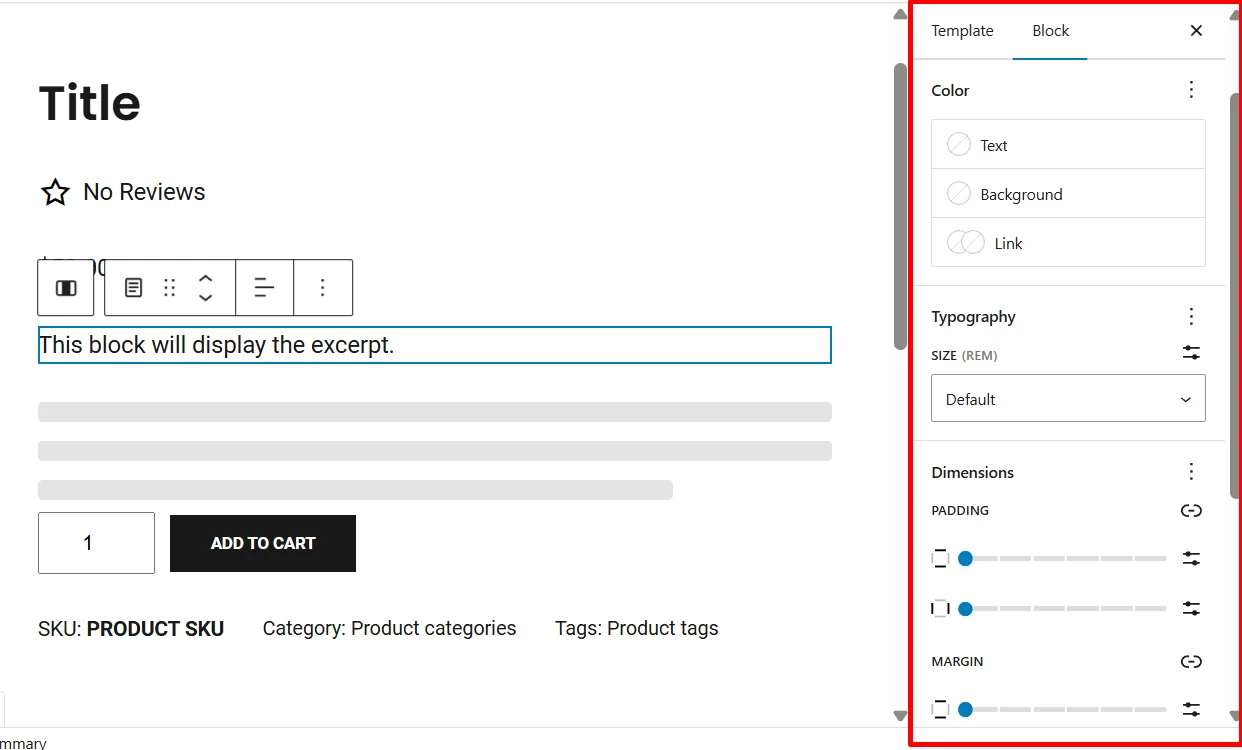
- Depending on the block, you can change text, background, and link colors. Choose from your theme’s default color palette, or click No color selected to open the color picker.
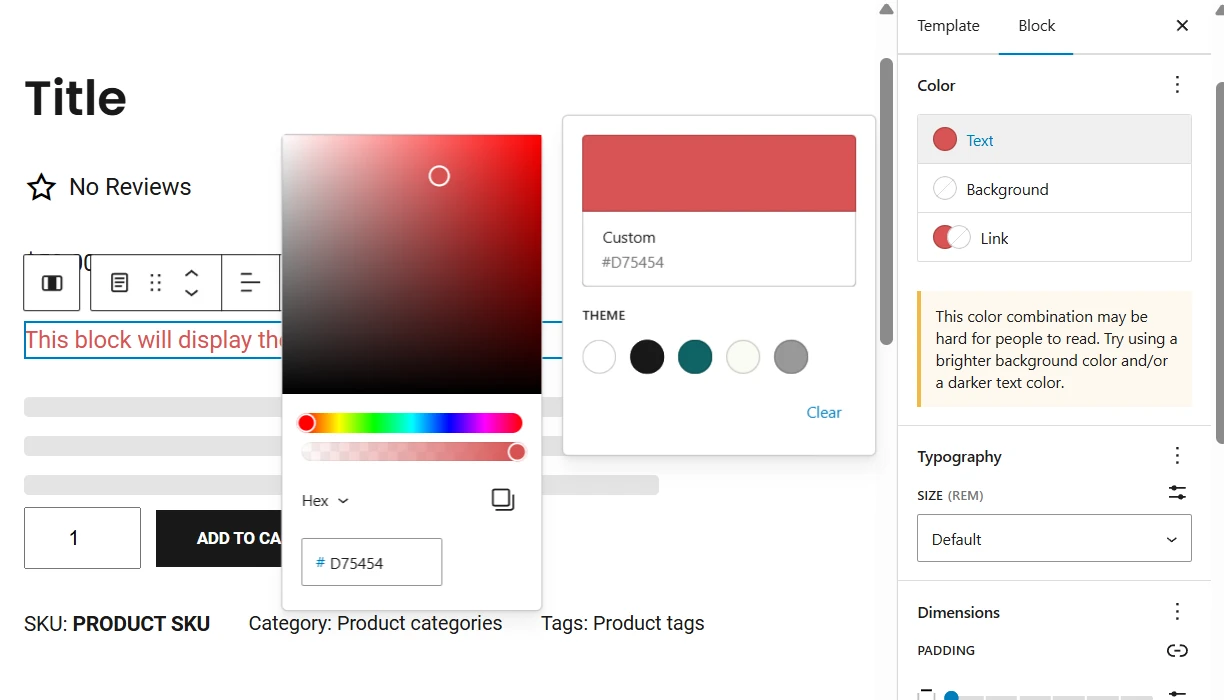
- Use the color picker to set a custom shade, or input HEX, HSL, or RGB codes to match your exact brand colors.
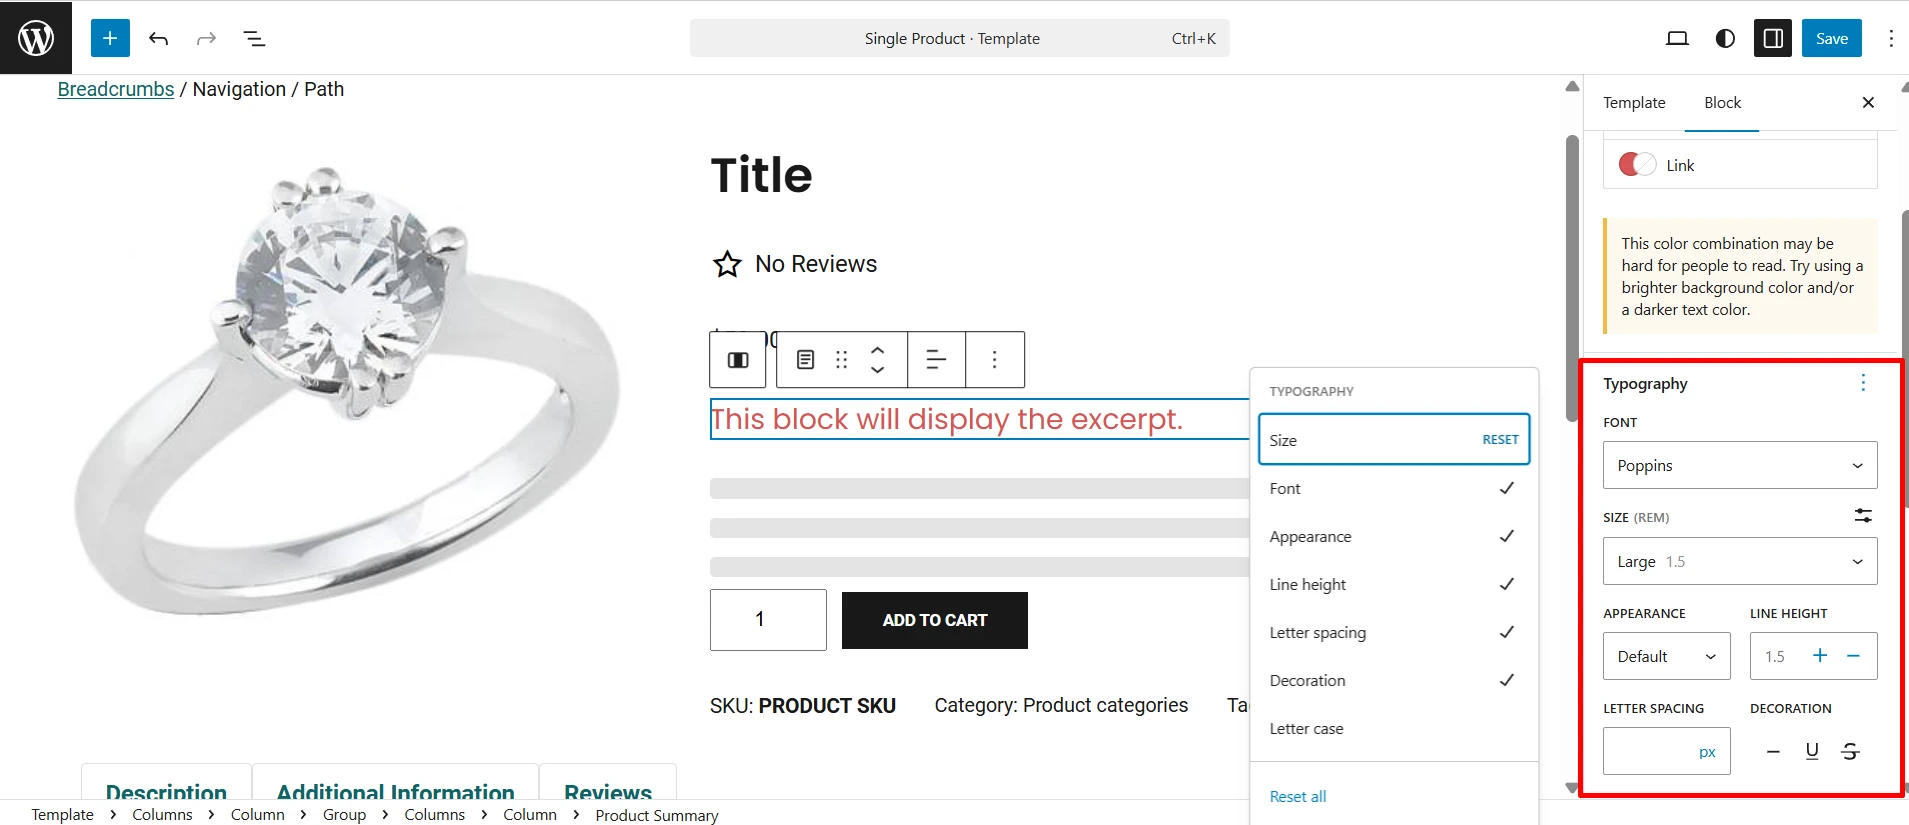
- Under the Typography tab, adjust text size (small, medium, large, etc.).
- For more font settings, click the three dots next to Typography. You’ll see a variety of options.
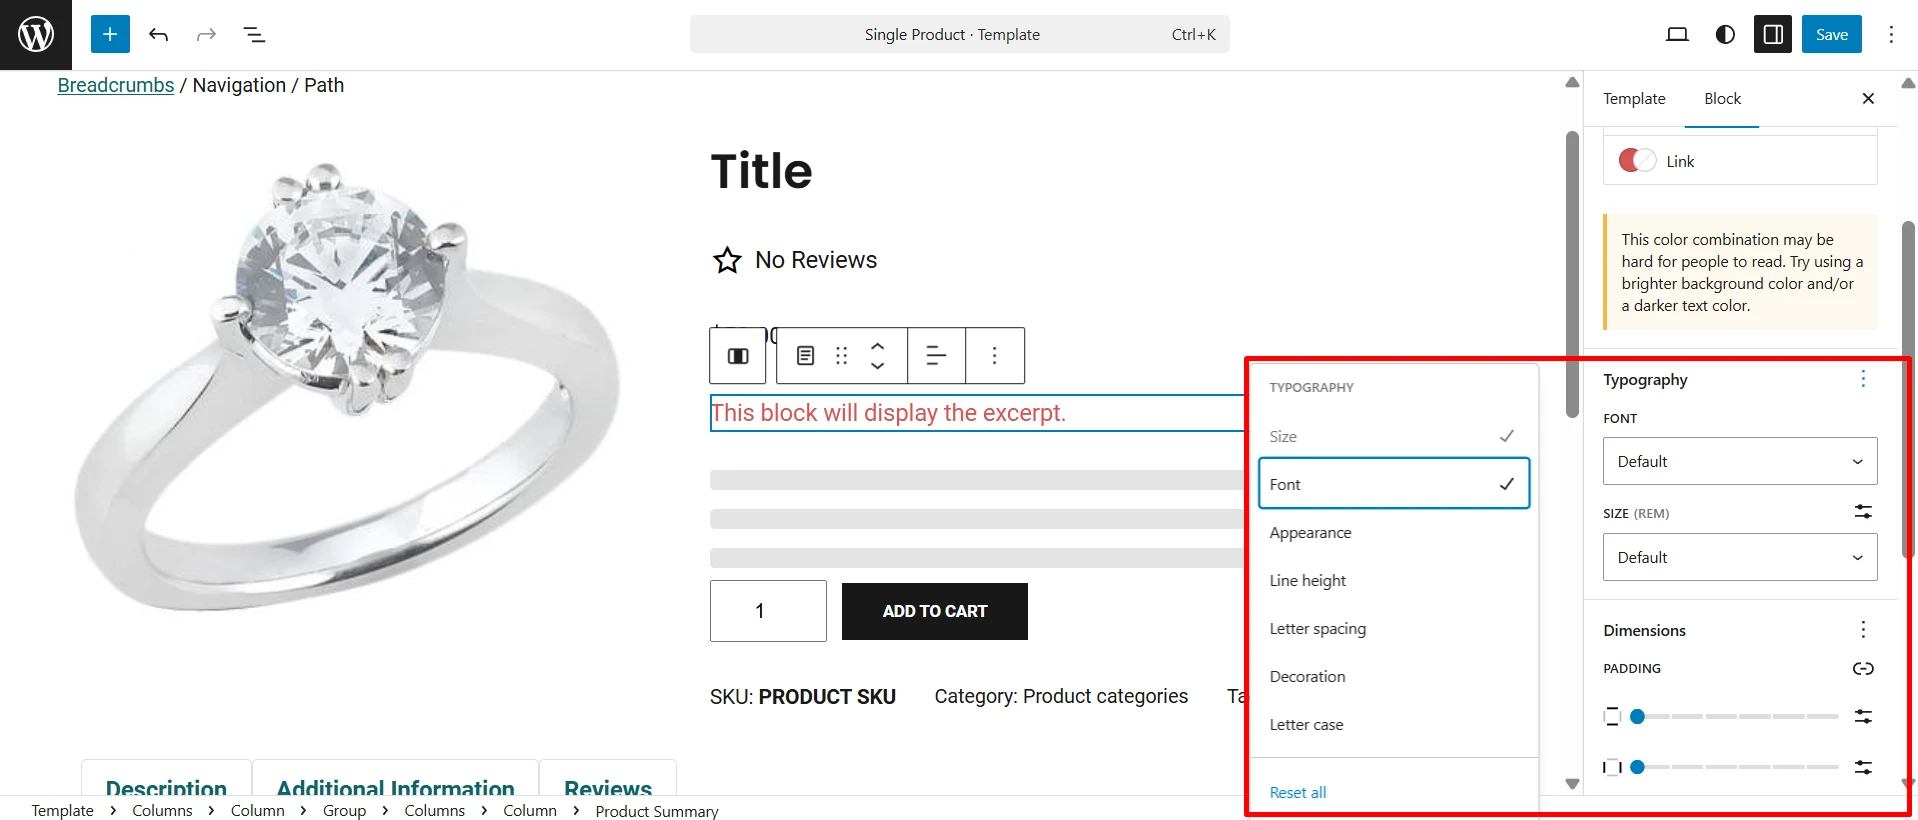
- Select the ones you want, and they’ll appear in your Typography menu.
- If you change your mind later, you can easily remove these settings.
Step 4: Add custom blocks
With the basics in place, you can go beyond the default elements by adding custom blocks. These give you the freedom to highlight special offers, include extra product details, or add unique design touches that make your store stand out.
- Click on the “+” button to insert custom blocks.\
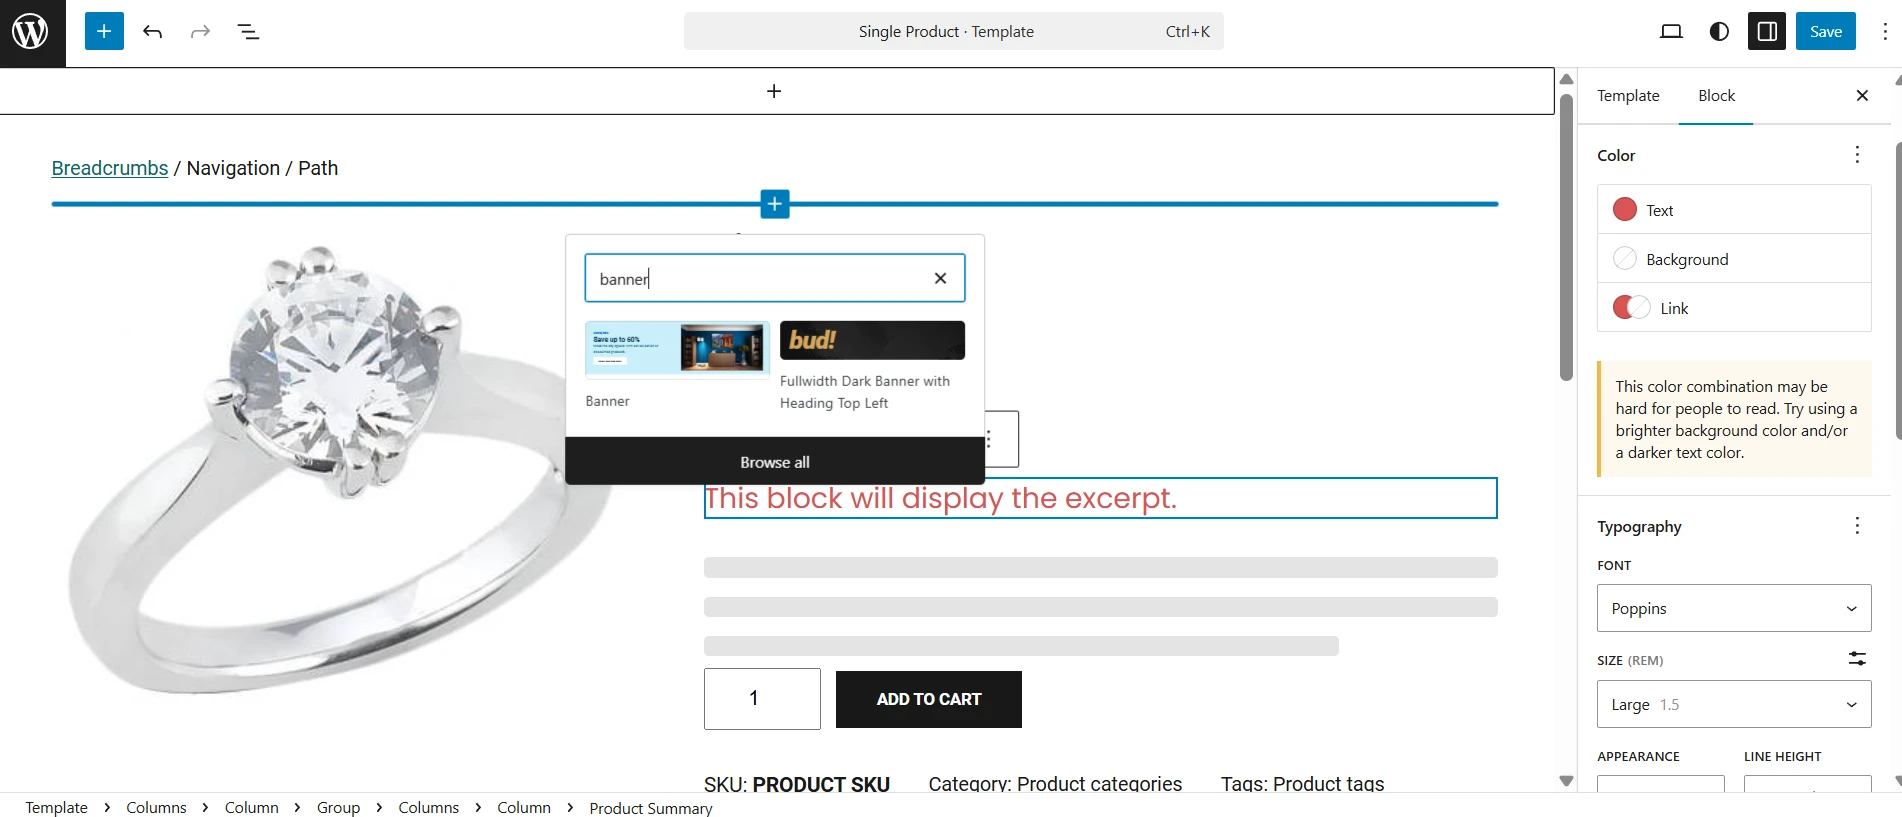
- Add blocks for customer reviews, product FAQs, or related product recommendations.
- Place CTA buttons strategically, like near the product description, to encourage purchases.
- Include promotional banners for special offers or discounts.
- Add blocks to display shipping details, product specifications, or warranty information.
Step 5: Create different types of product pages
For a simple product page, you should focus on essential elements: product image, short description, price, and an “Add to Cart” button.
For a variable product page, you can customize the layout to clearly display product variations (e.g., sizes and colors). My tip for you is to use dropdown menus or swatches to make selection options user-friendly.
For a grouped product page, you can create pages for grouped products, like sets or bundles, by listing related products together. Let’s also consider adding a “Buy Together” feature to encourage upsells and cross-sells.
How to Customize WooCommerce Product Page Using Custom Code
If you’re comfortable with coding, adding custom code can significantly improve the design and functionality of your WooCommerce product pages. By using custom CSS and PHP, you can implement advanced customizations that go beyond the default settings and available plugins.
1. Use custom CSS
Custom CSS allows you to modify the style and appearance of your product pages without changing the core code of your theme or WooCommerce.
Warning: Always back up your current Custom CSS before making changes. This ensures you can restore the original layout if something goes wrong or you need to undo your edits. Also, use your browser’s Inspect tool to preview CSS changes before adding them to your site. This lets you test styles safely without affecting your live store.
Here are three methods to add custom CSS to customize your WooCommerce product page:
Method 1. Add Custom CSS in the Site Editor (Block Themes)
- Go to Appearance > Editor in your WordPress dashboard.
- Select the “Product Page” template you want to customize.
- Click on the block or section you want to style and use the “Additional CSS” option to insert your custom CSS code.
For example, if you want to style the blocks with class=”woocommerce-product-title” to have a font size of 24px and a color of #333, you would add:
.woocommerce-product-title

font-size: 24px;

color: #333;

}
- Preview your changes to ensure they look good before saving.
Method 2. Add Custom CSS in the WordPress Customizer
- Navigate to Appearance > Customize.
- Click on Additional CSS in the Customizer menu.
- Paste your CSS code and watch the live preview to see your changes in real-time.
For example:
.woocommerce-tabs {

background-color: #f9f9f9;

padding: 20px;

}
- Once you’re satisfied with the modifications, click “Publish.”
Method 3. Add Custom CSS to a Child Theme Style Sheet
- First, you should ensure you’re using a child theme to avoid losing changes when the parent theme updates.
- Now, go to Appearance > Theme File Editor then click on the “style.css” file of your child theme.
- Add your code at the bottom of the style sheet.
For example:
.single-product .price {

font-weight: bold;

color: #e74c3c;

}
- Click “Update File” to save your changes.
2. Use PHP and WooCommerce Hooks
For deeper customization, you can use PHP and WooCommerce hooks to modify the functionality and layout of your product pages. This method requires a basic understanding of PHP and WordPress hooks.
Method 1. Working with Actions and Filters
This method this best for small adjustments like moving buttons, changing text, or adding/removing elements. Steps:
- Go to Appearance > Theme File Editor and open the “functions.php” file in your child theme.
- Use WooCommerce action and filter hooks to customize your product page.
For example, you’re moving the “Add to Cart” button below the product description:
// Remove Add to Cart from default position
remove_action('woocommerce_single_product_summary', 'woocommerce_template_single_add_to_cart', 30);

// Re-add Add to Cart after the product description
add_action('woocommerce_single_product_summary', 'woocommerce_template_single_add_to_cart', 35);
- Click “Update File” and test your product page to ensure the changes work as expected.
Method 2. Creating a Global Page Template
This method is best if you want a completely new product page structure that applies across your site.
- In your child theme folder, create a new file called single-product-custom.php.
- Then, add the following template header to the top of the file:
<?php

/*

Template Name: Custom Product Page

Template Post Type: product

*/
- Use WooCommerce functions like woocommerce_content() to display product content.
For example:
get_header();

?>

<div class="custom-product-layout">

<div class="product-main-content">

<?php woocommerce_content(); ?>

</div>

</div>

<?php

get_footer();
- Go to your WordPress dashboard, edit a product, and select your new “Custom Product Page” template from the template dropdown.
- Make sure everything looks and functions correctly.
Seamlessly migrate to WooCommerce!
LitExtension can safely transfer your products, customers, and orders to unlock more growth on WooCommerce.

How to Edit WooCommerce Product Page Using Extensions
If you’d like more control than the Site Editor offers, you can consider using extensions. Some popular names include Elementor, SeedProd, and Divi Builder, etc., which all give you more design freedom.
In this guide, we’ll use Elementor as an example for WooCommerce edit product page. With its drag-and-drop builder, you can create custom layouts, add advanced widgets, and showcase products in a more engaging way – without touching a line of code.
Step 1: Set up a single product template
Before you can start designing, you need to set up a dedicated WooCommerce product page template in Elementor. This will serve as the foundation for all the customizations you’ll make.
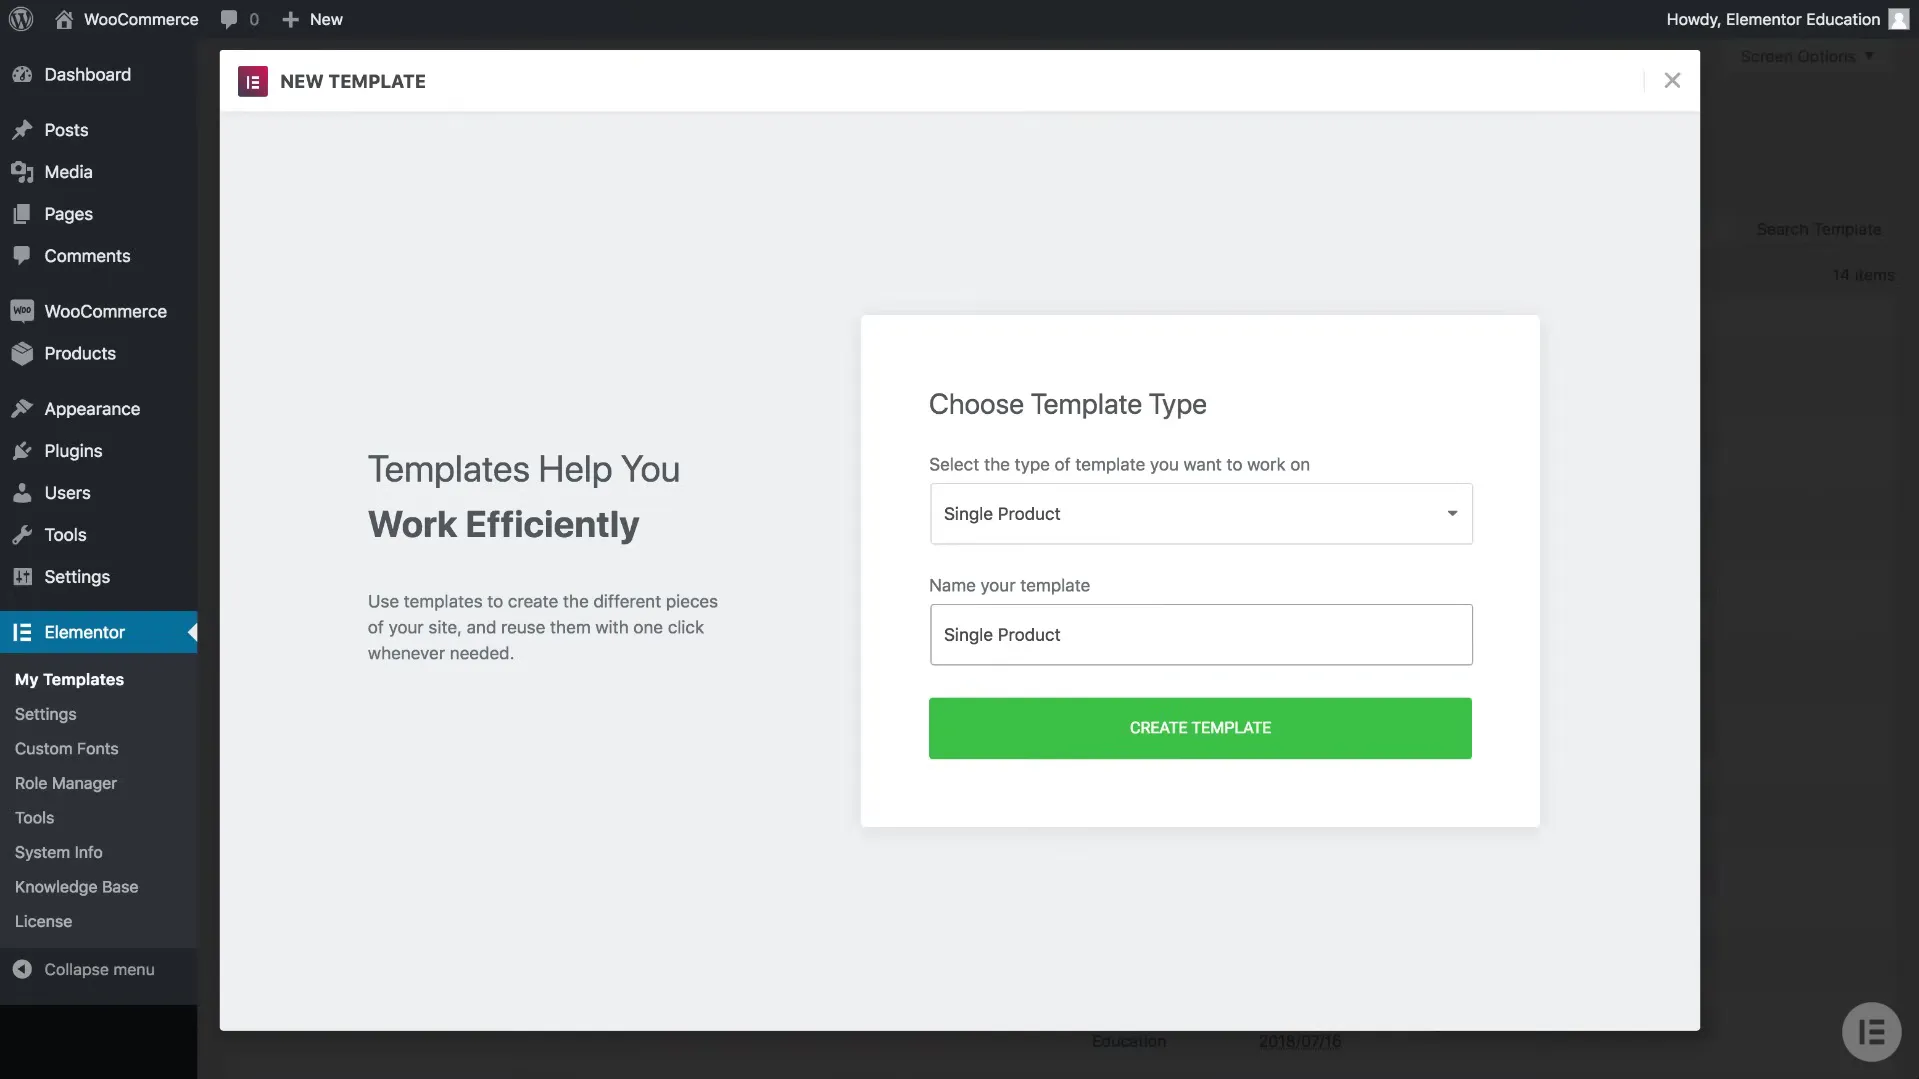
- Go to Elementor > My Templates in your WordPress dashboard.
- Click on the Add New button.
- In the pop-up, choose Single Product as the template type and give your template a name so you can identify it later.
- Click Create Template to open the product page in Elementor’s editor.
Step 2: Choose a pre-designed template (or build from scratch)
When the editor opens, Elementor will show you a library of ready-made WooCommerce product page layouts. You can pick one that matches your store’s style and then customize it to fit your needs.
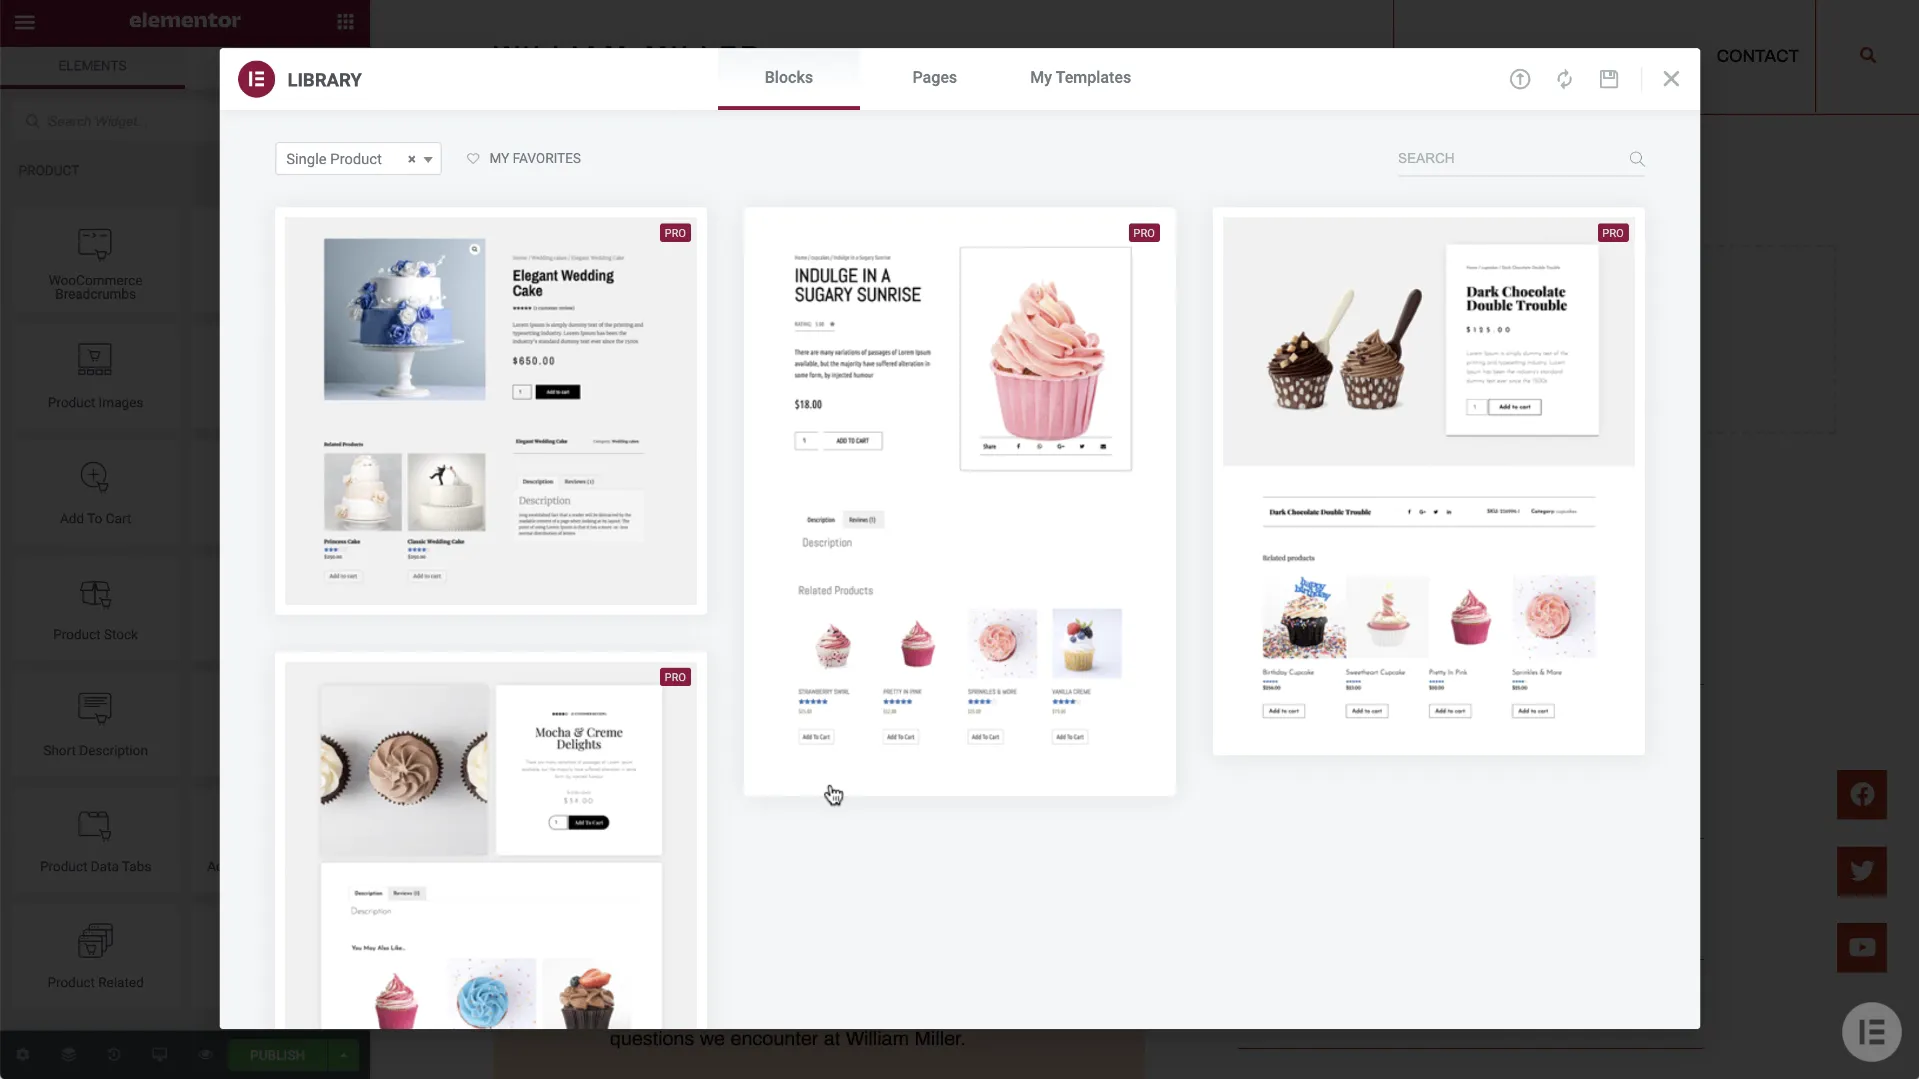
If you prefer more control, close the library and switch the page layout to Full Width in the settings panel. This gives you a blank canvas where you can design your product page from scratch, placing each widget exactly where you want it.
Step 3: Add the product widgets
Elementor includes special WooCommerce widgets that let you build the core of your product page. These let you build every part of the page visually, no coding required. You’ll find widgets like Menu Cart, Product Title, Product Price, Product Rating, Product Stock, etc.
To add a widget, open the Elementor panel and drag it onto your page. You can then rearrange the order to match how you want customers to experience the page.
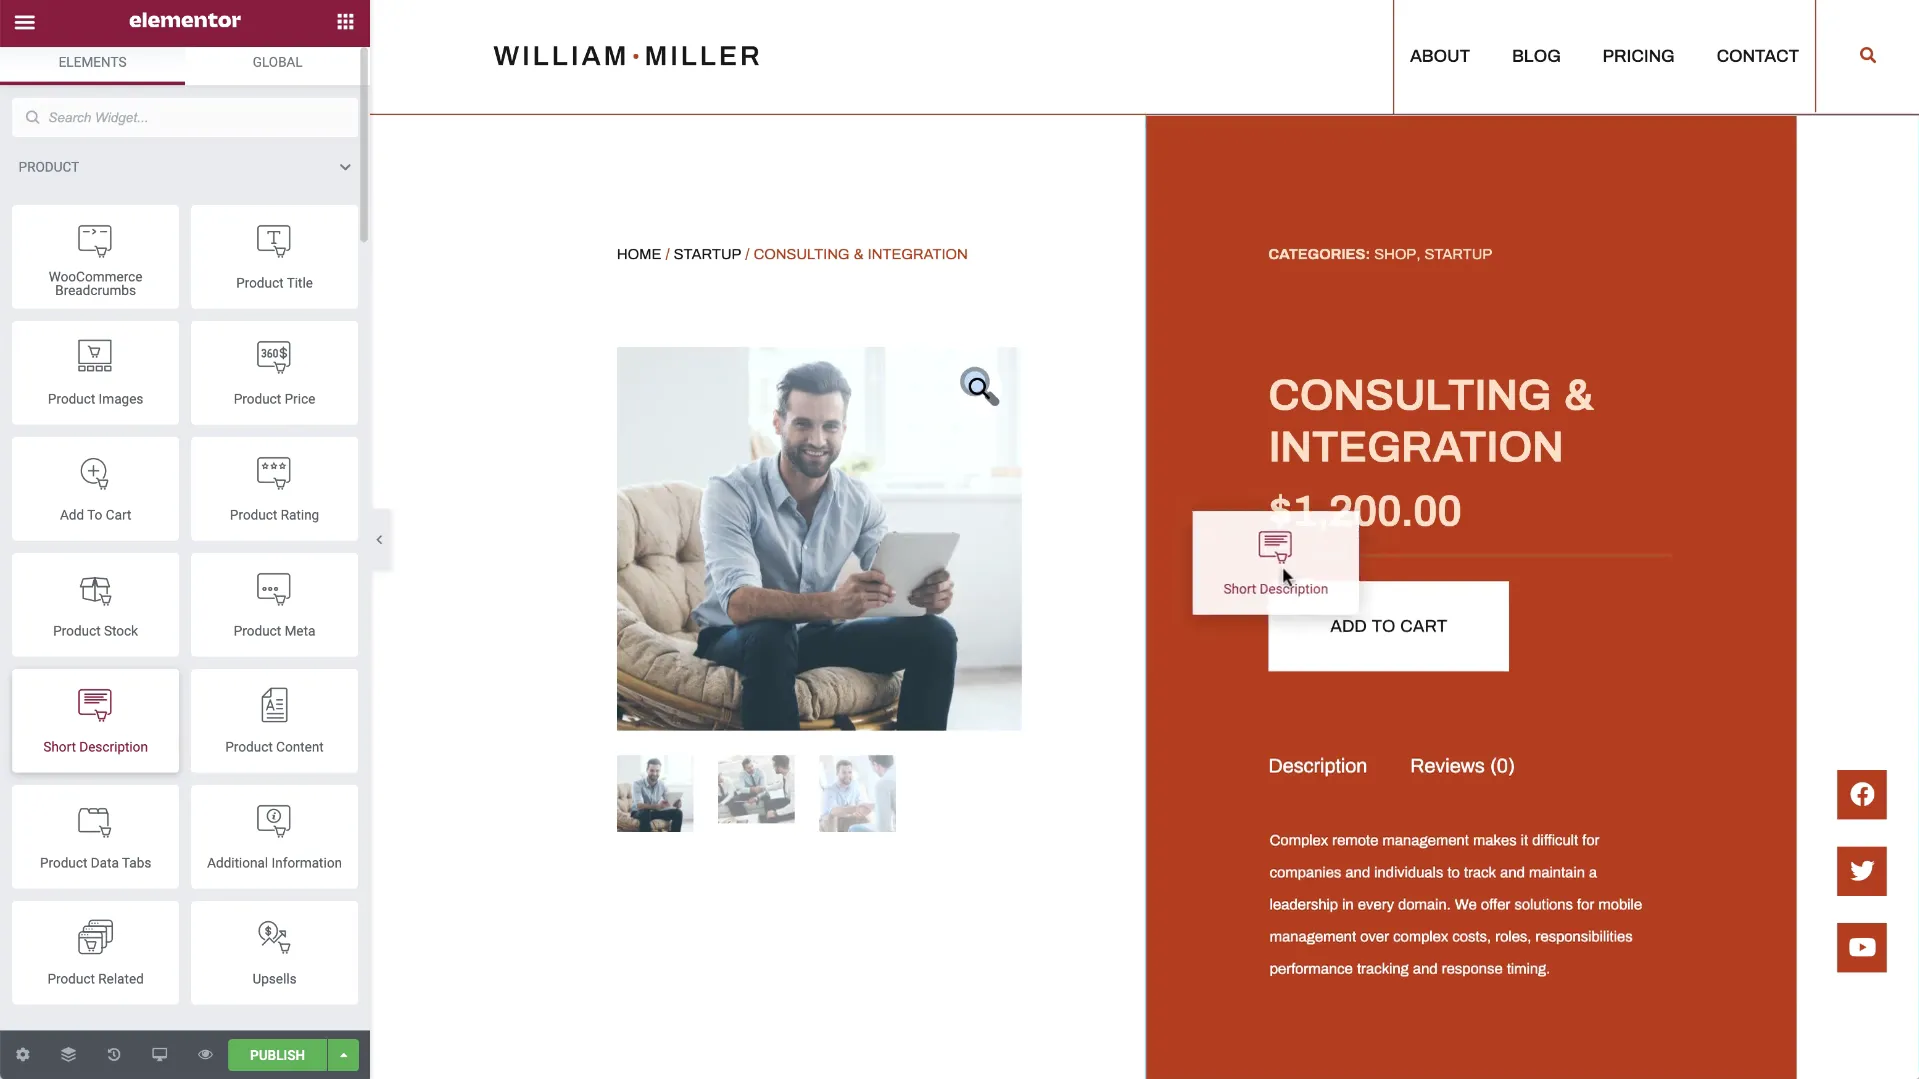
You can also enhance the page by adding extras such as related products, upsells, or share buttons. Even custom fields can be pulled in to highlight unique details about your products.
Step 4: Preview with real products
Once you’ve added your widgets, it’s important to see how your template looks with actual products. This helps you catch design issues early and make sure everything lines up properly.
In Elementor, click the eye icon at the bottom of the panel and open Preview Settings. From there, choose a specific product from your catalog and apply it to the preview.
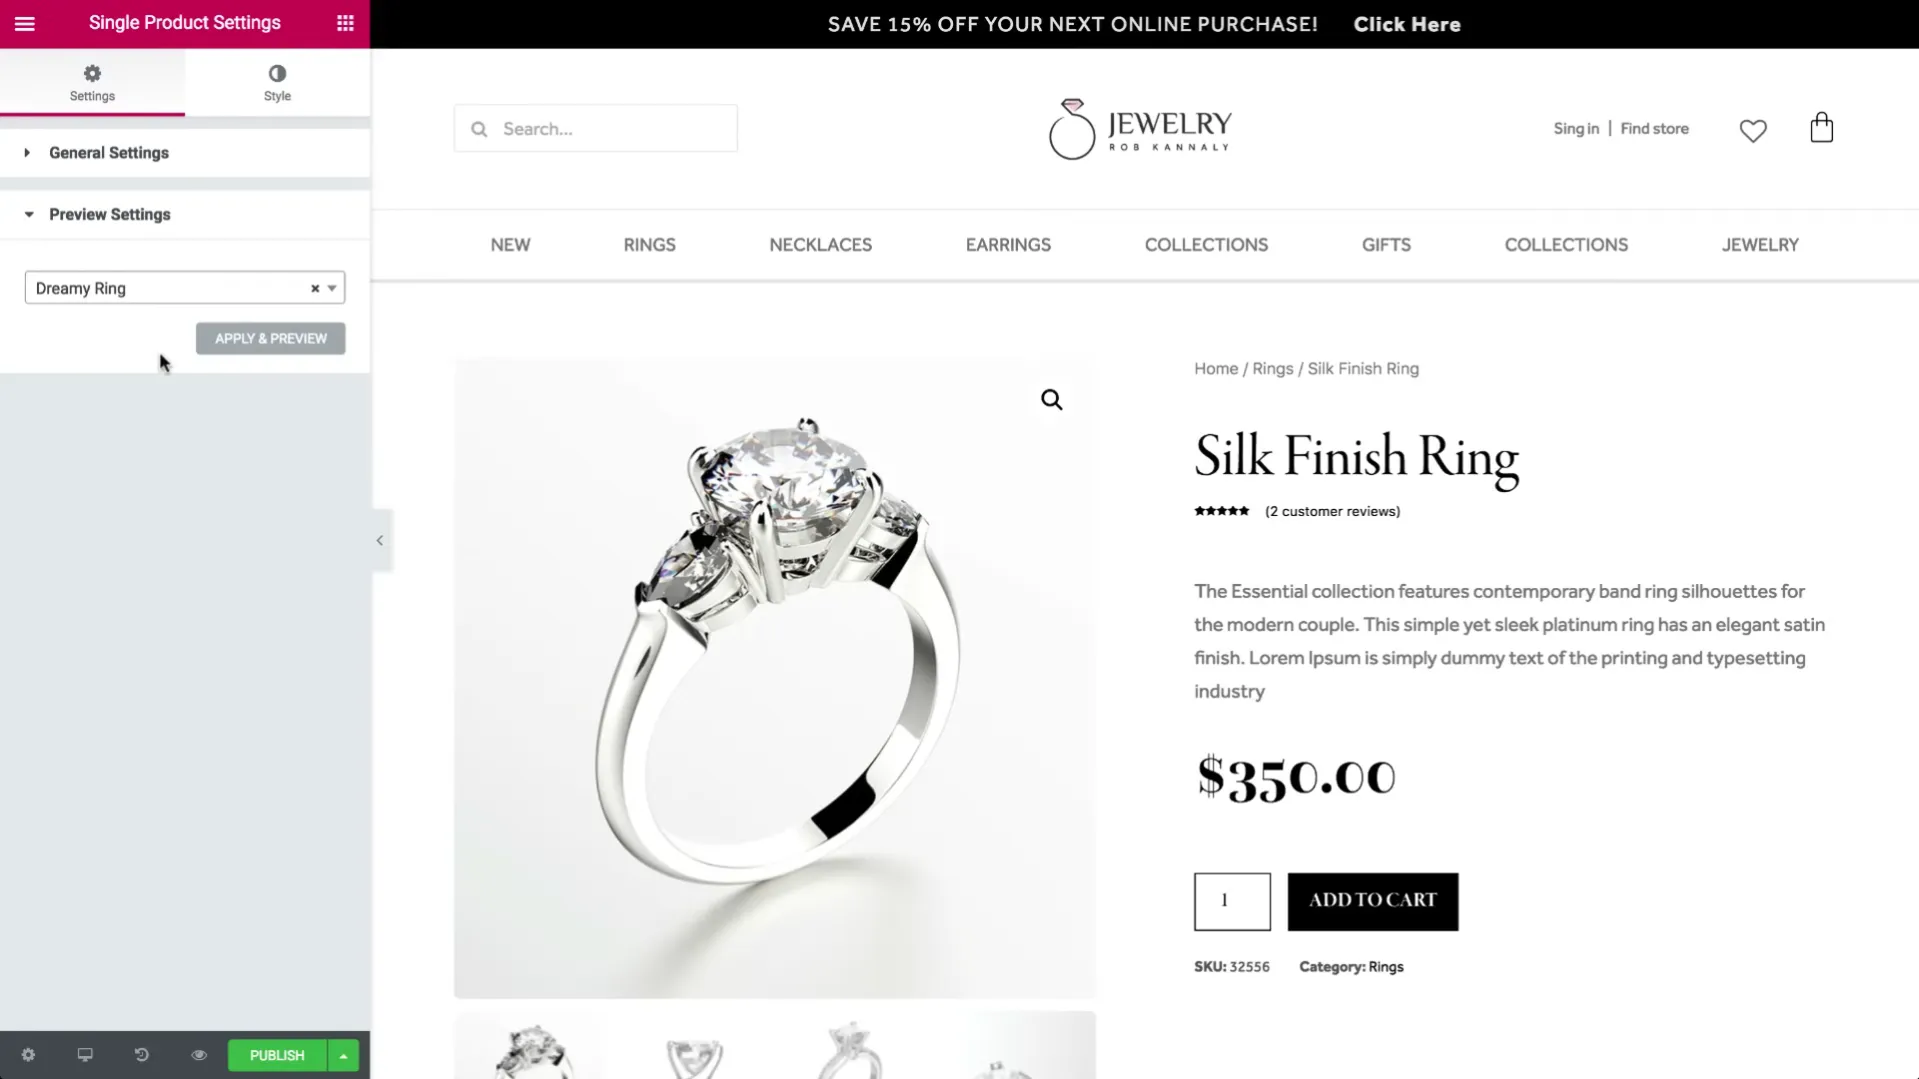
Try switching between a few different products, especially ones with varying descriptions, images, and options. This will show you whether your layout works consistently across your store.
Step 5: Set the display conditions
The last step is deciding where your new product page template should appear. By default, Elementor applies it to all products, but you can narrow it down if needed.
After clicking Publish, you’ll be prompted to set your Display Conditions. You can choose to show the template on every product, only for certain categories, or even just for specific items.
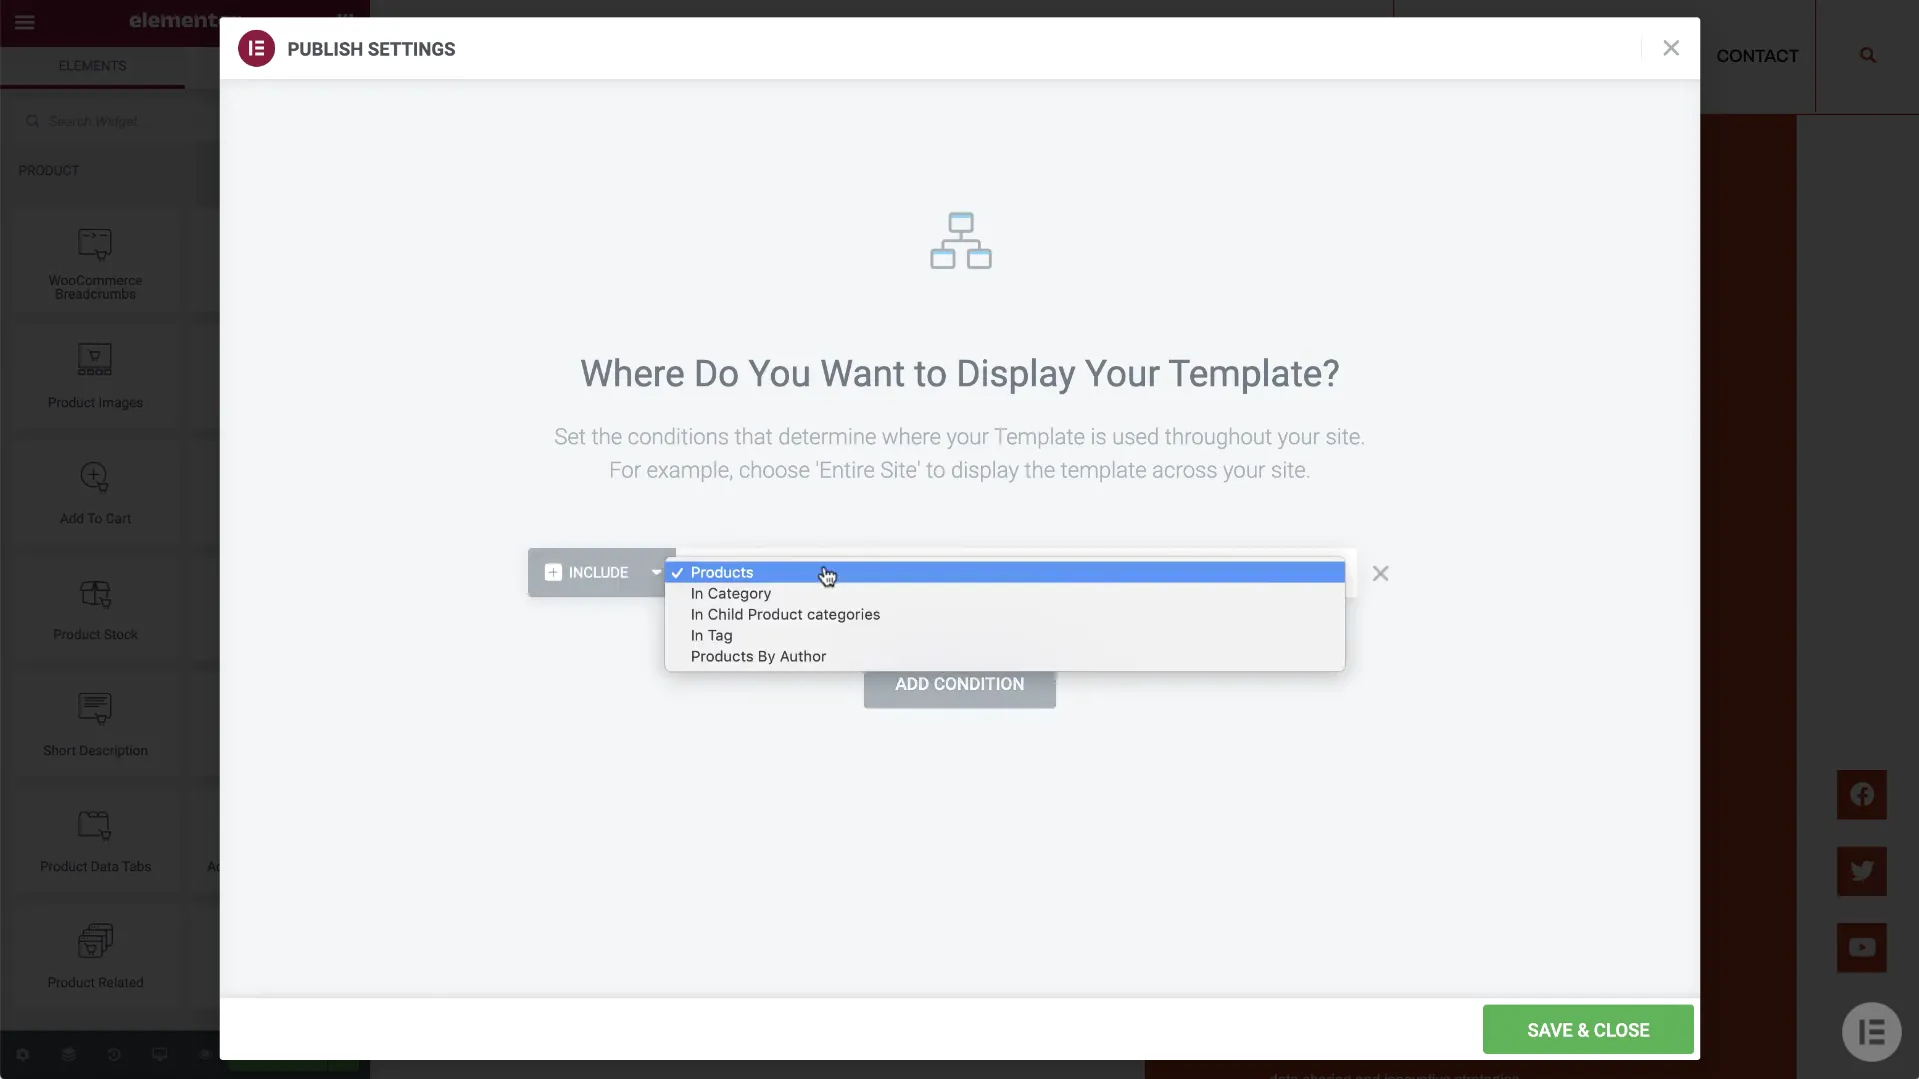
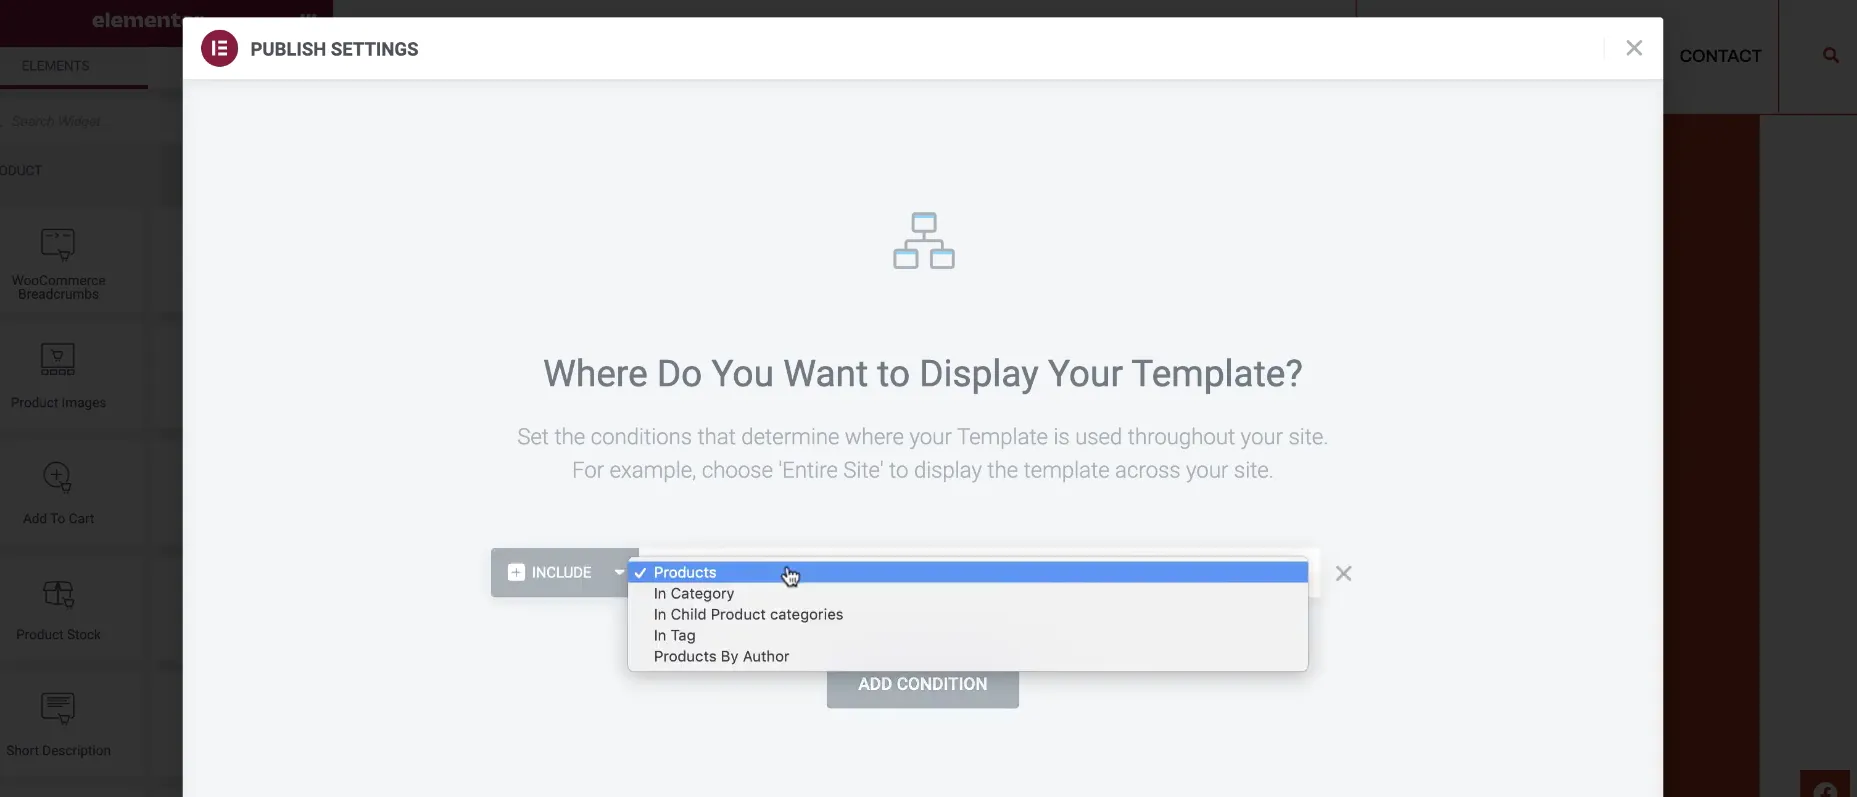
Once your conditions are set, confirm and save. Your custom product page will now be live for customers to see.
WooCommerce Product Page: FAQs
How to create a product page in WooCommerce?
Go to your WordPress dashboard > Products > Add New. From there, enter the product title, description, price, images, and other details. Once published, WooCommerce automatically generates a product page with your chosen theme’s layout.
How do I edit a WooCommerce product page?
You can edit product details directly under Products > All Products > Select the item. For layout and design changes, here are the steps:
- In your WordPress dashboard, go to Appearance > Editor (Site Editor).
- Open the Templates section.
- Select Single Product (this controls product page layout).
- Use the block editor to add, remove, or rearrange elements (title, price, gallery, add-to-cart, reviews, etc.).
- Click Save to apply changes across all product pages.
Why is my product page not showing up in WooCommerce?
Common reasons include the product being set to Draft, stock status marked as Out of Stock, or a conflict with your theme/plugins. Please double-check the product’s visibility settings, clear your site cache, and ensure your theme supports WooCommerce templates.
How many types of products are in WooCommerce?
WooCommerce supports six product types: simple, grouped, variable, external/affiliate, downloadable, and virtual. Each type lets you sell different product formats, from physical items to digital downloads or services.
What is the difference between a product page and a sales page?
A product page is a standard WooCommerce page showing product details, price, and an “Add to Cart” button. A sales page is designed specifically for marketing – it’s longer, more persuasive, and often includes storytelling, testimonials, and strong CTAs to maximize conversions.
Wrapping Up
Customizing your WooCommerce product pages can transform your store into a more engaging and conversion-friendly shopping experience. Whether you’re adjusting the default settings or exploring advanced techniques, there are plenty of options to make your product pages align better with your brand and cater to your customers’ needs.
You can use built-in tools, install helpful plugins, or even add custom code, but always prioritize performance, ease of navigation, and consistency with your brand’s style. Remember to test your changes and keep refining them for the best results.
We hope you found this article insightful and now have a clear understanding of the WooCommerce product page. For more content like this, be sure to visit our WooCommerce blog section and join our eCommerce community to gain further insights and connect with fellow business owners.

