
Webflow makes it easy to build and host a website, but there are times when you may need to download your code for a backup, client handover, or external hosting. A Webflow export lets you retrieve your site’s HTML, CSS, JavaScript, and static assets in a ZIP file.
In this guide, we’ll explain what Webflow allows you to export, its key limitations, and how to export your site code through these four steps:
- Step 1: Log in and open your Webflow project
- Step 2: Open the Code export panel
- Step 3: Prepare the ZIP file
- Step 4: Download the Webflow export code
We’ll also cover how to export CMS content and eCommerce data separately for backup or migration. If you’re still getting familiar with the platform, our Webflow tutorial walks you through its essential features and workflows.
Should You Export Your Webflow Code?
You should consider exporting data for a Webflow backup, client handover, or self-hosting a primarily static site. However, it is not ideal for websites relying on Webflow’s CMS, eCommerce, forms, search, or other dynamic features.
A Webflow export only provides HTML, CSS, JavaScript, and static assets. Once the site is moved outside Webflow, you will need to replace unsupported features and manage hosting, deployment, security, maintenance, and future code updates yourself.
Therefore, code export is best suited to static websites managed by teams with sufficient technical resources. For a complete website or store migration, exporting the code alone is not enough, as content, business data, and dynamic functionality may need to be transferred or rebuilt separately.
What Can and Can’t You Export from Webflow?
Before starting the Webflow export process, it’s important to know what parts of your Webflow project you can export and what features will still be tied to the platform. This understanding helps you plan ahead and avoid surprises when moving your project elsewhere.
What you can export | Format / limitation |
HTML, CSS, JavaScript, and assets | Downloaded together as a ZIP file |
CMS content | Exported per collection as CSV |
Products, variants, and categories | Exported separately as CSV |
Orders, discounts, forms, and users | Exported separately as CSV |
CMS and eCommerce functionality | Not included |
Forms, search, and password protection | Will not work when self-hosted |
Localized content | Only the primary locale is included |
Code components | Not exportable |
In short, Webflow lets you export most static files and data, but not a fully functioning version of your website or store.
How to Export Webflow Code (HTML/CSS/JS)
Webflow allows users on paid Workspace plans to export a site’s HTML, CSS, JavaScript, images, and other static assets as a ZIP file. You can use this Webflow export to:
- Back up your site’s code for future use.
- Hand over a completed project to a client.
- Edit the exported files outside Webflow.
- Deploy your Webflow-designed site to another hosting provider without Webflow attribution.
Note: Webflow code export is only available with paid Workspace plans. A Site plan alone does not include this feature, and Webflow does not provide an official free option.
Here is how to export Webflow code in 4 steps:
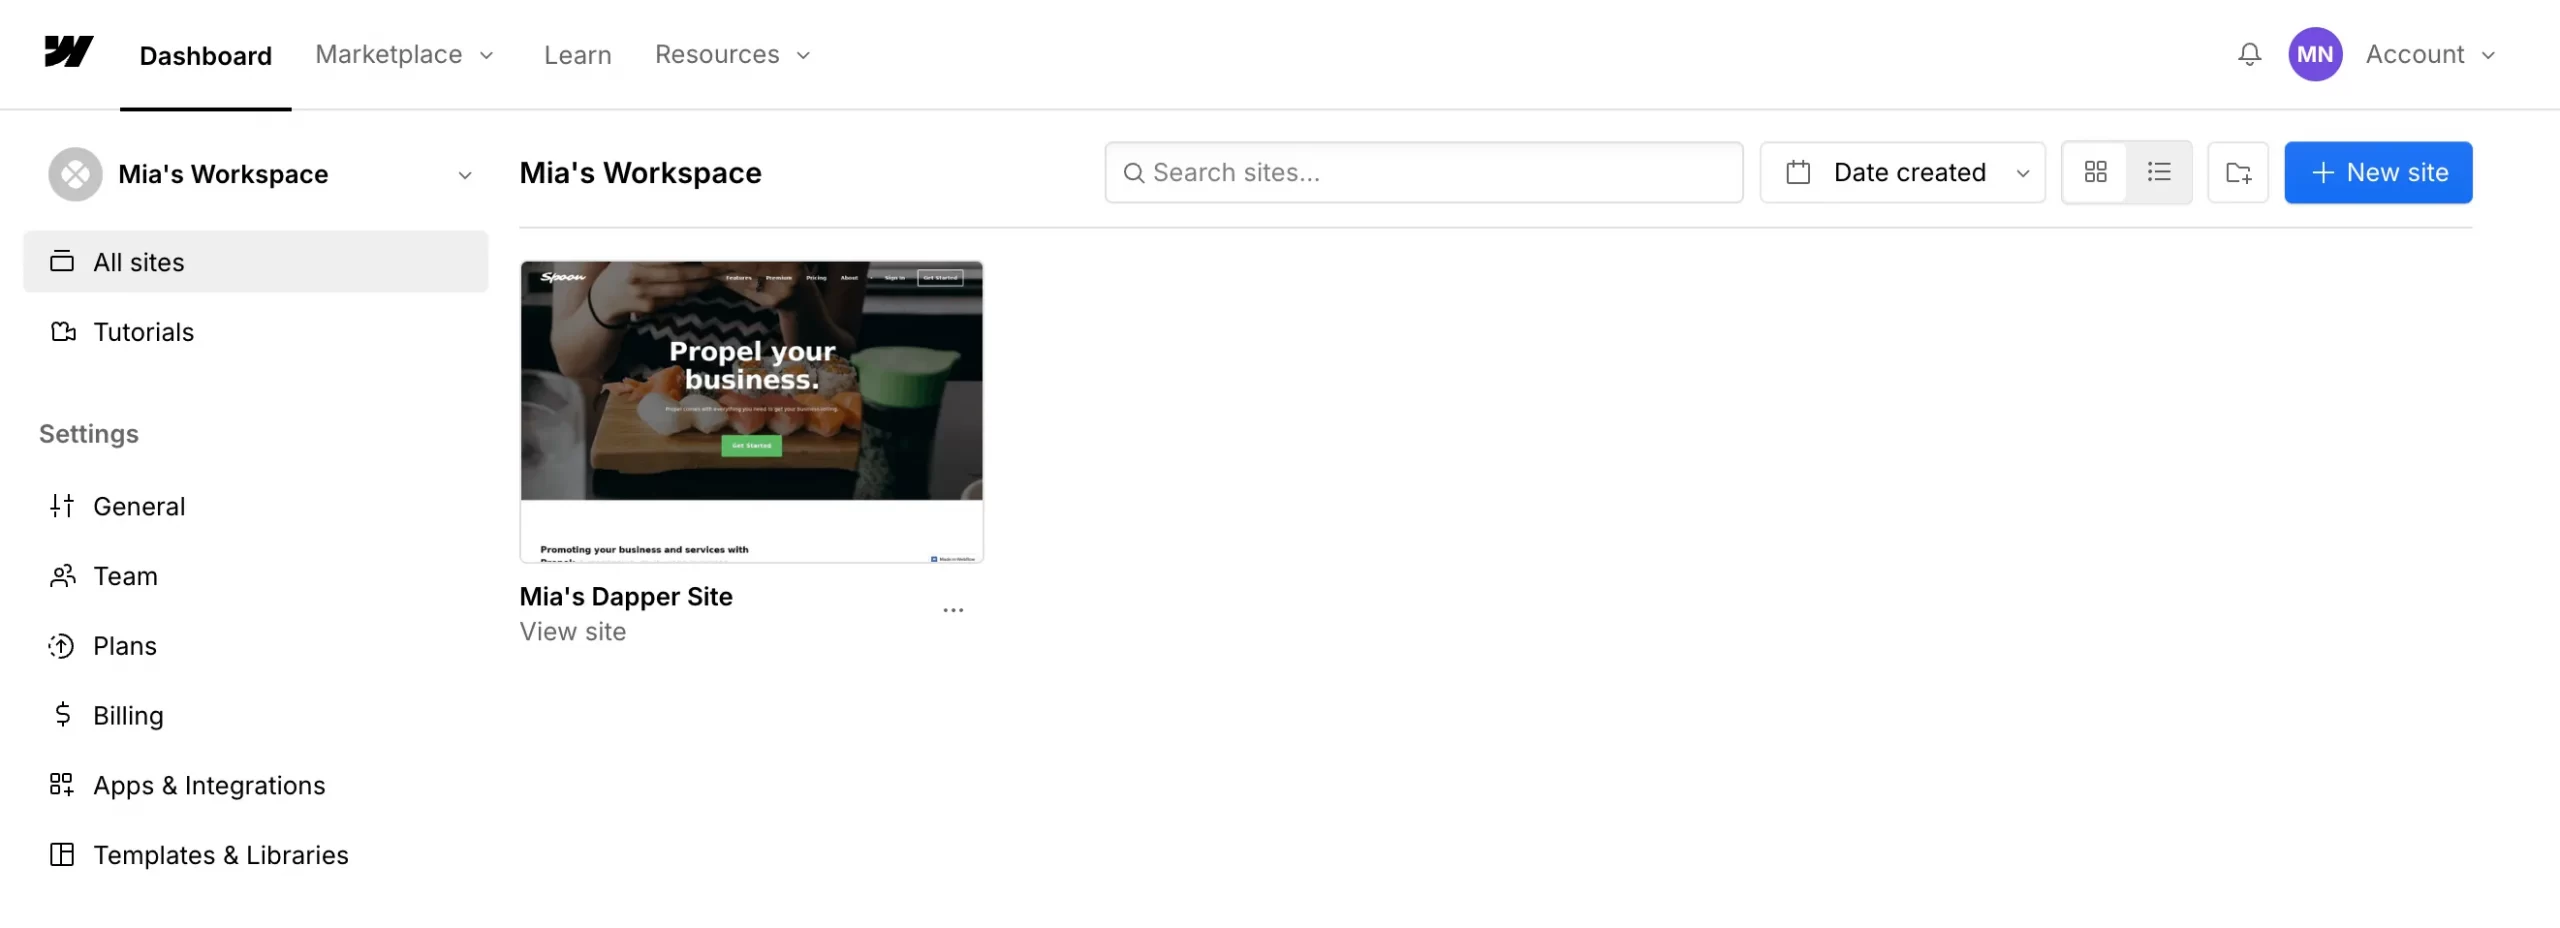
Step 1: Log in to Webflow
Go to Webflow.com, sign in to your account, and open the site you want to export in the Designer.
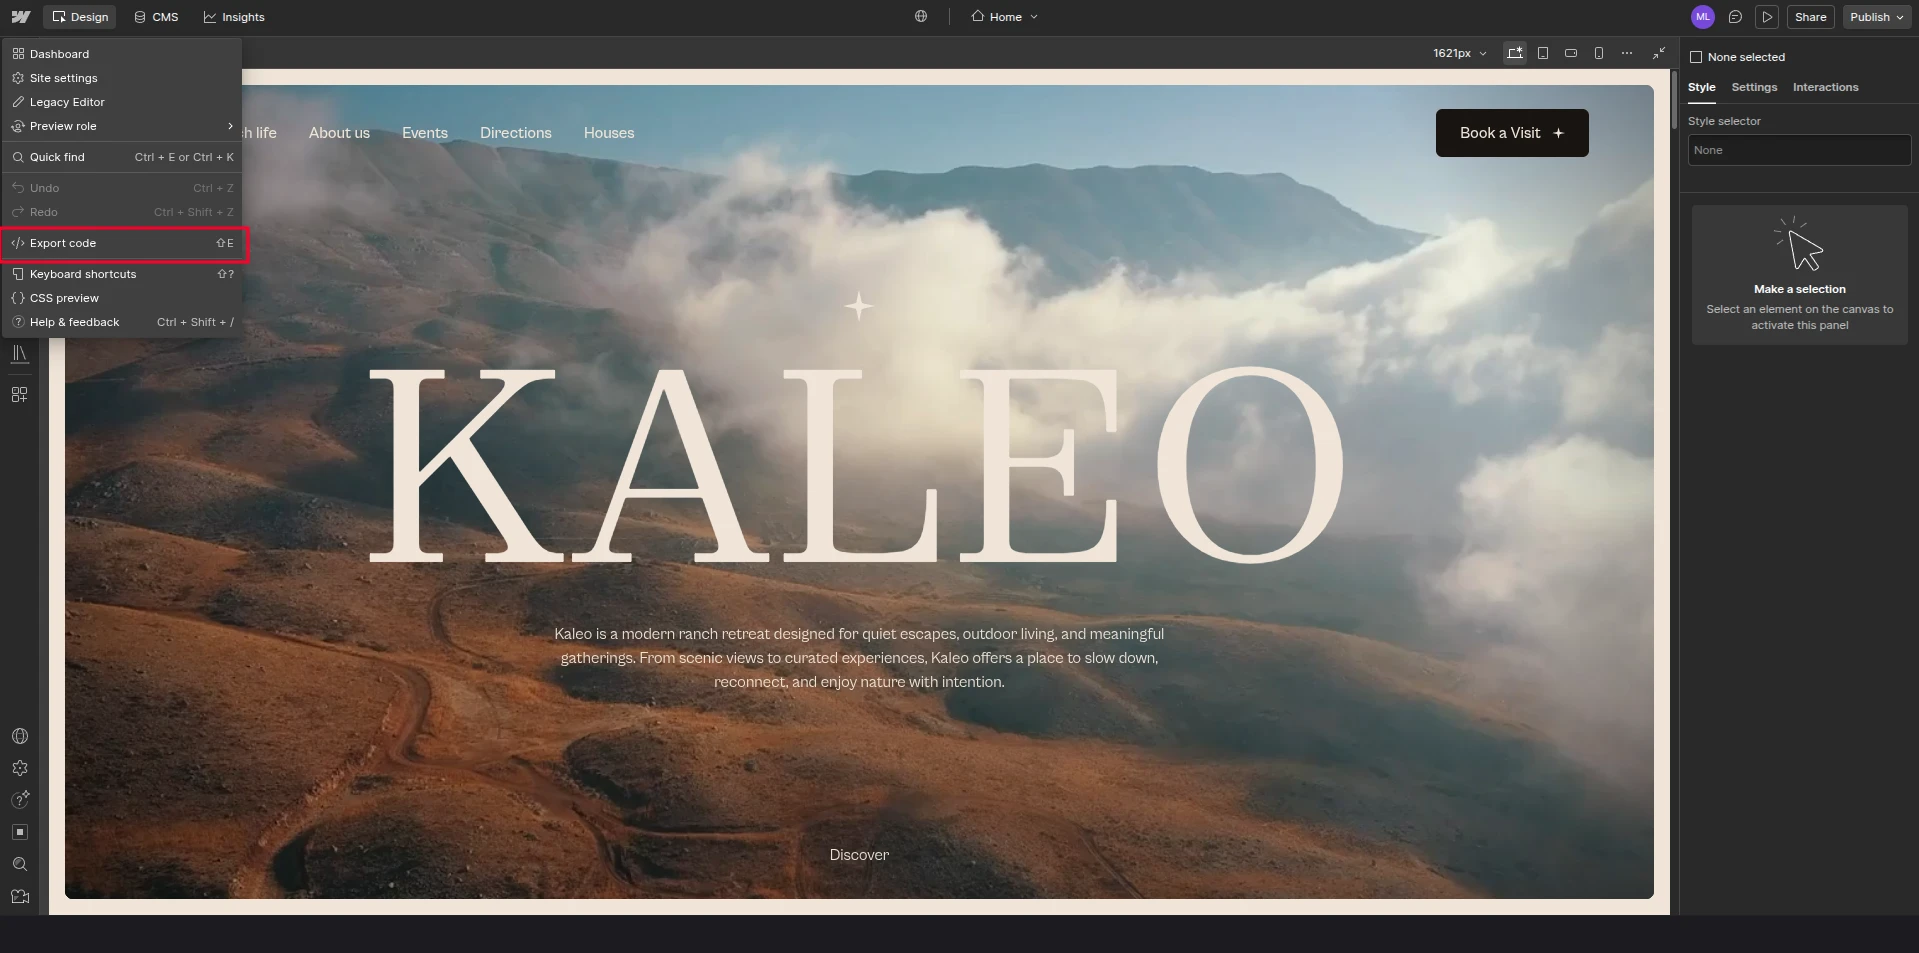
Step 2: Click Export code
Click the Webflow “W” logo in the upper-left corner to open the main menu, then select Code export. Alternatively, press Shift + E to open the panel directly.
Step 3: Prepare the ZIP file
Click Prepare ZIP. Webflow will compile the exportable parts of your site into one package, including:
- HTML files for static site pages.
- CSS files containing your custom styles and Webflow’s base styles.
- JavaScript files used by elements and interactions.
- Images and other files uploaded to the Assets panel.
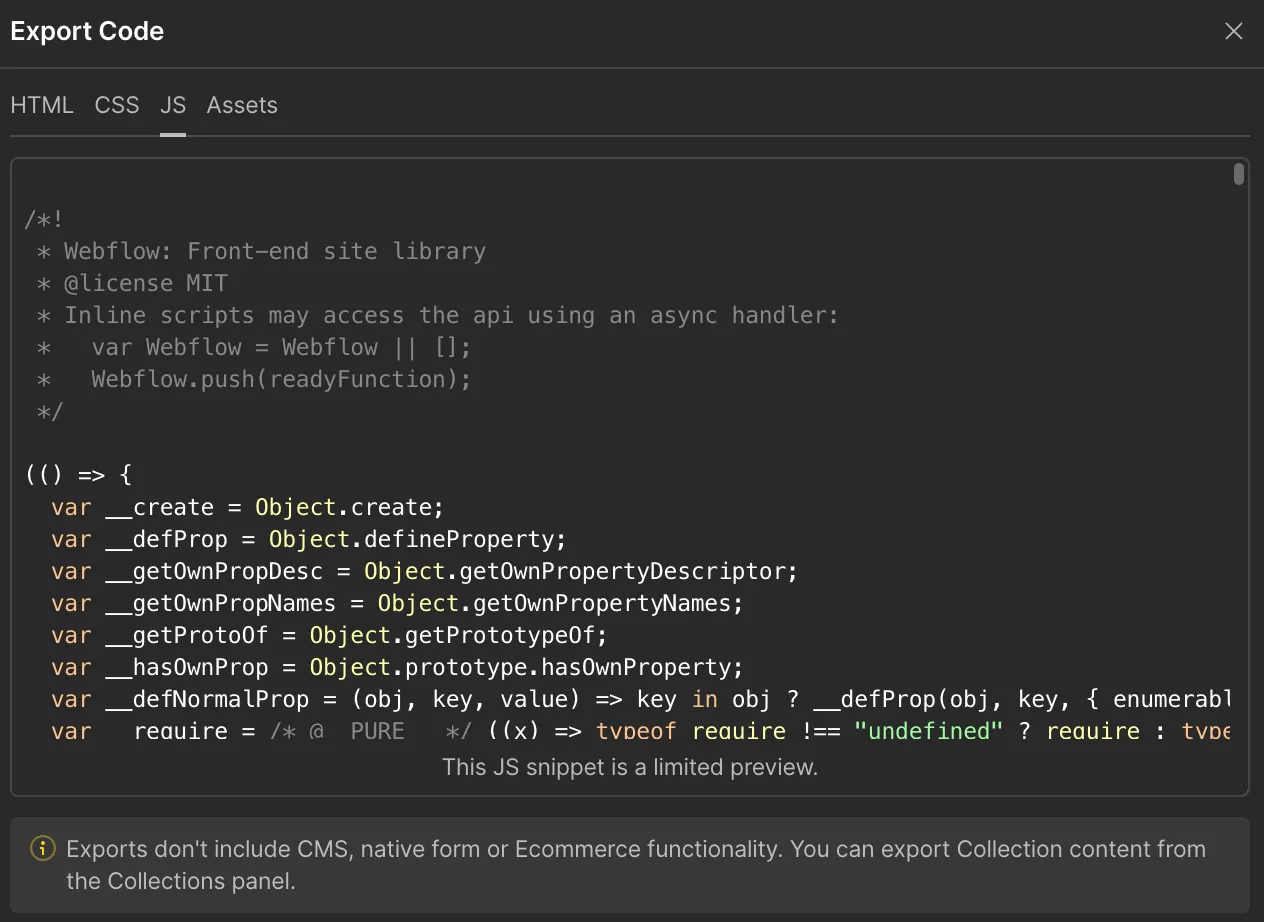
Step 4: Download Webflow export code
Once Webflow finishes preparing the package, click Download ZIP and save it to your device. You can then extract the files, modify the code if needed, and upload them to your external hosting provider.
Keep in mind that Webflow export only includes static code and assets. Dynamic features such as CMS content, eCommerce, native forms, site search, and User Accounts will not work properly when the site is self-hosted.
If your website relies on these features, you will need third-party or custom solutions to replace them. You can also export certain CMS and eCommerce data separately as CSV files.
How to Export Webflow CMS Content to CSV
Besides exporting your site’s static code, Webflow also allows you to export CMS content as a CSV file. This method is useful for backing up collection data, editing it in bulk, or preparing content for import into another CMS or platform.
Here’s how to complete a Webflow export for CMS content:
Step 1: Find Webflow CMS Collections tab
Log in to your Webflow account and navigate to the project containing the CMS content. Open the CMS Collections tab in the Designer or Editor.
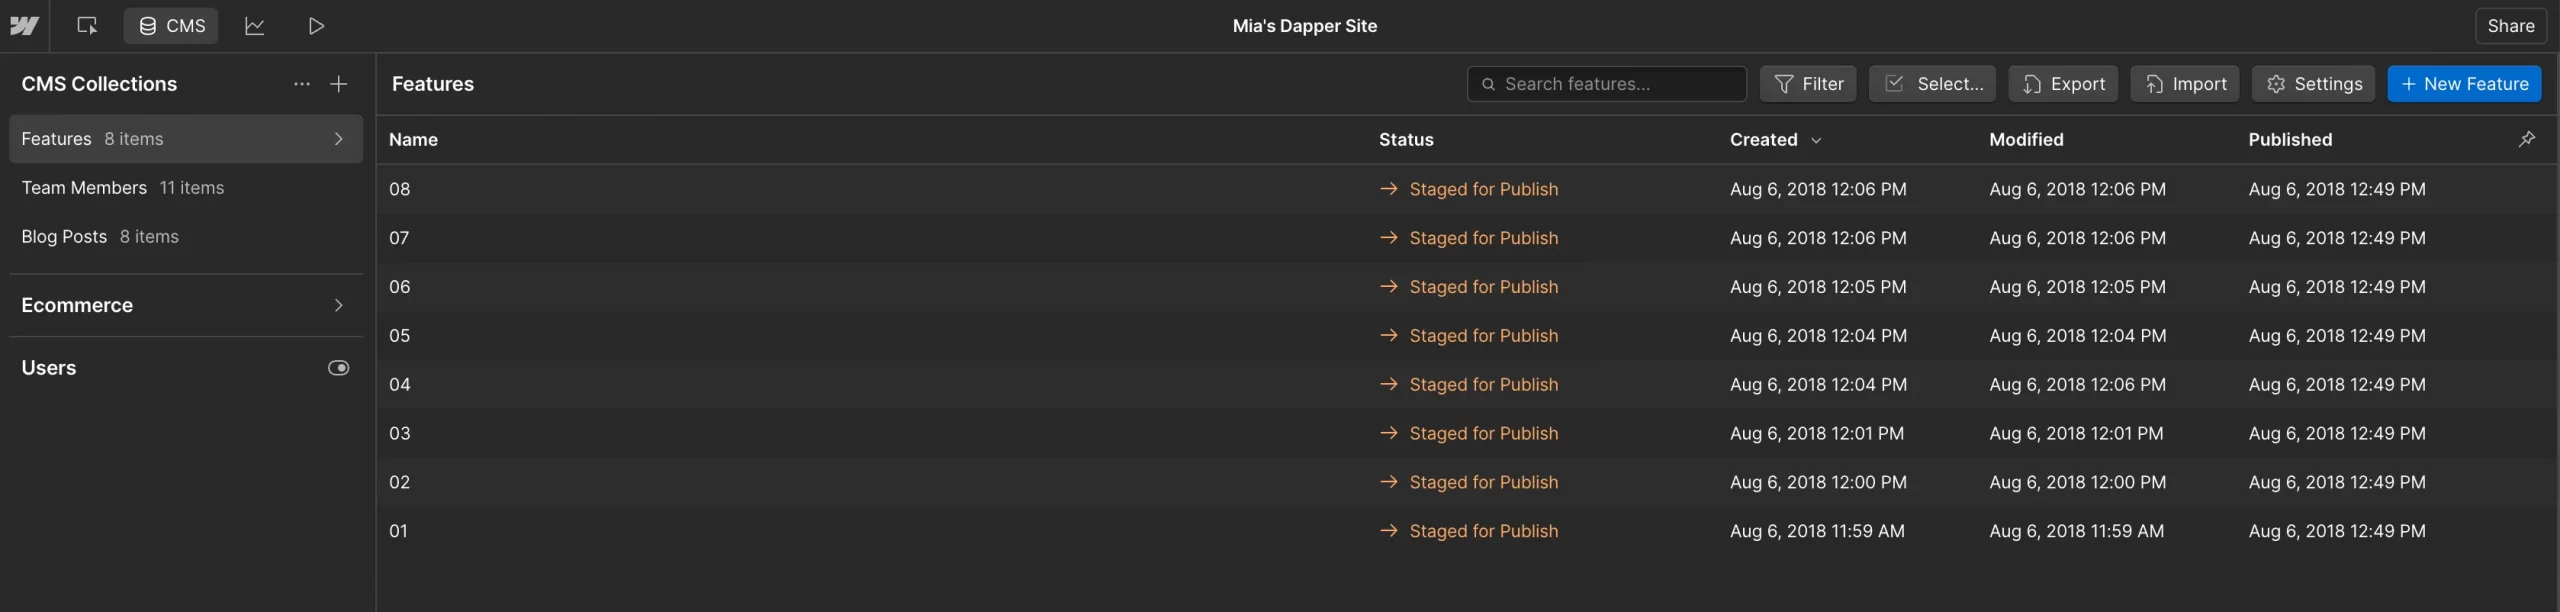
Step 2: Select collection to export
Open the collection you want to export, such as Blog Posts, Products, or Team Members. Since Webflow exports one collection at a time, you will need to repeat these steps for any additional collections.
Step 3: Download CMS content file
Click the Export icon in the collection panel.
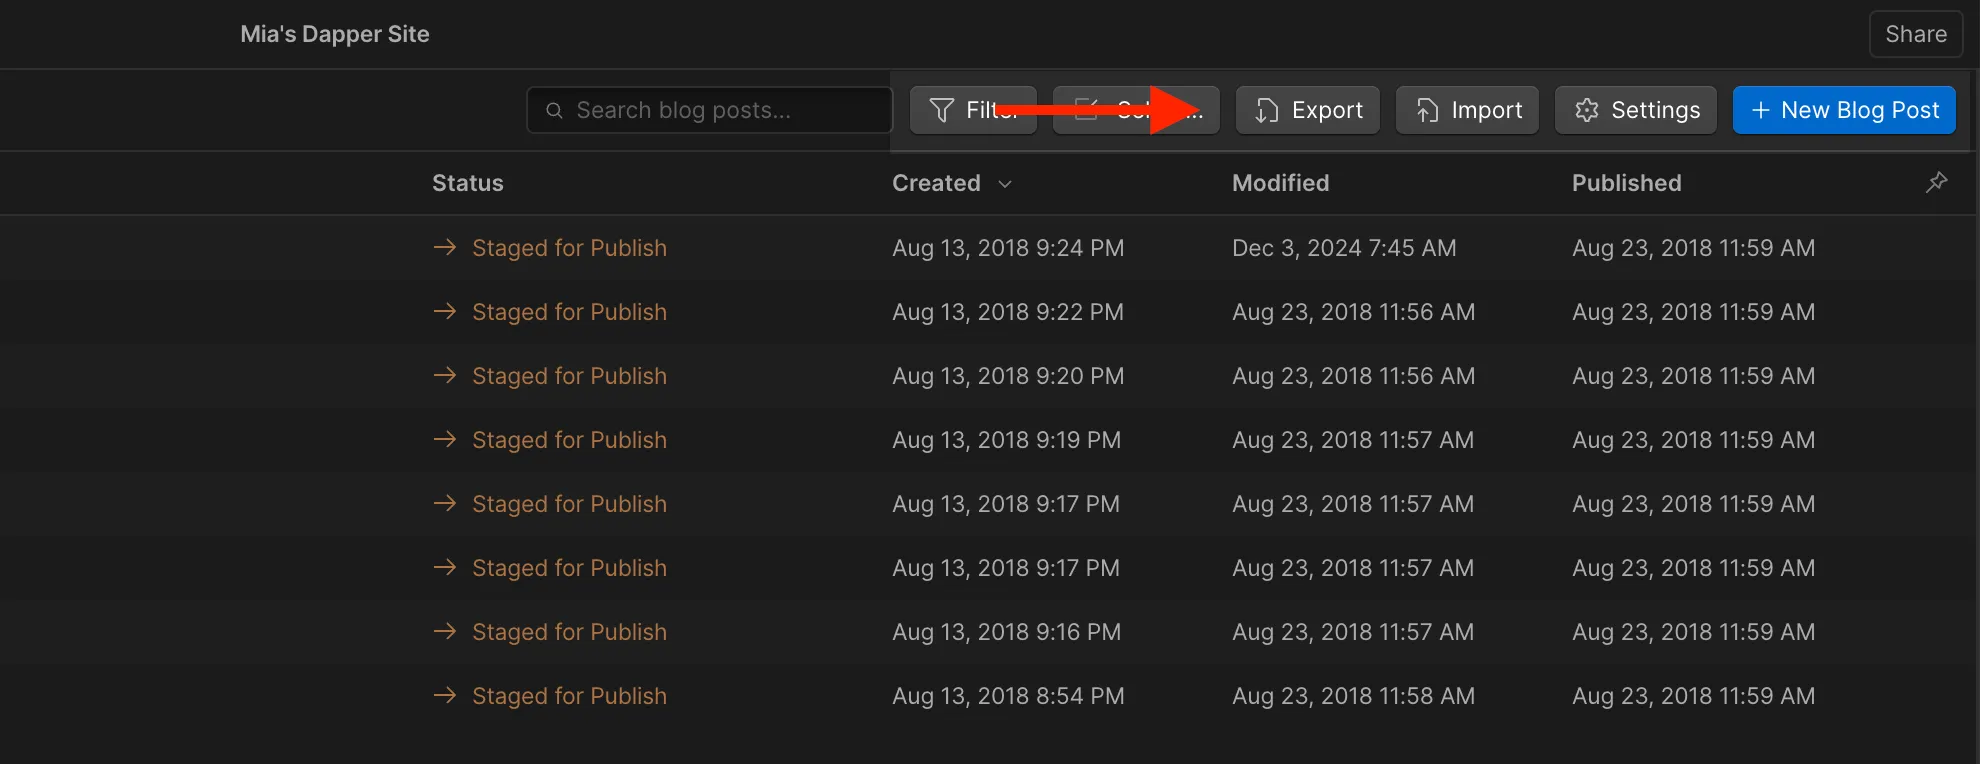
Webflow will generate and download a CSV file containing the collection items and their corresponding fields.
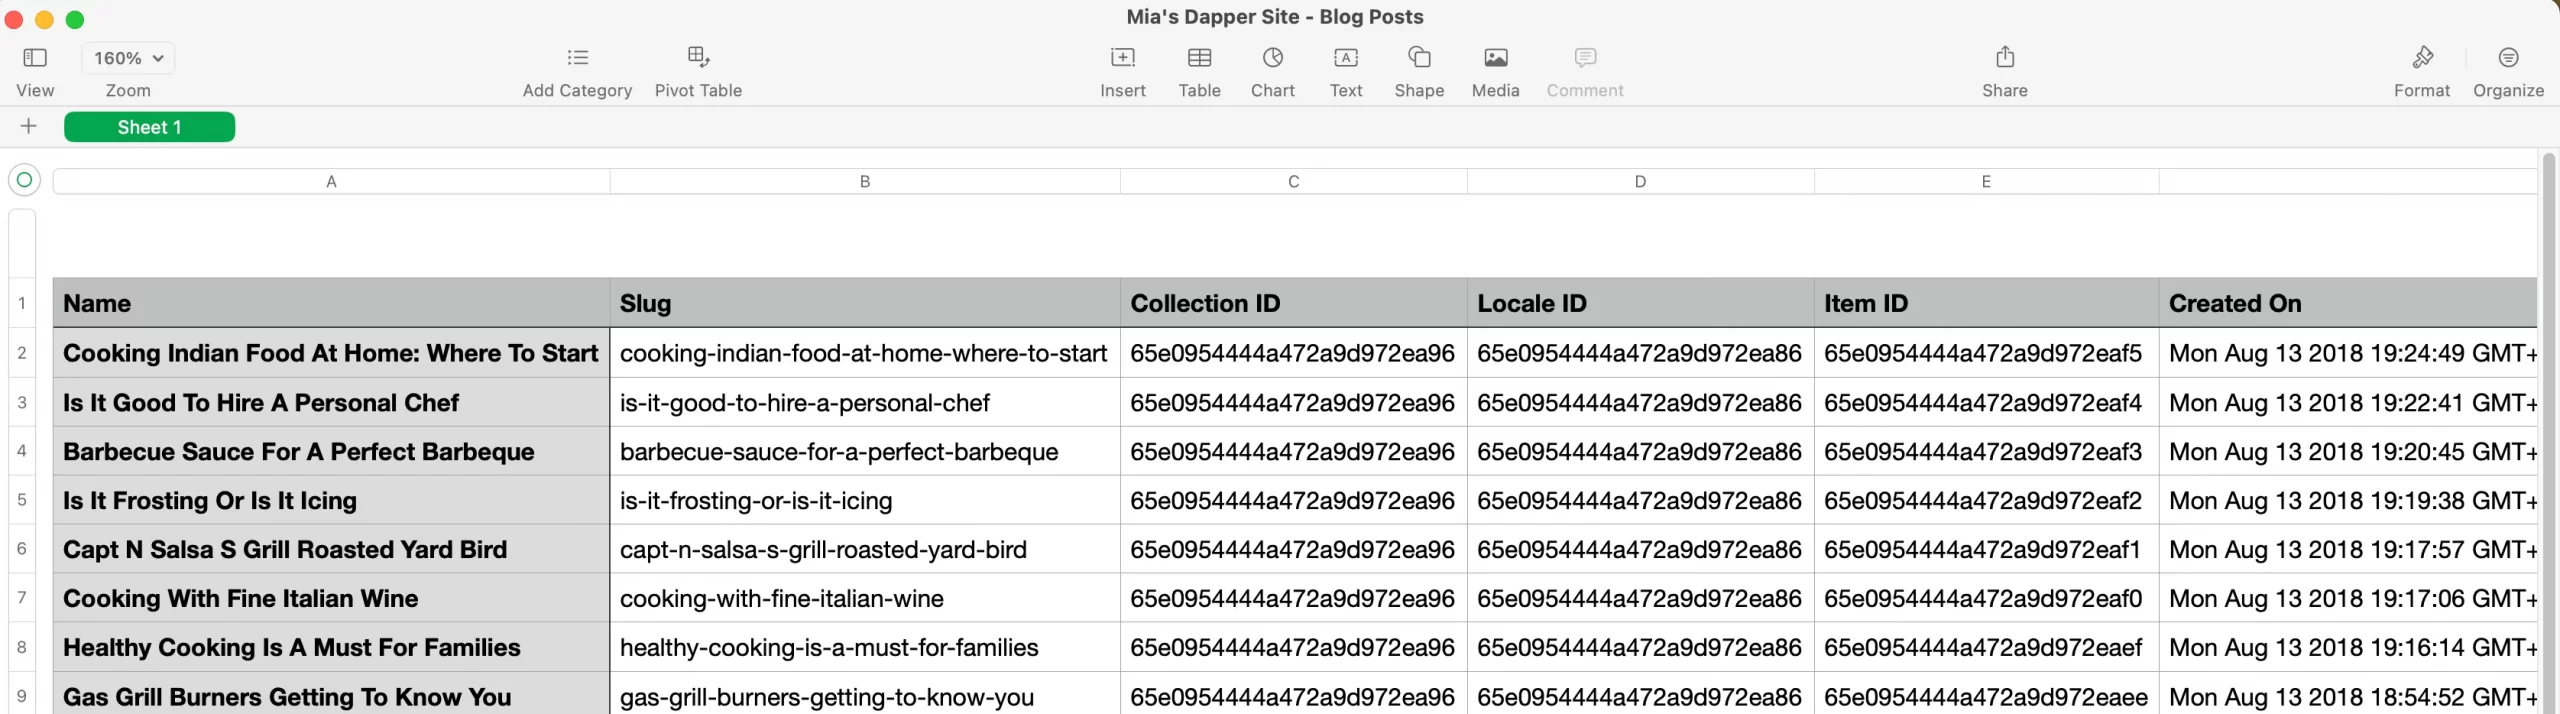
Once your Webflow content has been exported, you can move it to a more flexible content management platform like WordPress. LitExtension can simplify the Webflow to WordPress migration by transferring your CMS pages, blog posts, and other essential content accurately.
Need Help to Migrate Your Store from Webflow to WordPress?
LitExtension offers great migration solutions that help you transfer your data from Webflow to WordPress accurately, painlessly with utmost security.

How to Export Webflow eCommerce Data
Webflow’s eCommerce tools help you create online stores, but they don’t allow for easy exports to static formats. If you want to move your store to another platform, you will need to manually extract your product and order data.
*Note: Webflow’s exports only include basic information, like product details and orders. You will have to rebuild features such as shopping carts and checkout, as these are not included in the export.
Now, here are the steps to export Webflow eCommerce data:
Step 1: Find CMS content section
Log in to Webflow and open your store project in the Designer. From the left sidebar, navigate to the CMS and eCommerce panel.
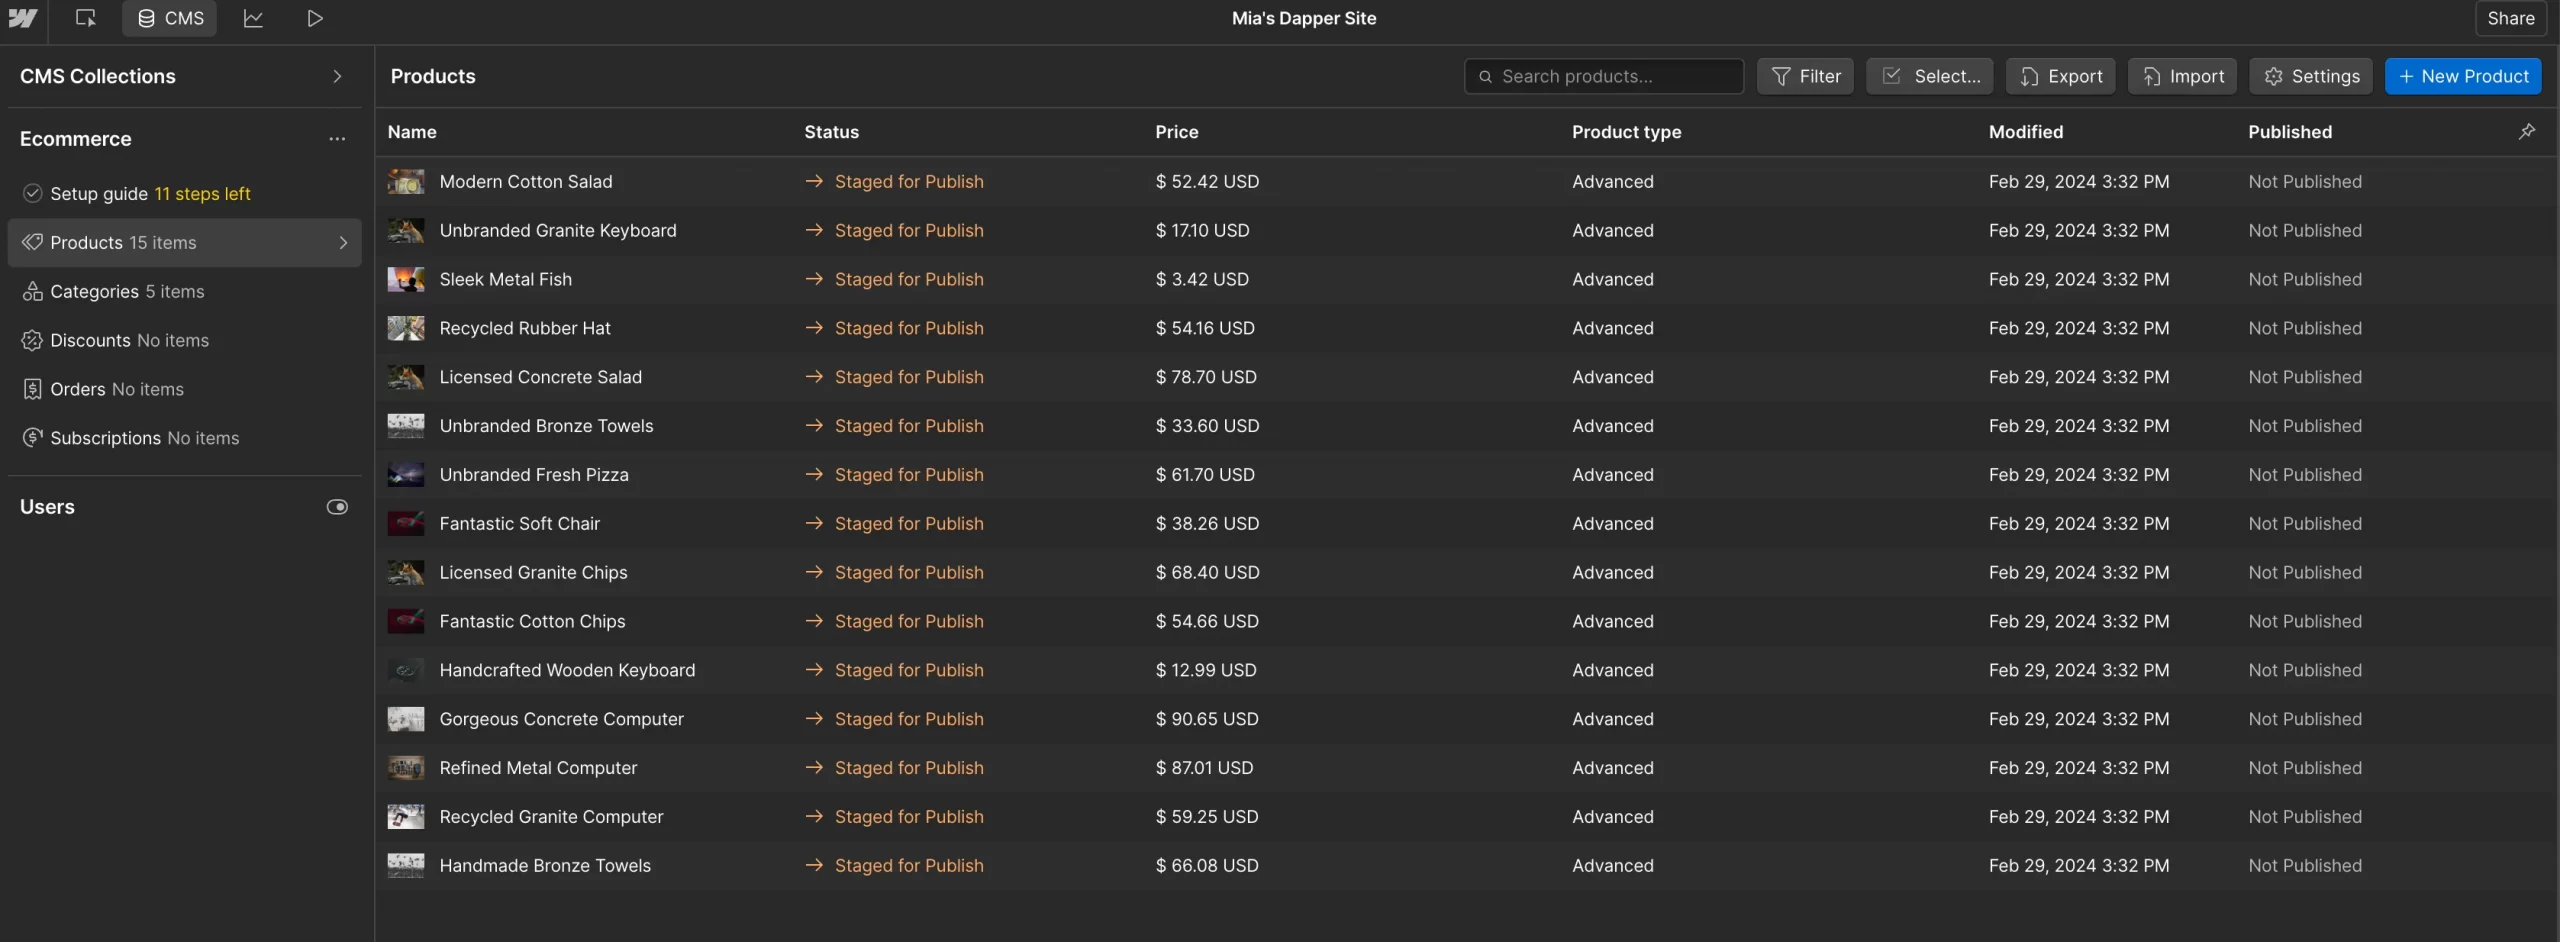
Step 2: Go to Ecommerce tab
Open the Ecommerce section and select the data you want to export, such as Products or Categories. For additional data types, including orders, open their corresponding section in your Webflow dashboard.

Step 3: Click Export button and download
Click the Export button at the top of the collection and select Export as CSV. Webflow will generate and download a CSV file containing the items and their associated fields.
Step 4: Check fields and custom attributes
Open the downloaded file and check whether all necessary columns are included, such as product names, SKUs, prices, images, variants, and categories. Custom fields added to the collection should also appear in the Webflow export.
Before importing the data into another platform, you should review the CSV structure carefully and map each column to the correct destination field. This helps prevent missing, duplicated, or incorrectly placed eCommerce data.
For a complete Webflow store migration, LitExtension can securely transfer your products, customers, orders, and other essential data to another platform.
Let Our Experts Handle Your Webflow Migration!
With the All-in-One Migration Service, our experts take care of everything, ensuring a seamless and stress-free migration.
Troubleshooting Common Errors with Webflow Export
Even when you follow the correct steps, the Webflow export does not always go smoothly. Some issues stem from plan restrictions, others from features that simply do not carry over outside of Webflow’s hosting environment. The table below covers the most common problems users run into, along with the likely cause and the right fix for each.
Error | Cause | Solution |
Code Export option is missing or unavailable | Code export is only available on Workspace plans. Site plans do not include the ability to export your site's code. | Upgrade to a Core, Growth, or Agency Workspace plan, not a Site plan. |
Exported ZIP file has missing images or assets | Only assets uploaded directly to Webflow's Assets panel are bundled into the export. External hosted media and third-party embeds are not included. | Upload all images directly to the Assets panel, and manually download and re-link any externally referenced media after export. |
CMS Collection pages are empty after export | CMS, User Accounts, and eCommerce content are not included in exported code. | Export your CMS content separately as a CSV file and re-integrate the data |
Forms stop working on the exported site | Site search and forms (including file upload and reCAPTCHA) will not work on exported sites in order to comply with GDPR. | Adjust your form settings to connect to a third-party form service, or embed forms generated by third-party services instead of using the native form element. |
Password-protected pages are no longer protected | Password protection in Webflow is server-side functionality that does not survive export. | Your site must be hosted with Webflow in order for password protection to work as expected. |
Lottie animations do not appear on local preview | For security reasons, Lottie JSON files will not load from your local file system | Upload the exported files to a web server, or use a local server environment |
Webflow Export: FAQs
Can you export Webflow for free?
No. Webflow’s native code export feature is only available on paid Workspace plans, not free plans or standalone Site plans. It lets you download the site’s HTML, CSS, JavaScript, and assets as a ZIP file.
How to export Webflow CMS content?
Open the CMS Collections panel in the Webflow Designer, select the collection you want, and click the Export icon to download it as a CSV file. A Webflow export must be completed separately for each CMS collection.
Are third-party Webflow export tools safe to use?
It depends on the tool. Before granting access, review its reputation, permissions, privacy policy, and data-handling practices. Avoid tools that request unnecessary account credentials, and back up your site before starting the export.
Can you transfer a Webflow site to another platform?
Yes, but a complete transfer usually requires more than exporting the code. Static files, CMS content, and certain eCommerce data can be exported, while dynamic features such as checkout, forms, search, and CMS functionality may need to be rebuilt on the new platform.
In case you need help, LitExtension experts can help migrate essential Webflow content and store data to another platform.
Is Webflow’s exported code SEO-friendly?
Generally, yes. The exported HTML retains much of the site’s existing structure and on-page SEO information. However, you still need to review metadata, image paths, canonical tags, sitemap settings, page speed, and 301 redirects after moving the site. CMS-driven SEO content may also require separate migration because CMS functionality is not included in the code export.
Final Words
Webflow export gives you control over your website. You can export static files like HTML, CSS, and JavaScript, along with assets and CMS or eCommerce data in CSV format for migration. However, features such as forms and CMS-driven pages need more development work. With the right approach, exporting opens up many options for hosting and customizing your site beyond what Webflow offers.
We hope you found this article insightful and now have a clear understanding of the Webflow export process. For more content like this, be sure to visit the LitExtension blog and LitExtension Resources to gain further insights and connect with fellow business owners.

