A reliable backup system is essential for keeping your data safe and ensuring your business runs smoothly. If you use Webflow, it’s important to know how its backup features work, along with best practices for managing backups and troubleshooting issues. This guide covers everything you need to know about Webflow backup.
In today’s agenda, LitExtension will include:
- Webflow backup features;
- How to manage Webflow backups effectively;
- Limitations of Webflow built-in backup tools;
- Some third-party solutions for extra protection.
Let’s get started!
Understanding Webflow Backup Features
Webflow provides tools to help users back up their projects and avoid losing data. The platform has features for both automatic and manual backups.
1. Webflow automatic backups
Webflow now lets you save and restore backups easily. It automatically creates backups for all site plans, including Starter, Basic, CMS, Business, and Enterprise, and you get unlimited storage.

How do automatic backups work?
- Webflow creates backup points automatically every 50 auto-saves and during key actions like publishing or making major design changes.
- You can also create backups manually.
- To preview and restore backups, visit the Backups tab in the Designer or Site Settings.
2. Webflow manual backups
While automated backups offer convenience, they may not capture every detail, such as CMS content exports or specific design nuances. Therefore, manual backups are a crucial supplement to Webflow’s automated system, particularly for those managing complex projects.
Manual backups let you choose when and how to save your data. They are especially helpful for creating checkpoints before major updates, redesigns, or when you need to export data for storage elsewhere.
How to Manually Backup Webflow?
1. Backup Webflow site code
- Open the Webflow Designer.
- Locate the Export code button and click on it.
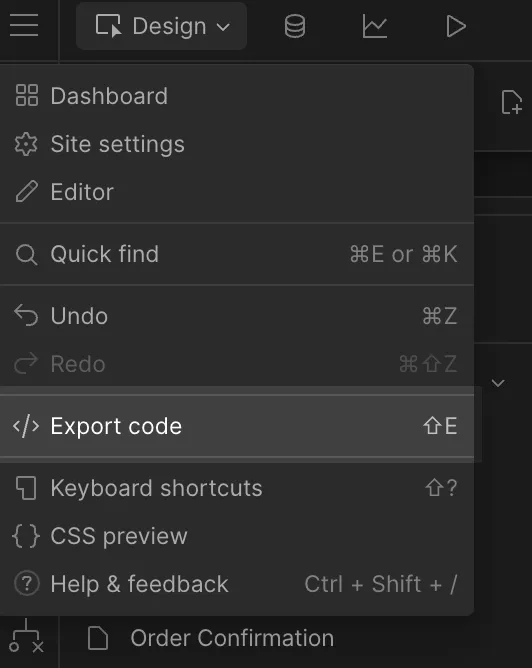
- A ZIP file containing your site's HTML, CSS, and JavaScript files will be generated.
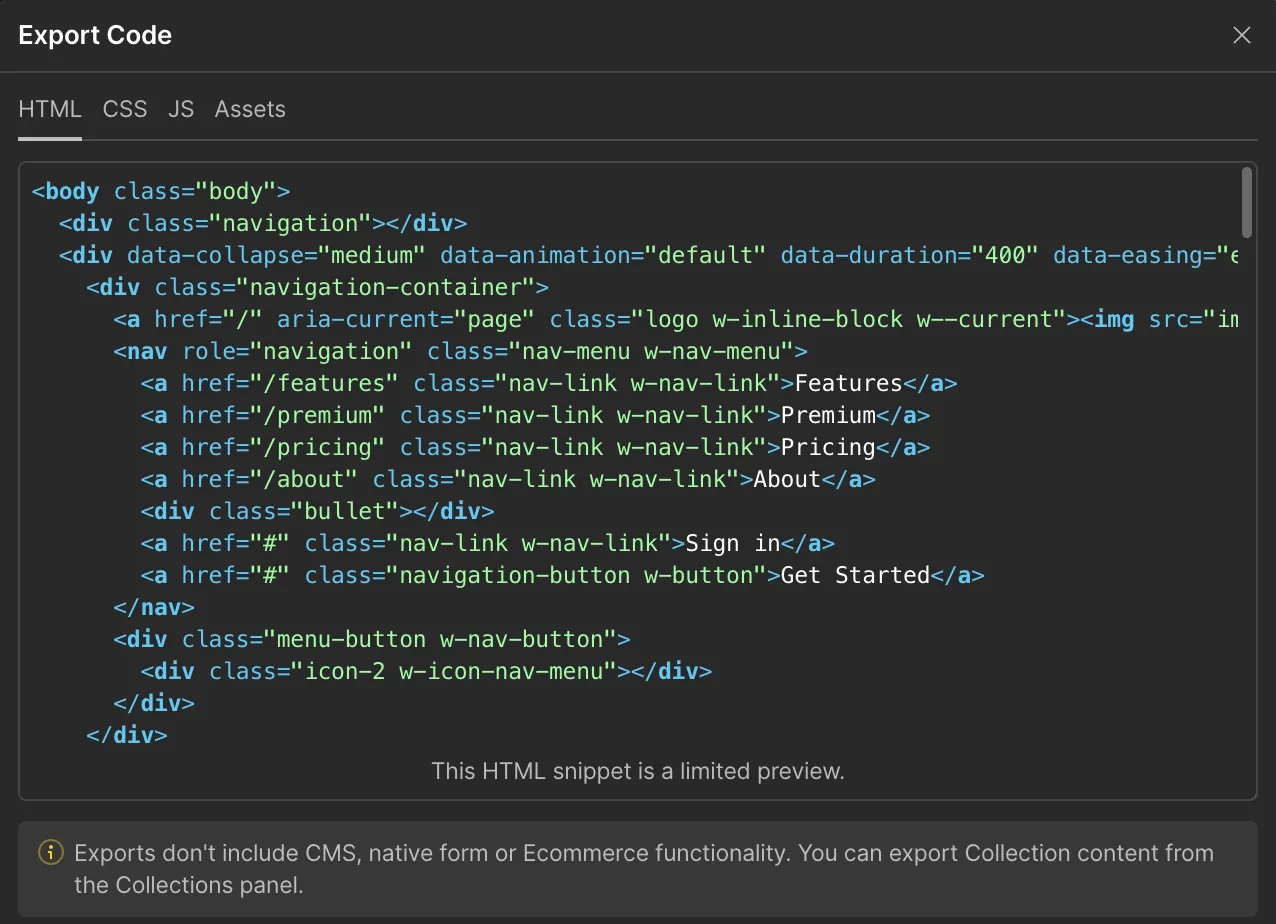
- Download Webflow backup ZIP file to ensure you have a local copy of your site code.
Note: Code export is available only for users with paid site plans and will not include CMS.
2. Backup Webflow CMS data
- Navigate to the CMS section of your project in the Designer.
- Select the Export option, and the CSV Webflow backup download file will be automatically saved to your computer containing all your dynamic content.

Note: CMS data export captures only dynamic content, not the static content or custom code changes made by the Designer.
How to Restore Webflow Backups?
Webflow has a Webflow version control system that helps users manage their projects better. It automatically saves versions of a site when important updates happen, like when a project is published or when changes are made. This feature allows users to view a timeline of their work easily.
Sometimes, you may need to go back to an earlier version of your website, even with good backup practices in place. Webflow makes it easy to restore backups without much hassle. Here’s how to do it:
1. Access the Backups tab
- Open your project’s Settings.
- Select the Backups.
- A list of saved versions will appear, showing timestamps and descriptions for each backup.
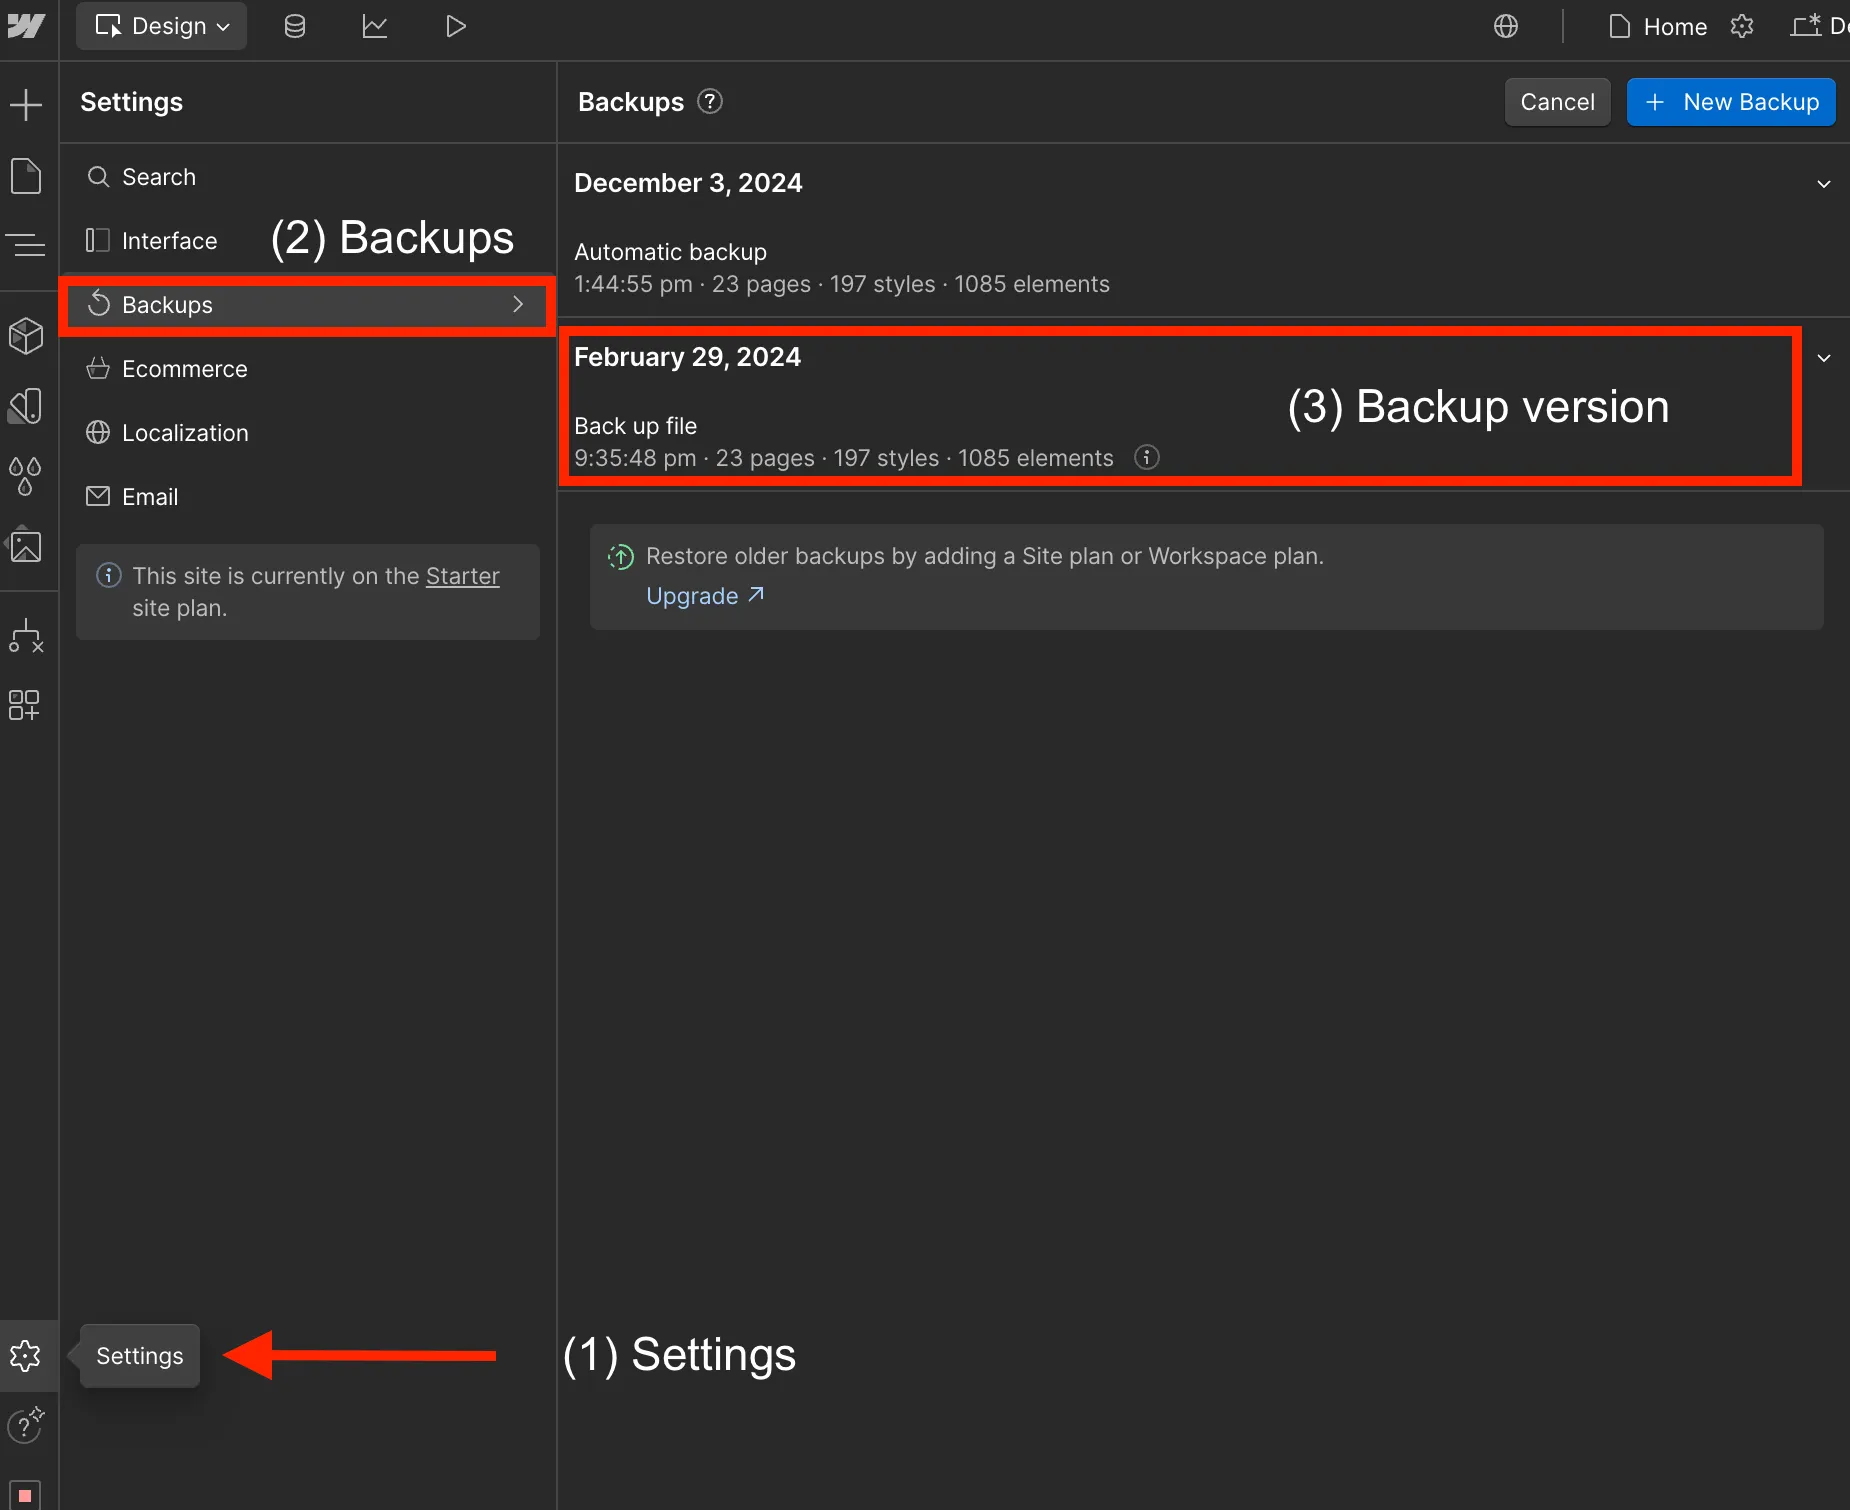
2. Choose the backup you want to restore
- Browse through the list to locate the version you want.
- Each entry displays:
- The date and time the backup was created.
- A short description (e.g., “Backup created before publishing”).
3. Restore the backup
- Click the dropdown, and you will see the Restore backup button next to the selected backup.
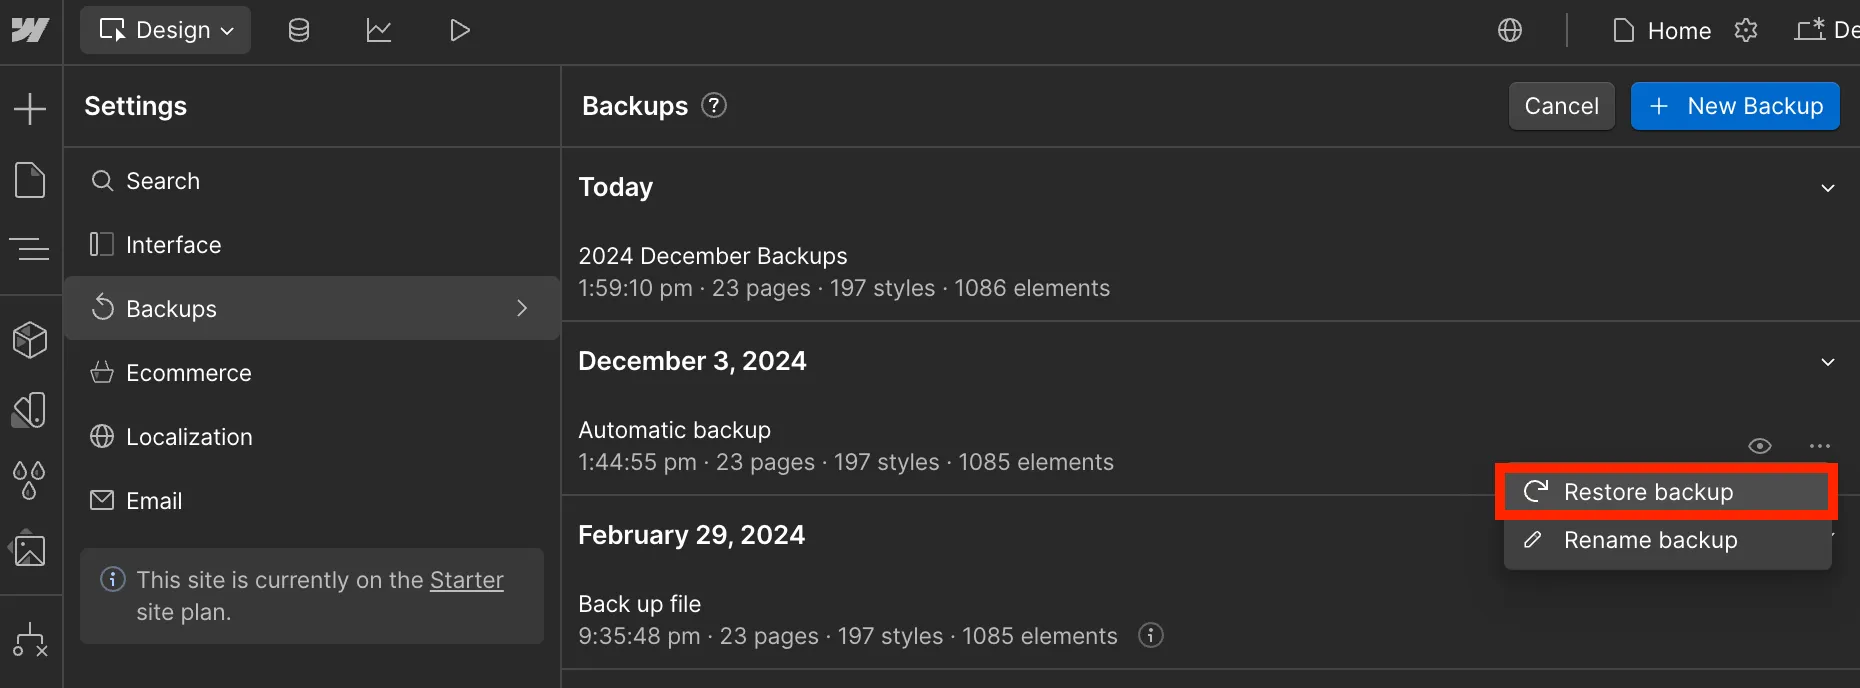
- Confirm your decision in the prompt that appears. Webflow will revert your site to the chosen state.
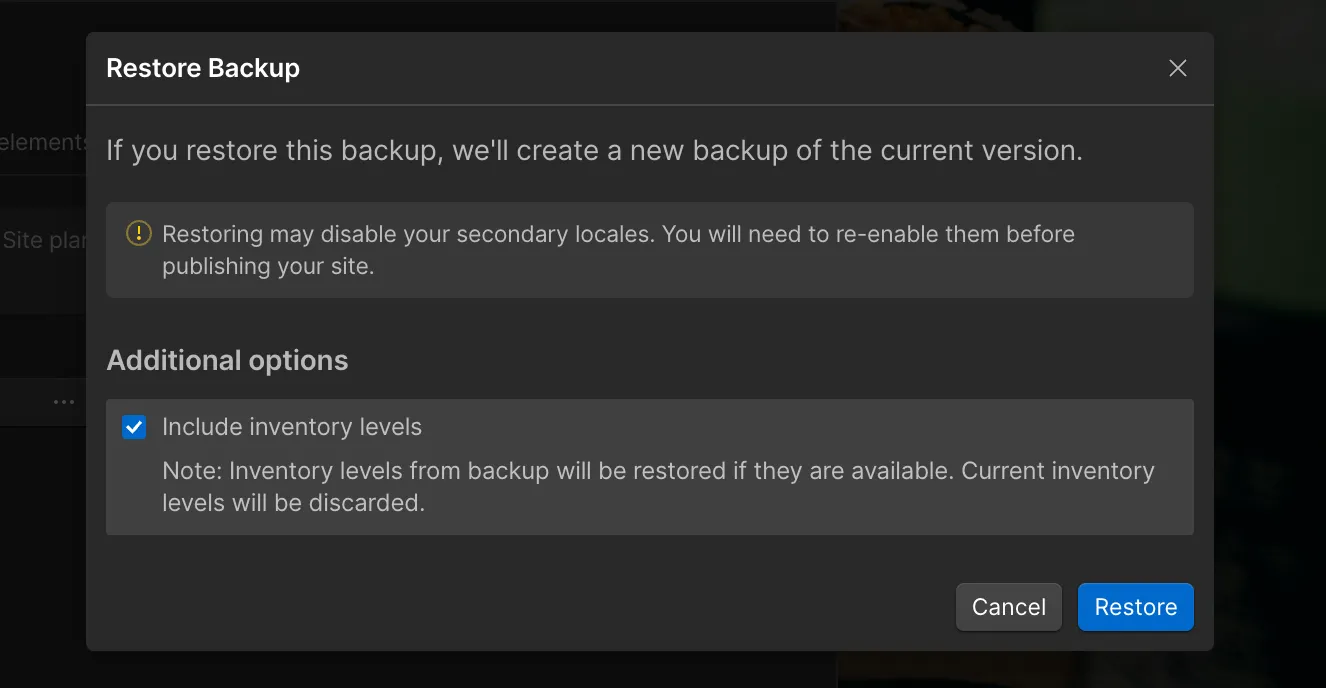
4. Publish the restored version
- After the restoration, preview your site to ensure everything looks and functions as expected.
- Publish the restored version to make it live for your visitors.
Important notes:
Webflow's restoration process works well, but you should know some important details. If your backup was made before March 25, 2024, restoring it may change CMS Collection and item IDs. This change can impact APIs or third-party tools that depend on these IDs. Backups made after March 25, 2024, will keep the same IDs, so there will be no issues with API calls or external integrations.
Restoring a backup may temporarily disrupt your APIs, forms, or third-party apps connected to your site. After the restoration, check these integrations to make sure they are working correctly.
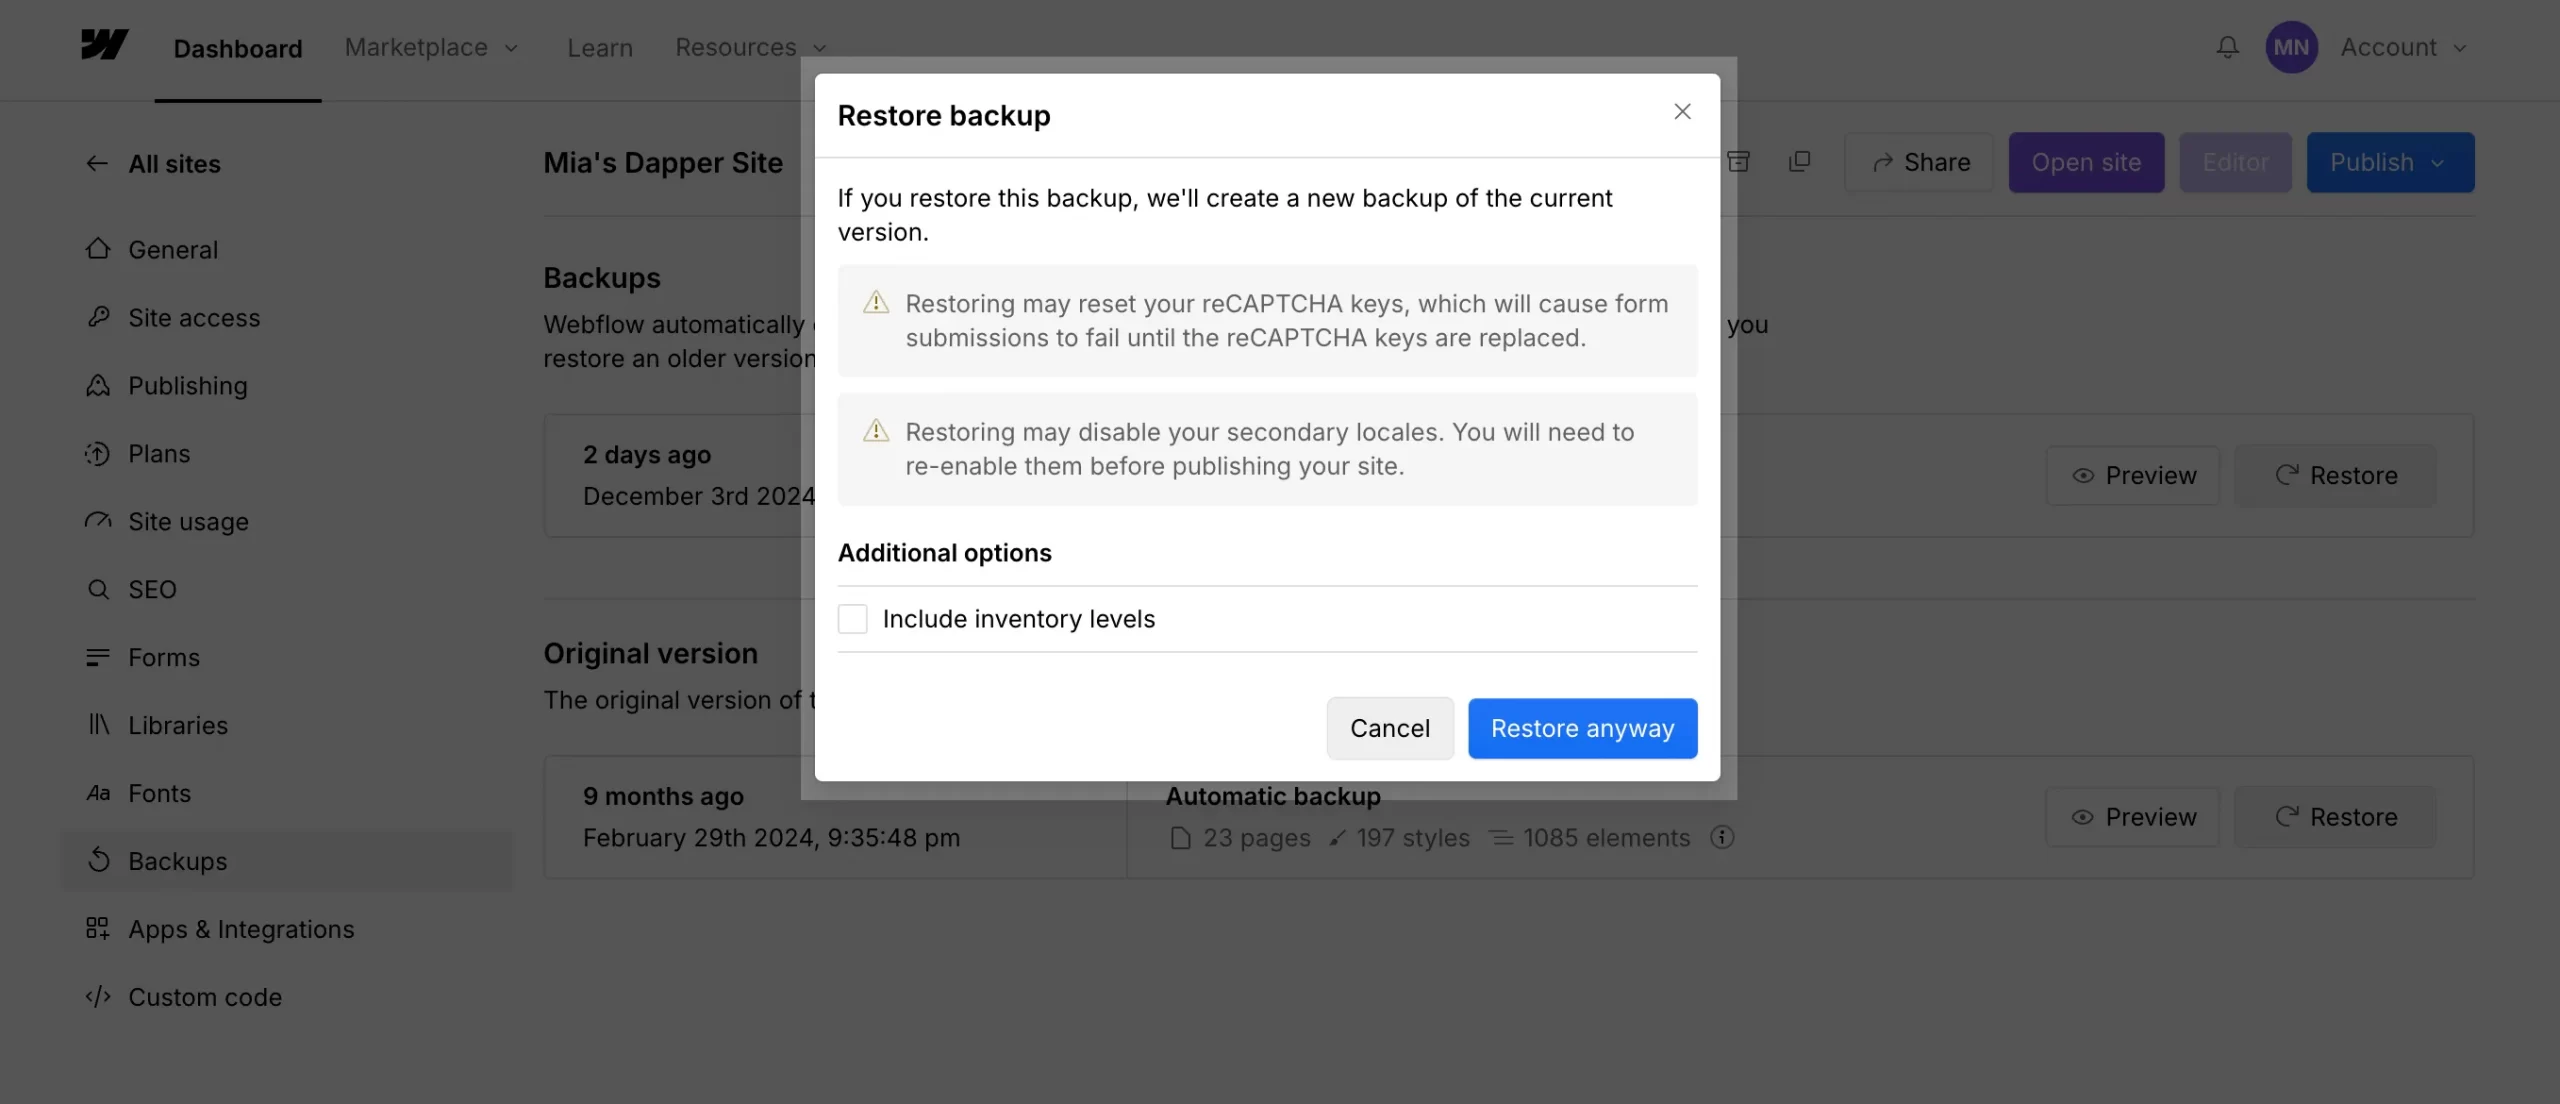
You may also need to adjust your ReCAPTCHA settings and eCommerce inventory levels after restoring the backup.
Key Limitations of Webflow’s Backup System
1. No automatic backups for free plan users
The backup feature is exclusively available to users on paid plans. For those on the free plan, however, reliance on manual backups is necessary. While this option is available, it can be quite time-consuming and carries the risk of being prone to errors.
Solution:
- Upgrade to a paid plan to access automatic backups.
- Use external tools like HTTrack or third-party plugins to automate backups.
- Set reminders to perform regular manual backups if upgrading isn’t an option.
2. Incomplete backup coverage
Webflow captures your site’s design, structure, and CMS collections, but it lacks important features. It doesn’t back up external integrations, such as APIs or third-party tools, and assets in external databases aren’t saved. Furthermore, custom code changes made outside of Webflow’s Designer may not be preserved, leading to potential gaps in your site’s backup.
Solution:
- Maintain detailed documentation of external APIs, tools, and custom code.
- Use GitHub for version control of custom code.
- Regularly back up external assets and integrations manually or with external tools.
- Test the recovery of all critical functionalities after restoration to identify gaps.
3. No scheduling for manual backups
Webflow has a significant limitation: it does not allow users to schedule automatic backups. This means users must remember to export their site data or CMS collections regularly.
Solution:
- Automate reminders with tools like Google Calendar, Asana, or Trello.
- Use automation tools like Zapier to trigger CMS data exports regularly.
- Allocate dedicated time for backups weekly or monthly.
4. Limitations in CMS data restoration
Restoring a backup returns CMS content to its state at the time of that backup, which can erase any recent changes. This may cause problems if data has changed frequently since the last backup.
Solution:
- Use the Export as CSV feature to save external copies of CMS data.
- Maintain a log of CMS changes after each backup to manually reapply updates.
- Use site duplication to test frequent CMS updates without affecting the live version.
5. Limited retention period
Webflow keeps backups for only a limited time, especially for larger or older projects. If users don’t save or export important versions, they might lose access to them.
Solution:
- Export and save important backups to external storage like Google Drive or Dropbox.
- Monitor backup retention timelines and schedule exports before backups expire.
- Use version management tools for comprehensive tracking and archival of changes.
Integrating Webflow with Other Tools
1. Using GitHub for version control
GitHub is a powerful tool for developers and designers who want to extend Webflow’s backup and version control functionality. It allows you to track changes, collaborate with teams, and maintain a detailed Webflow version history of your projects.
So, how to integrate Webflow projects with GitHub?
1. Export Webflow site code
- Open the Webflow Designer and click the Export Code button.
- This will download a ZIP file containing your site’s HTML, CSS, and JavaScript files.
2. Create a repository on GitHub
- Log in to your GitHub account.
- Set up a new repository specifically for your Webflow project. This repository will serve as the central hub for your code.
3. Upload your code to GitHub
- Extract the exported ZIP file and upload Webflow to Github repository.
- Ensure all project assets are included for a complete and functional setup.
4. Track and commit changes
- Use GitHub’s version control features to log updates to your project.
- Regularly create commits to document changes, making it easier to roll back if needed.
2. Using tools like Udesly and Zapier
Third-party tools can enhance Webflow’s features by automating backups and adding extra protection. These tools help you avoid relying on just one backup source and allow for more flexible backup strategies.
Here are some popular tools and their features for Webflow backup:
Udesly:
- Automates the process of exporting Webflow sites.
- Converts Webflow projects into other formats (e.g., WordPress), making it an ideal solution for users transitioning platforms or creating robust backups.
Zapier:
- Connects Webflow to cloud storage services like Google Drive and Dropbox.
- Automates periodic CMS data exports, ensuring dynamic content is securely backed up.
External tools can greatly improve your Webflow experience by addressing its limitations in backup and version control. They offer automation and flexibility, which is crucial for complex projects that need customization and security. These tools also enhance team collaboration and help manage site assets more effectively, ensuring alignment and efficient resource use.
Webflow Backup: FAQs
Does Webflow have backups?
Yes, Webflow automatically backs up your site as you work. It creates restore points every 50th time it saves your progress.
How do I save a Webflow backup?
To manually create a backup:
1 - Ensure the "Changes saved" checkmark is visible in the Designer's top toolbar.
2 - Press Shift + Command + S (Mac) or Shift + Control + S (Windows).
3 - In the "Save backup" window, name your backup and click Save.
How do I transfer my Webflow site?
To transfer your site:
1 - Go to your Dashboard and hover over your project.
2 - Click the Settings icon.
3 - In the General tab, scroll down to Transfer Ownership.
4 - Enter the email of the person you want to transfer the project to, making sure it's linked to their Webflow account.
5 - Click Transfer Project.
Does Webflow save automatically?
Webflow automatically backs up your site as you work. All site plans, including Starter, Basic, CMS, Business, and Enterprise, offer unlimited backups.
Conclusion
This guide explains Webflow backup features, including automatic and manual backups, as well as how to restore them. We also discuss their limitations and troubleshooting tips. By combining Webflow's tools with services like GitHub and Zapier, you can create a tailored backup strategy.
Key points:
- Automatic backups are easy, while manual backups give you more control.
- Schedule backups regularly combine types, and test restorations.
- Use third-party solutions for gaps in Webflow’s backup coverage.
- Monitor your backups and adjust your strategy as your website changes.
These steps will help you protect your Webflow projects and allow you to experiment confidently. A good backup strategy is essential for recovery and allows you to focus on your goals.
We hope this article helps you understand the Webflow backup. For more insights and support, visit the LitExtension blog and connect with our eCommerce community.

