When it comes to Shopware import export, there is no one-size-fits-all approach. Shopware 6 offers multiple ways to import and export data, and each method is better suited to different business needs, data volumes, and database structures.
In this guide, we'll walk you through the complete Shopware import export process with the two main methods:
- Method 1: Using Shopware's built-in import export tool;
- Method 2: Using LitExtension's migration tool for automated data transfers.
We'll also cover common Shopware import export errors and how to troubleshoot them to keep your data transfer process running smoothly.
Let’s get started!
How to Import Data to Shopware via Admin Panel?
Shopware 6 comes with a built-in import tool that allows you to upload store data using CSV files. Before starting the import process, make sure your file meets Shopware's formatting requirements.
Your Shopware import CSV file should:
- Use the UTF-8 character encoding
- Use semicolons (;) as field separators
- Use quotation marks (“) as string delimiters
These settings can usually be configured in spreadsheet editors before exporting the file. If your data contains special characters such as umlauts or accented letters, saving the file in UTF-8 format is especially important to prevent import errors.
Once your CSV file is ready, follow the steps below to import data to Shopware.
Step 1. Open Import module
From your Shopware admin dashboard, navigate to Settings > Automation > Import/Export.
This section contains all tools related to data imports and exports. Here, you can manage import profiles, upload CSV files, and monitor import activities.
Step 2. Upload the CSV file
In the Upload CSV file (1), select the CSV file from your computer and upload it to Shopware.
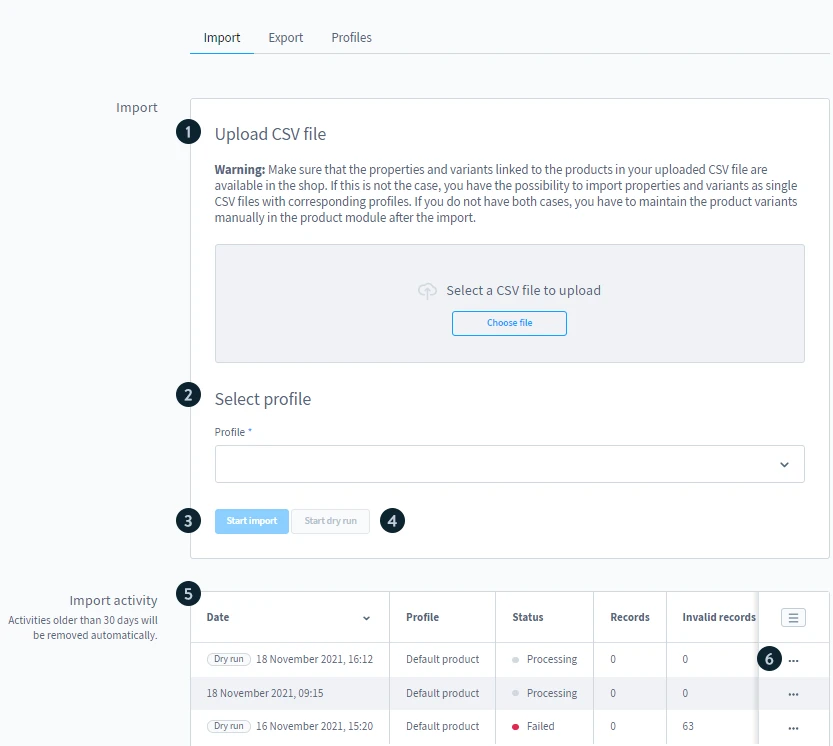
The file should contain the data you want to import into your store. To avoid formatting issues, make sure you're using a native CSV file. Some spreadsheet applications may automatically modify separators, quotation marks, or leading zeros, which can cause import errors.
Once uploaded, Shopware will use this file as the data source for the import process.
Step 3. Select import profile
Next, choose a profile from the Select profile dropdown (2).
The selected profile determines how Shopware processes your CSV file during the import. Depending on the data you want to transfer, you'll need to choose the corresponding profile – for example, products, customers, orders, categories, manufacturers, or media files.
Step 4. Creating custom import profiles & field mapping (optional)
If none of the existing profiles fit your CSV structure, you can create a custom profile.
Click Add new profile to build a new import configuration. You can also open, duplicate, edit, or delete existing profiles from the profile management menu.
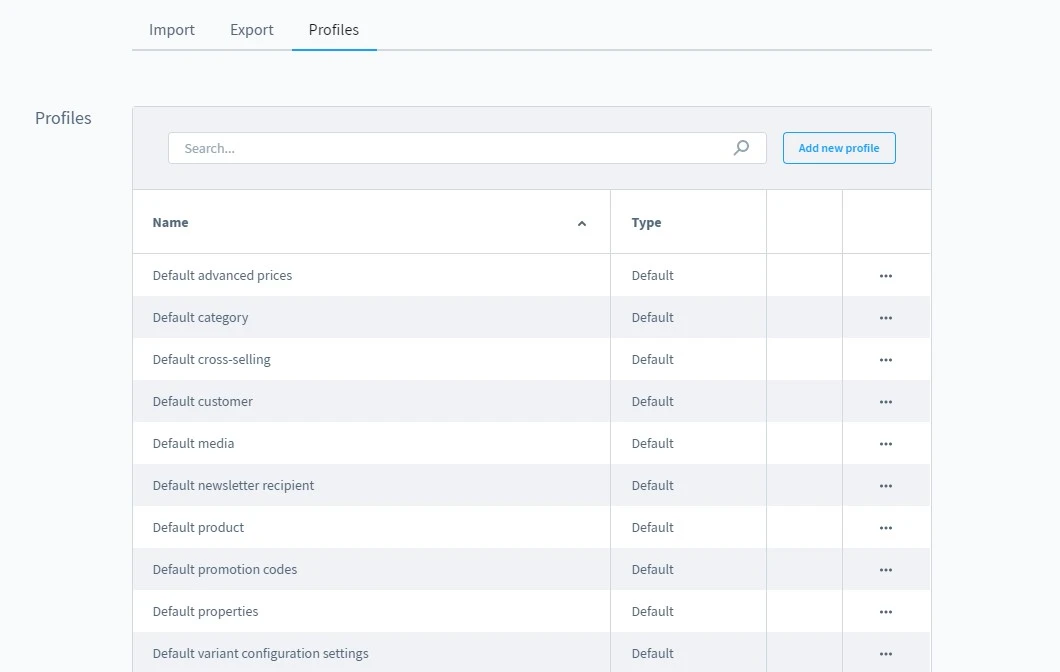
Custom profiles allow you to:
- Define your own field mappings
- Match CSV columns with Shopware database fields
- Import custom attributes and additional data fields
- Save reusable configurations for future imports
This option is particularly useful when importing data from another eCommerce platform, ERP system, or custom database.
Before running the import, review all field mappings carefully to ensure every column is assigned to the correct Shopware field.
Step 5. Run a dry test (optional)
Before importing your data, you can click Start dry run (4) to test the process. A dry run validates your CSV file and checks for potential mapping or formatting issues without making any changes to your store data. This allows you to identify and fix errors before running the actual Shopware import.
For large or complex imports, performing a dry run first can help reduce the risk of failed or partially completed imports.
Step 6. Run the import
Once everything is configured correctly, click Start import (3) to begin the Shopware import process.
Shopware will validate the records in your CSV file and import all error-free data. If any records fail validation, they will be excluded from the import and collected in a separate CSV file for review.
You can monitor the progress in the Import activity (5), where Shopware stores the history of all imports from the last 30 days. From here, you can review previous imports, download source files, access the associated profiles, and retrieve CSV files containing failed records.
If necessary, you can also cancel an ongoing import from the context menu in the Import activity table (6). Keep in mind that some records may have already been imported before the process is stopped.
Looking for a simpler way to perform a Shopware import? LitExtension helps you migrate products, customers, orders, and more to Shopware without the manual work involved in CSV-based imports.
Seamless Shopware Import with LitExtension
LitExtension secure migration solutions accurately and painlessly transfer data from your current eCommerce platform to Shopware.

How to Export Data from Shopware to CSV?
After learning the steps for Shopware import, you may also need to export existing store data for reporting, backups, migrations, or further processing. Fortunately, Shopware 6 import export tool is built-in to make this process straightforward.
With this Shopware export feature, you can generate CSV files containing products, customers, orders, categories, and other supported data types whenever needed.
Step 1. Enter the Export screen
From your Shopware admin dashboard, navigate to Settings > Automation > Import/Export and switch to the Export (1) tab.
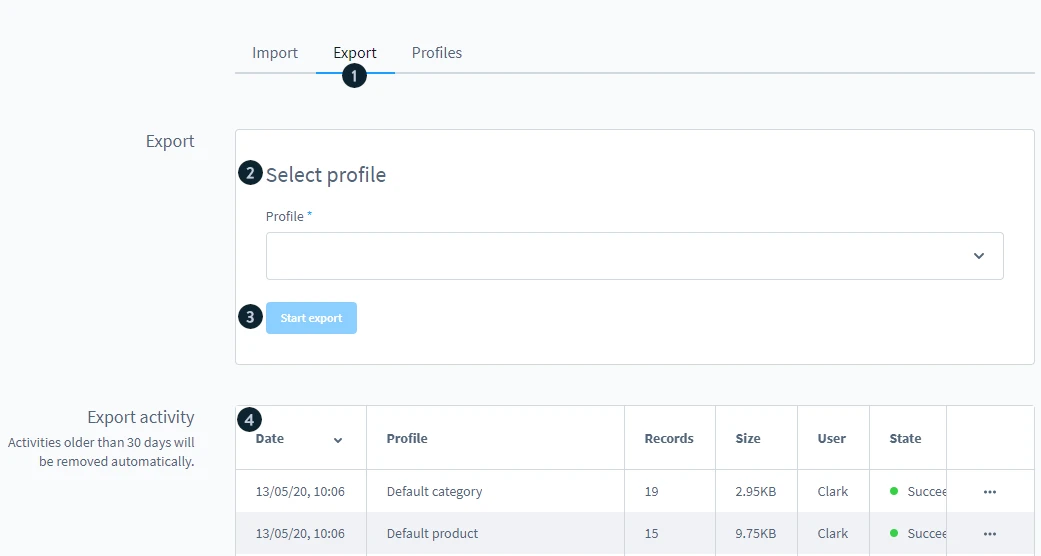
This section contains all tools related to data exports and lets you generate CSV files from your existing store data.
Step 2. Select the export profile
In the Select profile (2), choose the profile that corresponds to the data you want to export.
The selected profile determines which data is retrieved from your Shopware database and included in the CSV file. For example, you can export products, customers, orders, categories, manufacturers, and other supported data entities.
Step 3. Apply filters (optional)
If you only need to export specific records, you can apply filters before running the export.
For instance, you may choose to export products from a particular category, customers that meet certain criteria, or orders within a specific date range. This helps reduce the amount of unnecessary data in the exported file and makes your Shopware export more efficient.
Step 4. Run the export & download your file
Once you've configured the export settings, click Start export (3).
Shopware will generate a CSV file based on the selected profile and make it available for download. Depending on the profile used, the exported file can later be reused for reporting, backups, migrations, or even a future Shopware import process.
You can also view previous exports in the Export activity (4). Shopware stores export records for up to 30 days, allowing you to reopen the profile used for an export or download the generated CSV file again whenever needed.
Shopware 6 Import Export with LitExtension
As you can see, Shopware's built-in import and export tools are useful for handling simple CSV transfers. However, if you're working with large datasets or moving data between platforms, the process can quickly become repetitive and time-consuming.
Many merchants search for a Shopware import export plugin to make things easier. But they often require additional setup, file preparation, and ongoing management.
That's where LitExtension comes in. Whether you prefer a self-service approach with our automated tool or want our team to handle everything through our Expert helps, we make it easy to transfer all of your data to Shopware accurately and securely.

Let's take a closer look at both solutions and see which one works best for your store!
Automated Migration tool
Before getting started, create a LitExtension account or sign in with your Google account. Once logged in, you can set up and launch your migration in just a few steps.
Step 1. Set up your source & target cart
From the LitExtension dashboard, click Create New Migration.
Select your source cart (the store you're migrating from), then enter its URL. Depending on your platform, this may involve installing the LitExtension Connector or providing API credentials. Just follow our instructions below to perform the task.
Next, select Shopware as your target cart and enter your store URL. Then, connect your Shopware store to LitExtension by following the same setup process as your source cart.
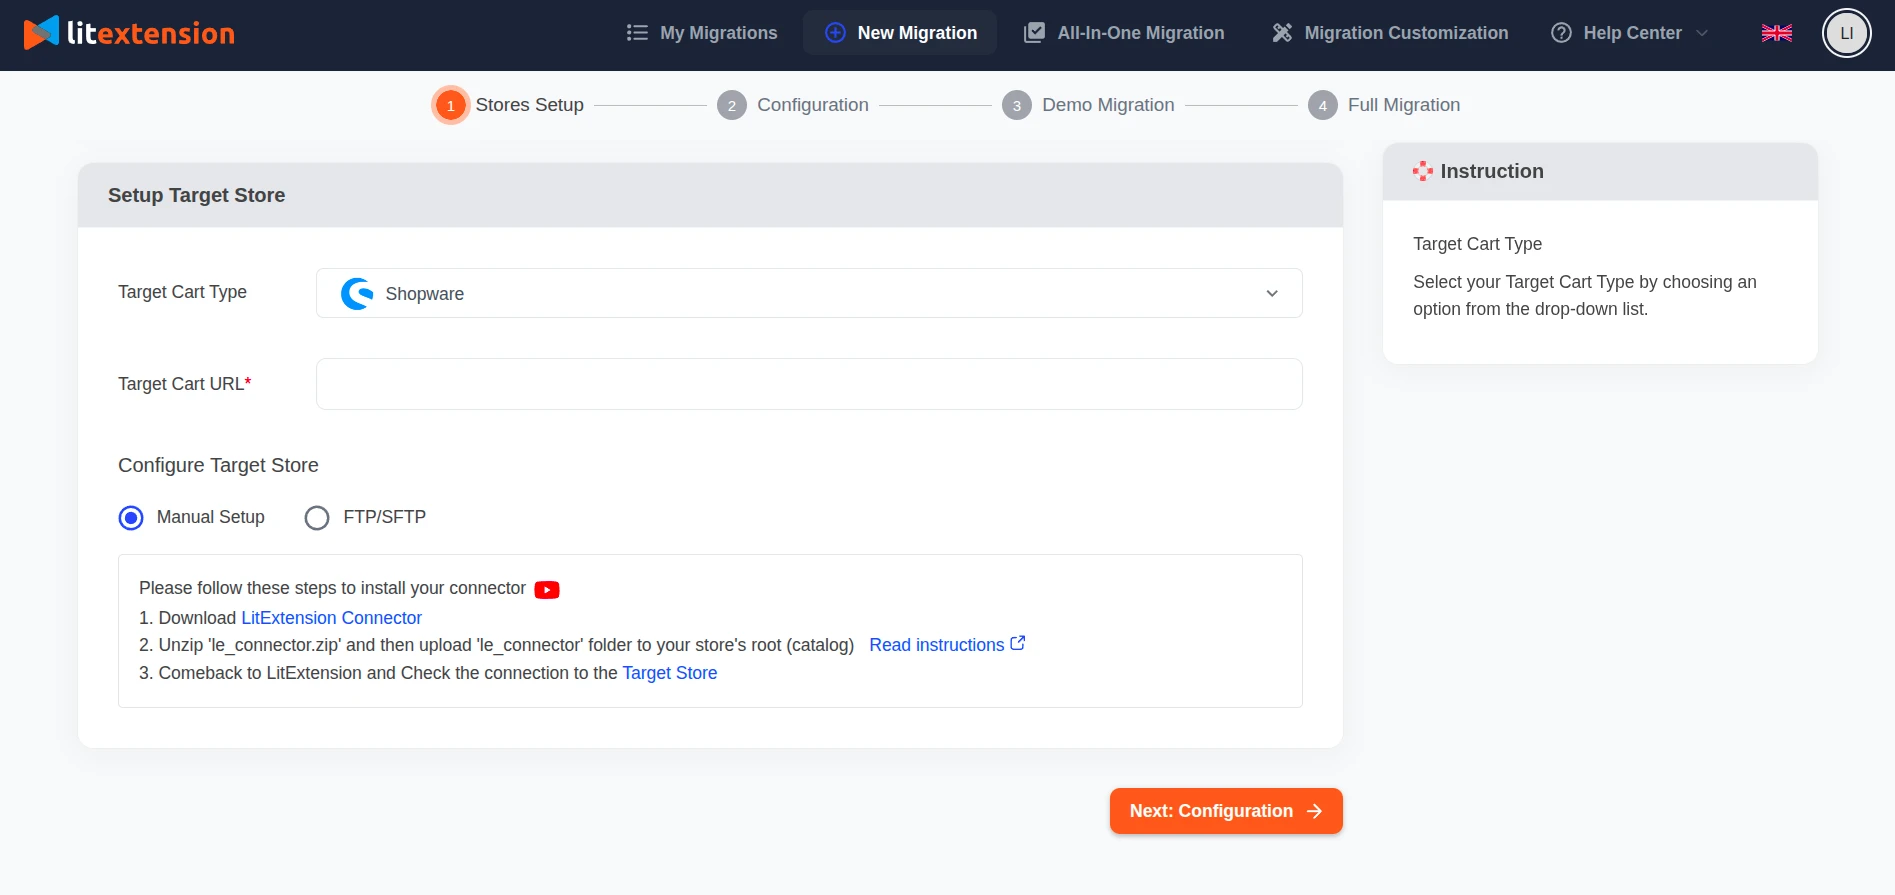
Once both stores are connected successfully, click Next: Configure Your Migration to continue.
Step 2. Select entities to migrate
At this step, select the data you want to import to Shopware. You can transfer products, customers, orders, categories, manufacturers, and other supported entities. To migrate everything, simply click Select All.
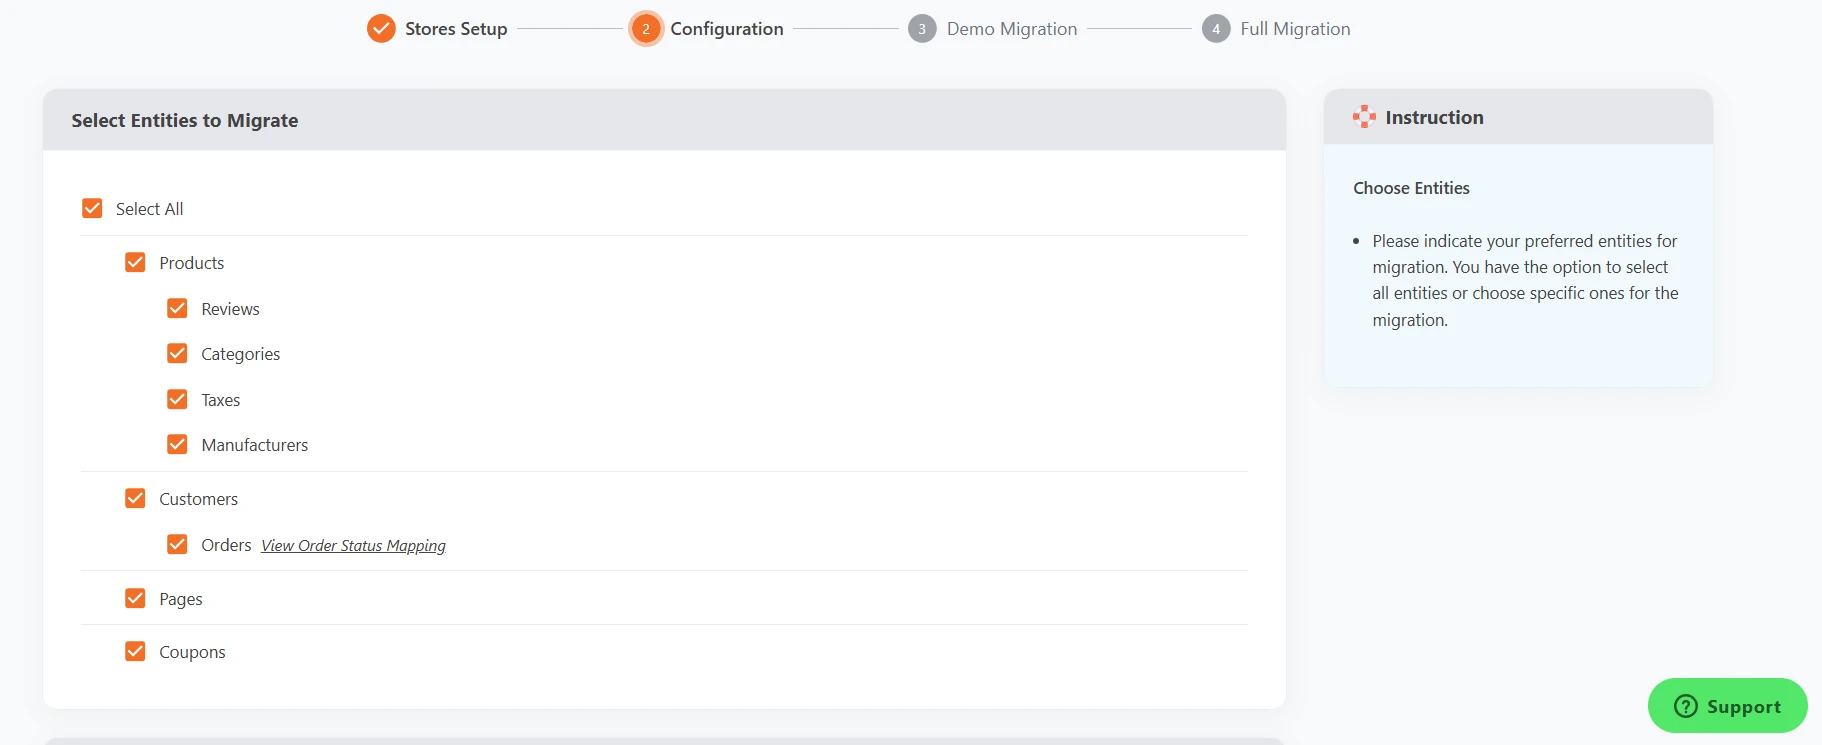
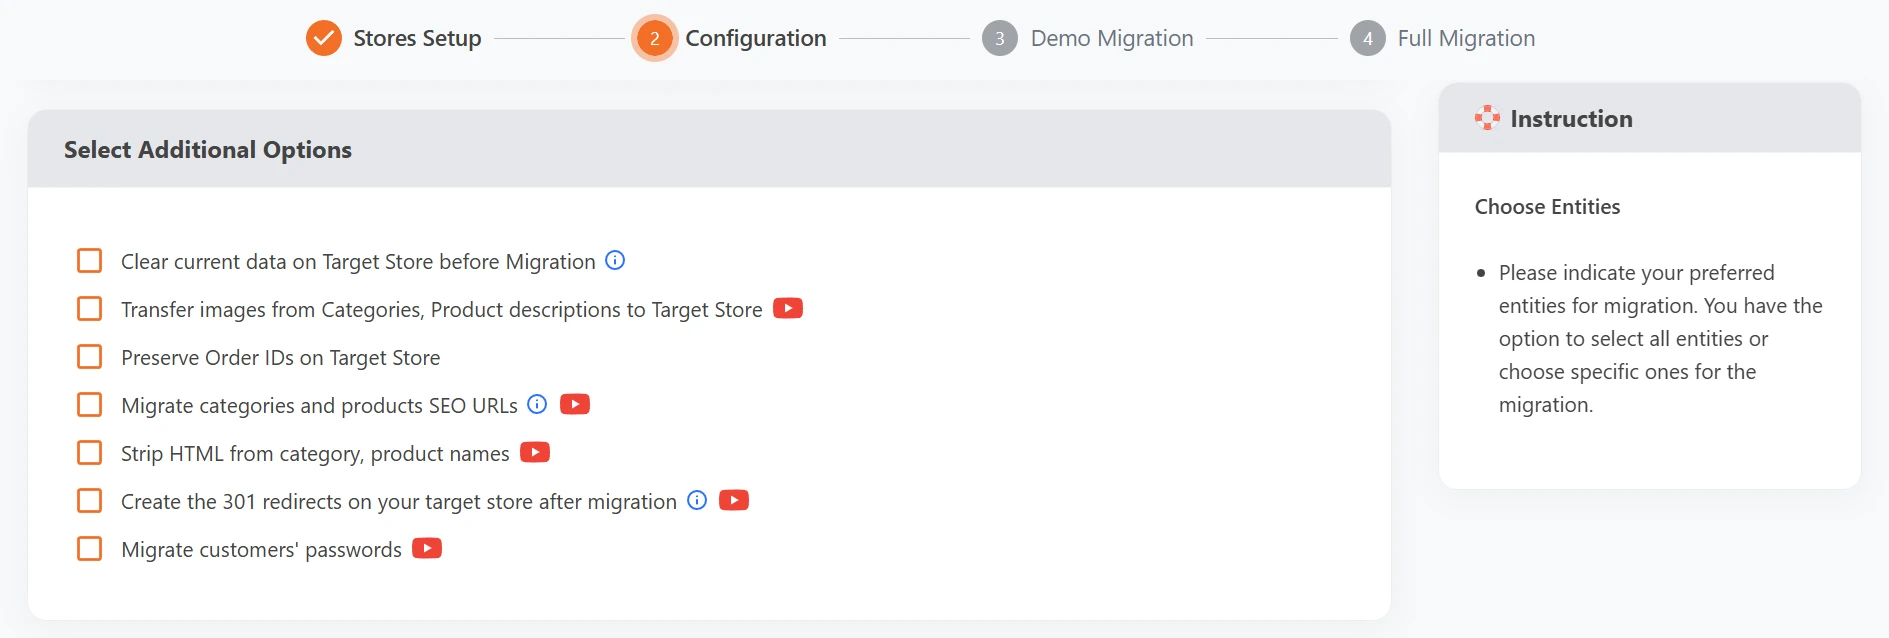
After that, scroll down for further configurations, such as Additional Options, language mapping, and order status mapping to ensure your data is transferred correctly.
Step 3. Run Full Migration
Before performing the full migration, you can start a free demo to preview how your data will be transferred. If you're satisfied with the results, proceed with the Full Migration. Our tool will automatically handle the Shopware import process while your stores remain online.
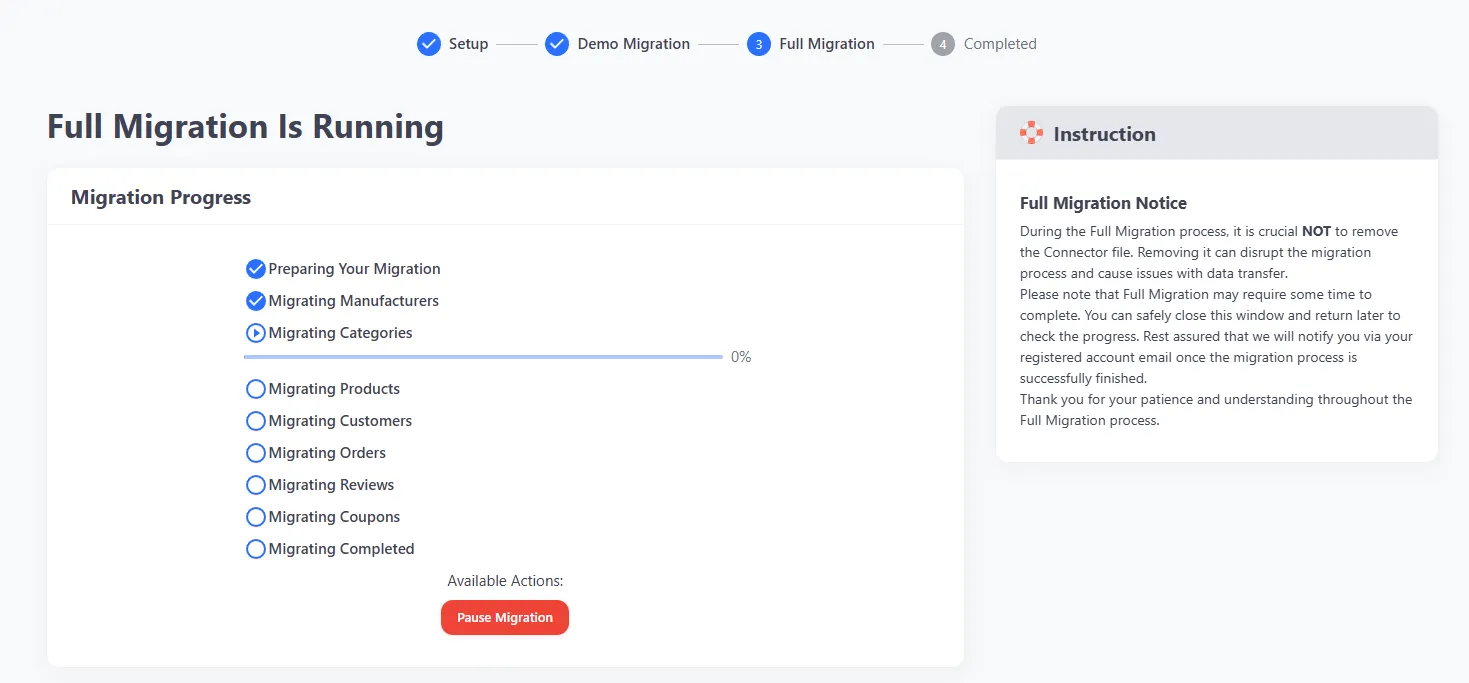
Once the migration starts, you can simply monitor the progress from your dashboard and wait for the process to complete.
All-in-One Migration Service
If you'd rather leave the Shopware import task to experts, LitExtension's All-in-One Migration Service is the way to go. With this service, you'll be assigned a dedicated Personal Assistant (PA) who manages and performs your migration from start to finish.
We highly recommend this package for stores with large databases, complex data structures, or custom migration requirements. These projects often require additional planning, careful execution, and hands-on support throughout the migration process.
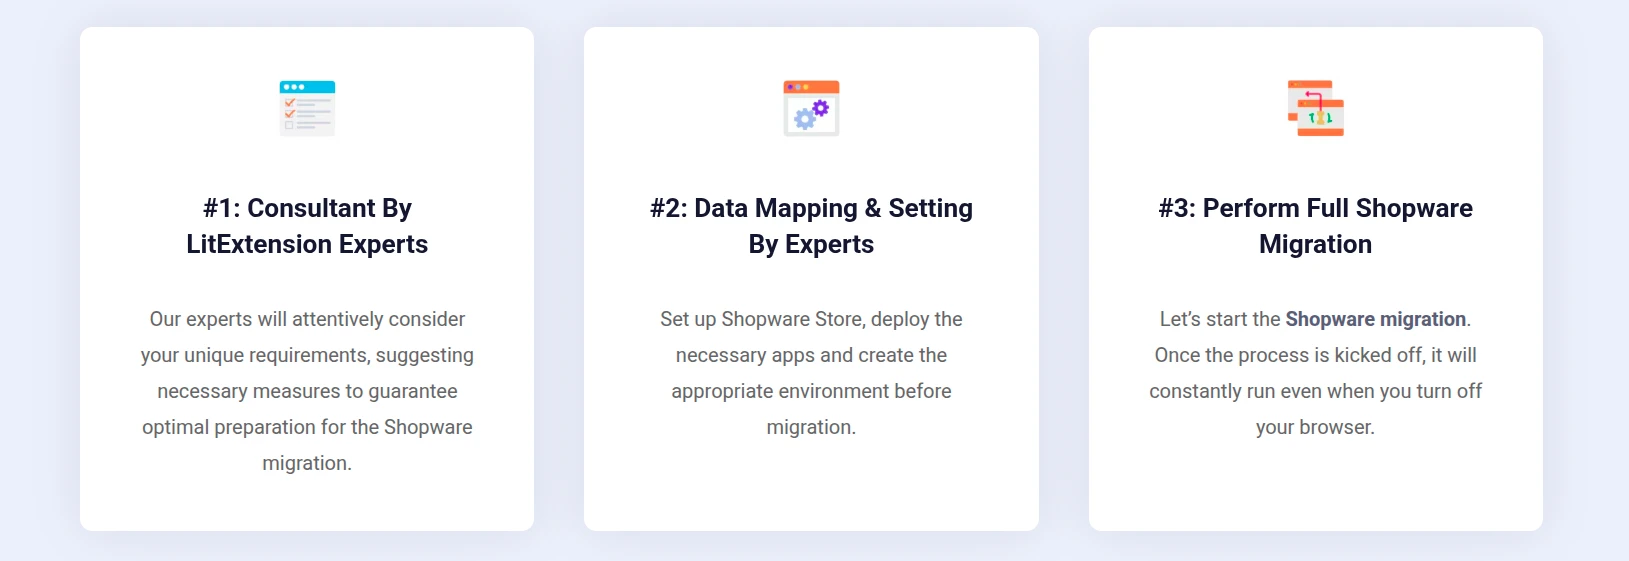
Step 1. Consult with LitExtension experts
The process starts with a consultation.
Tell us what data you'd like to migrate to or from Shopware, whether that's products, customers, orders, categories, CMS pages, blog posts, or custom data. Our experts will review your requirements, recommend the best migration approach, and provide a clear project scope and pricing estimate.
Once everything is approved, we'll take it from there.
Step 2. Data mapping and store preparation
Next, our experts prepare both stores for the Shopware import.
This includes reviewing your data structure, configuring migration settings, mapping entities, and handling any technical requirements needed for a smooth transfer. Depending on your project, we can also help with tasks such as creating 301 redirects, preparing the target store, and configuring additional migration options.
If you'd like to see how the migration works beforehand, we can also provide a free demo migration.
Step 3. Perform the Full Migration
Once the preparation is complete, our team will perform the full migration for you.
Throughout the process, your Personal Assistant will keep you informed and coordinate any adjustments if needed. After the migration is finished, we conduct thorough checks to verify data accuracy and resolve any migration-related issues.
Your support doesn't end there. Within up to 60 days from the date that the Full Migration is completed, you'll also have access to LitExtension's post-migration services, including:
- Free and unlimited Recent Data Migration if your new data is less than 5% of the initial migration.
- 2 Free Re-migrations.
- Free & unlimited Smart Update.
These services help ensure your Shopware store stays up to date even if new data is created during the migration period.
Common Shopware Import Export Errors & Troubleshooting
Even if you follow the Shopware import or export process correctly, issues can still happen from time to time. The good news is that most Shopware import export errors are caused by file formatting, profile settings, or data inconsistencies and can be resolved fairly quickly.
Below, we'll walk you through some common issues and show you how to fix them.
1. Import shows “successful” but no records imported
When this happens, Shopware may display a green success message after the Shopware import finishes, but no records are actually created or updated. In many cases, no obvious error appears in the UI, making the issue difficult to spot at first.
This typically occurs when Shopware can read the CSV file but cannot process the data correctly. The most common causes include using the wrong import profile, incorrect field mappings, or importing data that doesn't match the selected entity type.
How to fix it: Verify that the selected profile matches the data in your CSV file and check whether all required fields are mapped correctly before running the import.
2. CSV format, encoding, and separator problems
Shopware requires CSV files to use UTF-8 encoding and semicolons (;) as field separators. If your file uses a different format, the import may fail or produce unexpected results.
You may also notice broken special characters when the file isn't saved in UTF-8.
How to fix it: Before uploading your file, make sure it is saved as a UTF-8 CSV and uses semicolons as separators. We also recommend reviewing the file in a text editor to confirm the formatting.
3. Missing or invalid IDs and required fields
Some data types require mandatory values such as IDs, product numbers, names, or category assignments. If any of these fields are missing or invalid, Shopware may skip or reject the affected records during the Shopware import process.
How to fix it: Review the requirements of your import profile and make sure all required fields contain valid values before starting the import.
4. Jobs stuck in “processing” or partial imports
If you're importing or exporting a large amount of data, you may occasionally encounter jobs that remain in the processing state for longer than expected. In some cases, only part of the data may be transferred successfully.
How to fix it: We suggest checking the import activity logs first. If the issue persists, review your server resources and consider splitting large files into smaller batches.
5. Profile configuration, custom entities, and naming issues
Import profiles control how Shopware interprets your data. Problems can occur when profile settings don't match the CSV structure or when custom entities and fields are configured incorrectly.
How to fix it: Before running a full import, we recommend testing your configuration with a dry run. If you're importing custom entities, double-check that all corresponding fields exist and are mapped correctly.
Shopware Import: FAQs
Can I import data into Shopware for free?
Yes. Shopware includes built-in import functionality that allows you to import data using CSV files at no additional cost. However, you'll still need to prepare your files, configure import profiles, and map fields manually.
If you're migrating large amounts of data or moving from another platform, using a dedicated migration solution like LitExtension can help save time and reduce errors.
What file formats does Shopware support for import?
Shopware primarily supports CSV files for data imports through its built-in Import/Export tool. The files should use UTF-8 encoding and semicolons (;) as separators.
XML files are not supported by the default Shopware import tool. If your data is stored in XML format, you'll typically need to convert it to CSV first or use a third-party solution that supports XML imports.
Can I import product variants into Shopware?
Yes. Shopware supports importing product variants, including variant-specific attributes such as size, color, SKU, price, and inventory data.
Does Shopware import overwrite existing data?
It depends on how the import is configured. Shopware can either create new records or update existing ones when matching identifiers are found.
Before running an import, we recommend reviewing your import profile settings and testing with a dry run to understand how existing data will be affected.
How do I migrate from another platform to Shopware?
The easiest way to migrate from another platform to Shopware is by using LitExtension. LitExtension automatically transfers products, customers, orders, categories, and other important store data from your current platform to Shopware without requiring manual CSV exports or complex data mapping.
Is there a limit to how much data I can import into Shopware at once?
Shopware does not impose a strict limit on the amount of data you can import. However, the actual limit depends on your server resources, PHP configuration, and the size of the import file.
Conclusion
Hopefully, this guide has helped you understand the Shopware import export process and how to move data in and out of your store efficiently.
If you're looking for a faster and more reliable way to migrate data to Shopware, LitExtension is here to help. With both an Automated Migration Tool and an All-in-One Migration Service, we make it easy to transfer your products, customers, orders, and other store data accurately, securely, and with minimal effort.
For more eCommerce insights, migration tips, and platform guides, be sure to explore our other tutorials and join our group community to connect with fellow store owners.

