Are you planning to migrate your online store from Shopify to Ecwid but don’t know where to start? Don't worry, it’s our expertise! In the following lines, LitExtension – #1 eCommerce Migration Service will guide you through 6 simple steps on how to migrate your store from Shopify to Ecwid, including:
- Back up your Shopify website
- Set up a new Ecwid store
- Set up Source Cart & Target Cart
- Select entities you want to migrate
- Migrate Shopify to Ecwid
- Perform essential post-migration activities.
Additionally, we'll show you how to manually transfer your data from Shopify to Ecwid and the benefits of migrating.
Without further ado, let’s get right into it!
Seamlessly Migrate Your Shopify Store to Ecwid
Our team of experts can safely transfer your business data, products, customers, and orders to unlock more growth on the new platform. Let us provide you with a customized migration!
How to Migrate Data from Shopify to Ecwid with LitExtension?
There are several ways to migrate from Shopify to Ecwid, but the quickest solution is to go with a reputable migration service provider, such as LitExtension. We provide a streamlined and automated migration solution that eliminates the need for manual input or inspection. All you have to do is provide us with some basic information, and our system will automatically migrate your online store to the more robust platform.
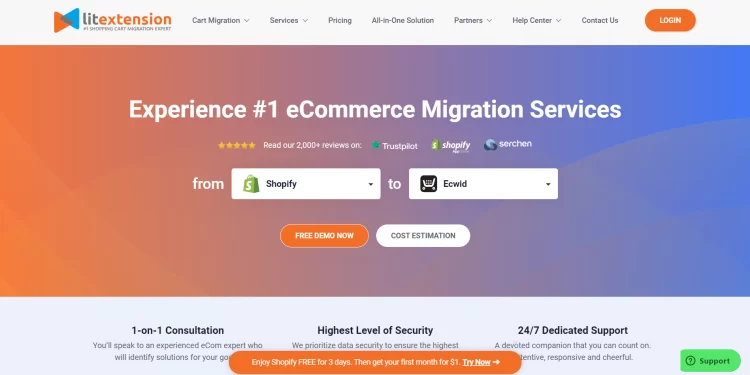
Here are the steps for migrating your Shopify to Ecwid with LitExtension's service.
Stage 1. Back up your Shopify website
Before starting the migration process, it's important to export all data to CSV files to back up your website. While LitExtension guarantees accurate and secure data migration, it's still crucial to have a backup file for some reasons:
- Prevent data loss in case your old store fails
- Make any changes to your products and inventory
- Prevent unauthorized access to your site for data security.
For those who don’t know, a CSV (Comma-Separated Values) file is a simple text file that organizes data into a table form. In eCommerce, you can utilize CSV files to export and import all data about products, customers, and order information from and to your store.
Follow the steps below, and you’ll have your Shopify store data exported to CSV files in no time.
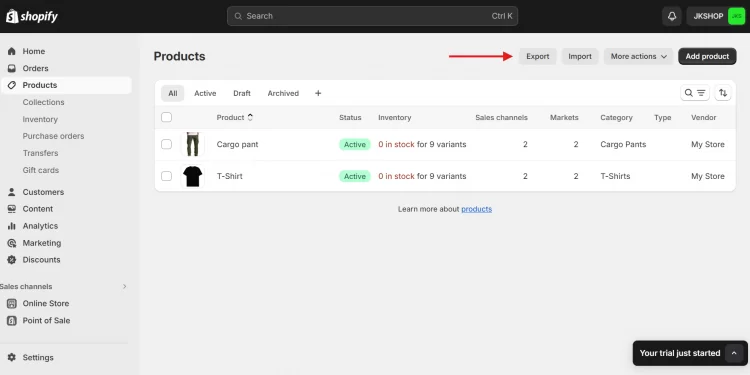
- Log into your Shopify admin account and choose the sections you want to export (Products/Customers…).
- Press the “Export” button on the top right corner of the page.
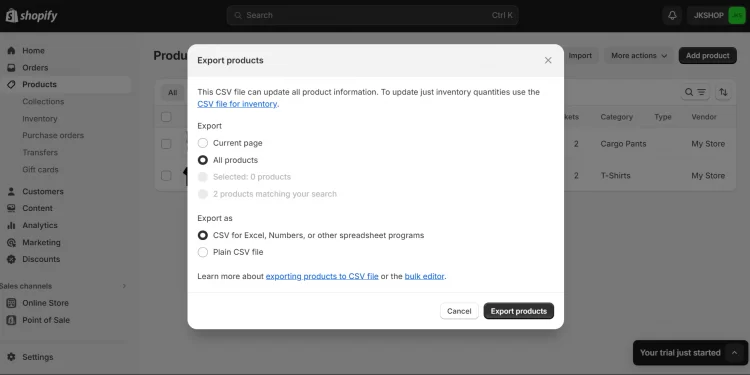
- Select the quantity of data and the format you want.
- In the “Export” section, choose the data you want to export.
- In the “Export as” section, choose the format you want.
- Click the “Export products” button.
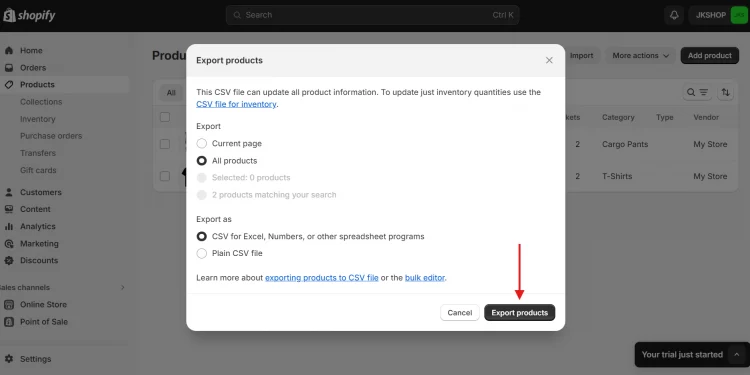
After that, Shopify will send CSV files to the email you used to create your Shopify account.
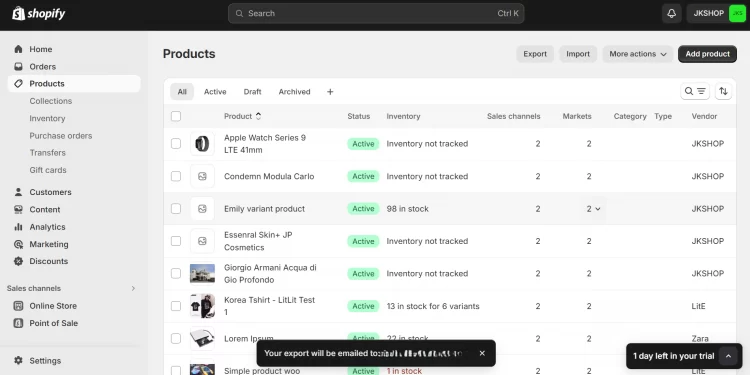
*Please note that CSV files do not make copies of your images. If you want to backup your images, you have to save them manually.
Stage 2. Set up a new Ecwid store
After saving backup data for your store, let’s create an Ecwid store to start your new journey.
- Go to the Ecwid website and select “Get started for free”.
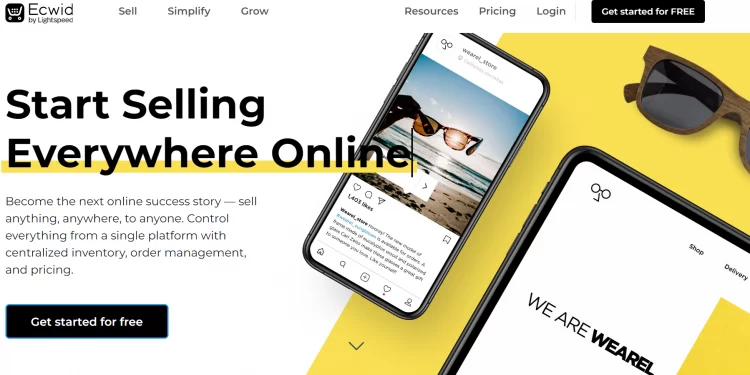
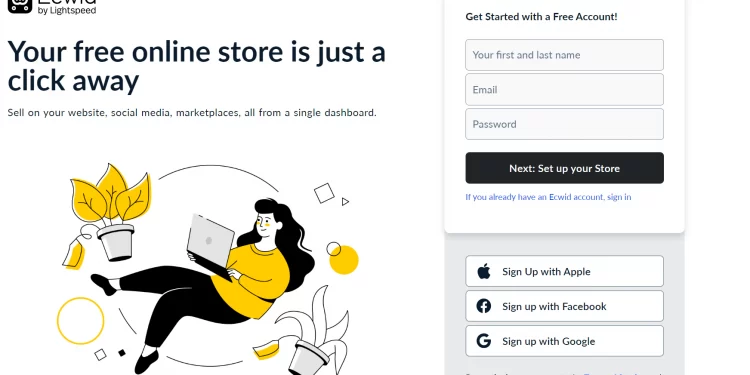
From here, fill in your email, store name, and password to create an account. Or, you can sign up with your existing Apple ID, Facebook, or Google account.
Then, please enter the required information to complete your sign-up. You can skip this step and complete it later by clicking anywhere outside the white box.
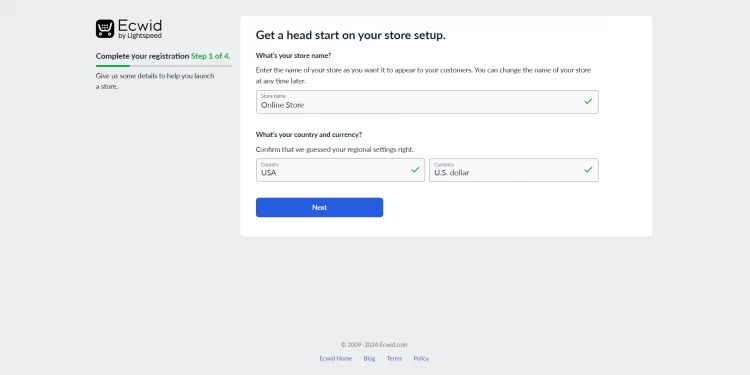
- Create your online store
After registering with Ecwid, go to the ‘Sales Channels’ section on your dashboard. Then, click “Manage Instant Site” in the “Sell on Instant Site” section.
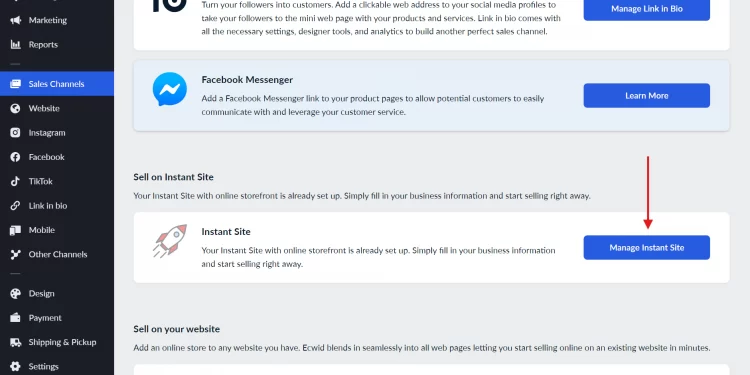
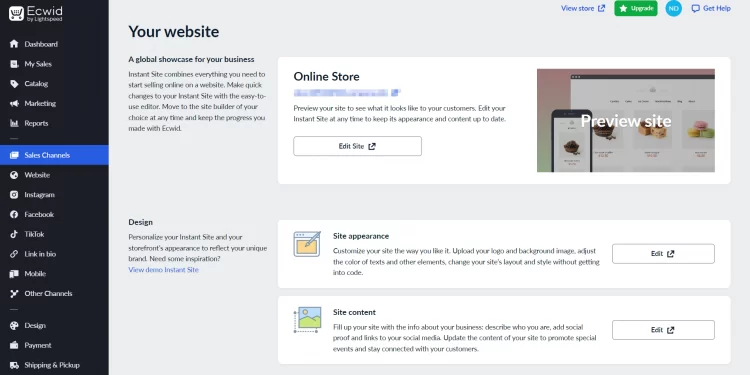
- Start adding new products, customizing your storefront, and setting up shipping and payments.
Stage 3. Set up Source Cart & Target Cart
Next, to start migrating to Ecwird with LitExtension, you will need to register for an account. You can also log in easily using your existing Google or Facebook account.
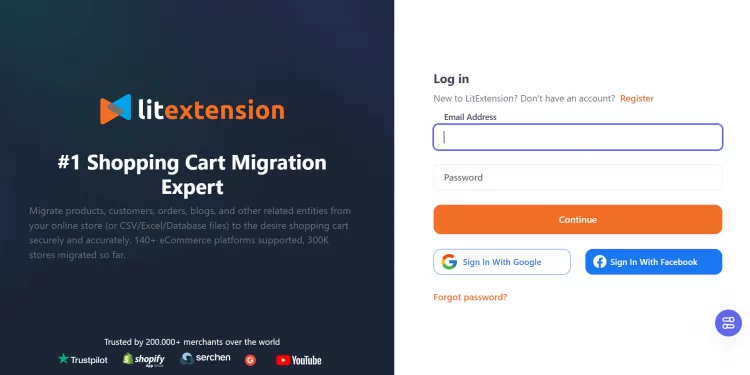
After logging in to LitExtension, move to the tab “Create Migration” to begin the migration process. In the Source Cart Setup, select Shopify as the Source Cart Type, and fill in other required fields such as Source Cart URL and Shopify API.
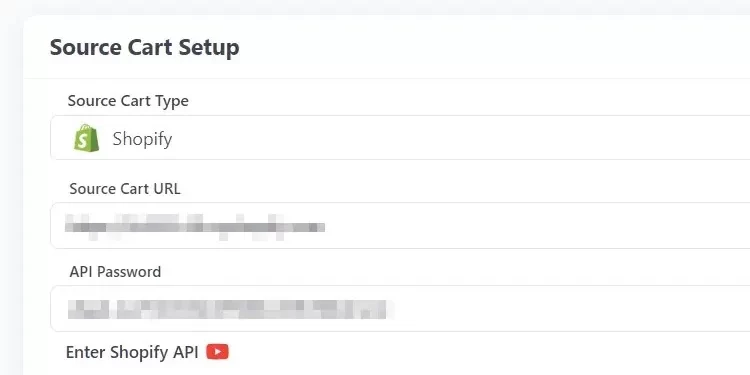
If you're unsure how to locate your Shopify store API, please refer to our instructional video below:
In the Target Cart Setup, select Ecwid as your Target Cart Type and fill in the required fields, such as Target Cart URL, Secret Token, and Store ID. If you are unsure how to get your Secret Token and Store ID, please follow the instructions on the right side of the screen.
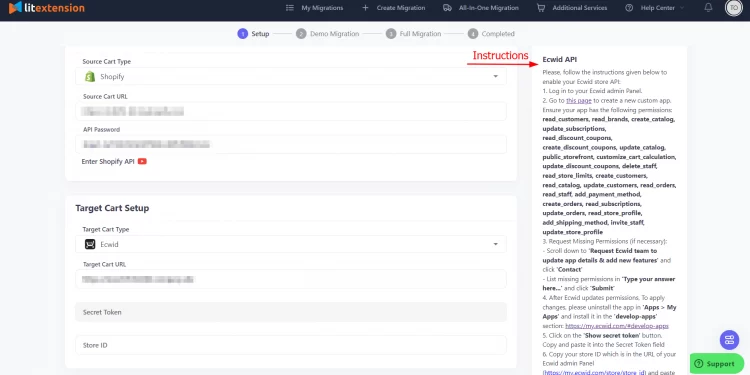
Stage 4. Select entities you want to migrate
In the next stage of your Ecwid migration, choose the entity types you want to migrate to Ecwid. You can migrate all the listed entities or select only the specific ones you need for your new store.
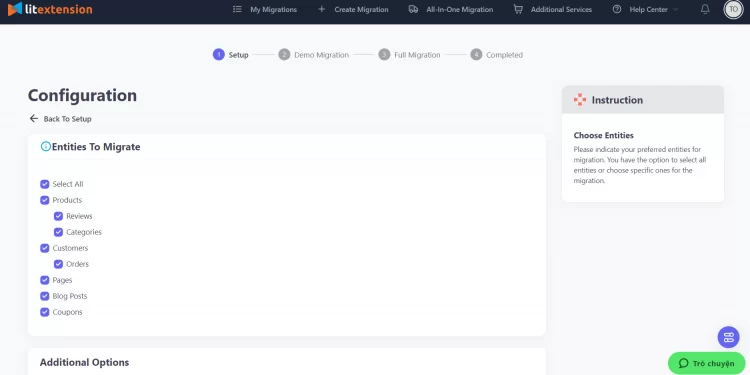
Moreover, LitExtension also provides additional options for you to choose from to expand the migration possibilities.
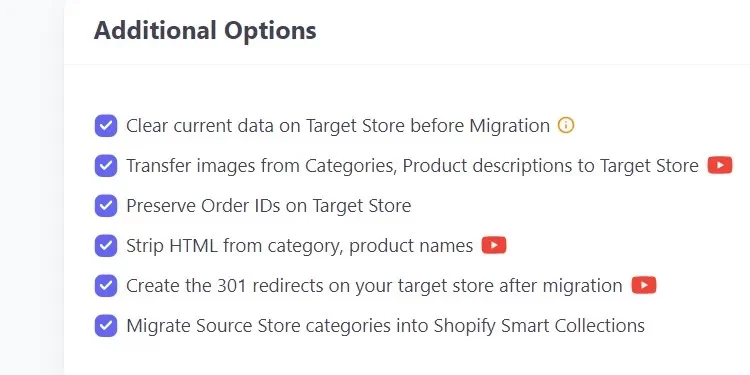
Each one of these options has a separate function, for instance:
- 301 redirects: This option will direct your customers to your new store even when they click on the old URL.
- Clear current data on Target Store before Migration: This option lets you permanently delete all the data in your target store.
Besides, don't forget to use Language Mapping and Order Status Mapping to ensure all the corresponding data migration.
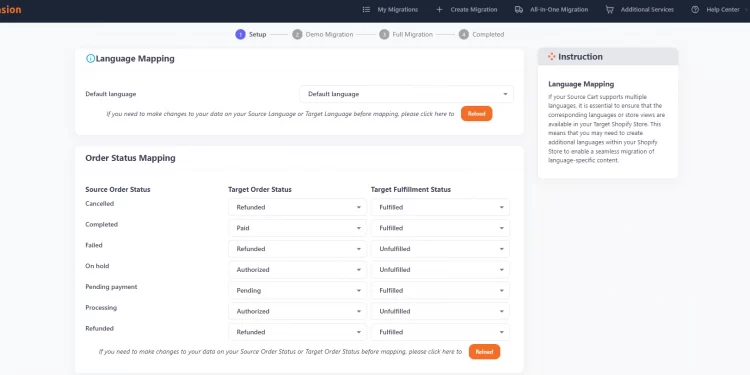
Stage 5. Migrate Shopify to Ecwid
Next, run your demo migration. This demo migration is totally free and can be run as many times as you want.
You can skip this stage, but we highly recommend running this free demo migration to see how the migration progress works.
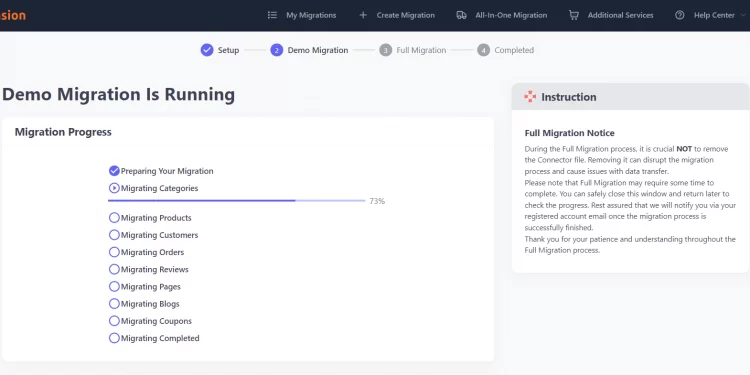
After running the demo migration, you can check the results by selecting “Check Result”.
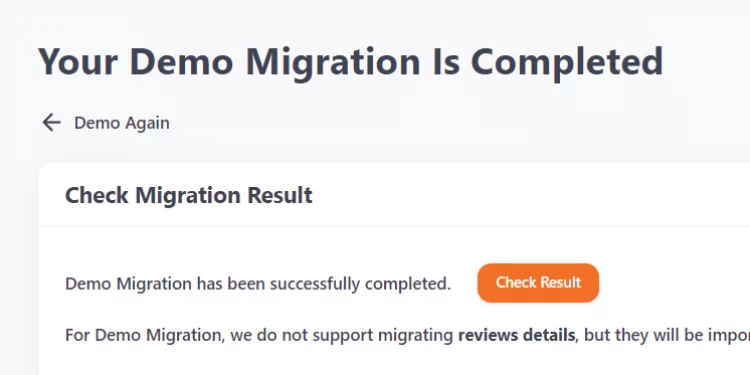
If you are satisfied with the results, it’s time to run the full migration. To do so, select the button “Next: Full Migration” at the end of the page.
*Please note that if you have a Coupon, click the “I Have Coupon” button and then fill in your coupon code to get a discount.
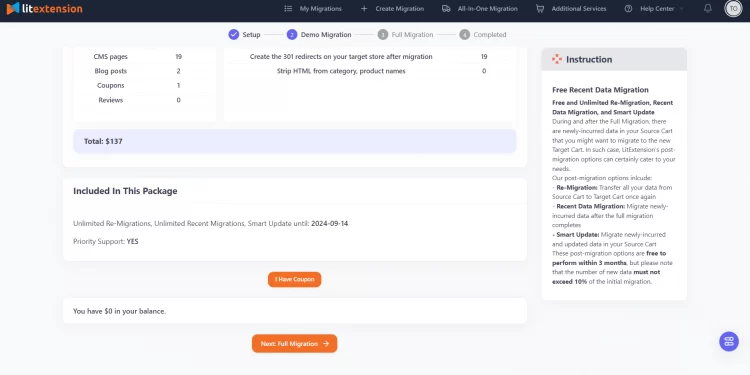
Once the full migration process has started, you don't need to keep your browser open. Since LitExtension is a cloud-based service, you don't have to worry about data loss during the migration process or the migration stage stopping. There's no need to time this process, as LitExtension will send you a notification email when it is completed.
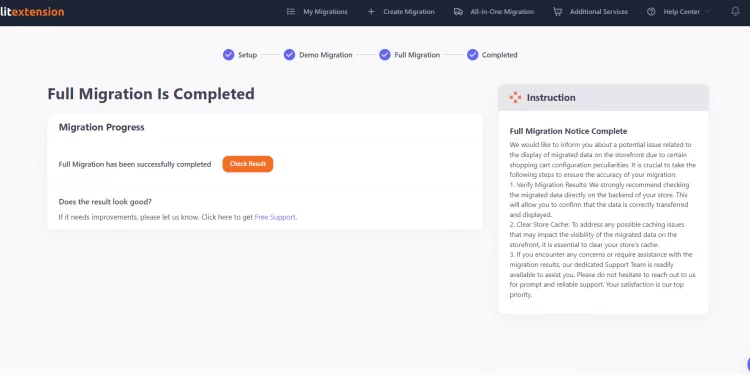
Stage 6. Perform essential post-migration activities
After the migration process, you should recheck your new Ecwid store to ensure it runs without error. If there are any problems, contact the LitExtension support team for assistance.
Below are some steps to check your migration.
#1. Check new store results
You must check all the data on your Ecwid store's front and back end, including all information related to your products, customers, orders, etc.
#2. Run Recent data migration
Because your old store will not be closed during the migration to the new platform, some data will need to be transferred after the migration is completed.
It is crucial that you run the Recent Data Migration to ensure that all your new entities, such as new orders, customers, or inventory changes, are transferred to your new online store.
#3. Place a test order
After checking all the results on the new site, you should place a test order to ensure that everything works as you expected.
#4. Customize & Go live with your new store.
After successfully placing your test order, you can customize and launch your new store.
If you don’t have time to perform your Ecwid migration on your own, LitExtension’s All-in-One service can help you quickly.
With LitExtension’s All-in-One service, we will assign a personal assistant (PA) to take care of your migration from beginning to end and ensure the delivery of satisfactory results. Additionally, your PA will be responsible for answering any of your questions or concerns within 12 hours from the start to 3 months after full migration. Furthermore, all additional options that require extra fees, such as 301 Redirect, Strip HTML Tags, and Preserve Product IDs… are FREE in the All-In-One Migration Package.
Now, you have a better understanding of the LitExtension All-in-One package. If you are interested in our service, please contact our support team for more advice.
How to Migrate from Shopify to Ecwid Manually?
If you don't want to hire an expert to migrate your data, you can still do it by yourself.
There are two ways for you to migrate your data from Shopify to Ecwid manually:
- Copy and paste content: You may manually copy and paste content from your old store, but this process is time-consuming.
- Upload products using CSV files: For larger amounts of data, consider using CSV files. After downloading all the data from Shopify, you can import those CSV files into Ecwid.
Below are steps to export CSV files from Shopify and import them into Ecwid:
Step 1: Export data from your Shopify store in CSV files
To obtain the CSV files containing all data types from your Shopify store, you should follow the steps to back up your Shopify store in the previous part.
Step 2: Edit contents in CSV files
To successfully upload the CSV files containing your data on your new Ecwid store, you will need to edit their contents so that they comply with the CSV file format supported by Ecwid. You can check the Ecwid CSV file format here.
Step 3: Import CSV files into your new Ecwid store
When you have CSV files that match the required file format, you can start uploading them to the Ecwid store.
After logging in to Ecwid.com, choose the Catalog section/Data Import & Export on the Dashboard on the left of the screen. Click “Upload Catalog File” to upload all your CSV files.
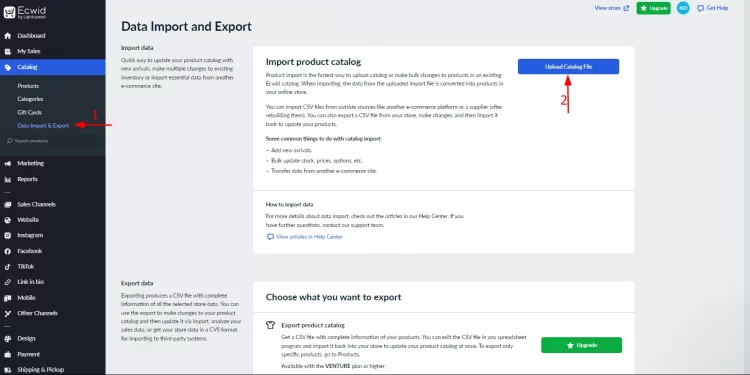
After selecting the file you need to import, click “Start Import” on the following page.
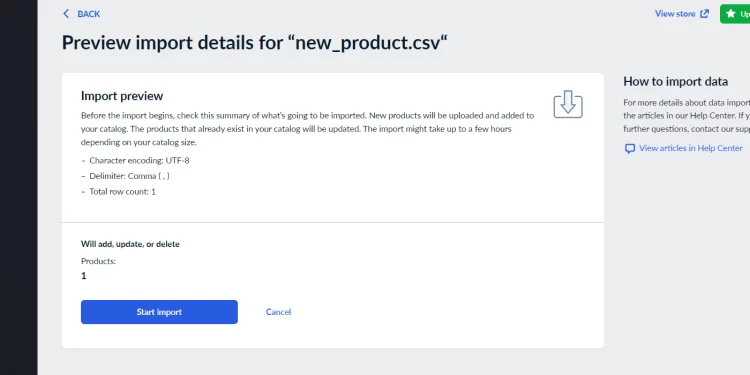
Then, the import progress will begin. You can now do anything you want, including closing the browser tab. Once this process is complete, you will receive a notification on the top right corner of your store admin.
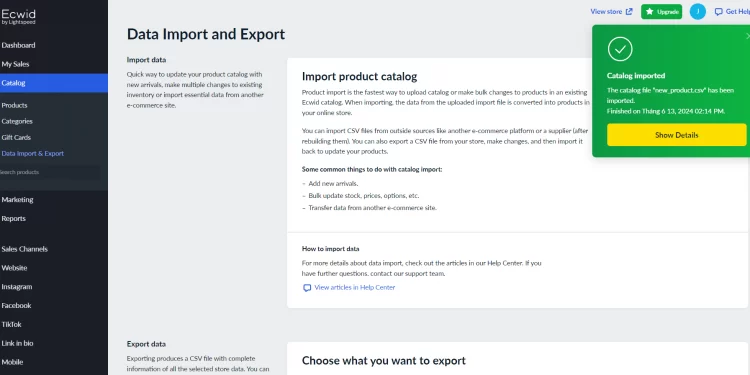
Step 4: Check the results
After importing all your data into your new Ecwid store, review the results as instructed in the previous section.
While manually transferring your store from Shopify to Ecwid might save on upfront costs, it might also cost you a lot of time. The process involves numerous steps, such as exporting and importing data, reconfiguring settings, and ensuring that all elements of your store function correctly in the new environment. This can take hours or even days to complete, diverting your focus from other critical aspects of your business.
Additionally, without technical expertise during the migration, you may encounter various challenges and risks. Technical difficulties, such as data loss or compatibility issues, can potentially lead to business disruptions and operational downtime. These interruptions can affect customer experience and sales, ultimately costing you more lost productivity and revenue than the initial savings from not using a professional service such as LitExtension.
Ecwid vs Shopify – Is Ecwid Better Than Shopify?
Now, if you are still wondering whether you should switch from shopify to ecwid, let’s take a look at the benefits of this migration.
Better Cost-Optimization
While both platforms offer a variety of plans, Shopify's pricing is significantly higher. Therefore, performing Ecwid migration allows you to take advantage of Ecwid's lower-cost options. Moreover, Ecwid provides a free plan, allowing merchants to test their services before committing to a subscription plan
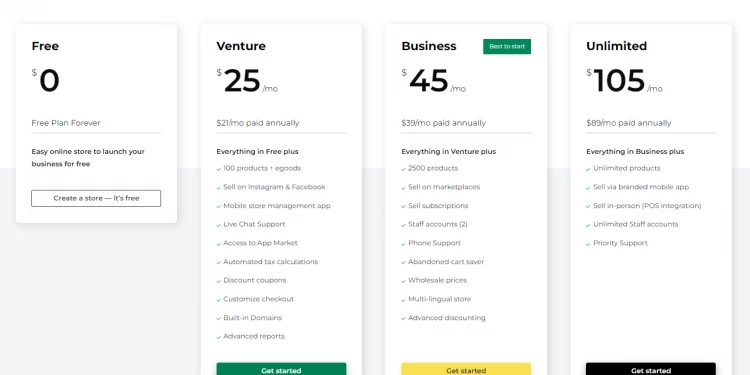
Additionally, Ecwid allows you to integrate your store with various platforms and social media channels without incurring additional costs. This transition can result in substantial savings, particularly if you're looking to streamline your eCommerce operations and minimize overhead expenses.
Below is the table to provide a better insight into the plans & pricing of both platforms.
Plans | 1st pricing tier | 2nd pricing tier | 3rd pricing tier | 4th pricing tier |
Ecwid | Free | 25$/month | 45$/month | 105$/month |
Shopify | 39$/month | 105$/month | 399$/month | 2300$/month |
Friendlier interface
In terms of user experience, the interface of the Ecwid control panel is easier to use.
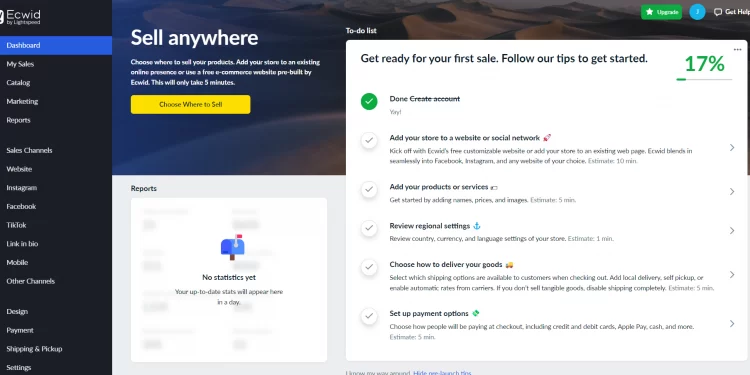
The dashboard located on the left side of your screen can help you quickly familiarize yourself with the platform's features in just a few clicks. Regarding this, if users already have a running store, it takes only a little time to integrate into Ecwid.
The process is simple, as Ecwid automatically matches and adapts to your current store theme and templates. This could be done with a few clicks in the dashboard settings.
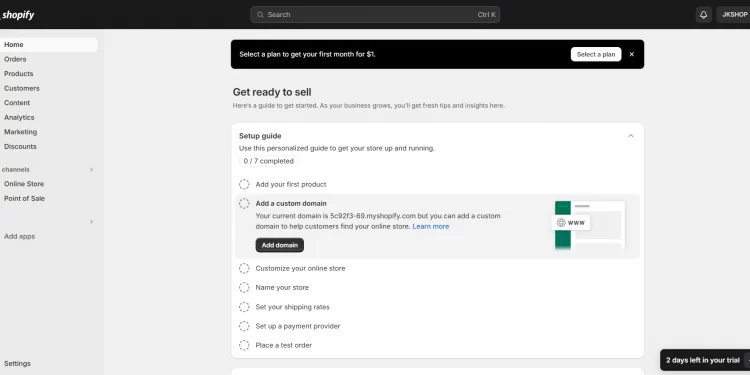
On the other hand, creating a Shopify store from scratch can be time-consuming. Shopify’s interface is complicated, and extensive options require a steep learning curve. That said, Shopify's logical arrangement and wide design selection will impress you.
More product options
On one hand, Shopify only offers 3 options per product you sell on your online store.
For example, if you sell a pair of pants in a Shopify-powered store, your customers can only choose “Size, Colour, and Gender.” You cannot add one more option, such as “Length,” to your product.
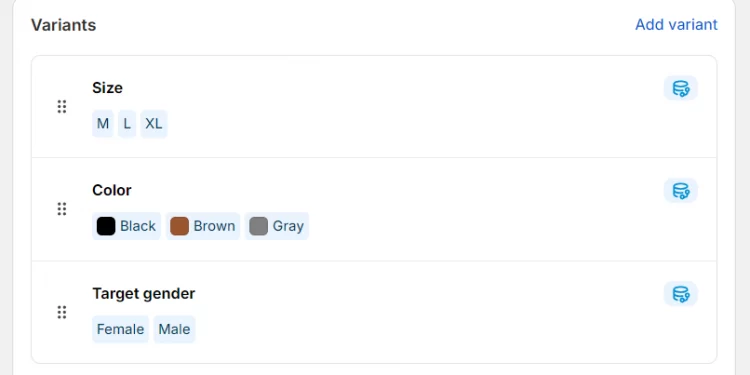
If you want more product options, you might have to pay for a third-party app such as Infinite Options in your Shopify app store.
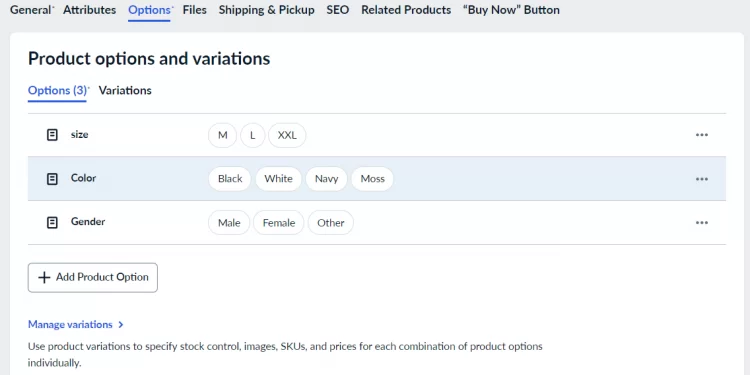
On the other hand, Ecwid store owners can add as many product options as they want, even when using the free plan.
Better language translation
In terms of language, Ecwid has advantages over Shopify. Its built-in translation feature allows you to choose among 51 languages to translate your store. Moreover, Ecwid’s multilanguage detection and translation ability can help you attract worldwide traffic.
Whereas Shopify requires you to install third-party translation apps such as Langify or Langshop, and a multi-language compatible theme to publish your site in a different language.
If you want to read the detailed comparison between Shopify and Ecwid, you can find it here.
What Data Can Be Migrated from Shopify to Ecwid?
The short answer is that all your important data, such as products, customers, orders, and taxes can be transferred from Shopify to Ecwid. If you want to know more about the details, you can check the table below:
Data Types | Data |
Products | 1. Products: Name, SKU, Short Description, Full Description, Status. 2. Name: Description. |
Customers | First Name, Last Name, Email. |
Orders | Order ID. |
Taxes | Tax Class (Name). |
Shopify to Ecwid Migration: FAQs
How to migrate from Shopify to Ecwid?
You can migrate your Shopify store to Ecwid with 6 simple steps:
Step 1: Back up your Shopify website.
Step 2: Create a new Ecwid store.
Step 3: Set up the Source Cart and Target Cart.
Step 4: Select entities you want to migrate.
Step 5: Migrate Shopify to Ecwid.
Step 6: Perform post-migration activities.
Is Ecwid cheaper than Shopify?
Yes, Ecwid is cheaper than Shopify in all plans, and the platform even offers a free plan.
Can I transfer my Shopify store to another platform?
Yes, you can migrate your Shopify store to any platform by yourself or by hiring a data migration expert such as LitExtension.
Conclusion
In summary, we have just shown you how to migrate your Shopify store to Ecwid with LitExtension and by yourself. You can choose any method that suits your budget and technical expertise. But if you want to transfer all your data quickly, accurately, and securely, LitExtension can do that for you.
LitExtension has 12 years of experience in eCommerce data migration, with over 300,000 stores migrated and 200,000 worldwide customers.
If you are interested in our migration service, contact our support agents. We are available 24/7 and will help you solve the problem as soon as possible. To learn more about eCommerce, join our Facebook community and LitExtension’s blog.

