As the eCommerce inventory grows, so does the complexity of keeping everything in sync. That's why many online merchants, particularly Magento 2 users, want to learn how to upload Magento 2 import products quickly and accurately.
And that's exactly what we're going to address today! Our article will explore:
- Understand the Magento 2 product CSV structure
- Know how to import products using a CSV file
- Learn how to track import history and troubleshoot errors
- Get practical best practices for successful imports
Ready to jump in? Let’s get started!
Get to Know Magento 2 Product CSV Structure
Before importing products, it’s important to understand the Magento 2 product CSV format. This file contains all product details such as SKUs, names, prices, categories, stock status, and images.
Required fields in the Magento 2 CSV file
To ensure a successful Magento 2 import products, your CSV file must include these essential columns:
| Column name | Description |
|---|---|
| sku | Unique product identifier (cannot be changed after creation) |
| name | Product name |
| price | Product price |
| type | Product type (simple, configurable, bundle, etc.) |
| attribute_set_code | Attribute set name assigned to the product |
| product_online | 1 = Enabled, 0 = Disabled |
| visibility | 1 = Not Visible, 2 = Catalog, 3 = Search, 4 = Both |
| qty | Stock quantity |
| is_in_stock | 1 = In stock, 0 = Out of stock |
| categories | Category path (e.g., Default Category/Men/T-Shirts) |
| image, small_image, thumbnail | Image file names (must be uploaded separately) |
Optional fields for advanced Magento products import
Magento 2 also supports additional columns for more product customization:
- description – Full product description
- short_description – Brief product overview
- weight – Product weight (required for shipping items)
- special_price – Discounted price
- meta_title, meta_description – SEO-friendly metadata
- custom_attributes – Any extra attributes for your store
How to Perform Magento 2 Import Products CSV
Step 1. Prepare a CSV file for your products
First, log into the Magento Admin Panel with your credentials, then go to “System”> “Data Transfer”> “Import” from the main dashboard to begin the Magento 2 CSV import.

Now, create a CSV file that includes all the product data you want to import. Not sure how to format it? That is no problem; you can download a Magento 2 import products CSV sample file for reference. Simply select “Products” in the “Entity Type”, then click “Download Sample file.”
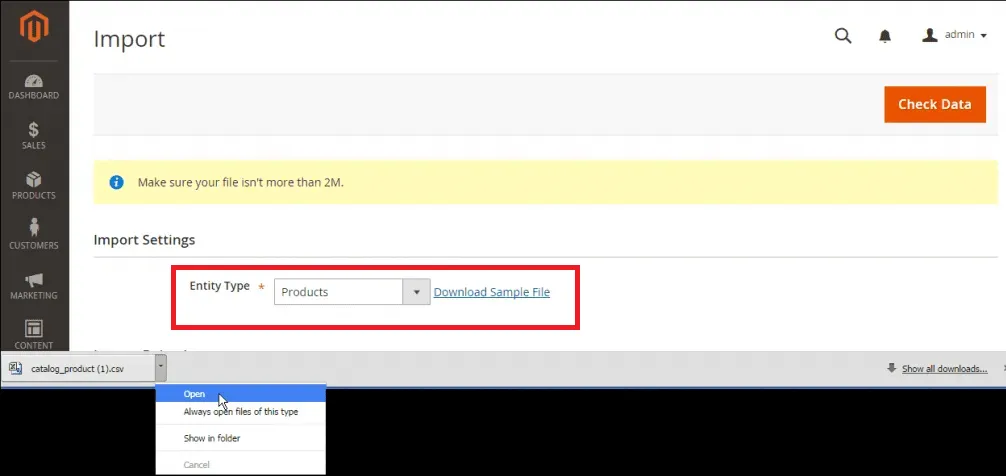
Note: Make sure the file size is under 2MB to avoid issues.
Step 2. Upload Product Images to Magento 2
If your products include images, you must upload them to your Magento server before importing the CSV.
To ensure Magento 2 can correctly import and assign images to products:
- Connect to your server using FTP, SFTP, or SSH.
- Navigate to the Magento 2 media folder: /pub/media/import/
- Upload all your product images into this directory.
- Ensure file names in your CSV match exactly with the uploaded images.
In your CSV, reference your images in the image, small_image, and thumbnail columns:
- If images are uploaded to the Magento server, specify only the file name: product-image.jpg
- If using external image URLs, provide the full path: https://yourdomain.com/images/product-image.jpg
At this stage, my tip for you is to ensure image file names don’t contain spaces or special characters to avoid errors.
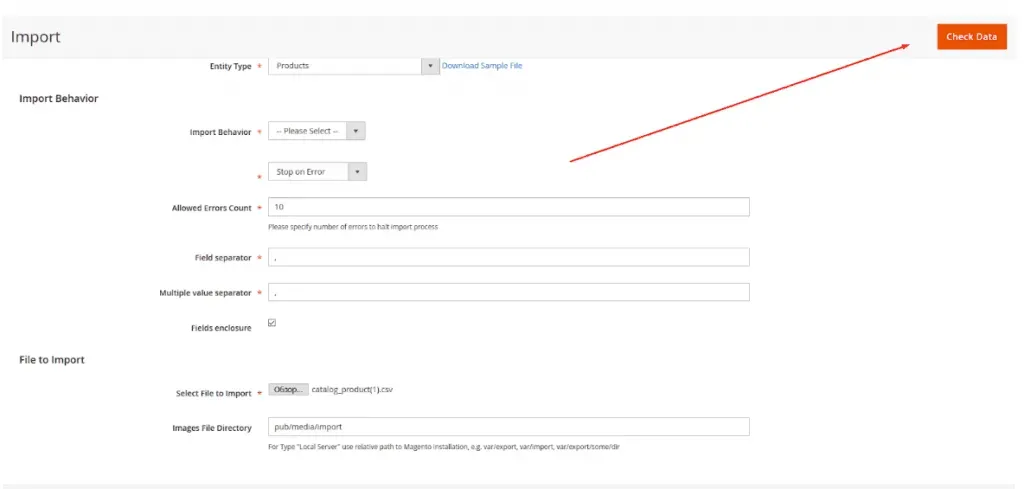
Step 3. Configure Magento import settings
Under the “Import settings”, you have three options for your Magento import behaviors:
- Add/Update: This option will add new products and update existing ones, except for SKUs.
- Replace: With this option, you will overwrite the existing product data entirely with the new data.
- Delete: As the name suggests, this option removes products that match entries in the CSV.
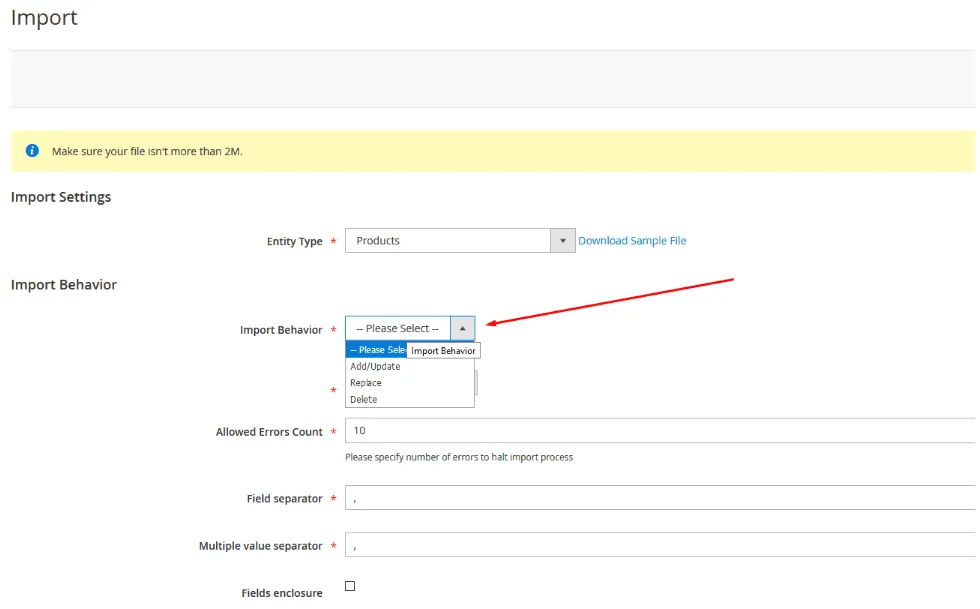
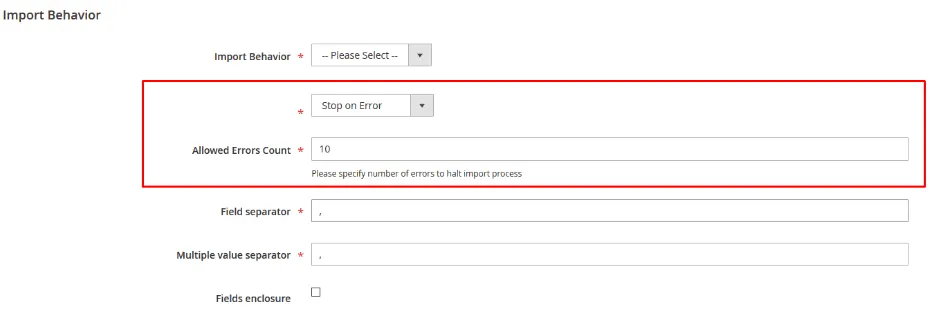
You can also set how Magento should react to errors; it will either stop the import entirely or skip problematic entries, depending on your needs.
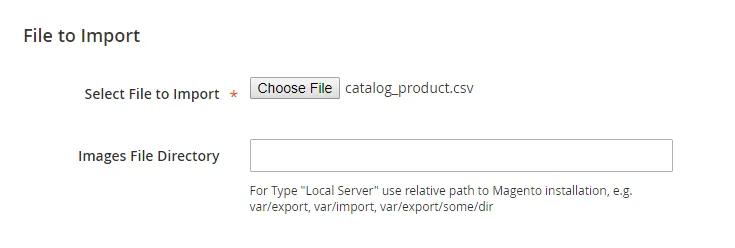
Step 4. Choose your file for Magento 2 import products
In the “File to import” section, click “Choose file,” then find your CSV file on your device and click “Open”. If your CSV file contains images, double-check that the path is correct so Magento knows where to pull them from.
Step 5. Finish uploading Magento 2 import products
Finally, click the “Check data” button in the top-right corner to validate your CSV file.
- If there are errors, you'll need to fix them and try again.
- If the data checks out and no errors exceed your limit, click “Import” to finalize the upload.
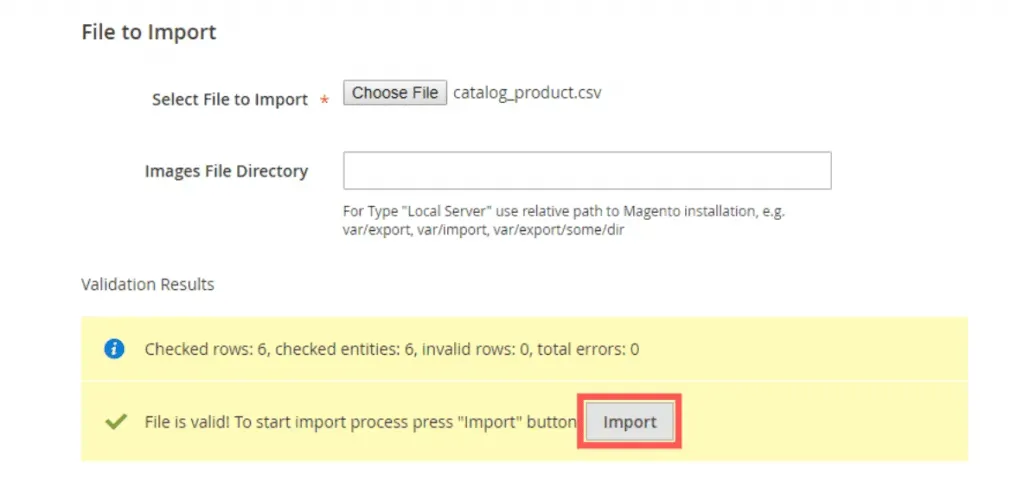
You will receive a notification confirming completion once the Magento 2 import products with images are finished. And that's it!
Ready to migrate your store to Magento?

How to View Magento 2 Import Products History?
After importing products into Magento 2, it’s essential to check the import history to track past imports, identify errors, and confirm successful data uploads. Magento provides a built-in tool to review all import attempts.
To view your import history:
- Log in to your Magento 2 Admin Panel.
- Go to System > Data Transfer > Import History.
This section displays a list of previous imports along with their statuses. Then, the Import History page provides details on each import attempt, including:
| Column name | Description |
|---|---|
| ID | Unique ID for the import attempt |
| Execution Date | Date and time the import was performed |
| User | The admin user who performed the import |
| Source File | The name of the uploaded CSV file |
| Import Type | The entity type (e.g., “Products”) |
| Import Behavior | Add/Update, Replace, or Delete |
| Status | Success, Partial Success, or Failed |
| Error Messages | Details on any import failures |
If an import fails or partially succeeds, Magento provides error messages to help you troubleshoot the issues. To view error details:
- Click the View Details link in the “Error Messages” column.
- Download the error log file to see a list of problematic entries.
- Identify the errors and fix them in your CSV file before re-importing.
Troubleshooting Common Errors for Magento 2 Import Products
As you can see, Step 4 in our guide above must be completely error-free before you can successfully import Magento 2 products. If any issues remain, you must resolve them before proceeding! Although we can't list every potential error here, here are a few solutions for some of the most common problems you might face:
Error | Potential reason | Solution |
'Please wait...' issue | The server doesn't have enough resources to complete the process. | Increase server limits (memory_limit, max_execution_time) in php.ini. |
Required field missing in a row | A required column in the CSV is empty or lacks values. | + Fill in the missing values or required fields. + Ensure that the file is encoded in UTF-8. |
Invalid value for a field | The format of the data in one of the columns is incorrect. | Ensure that column headers are formatted correctly without extra characters. |
Duplicate column names | There are repeated column names in your CSV file. | Make sure each column has a unique name and is parsed correctly, with appropriate delimiters. |
Unlinked child items | Parent-child product relationships were not maintained properly. | Check that all related child items are correctly associated with parent products in your CSV file. |
Missing or incorrect image path | The image file path is incorrect or the image doesn't exist. | Ensure the image file is correctly named and uploaded to the appropriate directory (/pub/media/import/). |
Attribute set does not exist | The attribute_set_code in the CSV does not match any existing attribute set in Magento. | + Check existing attribute sets in Stores > Attributes > Attribute Set. |
SKU already exists | The SKU in the CSV already exists in Magento. | + If updating products, use the Add/Update import behavior. |
Import file size too large | The CSV file exceeds Magento’s default file upload limit (2MB). | + Increase the maximum file size in php.ini (upload_max_filesize = 10M, post_max_size = 12M). |
Advanced Magento Import Products with LitExtension
Overall, Magento's built-in tools should suffice if you're dealing with basic product data. But what about the more complex data like customer passwords, blog posts, taxes, or CMS pages? Unfortunately, these tools just don't cut it!
Not to mention, the amount of data you can import using those tools is restricted. Worse, if you run into technical difficulties with Magento 2 import configurable products, you're left on your own to solve the problem.
That's exactly why LitExtension shines as a far superior solution for store migration. You can choose between the Basic Migration package (where you're in 100% control) or the All-in-One Migration (where our expert team takes care of every step for you).
Both packages come with a detailed, easy-to-follow process designed to fit your needs perfectly. Let's go into the specifics of each:
Basic Migration
To start with the Basic Migration package, you must create your account first! Enter your name, email, and password to the registration page, then click “Register.” Or, if you already have a Google Account, click on the “Sign in with Google” button for a faster login experience!
Once you're set up, you can now begin your migration process, which involves the four steps below:
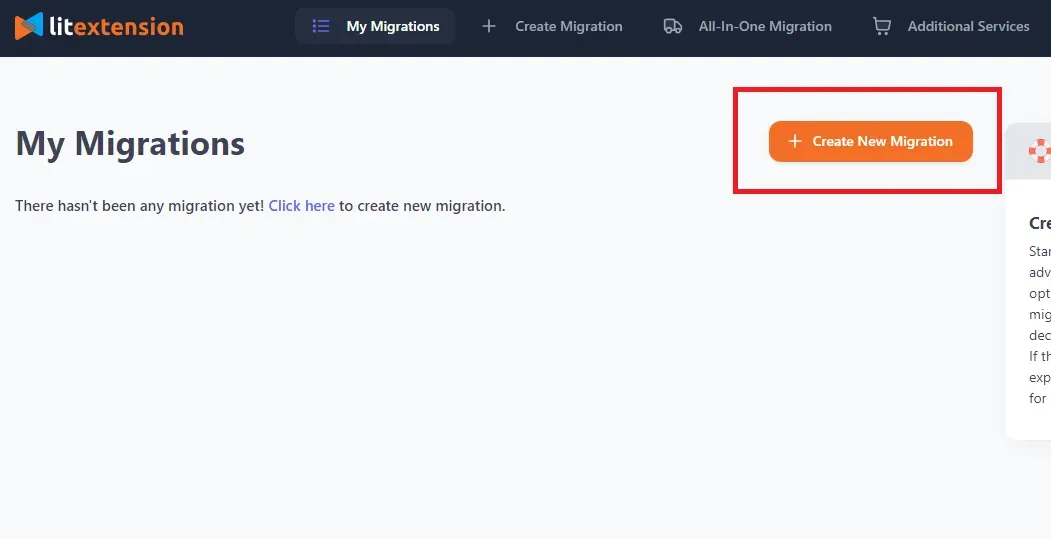
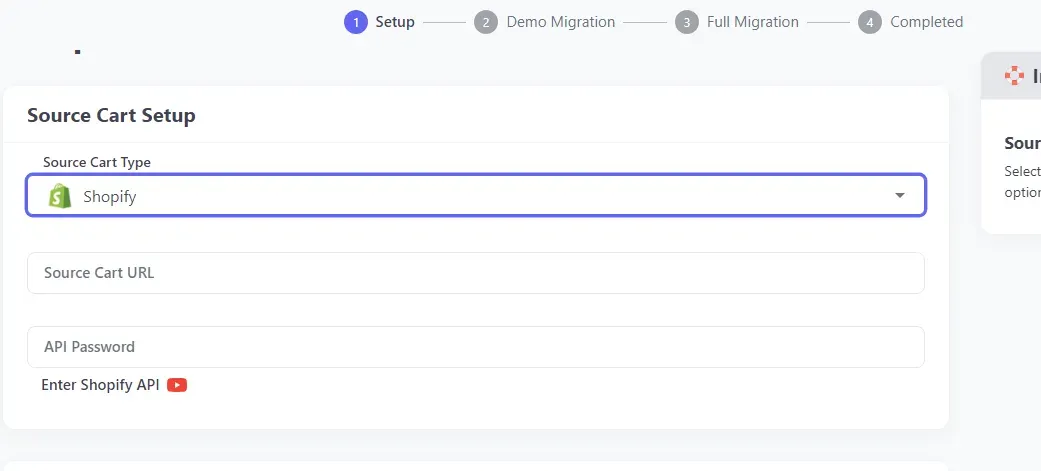
Step 1. Set up your Source Cart
Now, head to the Migration page and select “Create new migration.” You'll then need to choose the type of Source Cart (the store you're migrating from) and provide its URL.
Next, connect LitExtension to your store. There are two different options for this task, depending on your store type:
- Install the connector (for open-source stores)
- Provide your API keys (for hosted carts)
Clear, step-by-step instructions will be displayed on the screen regardless of your option. So, all in all, the setup process is very straightforward!
Step 2. Set up your Target Cart (Magento)
Once your Source Cart is connected, it's time to configure your Target Cart!
Choose Magento from the dropdown menu, enter the URL of your Magento store, and then install the connector. There's no need to worry about the latter; detailed guidance on setting up the connector will be displayed on the screen along the way.
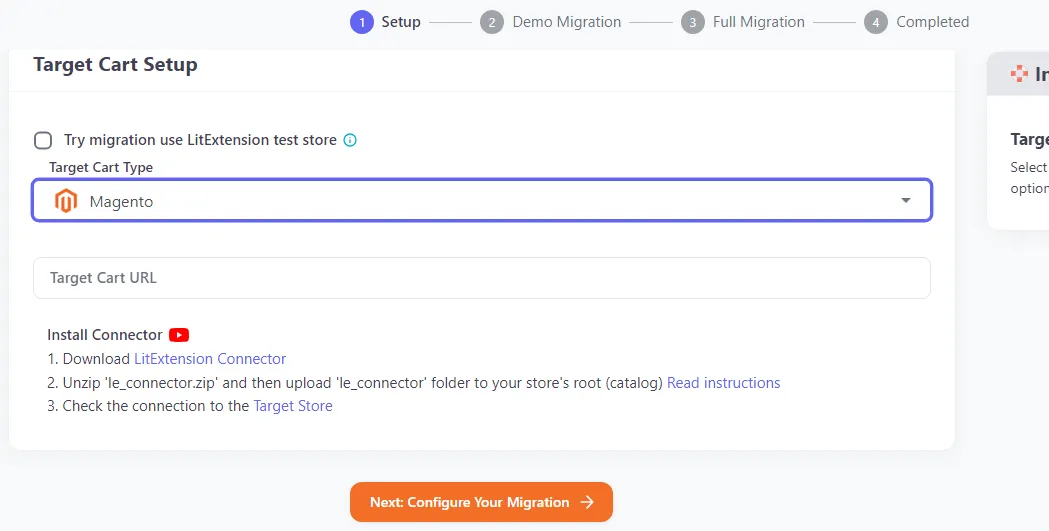
When you're done, click “Next: Configure your migration” to proceed to step 3.
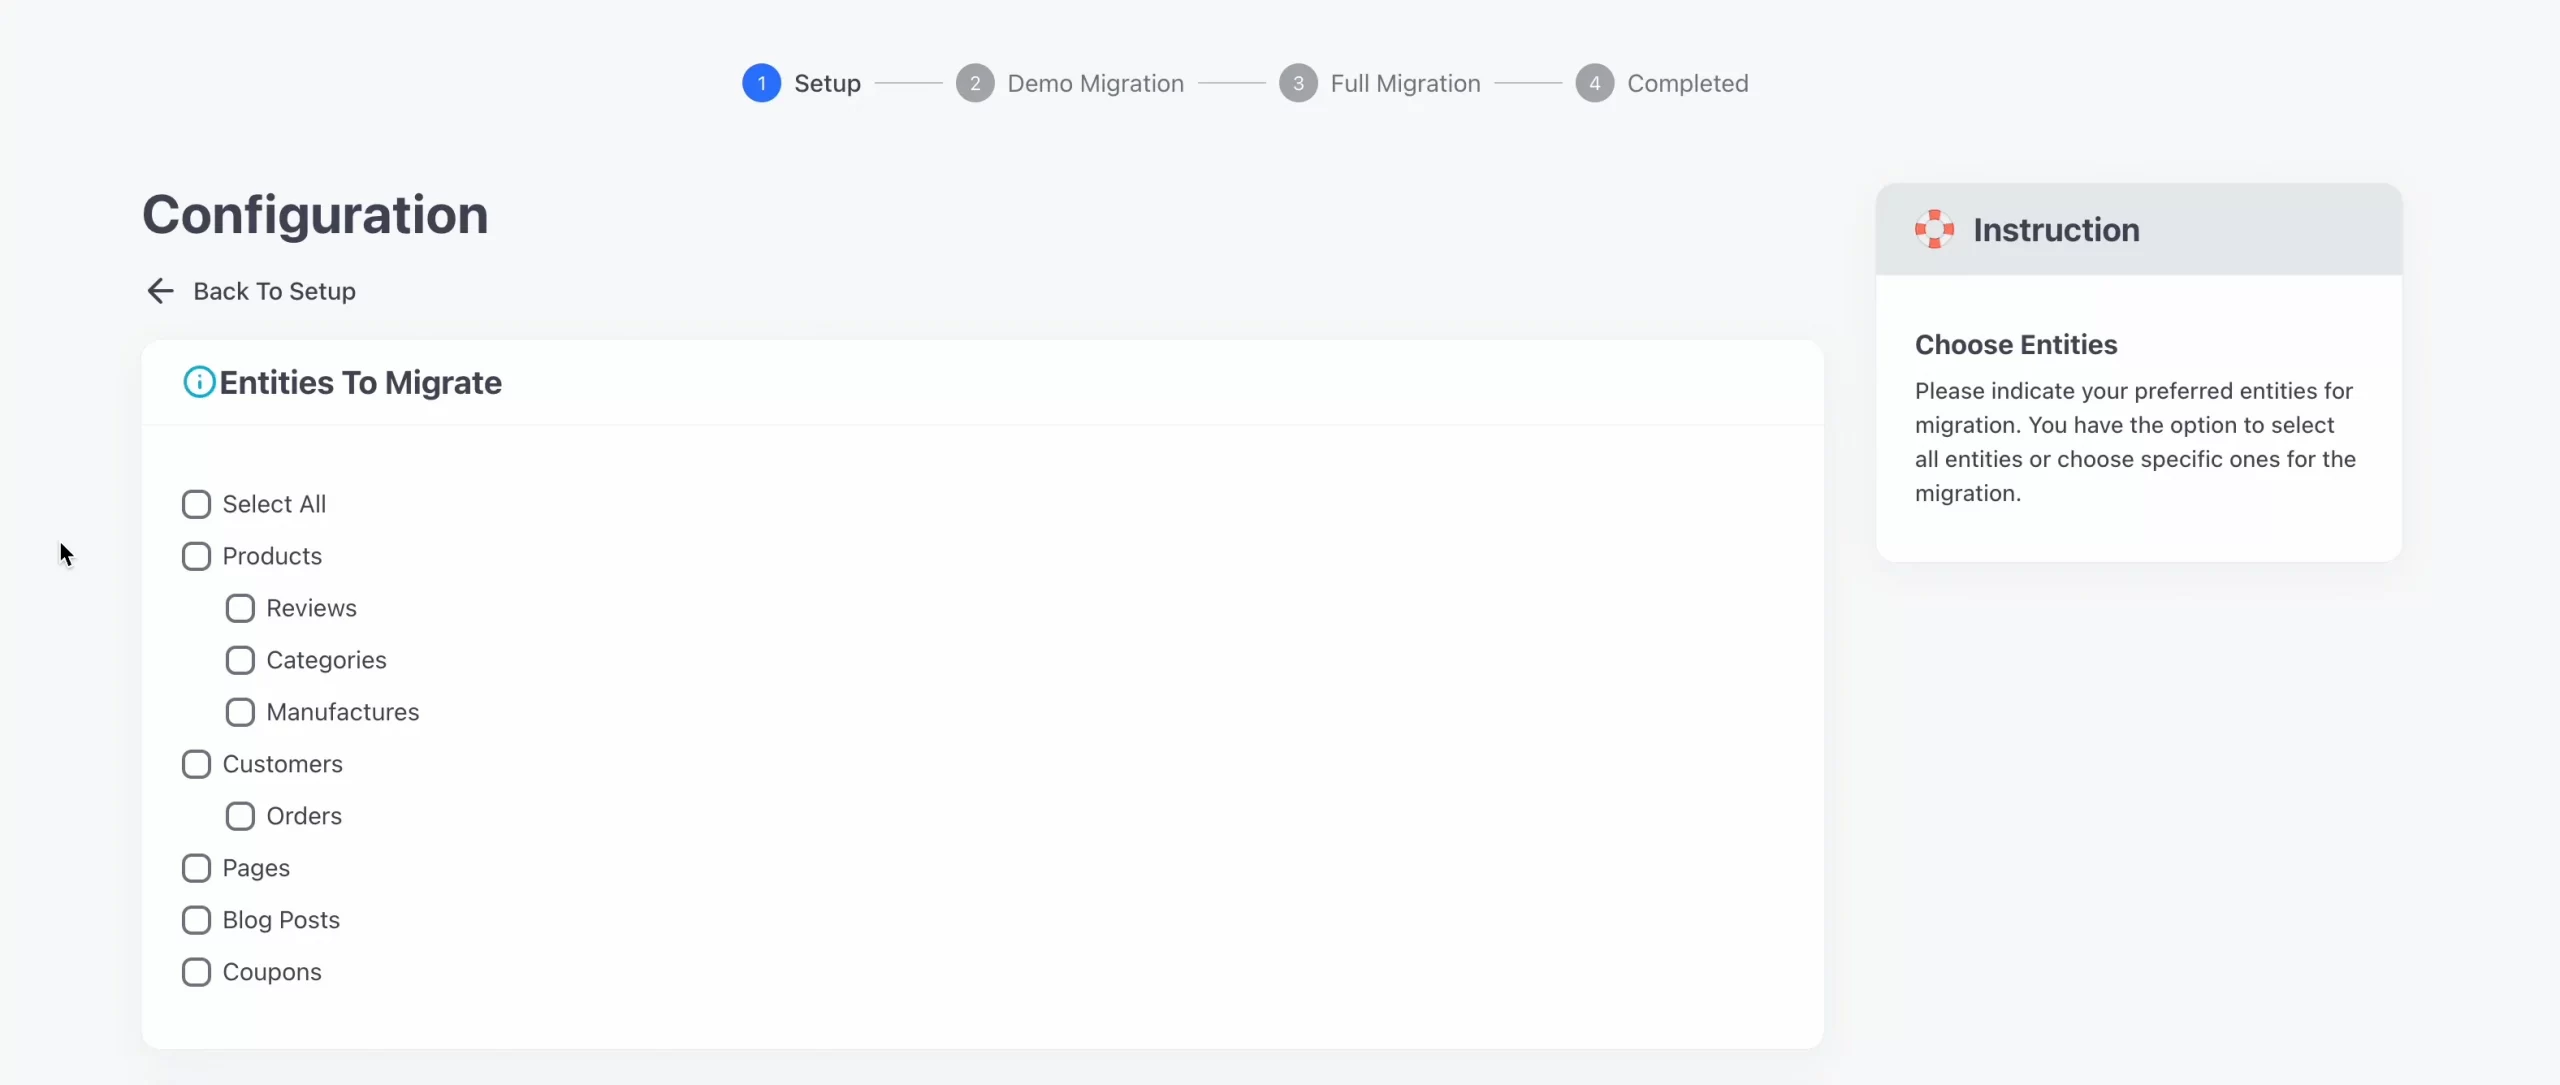
Step 3. Configure your migration
Now comes the exciting part of choosing what you want to migrate! You can select specific entities (“Customers,” “Products,” “Orders.” or other data) or simply hit “Select All” to transfer everything. You'll also find options to map the store, language, order status, and customer groups.
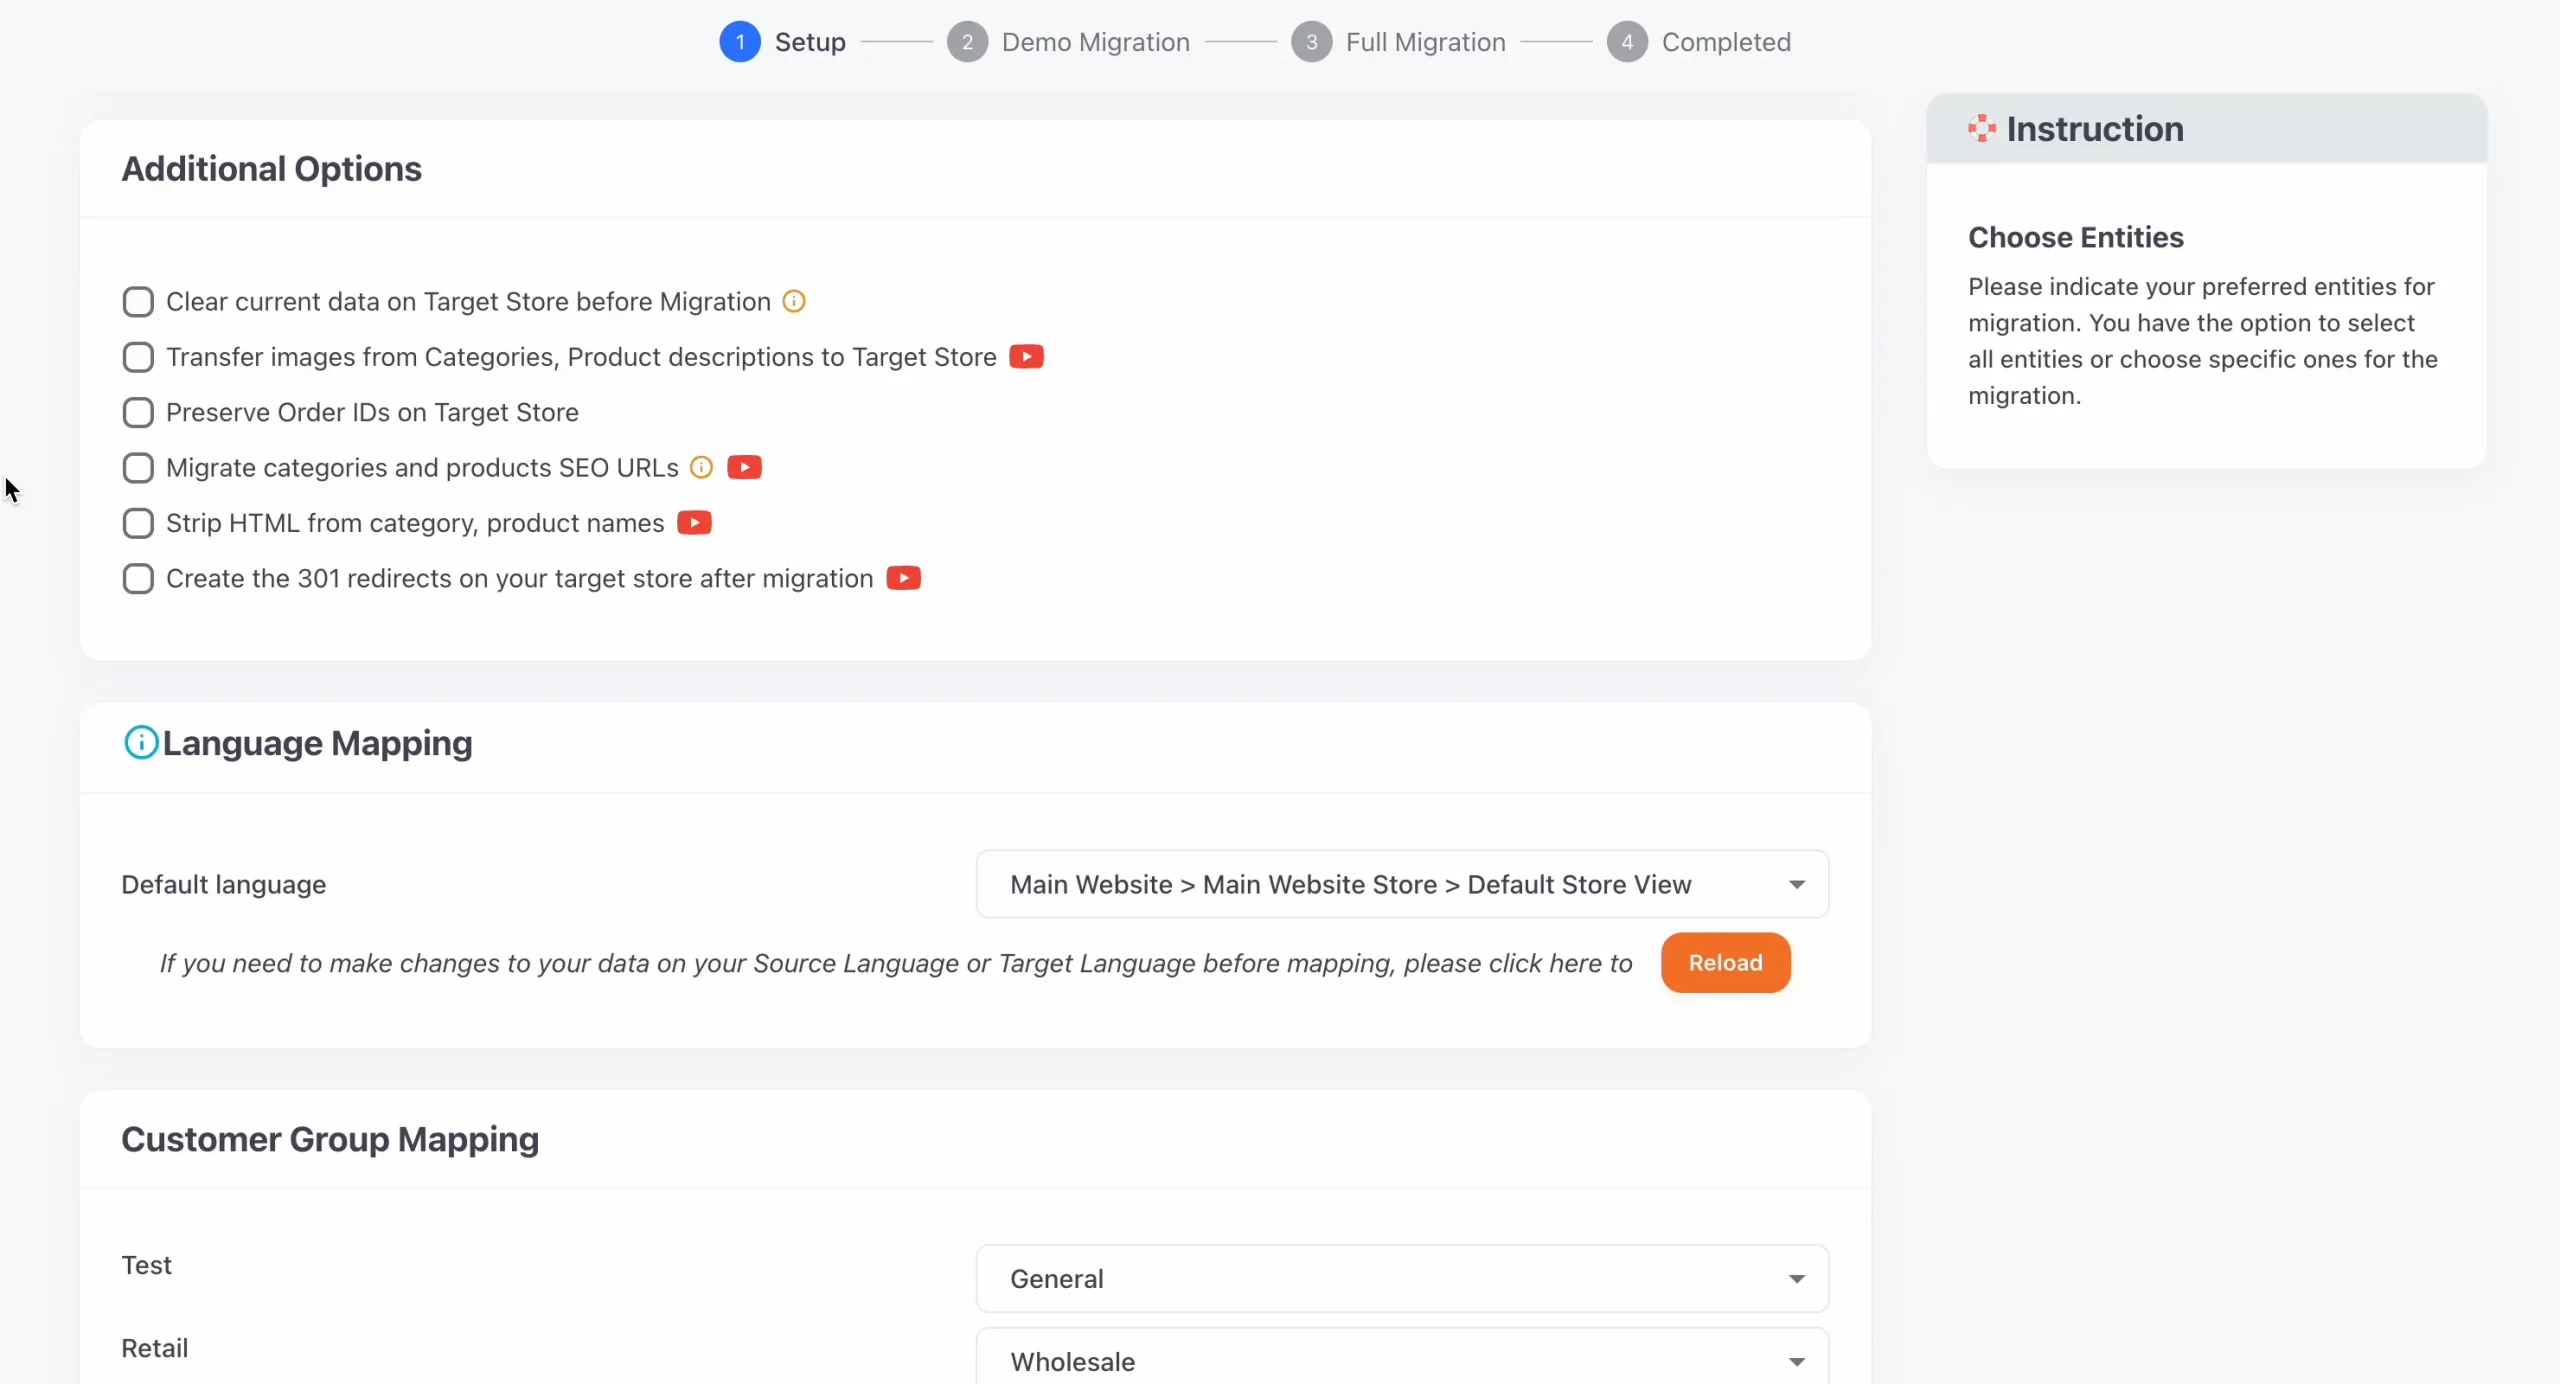
Looking for more flexibility? LitExtension has you covered with additional migration options, including migrating recent data, setting up 301 redirects on your target cart, and more (see image below).
Step 4. Run the migration (demo and full)
At the bottom of the Configuration page, you'll see the button “Next: Start free demo migration.” Clicking this button allows you to perform a FREE demo migration of up to 20 entities. It's a great way to test how LitExtension's migration process works!

Once the demo is complete, you'll receive an email confirming which entities were successfully transferred. If everything checks out, head back to the Configuration page, finalize your payment, and hit “Start Full Migration” to wrap things up and complete the process!
(Note: But what if you prefer to jump straight to the full migration – no demo in between? In that case, simply click “Skip demo migration” and then choose “Start full migration.”)
All-in-One Migration (Most popular)
Although the Basic Migration steps above are very straightforward, you must still handle everything by yourself. Not to mention, a bit of research is certainly required if you have extra, complex customization needs for your Magento 2 import products!
That's why the All-in-One package is clearly a much better choice since you can leave all those tricky technical aspects to our team. Here's how it works:
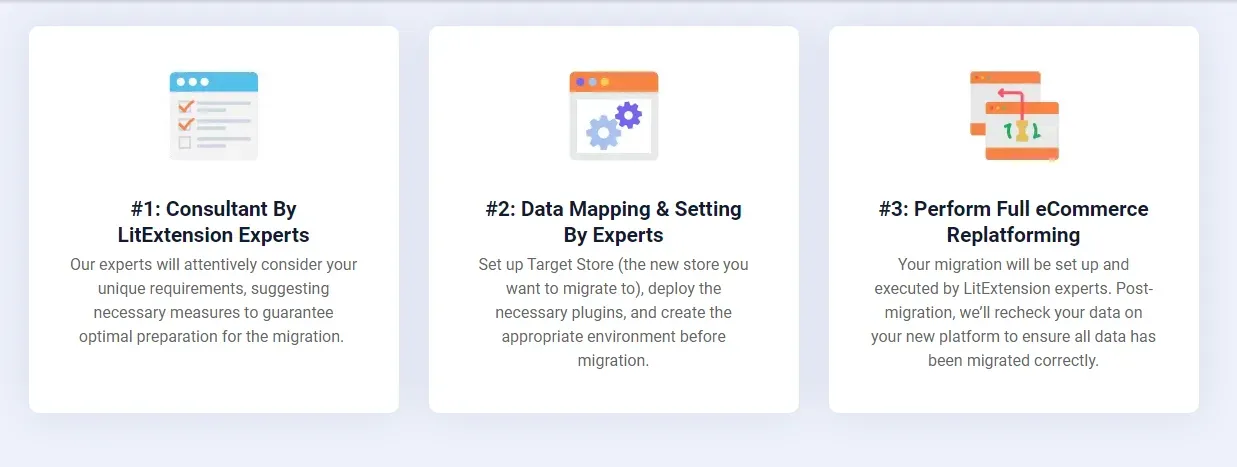
Step 1. Consultant by LitExtension experts
First, get in touch with our LitExtension team. We'll sit down with you and go over exactly what you want to migrate! We'll also lay out our services and pricing so you can choose the right option for your needs.
Once you are satisfied with the discussion and payment is squared away, we will handle the rest of the migration from there.
Step 2. Data mapping and setting by experts
Now that our team has nailed down your needs, we'll get everything ready for your big Magento migration. That means we will:
- Set up your WooCommerce store
- Install the necessary plugins
- Clean up demo content
- Create 301 redirects to ensure a smooth transition
Want to have a taste of what's coming? No problem; we can always offer you a free demo migration.
Step 3. Perform full eCommerce replatforming
Finally, the part we're all waiting for: your full migration!
Our expert team will take care of everything while keeping you in the loop throughout the process. With our priority support, you'll get responses for any issue within 12 hours — twice faster than the Basic Migration package's 24-hour window. Even better, any additional migration options in Step 3 are fully included at no extra charge, whether they pop up before or during the process.
After the migration wraps up, we'll conduct thorough checks to ensure your store is ready to go live on WooCommerce. Then, for the next six months, we'll provide continuous support via Re-migrations, Unlimited recent data transfers, and Smart updates. All of these services are totally free if your extra data is less than 10% of the total!
Seamlessly migrate your store to Magento!
Extra Tips for Successful Magento 2 Import Products
We have covered various Magento import product options and walked you through the detailed step-by-step guide for each one. Now, before we wrap up today's discussion, let's peek at some extra tips to make sure your Magento product import goes off without a hitch!
Customize your import profiles
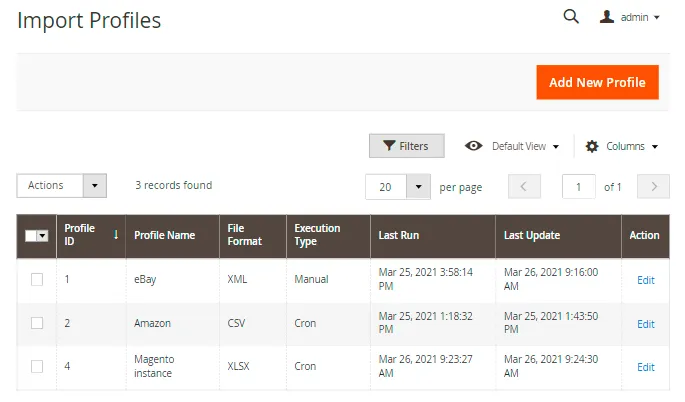
One of the best ways to optimize your Magento 2 import grouped products is to create tailored profiles that align perfectly with the unique demands of each data type (e.g., customer info, product details, etc.) That way, it would be easy to fine-tune how those types of data are brought into the system:
- For example, you may set up your import profile to specify exactly which columns in your CSV file match Magento attributes like product descriptions, SKU, or price.
- Even better, Magento 2 allows you to assign default values to certain fields when they’re missing from the import file. Suppose the CSV doesn’t include a product’s stock status; you can configure the import profile to fill that gap automatically!
Prevent data loss
Although the Magento 2 data import tool is fairly easy to use, you still need to map fields accurately to avoid potential hiccups down the road:
- Make sure your CSV files are structured properly, with all data neatly organized before hitting the import button.
- Double-check your files for missing or incorrect values
- Clean up any duplicates and ensure all mandatory fields are properly filled in.
Also, do not forget to back up your store's data regularly; it would be your safety net if anything goes wrong with the Magento 2 import products!
Choose the right import method
This advice might sound a bit obvious, but no less important: carefully consider your requirements and data volume before choosing an import method!
- If you're working with large files or complex data structures, Magento's built-in tools might not be the most reliable option. They likely lead to frustrating import errors that take hours or even days to troubleshoot. In such cases, opting for a specialized third-party solution like LitExtension will be a much better choice.
- On the flip side, if you are a small start-up or only managing a modest catalog (say, fewer than 100 products without variants), hiring a whole team of experts is unnecessary. Magento's native tools are more than capable of handling these small imports efficiently!
Ultimately, evaluating your data's size and complexity is key to hassle-free Magento 2 import products CSV with images, so don't treat it lightly.
Magento 2 Import Products: FAQs
How do I import products into Magento 2?
To import products into Magento 2:
- Prepare a CSV file with product details.
- Upload product images to /pub/media/import/.
- In the Magento Admin Panel, go to System > Data Transfer > Import.
- Choose Products as the entity type.
- Upload the CSV file, configure import settings, and click Check Data.
- If no errors are found, click Import to complete the process.
- Reindex and flush cache after import for changes to take effect.
How do I add products to Magento 2?
To add a new product:
- Go to Catalog > Products in the Admin Panel.
- Click Add Product and fill in product details (SKU, name, price, images, stock, etc.).
- Save the product and refresh the cache if necessary.
How do I get products by ID in Magento 2?
For quick testing, you can use the Object manager method and run the following command:
$objectManager = MagentoFrameworkAppObjectManager::getInstance();
$product = $objectManager->get('MagentoCatalogModelProduct')->load($productId)
How do I create import functionality in Magento 2?
First, you must create a CustomImportExport module. Once that's in place, add an import.xml file to configure the import. From there, you can:
- Define your entity model and set the appropriate behaviors.
- Specify your custom entity type.
- Integrate a relatedIndexer to ensure the data is refreshed immediately after import.
How do I create a custom import in Magento 2?
To create a custom import functionality in Magento 2, you need to develop a custom module. Here’s a high-level approach:
- Create a custom module under app/code/Vendor/Module/.
- Define a new import entity in etc/import.xml.
- Create a data model to process custom fields.
- Use Magento’s ImportExport API to handle CSV data.
- Implement CLI commands to run the import via command line.
Final Words
This article has introduced two options for Magento 2 import products. If your import requirements are fairly straightforward, the built-in tools should suffice (though keep in mind that some errors may still crop up). But if you're looking for a seamless, comprehensive migration experience, LitExtension is your best bet!
With over 12 years of expertise and a track record of 300,000+ successful migrations, LitExtension is proud to be the trusted partner of more than 200,000 customers across 100 countries. We'd love for you to be the next one; get in touch with us today!
For more information, check out our Magento guides and join our Facebook Community.

