Salesforce Commerce Cloud is a powerful tool for managing online stores, yet its feature-rich interface might make it difficult to navigate at first. As a result, understanding how to use Salesforce is essential to grow your business.
If this is the first time you get to know Salesforce, this guide is for you! In this article, we will walk you through the 6-step Salesforce tutorial, including:
- Step 1. Set up Salesforce Commerce Cloud org
- Step 2. Create your online store
- Step 3. Add your branding
- Step 4. Add your products and categories
- Step 5. Set up checkout
Additionally, in the last part of this article, we will also discuss how to use Salesforce effectively.
Let's get right in!
How to Use Salesforce Commerce: The Ultimate Guide
In this ultimate guide, we will walk you through the step-by-step instructions on how to use Salesforce Commerce Cloud. Whether you’re new to Salesforce Commerce or looking to improve your skills, this guide covers everything you need.
Before diving into the tutorial, don't forget to check out our Salesforce Commerce reviews to grasp a better understanding of what is Salesforce and what we think about this platform.
Step 1. Set up your Salesforce Commerce org
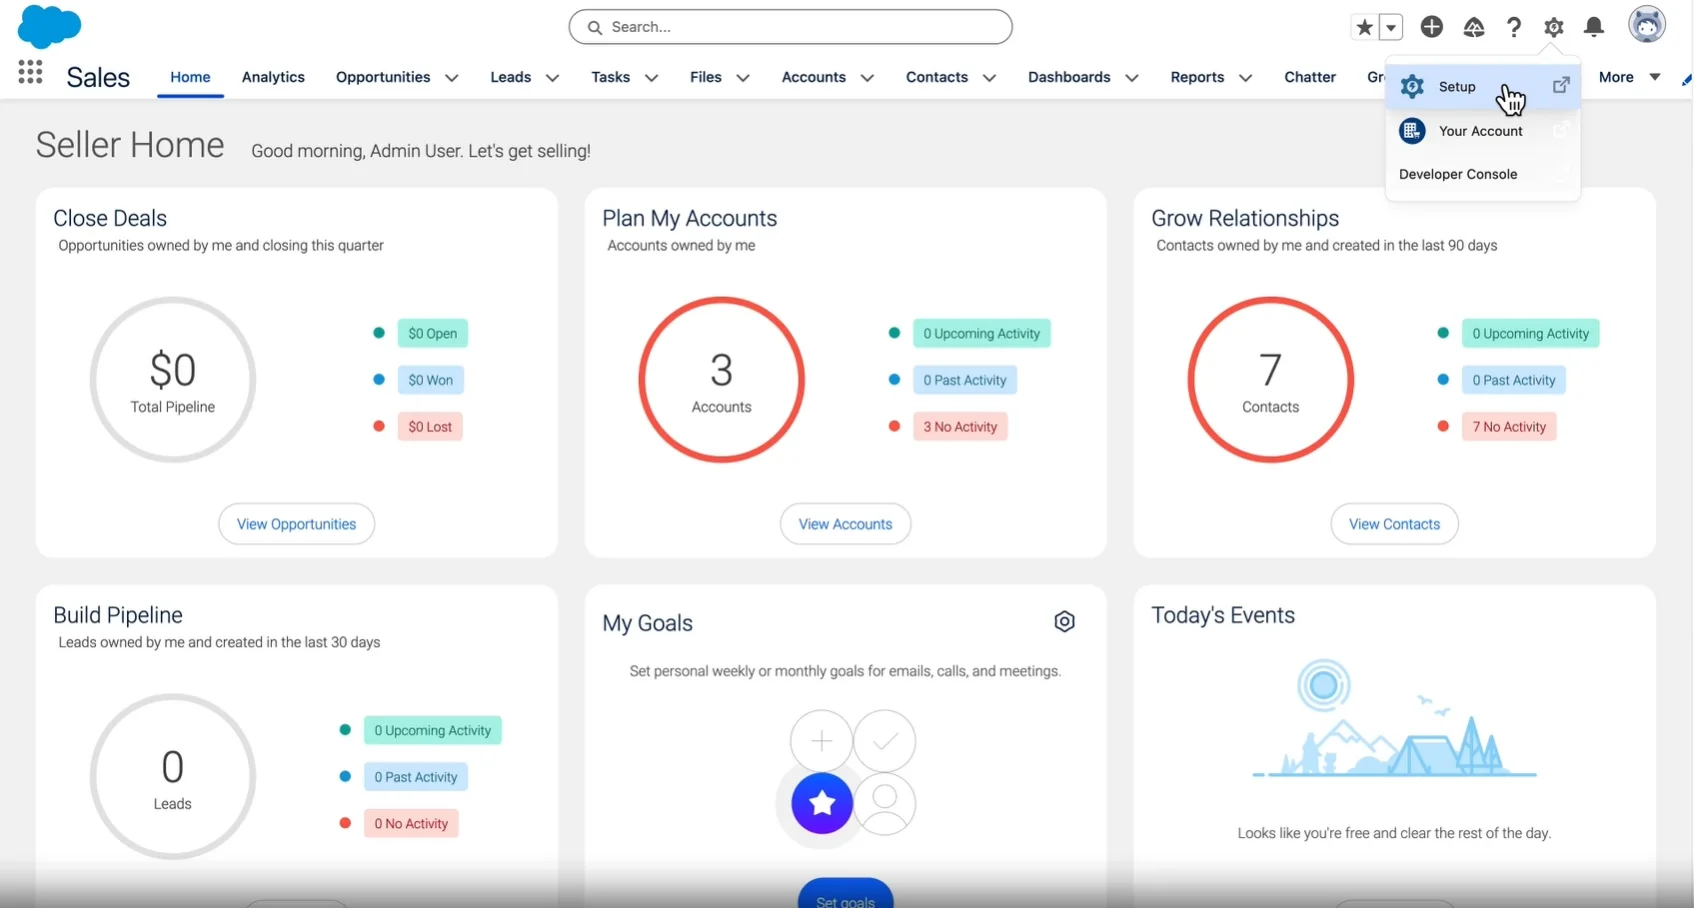
- In the Salesforce admin dashboard, click the ⚙️ icon and select “Setup.”
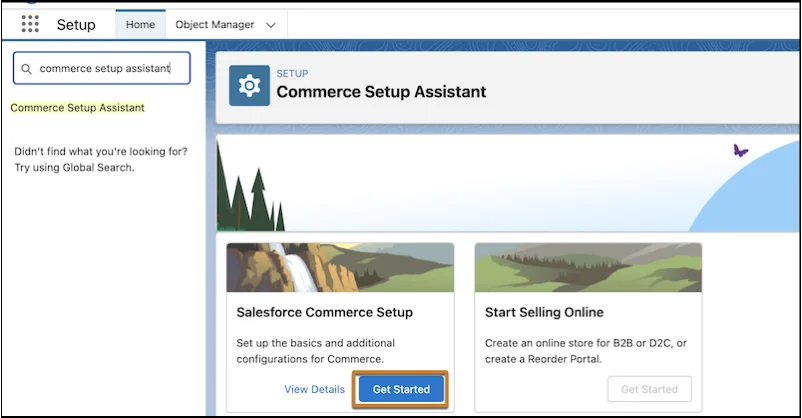
- 2. Then, in the “Quick Find” box, fill in “Commerce Setup Assistant” and enter.
- On the Salesforce Commerce Setup tile, click the “Get Started” button.
- The setup process will be carried out automatically, but you'll need to review all features and approve any changes (if made).
Note that this process might take a few minutes, so please be patient while your org is getting ready.
Step 2. Create your online store
- Back to the Salesforce Commerce Setup tile, click on the “Get Started” button.

- Choose your desired store type, including B2B Store, D2C Store, Commerce Reorder Portal, or Pay Now. Please note that once you select a store type, you won't be able to change it later.
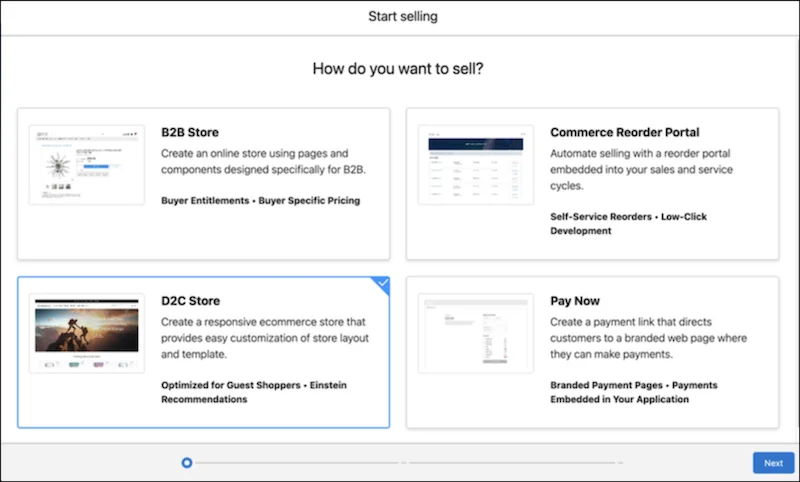
- Click “Next” and follow the guide wizard to finish setting up your Salesforce Commerce store.
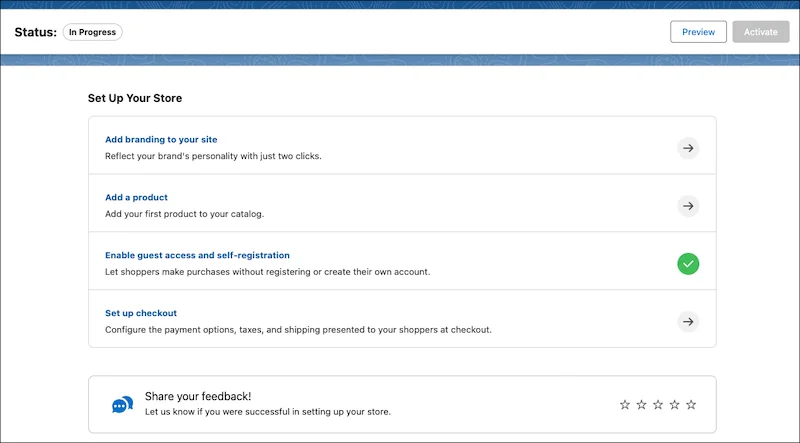
After this step, you'll be directed to your Commerce app dashboard, where you can perform further configurations to create your dream online store. Follow us in the next parts of this article for more details on how to use Salesforce Commerce.
Step 3. Add branding to your site
Unlike other hosted contenders like Shopify, Salesforce Commerce Cloud doesn't come with pre-built themes to choose from. Instead, you'll be able to upload your logo, choose the preferred style, select a color palette, and change your fonts.
- In the navigation sidebar, select the store that you want to customize from the drop-down list
- Here, click on “Website Design” to start customizing your storefront. In case you want to make advanced design changes, such as configuring store components, pages, or navigation, please choose “Experience Builder” instead.
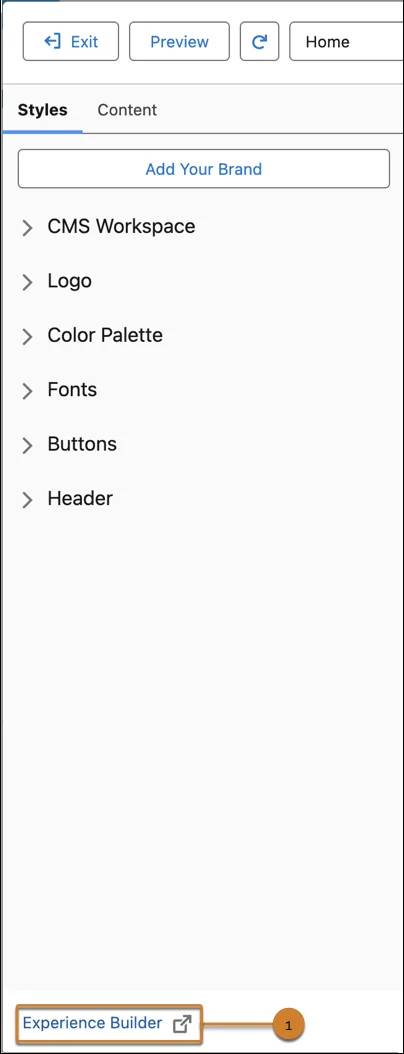
- Switch to the “Styles” tab to make your changes by clicking the corresponding section. Please note that all the changes you made in this tab will be applied to all pages in your online store.
- To preview your adjustments, simply click “Save” and then “Preview.”
- When you are satisfied with all the customization, go back to the “Website Design” dashboard and click “Publish” to bring your Salesforce Commerce store to light.
Step 4. Add your products and categories
In this section of our how to use Salesforce Commerce guide, let's learn how to add products and categories to your store.
1. Add your products
- In the navigation sidebar, select your store from the drop-down list.
- Navigate to “Merchandising” > “Products” and click “New.”
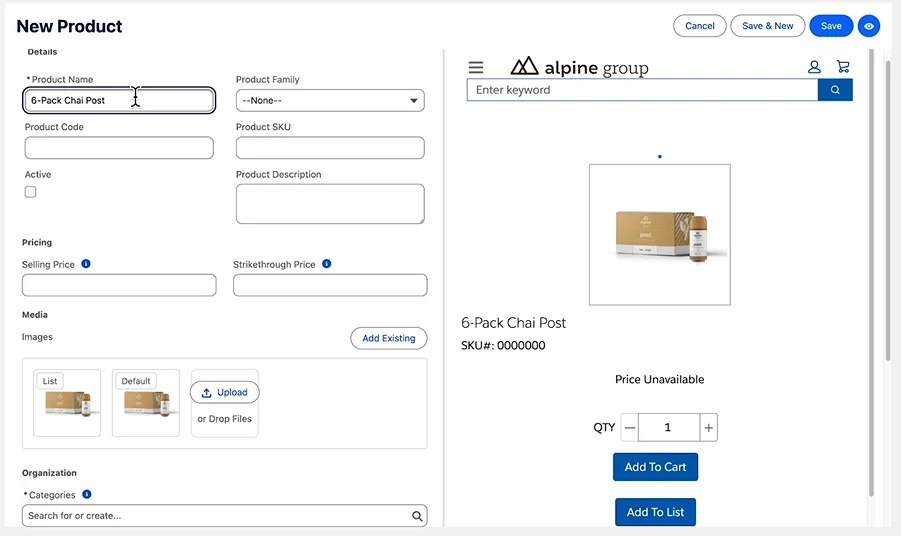
- Here, fill in the necessary information about your item. Fortunately, the changes will be previewed in real-time, so you can see how your product is displayed.
- If you want to make the product available in your store, don't forget to select “Active.” Or, if you are just creating draft items, leave this box blank.
- To add images to help customers visualize your products, scroll down to the “Media” section. Click on the “Add Existing” button if you have already uploaded your media files. Or, drop your files into the corresponding section.
- If the product has variations (such as color, size, material, etc), select “This product has variations” and insert the variation details.
- When you are done, click “Save,” or to continue adding products, click “Save & New.”
2. Create categories
You can organize your items into different categories or subcategories to enhance product discoverability and improve search and navigation. Please note that you can only add a maximum of 5 categories for each product.
- In the navigation sidebar, select your store from the drop-down list.
- Navigate to “Merchandising” > “Categories” and click “New.”
- Enter the name of your category and fill in the essential information.
- Don't forget to tick on the “Show In Menu” box if you want to display that category in your main menu. Otherwise, leave this box blank.
- Assign a sort order to your category. This will determine the order in which that category appears on the navigation menu and in filters.
- Then, to assign products to the created category, click “Assign”, then select the products and click “Next.”
- Finally, click “Save” to save your changes and get back to the dashboard or click “Save & New” to continue creating categories.
Step 5. Set up checkout
The last step in today's guide on how to use Salesforce Commerce is setting up your checkout to receive payment. Here's how to do so.
- In the navigation sidebar, select your store from the drop-down list.
- Go to “Settings” > “Checkout”, then select the “Payments” tab.
- Select the payment service that you want to integrate:
- To use Salesforce Payments, go to the “Salesforce Payments” tab and click “Configure”. Then, set up the merchant account.
- To use a third-party service, go to the “Alternate Provider” tile and click Select Provider. Then, select a gateway provider from a third-party package.
Best Practices on How to Use Salesforce Commerce Effectively
Now that we've learned the full tutorial on how to use Salesforce, it's important to apply proven best practices to make the most out of this platform.
Scroll right down for the tried-and-true tips to ensure your Salesforce Commerce store runs smoothly.
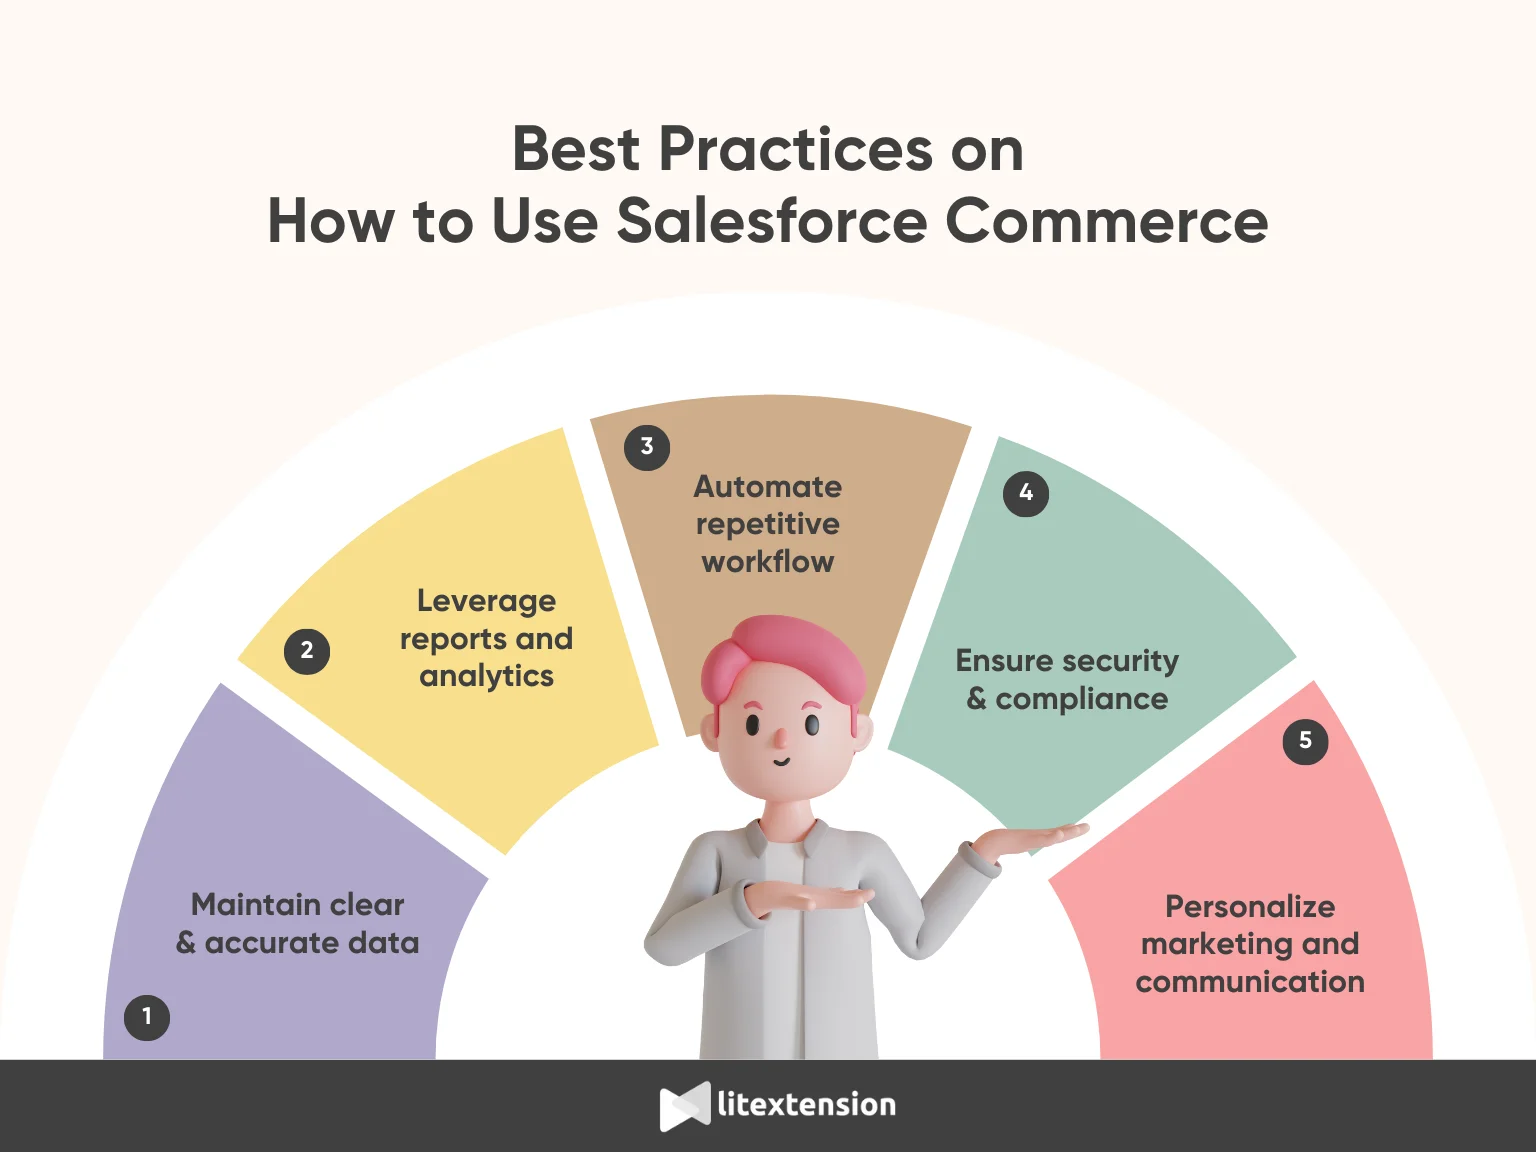
1. Maintain clean and accurate data
- Regularly perform data audits to identify and remove duplicate or outdated records.
- Validate product data, customer information, and sales orders to ensure accuracy.
- Use data hygiene tools available in Salesforce to automate and simplify the cleaning process.
2. Leverage reports and analytics
- Regularly generate reports on key metrics such as sales performance, inventory levels, and customer activity.
- Use dashboards to monitor trends and visualize data in real-time.
- Analyze reports to identify top-selling products, slow-moving inventory, and customer buying behavior.
- Use insights from analytics to inform marketing, promotions, and sales strategies.
3. Automate repetitive workflow
-
- Identify manual processes that can be automated, such as order processing and email notifications.
- Use tools like MuleSoft Flow or Automation Lightning along with automation rules to streamline operations.

- Set up automated triggers for inventory alerts, order confirmations, and customer follow-ups.
4. Ensure security and compliance
- Assign appropriate user roles and permissions to control access to sensitive information.
- Implement two-factor authentication (2FA) to enhance security for users logging into Salesforce.
- Stay updated on data privacy regulations (e.g., GDPR, CCPA) to ensure compliance with legal requirements.
- Regularly review access logs to detect unauthorized activities and address potential risks.
5. Personalize marketing and communication
- Use Salesforce’s personalization tools to create tailored marketing campaigns for different customer segments.
- Set up automated emails for order confirmations, abandoned cart reminders, and special offers.
- Track customer preferences and purchase history to deliver relevant recommendations.
By learning how to use Salesforce effectively, you can ensure that your eCommerce website operates efficiently, delivers a positive customer experience, and supports your business goals. Applying these practices will help you drive sales, optimize processes, and maintain high levels of customer satisfaction.
How to Use Salesforce – FAQs
What is Salesforce Commerce?
Salesforce Commerce, also known as Salesforce Commerce Cloud, is a cloud-based eCommerce platform that enables businesses to create, manage, and scale their online stores. It offers a wide range of tools and features to handle product listings, order management, inventory, customer interactions, and marketing activities.
Who use Salesforce Commerce Cloud?
Salesforce Commerce Cloud is widely used by various types of businesses and professionals, including:
- D2C business owner
- B2B companies
- Omnichannel retailers
- Enterprise with global reach
What is the difference between Salesforce CRM and Salesforce Commerce Cloud?
While both platforms are part of the Salesforce ecosystem, there are key differences between Salesforce CRM and Salesforce Commerce Cloud:
- Salesforce CRM is a customer relationship management platform that focuses on managing customer interactions, sales leads, marketing campaigns, and support services. It is used for tasks such as tracking sales opportunities and managing customer data.
- Salesforce Commerce Cloud is specifically designed for eCommerce operations. It provides tools for building and managing online stores, handling product catalogs, managing orders, and processing payments. It focuses on the end-to-end eCommerce experience, rather than just customer relationships.
How to create a Salesforce Commerce Cloud store?
To access Salesforce Commerce Cloud, follow these steps:
1. Step 1. Set up Salesforce Commerce Cloud org
2. Step 2. Add branding to your site
3. Step 3. Add your products
4. Step 4. Set up payments
5. Step 5. Set up buyers and buyer groups
6. Step 6. Manage store access
Final Words
In short, learning how to use Salesforce Commerce can transform the way your business operates. By following this guide, you now have a solid understanding of setting up, customizing, and managing your online store.
If you like this blog post, feel free to check out other eCommerce articles on our website for more expert tips and insights.

