Yup, Square is well-known for its ease of use. However, with the miscellaneous features Square offers (POS, payment processing, online store, etc.), learning how to set up Square might still come with a learning curve. But don’t worry! In this article, we will provide you with step-by-step Square tutorials to help you overcome that curve.
Here’s what we’ll guide you through in this article:
- Set up Square account
- Set up Square POS
- Configure payment methods and link bank accounts
- Add products, services and set prices
- Set up Square hardware
Additionally, we’ll also discuss how to integrate Square with other hardware and how to set up Square online payment.
Let’s explore!
#1. Creating and Setting Up Your Square Account
Before we show you how to set up Square, let’s learn how to sign up for a Square account first. Simply follow the steps below:
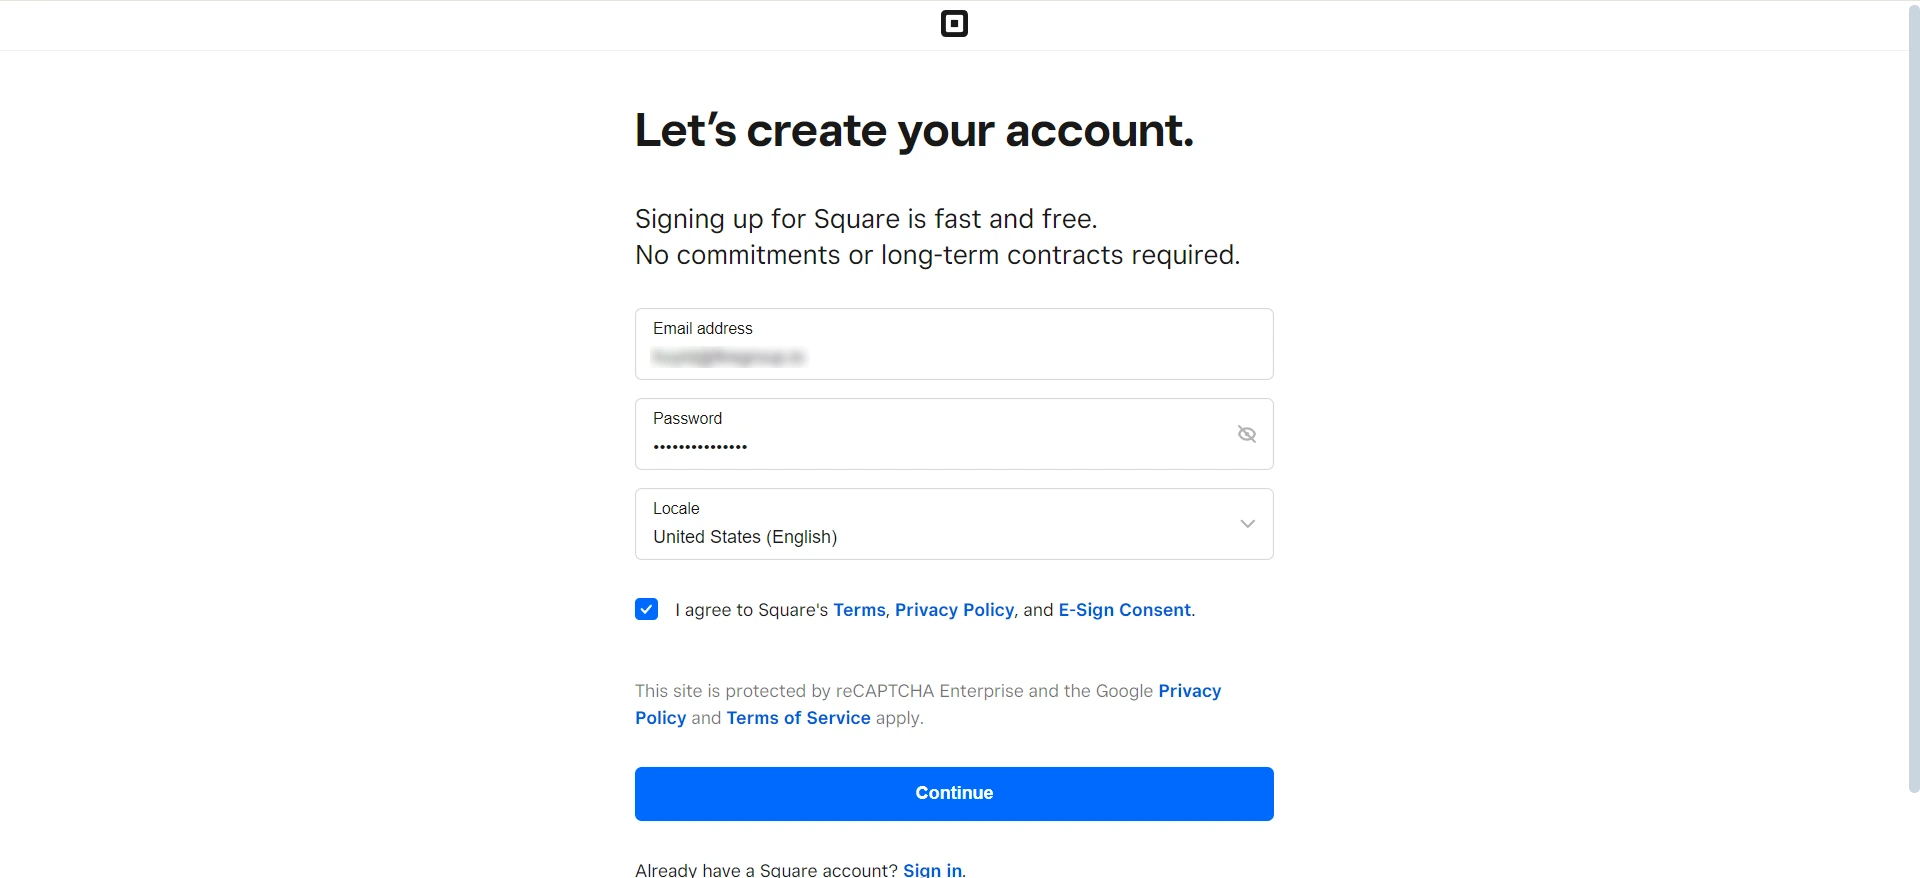
- Go to https://squareup.com/us/en and click “Get Started”.
- Fill in your email, password, and choose your region, then click “Continue”.
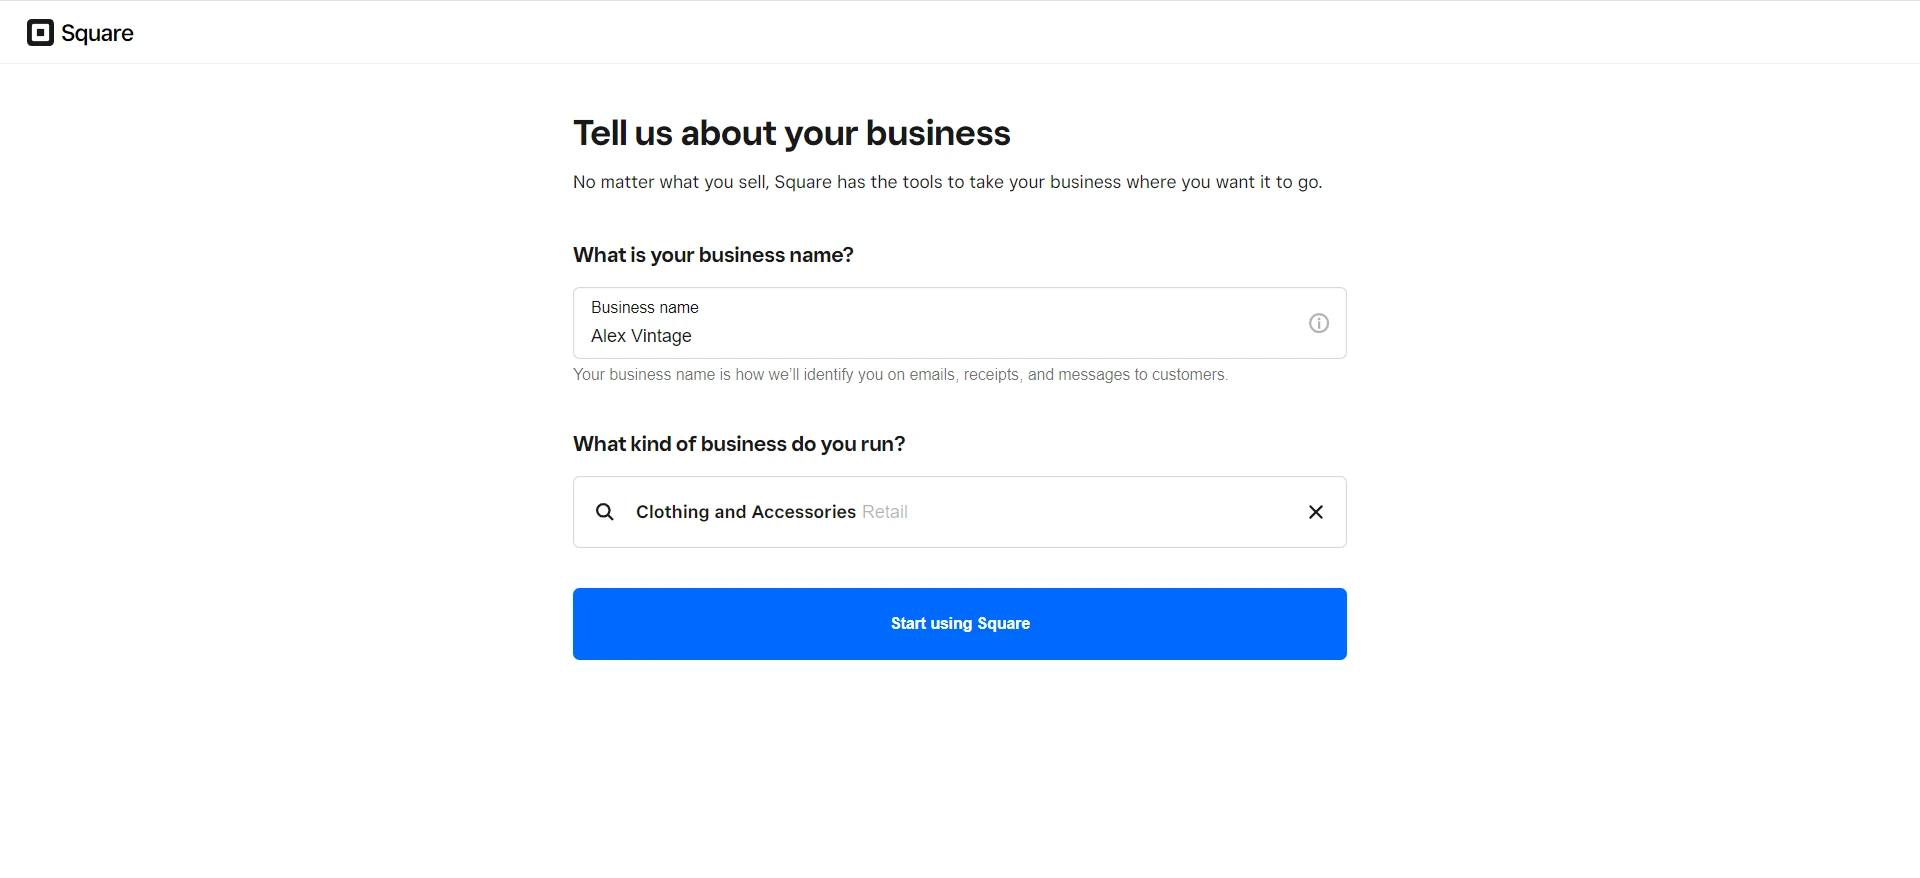
3. Input your business name, choose your business type, and hit “Start using Square”.
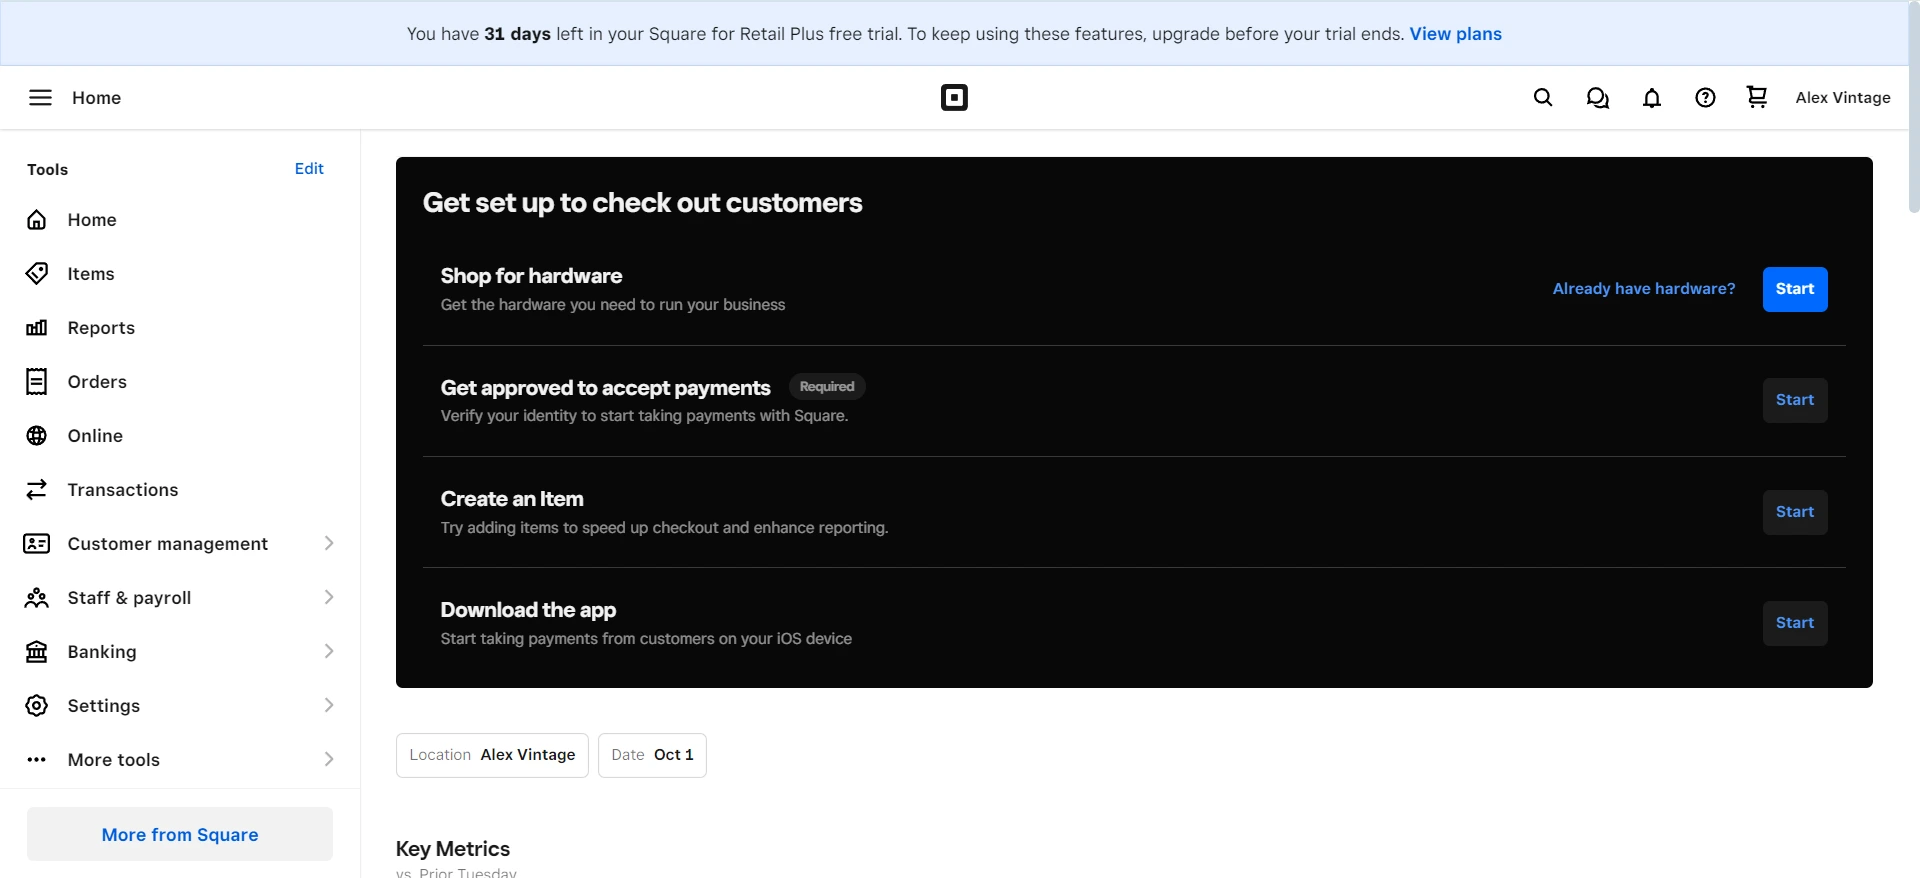
That’s how you successfully sign up for a Square account. Afterward, Square will direct you to your Square admin dashboard, where you can set up and manage every aspect of your business.
Now that you’ve created a Square account, let’s set up other things.
#2, Setting Up Square For POS Devices
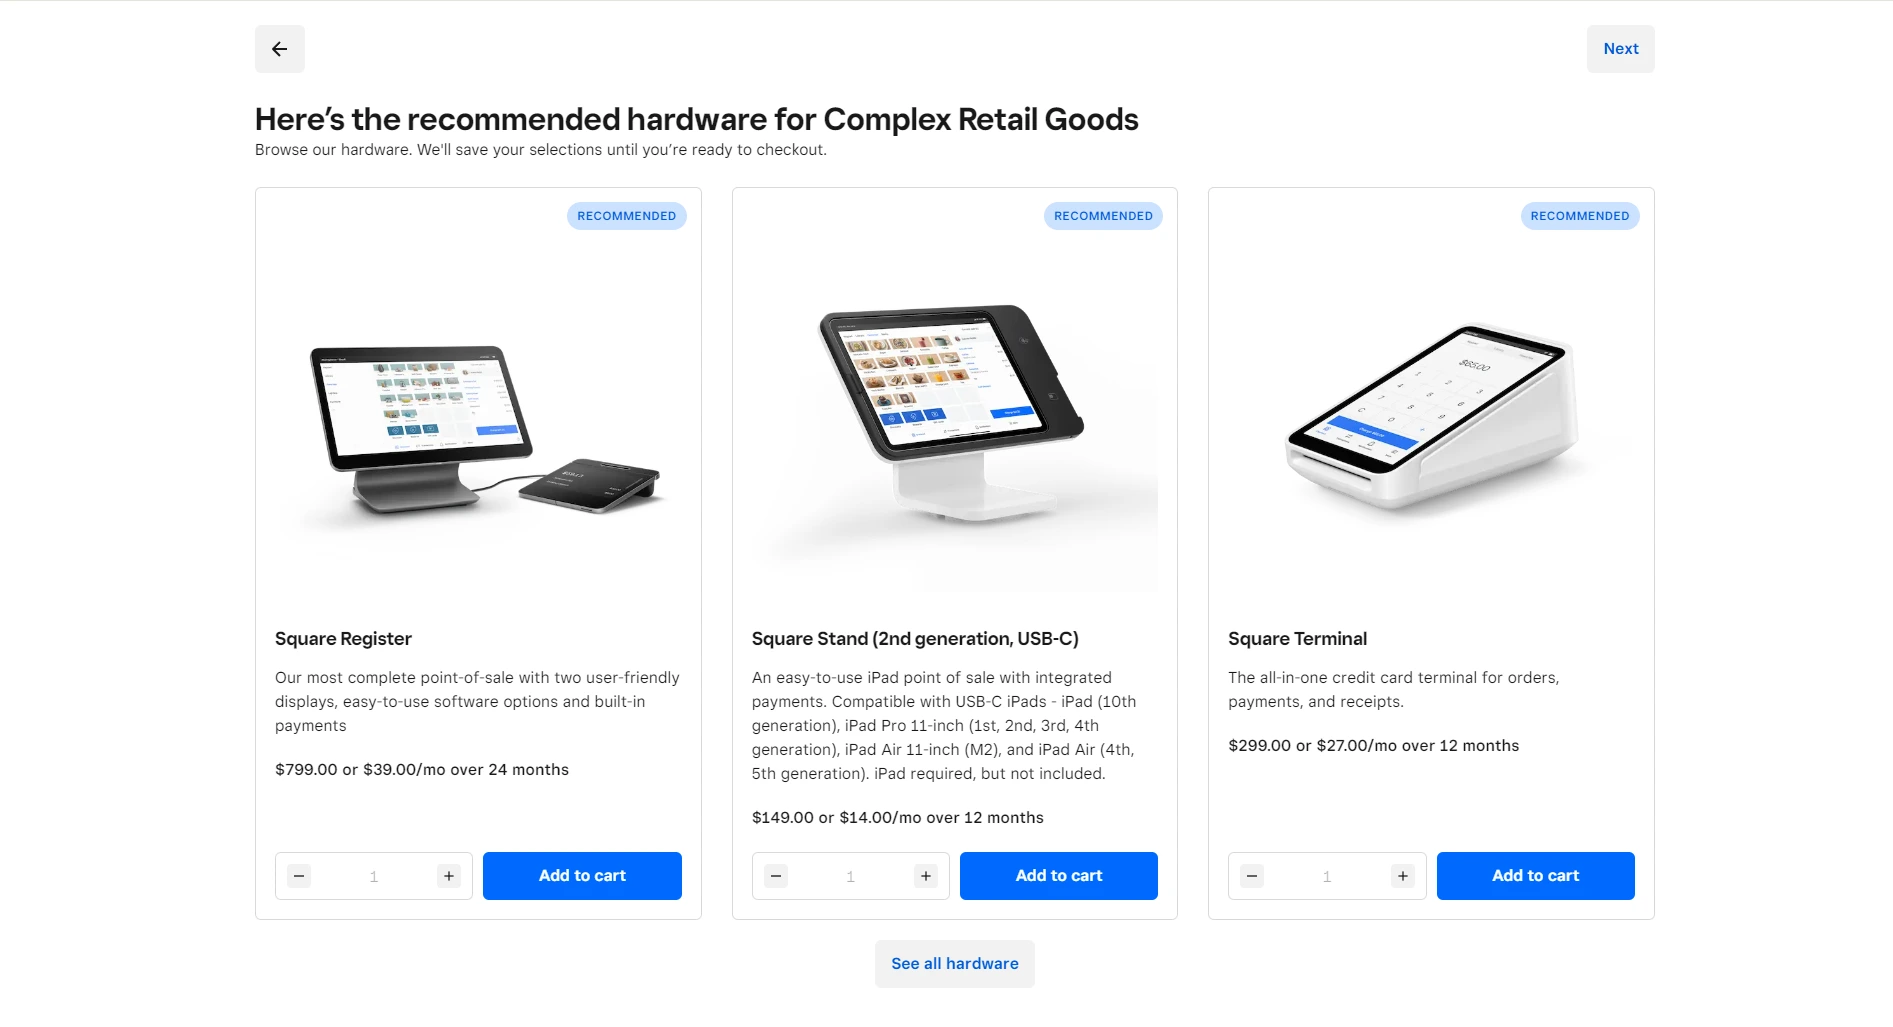
If you don’t have POS hardware yet, click “Start” in the “Shop for hardware” tab > Specify which business you’re (on the go, brick-and-mortar or multi-location),
Square will then recommend hardware suitable for your business’s model and scope.
If you already have POS hardware, click “Already have hardware?” in the “Shop for hardware” tab. Next, click “Add a device”.
After that, specify the number of codes you need, and your device code name then click “Create”.
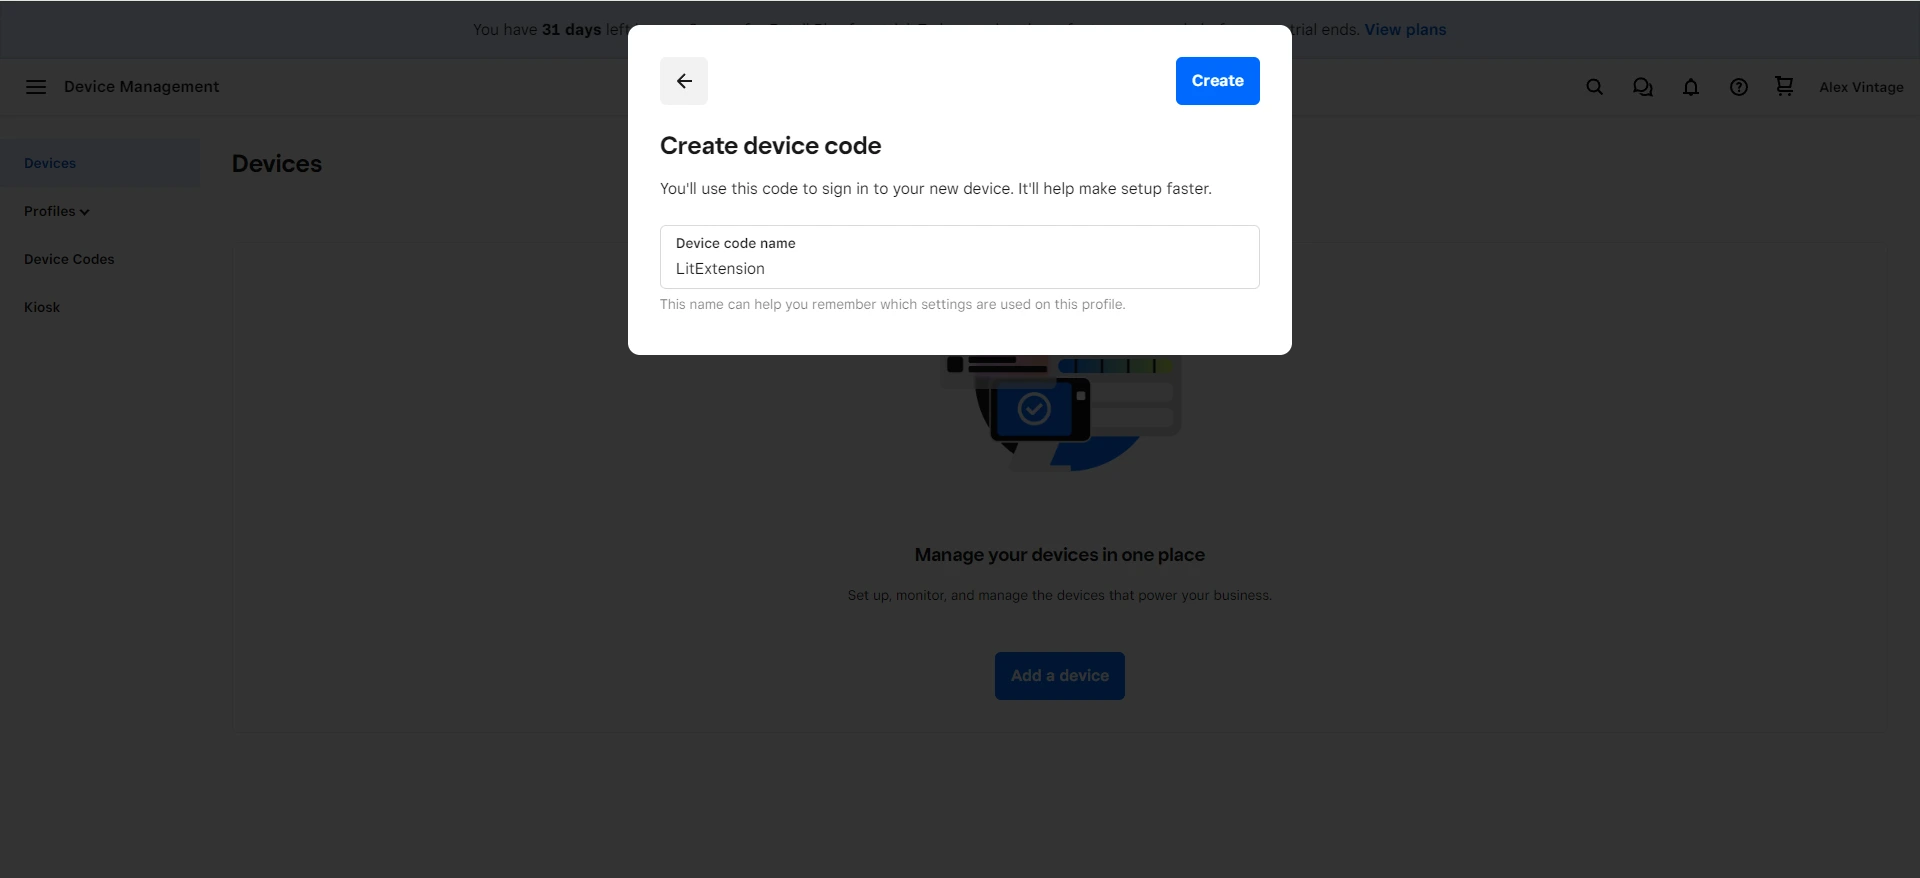
Square will then give you the device code as shown in this screenshot to log in:
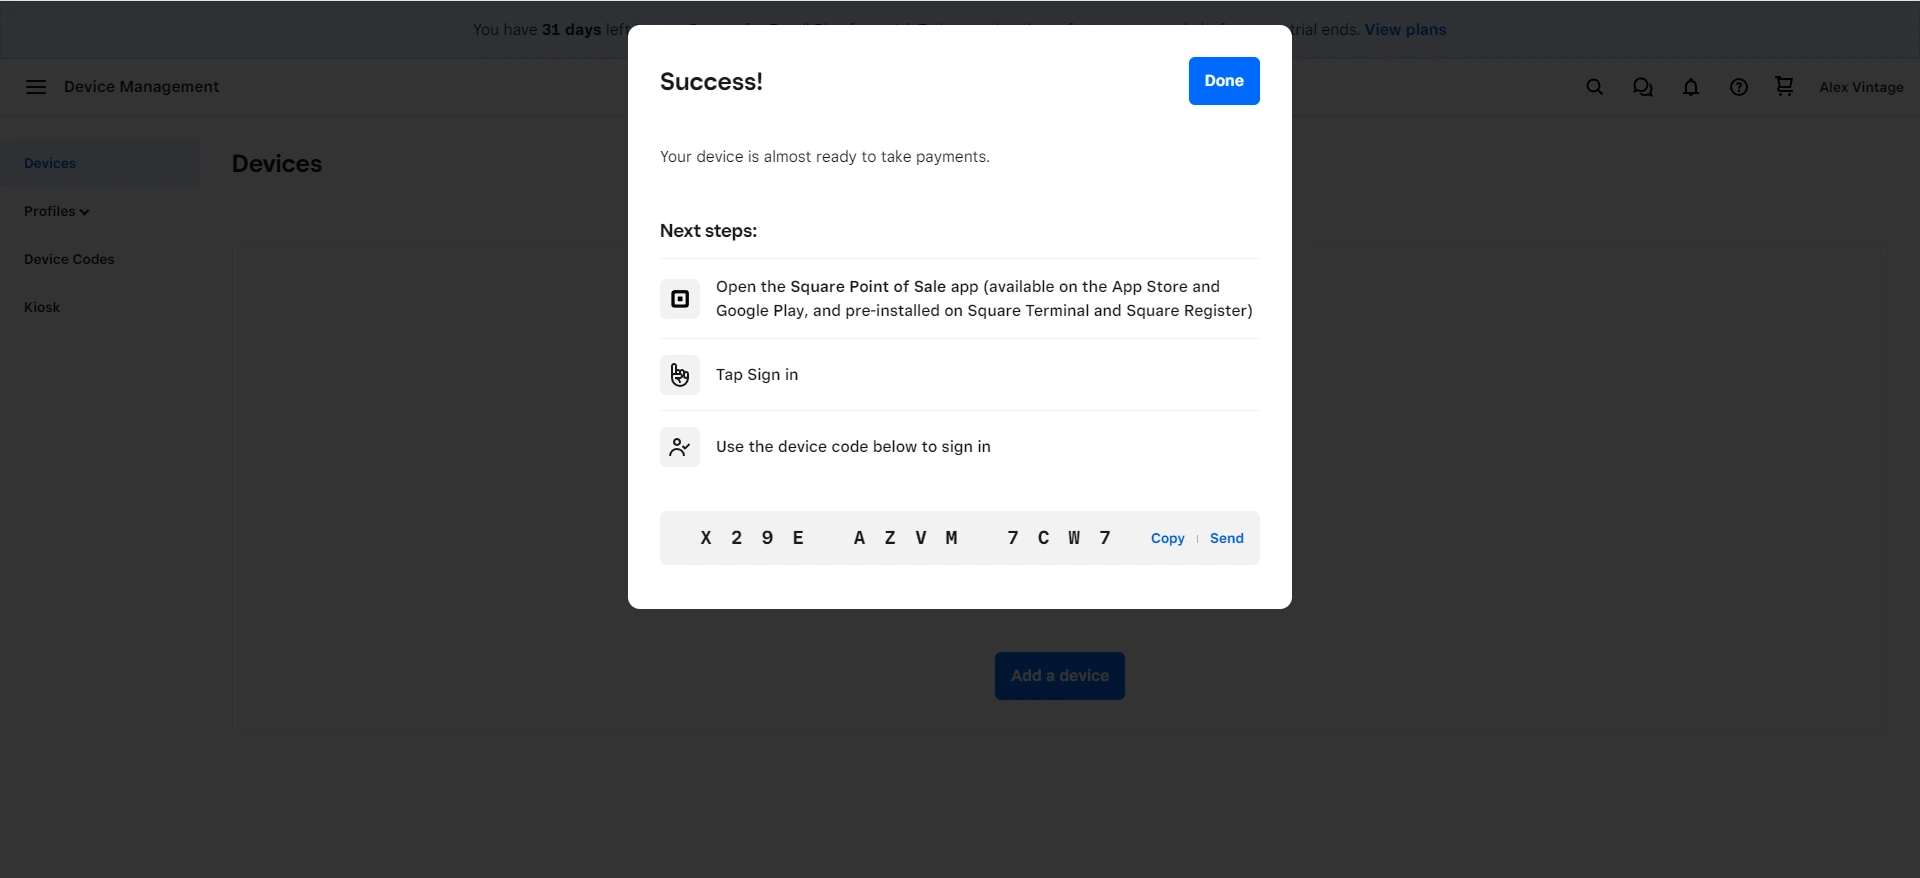
Proceed by downloading the Square point of sale app on the App Store or Google Play Store.
#3. Configuring Payment Methods and Linking Bank Accounts
Let’s keep moving our guide on how to set up Square by configuring payment methods and linking your bank accounts.
Square requires you to link a business bank account where your sales will be deposited. You need to have this account set up before Square allows you to start accepting payments.
When setting up your deposits, you can choose how quickly you want to receive your funds. There are currently three options:
- Via Square Checking: Square will deposit your funds instantly into a Square Banking account. In most cases, you can access these funds immediately without any additional fees.
- Next business day: Your funds will be deposited within one to two business days at no cost.
- Same-day: Receive your funds instantly at the end of your business day for a 1.5% fee of the total deposit amount.
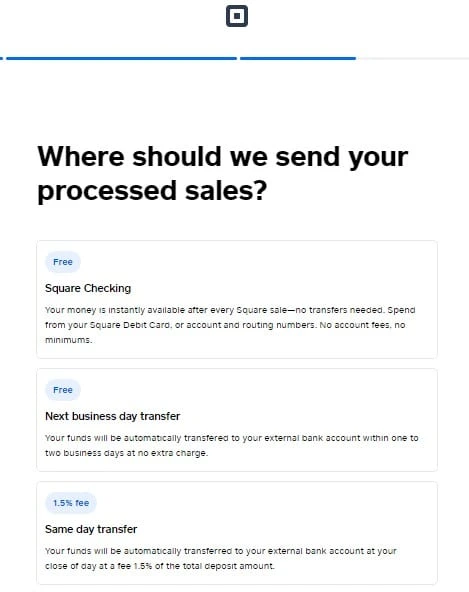
You can adjust your deposit options and schedules at any time through your Square Dashboard. Deposits can be scheduled or manually initiated. This means that even if you opt for scheduled, free next-day deposits, you can still request a same-day deposit for a 1.5% fee through the Square Dashboard if you need funds immediately.
#4. Adding Products, Services, and Setting Prices
After you’ve configured your payment methods, let us show you how to set up Square products. This should be easy-peasy because you can add products from any compatible device from Square Terminal, Square Stand, or Register.
Here’s how to create products from your Square app:
- Within your Point of Sale app, go to “☰ More” > Choose “Items”.
- Tap “All items” > Tap “Create Item”.
- Add a label by tapping the square label. Then upload an image (optional) or choose the tile colour that’ll display on your item grid.
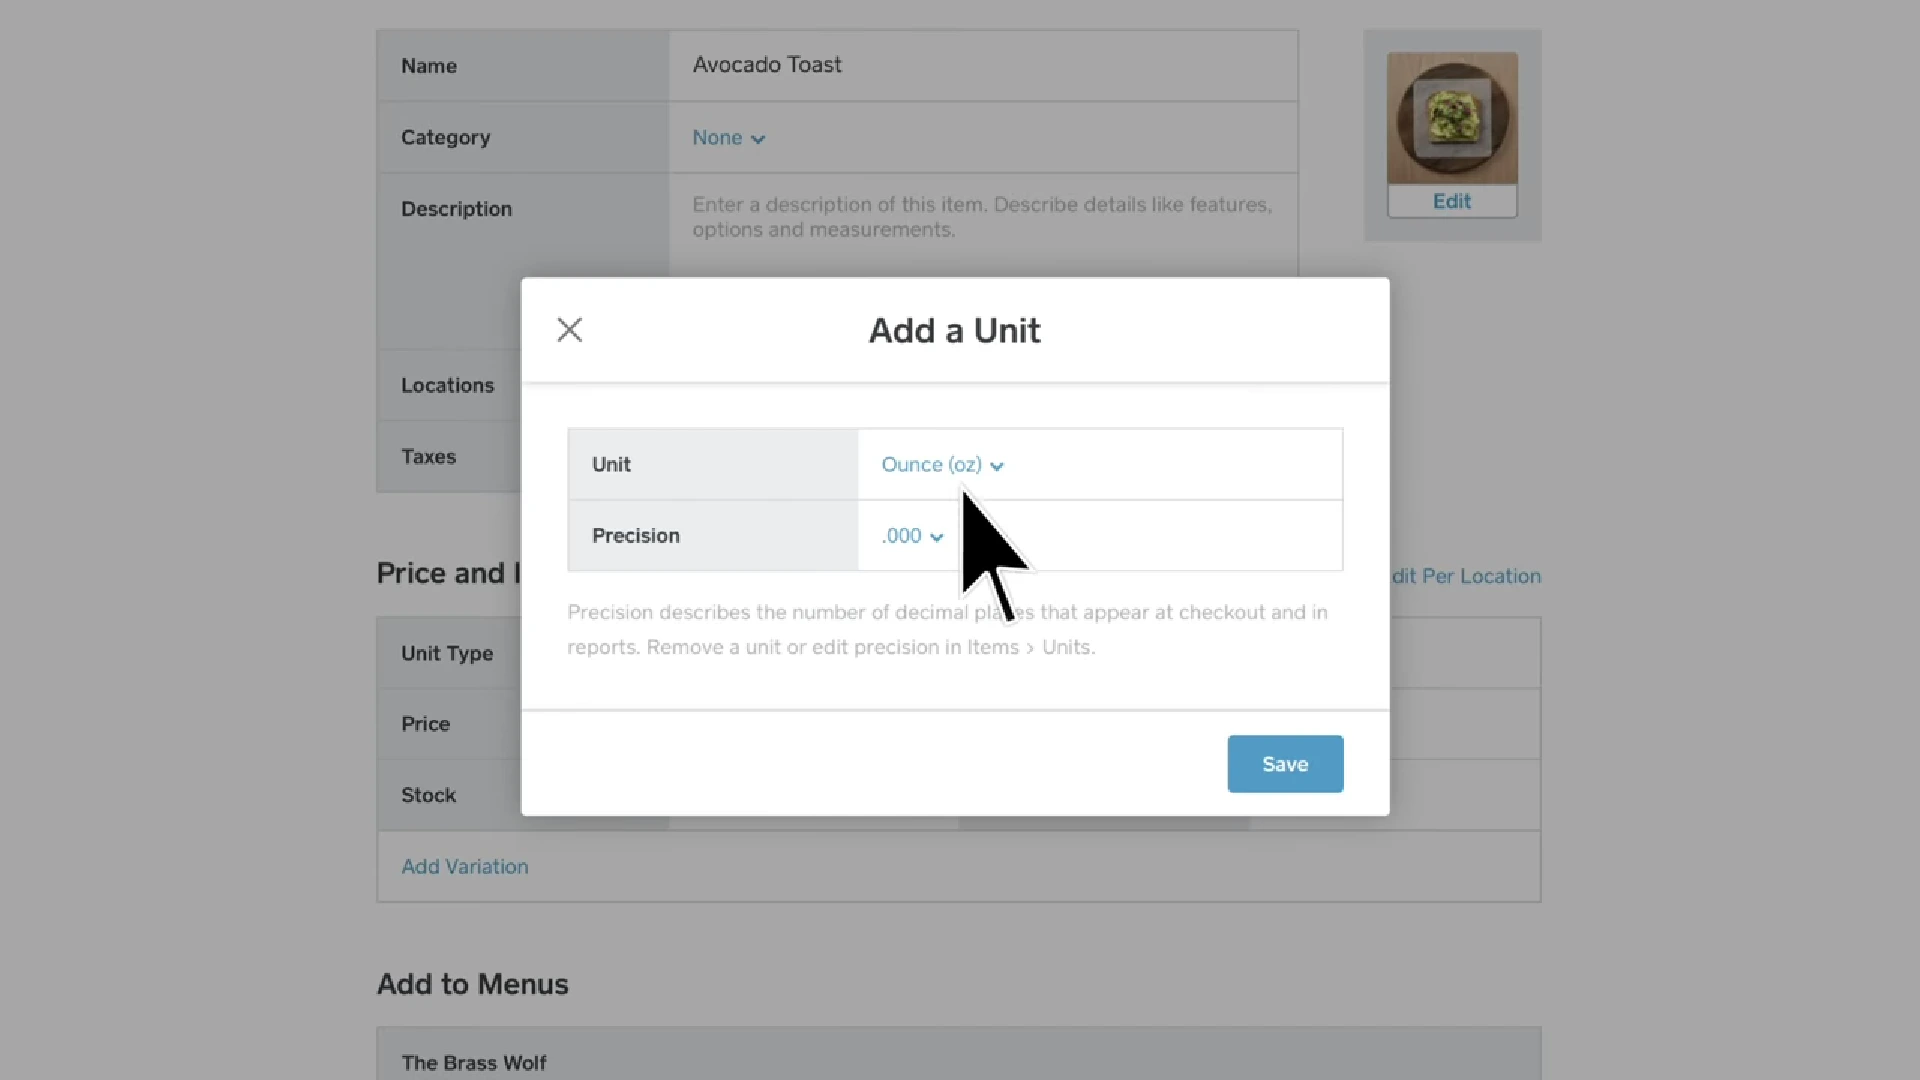
- Fill in the item information such as a name, category, description and image.
- Complete setting your item’s important attributes like prices/variations and tap “Save” when you finish.
#5. Setting Up Square Hardware
Up next, let’s learn how to set up essential Square hardware in this Square tutorial.
1. Set up the Square Reader
After making sure you have the right version of Square Reader (1st generation, v3 or 2nd generation, v1) and charge the reader completely, here’s how to pair it for contactless and chip wirelessly through Bluetooth:
- Turn on your reader by quickly pressing and releasing its power button.
- On your device, go to “Settings” and make sure “Bluetooth ON” is activated.
- Open the Square POS app and go to “More” > “Settings” > “Hardware” > “Square Readers”.
- Tap on “Connect a Reader”.
- To put your reader in pairing mode, press and hold its button for about 3-5 seconds. Let go when you see orange flashing lights. If you see red flashing lights, you've held it too long – just try again.
- Look for a notification from your Square POS app. Tap “Pair” to complete the connection.
- You'll know your reader is connected when it shows up as “Ready” in the Square POS app.
2. Set up the Square Stand
Step 1: Connect Square Stand
Begin setting up your Square Stand by unwrapping it and linking all hardware parts.
- Join the Square Stand to the hardware hub. This hub has two wires. Attach one to the Stand's base and the other to the power supply.
- Insert the hardware hub into the power supply, then link the power supply wire to itself.
- Plug the power supply into an electrical socket.
Step 2: Power up and connect your network
- Activate the iPad for your Square Stand and link to Wi-Fi or Ethernet.
- Navigate to “Settings” > “Wi-Fi”, then enable Wi-Fi.
- Choose your preferred network and input the password if needed
Step 3: Connect your iPad to Square Stand
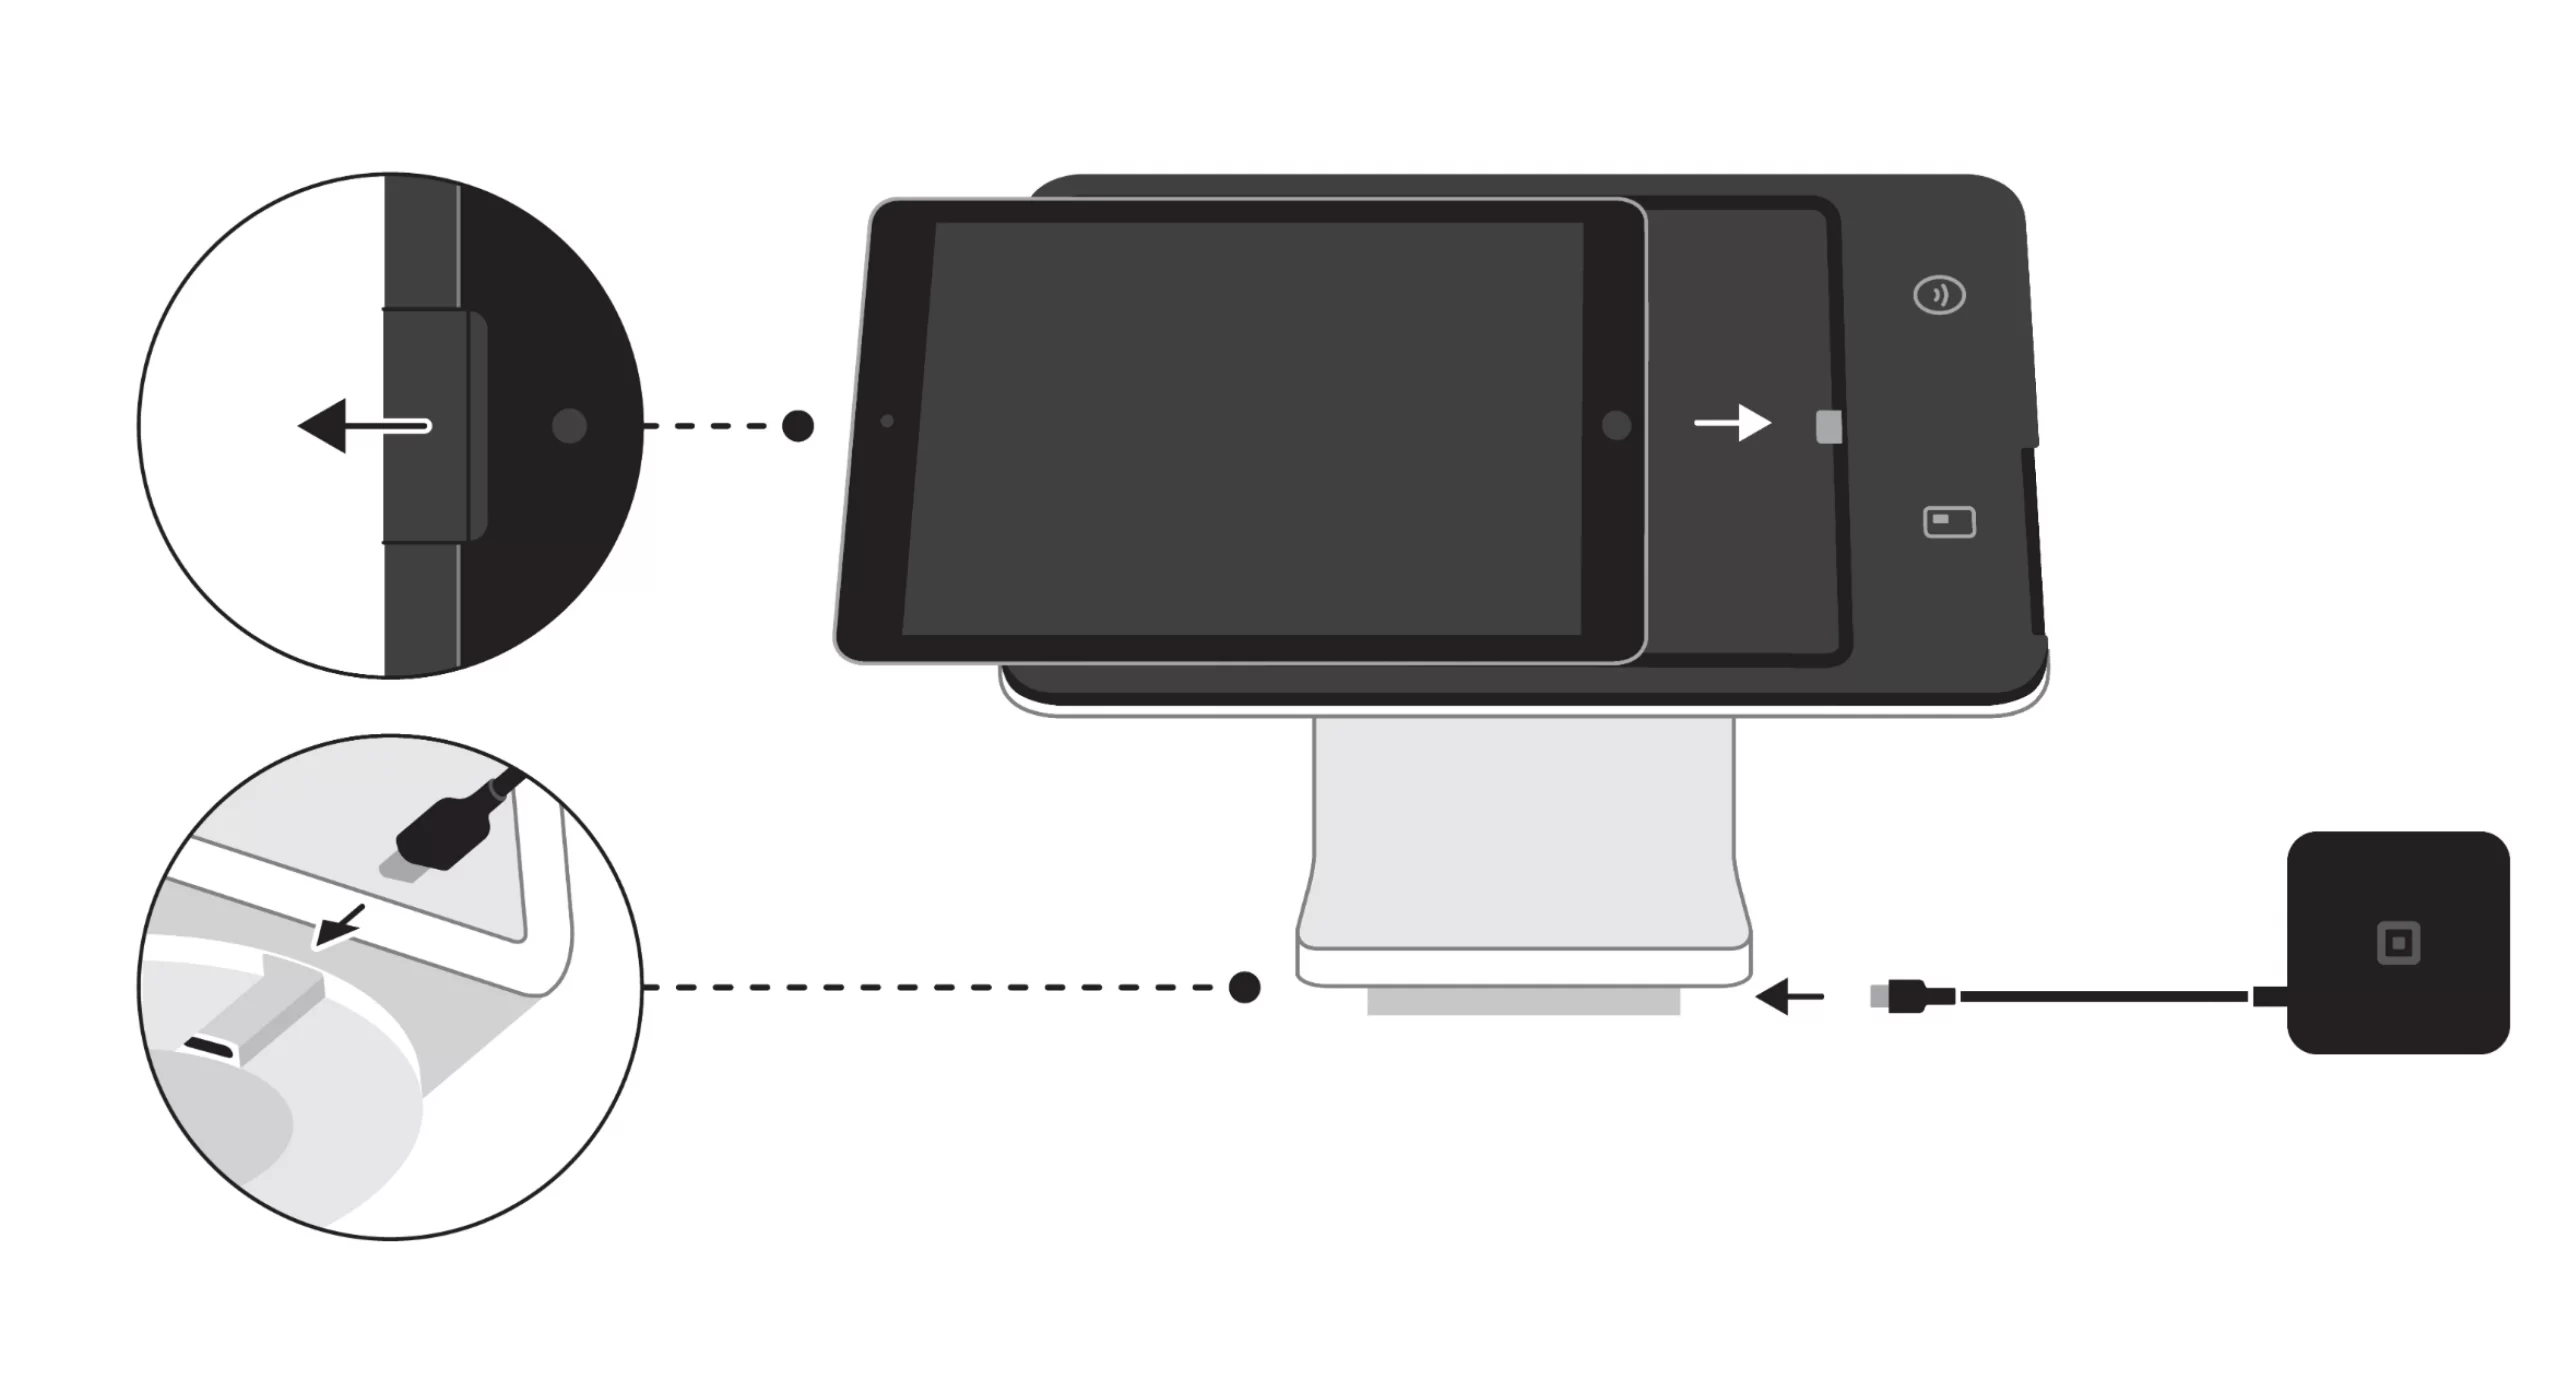
Place your iPad into the Square Stand's frame and secure it.
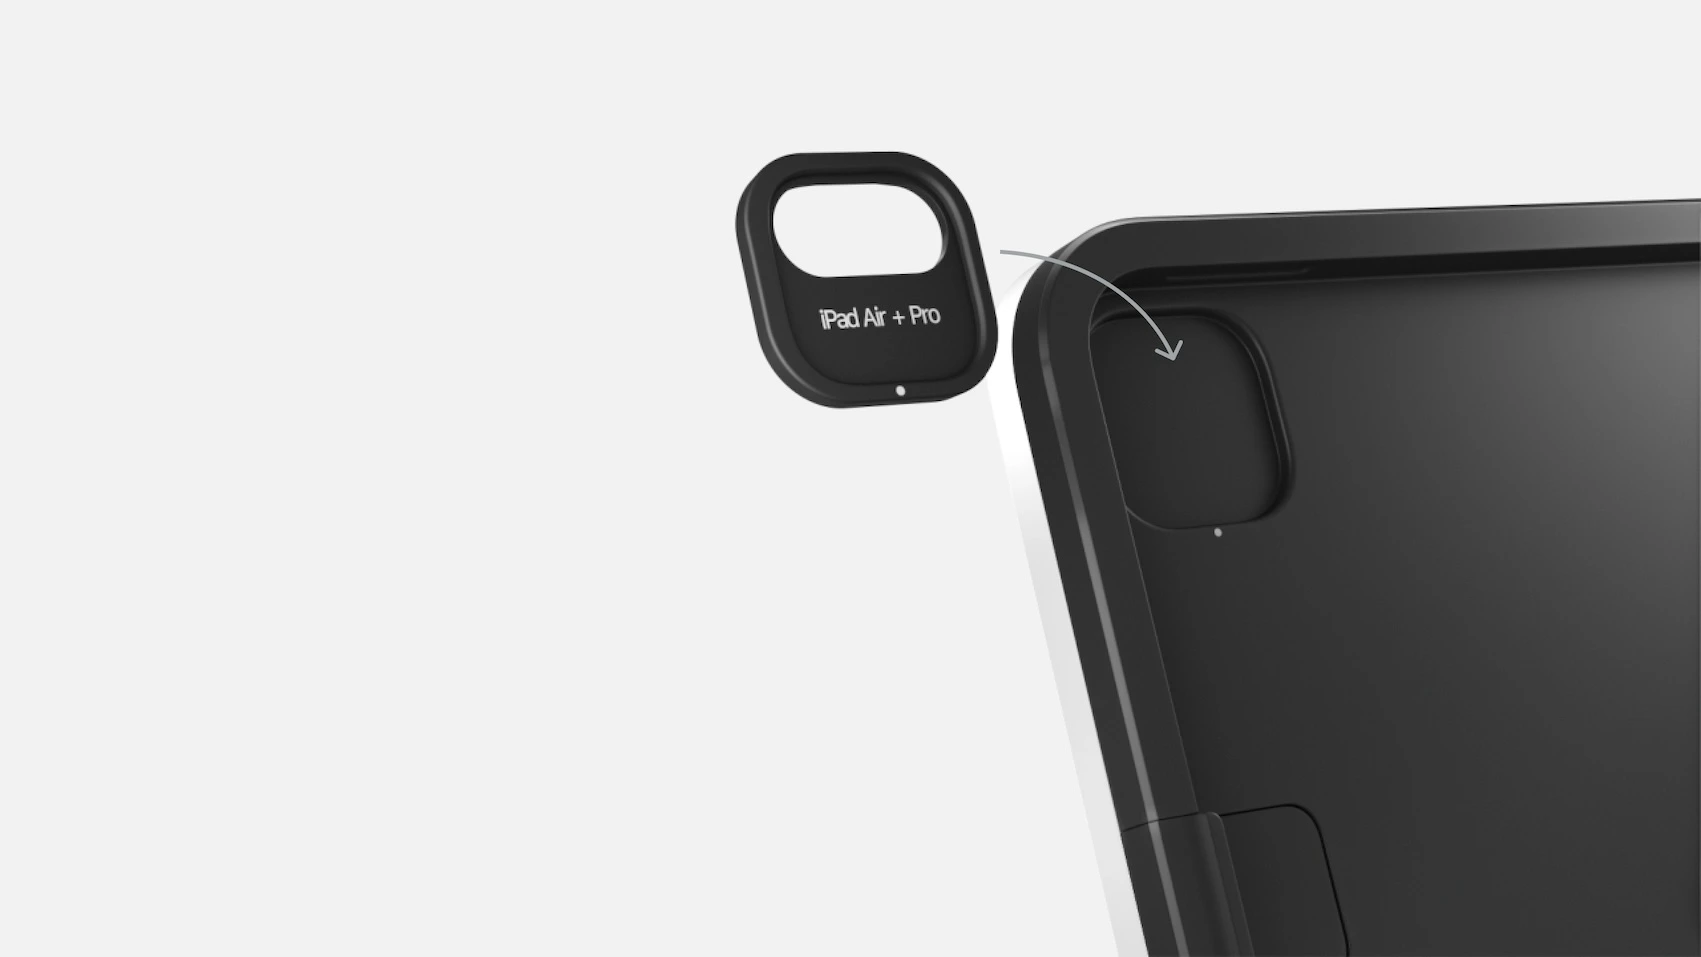
Note: For users with a compatible iPad Air or iPad Pro model using Square Stand (2nd generation, v2), insert the provided adapter for iPad Air and Pro into the Stand's cradle before placing your iPad.
3. Set up Square Register
Step 1: Connect Square Register cables
Here’s how to set up Square Register connection:
- Take off the protective covering.
- Gently extract the customer display from your Square Register and take out the foam cushion.
- Set the customer display aside temporarily—ensure it's placed on a flat surface.
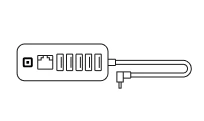
- Link the accessory hub to your Square Register.
- Insert the cable into one of the micro USB ports found on the underside of your Square Register.
6. Attach the power adapter to the hub.
7. Connect one end of the power adapter cable to the power adapter itself and the other end to an electrical outlet.
Step 2: Connect customer display for Square Register
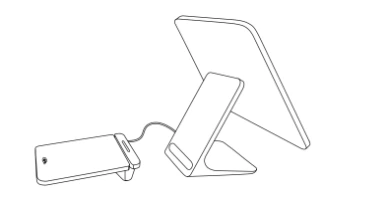
You can set up your Square Register’s customer display as docked or undocked.
To set it as docked
- Return the customer display to its designated slot on your Square Register.
- Apply firm pressure to the lower edges of the customer display until you hear a clicking sound, indicating it's securely in place.
- Verify that both sides of the display are evenly snapped in. This is crucial for the customer display to operate correctly in the docked position.
- Should you need to remove the customer display, press and hold the release mechanism located at the bottom of your Square Register, then lift the customer display out. Ensure the latch is fully disengaged before attempting to remove the customer display, as it cannot be taken out unless the latch is released.
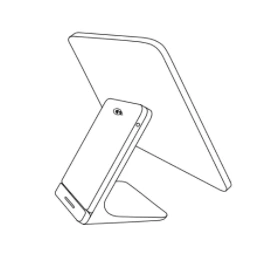
To set it as undocked
- Obtain the provided micro USB cable.
- Connect one end to the customer display and the other end to the base of your Square Register.
Step 3: Power up and connect your network
Turn on Square Register
- Press and hold the power button on your Square Register display's base until you see the Square logo on the screen.
- Note that Square Register requires a power outlet connection to function, as it doesn't run on battery power.
Connect to the internet
When you power your Square Register for the first time, you'll need to connect a network, which you have two options: Wi-Fi or Ethernet.
- Connect through Wi-Fi:
- Choose your preferred network from the available options.
- If required, input the network password.
2. Connect through Ethernet:
- Plug your Ethernet cable in the accessory hub.
- Your Square Register will automatically connect to your network once the Ethernet is plugged into the accessory hub and the hub is connected to power.
Integrating Square with Other Business Tools
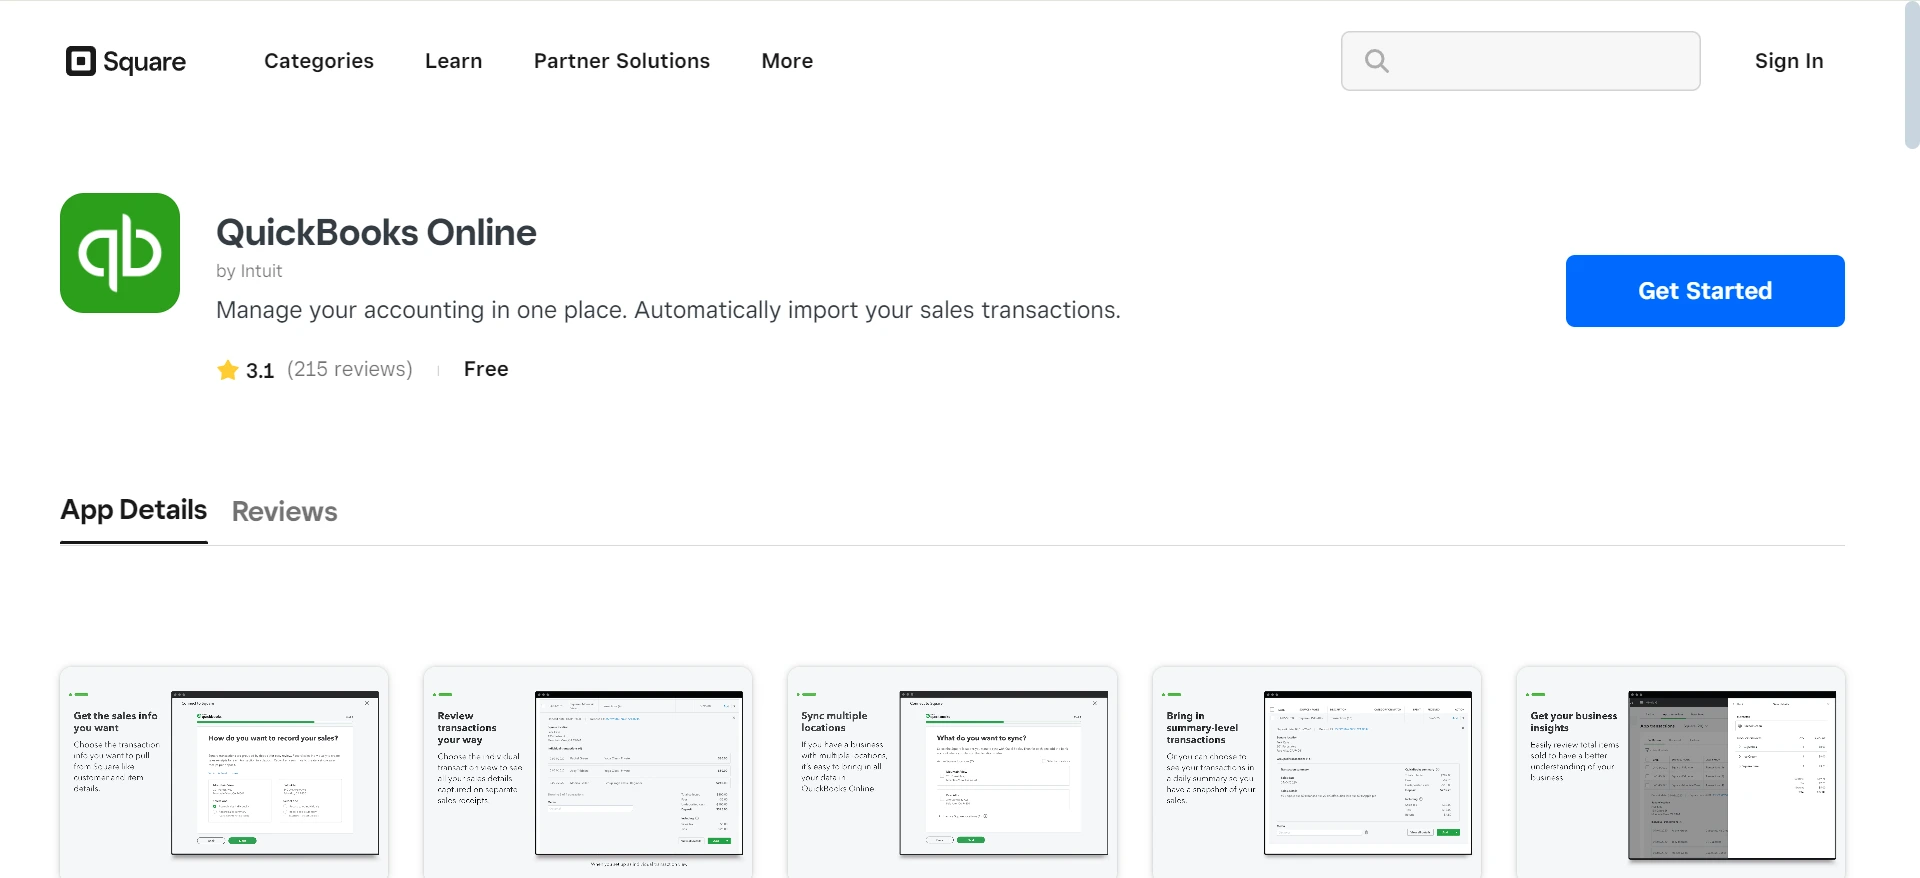
You can install apps directly from the Square App Marketplace.
- Sign in to your Square Dashboard and select “Settings” > “App integrations” and select “Visit App Marketplace”, or go directly to Square App Marketplace.
- Browse apps by category or search for a third-party integration.
- To connect the app with your Square account, select “Get Started”.
- Follow the prompts to authorize.
Setting Up Square for Online Payments
Square Online is automatically configured to use Square’s payment processor to accept card payments during the checkout flow of your site. No additional setup is needed.
Option 1: Afterpay
To activate Afterpay for your Square Online store:
- Within your Square Dashboard, navigate to “Account & Settings” > “Business information” > “Payment methods”.
- Under Afterpay section, choose “•••> Edit settings”.
- Turn on the Online option > Click “Save”.
Option 2: Cash App Pay
To enable Cash App Pay for online payments:
- Within your Square Dashboard, go to “Sales channels” > Online.
- Hit “Settings” > “Checkout or Shared Settings” > “Checkout”.
- Under the Cash App section, toggle on “Accept Cash App”.
Option 3: Square Gift Cards
Here’s how to set up Square gift cards:
- Within your Square Dashboard, choose Payments > Gift Cards.
- Pick eGift Cards > Configure.
- Turn on Sell eGift Cards in Store to activate this payment option in the Square POS app.
- Select a design for your Square gift card, or upload a file.
Option 4: Apple Pay and Google Pay
To activate Apple Pay and Google Pay on the checkout page for your Square Online:
- Within your Square Dashboard, select Sales channels > Online.
- Choose Settings > Checkout or Shared Settings > Checkout.
- Ensure that Square is selected as your payment processor.
- Turn ON Accept Apple Pay and/or Accept Google Pay.
Option 5: PayPal
To accept PayPal payments for your Square online store:
- Within your Square Dashboard, select Sales channels > Online.
- Choose Settings > Checkout or Shared Settings > Checkout.
- Under the PayPal section, choose Connect and then log in to your PayPal account for authorization.
How To Set Up Square For My Business: FAQs
How do I set up Square for the first time?
Here’s how to set up Square account for the first time:
- Download the Square app
- Create a Square account
- Connect your bank account
- Set up your hardware (e.g., Square Reader)
- Add items to your inventory
Is Square easy to set up?
Yes, Square is designed for easy setup. So don’t worry if you don’t know how to use Square app yet.
How do I set up items on Square?
Follow the steps below to set up Square products:
- Open the Square app or dashboard
- Go to "Items" or "Catalog"
- Click "Create Item"
- Enter item details (name, price, description)
- Add modifiers or variants if needed
- Save the item
How do I set up my Square Reader?
To set up Square Reader:
- Ensure your device's Bluetooth is on
- Open the Square app
- Go to Settings > Hardware
- Select "Connect a Reader"
- Follow the on-screen instructions to pair your reader
Scroll up for a more detailed instruction.
Conclusion
As a newbie just getting started with Square, you’ll need to set up quite a lot of things before processing sales from your customers. And we hope after reading our guide on how to set up Square, you will get a clear picture of what needs to be done and how to do it.
If you’re interested in reading this blog, we bet you’ll find other insightful articles on LitExtension’s eCommerce platform topics. Also, join our active Facebook Community to get insider tips and tricks from over 20,000 global eCommerce entrepreneurs.


