Exporting customer data from QuickBooks is crucial for effective record management, data integration, and detailed analysis. This article will outline the steps on how to export customer list from Quickbooks efficiently. QuickBooks offers user-friendly tools and third-party integrations, making the export process straightforward for all technical skill levels and business requirements.
You can export customer lists from QuickBooks in two main versions: QuickBooks Online and QuickBooks Desktop. Each version offers different methods, from simple manual exports to more advanced automation using APIs and third-party tools.
Why Export Your Customer List?
First, why do you need to export customer list from Quickbooks? Exporting your customer list can serve multiple important purposes:
- Keeping a backup of your customer information is crucial for data security.
- If you're switching to a new accounting software, exporting your customer list is often a necessary step.
- Exported data can be analyzed in spreadsheet applications like Excel, allowing for more detailed reporting and insights.
- A well-organized customer list can aid in targeted marketing campaigns and communications.
Overall, whether it's for backup, software migration, analysis, or marketing, having your customer information readily available in an exportable format can be incredibly beneficial.
Seamlessly migrate data to Quickbooks!
LitExtension can safely transfer your financial data to Quickbooks.
FREE DEMO NOW

How to Export Customer List from QuickBooks Online
Exporting a customer list from QuickBooks Online is quick and easy, whether you’re doing it for backups, reports, or integration with other tools. Here’s how you can get it done in just a few steps.
Method 1: Export customer data from the Customers Page
This method is ideal for quickly exporting general customer information, such as names, contact details, and balances.
Step 1: Log in to QuickBooks Online
- Open your web browser and head to the QuickBooks Online website.
- Enter your login credentials and sign in to your account.
Step 2: Navigate to the Customers tab
- Go to Sales in the left-hand menu, then select Customers.
- Find the Export Icon (a small box with an arrow) located next to the Print Icon at the top of the Customers page.
Step 3: Export the list
- Click the Export Icon and select Export to Excel.
- The customer information will be downloaded as an Excel file.
Information exported list: Name, Company, Address, Phone Number, Email Address, Customer Type, Attachments, Currency, Balance and Notes.
Method 2: Export customer data from the Reports Page
If you require more specific information or wish to customize the data you’re exporting, this method offers greater flexibility.
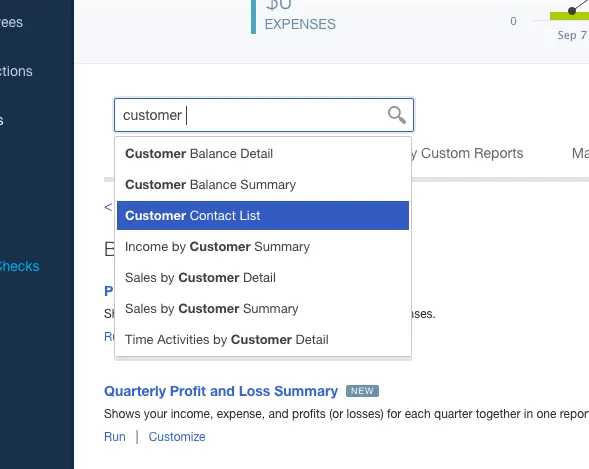
Step 1: Access the Customer Contact List report
- Click on Reports in the left-hand menu.
- Under the Sales and Customer section, locate and select Customer Contact List.
Step 2: Customize the Report (optional)
- To tailor the data, click the three vertical dots (⋮) icon, then select Customize.
- Under the Rows/Columns dropdown, select Change Columns.
- Add or remove columns based on the information you want to include.
- Click Run Report to apply your changes.
Step 3: Save the Report for future use (optional)
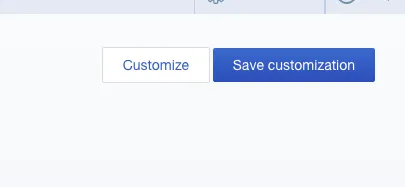
- If you plan to use the same customized report later, select Save Customization at the top right corner.
Step 4: Export the Report to Excel
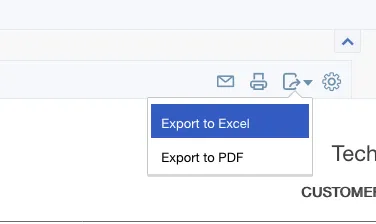
- Click the Export Icon next to the Print Icon, then choose Export to Excel.
This method allows you to customize columns and filters to meet your specific needs. Users can export tailored data for marketing or reporting purposes. Moreover, customizations can be saved for easy application in the future.
How to Export a Customer List from QuickBooks Desktop
QuickBooks Desktop offers multiple ways to export customer lists, depending on how much detail you need and the format required.
Method 1: Export using the Customer Center
To quickly and easily export your entire customer list, use this method. It’s ideal for backing up or migrating data without any customization.
Step 1: Open QuickBooks Desktop
- Launch QuickBooks Desktop and open the company file that contains the customer data you want to export.
Step 2: Access the Customer Center
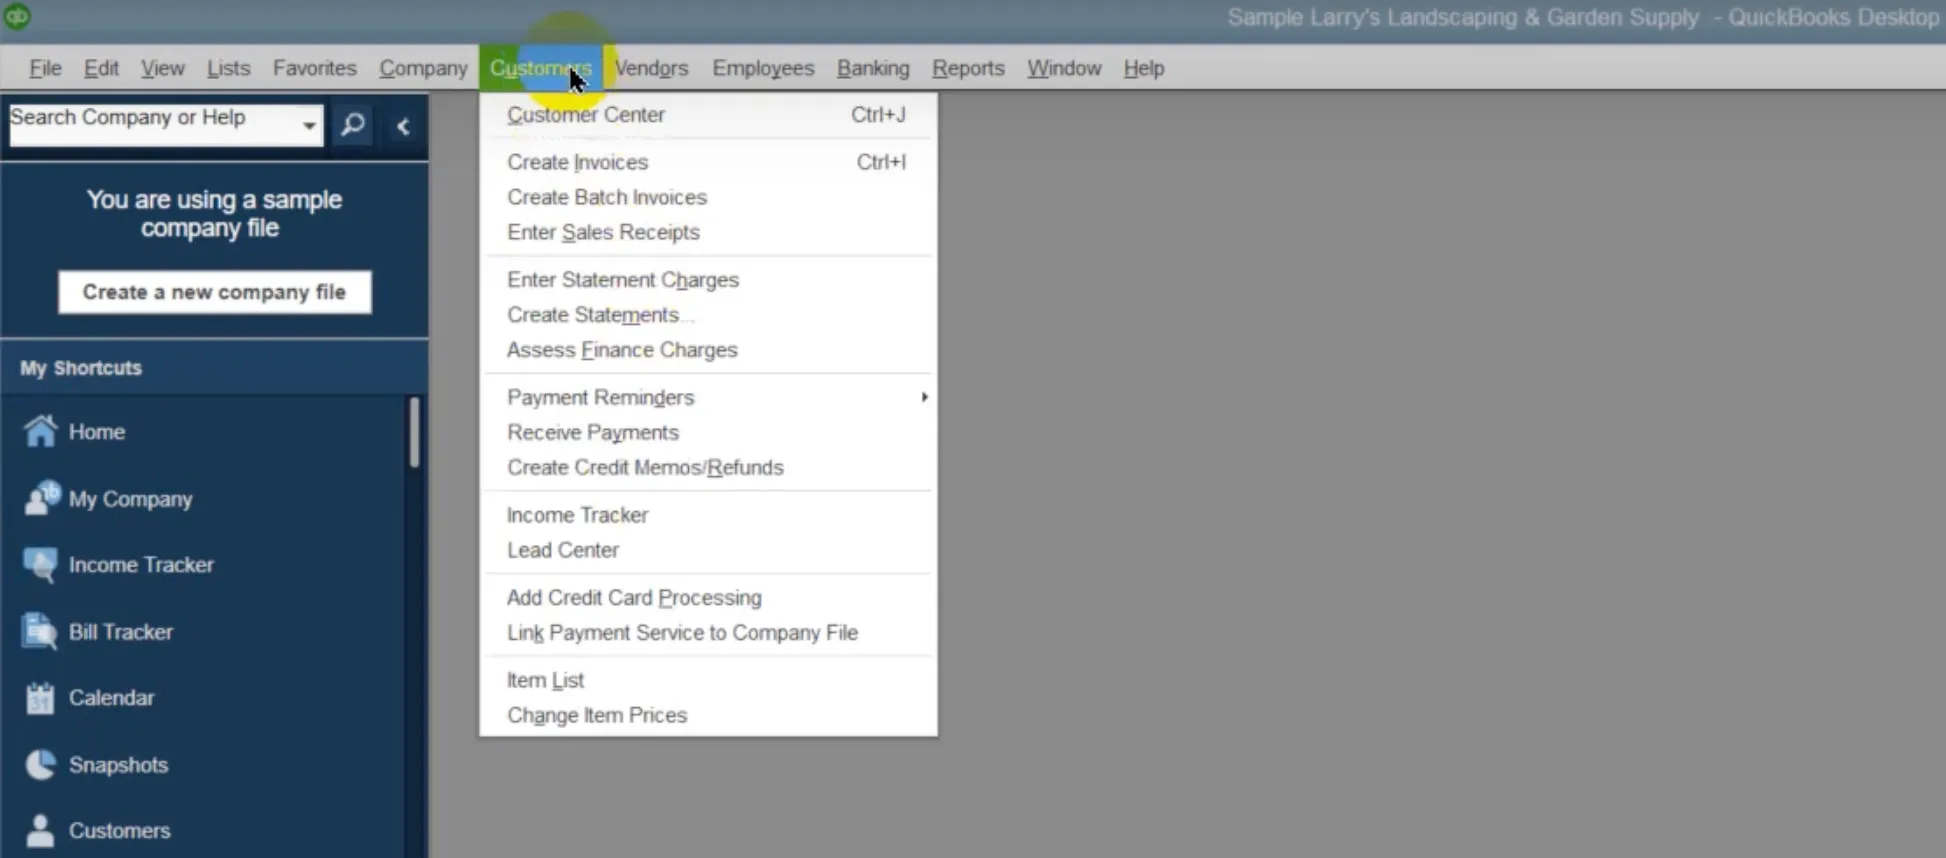
- In the top menu bar, click Customers > Customer Center.
- This will open the Customer Center, where all your customer details are displayed.
Step 3: Prepare to export
- Look for the Excel button in the Customer Center toolbar (typically on the right side).
- Click on it, and from the dropdown, choose Export Customer List.

- Choose one of the following options:
- Create new worksheet: Export the data to a new Excel file.
- Update existing worksheet: Add the data to an existing Excel file.
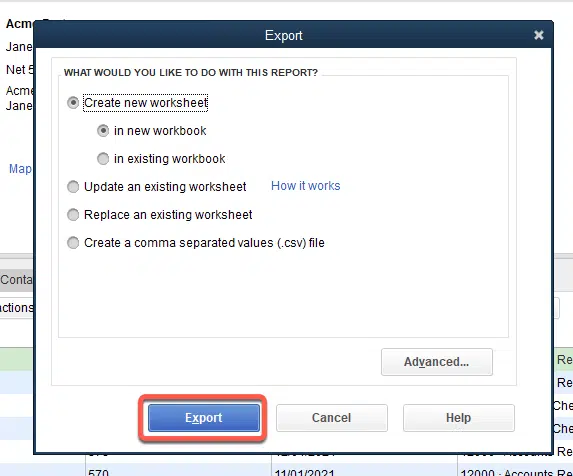
Step 4: Save the file
- Choose a folder on your computer where you want to save the exported file.
- Name the file and select the format (Excel or CSV) and click Save to complete the export.
Method 2: Export using a Custom Report
This method provides greater control, allowing you to export specific customer details such as email addresses, phone numbers, or outstanding balances. It's perfect for filtered or detailed customer data, making it ideal for analysis, marketing, or compliance reports.
Step 1: Generate a custom report
- Go to the top menu and select Reports > Customers & Receivables > Customer Contact List.
- Alternatively, you can create a new custom report by navigating to Reports > Custom Reports > Transaction Detail, and then selecting the fields you want to include.
Step 2: Filter and customize the report
- Click the Modify Report button to tailor the report to your needs.
- Add or remove columns to display only the data you require (e.g., names, contact details, account balances).
- Use filters to narrow the list to specific customers or data ranges.
Step 3: Export the report
- Once the report is ready, click the Excel button.
- Choose whether to create a new worksheet or update an existing one, then follow the prompts to save it.
How to Export Customer Lists Using QuickBooks API
The QuickBooks API is a set of developer tools provided by Intuit that allows external applications to interact with QuickBooks Online and Desktop. Using this API, developers can retrieve, update, or create data within QuickBooks programmatically, including exporting customer lists.
Step 1: Access the QuickBooks Developer Portal
- Visit the QuickBooks Developer Portal.
- Sign up or log in using your Intuit account.
- Create an app by following the portal’s instructions to obtain your API keys (Client ID and Client Secret).
Step 2: Authenticate your API requests
QuickBooks API requires secure authentication via OAuth 2.0. To set this up:
- Obtain your API credentials from your QuickBooks app.
- Use an OAuth 2.0 library (e.g., for Python, Java, or Node.js) to generate access tokens.
- Include the access token in the headers of your API requests for authorization.
Step 3: Explore the API endpoints
Use the API documentation to identify the correct endpoint for customer data. For exporting customer lists, the endpoint typically looks like this: GET /v3/company/{companyId}/customer
But let’s replace {companyId} with your QuickBooks company ID.
Step 4: Fetch customer data
Send a GET request to the customer endpoint using your preferred programming language or API client (e.g., Postman). Example request:
GET https://quickbooks.api.intuit.com/v3/company/{companyId}/customer
Authorization: Bearer {AccessToken}
Accept: application/json
Example response (JSON):
{
“Customers”: [
{
“Id”: “1”,
“DisplayName”: “John Doe”,
“PrimaryEmailAddr”: {
“Address”: “[email protected]”
},
“Balance”: 100.00
},
{
“Id”: “2”,
“DisplayName”: “Jane Smith”,
“PrimaryEmailAddr”: {
“Address”: “[email protected]”
},
“Balance”: 0.00
}
]
}
Step 5: Save the data
- Convert the retrieved data into a desired format (e.g., CSV, Excel, JSON) using libraries or tools in your programming language.
- Save the processed file locally or upload it to a cloud-based storage system.
Example (Python):
import csv
import requests
# API endpoint and headers
url = “https://quickbooks.api.intuit.com/v3/company/{companyId}/customer”
headers = {“Authorization”: “Bearer {AccessToken}”}
# Fetch data
response = requests.get(url, headers=headers)
customers = response.json()[“Customers”]
# Write to CSV
with open(“customers.csv”, “w”, newline=””) as file:
writer = csv.writer(file)
writer.writerow([“Id”, “Name”, “Email”, “Balance”]) # Headers
for customer in customers:
writer.writerow([
customer[“Id”],
customer[“DisplayName”],
customer[“PrimaryEmailAddr”][“Address”],
customer[“Balance”]
])
Step 6: Automate the process
- Use cron jobs (Linux) or Task Scheduler (Windows) to schedule regular exports.
- Ensure tokens are refreshed periodically to maintain authentication.
Using Third-Party Tools to Export Customer Lists from Quickbooks
Third-party tools and integrations enhance the ability to export customer lists from QuickBooks, surpassing the basic features of QuickBooks Online and Desktop. They are ideal for businesses that require regular, automated, or customized data exports.
There are several effective tools for exporting data from QuickBooks.
1. Zapier
Zapier allows connection with thousands of applications, automating workflows by exporting customer data to CRMs, email marketing tools, or Google Sheets whenever new or updated customer entries are made. It features flexible field mapping, ideal for small to medium-sized businesses seeking simple automation.
2. SaasAnt Exporter
SaasAnt Exporter specializes in managing QuickBooks data through exports, imports, and bulk updates. It is perfect for businesses needing to export large volumes of customer data or generate detailed reports. SaasAnt supports multiple formats like CSV, Excel, and JSON, and allows users to schedule recurring exports with custom filtering and fields.
3. ODBC Connector
QODBC Connector is a database driver that provides direct access to QuickBooks data via ODBC. It enables real-time data access into SQL databases or integration with business intelligence tools such as Tableau or Power BI, making it a favored choice for IT professionals.
4. Transaction Pro Exporter
Transaction Pro Exporter simplifies data exports from QuickBooks for various systems. It is particularly useful for exporting customer lists for accounting or CRM integration, offering batch mode exports for efficiency, along with customizable fields and data structures. This tool is suitable for businesses wanting straightforward exports without the need for extensive IT support.
Export Customer List from QuickBooks – FAQs
How do I export a customer list from QuickBooks?
To export a customer list from QuickBooks, the process varies slightly between QuickBooks Desktop and QuickBooks Online:
QuickBooks Desktop:
1. Open QuickBooks and go to the Customer Center.
2. Select the Customers tab.
3. Click on the Excel icon and choose Export Customer List.
4. Follow the prompts to save the file to your desired location.
QuickBooks Online:
1. Log into QuickBooks Online and navigate to Sales > Customers.
2. Click on the Export icon next to the Print icon.
3. Choose Export to Excel or select another format if available.
Can I export customer lists from QuickBooks to other file formats besides Excel?
Yes, in QuickBooks Online, you can export customer lists to both Excel and PDF, especially with reports like the Customer Contact List Report. You can also use third-party tools like Coupler.io to automate exports to formats like CSV or Google Sheets.
How do I get a list of Customers in QuickBooks?
To access your customer list in QuickBooks:
1. Log into your QuickBooks account.
2. Navigate to Sales or Customers (depending on your version).
3. Click on the Customers tab to view all your customers listed there.
How to print a customer list in QuickBooks Online?
To print a customer list in QuickBooks Online:
1. Go to Sales > Customers.
2. Click on the Reports option and select the Customer Contact List Report.
3. Customize if needed, then click the Print icon at the top of the report.
Final Words
Exporting your customer list from QuickBooks is a straightforward way to improve your business operations. Whether you use QuickBooks Desktop or Online, these steps will help you manage your customer data for backup, reporting, or marketing.
We hope this article was helpful in guiding you on how to export customer list from Quickbooks. For more insights, visit the LitExtension blog and join our eCommerce community to connect with other business owners.

