Overview
LitExtension Connector files are used to establish a connection between your shopping carts and make the data exchange possible. They are special access gateways that are completely secured by unique Security Tokens bounded to your personal account and provided by LitExtension. To work correctly, the “le_connector” folder needs to be located in your store’s root folder.
Before you start
Things you need to know before you start:
Connector exists for migration purposes only. It helps the migration app to copy (not modify) the data you’d like to move to a target store. With each Connector, we provide an unique Security Token; thus, only you can access your Source store database. And once the migration is done, it is totally safe to delete the Connector.
Install the LitExtension connector
To install the LitExtension connector, basically you need to go though 3 steps:
- Download Connector to your computer.
- Upload folder “le_connector” to your store’s root folder.
- Check the Connector file’s installation status.
Now, let’s go into more detail about each step to set up the LitExtension connector:
Step 1:
At your Shopping Cart Migration Setup page, download the connector by clicking “Download Litextension Connector”.
Step 2:
Extract and upload the folder “le_connector” to your store root folder. There are quite a few ways to upload a file to your server. How you upload your files will depend on your preference and your accessibility to the server. In this tutorial, we will explain how to upload a file using the File Manager, FileZilla
- File Manager (browser-based): The File manager is good to use when you are away from your computer and you can access a browser. The File Manager can be accessed from any location. This eliminates the need to install a program like FileZilla.
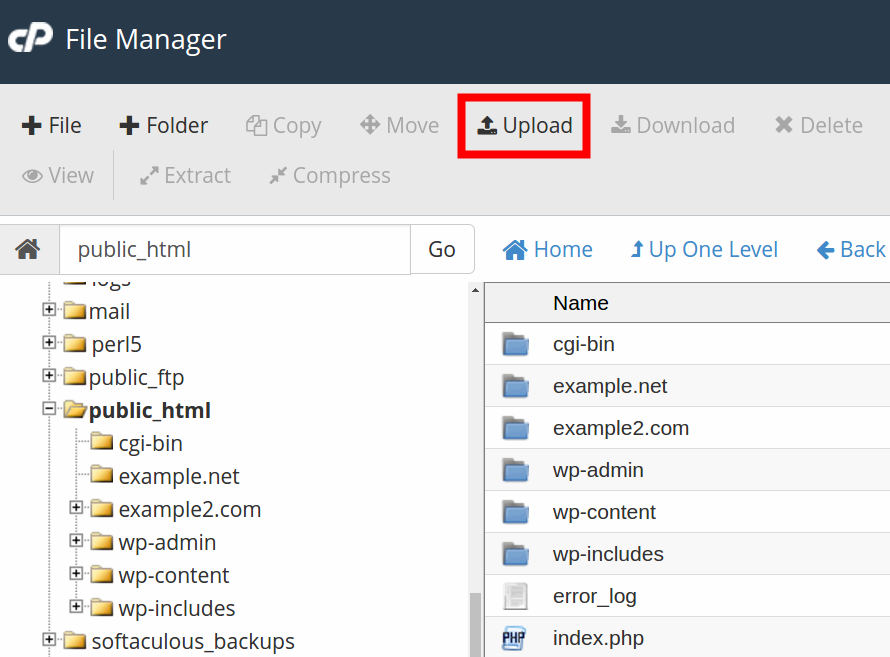
- Login into your cPanel. Click the File Manager button in the Files section
- Navigate to the directory you want to upload a file to and click the Upload link at the top of the File Manager. This will open an upload page in a new tab.
- Drag and drop your file into the window, or click Select File to browse your computer for the file you want to upload. Check the available box if you want to overwrite files that already exist in the upload folder.
- Your file will then upload. You will see a “100%” message when the upload completes.
- Click the Go Back link to return to the File Manager.
- Refresh your File Manager by clicking the Reload link at the top middle of the File Manager. You should then see the file listed in the File Manager now.
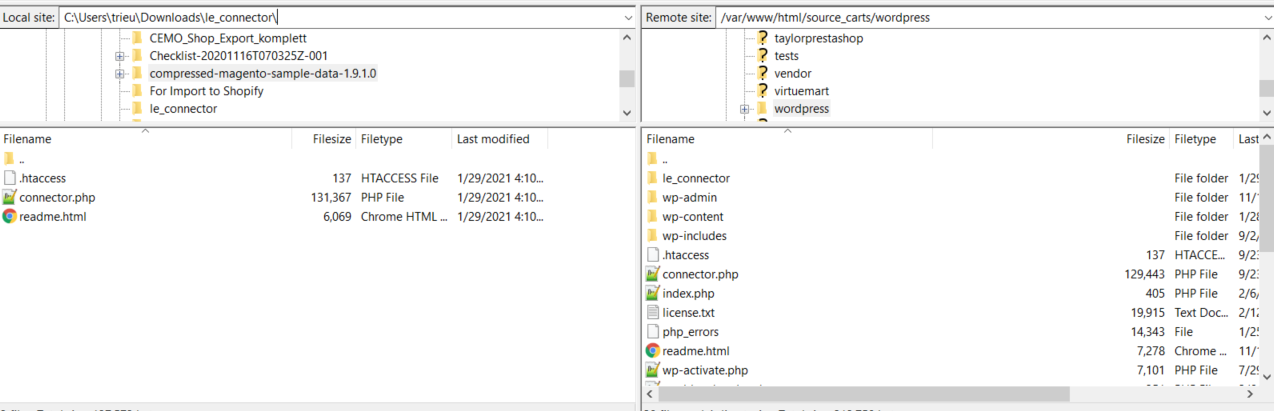
- FileZilla (FTP): FileZilla is good to use for uploading files because it works over port 21 and can upload mass amounts of files all at once.
- Connect to your server with FileZilla.
- Navigate to the folder le_connector, drag the file from “Local Site” to the “Remote Site“. The file will upload and you will see the file in the list of files in the directory when you dragged the file to.
Step 3:
After installing, our module can check automatically, please fill out URL store then click out the box, a message confirms a successful connection will be shown

Or you can check manually directly in your browser, Example Domain (http://example.com/le_connector/connector.php). If you see this message “Connector Installed” – Connector is working correctly and you can proceed with the next step of your migration.
The related articles
In case you have any other questions, please reach out to us via:
- Ticket system (highly recommended)
- Email us at [email protected]